Checkout Shield
Checkout Shield watches every step of your checkout for automated abuse — bots hammering your payment form with stolen card numbers, scripts flooding your registration page, or scalpers racing through checkout on a limited drop. It scores each attempt, logs everything to a dashboard under Analytics, and can automatically challenge or block the worst offenders once you decide it is time.
It ships in monitor mode. Out of the box it watches and reports without blocking a single legitimate shopper, so you can see exactly what it would have done before you ever flip the switch.
Why This Matters to Your Store
What a checkout bot attack actually looks like
The most common attack against a checkout is called card testing (sometimes "carding"). Criminals buy lists of thousands of stolen credit card numbers on the dark web, then run them through your checkout — usually against your cheapest product, in tiny amounts — to find out which cards are still active. A single wave can generate thousands of attempts in under an hour, and the person running it is never planning to actually receive the product.
You never see the fraud directly. What you see is a sudden spike in declined payments that looks nothing like your normal traffic.
Why it costs you money even when every card is declined
- You pay for every attempt, not just the successful ones. Most payment gateways charge a small fee per authorization request — usually $0.20 to $0.40 — whether the card is approved or declined. A few thousand test attempts can rack up hundreds of dollars in fees before a single item is stolen.
- Your decline rate becomes your reputation. A healthy store normally declines 10-15% of payment attempts. During a card-testing wave that number can jump to 70-90% within minutes. Payment processors watch this number, and a spike can get your whole account flagged as high risk.
- A "high risk" flag has real consequences. Processors respond to elevated decline rates with extra fees, closer monitoring, and in serious cases account termination.
- The fraud shows up again later, as chargebacks. Cards validated through your store get used for fraud elsewhere. Weeks later those chargebacks land on your account and push your chargeback rate into unhealthy territory.
- A big enough burst can slow your whole checkout down for real customers trying to buy from you at the same time.
Checkout Shield is designed to stop this activity before it ever reaches your payment gateway — a bot that never gets past the honeypot or the velocity check never generates a billable authorization attempt in the first place.
Purchase and Download
The Checkout Shield app is a separate add-on available from the J2Commerce Extensions Store. It is not included with the core J2Commerce 6 component.
Step 1: Go to the J2Commerce website -> Apps.
Step 2: Locate the Checkout Shield app -> click View Details -> Add to cart -> Checkout.
Step 3: Go to My Downloads under your profile menu at the top right corner and search for the app. Click Available Versions -> View Files -> Download.
Installation
Checkout Shield is a separate add-on available from the J2Commerce Extensions Store. It is not included with the core J2Commerce 6 component.
Checkout Shield actually ships as two extensions that work together — install both:
plg_j2commerce_app_checkoutshield— the protection engine, dashboard, and settings. This is the plugin you configure.plg_task_j2commerce_checkoutshield— a companion task plugin that runs the scheduled maintenance jobs (list syncing, log purging, digest emails, and the GeoIP database refresh). See Scheduled Tasks below — Checkout Shield needs these jobs scheduled to stay accurate over time.
Install the App
You can install this Additional Fees App using the Joomla installer. The following steps help you with a successful installation.
In the Joomla admin, go to System -> Install -> Extensions
Upload plg_j2commerce_app_checkoutshield.zip, then upload plg_task_j2commerce_checkoutshield.zip.
 (1)-a6689f12b23b8e992f5c2a169737672f.webp)
Enable the App
Once you have installed the App, you will need to enable it. There are two ways you can access the extension.
Option A: Go to the J2Commerce icon at the top right corner -> Apps
Option B: Go to Components on the left sidebar -> J2Commerce -> Apps
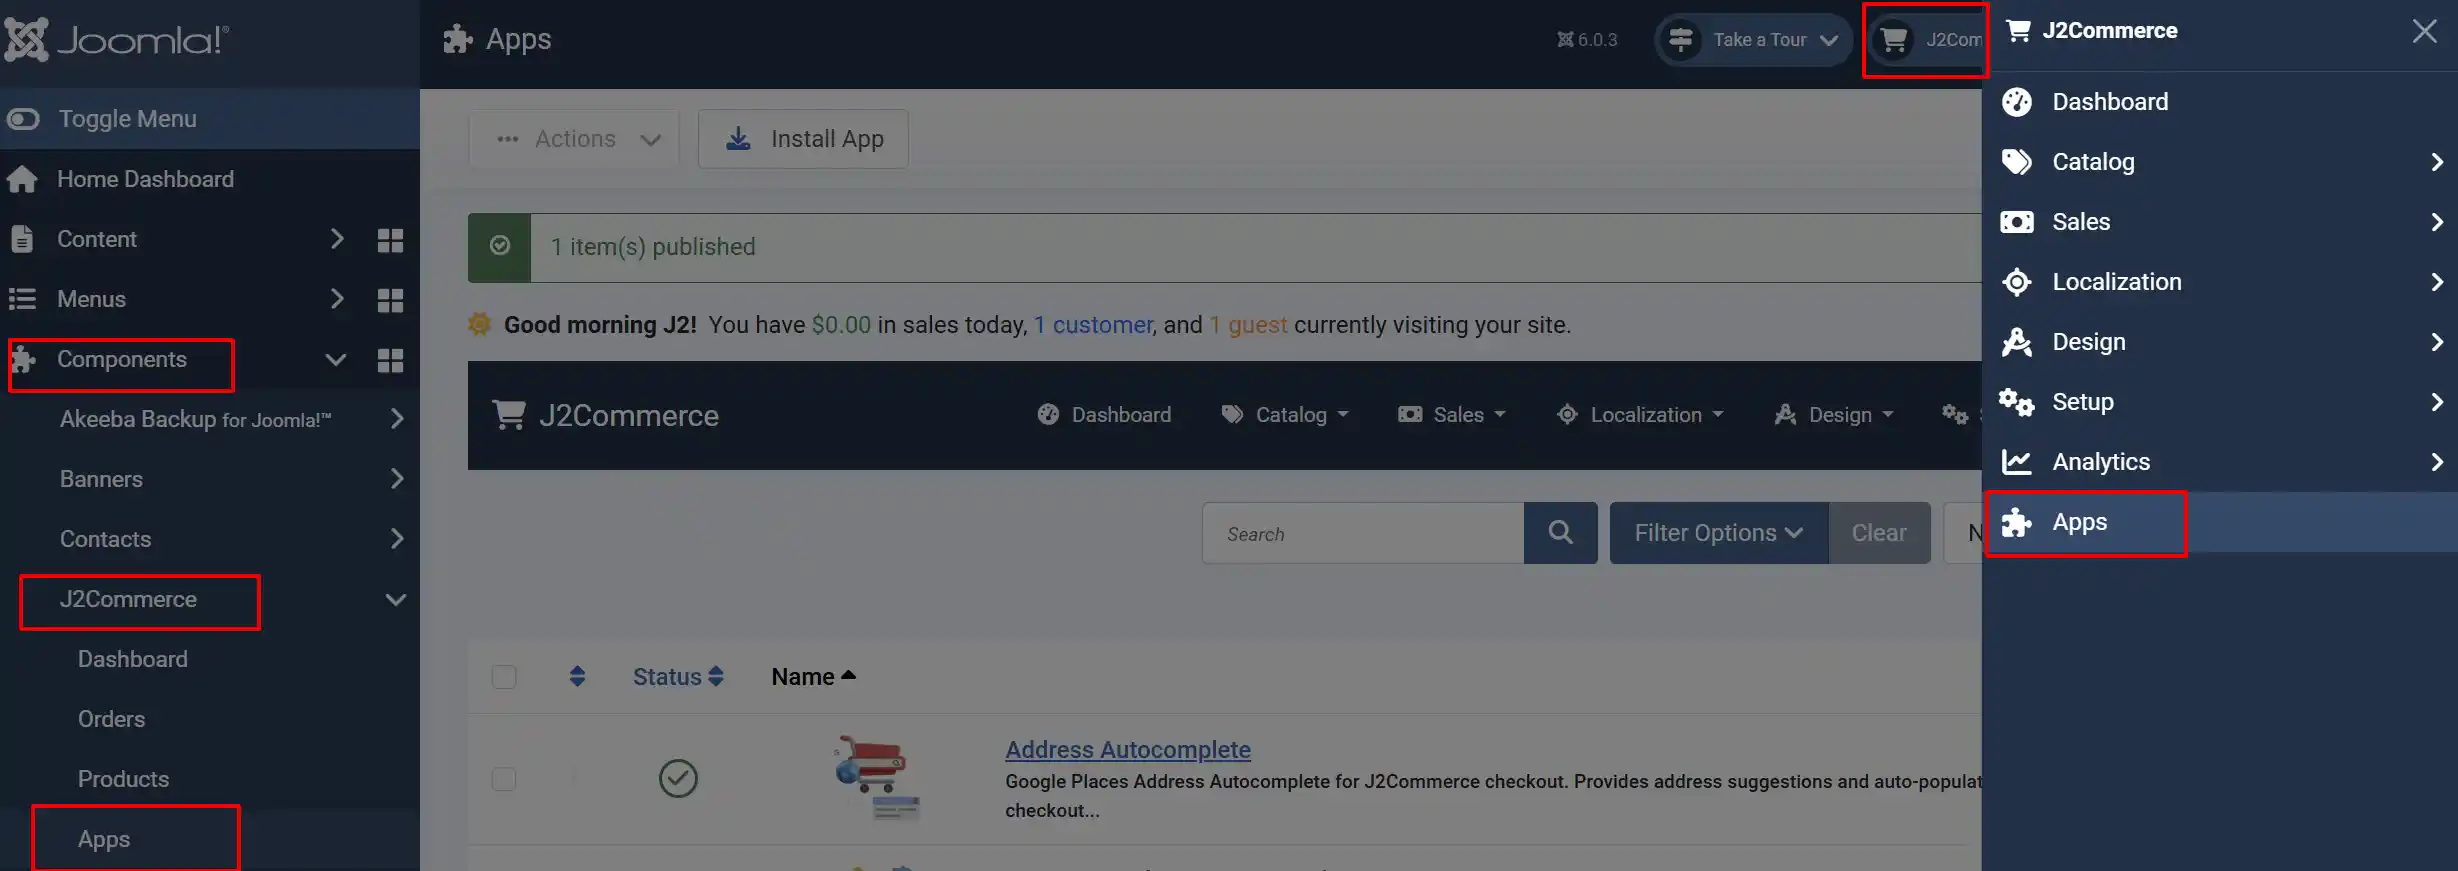
Look for Checkout Shield, click the X, and it will turn into a green checkmark. It is now enabled and ready for setup.
Click the plugin name to open its settings — this is where every option in this guide lives.
The dashboard lives in a different place: J2Commerce -> Analytics -> Checkout Shield.
Configuring the App
Click the Toggle Inline Help button in the toolbar and the app will show a description below each field as you configure it.
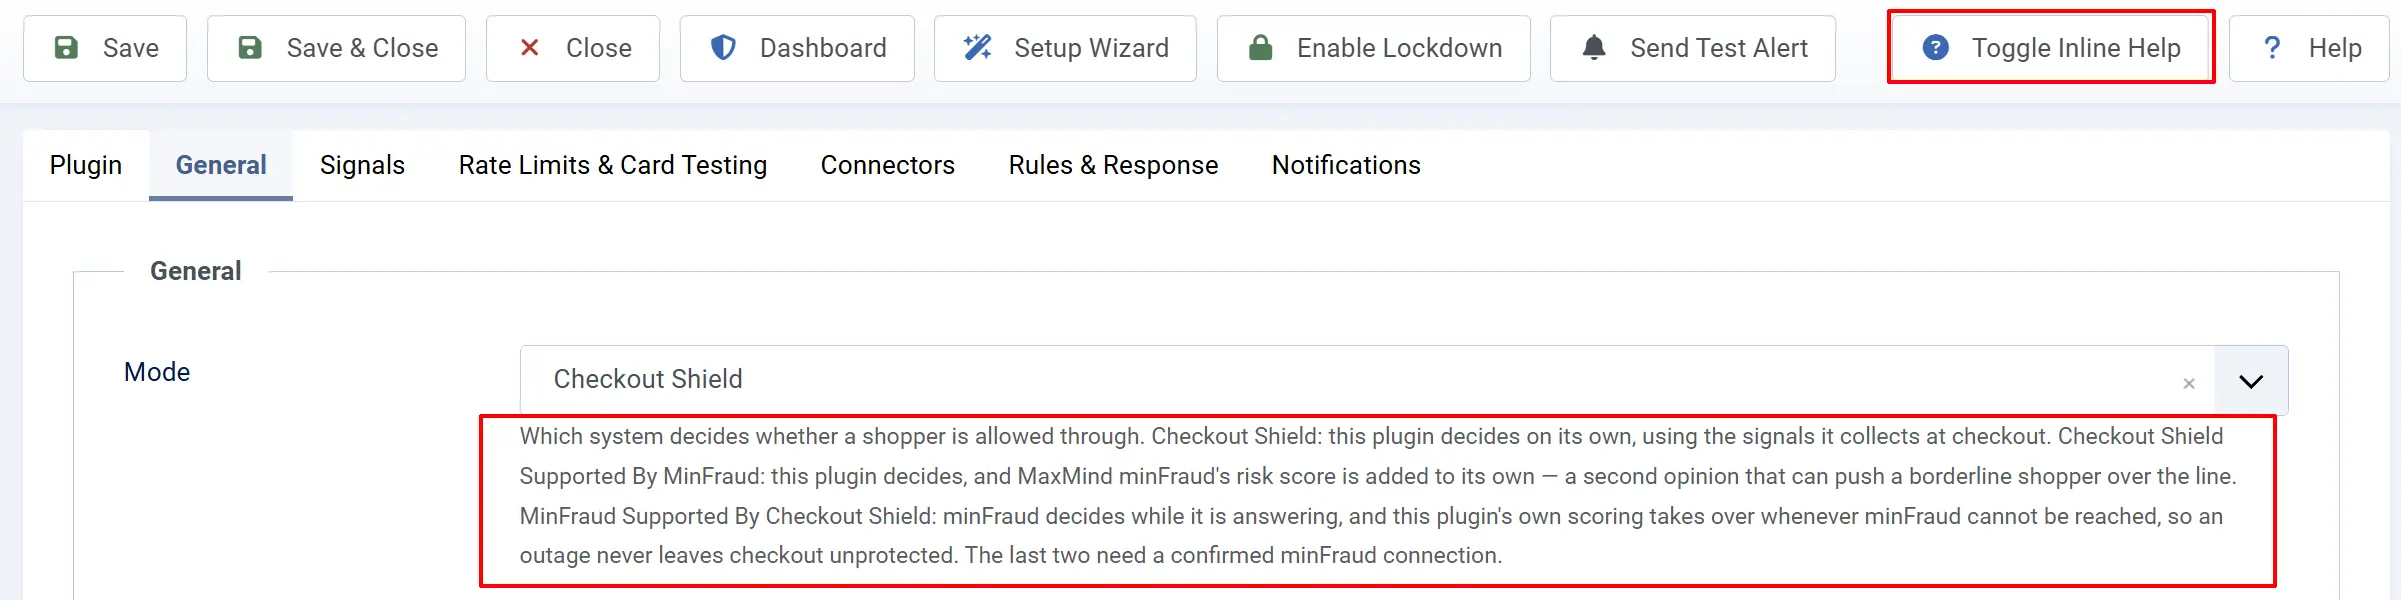
The Monitor-First Rollout (Read This Before Anything Else)

This is the single most important thing to understand about Checkout Shield: it ships in Monitor mode, and you should leave it there for about a week before switching to Enforce.
In Monitor mode, Checkout Shield:
- Scores every checkout attempt exactly as it would in live enforcement.
- Logs the action it would have taken — "would challenge" or "would block" — right alongside every attempt.
- Never actually challenges, blocks, throttles, or bans a real shopper.
This "observe before block" approach is standard practice across every serious bot-protection product (Cloudflare, Akamai, and enterprise bot-management vendors all default new customers into a monitor-only period first). It exists because every store's traffic is different — your legitimate customers might share office IPs, use ad-blockers that strip browser fingerprinting signals, or be unusually fast at filling out forms with browser autofill. A week of monitoring shows you exactly how your real traffic behaves before you risk turning away a paying customer.
Recommended rollout steps
- Install and enable the plugin. Leave every default setting as-is.
- Watch the dashboard daily for about a week. Pay attention to the Attempts Log — look at what scored in the Challenge or Block band and check whether those look like real customers or bots.
- Tune the weights if something looks off. If a signal is flagging real shoppers too often, lower its weight under Signals or Velocity in the plugin settings.
- Switch Mode to Enforce under the General fieldset once you are comfortable with what the dashboard is showing you.
- Keep watching the dashboard for the first few days after enforcing — the Checkout Health badge and the KPI band are your early warning system.
Before you switch to Enforce, open the Blocked IPs dashboard page and confirm your own office/home IP address is on the Allowlist. The dashboard will warn you at the top of every page if your current IP is not allowlisted while enforcement is on — don't lock yourself out during a real attack.
The Analytics -> Checkout Shield Dashboard
Everything Checkout Shield sees lives in one place: The Dashboard. There are two ways to get to the Checkout Shield Dashboard.
Option A: J2Commerce -> Apps -> Checkout Shield
Option B: J2Commerce -> Setup -> Checkout Shield
The image below shows the dashboard in the Apps plugin

Checkout Health badge
At the top of the dashboard, next to the page title, a colored badge gives you an instant read on your store's status:
Good (green): Fewer than 5% of checkout attempts are being flagged, and no decline-rate spike is active.
Watch (yellow): Between 5% and 15% of attempts are being flagged. Worth a look.
Under attack (red): More than 15% of attempts are being flagged, or a live decline-rate spike has been detected.
KPI cards
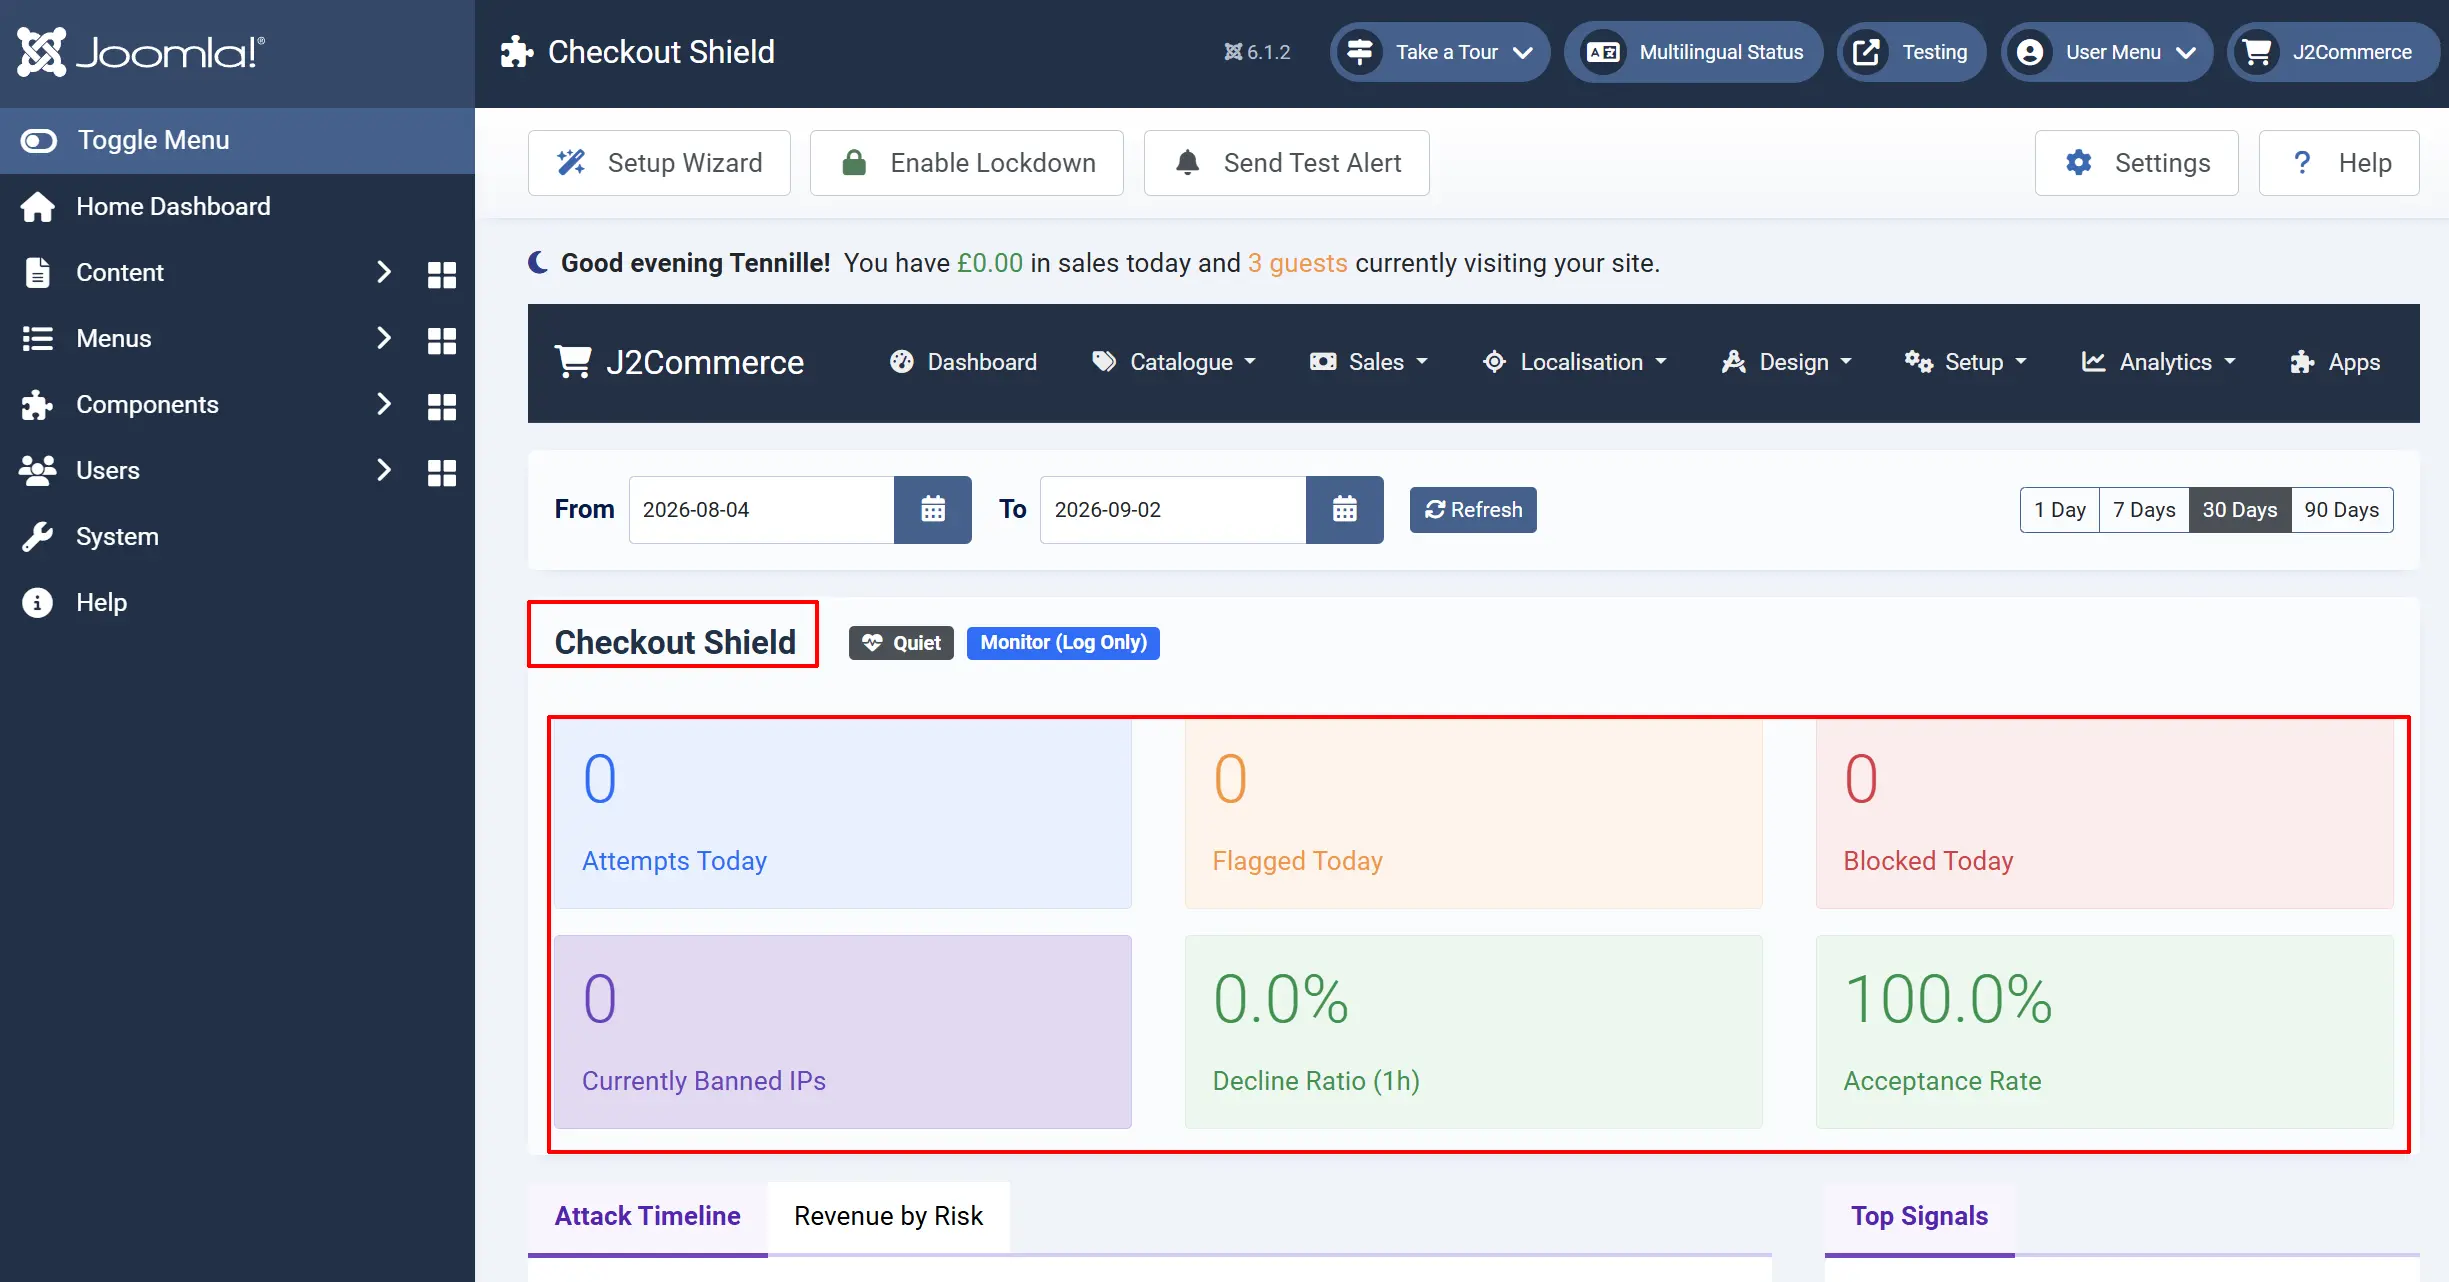
Six numbers give you the headline picture for the store:
| KPI | What it shows |
|---|---|
| Attempts today | Every checkout request Checkout Shield has evaluated since midnight, store time. |
| Flagged today | Attempts that reached at least the Challenge score band. |
| Blocked today | Attempts that reached the Block band (or would have, in Monitor mode). |
| Currently banned IPs | How many IP addresses are actively blocked right now, either automatically or by hand. |
| Decline ratio (1h) | The share of payment attempts declined by your gateway in the last hour, with the underlying "X of Y declined" count and an arrow when it is spiking above your normal baseline. |
| Acceptance rate | 1 minus the flagged share over the last 7 days — the mirror image of your store's overall friction level. |
Charts
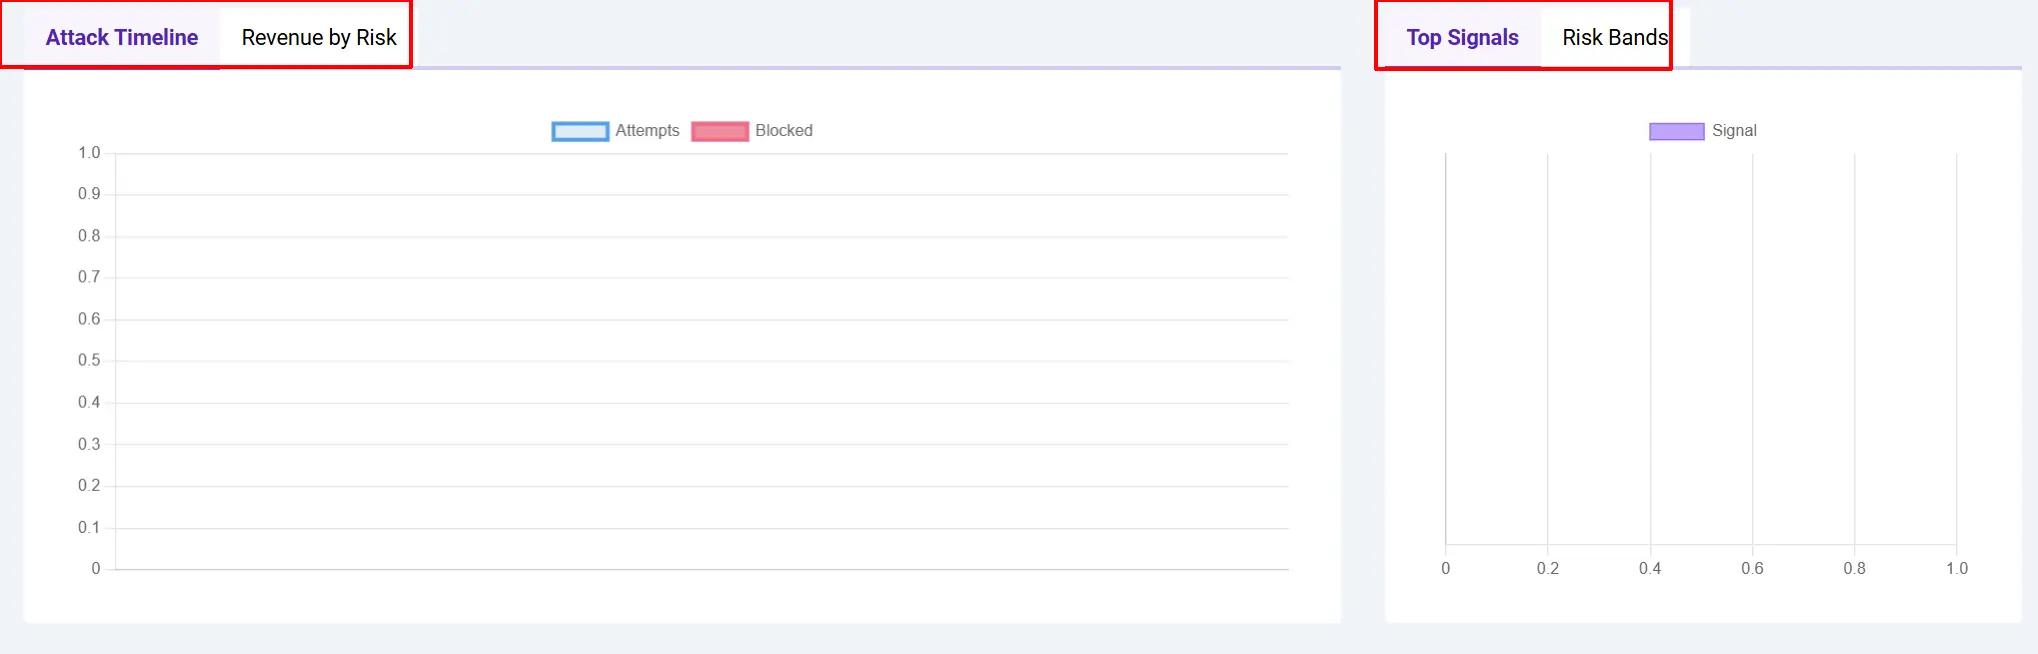
Three tabs sit below the KPI band, powered by Chart.js:
- Attack timeline — attempts vs. blocked, day by day, over your selected date range.
- Decline ratio trend — your payment decline percentage over the same range, so you can see spikes at a glance.
- Top signals — which detection signals (honeypot, velocity, card-testing pattern, and so on) are firing most often.
Use the date-range buttons (1 day / 7 days / 30 days / 90 days) or the calendar pickers above the KPI band to change the window; the KPIs and charts refresh without reloading the page.
The Attempts Log
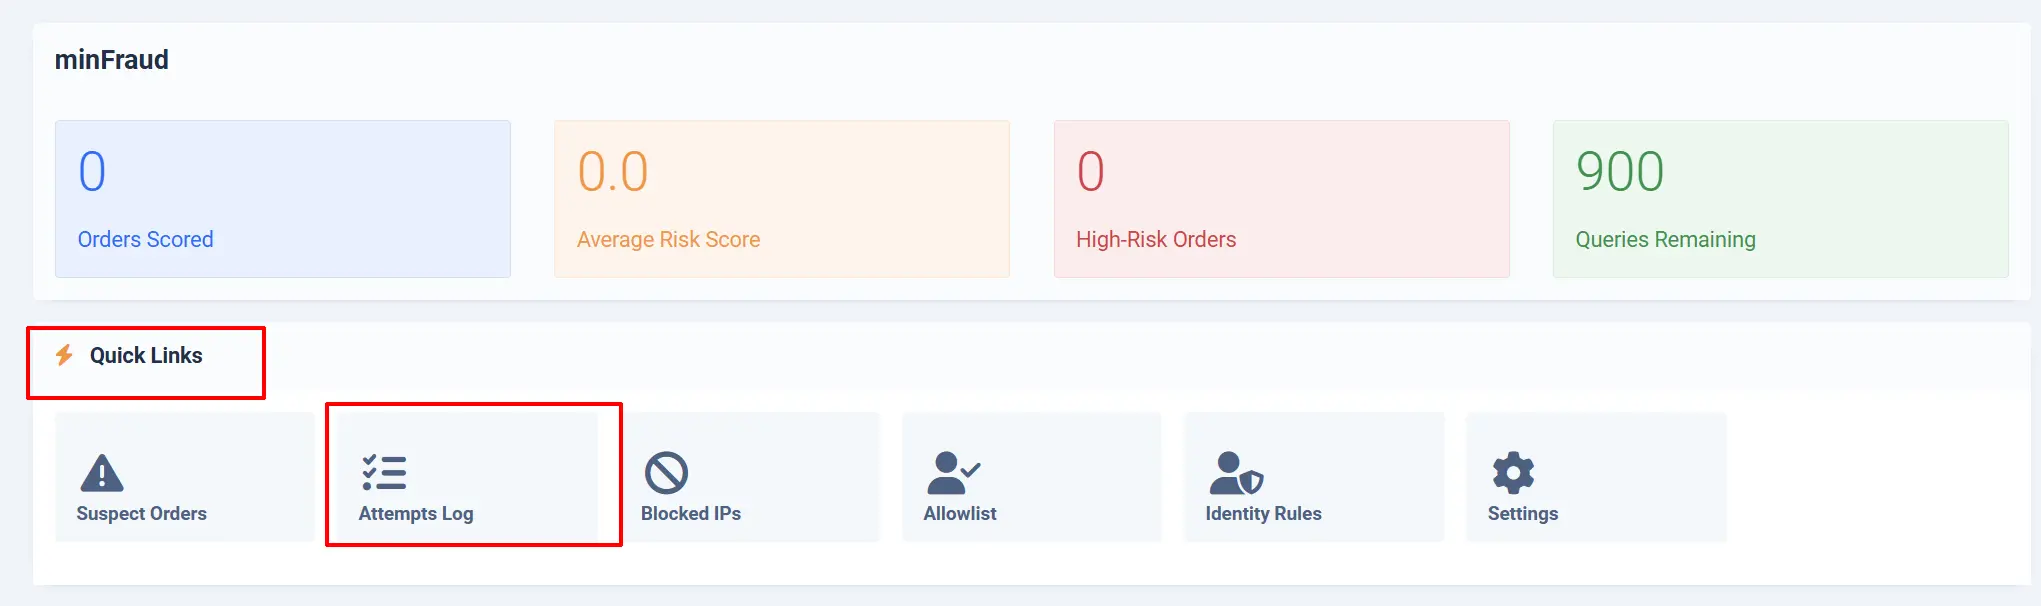
Every checkout request Checkout Shield evaluates gets a row here — go to Checkout Shield -> Dashboard -> Quicklinks -> Attempts Log, or click the View all link under "Recent attempts" on the dashboard.
Each row shows the timestamp, the IP address (with a country flag when Geolocation is on), a strip of colored dots for the individual signals that fired, the overall risk score, and the action taken (Logged / Would Block / Challenged / Throttled / Blocked / Banned).
- Filter by IP or email domain, risk band, action taken, checkout step, or date range using the search bar at the top.
- Select rows and use the toolbar to Block IP (choose 1 hour / 24 hours / 7 days / permanent from the dropdown), Allowlist IP, Clear Counters (reset the velocity count for that key — useful if you just fixed a false-positive setting), Export CSV, or Purge Log.
- Every row also has a one-click Block/Unblock icon so you can act on a single attempt without selecting it first.
The Blocked IPs Manager
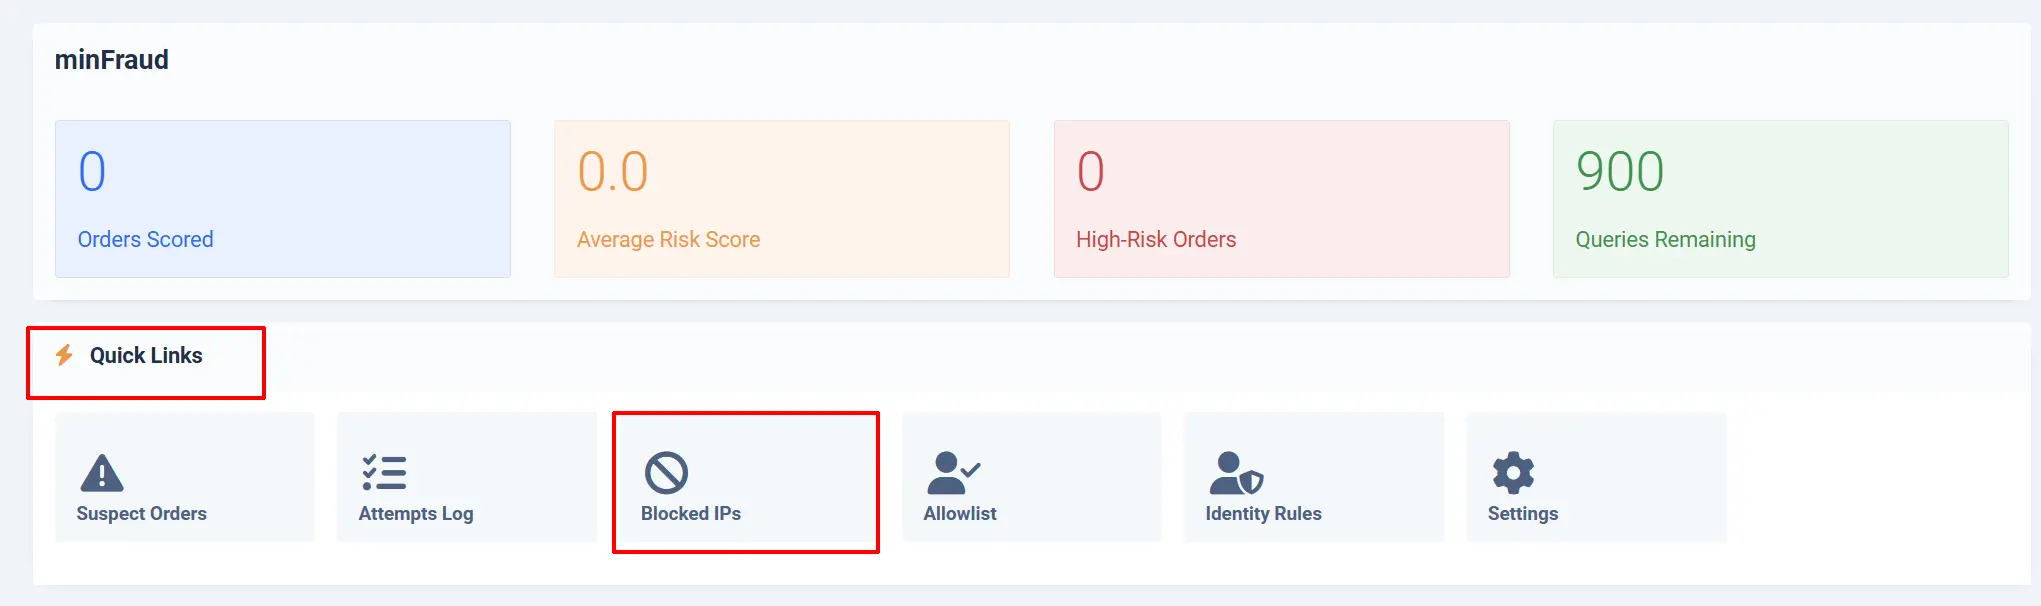
Go to Checkout Shield -> Dashboard -> Quicklinks -> Blocked IPs to see every IP currently on the blocklist, whether it got there automatically (repeat offenses) or you put it there by hand.
Each row shows the IP (or CIDR range), a Temporary/Permanent badge, the reason, the source (Auto, Manual, or Reputation), how many hits it has racked up since the ban, its ban escalation level, and a countdown to expiry.
- Use Add Block… to manually block a specific IP address.
- Select rows and Unblock, Make Permanent, or Delete.
- The same one-click toggle icon from the Attempts Log lets you unblock (or re-block) any row without selecting it first.
Temporary bans stop enforcing the moment they expire — they don't need a cleanup job to become harmless — but Checkout Shield does clean up expired rows automatically about 30 days after they lapse, so the log doesn't grow forever.
The Allowlist Editor
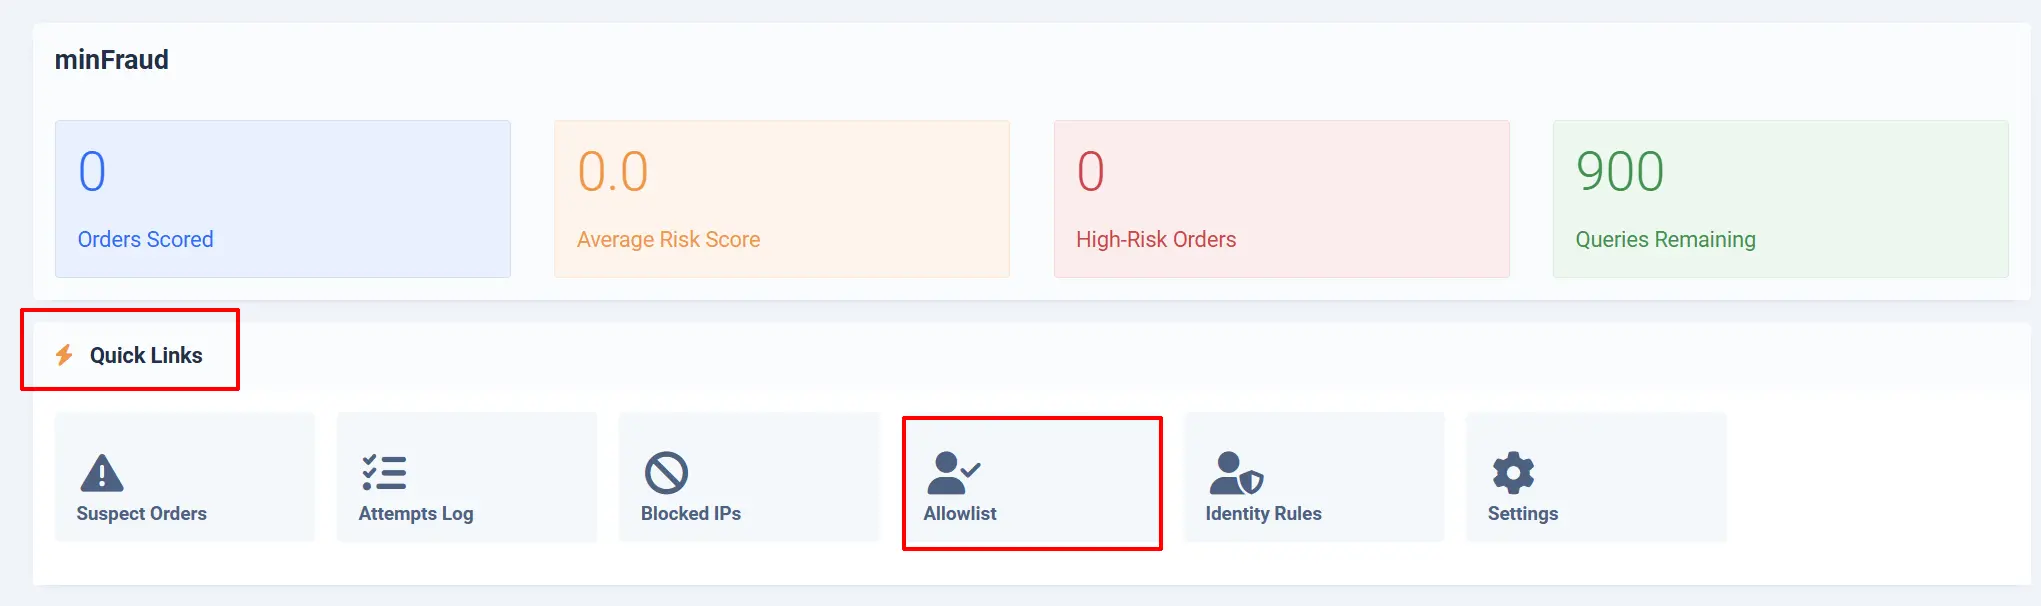
Go to Checkout Shield -> Dashboard -> Quicklinks -> Allowlist to manage entries that always bypass every check, no matter what — including Lockdown Mode.
You can allowlist by:
| Type | Example |
|---|---|
| IP | 203.0.113.42 |
| CIDR range | 203.0.113.0/24 |
warehouse@yourstore.com | |
| Email domain | yourstore.com |
Add entries with Add Entry…, remove them with Delete. At minimum, allowlist your own admin office/home IP address — the dashboard will warn you if it is not on the list while enforcement is active.
Lockdown Mode
Go to Checkout Shield -> Dashboard -> Enable Lockdown
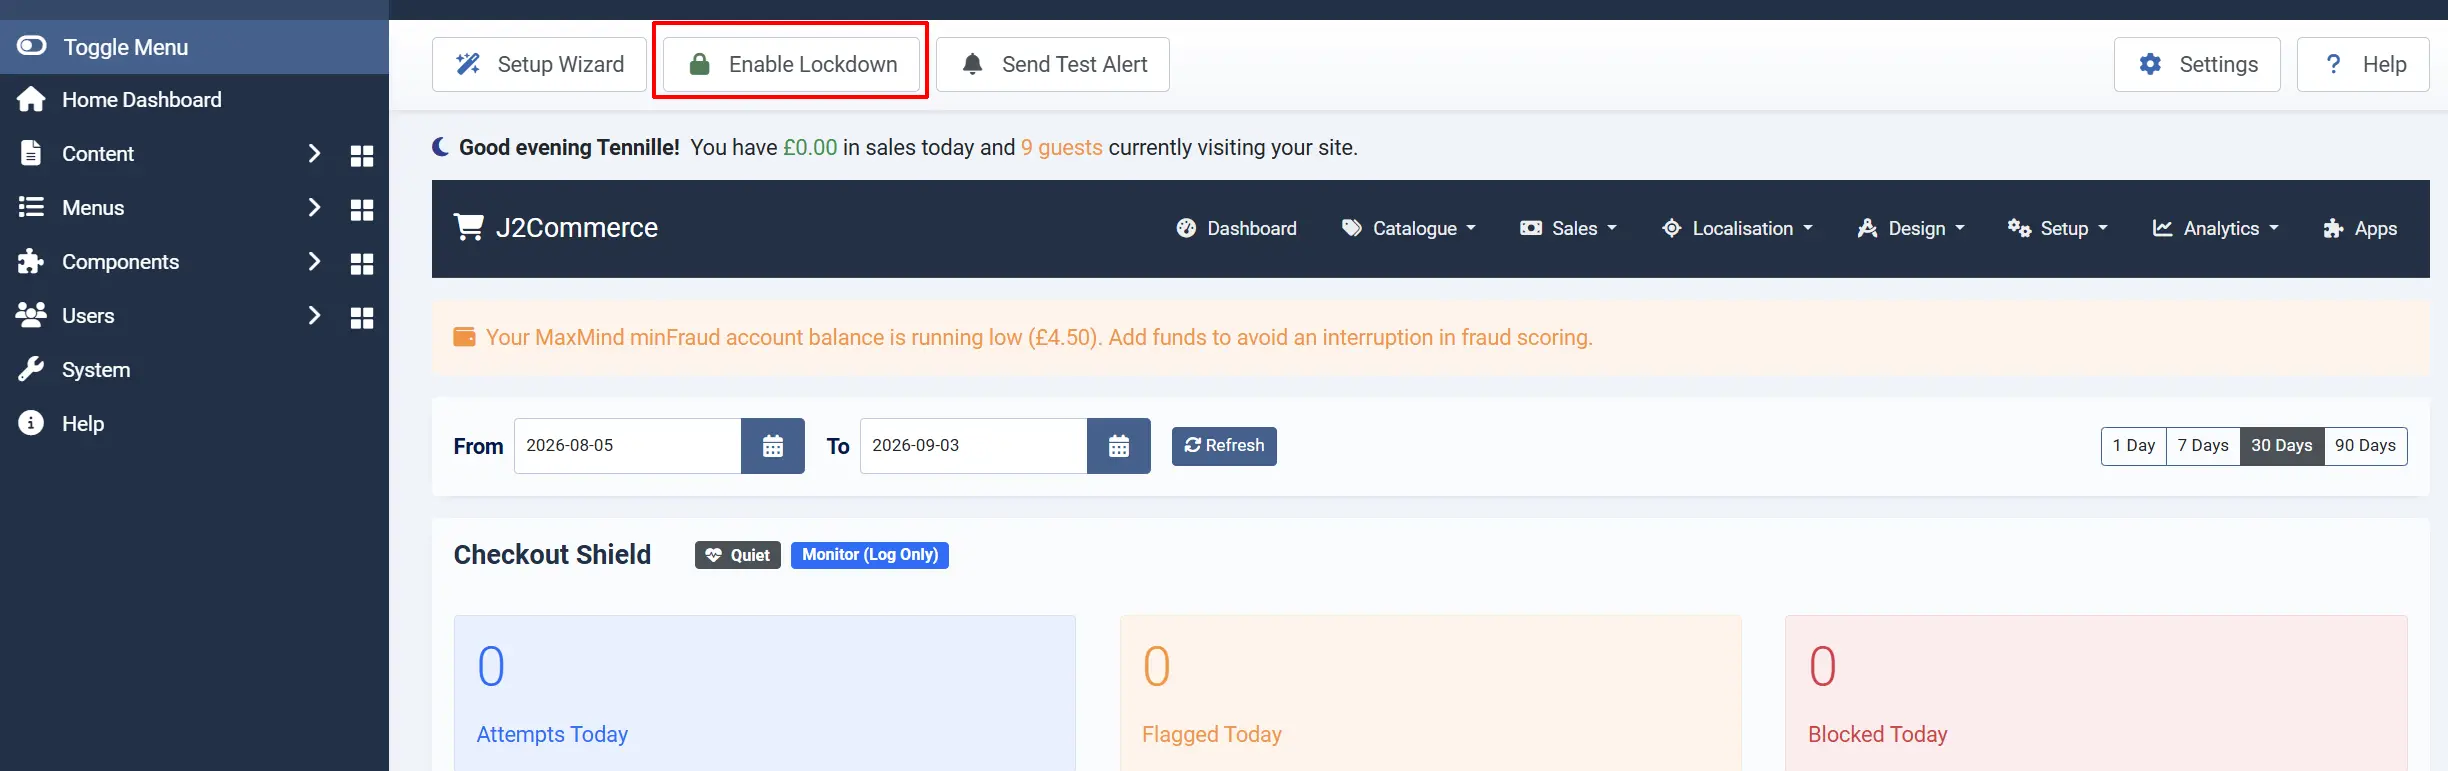
Lockdown Mode is a one-click emergency switch, available from the toolbar on Checkout Shield Dashboard page. Turn it on when you are watching a real attack unfold and need to slam the door immediately, without waiting to retune individual settings.
While Lockdown is active:
- Every checkout step is challenged, regardless of score (this can be turned off in settings, though the default is on).
- Guest checkout can be blocked entirely (on by default) — this matters because card-testing attacks almost always run through the anonymous guest path, never a logged-in account.
- All velocity thresholds are tightened by a configurable multiplier (25% of normal, by default) — attempts that would normally slide through in small numbers now trip the alarm much faster.
- Lockdown auto-expires after a configurable number of hours (24 by default) so you never forget it is on and lock out customers for good. Set it to 0 hours for manual-only control.
- A red banner appears at the top of every Checkout Shield page for as long as Lockdown is active, and both activating and deactivating it send you an immediate critical alert.
Allowlisted entries always bypass Lockdown Mode too — so your own admin IP stays safe even during a full lockdown, as long as you added it beforehand.

When to use it
Reach for Lockdown Mode when you see the Checkout Health badge flip to "Under attack" and the Decline ratio KPI spike hard — that combination is the clearest sign a card-testing wave is actively hitting your store right now. It buys you time to review the Attempts Log and add specific offenders to the Blocked IPs list, without needing to change your regular Mode/threshold settings under pressure.
Notifications
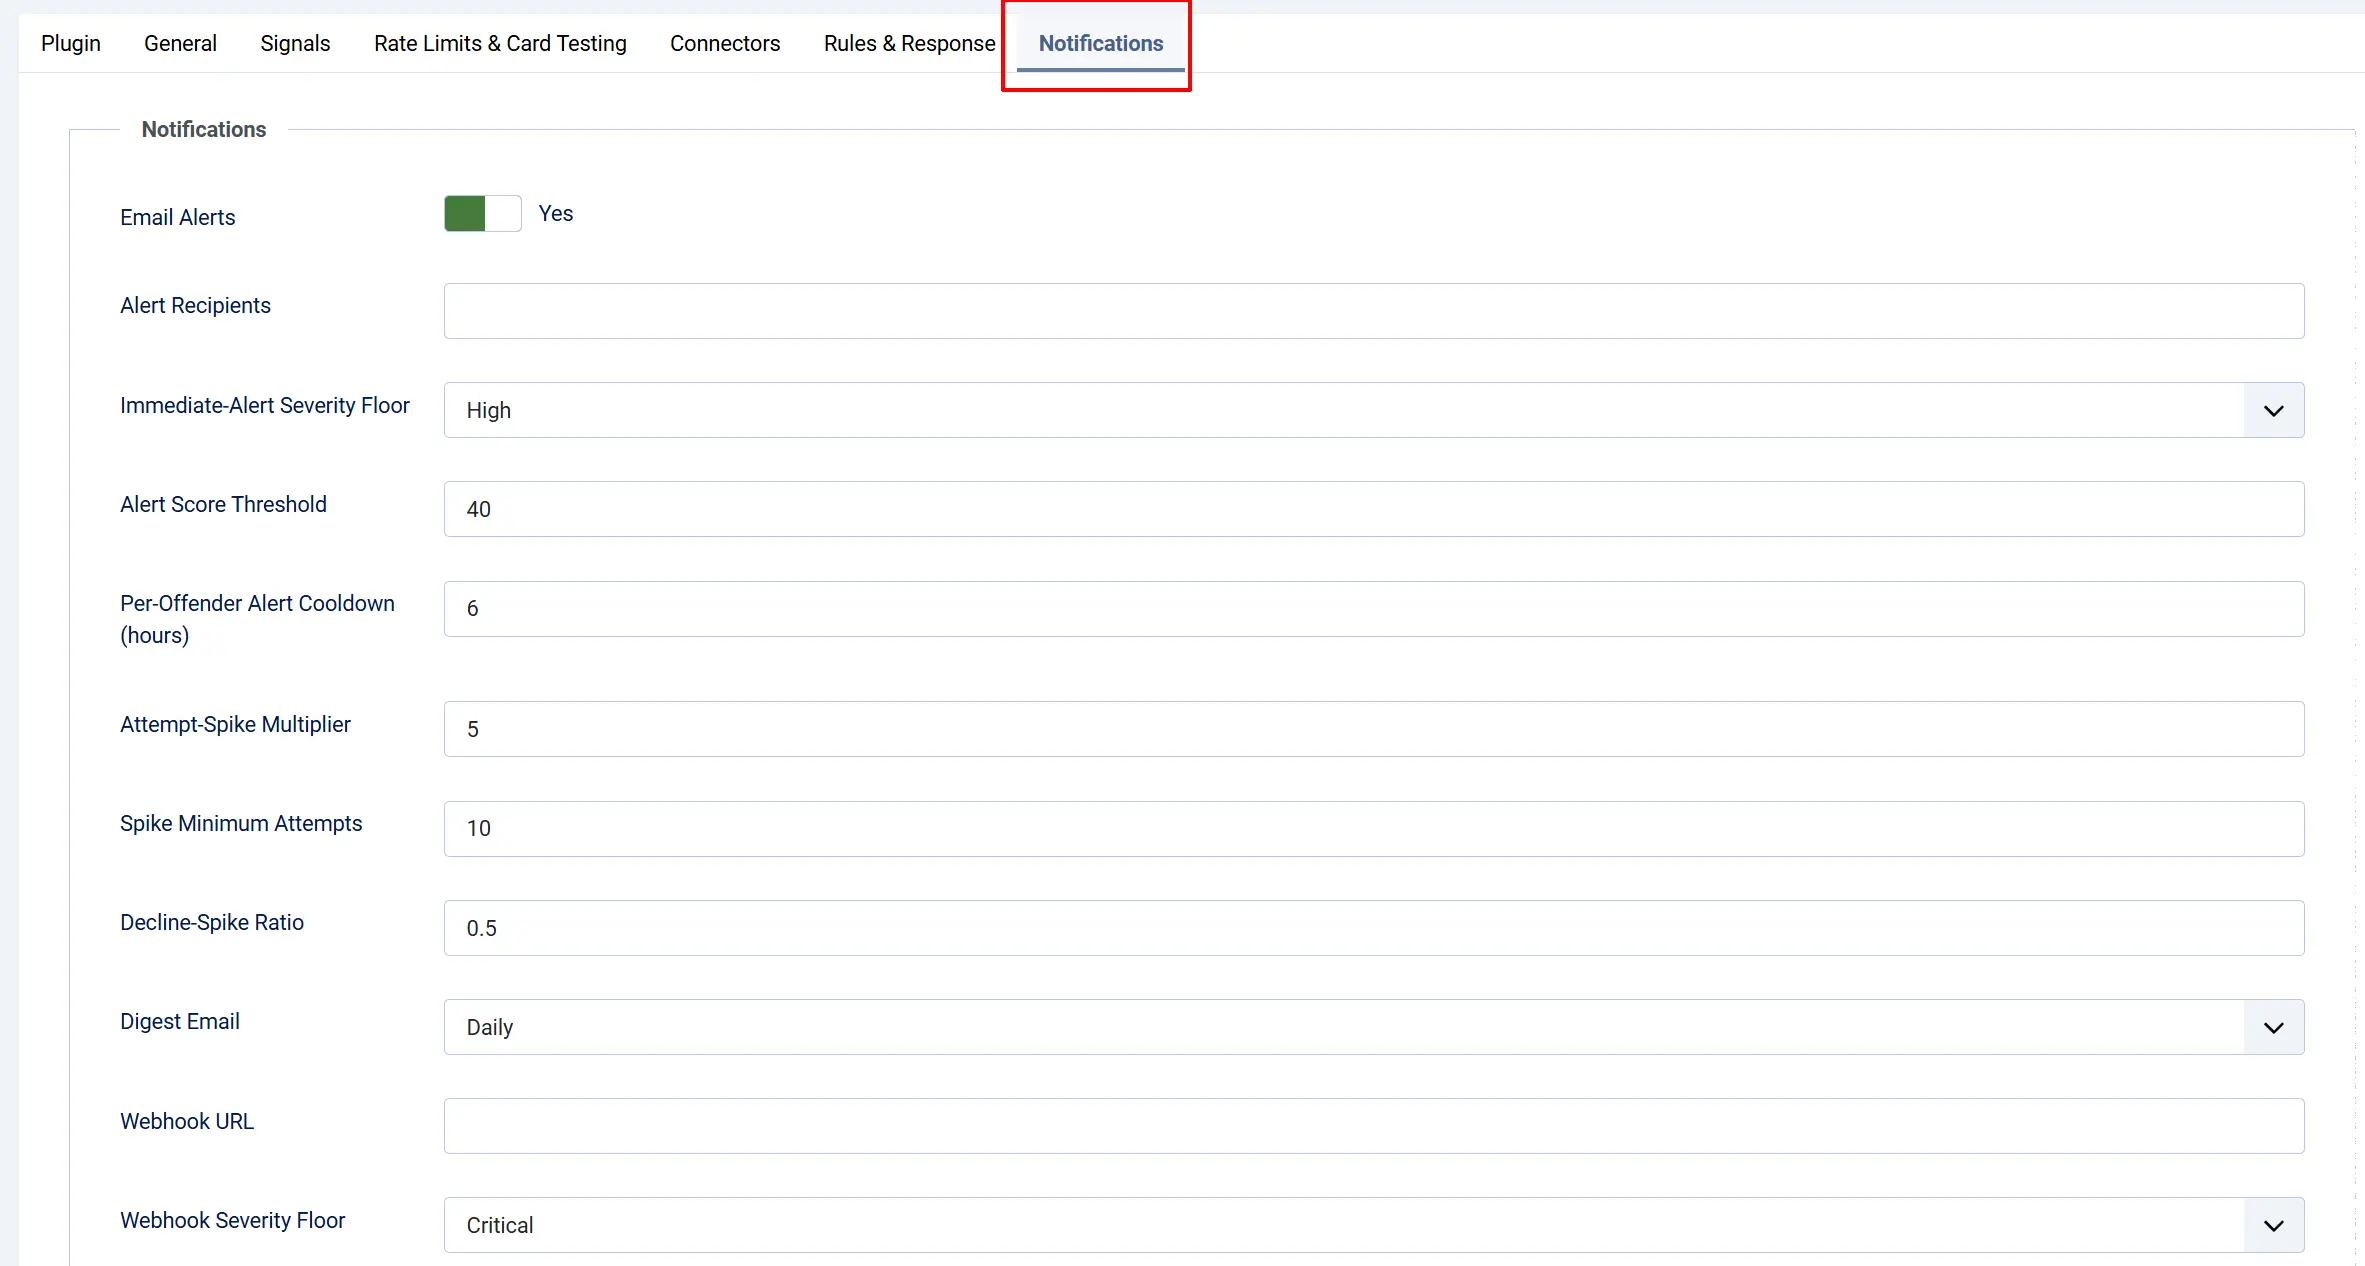
Checkout Shield can alert you two ways: immediate email for anything serious, and a periodic digest that rolls up everything else so your inbox doesn't drown in noise. Both live under the Notifications fieldset in plugin settings.
Immediate email alerts
| Setting | Description | Default |
|---|---|---|
| Email Alerts | Turn immediate email notifications on or off. | On |
| Alert Recipients | Comma-separated email addresses. Leave blank to use your site's default "mail from" address. | (site mail-from) |
| Immediate-Alert Severity Floor | Only events at or above this severity trigger an immediate email — Critical, High, or Medium. | High |
| Alert Score Threshold | The risk score that generates an alert, kept deliberately separate from your block threshold, so you can watch loudly while enforcing gently. | 40 |
An attack in progress, an IP getting auto-banned, or Lockdown Mode being switched on or off always sends an immediate email, regardless of these settings — those are the events that need your attention right now.
Anti-fatigue controls (so you don't get flooded)
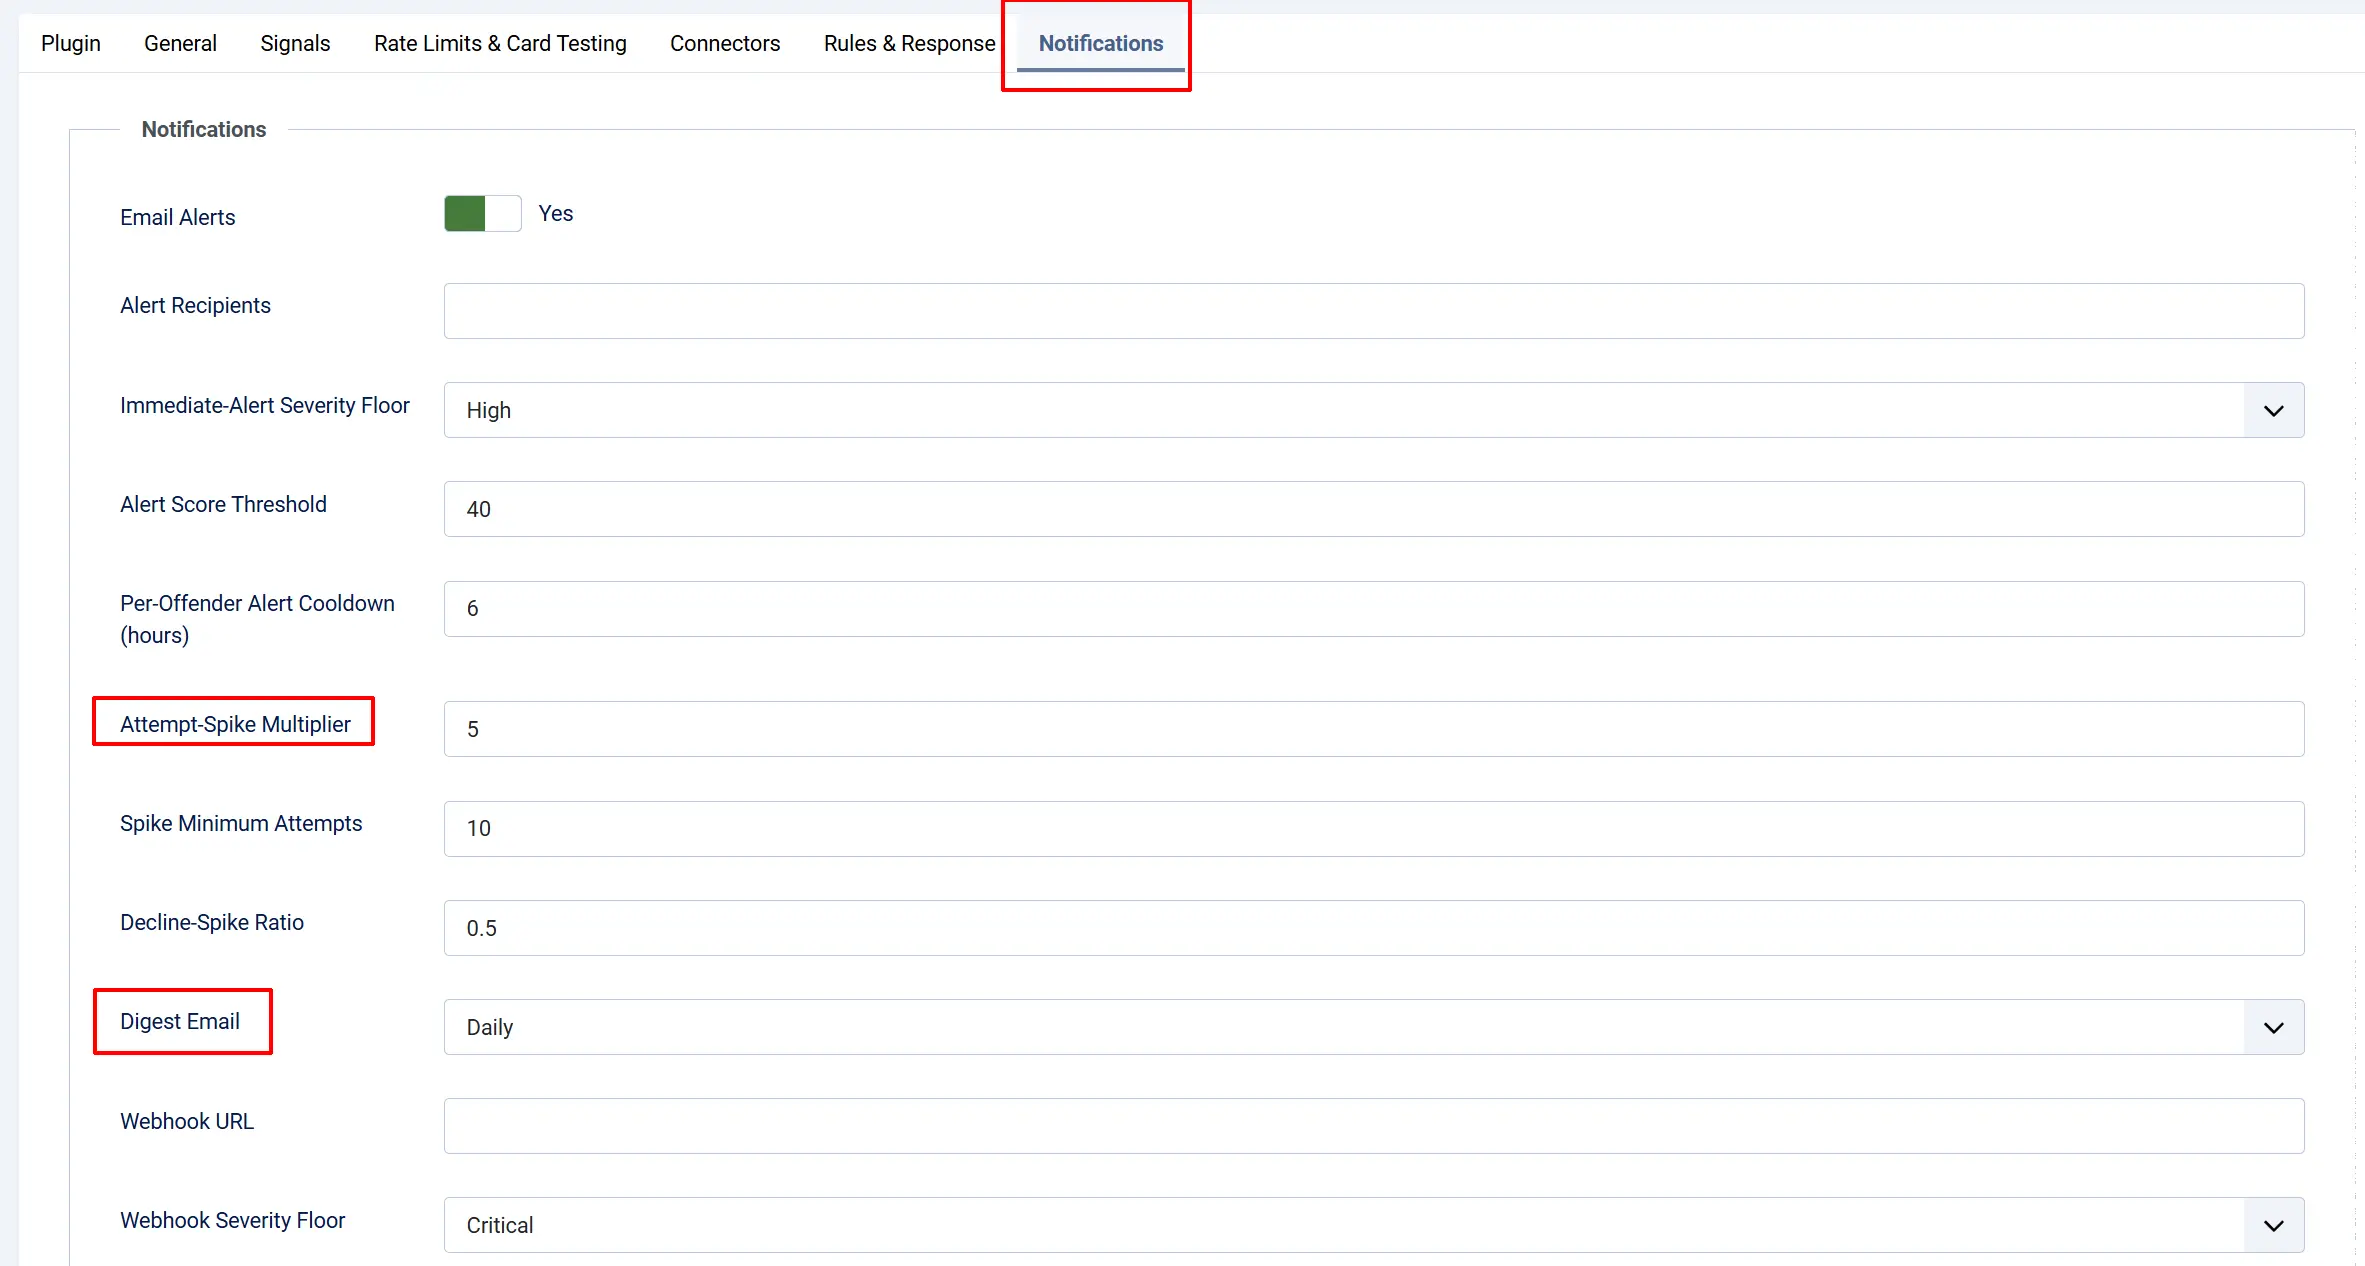
Nobody wants 500 emails during a real attack. Checkout Shield builds anti-fatigue directly into the notification system:
- Per-Offender Alert Cooldown — once you get an alert about a specific IP, you won't get another one about the same IP for this many hours (default 6). Repeat hits inside that window just bump a counter on the original alert instead of sending a new email.
- Alert threshold is separate from your block threshold — you can set a low alert score to watch closely while your actual block threshold stays conservative, or vice versa.
- Digest Email — instead of individual emails, roll medium-severity activity up into a single periodic summary. Options: Off, Hourly, or Daily (default: Daily). The digest includes counts by band and action, your top offenders, top flagged domains, ban changes, and the Checkout Health badge — no other checkout-protection product on the market offers digest mode, so this is a real convenience if you'd rather check in once a day than get pinged constantly.
Chat webhook (optional)
Point Webhook URL at a Slack, Discord, or Telegram incoming-webhook URL to get alerts posted straight into a channel your team already watches. Set Webhook Severity Floor to control how much noise it generates (default: Critical only).
Sending a test alert
Every Checkout Shield page has a Send Test Alert button in the toolbar — use it after configuring recipients to confirm mail delivery is working before you actually need it.
Editing the email templates
Checkout Shield registers two email types under Design -> Email Templates: Checkout Shield Alert and Checkout Shield Digest. Edit the subject and body like any other J2Commerce email — merge tags like [SHIELD_IP], [SHIELD_SCORE], [SHIELD_EVENT], and [DIGEST_TABLE] are available for you to work with.
Reputation Providers and Geolocation
These signals are optional and mostly disabled by default — Checkout Shield works fine without them, and turning them on trades a small amount of setup effort for extra detection accuracy against known-bad infrastructure.
Reputation providers
Configure these under the IP & Email Reputation fieldset. Two free bulk lists work locally with no API key and are already on by default:
| Provider | Needs a key? | Default | What it does |
|---|---|---|---|
| StopForumSpam | No | On | Matches the client IP against a locally synced bulk list of known-bad IPs. Free and fast because there's no live API call at checkout time. |
| Tor exit nodes | No | On (adds to score) | Checks the client IP against a locally synced list of Tor exit nodes. Can be set to Off, "Add to score," or "Block" outright. |
| Disposable email domains | No | On | Flags checkout attempts using a known throwaway email domain, from a bundled list plus a daily sync. |
| AbuseIPDB | Yes (free tier: 1,000 checks/day) | Off (gated by "IP Reputation Lookups") | Live lookup at payment submission only, cached for a day. |
| Project Honey Pot (http:BL ) | Yes (free) | Off | DNS-based lookup, cached, ~1-second timeout. |
| IPQualityScore | Yes (free tier: 1,000/month) | Off | Live fraud-score lookup, cached; the free tier is limited so it only runs at payment submission. |
The two locally-synced bulk lists (StopForumSpam and Tor) and the disposable-domain list all depend on the daily sync task — see Scheduled Tasks below. Until that task runs at least once, those lists are empty and contribute nothing.
To turn on the key-based providers: open plugin settings, flip IP Reputation Lookups to on, then paste in the API key(s) you signed up for on the provider's website. All lookups only happen at the payment step and are cached for 24 hours by default, so there is no ongoing per-request cost.
Reputation lookups require the full IP storage privacy mode. If you switch IP Storage to Hashed, reputation checks are automatically disabled — the providers need a real IP address to look up.
Geolocation (optional)
Geolocation is off by default. To turn it on:
- Sign up for a free MaxMind GeoLite2 account and generate a license key.
- Under the Geolocation fieldset, flip Geolocation to on and paste in your MaxMind License Key.
- Schedule the weekly Refresh GeoIP Database task (below) — the dashboard shows the database status so you know when it's ready.
- Choose your Country List Mode (allow only listed countries, or act against listed countries), pick the countries, and set the Geolocation Action (Add to score / Challenge / Block).
The database downloads and refreshes on a server-fixed path automatically once the task is scheduled — there's nothing to manage manually after the first setup.
Scheduled Tasks (Required)
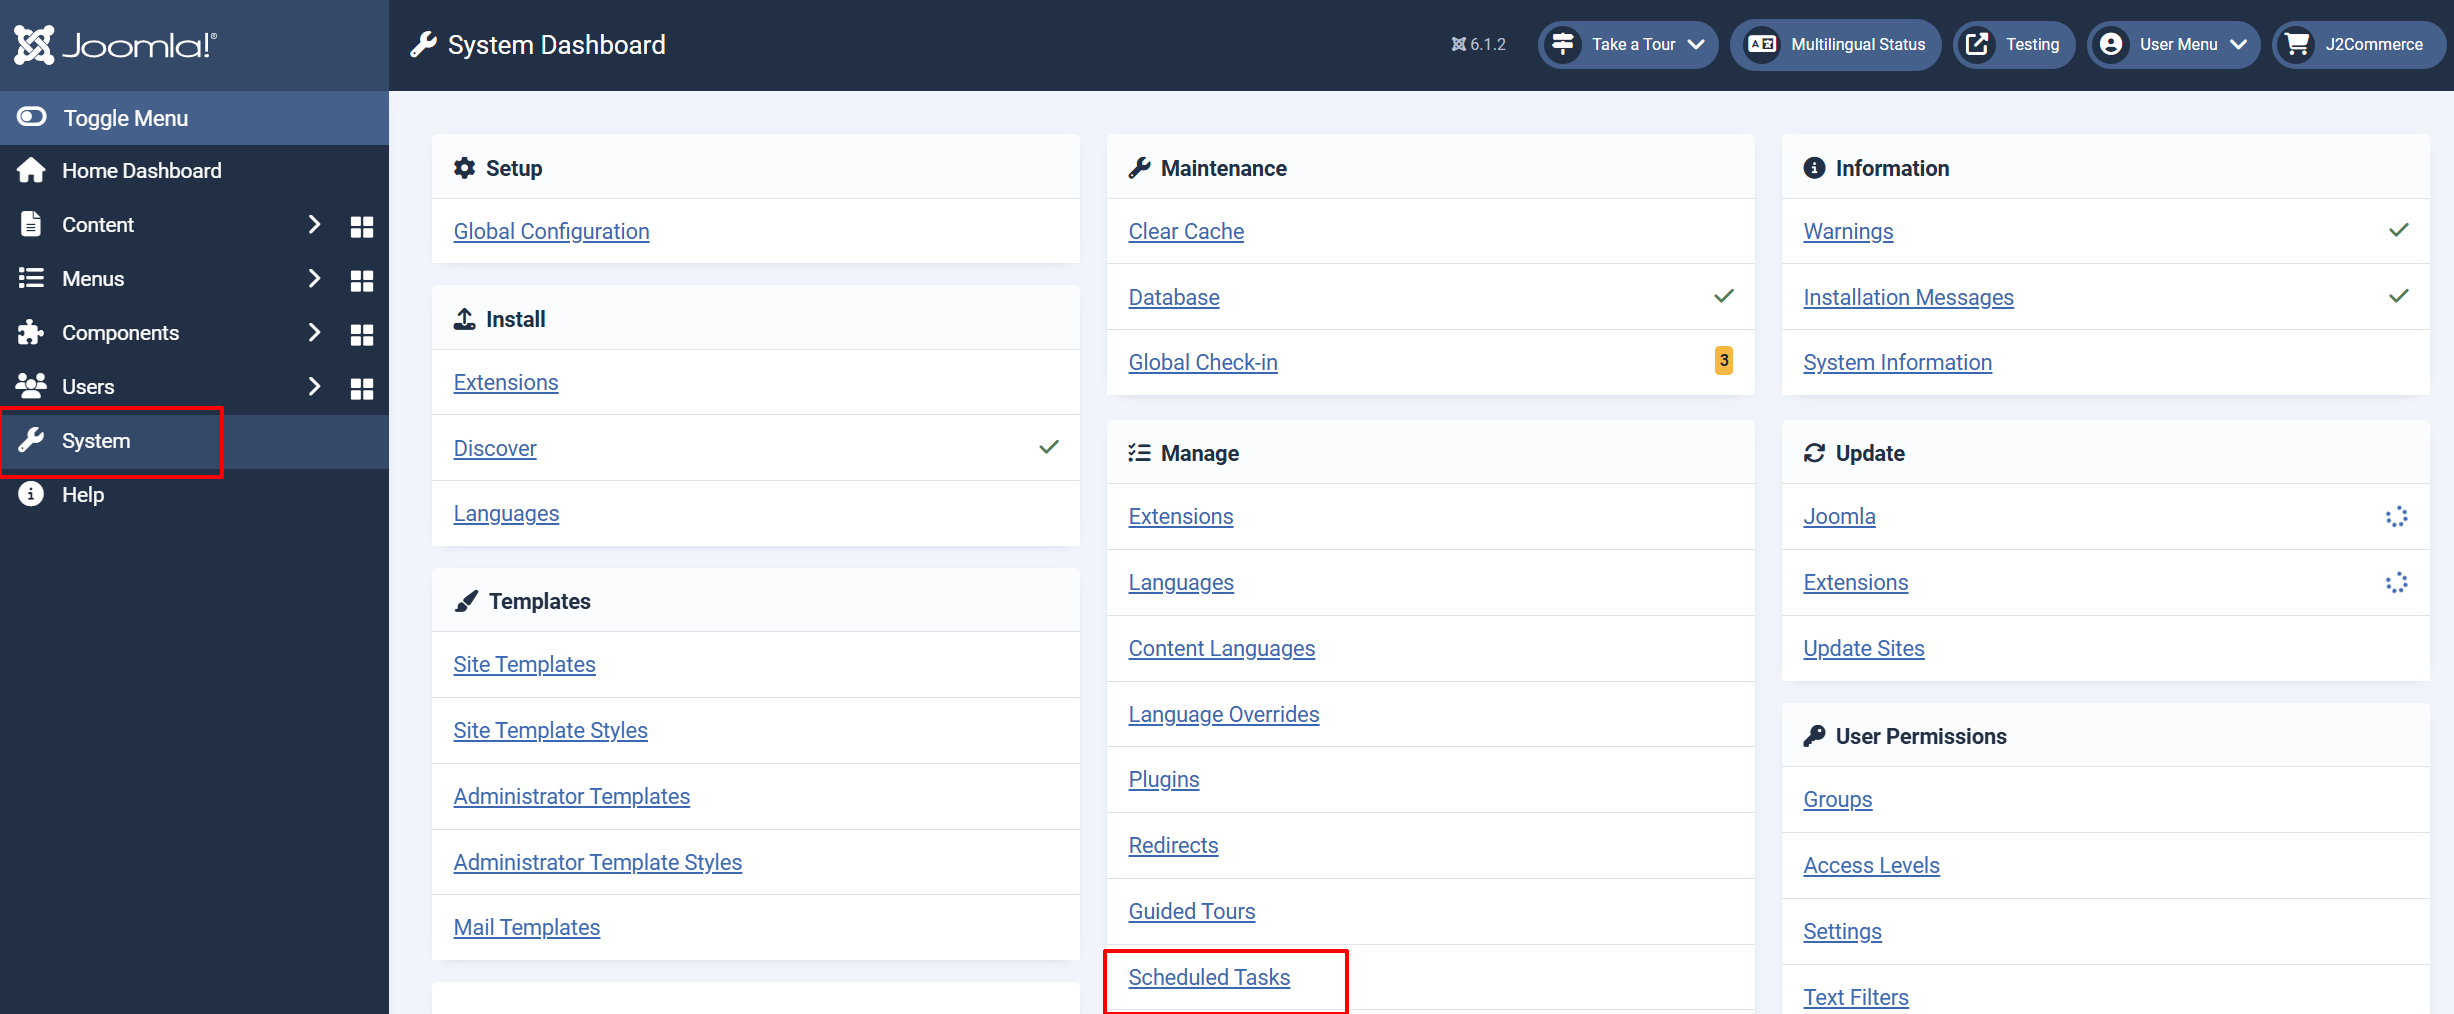
Checkout Shield's companion task plugin needs seven maintenance routines scheduled under System -> Scheduled Tasks to keep the dashboard accurate, keep the reputation lists fresh, and honor your data-retention settings. Add each one as a New Task, selecting the matching Checkout Shield task type.
| Task | Suggested cadence | What it does |
|---|---|---|
| Checkout Shield: Purge Expired Bans | Hourly | Removes temporary IP bans that expired more than 30 days ago. |
| Checkout Shield: Purge Old Attempts | Daily | Deletes attempt-log rows older than your configured retention period — this is the GDPR purge job. |
| Checkout Shield: Purge Stale Counters | Hourly | Cleans up spent velocity-tracking data so the counters table doesn't grow forever. |
| Checkout Shield: Sync Bulk Lists | Daily | Refreshes the disposable-email, StopForumSpam, and Tor exit-node lists used for local matching. |
| Checkout Shield: Send Digest | Hourly | Builds and sends the digest email when one is due — it checks your Digest Email setting itself, so it's safe to schedule hourly even if you've chosen daily digests. |
| Checkout Shield: Recompute Baselines | Hourly | Recalculates the 7-day rolling "normal traffic" baseline that the attack-spike detectors compare against. |
| Checkout Shield: Refresh GeoIP Database | Weekly | Downloads the latest GeoLite2 database using your MaxMind key. Only does anything if you have Geolocation configured. |
If any of these tasks are missing, the dashboard is designed to warn you — but don't wait for that. Add all seven the same day you install the plugin, before you even switch to Enforce mode. Without the sync tasks running, your reputation lists stay empty and your attack-spike baselines never build up.
GDPR and Privacy
IP addresses are personal data under EU law, so Checkout Shield is built with privacy controls from the start. These live under the Privacy fieldset.
| Setting | Description | Default |
|---|---|---|
| Attempt Log Retention (days) | How long attempt records are kept before automatic purge. Accepted security-log practice is 6-12 months. | 180 (range 30-365) |
| IP Storage | How client IPs are stored in the attempt log. | Full |
The IP Storage options are:
- Full — the raw IP address is stored. Best detection accuracy; needed for live reputation lookups.
- Hashed — IPs are stored as a SHA-256 hash combined with your site's secret key. Recommended for EU stores. Velocity limiting and auto-banning both keep working on the hashed value; live reputation lookups are automatically disabled because the providers need a real IP to check.
- Truncated — IPs are stored with the last portion removed (
/24for IPv4,/48for IPv6), a common middle-ground anonymization approach.
Export and erasure requests
Checkout Shield hooks into Joomla's built-in Privacy tools (Users -> Privacy). When a customer submits a data export or removal request:
- Export returns their own attempt records — timestamp, checkout step, risk score, band, action taken, email domain, and country — matched by their account or the email address on the request.
- Removal anonymizes those rows rather than deleting them outright: the IP, email hash, fingerprint, and user-agent are cleared, but the score/band/action/timestamp are kept so your store-wide statistics stay accurate.
The scheduled Purge Old Attempts task above enforces your retention period automatically — it isn't just a policy statement, records really do get deleted once they age out.
Troubleshooting / FAQ
A legitimate customer got challenged with a CAPTCHA — why?
Checkout Shield only presents a challenge when a request's risk score crosses your Challenge Score Floor (default 40). Open the Attempts Log, find the customer's attempt by IP or timestamp, and look at the signal dots — hovering over each dot shows exactly what fired and why. Common causes: a very fast checkout completion (browser autofill on a re-order), a shared office/VPN IP that has also seen other traffic, or several checkout attempts in a short window (a customer retrying after fixing a typo in their card number).
If a pattern like this keeps showing up for real customers, lower the relevant signal's weight under Signals or Velocity in plugin settings — you don't need to disable the signal entirely, just make it contribute less to the total score.
My store has a lot of shared/office IPs (CGNAT) — will this block whole offices at once?
No. Checkout Shield deliberately keeps per-IP velocity limits looser than per-session, per-email, and per-fingerprint limits, specifically because carrier-grade NAT (CGNAT) and office/university networks put many unrelated legitimate customers behind one shared public IP. The system also detects CGNAT-range traffic automatically and shifts its trust to the tighter per-session/per-fingerprint keys instead, so ten different customers checking out concurrently from one office network won't trip a shared IP ban.
Why do gateway payment callbacks or off-site redirects still work while an attacker's IP is banned?
By design. Checkout Shield only ever enforces on the checkout steps a customer walks through — never on the server-to-server callbacks (webhooks) your payment gateway sends back to confirm a payment, and never on off-site payment redirects. Those paths are structurally outside anything the plugin can block, so a temporarily banned IP can never accidentally swallow a real, already-authorized payment confirmation.
As an extra safety net, you can still add your payment gateway's published IP ranges to the Allowlist if you want belt-and-braces protection, though it is not required for correct operation.
I switched to Enforce mode and now I can't test checkout myself
Check the top of any Checkout Shield dashboard page — a warning banner appears whenever enforcement is on and your current admin IP is not on the Allowlist. Add your own IP (or your office's) to the Allowlist before enforcing, and remember to update it if your IP address changes (working from home vs. the office, for example).
The dashboard shows "No data for the selected range"
This is expected on a brand-new install — nothing has been logged yet. Place a test order (or a few) through your storefront, then refresh the dashboard. If it's still empty after real traffic, confirm the Checkout Shield plugin itself is enabled under System -> Manage -> Plugins.
Reputation lookups or Geolocation aren't doing anything
Confirm two things: (1) you've entered a valid API key (for AbuseIPDB/IPQualityScore) or a MaxMind license key (for Geolocation), and (2) the matching scheduled task has actually run at least once — check System -> Scheduled Tasks for the Sync Bulk Lists or Refresh GeoIP Database entries. Both features fail open by design: if a key is missing or a lookup fails, Checkout Shield logs it and lets the checkout continue rather than blocking a customer over an infrastructure hiccup.