Advanced Tax Rates
The Advanced Tax Rates plugin gives you fine-grained control over how taxes are calculated in your store. Rather than relying only on J2Commerce's built-in tax profiles, you can build your own tax classes with multiple rate rules — each one targeting a specific country, state or zone, postcode range, and address type.
This is the right tool when your tax requirements vary by location. For example, you might need one rate for California, a different rate for New York, and a blanket rate for the rest of the United States — all inside the same product's tax class.
Requirements
- PHP 8.3.0 or higher
- Joomla 6.x
- J2Commerce 6.x
Purchase and Download
This plugin is a separate add-on available from the J2Commerce Extensions Store. It is not included with the core J2Commerce 6 component.
Step 1: Go to our J2Commerce website -> Apps
Step 2: Locate the Advanced Tax Rates package -> click View Details -> Add to cart -> Checkout.
Step 3: Go to your My Downloads under your profile button at the top right corner and search for the app. Click Available Versions -> View Files -> Download Now
Install the Plugin
Go to System > Install -> Extensions
Install the plg_j2commerce_app_taxrate.zip package file or use the Install from URL option.
-e0515ef561b368cb4d5a053cacb4c525.webp)
Enable the App
Once you have installed the app, you will need to enable it. There are two ways you can access the app.
Option A: Go to the J2Commerce icon at the top right corner -> Apps
Option B: Go to Components on the left sidebar -> J2Commerce -> Apps
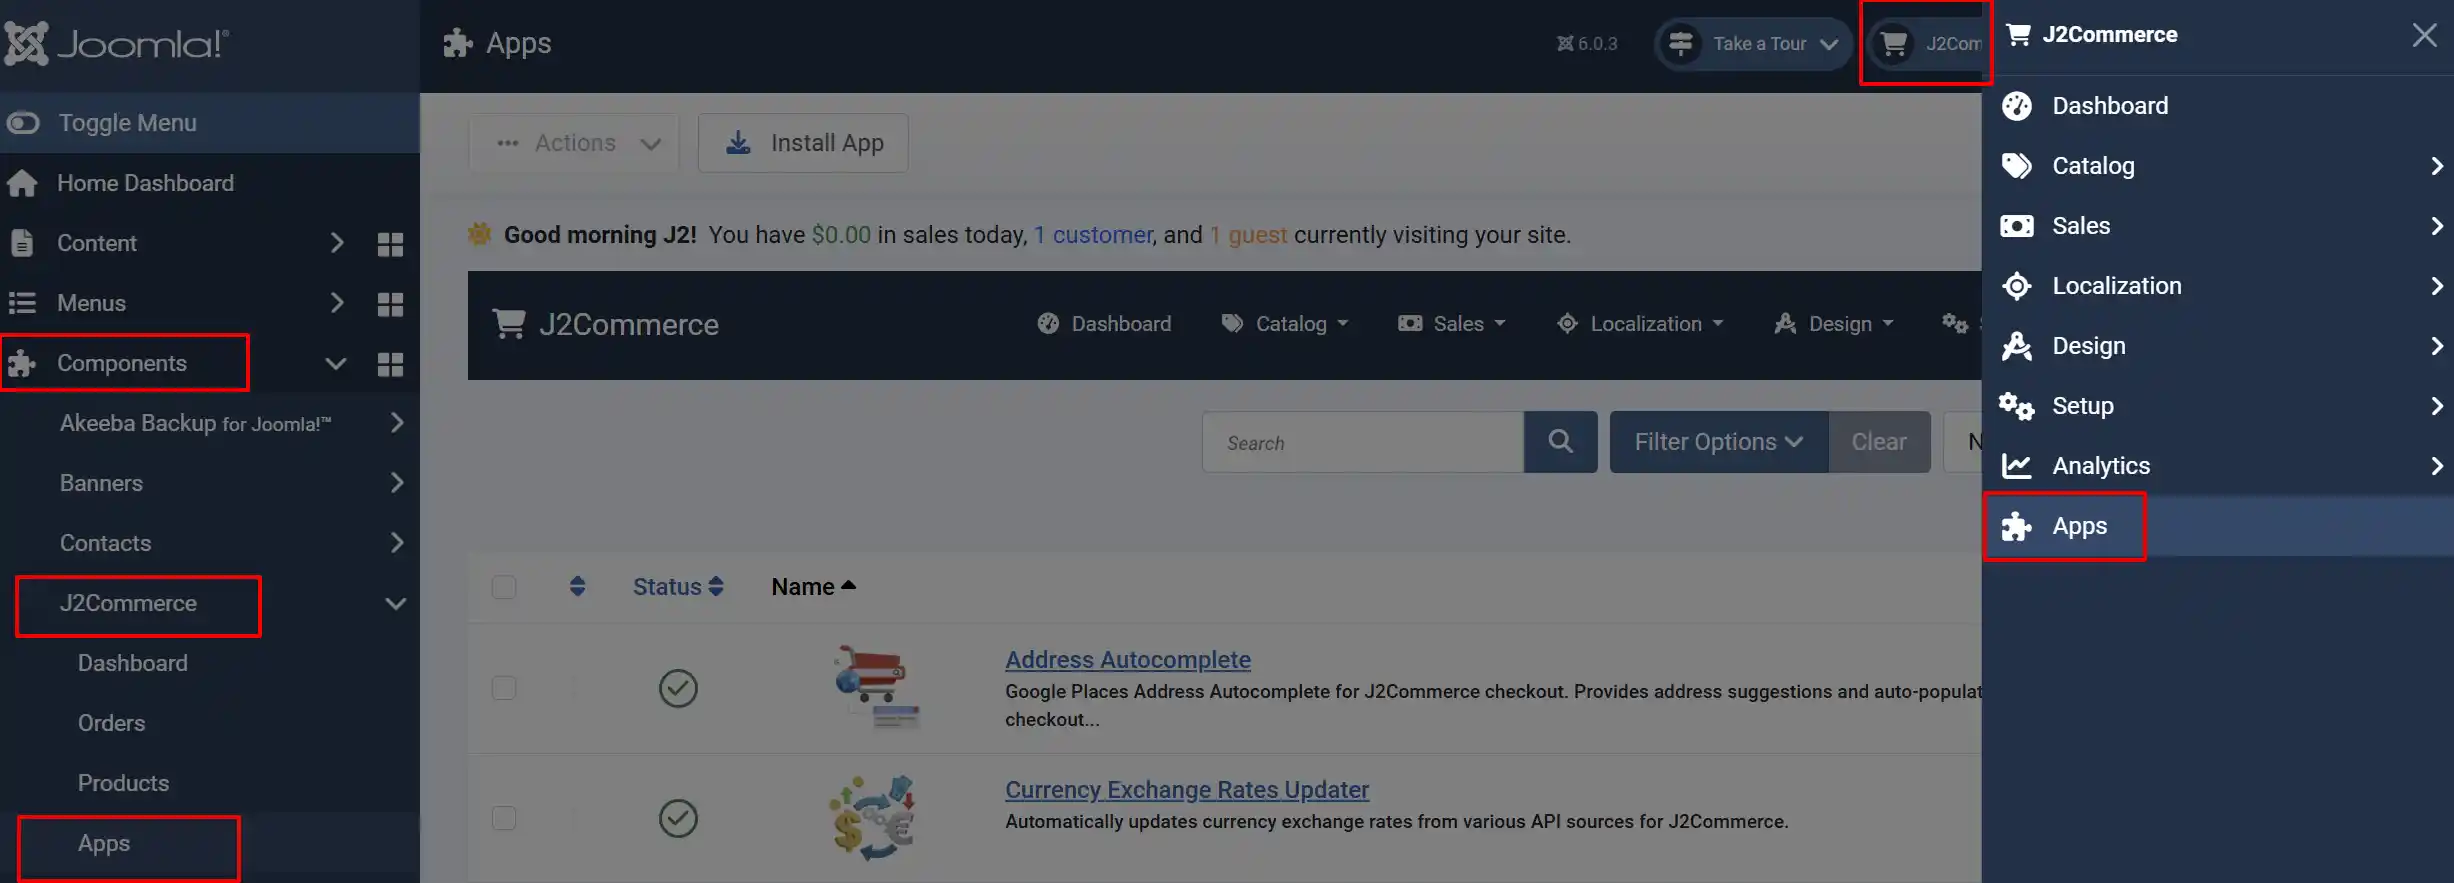
Search for Advanced Tax Rates, click the X, and it will turn into a green checkmark. It is now enabled and ready for setup.
Configure the Plugin Settings
Click the Toggle Inline Help button in the toolbar and the app will show a description below each field as you configure it.
Click the name Advanced Tax Rates to open its configuration page.
The configuration page has two main areas:
- Tax Classes — where you create and manage tax classes and their rates
- Advanced — postcode suffix stripping and a debug logging option
How It Works
The plugin uses a two-level structure:
- Tax Class — a named group such as "US Standard" or "EU VAT". You assign this to a product the same way you assign a built-in tax profile.
- Tax Rates — one or more rules inside the class. Each rule specifies a country, zone, postcode, address type, percentage, and priority.
When a customer reaches checkout, J2Commerce finds the tax class on each product and evaluates all its rules against the customer's address. Rules that match contribute their rate to the tax calculation. If multiple rules match, priority determines which ones run first.
Managing Tax Classes
Create a Tax Class
- On the plugin configuration page, click New Tax Class.
- Enter a name in the Tax Class Name field.
- Set Enabled to Enabled.
- Click Save.
The class appears immediately in the tax classes table.
Enable or Disable a Tax Class
Click the icon in the Enabled column of the table. The change takes effect immediately — no page reload needed.
A disabled tax class does not appear in the product Tax Profile dropdown and is not applied at checkout.
Delete a Tax Class
Click the trash icon next to the class and confirm the prompt. Deleting a tax class permanently removes all of its associated tax rates as well.
Assigning a Tax Class to a Product
Tax classes you create here appear alongside built-in tax profiles in the product edit form.
- Go to J2Commerce -> Catalog -> Products.
- Open the product you want to configure.
- Find the Tax Profile field and select the tax class from the dropdown.
- Click Save.
Managing Tax Rates
Click View / Edit Rates next to a tax class to open its rate management panel.
Add a New Rate
Use the "Add New Tax Rate" form at the top of the panel. Fill in the fields and click New:
Country: Country this rate applies to. Use * for all countries. Example: USA
Zone: State or zone within the country. Use * for all zones. Zones load dynamically when you pick a country. Example: CA
Postcode: Exact postcode, wildcard pattern, or * for all. Example: 90*
Address Type: Whether to match the Billing or Shipping address. Example: Billing
Rate (%): The tax percentage to apply. Example: 8.25
Rate Name: Label shown on invoices and order summaries. Example: CA Sales Tax
Priority: Lower numbers run first when multiple rates match. Example: 0
Postcode Wildcards
Postcode matching supports partial wildcards using an asterisk at the end of the value.
| Postcode value | What it matches |
|---|---|
* | Any postcode |
90210 | Exactly 90210 only |
90* | All postcodes starting with 90 |
SW1A* | All postcodes starting with SW1A |
Use wildcards to cover a region without listing every individual postcode.
Edit Existing Rates
All existing rates for the class appear in the table below the "Add" form. Edit the fields directly in each row. When you have finished making changes, click Save Changes at the top of the table to save all rows at once.
Delete a Rate
Click the trash icon at the right end of any rate row. Confirm the prompt. The row is removed immediately — you do not need to click Save Changes afterward.
Importing Tax Rates from CSV
For large rate tables, importing from a CSV file is faster than entering rates one by one.
Prepare Your CSV File
The first row must be these exact headers:
taxrate_country,taxrate_zone,taxrate_zip,address_type,taxrate_rate,taxrate_name,taxrate_priority
Each data row represents one tax rate. Use the same wildcard rules as the manual entry form. The address_type value must be either billing or shipping (lowercase); any other value defaults to billing.
Example:
taxrate_country,taxrate_zone,taxrate_zip,address_type,taxrate_rate,taxrate_name,taxrate_priority
USA,CA,*,billing,8.25,California Sales Tax,0
USA,NY,*,billing,8.875,New York Sales Tax,0
GBR,*,*,billing,20,UK VAT Standard,0
GBR,*,*,billing,5,UK VAT Reduced,1
Run the Import
- In the tax classes table, click Import next to the class you want to populate.
- Either upload a CSV file using the file picker, or type the server path to the file in the File Path field.
- If your file uses a delimiter other than a comma, enter it in the Delimiter field.
- Click Import.
A message tells you how many rows were saved. Rows with formatting errors are skipped.
Importing adds to the existing rates — it does not replace them. To reset a class before importing, delete its existing rates first.
Exporting Tax Rates to CSV
Click Export CSV next to any tax class to download all its rates as a CSV file. This is useful for backing up rates, sharing them between stores, or editing a large set offline before re-importing.
Advanced Settings
Ignore Postcode Suffix
When enabled (the default), the plugin strips hyphenated suffixes from postcodes before matching. For example, 94403-1234 is treated as 94403.
Turn this on when customers may enter extended postcodes (common in the United States) and your rate rules only use the base postcode.
Debug Mode
When enabled, the plugin writes detailed logging to administrator/logs/app_taxrate.php. Use this when a rate is not being applied as expected. Disable it again when you are done investigating — debug logging adds overhead to every tax calculation.
Troubleshooting
A rate is not being applied at checkout
Cause: The rate rules may not match the customer's address.
Steps to diagnose:
- Confirm the product has the correct tax class selected in its Tax Profile field.
- Open the tax class and check the Country, Zone, and Postcode values on each rate.
- Verify the Address Type matches whether your store calculates tax from the billing or shipping address.
- Enable Debug Mode in the Advanced settings, place a test order, then review
administrator/logs/app_taxrate.phpto see which rules were evaluated and why they matched or did not match.
The tax class does not appear in the product Tax Profile dropdown
Cause: The tax class is disabled.
Solution: Go to the plugin configuration page and click the toggle in the Enabled column to enable the class.
Import shows 0 rows imported
Cause: The CSV header row does not match the expected column names exactly.
Solution: Check that the first row of your CSV is exactly:
taxrate_country,taxrate_zone,taxrate_zip,address_type,taxrate_rate,taxrate_name,taxrate_priority
Spelling and capitalisation must match. There should be no extra spaces or columns.
Zone dropdown stays empty when I select a country
Cause: The country has no zones (states or provinces) configured in J2Commerce, or the AJAX request failed.
Solution: Go to J2Commerce -> Localisation -> Zones and verify that zones exist for the country. If zones exist but the dropdown still does not populate, check your browser's developer console for JavaScript errors.