Meta Pixel / Facebook Conversion
The Meta Pixel / Facebook Conversion app connects your J2Commerce store to Meta's advertising platform. It places the Meta Pixel base code on every page and automatically fires standard ecommerce events — such as product views, add-to-cart actions, and completed purchases — so Meta can optimize your ads and measure their performance. An optional server-side Conversions API (CAPI) mirror recovers events that browsers block due to ad blockers or iOS privacy restrictions.
Requirements
- PHP 8.3.0+
- Joomla! 6.x
- J2Commerce 6.x
- A Meta Business account with at least one Pixel/Dataset created
Find Your Pixel ID
The Pixel ID is the most important piece of information you need before configuring the app. Meta renamed the Events Manager interface during 2025–2026, so here is the exact path as it appears today.
Step 1: Sign in at https://business.facebook.com/
Step 2: Click the gear icon (Settings) in the left sidebar. This opens Business Settings.
Step 3: In the left menu of Business Settings, click Events dataset and pixel.
The direct URL is: https://business.facebook.com/latest/settings/events_dataset_and_pixel
Step 4: Pick the Pixel / Dataset for your store from the list.
If no Pixel exists yet, click Add -> Create a pixel, give it a name that matches your website (for example, "My Store Pixel"), and click Create.
Step 5: With the dataset selected, the numeric Dataset / Pixel ID appears at the top of the panel, just below the name. It is a 15- or 16-digit number. Click the copy icon next to it.
Step 6: Paste that number into the Pixel ID field in the plugin settings (described in the next section) and click Save.
NOTE: If you manage multiple stores or clients, each store should have its own dedicated Pixel. Do not share a single Pixel across unrelated stores.
Purchase and Download
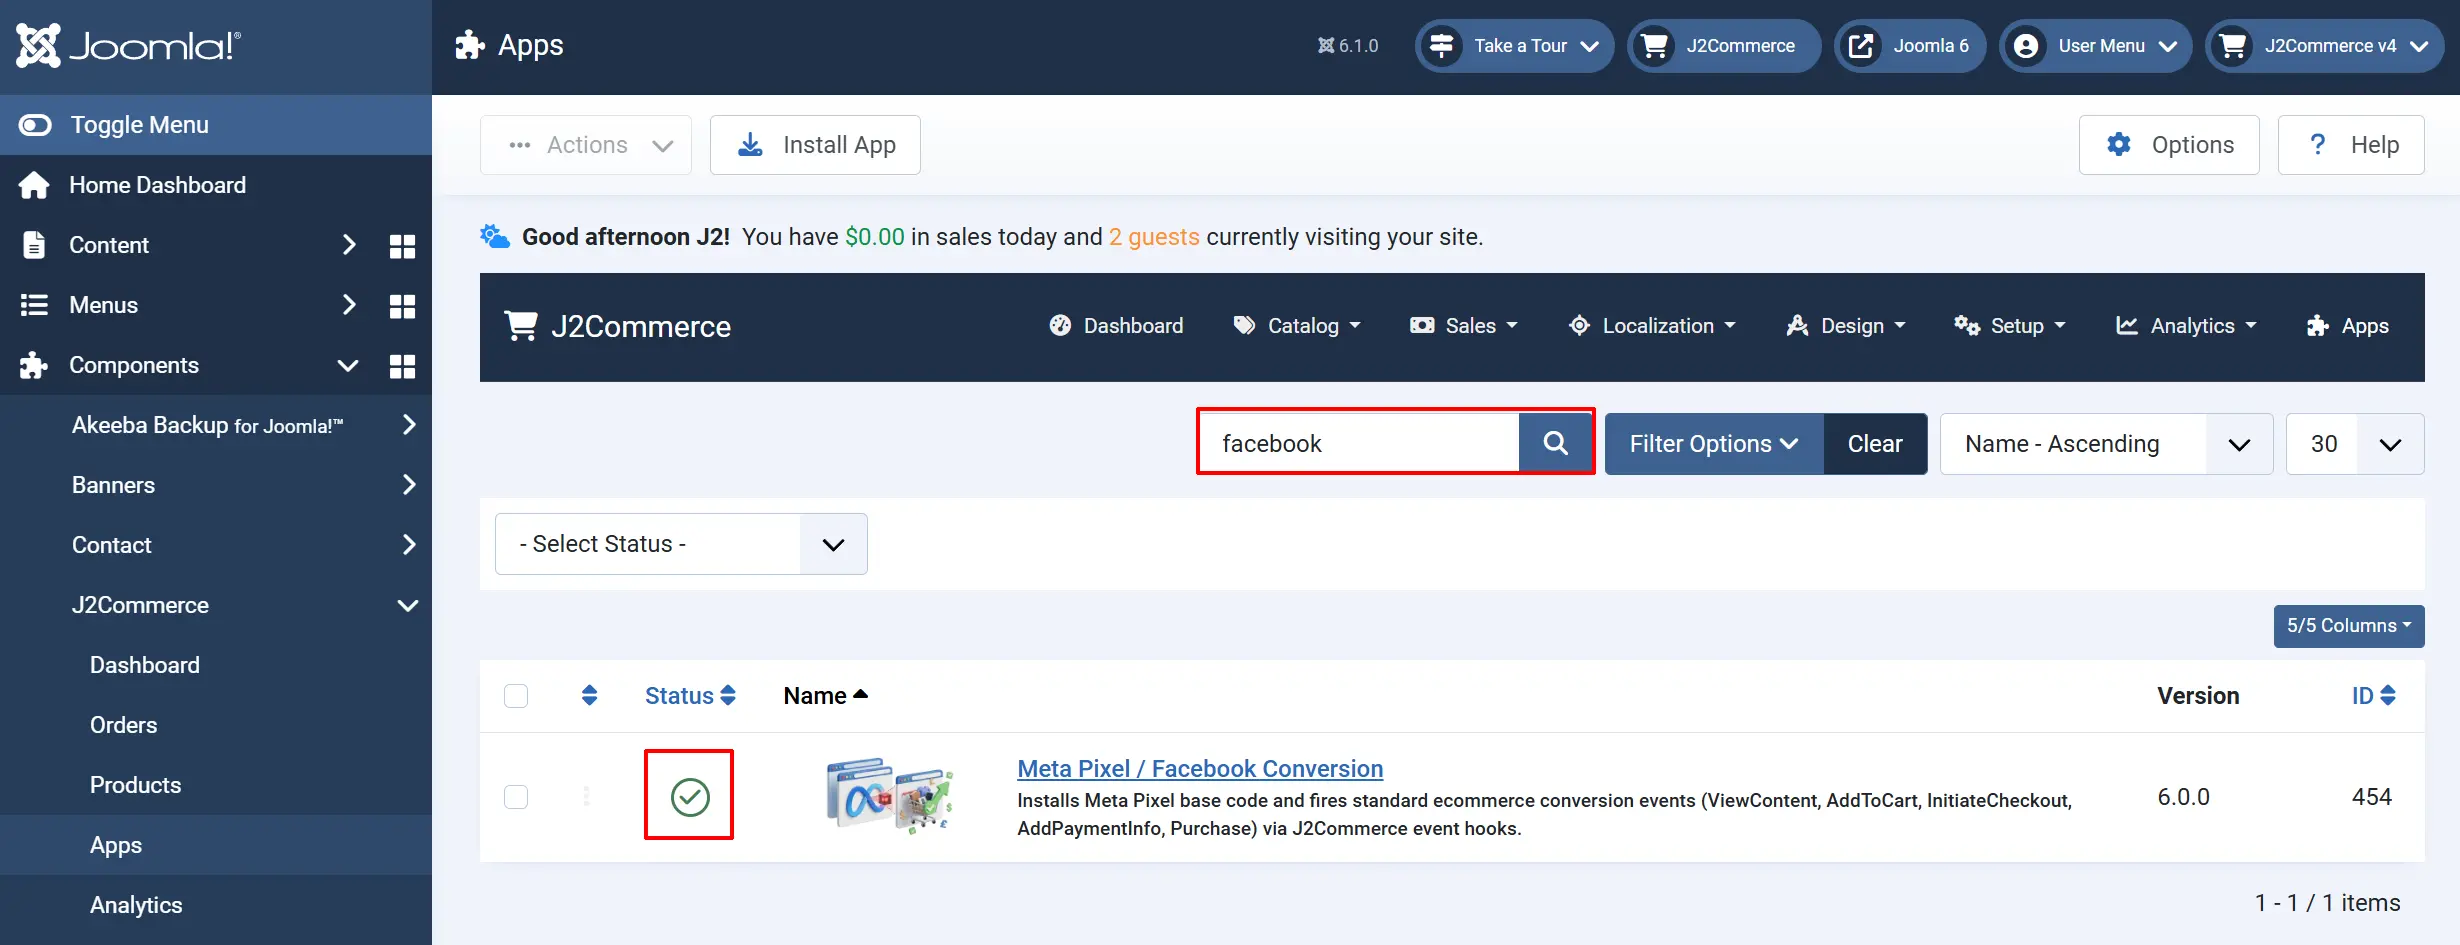
Step 1: Go to our J2Commerce website -> Apps
Step 2: Locate the Meta Pixel / Facebook Conversion App -> click View Details -> Add to cart -> Checkout.
Step 3: Go to your My Downloads under your profile button at the top right corner and search for the app. Click Available Versions -> View Files -> Download Now
Install the App
You can install this App using the Joomla installer. The following steps help you with a successful installation.
In the Joomla admin, go to System -> Install -> Extensions
Upload the plugin ZIP file or use the Install from URL option.

Enable the App
Once you have installed the App, you will need to enable it. There are two ways you can access the extension.
Option A: Go to the J2Commerce icon at the top right corner -> Apps
Option B: Go to Components on the left sidebar -> J2Commerce -> Apps

Search for Meta Pixel / Facebook Conversion, click the X, and it will turn into a green checkmark. It is now enabled and ready for setup.
Configure the App
Click on the Meta Pixel / Facebook Conversion title next to the green checkmark to open the settings.
Tip: Click the Toggle Inline Help button at the top of any plugin screen to show a description below each field.
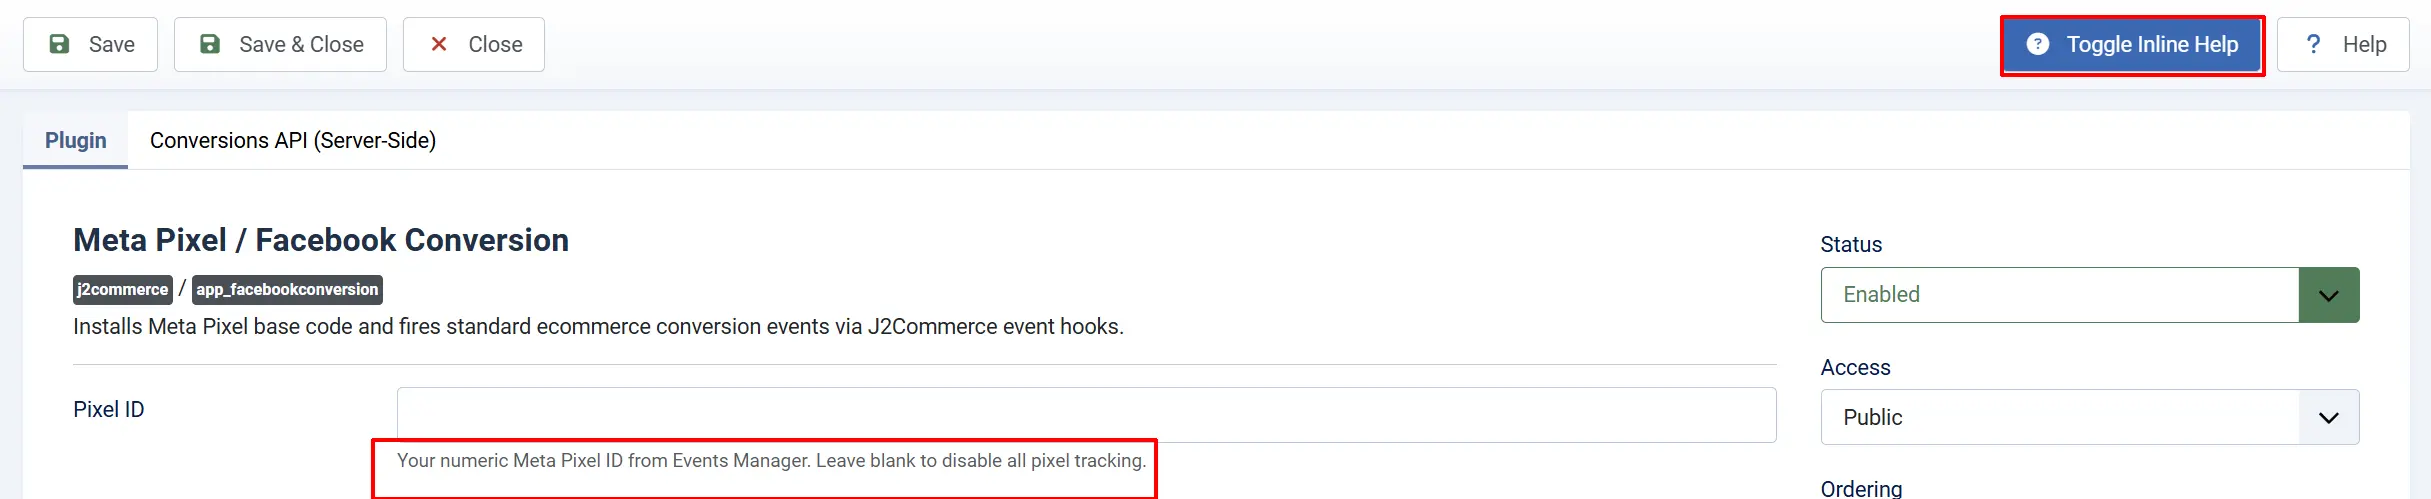
Meta Pixel Settings tab
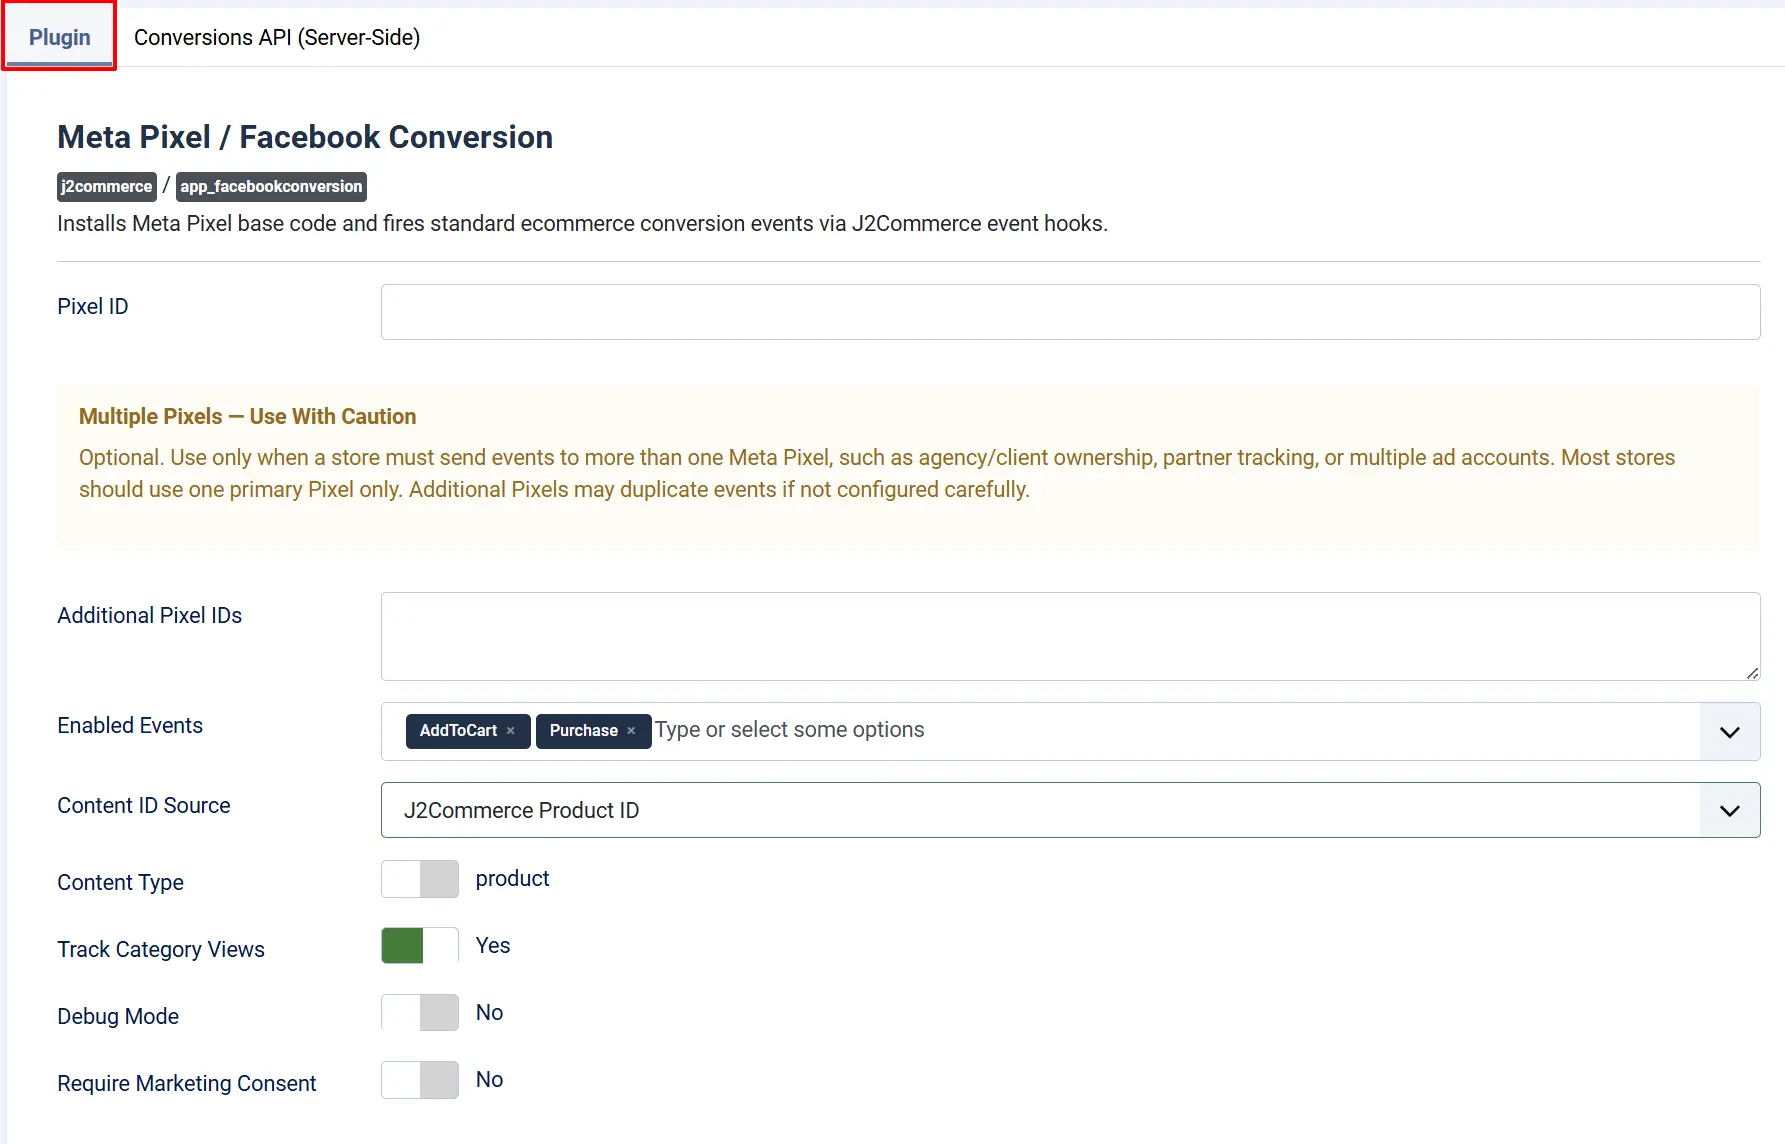
Pixel ID: Enter the numeric Pixel ID you copied from Meta Business Settings. Leave this blank and the plugin will not load any tracking code at all — useful if you need to temporarily disable tracking without uninstalling the app.
- Example:
1234567890123456
Additional Pixel IDs: A textarea that accepts one numeric Pixel ID per line. All IDs listed here are initialized alongside the primary Pixel.
NOTE: Most stores only need one Pixel. Use this field only when a store must send events to more than one Meta Pixel — for example, agency/client ownership or partner tracking. Adding IDs here without a deliberate reason will cause every event to appear twice in your reporting.
Enabled Events: A multi-select list of the standard Meta Pixel events the plugin can fire. All seven events are selected by default. Deselect any event you do not want fired without affecting the others. Below shows the Event and when it fires:
-
ViewContent: A shopper opens a product detail page
-
AddToCart: A shopper adds a product to the cart
-
RemoveFromCart: A shopper removes a product from the cart (sent as a custom event)
-
InitiateCheckout: A shopper reaches the checkout page
-
AddPaymentInfo: A shopper submits payment details during checkout
-
Purchase: An order is confirmed and the thank-you page loads
-
Search: A shopper submits a search query using the store's search filter
Content ID Source: Tells the plugin which product identifier to include as the content_ids value in each Pixel event. This must match the identifier used in your Meta Commerce Catalog product feed. Below shows the opions and when to choose it.
-
J2Commerce Product ID: Your catalog feed uses the internal J2Commerce numeric product ID (default)
-
Product SKU: Your catalog feed uses the product SKU field
Pick one and stick with it. Switching after your catalog is live will break the connection between ad events and catalog products.
Content Type: Controls the content_type value sent with Pixel events.
-
product: Matches events to individual variants in the catalog (recommended for stores with variable products)
-
product_group: Matches events to the parent product group regardless of variant
Track Category Views: When set to Yes (the default), the plugin fires a ViewContent event — with content_type set to product_group — whenever a visitor lands on a product category page. It also wires a click-tracking listener onto each product card on the page so that clicking a product fires the event immediately, before the product page loads.
Set to No only if you prefer to limit ViewContent tracking to individual product pages.
Debug Mode: When set to Yes, the plugin logs each fired Pixel event to the browser's developer console and writes Conversions API call details to logs/fbpixel-capi.php in your Joomla installation. Always turn this off before going live. The log file grows quickly under real traffic and the console output is visible to anyone who inspects the page.
Require Marketing Consent: When set to Yes, the Pixel base code and all fbq() events are held until the visitor has accepted marketing cookies. The plugin checks the joomla_user_state_consent_marketing cookie (value 1 = accepted) and also listens for the joomla:consent:marketing DOM event so any GDPR / cookie-consent banner that sets the cookie or fires that event unlocks tracking. Set to No only when you do not need GDPR / EU consent gating.
Conversions API (Server-Side) tab

The Conversions API (CAPI) sends the same events from your Joomla server directly to Meta, in parallel with the browser Pixel. This recovers conversions that ad blockers, iOS 14.5+ privacy restrictions, or browser extensions would otherwise silently drop. Configure the browser Pixel first and verify it is working before enabling CAPI.
Enable Conversions API: Set to Yes to activate server-side event mirroring. The remaining CAPI fields become visible only when this is set to Yes.
Access Token: The access token authenticates your server's requests to Meta's Graph API. Follow these steps to generate one.
Step 1: In Meta Business Settings, go to Events dataset and pixel and open the Dataset for your store.
Step 2: Click the Settings tab within the dataset.
Step 3: Scroll down to the Conversions API section and click Generate access token.
Step 4: Copy the long token that appears and paste it into the Access Token field. Save it somewhere safe — Meta only shows it once.
NOTE: The Access Token must come from the same Dataset/Pixel that your Pixel ID belongs to. Using a token from a different Pixel will cause all CAPI calls to be rejected silently.
Test Event Code: An optional code (for example, TEST40533) that routes CAPI events to the Test Events panel in Meta instead of production reporting. Use this during setup to confirm events arrive correctly, then clear the field before launch.
How to find your Test Event Code:
- In Business Settings, open your Dataset and click the Test events tab.
- Copy the
TEST…code displayed at the top. - Paste it into the Test Event Code field here and save.
- Trigger a purchase or add-to-cart on your site and watch the Test Events panel update in real time.
- Once verified, delete the code from this field and save again.

Graph API Version: The version of the Meta Graph API used for CAPI requests. The default is v18.0. Check the Meta for Developers changelog for the latest supported version if you need to update it.
HTTP Timeout (seconds): The maximum number of seconds the server will wait for Meta's CAPI endpoint to respond before giving up. The default is 3 seconds.
Keep this value low (2–5 seconds). CAPI requests run on the order confirmation page — a slow Meta server should not make customers feel like their order is hanging.
Events to Mirror via CAPI: A multi-select list of which browser Pixel events to also send server-side. The default selection covers the highest-value events: Purchase, InitiateCheckout, AddToCart, ViewContent, Search, and AddPaymentInfo.
You can include or exclude any of the seven available events. PageView is not in the list because sending every page view via CAPI at high volume is rarely worthwhile for ad optimization.

Send Hashed Email: When Yes, the plugin includes the visitor's email address (hashed with SHA-256) in CAPI events. Meta uses this for Advanced Matching — it improves attribution by linking server events to Meta user accounts. The email comes from the order record or the logged-in user's account.
Send Hashed Phone: When Yes, the plugin includes the billing phone number (SHA-256 hashed, digits only) in CAPI events. The phone number comes from the order's billing information.
How It Works
When a visitor lands on your store:
- The Meta Pixel base code loads in the page header and initializes with your Pixel ID (and any additional IDs).
- As the visitor browses products, the plugin fires ViewContent events with the product ID, name, price, and currency.
- When they add or remove an item from the cart, AddToCart or RemoveFromCart fires with the product details and quantities.
- Reaching the checkout page triggers InitiateCheckout. Submitting payment details triggers AddPaymentInfo.
- When an order is confirmed, the thank-you page fires the Purchase event with the order total, currency, and list of purchased items.
- If Conversions API is enabled, the same events are also posted server-side from Joomla directly to Meta's Graph API — recovering events that the browser would have blocked.
Use the Test Events panel in Meta Business Settings to confirm events are arriving correctly before running live ad campaigns.
Tips
- Use one primary Pixel per store unless you have a specific reason for agency or partner tracking.
- Match Content ID Source to your Meta catalog feed — either Product ID or SKU — and never switch after the catalog is live.
- Keep HTTP Timeout at 3 seconds so the order confirmation page never feels slow for customers.
- Enable Conversions API only after the browser Pixel is verified and working — never start with CAPI alone.
- Turn Debug Mode off before going live. The log file grows quickly under real traffic.
- Use a Test Event Code while configuring CAPI, then remove it for production. Leaving a test code in place means your real purchases never appear in production reporting.
Troubleshooting
No events appear in Events Manager
Cause: The Pixel ID is incorrect, the plugin is disabled, the browser is blocking the Pixel, or marketing consent has not been accepted.
Solution:
- Go to J2Commerce -> Apps and confirm Meta Pixel / Facebook Conversion shows a green checkmark.
- Open the plugin settings and check that Pixel ID contains only digits with no spaces or extra characters.
- Test in a private/incognito browser window — ad blockers are usually disabled there.
- If your site uses a cookie consent banner, accept marketing cookies and then trigger a product view. Events should appear within a few minutes in Events Manager.
Events appear twice
Cause: A second Pixel ID has been added in the Additional Pixel IDs field, or a separate tag manager (Google Tag Manager, for example) is also firing the Meta Pixel.
Solution:
- Open the plugin settings and check the Additional Pixel IDs textarea. Remove any ID that should not receive duplicate events.
- Check your Google Tag Manager container or any other tag management tool for a Meta Pixel tag and remove the duplicate.
Purchase event fires but the value is wrong
Cause: The currency configured in J2Commerce does not match the currency set in Meta Commerce Manager.
Solution:
- Go to J2Commerce -> Setup -> Configuration and note the store currency.
- In Meta Business Settings, confirm your Commerce Manager or catalog is set to the same currency.
- Currencies must match exactly — for example, both must be
USD, not oneUSDand oneUS Dollar.
CAPI events are not arriving
Cause: The Access Token is from a different Pixel, the Graph API Version is outdated, or the server cannot reach Meta's API endpoint.
Solution:
- Confirm the Access Token was generated from the same Dataset/Pixel that your Pixel ID belongs to.
- Check that Graph API Version is
v18.0or a more recent version from the Meta developer changelog. - Verify your hosting server allows outbound HTTPS connections to
graph.facebook.comon port 443. Contact your host if outbound firewall rules block this. - Enable Debug Mode temporarily and check the
logs/fbpixel-capi.phpfile for error details from Meta's API response.
Test Event Code is still set after launch
Cause: The Test Event Code was not cleared before going live, so real conversions are routing to the Test Events panel instead of production reporting.
Solution:
- Go to J2Commerce -> Apps -> Meta Pixel / Facebook Conversion.
- In the Conversions API (Server-Side) tab, clear the Test Event Code field completely.
- Click Save.
- Go to Home Dashboard -> Cache -> Delete All to clear any cached output.