Product Shipping Restrictions
The Product Shipping Restrictions add-on lets you control which shipping methods appear at checkout depending on what is in the cart. Restrictions can be set per product, per variant, or inherited from a Joomla content category. Two modes are available: Simple (pick allowed methods per product) and Advanced (create named restriction groups with geo zone and postal code rules).
Purchase and Download
The Product Shipping Restrictions app is a separate add-on available from the J2Commerce Extensions Store. It is not included with the core J2Commerce 6 component.
Step 1: Go to the J2Commerce website -> Apps.
Step 2: Locate the Product Shipping Restrictions app -> click View Details -> Add to cart -> Checkout.
Step 3: Go to My Downloads under your profile menu at the top right corner and search for the app. Click Available Versions -> View Files -> Download.
Install the App
You can install this Product Shipping Restrictions App using the Joomla installer. The following steps help you with a successful installation.
In the Joomla admin, go to System -> Install -> Extensions
Upload the plugin app_restrictbyshipping.zip file or use the Install from URL option.
 (1)-a6689f12b23b8e992f5c2a169737672f.webp)
Enable the App
Once you have installed the App, you will need to enable it. There are two ways you can access the extension.
Option A: Go to the J2Commerce icon at the top right corner -> Apps
Option B: Go to Components on the left sidebar -> J2Commerce -> Apps
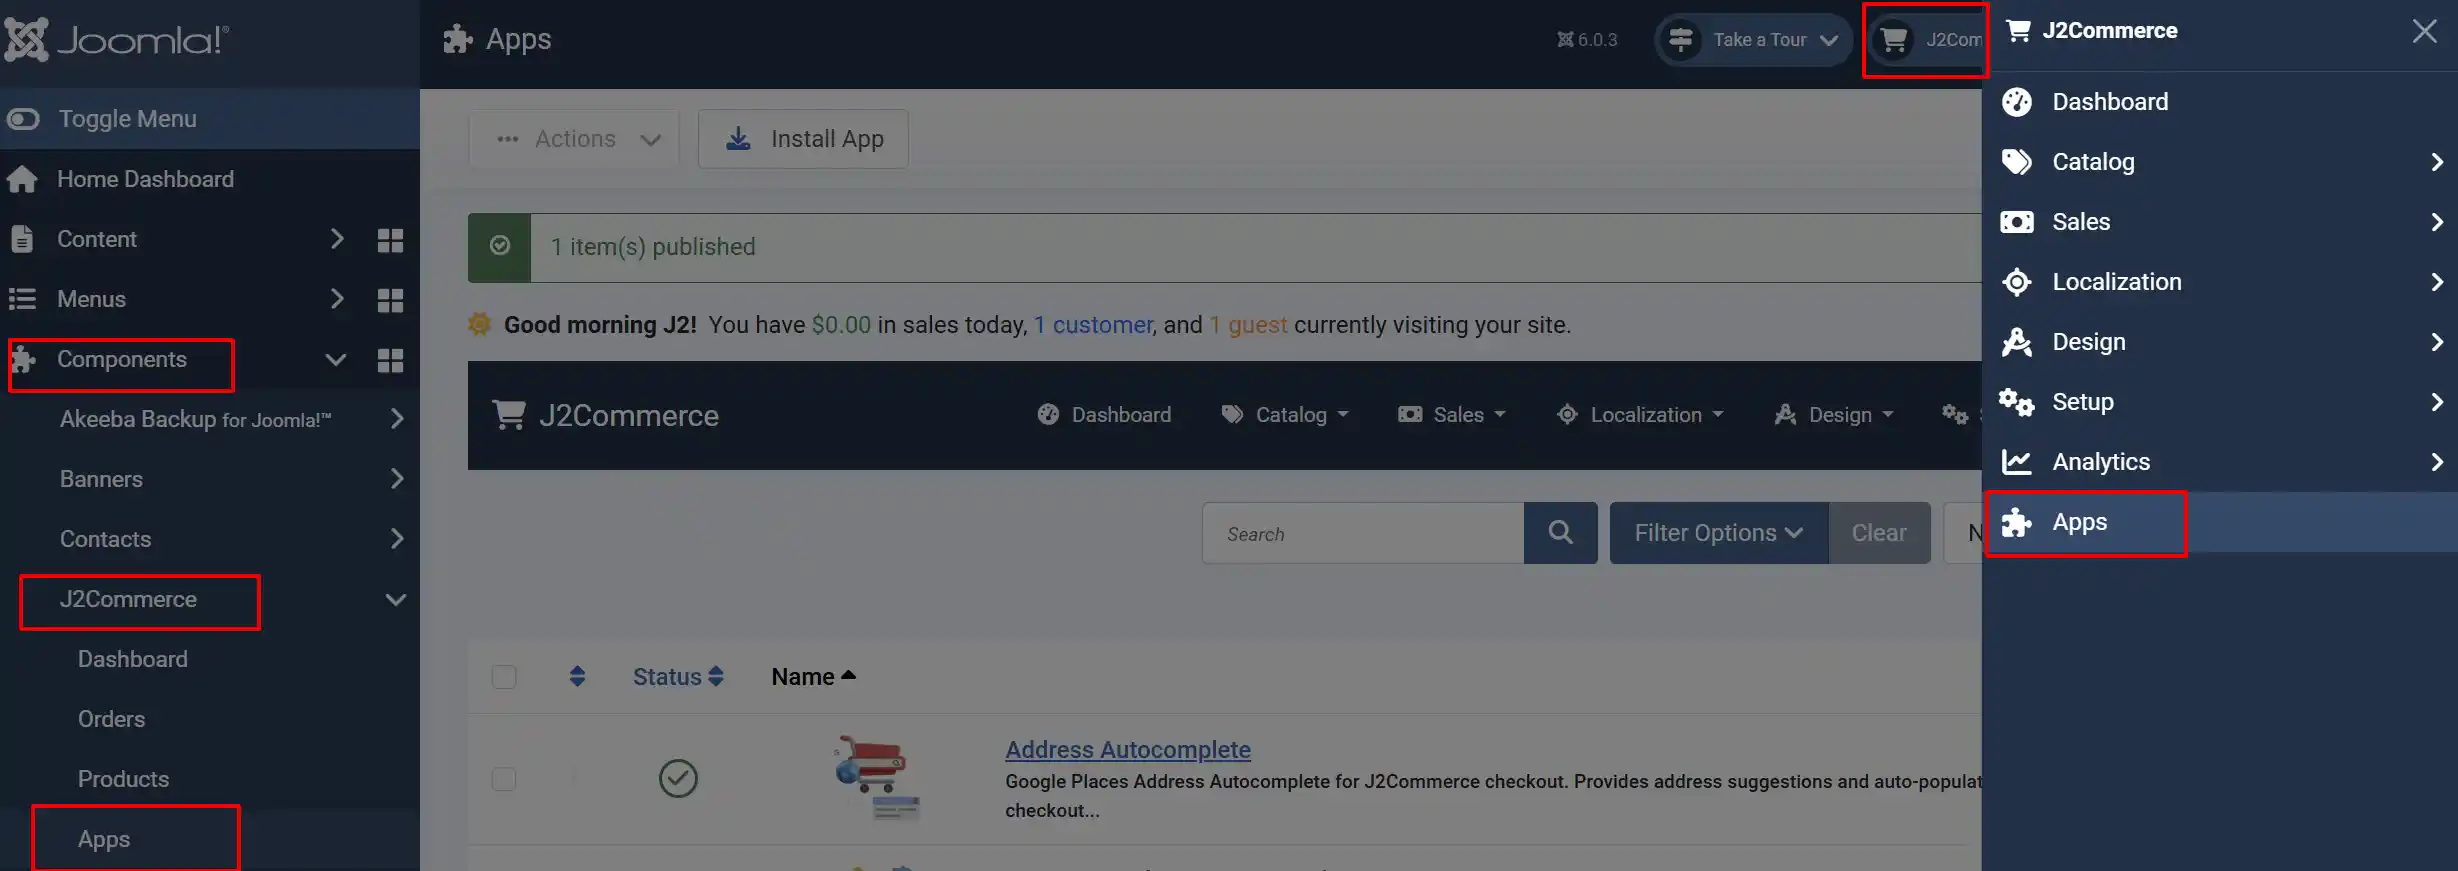
Search for Product Shipping Restrictions, click the X, and it will turn into a green checkmark. It is now enabled and ready for setup.

If you are upgrading from J2Store 4, the installer automatically migrates existing restriction groups from the j2store_shippingrestrictions table into the new j2commerce_apprestrictbyshipping_groups table. No manual migration is needed.
Configure the App
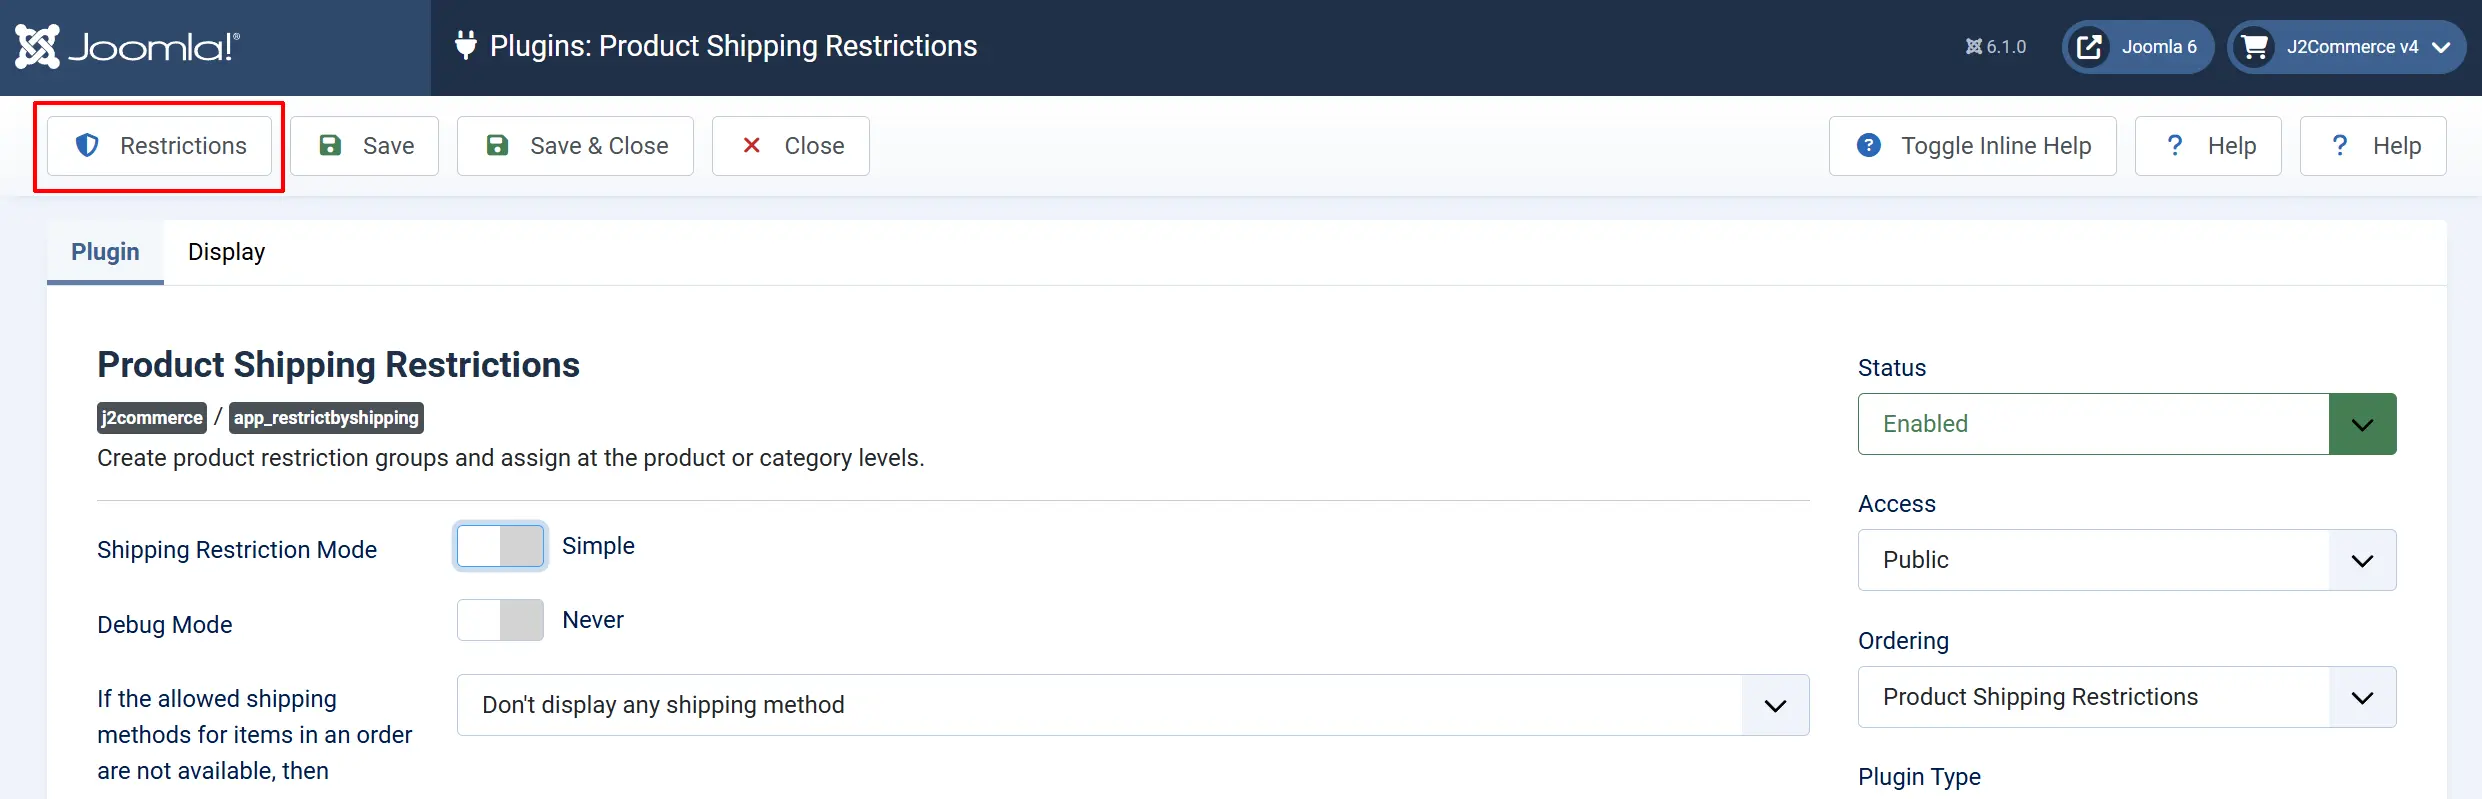
Go to J2Commerce -> Apps and click Product Shipping Restrictions title to open the plugin settings.
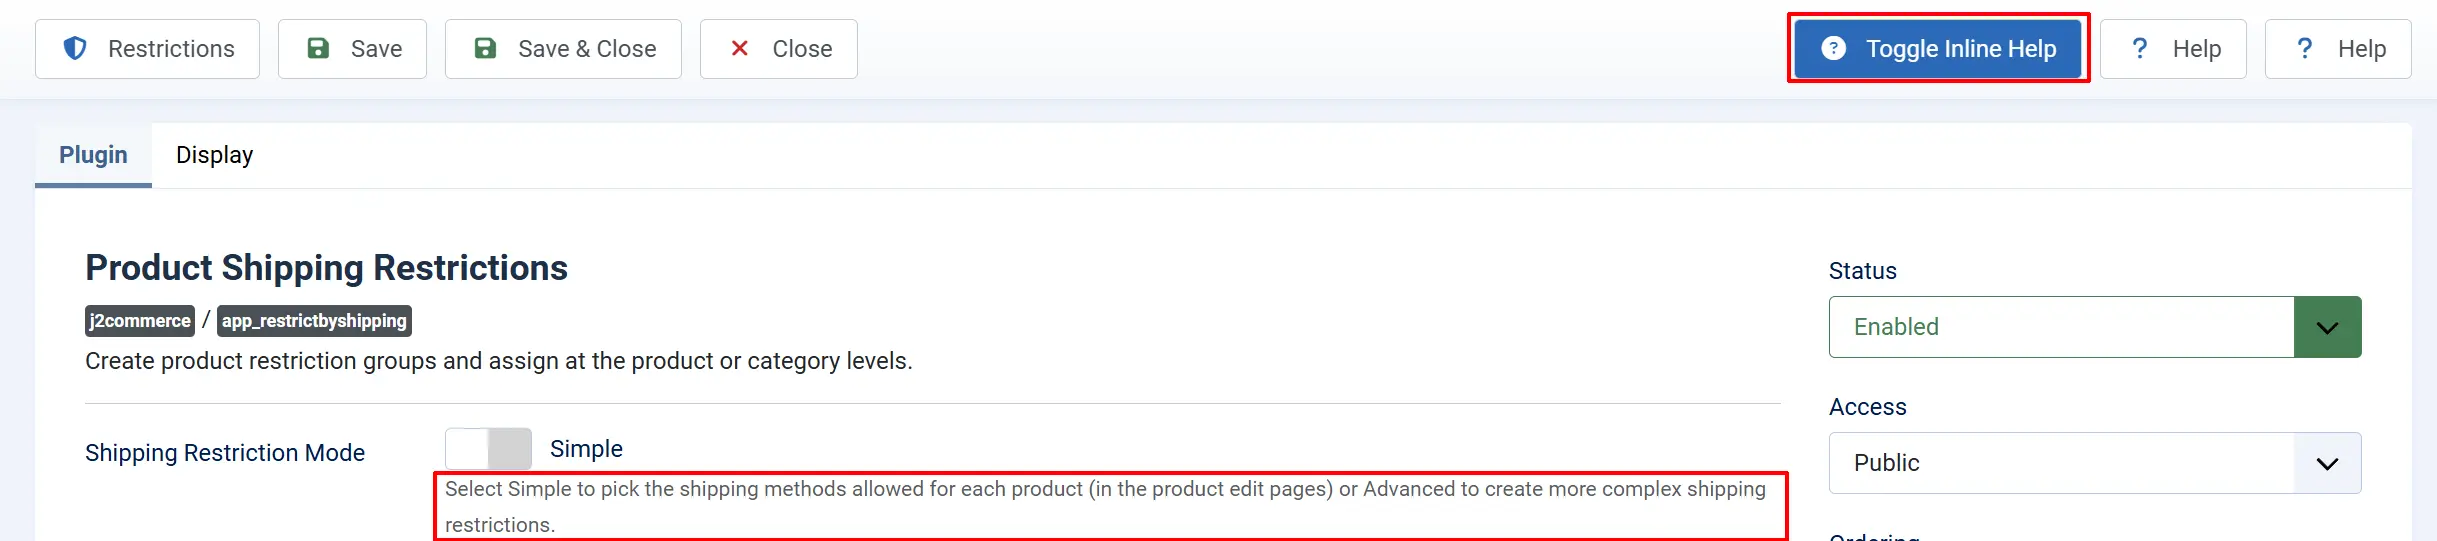
Click the Toggle Inline Help button in the toolbar and the app will show a description below each field as you configure it.
Basic Settings tab
The extension offers two Shipping Restriction Modes. Choose the one that best fits your needs:
- Simple Mode: (Recommended for Most Users)
Best for stores that need basic shipping method restrictions on a per-product basis.
How it works: You select which shipping methods are allowed for each product directly on the product edit page.
- Advanced Mode:
Best for stores with complex shipping requirements involving geographic restrictions, zip code limitations, and user group restrictions.
How it works: You create "Restriction Groups" that combine multiple rules, then assign these groups to products.
Debug Mode: Enable debug logging. Logs are written to the Joomla log. Disable in production.
Simple Mode
In Simple mode, you select the allowed shipping methods directly on each product's edit form. No restriction groups are needed.
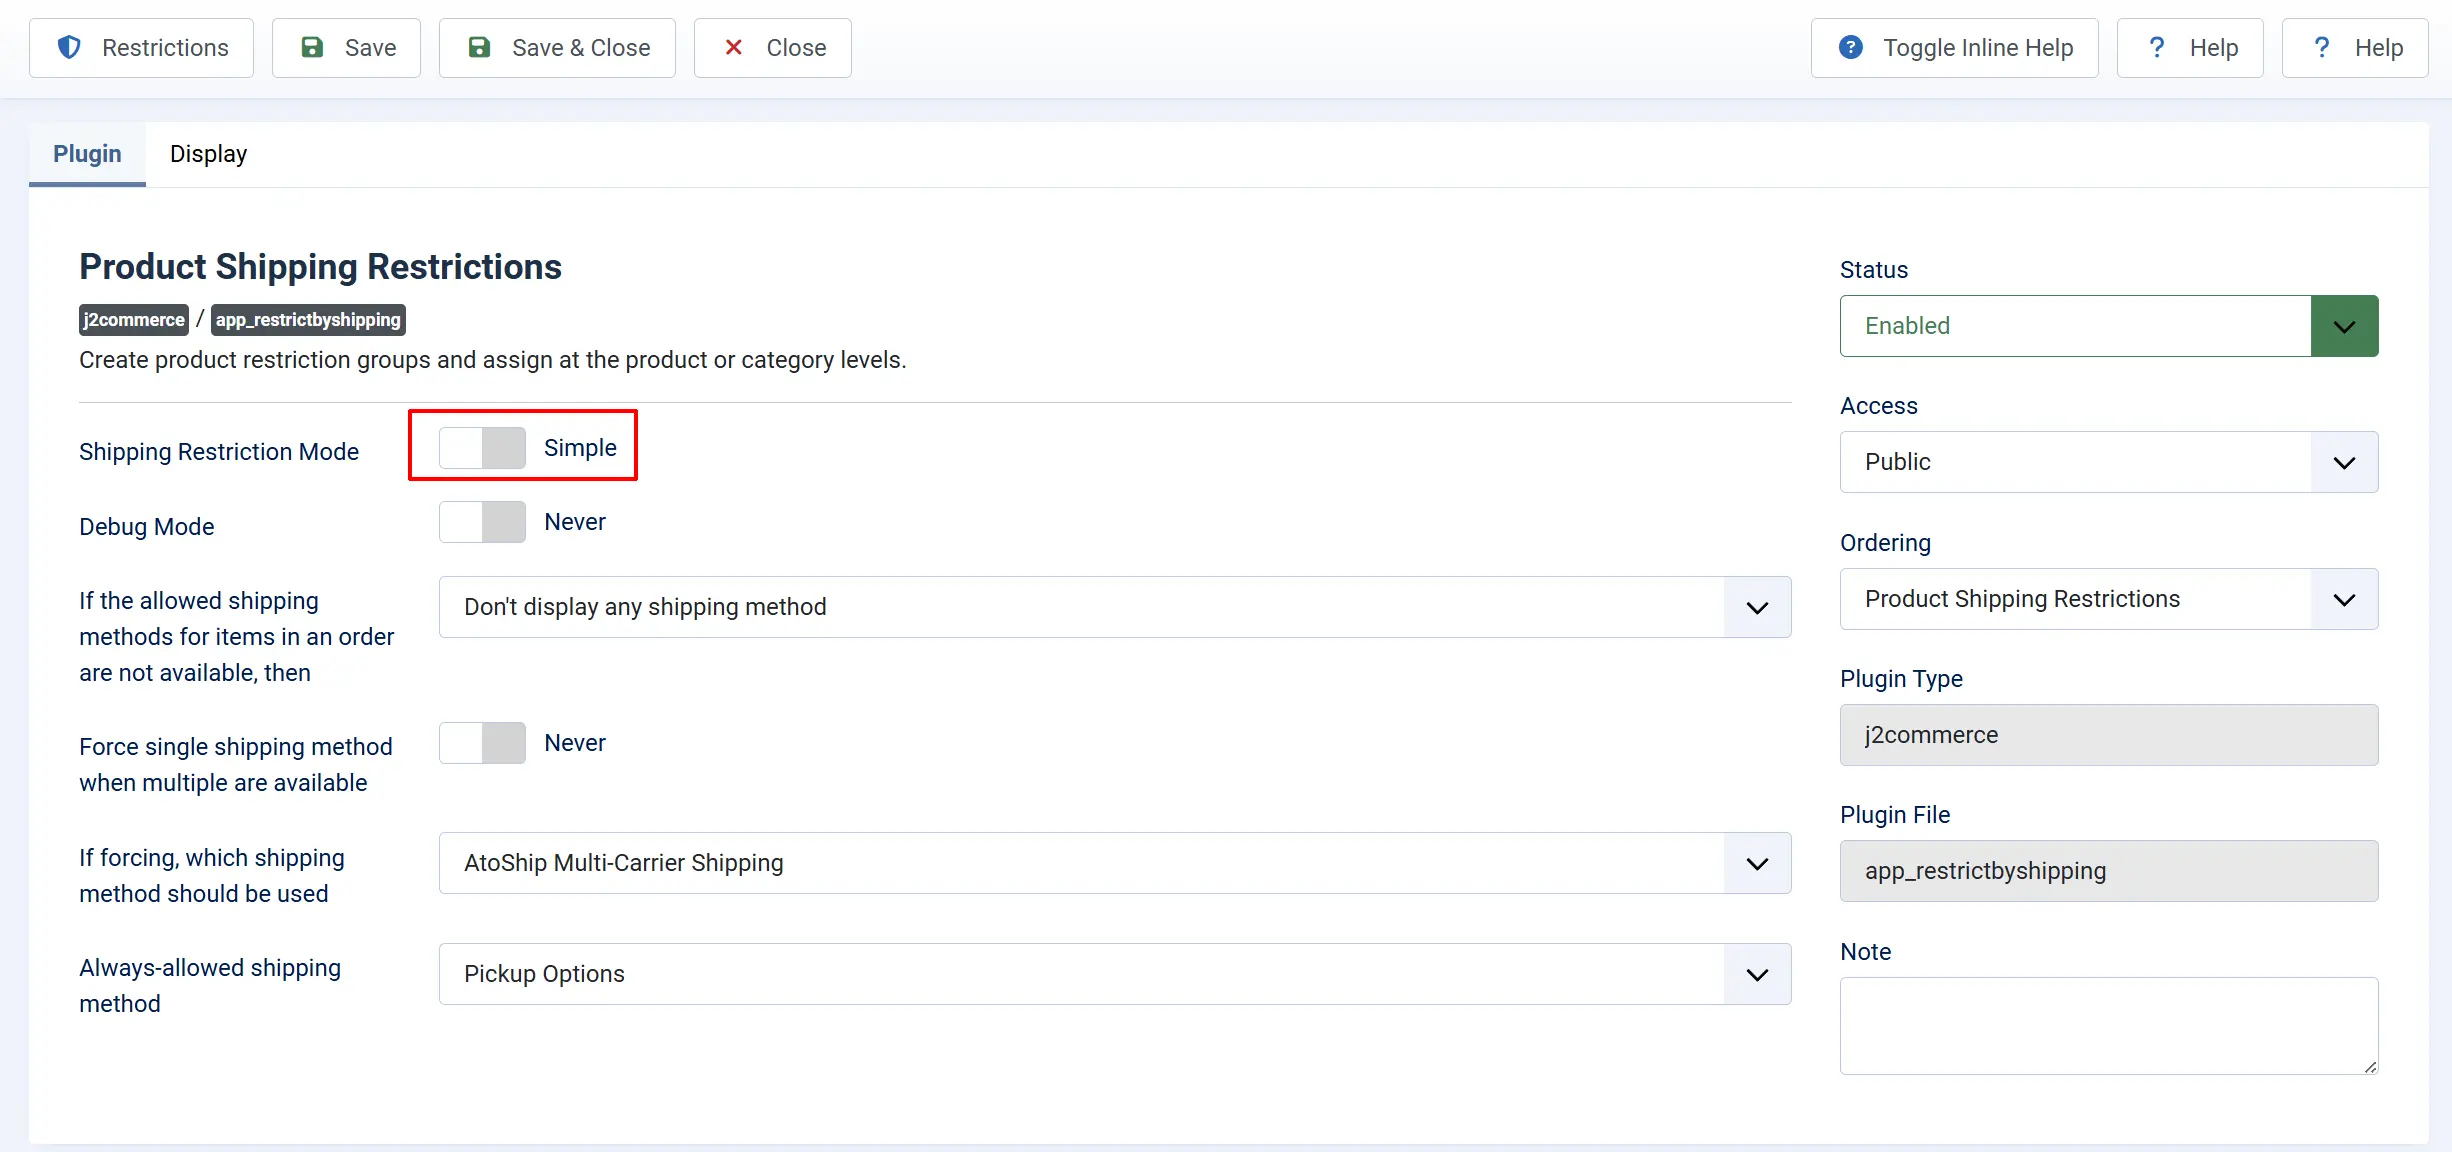
Simple Mode Settings
If the allowed shipping methods for items in an order are not available, then: Choose what happens when a product has no shipping restrictions set:
-
Don't display any shipping method: No shipping options shown
-
Display all available shipping methods: Show all options
Force single shipping method: When multiple methods are allowed across cart items, force only one to appear. Sometimes you may want to allow only one method if that was the restricted shipping option for a product. In those cases, you can choose to force.
If forcing, which method?: This applies only if the selected method is available for at least one product in the order. If not, all available shipping options are shown. It's the specific method to use when forcing is enabled. Only takes effect if that method is available for at least one item.
NOTE: This would apply only if the selected method is available for at least one product in the order. If this was not an available shipping option for any of the products in the cart/order, then no forcing will be implemented. Available shipping options would be shown
Always-allowed shipping method: A method that is always shown regardless of product restrictions (e.g., local pickup). If a selected shipping method is available, it will show in shipping. The shipping method that will always be available regardless of product restrictions
Assigning Allowed Methods to a Product (Simple Mode)
- Go to Content -> Articles and open the product article for editing.
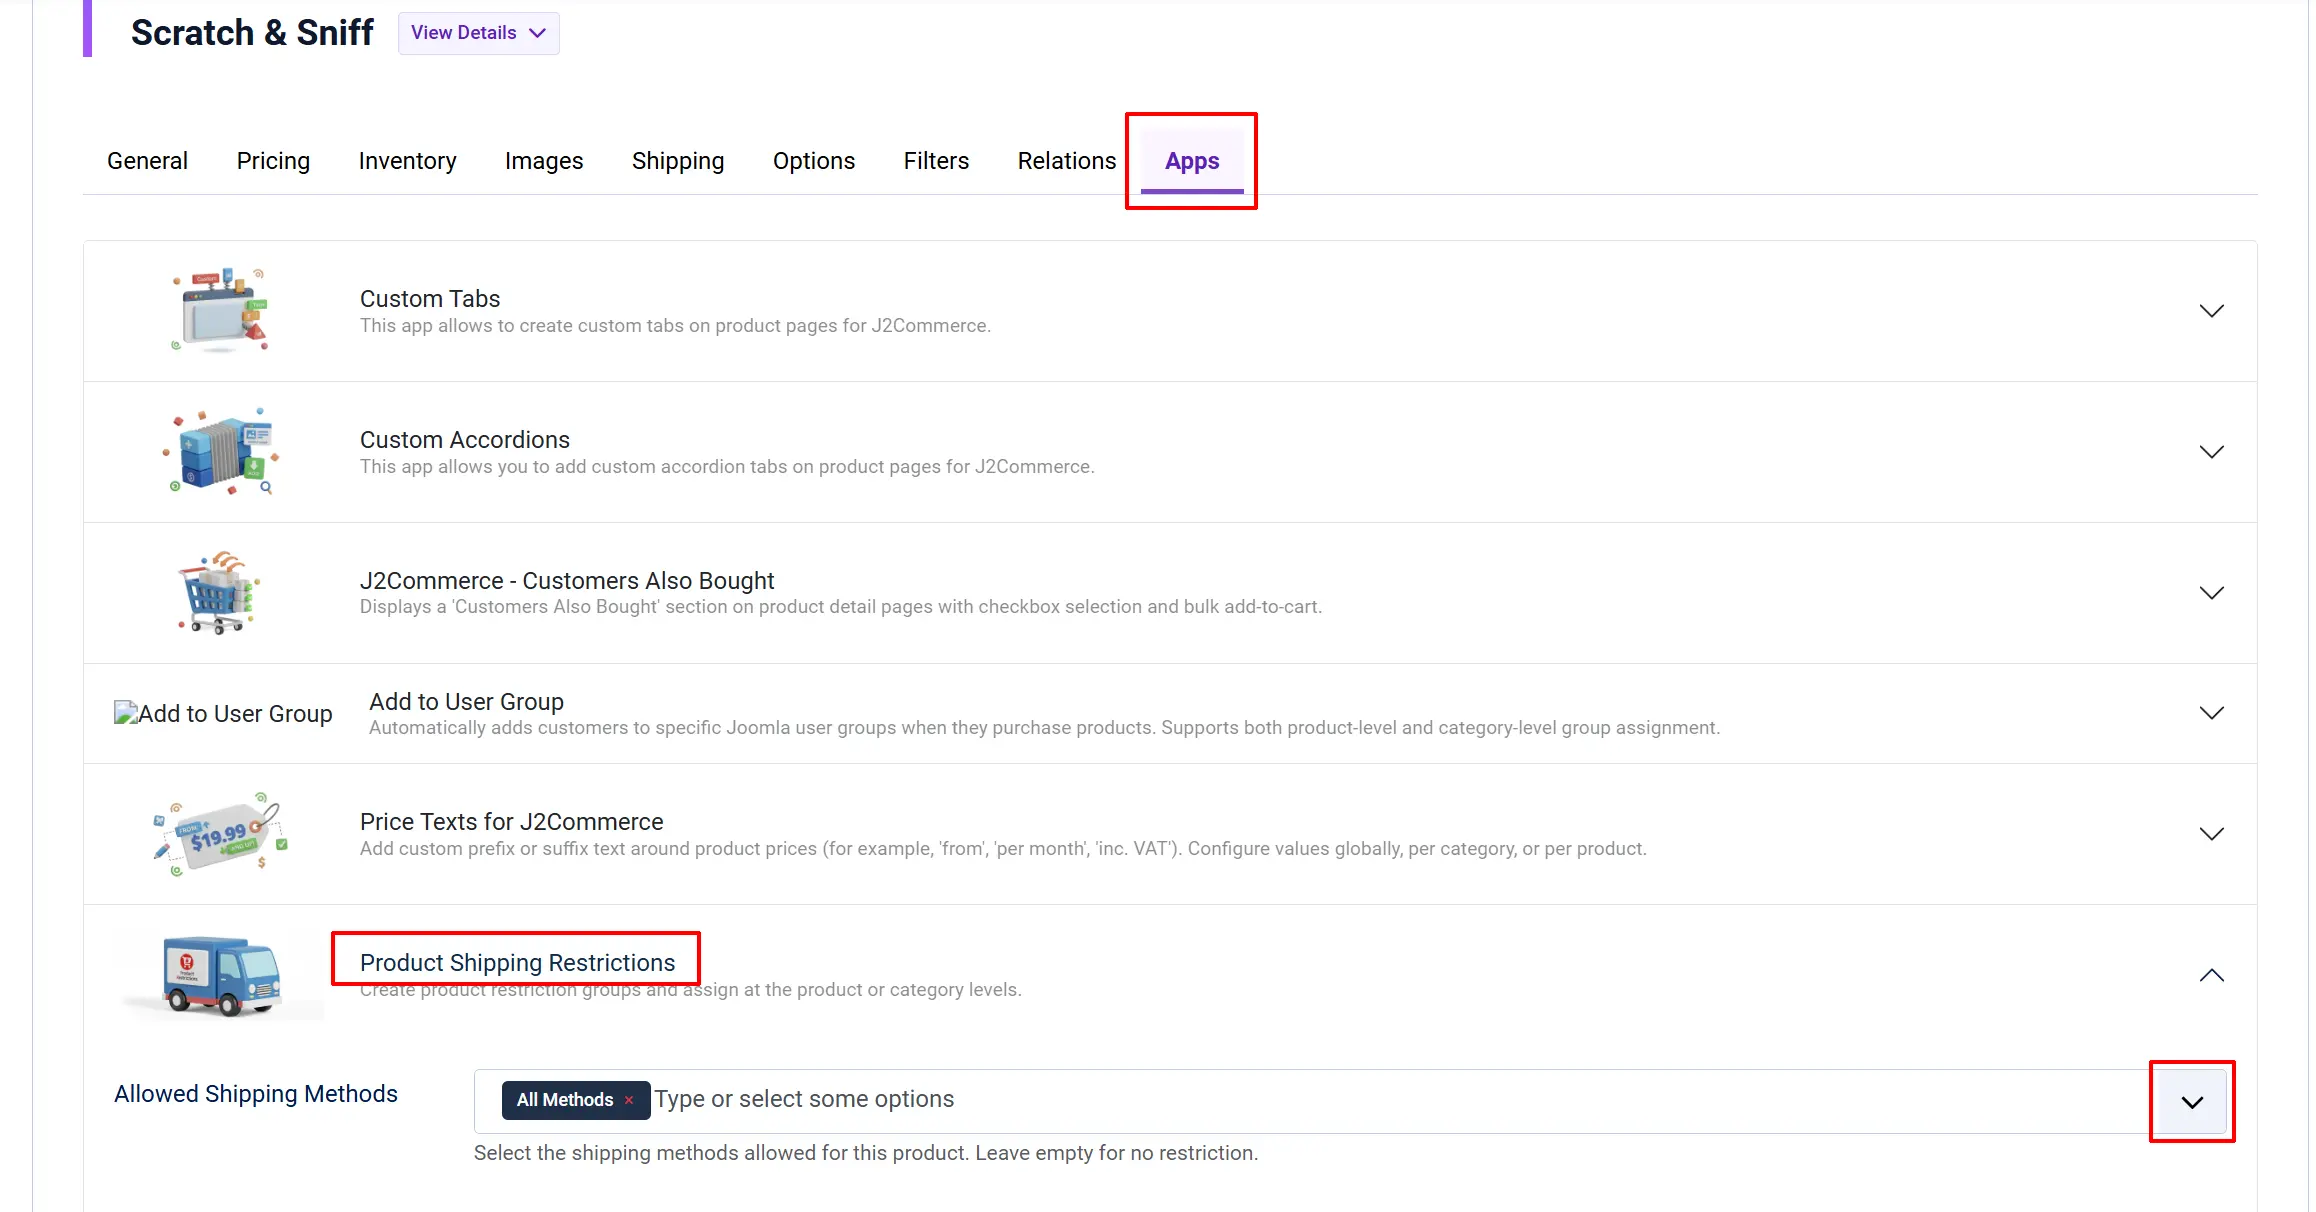
- Click the J2Commerce tab, then the App sub-tab.
- Under Shipping Restrictions, select the Allowed Shipping Methods for this product.
- Select
All Methodsto allow everything, or pick specific methods from the list. - Click Save.
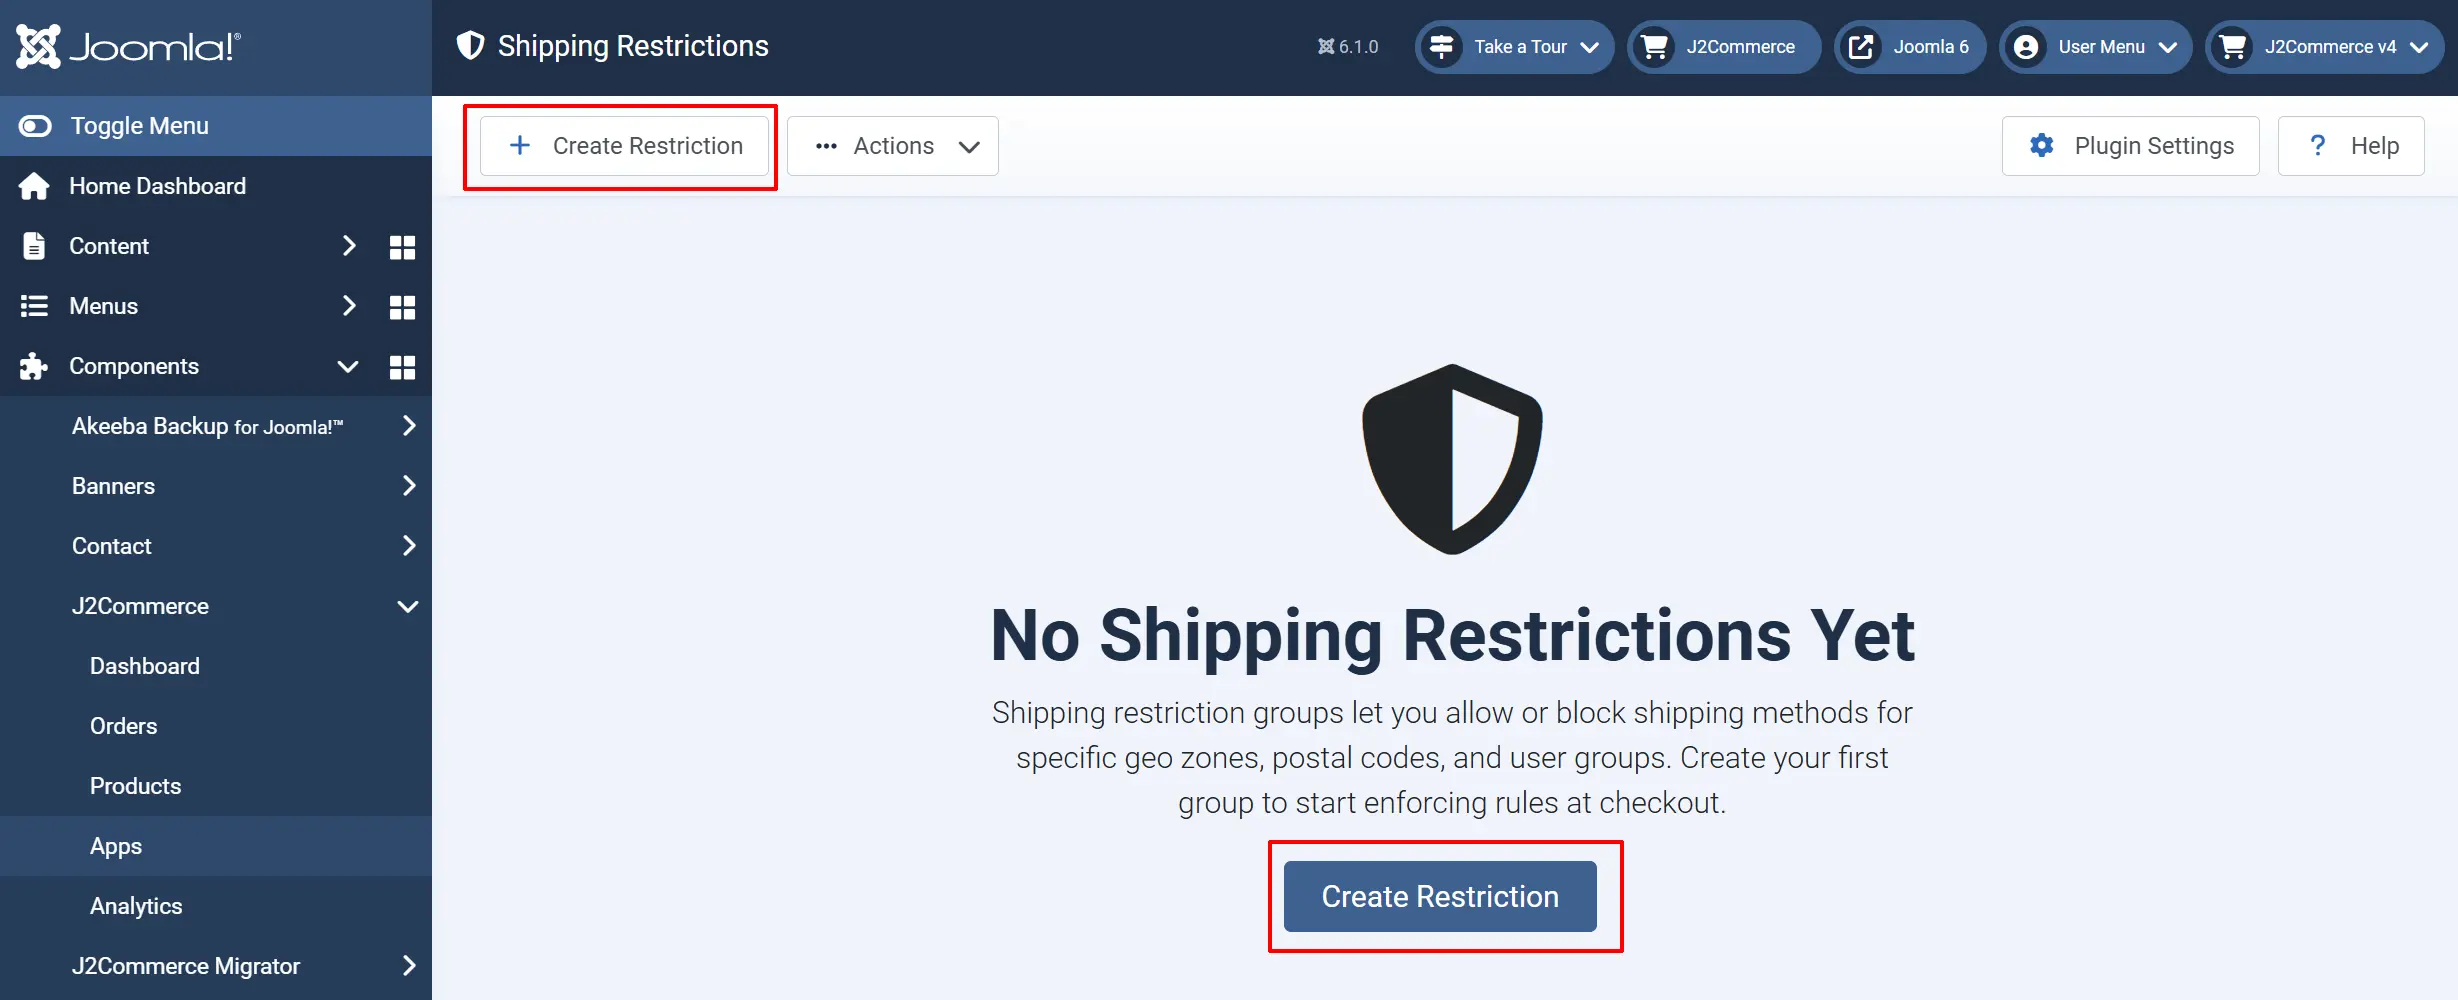
Create Restrictions
Click Create Restriction
You create named Restriction Groups that define:
- Which geo zones (countries/regions) trigger the restriction
- Which postal code ranges trigger the restriction
- Which shipping methods are allowed for matching orders
- Which Joomla user groups the restriction applies to
Creating a Restriction Group
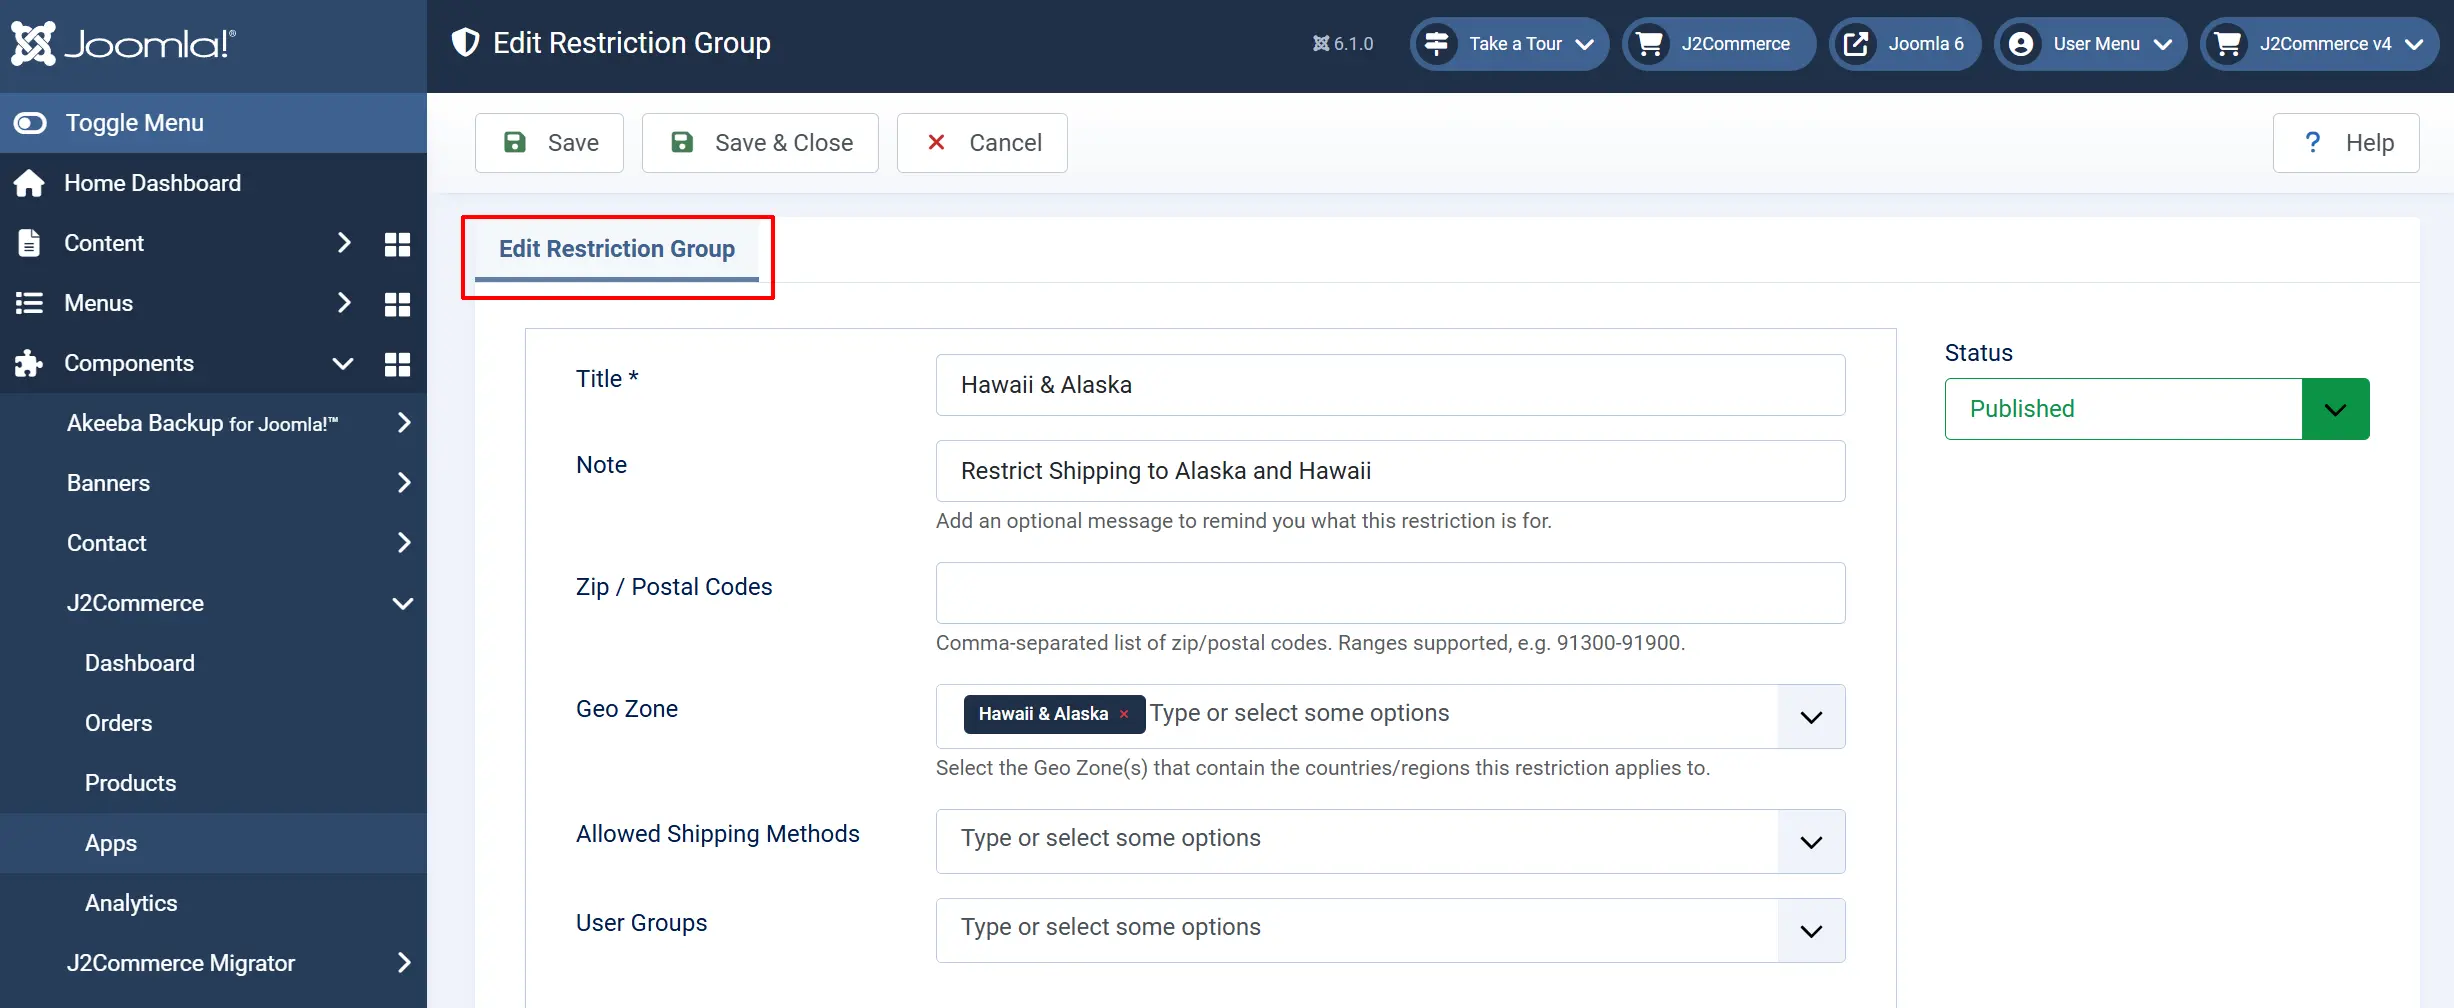
Title: A name to identify this group (e.g., "Continental US Only").
Note: Optional internal note describing the restriction purpose.
Geo Zone: One or more geo zones whose countries/regions trigger this restriction. Select all of the Geozones that are restricted from being shipped/sold to.
Zip / Postal Codes: Comma-separated codes or ranges (e.g., 90210,10001,30000-39999). If there are specific zip codes or zip code range that are restricted from a state then enter them in.
NOTE: This is very helpful when specific counties/cities restrict certain products from being shipped/sold.
Allowed Shipping Methods: Methods available when this restriction is triggered.
User Groups: Limit the restriction to specific Joomla user groups. Leave empty to apply to all.
Status: Enable or disable the group without deleting it.
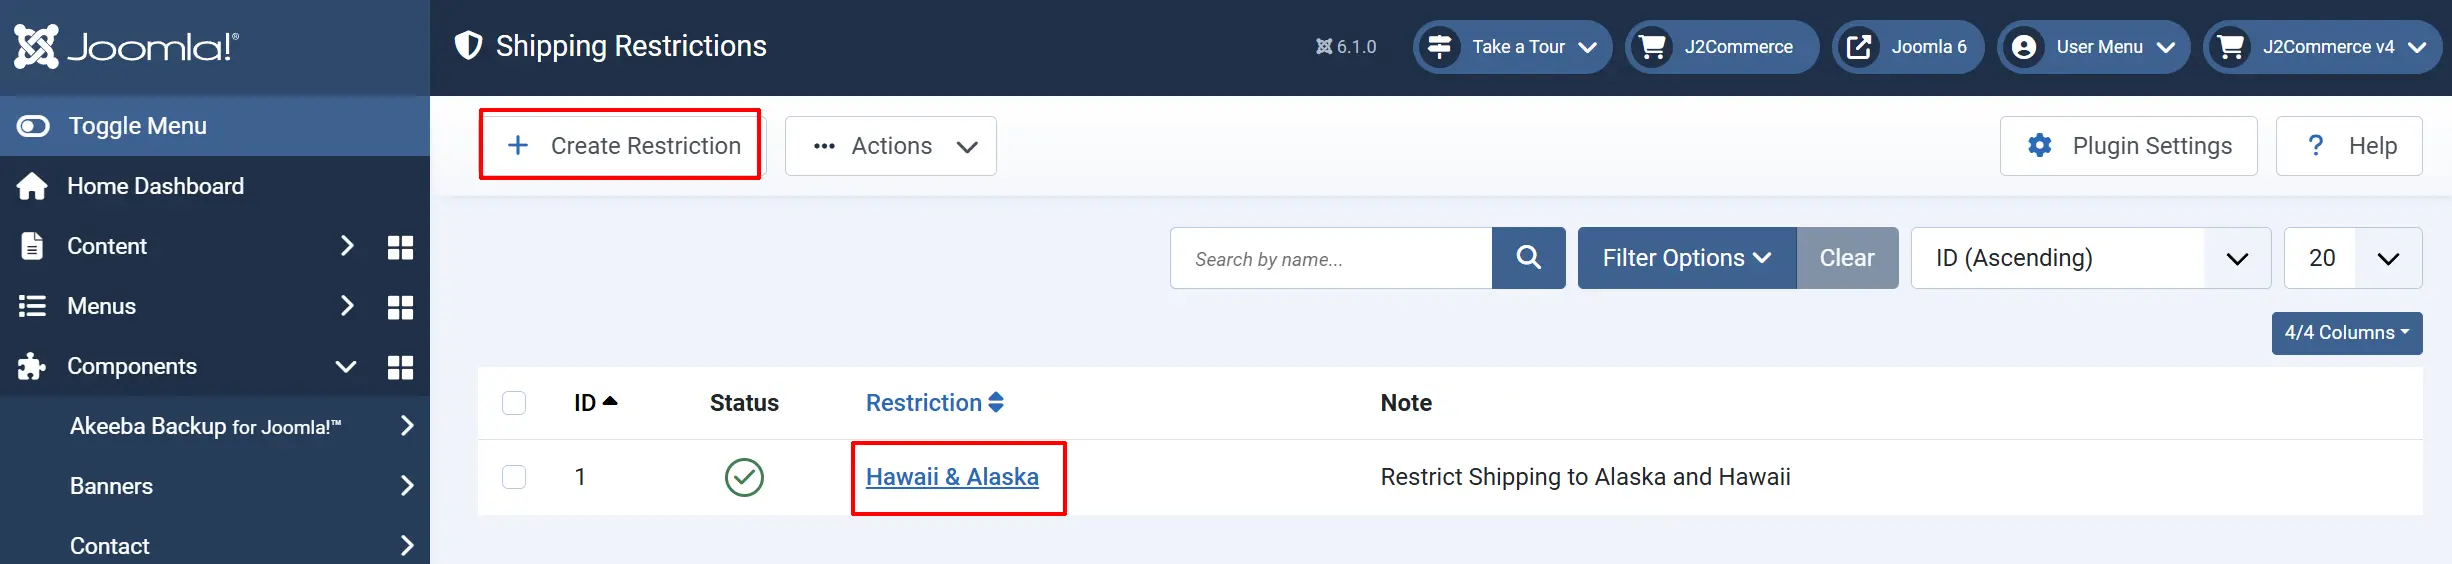
A list of all your restrictions will be listed once they have been created
You then assign a restriction group to a product, variant, or category in the Advanced Mode tab.
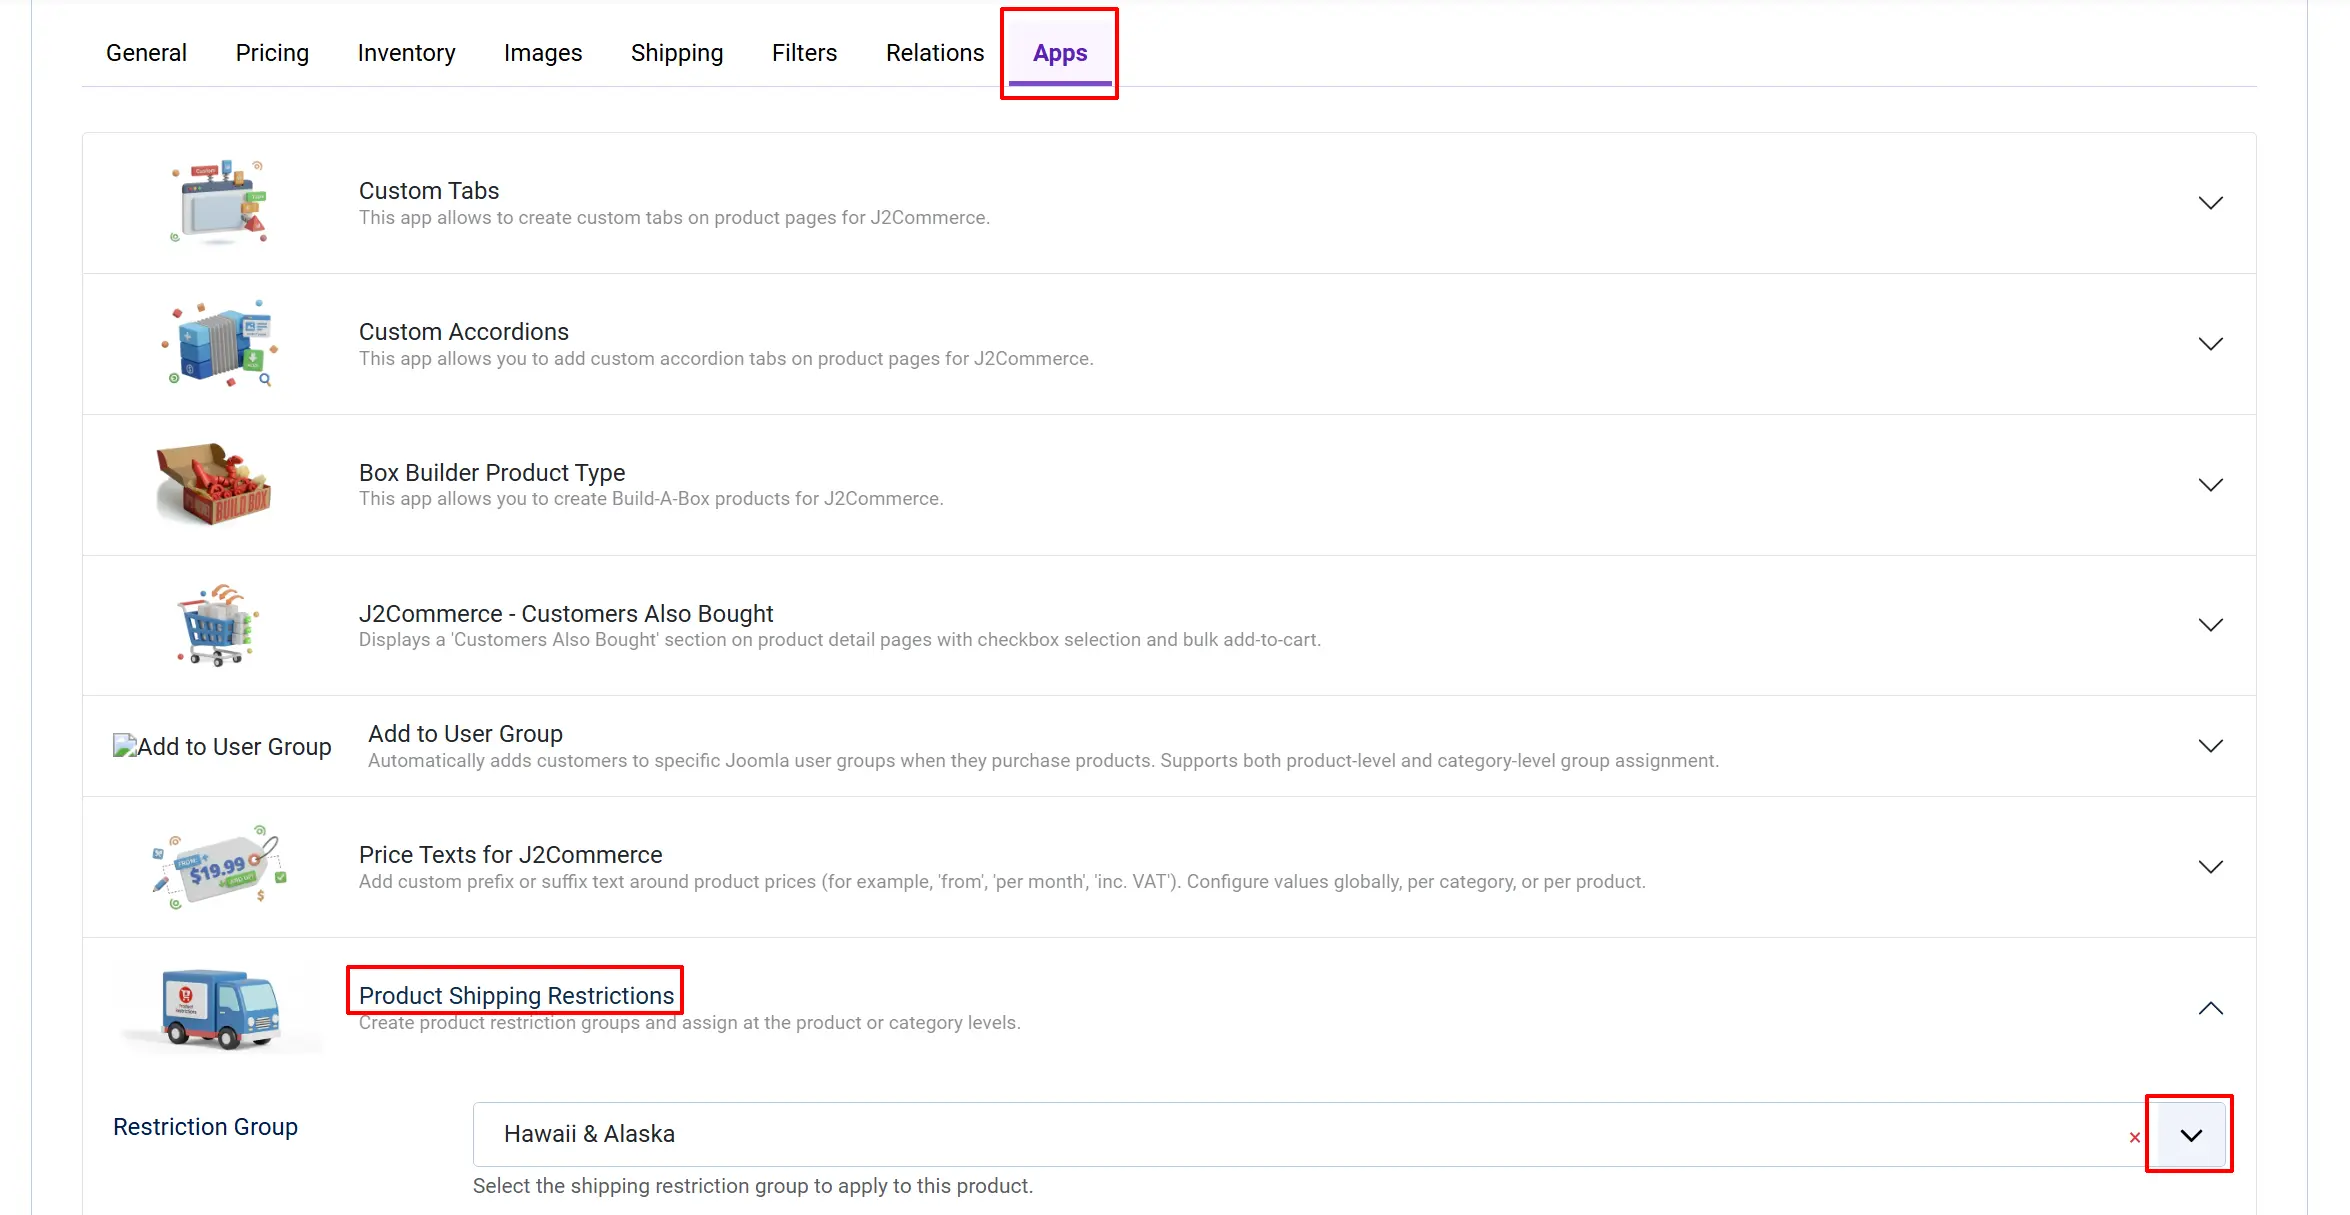
Assigning a Restriction Group to a Product
- Open the product article for editing.
- Click the J2Commerce tab, then the App sub-tab.
- Under Shipping Restrictions, select the group from the Restriction Group dropdown.
- Click Save.
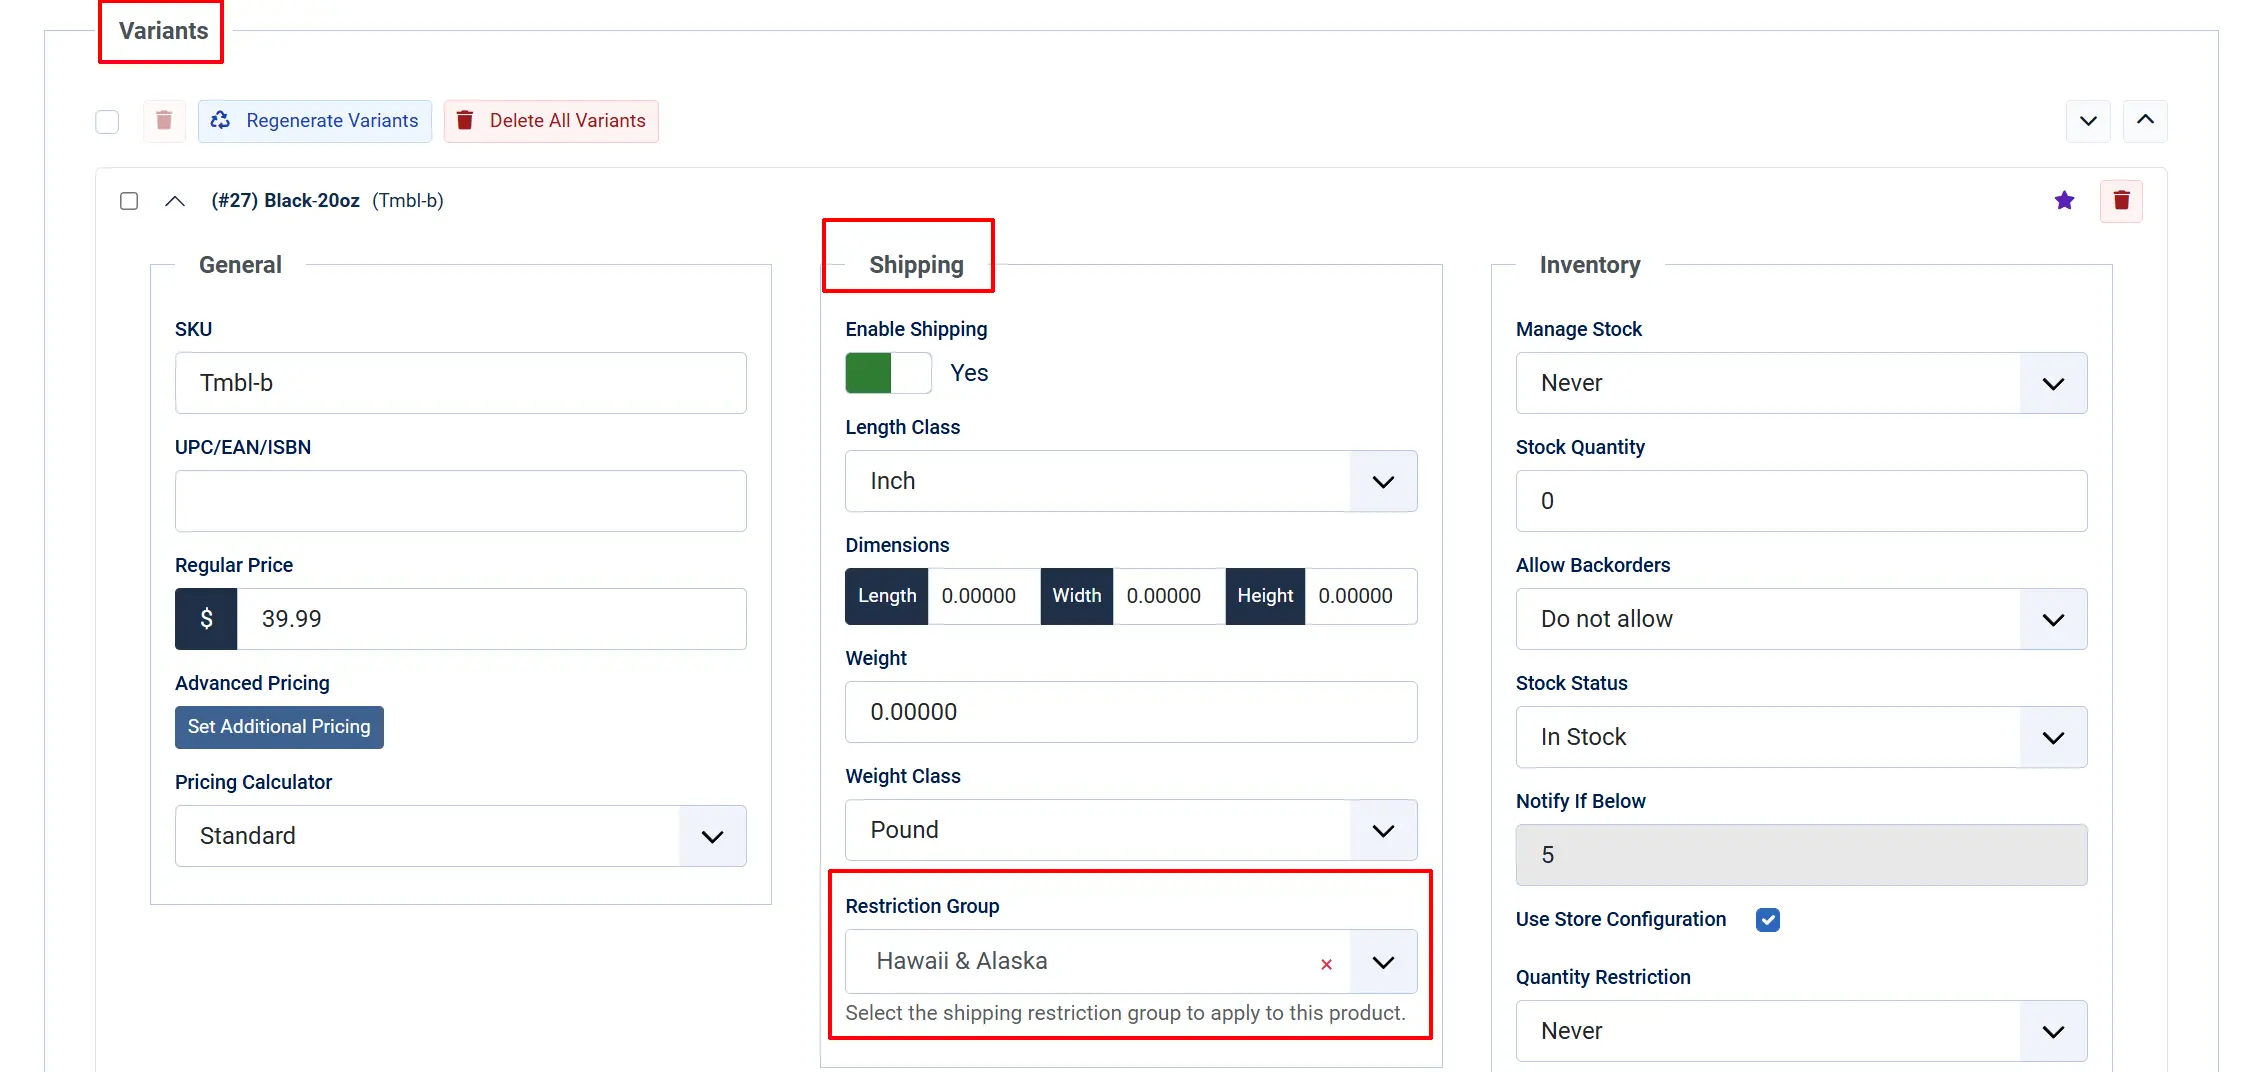
Assigning a Restriction Group to a Variant
- Open the product article and go to the Variants tab.
- Click a variant row to expand its settings.
- Under the Shipping section, find Restriction Group and select the group.
- Click Save.
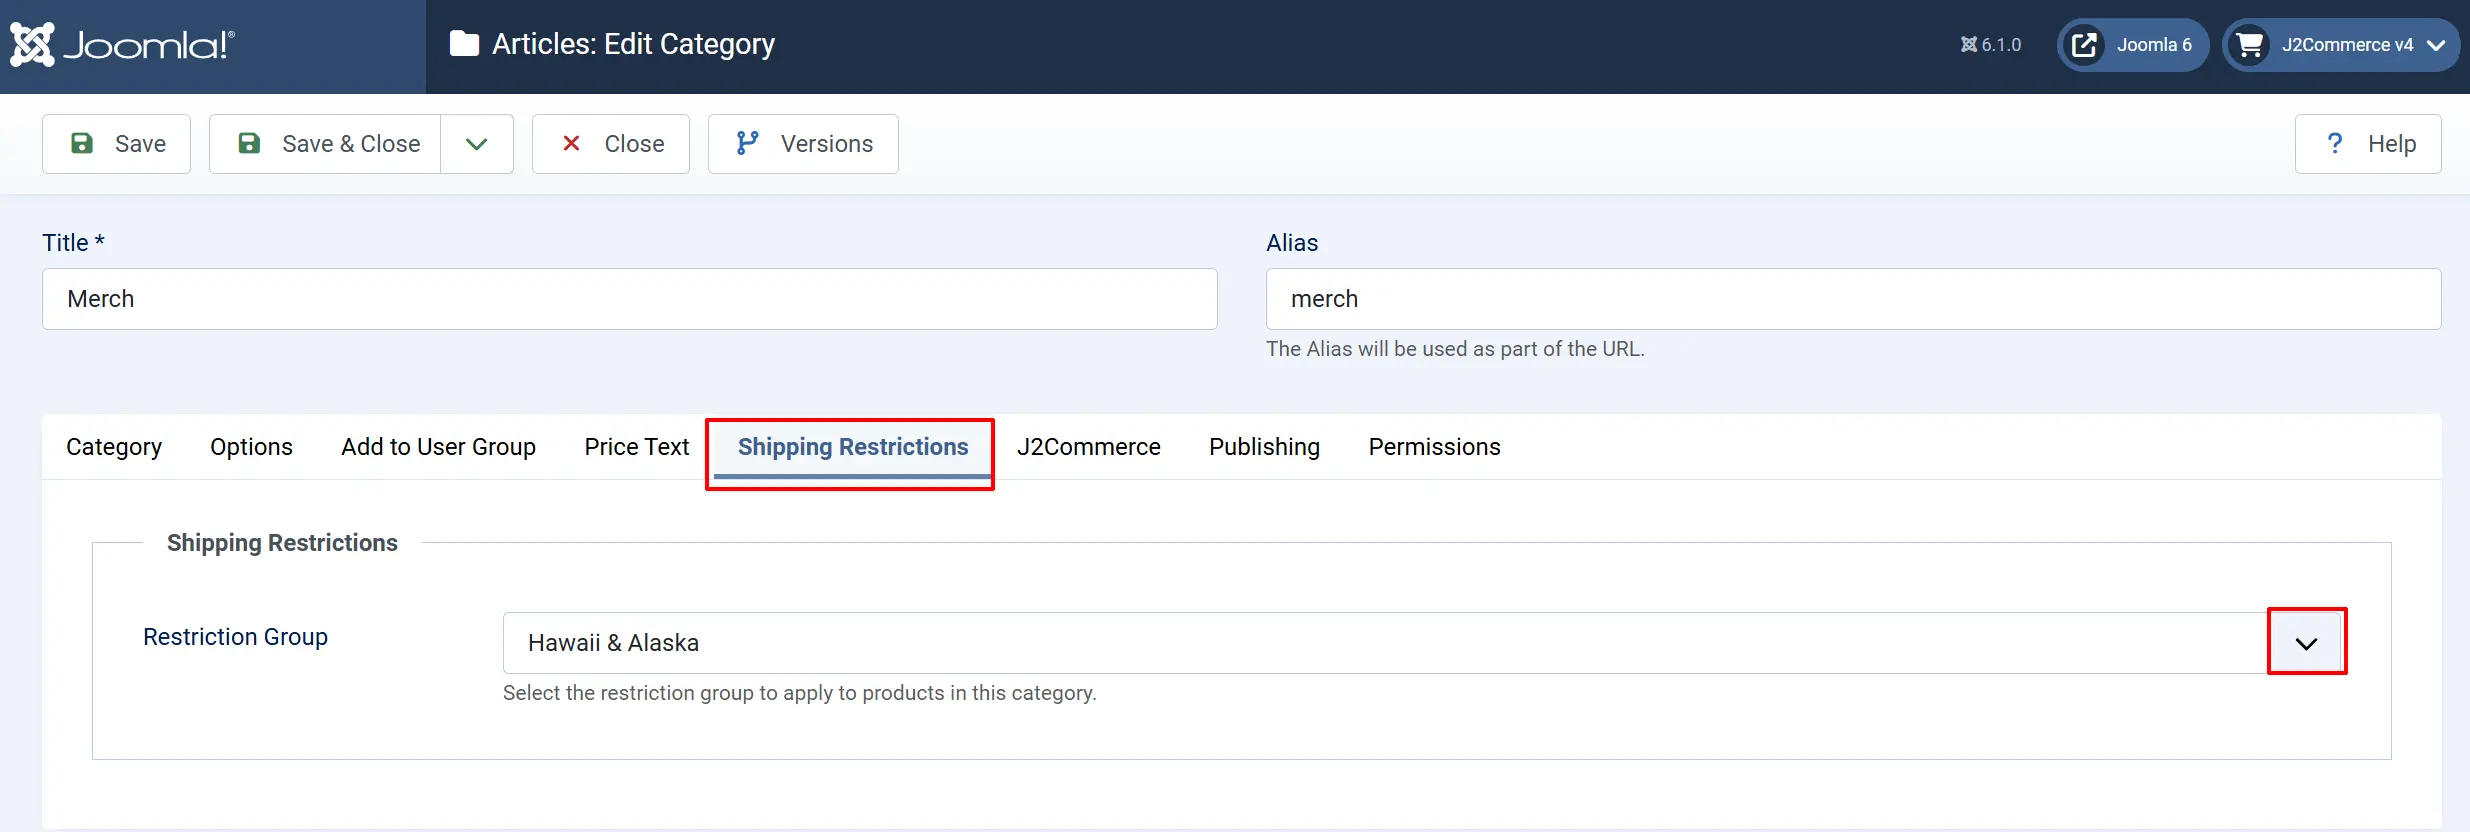
Assigning Restrictions to a Category
Category-level restrictions apply to all products in a specific category (when no product-level restriction is set).
- Go to Content -> Categories and open the category for editing.
- Click the Shipping Restrictions fieldset (added by the plugin).
- Simple mode: select the allowed methods. Advanced mode: select the restriction group.
- Click Save.
Product-level restrictions take priority over category-level restrictions. Variant-level restrictions take priority over product-level restrictions.
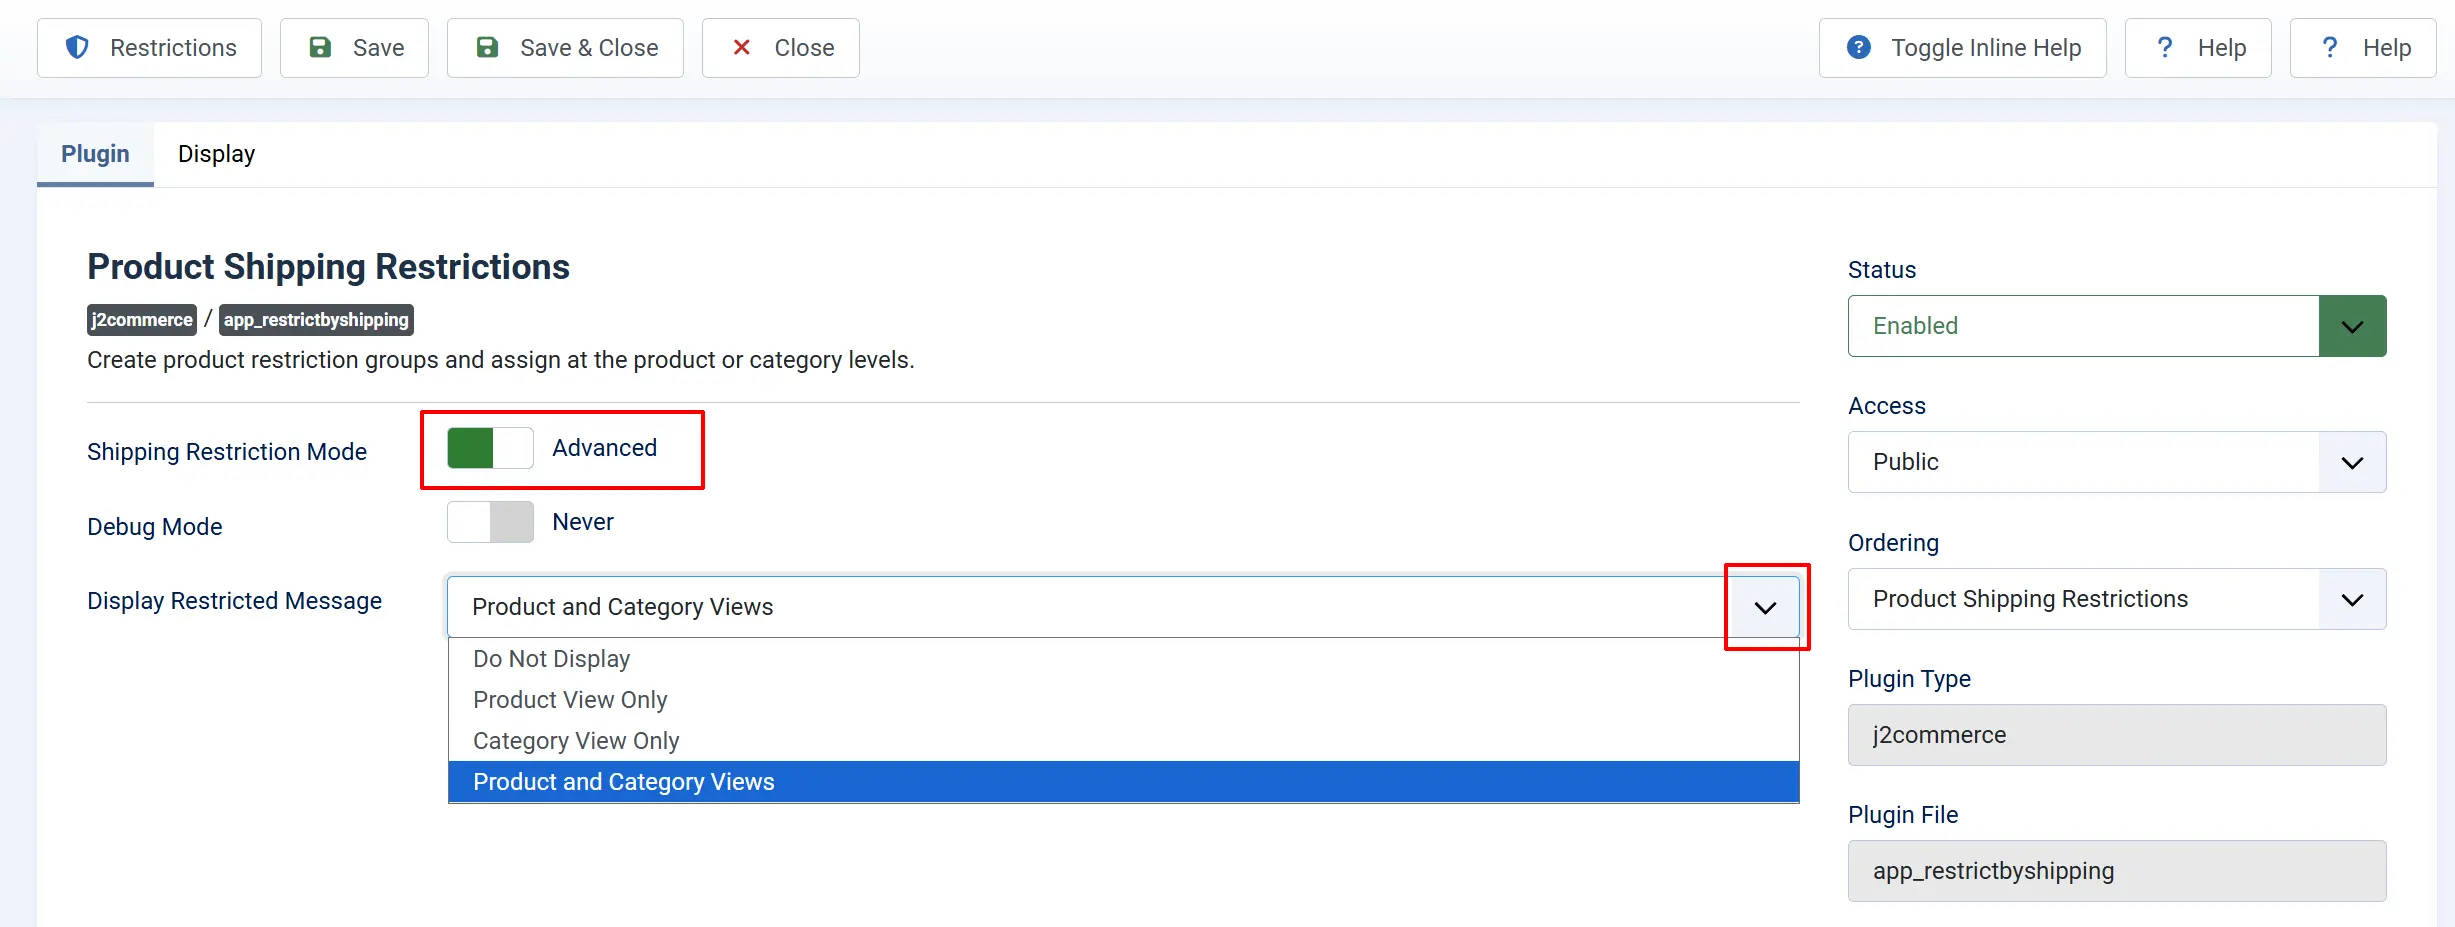
Advanced Mode Settings
Display Restricted Message: Show a geo-zone restriction notice on the Product View, Category View, both, or not at all.
Restriction Notices on the Storefront
When Display Restricted Message is enabled, a notice appears on the product or category page telling the customer which regions or postal codes restrict the product's available shipping methods.
On variable products, the notice updates dynamically when the customer selects a different variant — no page reload needed.
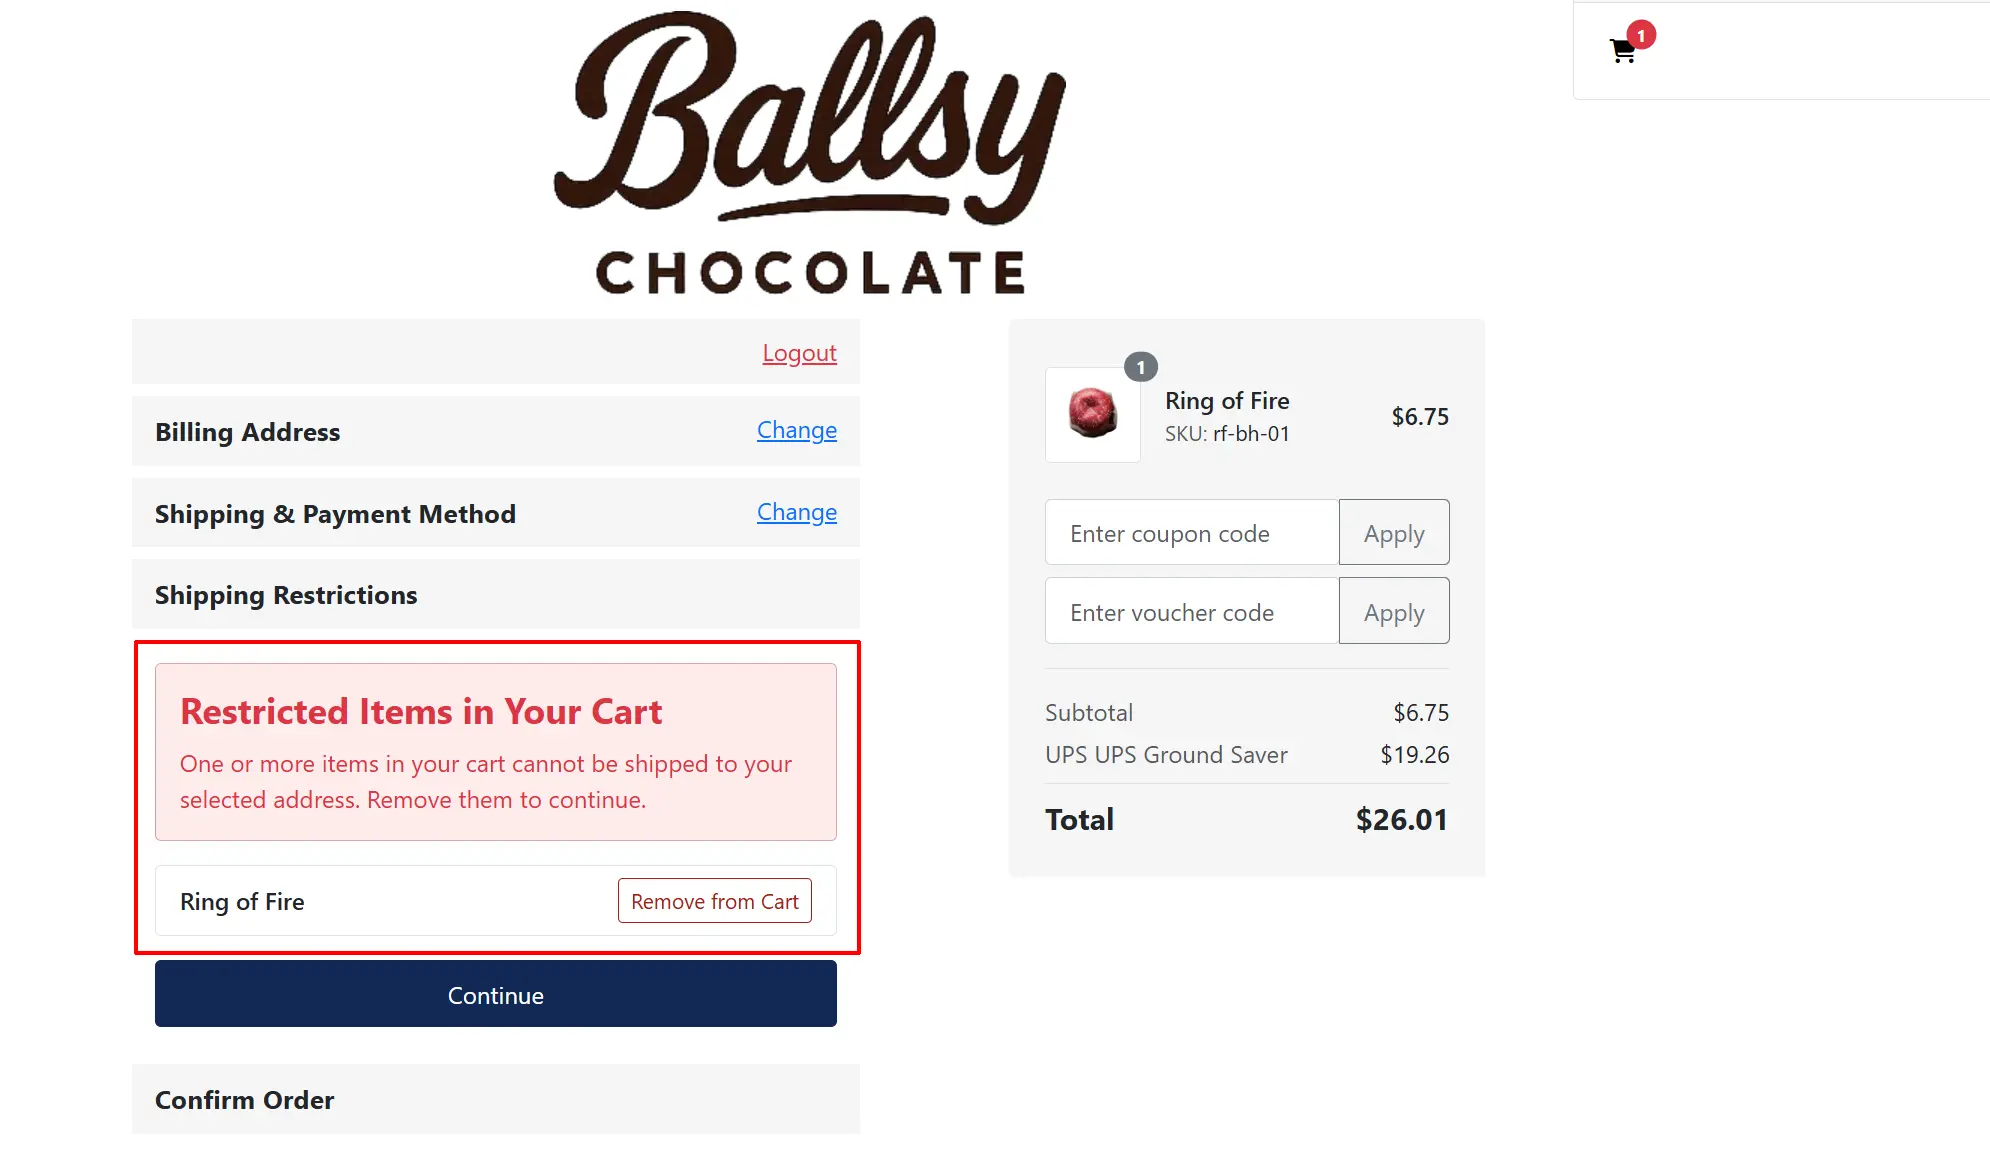
On the checkout shipping/payment step, if the customer's delivery address falls within a restricted zone and no allowed shipping method is available, a warning banner is displayed listing the restricted cart items.
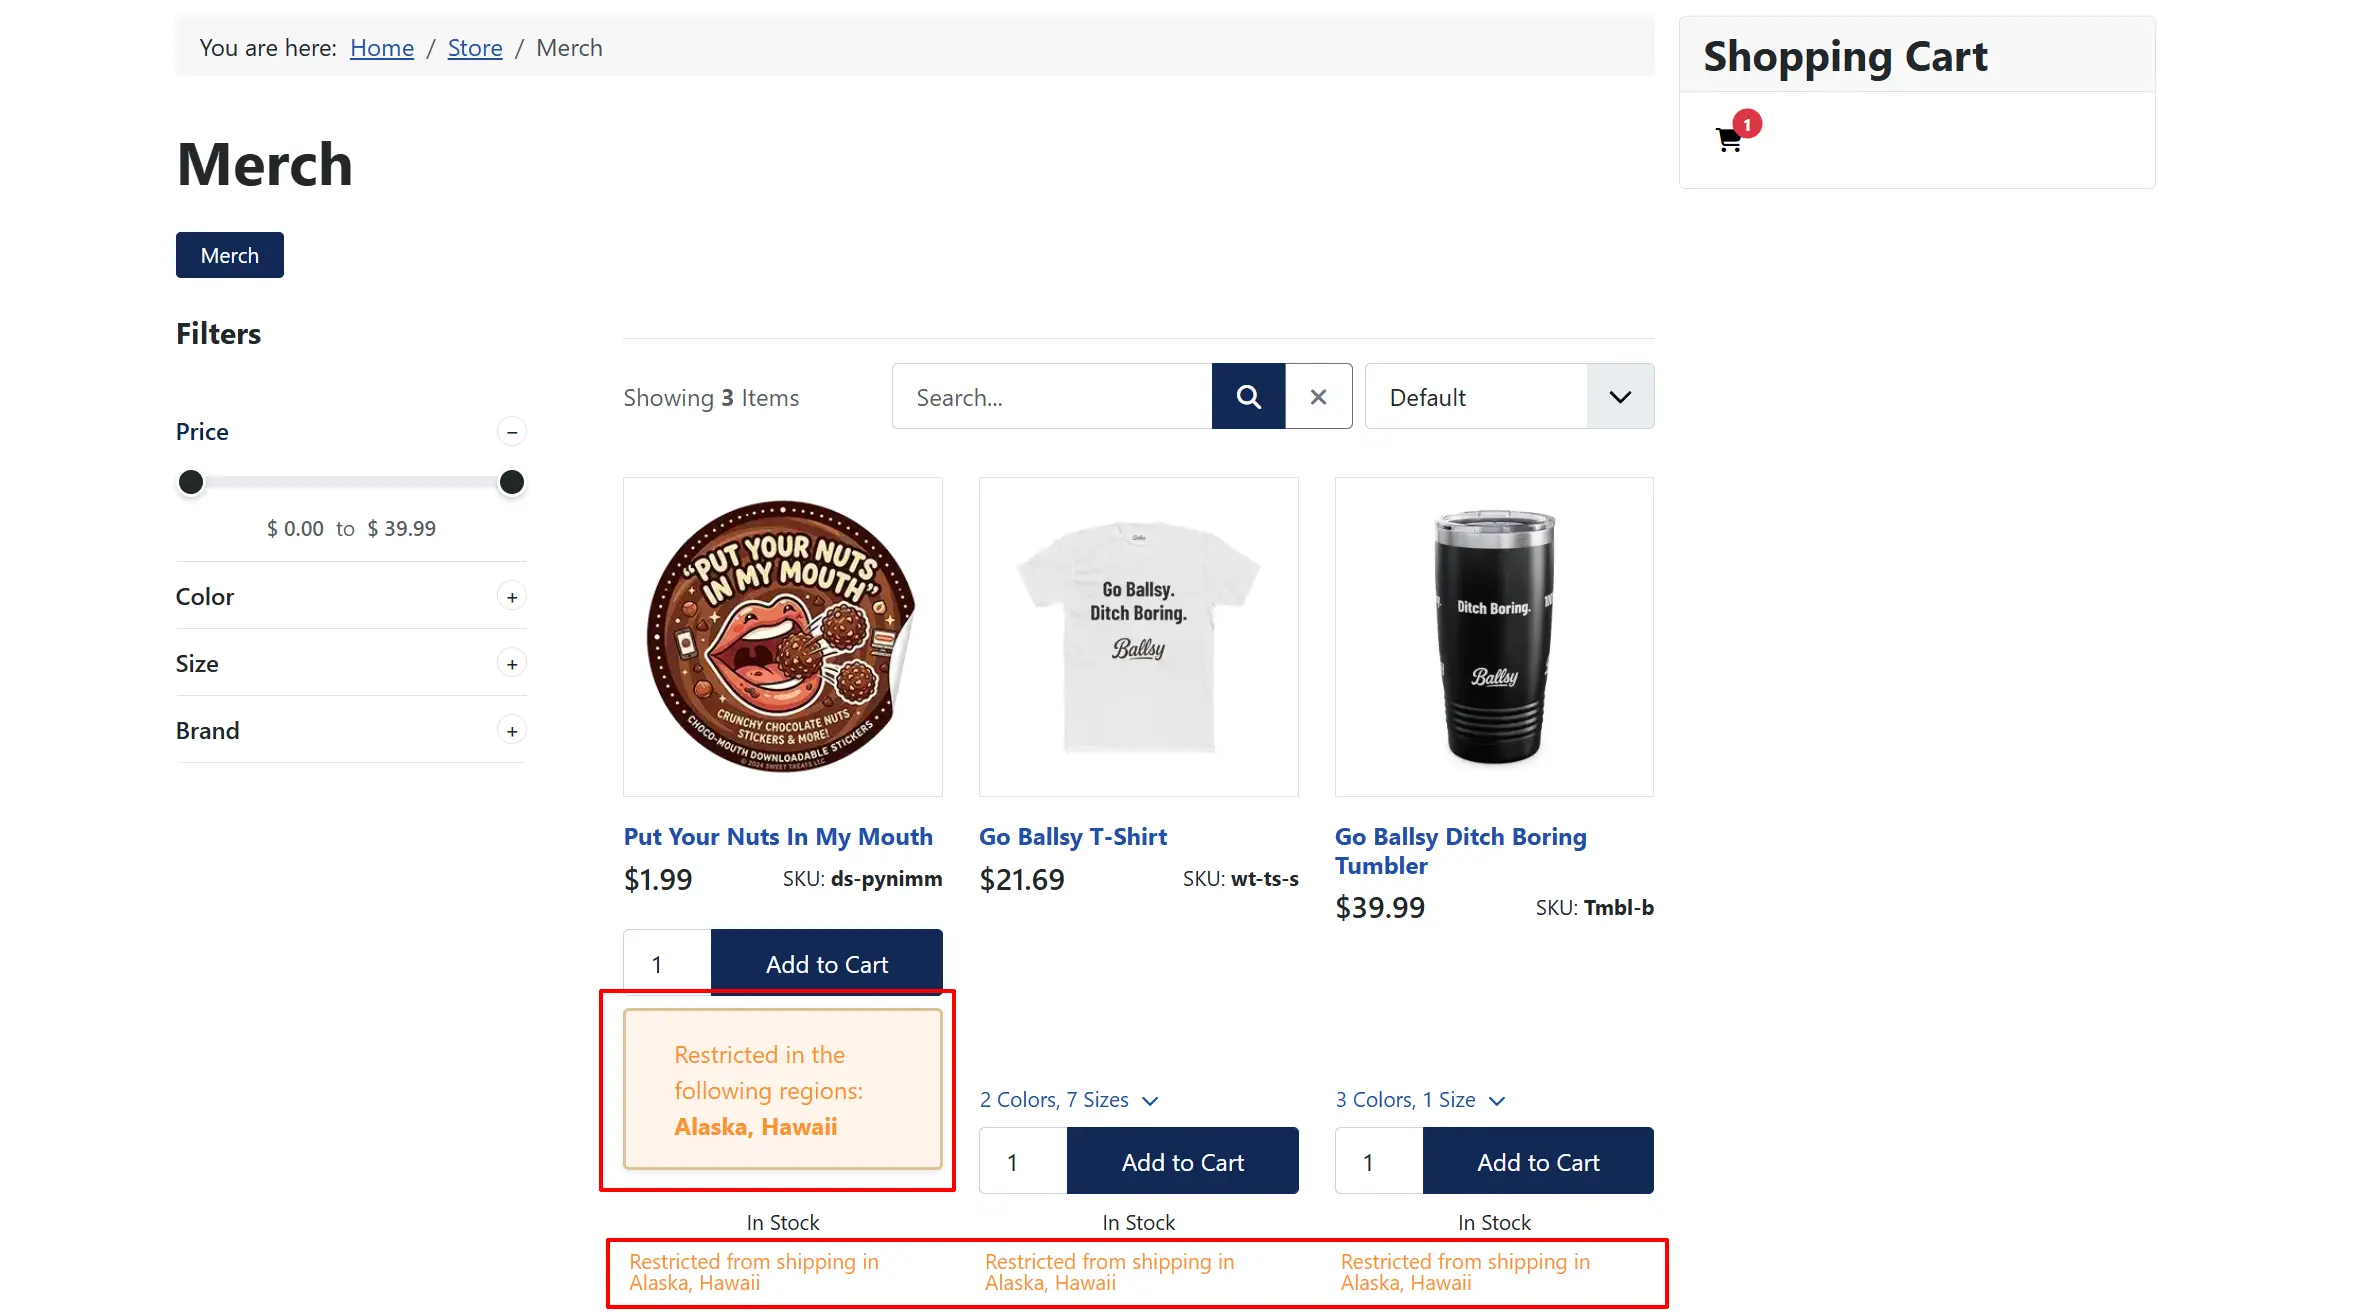
Frontend Product View
Product View Only
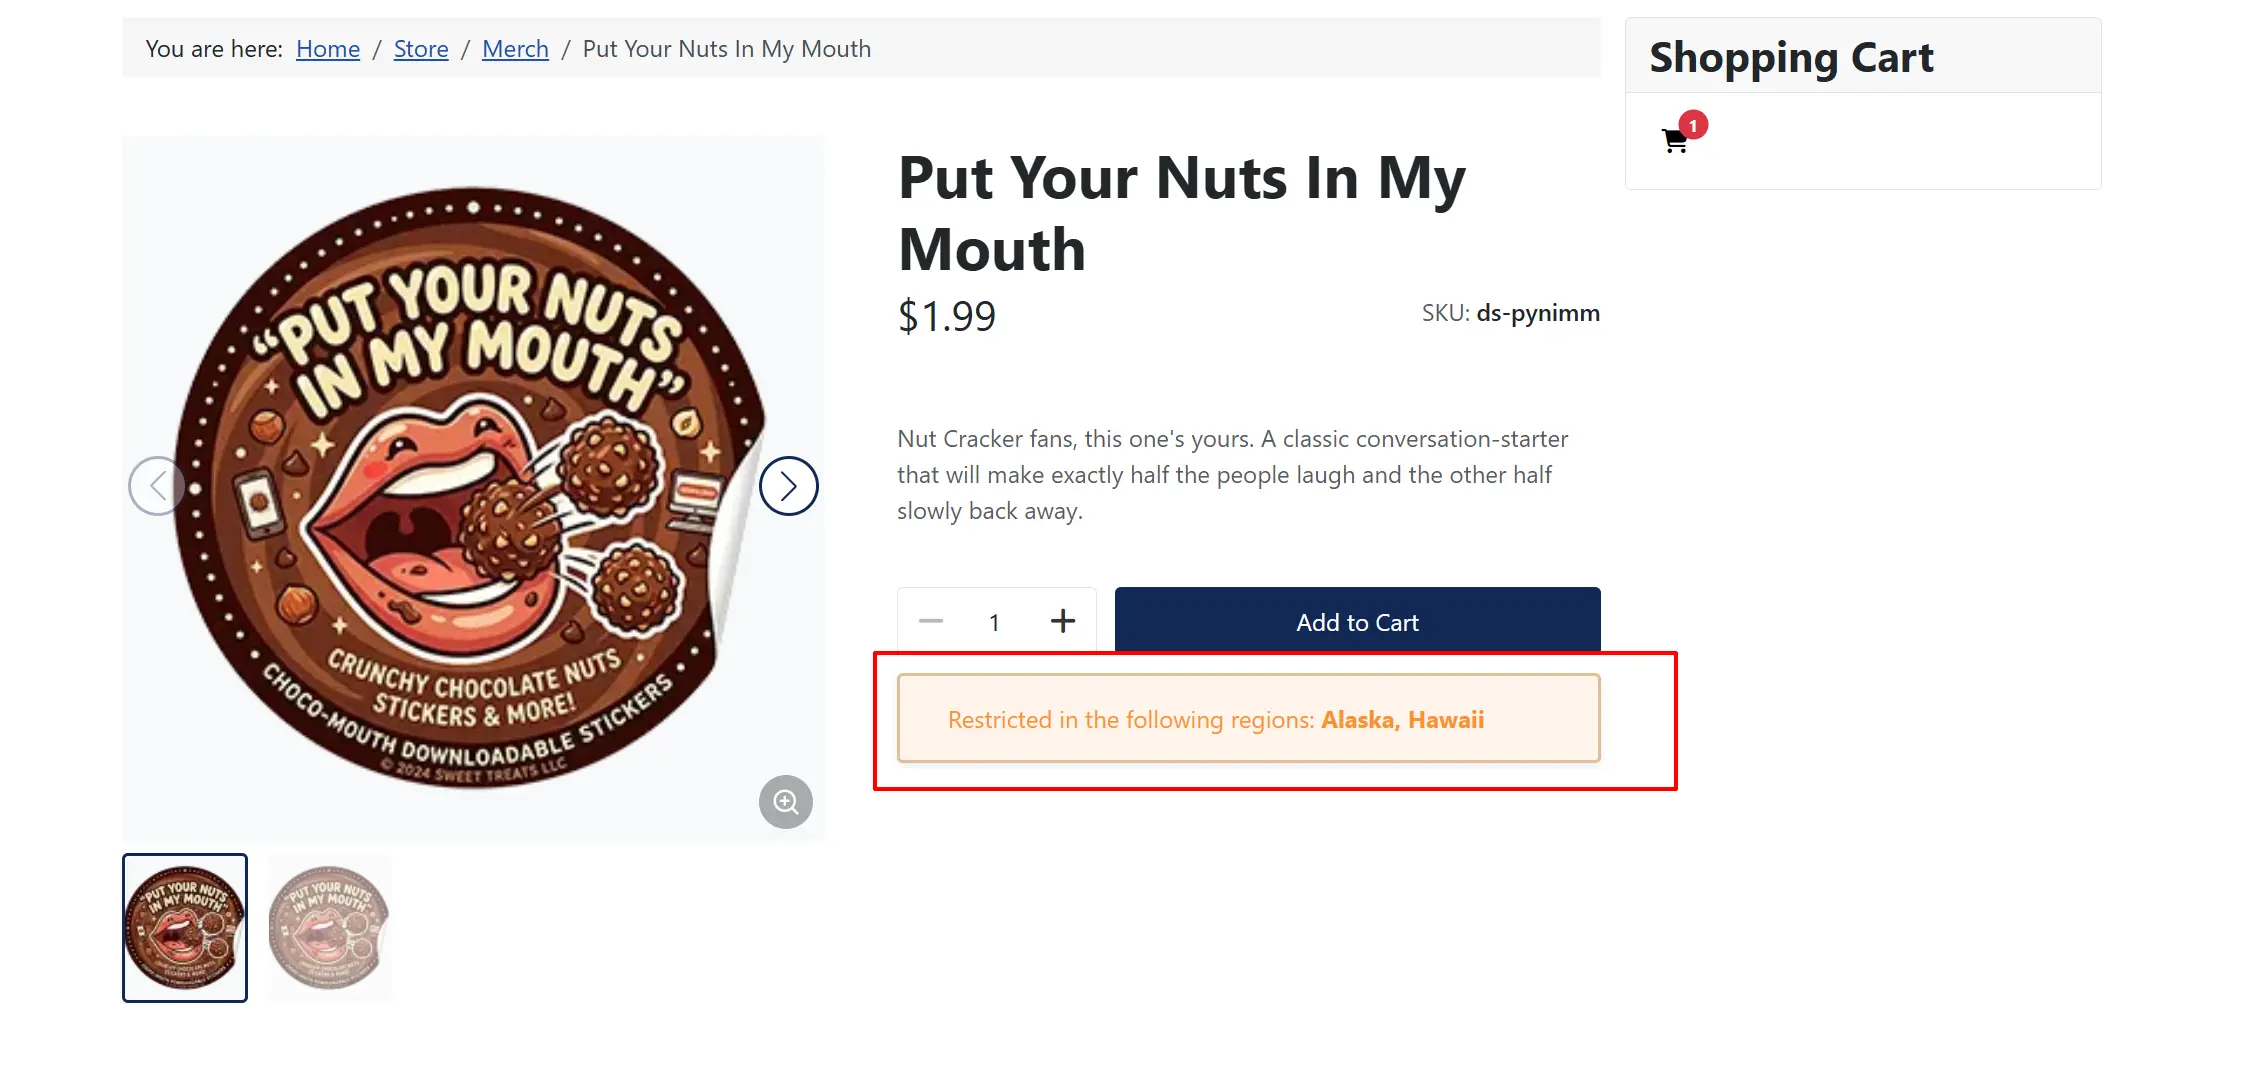
Product View Only (it will also show up on the category view if you assigned it in the main category section)
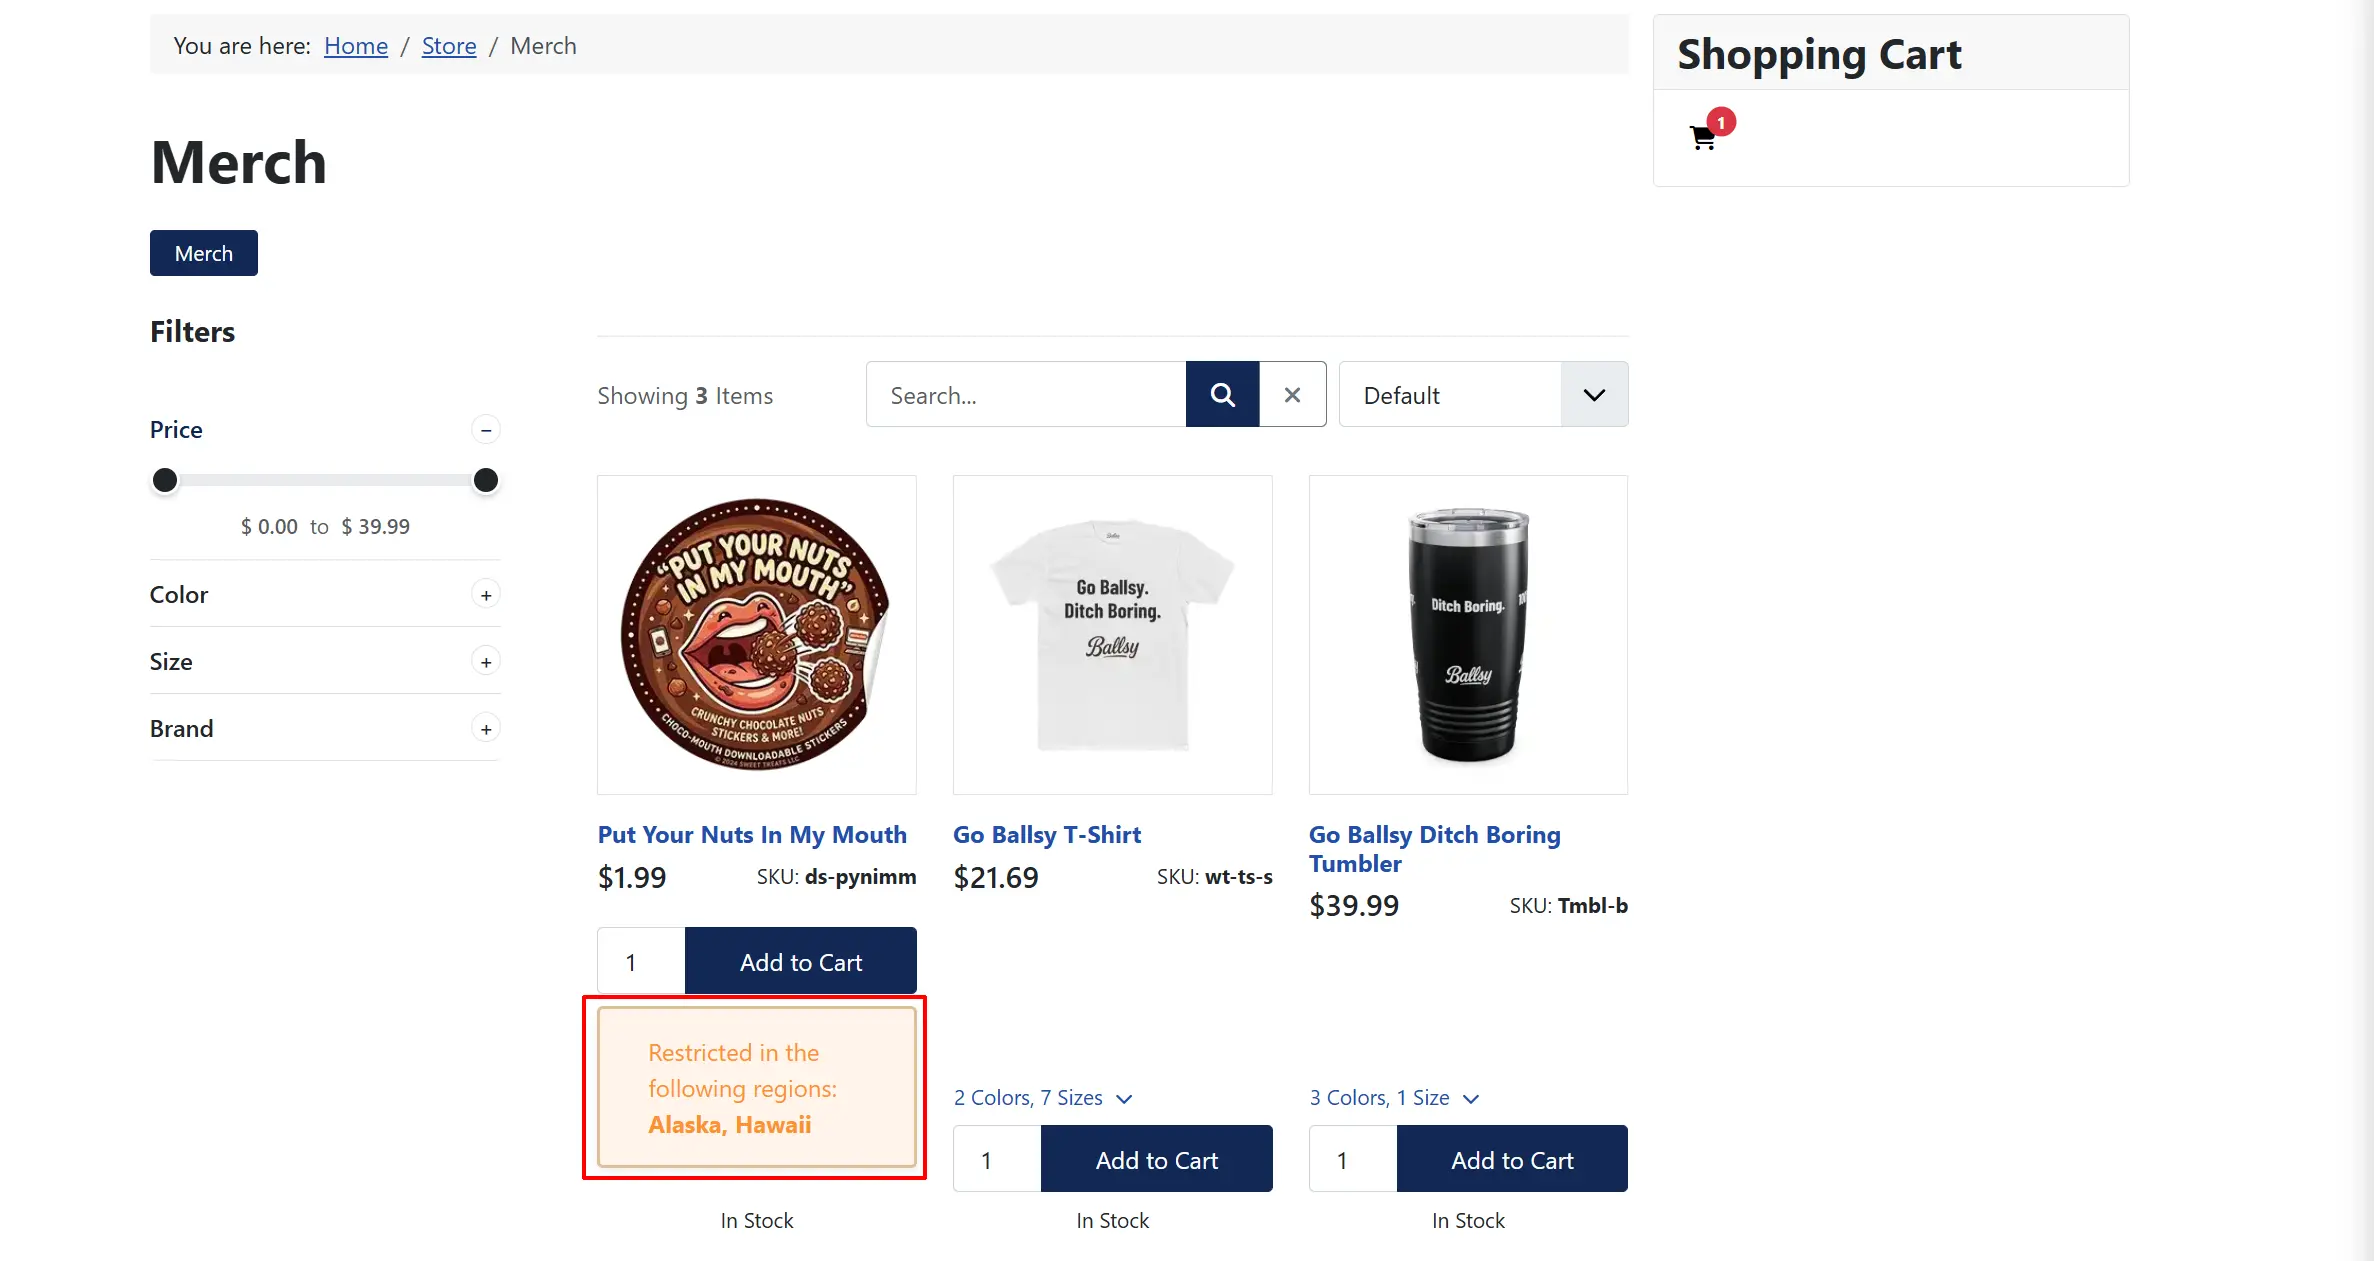
Category View Only

Product and Category View (It will show the message on the whole category as well as which product has the restriction)
Frontend Checkout View
GeoZone Configuration
Restriction groups use J2Commerce geo zones to define geographic coverage. Set up your geo zones before creating restriction groups.
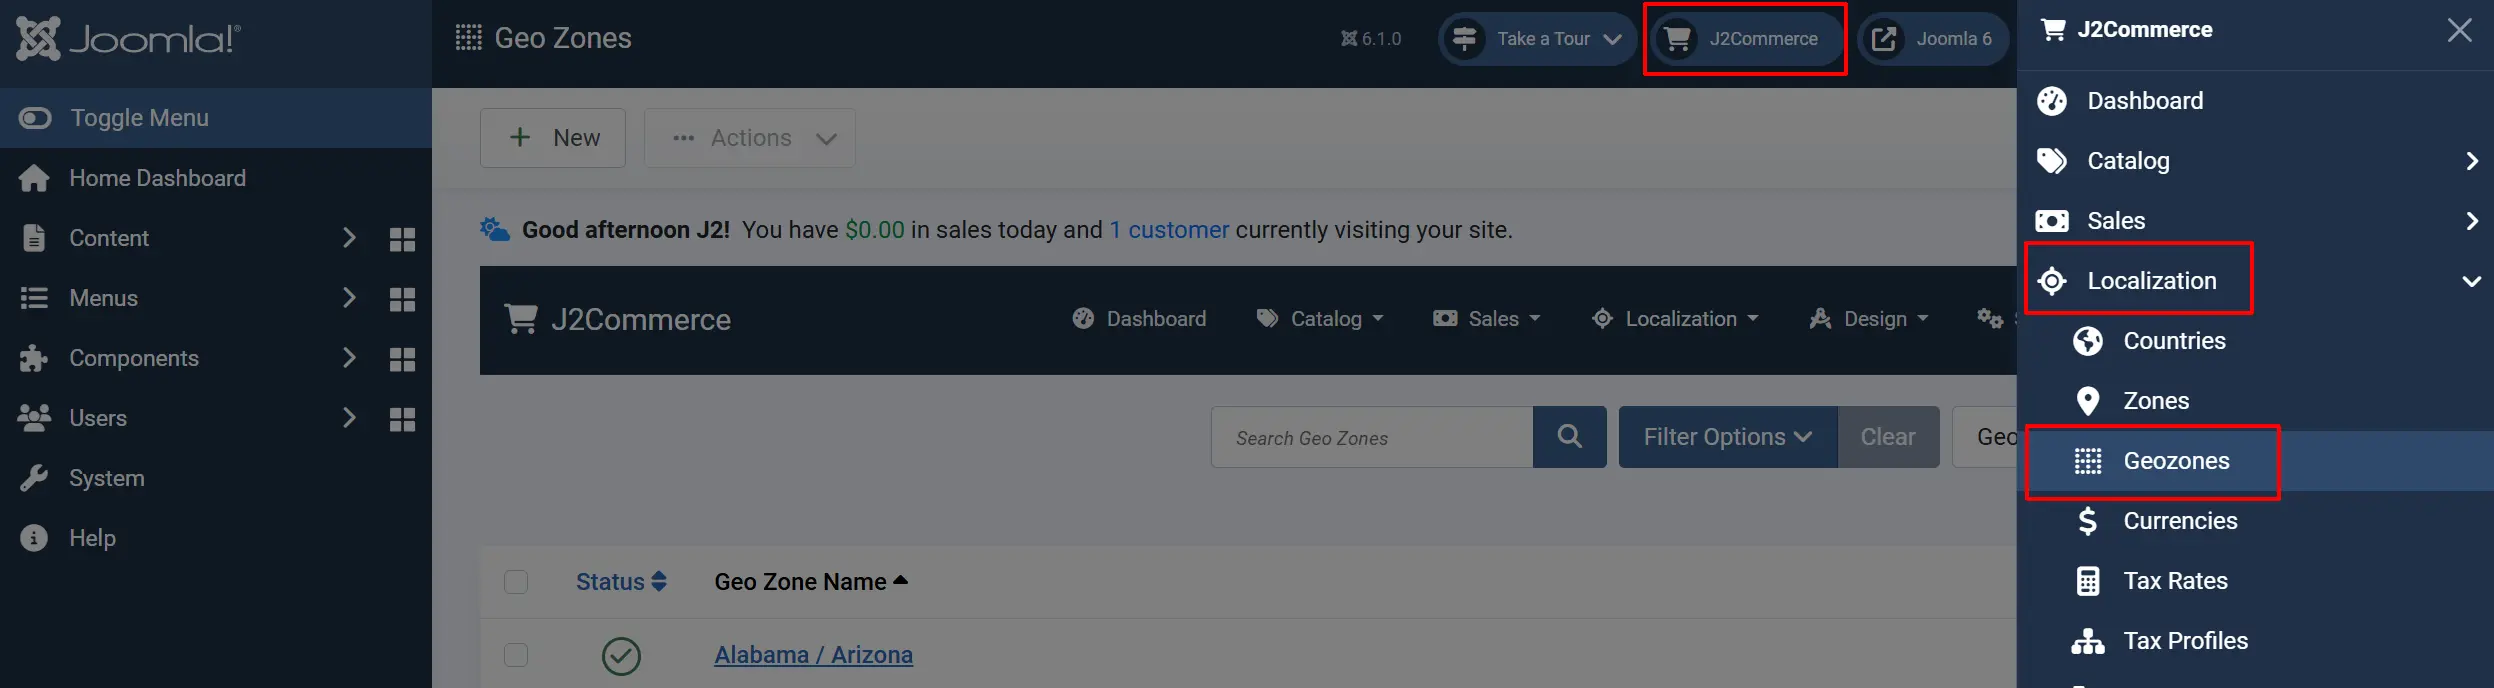
- Go to J2Commerce -> Localisation -> Geo Zones.
- Create or edit a geo zone and add the countries and zones it covers.
- Reference the geo zone in your restriction groups.
Troubleshooting
No shipping methods appear at checkout
Cause: A restriction group is assigned, the customer's address matches a restricted zone, and the allowed methods list in the group is empty or none of the listed methods are available.
Solution:
- Open the restriction group and verify the Allowed Shipping Methods field is not empty.
- Confirm at least one of the listed methods is published and active in J2Commerce -> Shipping -> Shipping Methods.
- Check that the customer's shipping zone matches the geo zones in the group.
The restriction notice does not appear on the product page
Cause: Display Restricted Message is set to Do Not Display, or the product has no restriction group assigned.
Solution: Open plugin settings, set Display Restricted Message to Product View Only or Product and Category Views, and verify a restriction group is assigned to the product.
Variant restriction not updating on variant selection
Cause: The j2commerce:variantUpdated custom event is not being dispatched by the active theme after a variant price AJAX call.
Solution: Verify the active theme dispatches the j2commerce:variantUpdated event with variant data in the detail property after a variant selection. The plugin listens for this event to update the displayed restriction information.
Debug logging
Enable Debug Mode in the plugin settings to write detailed log entries to administrator/logs/app_restrictbyshipping.php. Review this file when diagnosing unexpected shipping method filtering behaviour.