Content Fields for J2Commerce
This plugin bridges Joomla's built-in Custom Fields system and J2Commerce product pages. Once enabled, it reads the custom fields you already attach to your articles and injects them into product detail and category list views at the position you choose. No code changes are needed.
This is a separate add-on available from the J2Commerce Extensions Store. It is not included with the core J2Commerce 6 component.
What's New in J2Commerce 6
Version 6.0.0 is a full rewrite from the J2Store v4 predecessor. Key differences:
- Native Joomla 6 MVC event system — no FOF 2 dependency, no jQuery.
- Bootstrap 5 accordion option wraps long field values in collapsible panels.
- Configurable Accordion Threshold (characters) lets you keep short values inline.
- Debug Mode writes a log to
administrator/logs/plg_j2commerce_app_contentfields.phpfor troubleshooting field resolution. - Ships with both en-US (default) and en-GB language files.
- Shortcode processor skips the Joomla Smart Search indexer context automatically to avoid polluting search indexes.
Prerequisites
- J2Commerce 6.0 or later installed and enabled.
- At least one Joomla Article Custom Field created for the context
com_content.article(details below). - Your products must be linked to Joomla articles. Products sourced from something other than
com_contentwill not have fields to display.
Purchase and Download
Step 1: Go to the J2Commerce website -> Apps
Step 2: Locate Content Fields -> click View Details -> Add to Cart -> Checkout
Step 3: After purchase, open your account and go to My Downloads. Find Social Media Sharing, click Available Versions -> View Files -> Download Now to get the app_socialmedia.zip file.
Install the App
In the Joomla Administrator, go to System -> Install -> Extensions.
Upload the app_contentfields.zip ZIP file or use the Install from URL option.

Enable the App
Once you have installed the App, you will need to enable it. There are two ways you can access the App.
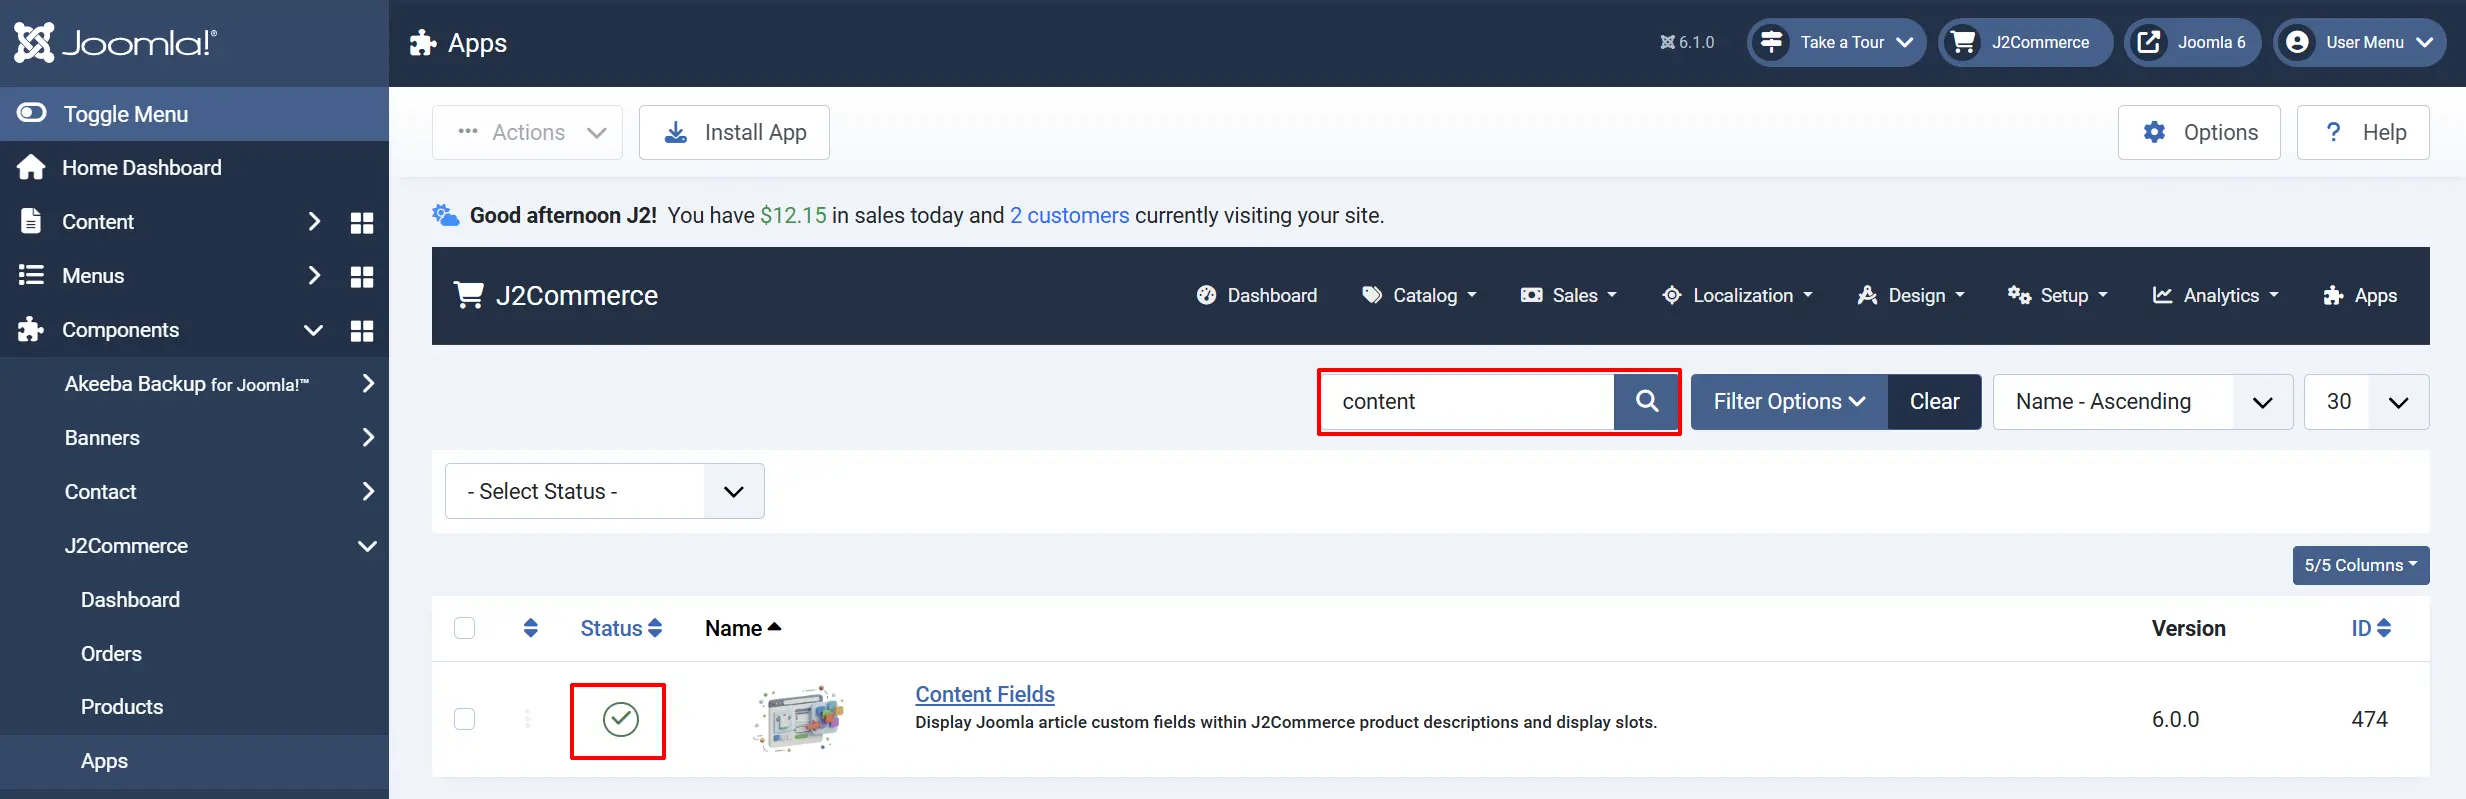
Option A: Go to the J2Commerce icon at the top right corner -> Apps -> Content Fields
Option B: Go to Components on the left sidebar -> J2Commerce -> Apps -> Content Fields

To help you narrow down the list, you can do a search for Content Fields, click the X, and it will turn into a green checkmark. It is now enabled and ready for setup.
Configuration
Click the Toggle Inline Help button in the toolbar and the app will show a description below each field as you configure it.
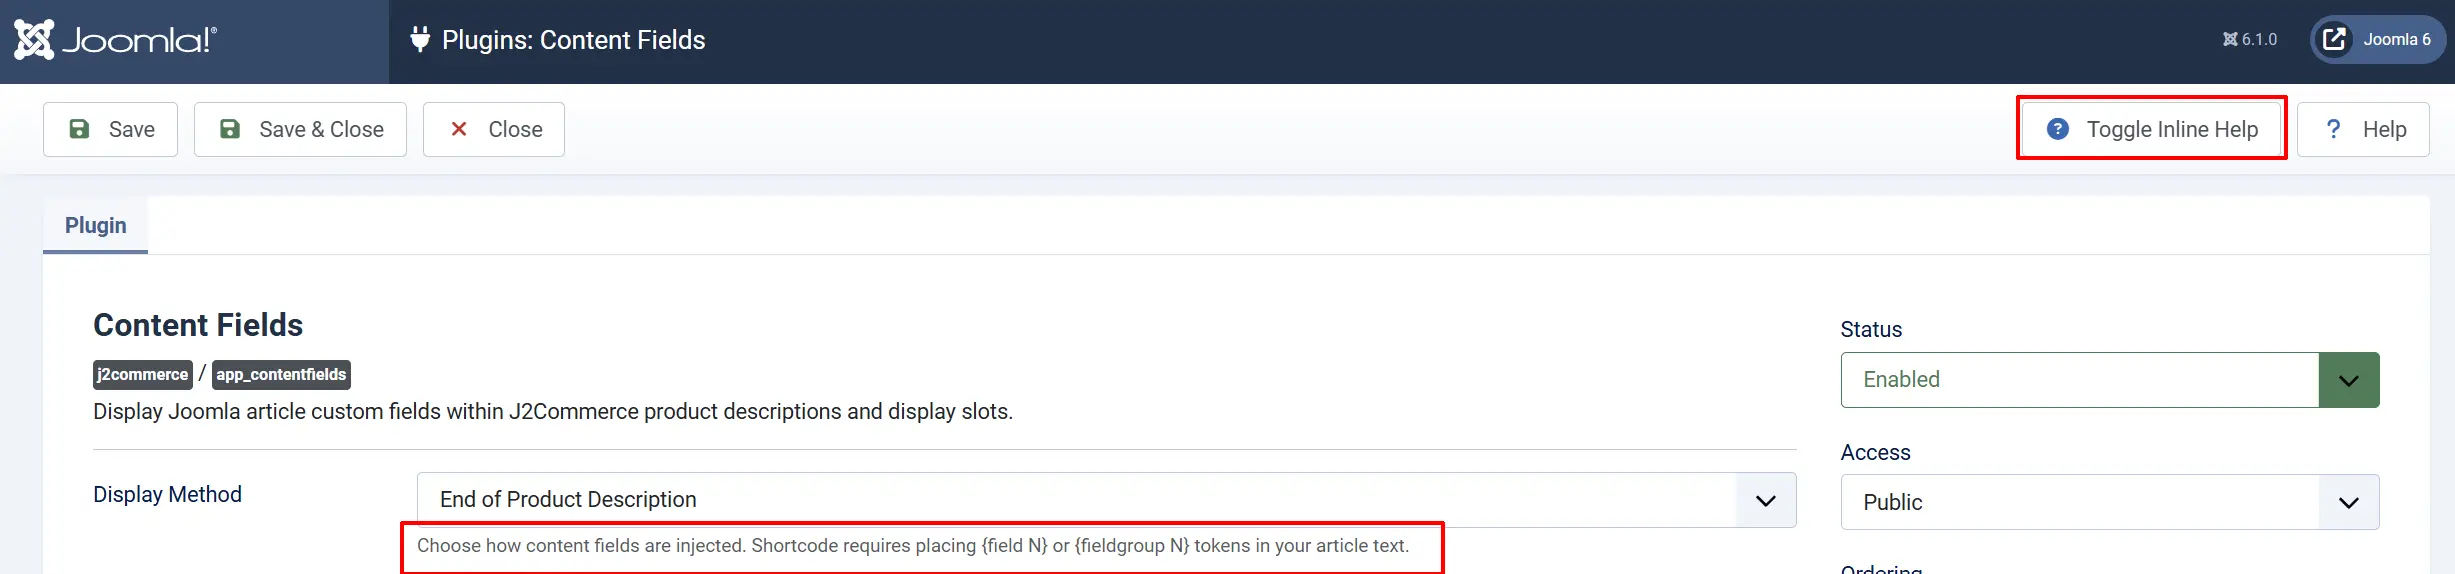
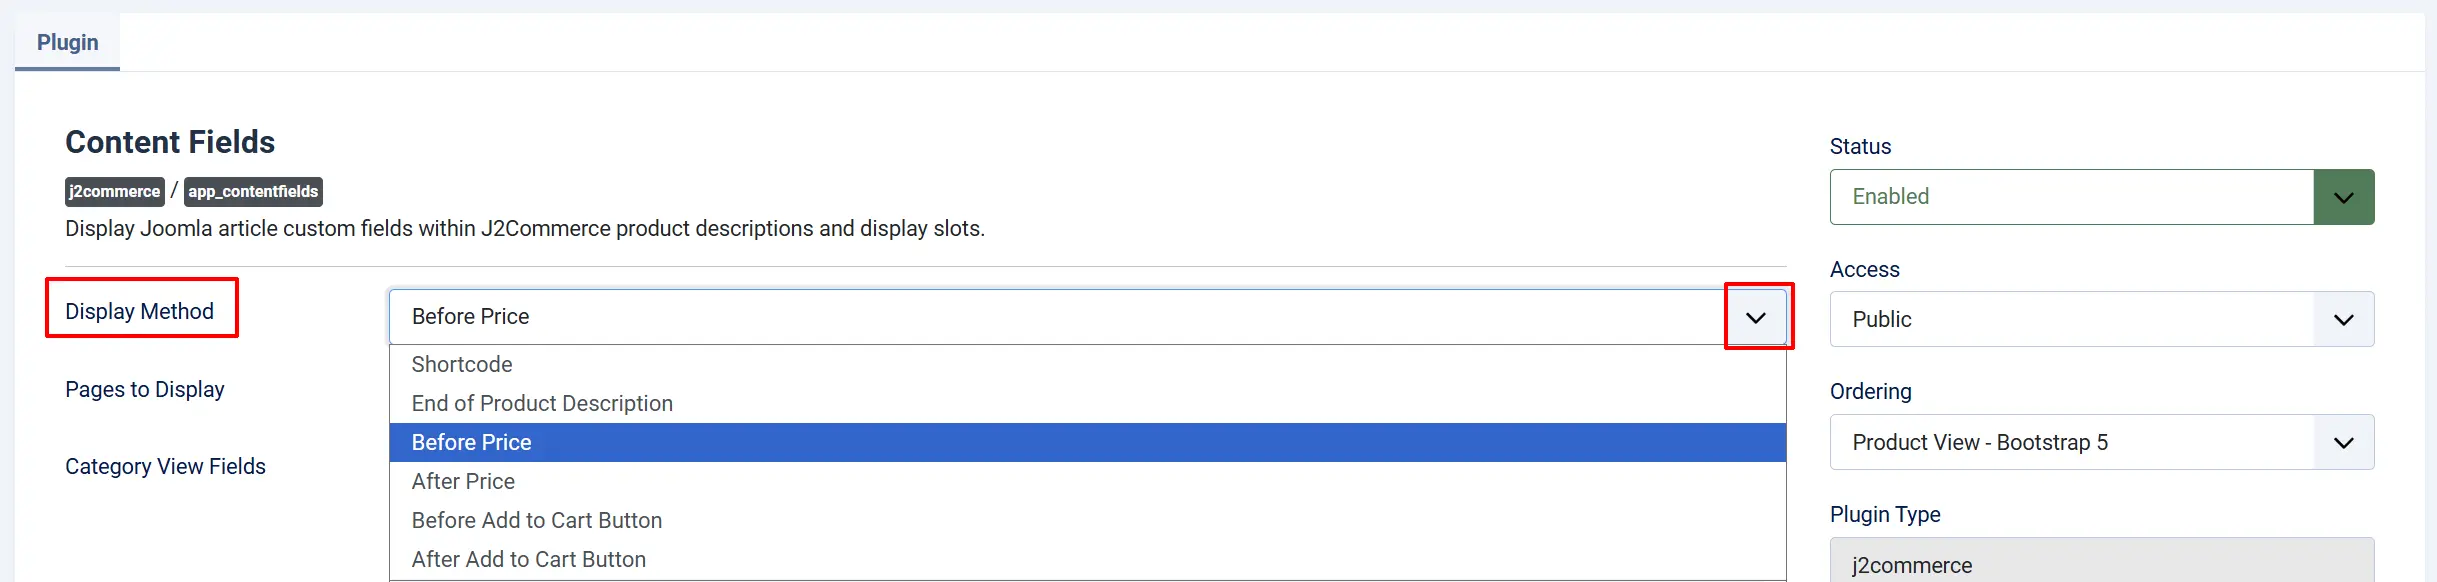
Display Method
Controls where the fields are injected on the page. Choose the option that matches your layout goal.
Belos shows the Disply methods and when to use them.
-
Shortcode: You want to place fields at exact spots inside the article text using
{field N}tokens. -
End of Product Description: Fields appear after the article description. Works with either the short (intro) or long (full) description. Default Option
-
Before Price: Fields appear directly above the price block. Good for a short spec summary.
-
After Price: Fields appear directly below the price block.
-
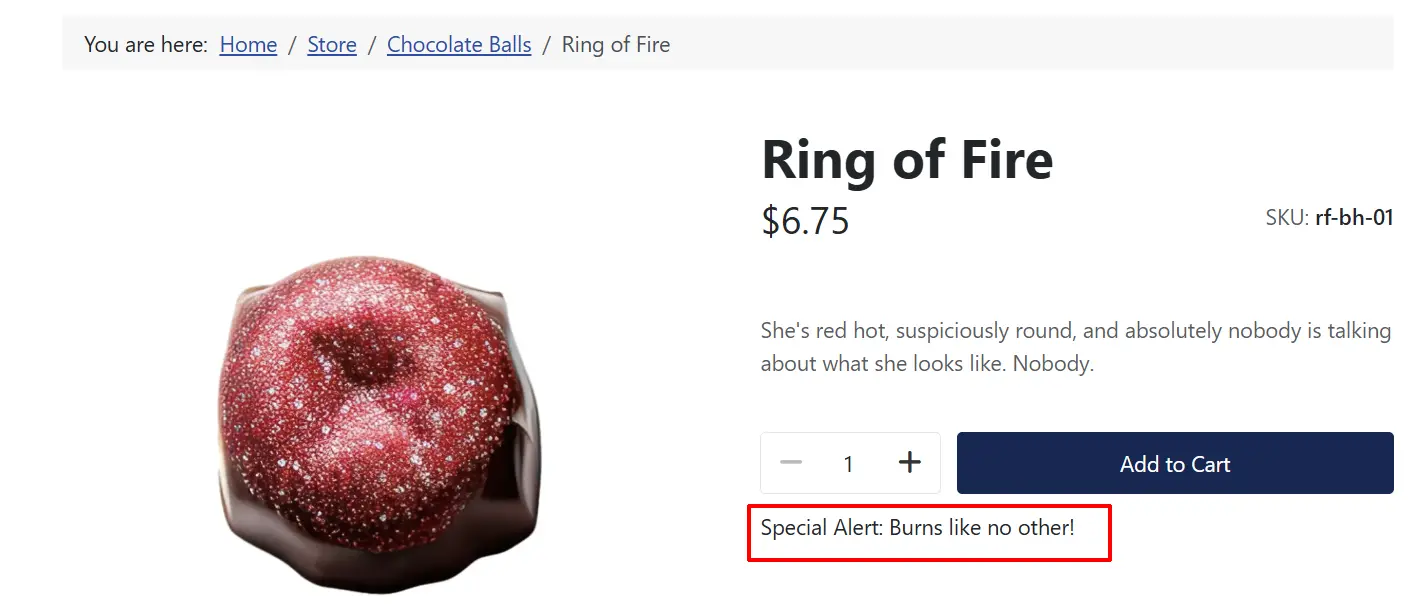
Before Add to Cart Button: Fields appear immediately above the Cart button.
-
After Add to Cart Button: Fields appear immediately below the Cart button.
Description Slot
Visible only when Display Method is set to End of Product Description.

-
Short Description (Intro): Appends fields to the intro text shown in category and article views.
-
Long Description (Full Text): Appends fields to the full article text shown only on the product detail page.
Pages to Display
Controls which pages show the fields.
-
Product View: Detail page only.
-
Category View: Product list / category page only.
-
Product & Category View: Both pages.
-
None (Hidden): Fields are never shown. Use this to temporarily hide all output without disabling the plugin.
Category/Product View Fields
These fields will be empty until you create your custom Content Fields. (See examples below on how to create the fields) Once they have been created, go back to the app and select which Joomla article custom fields to display in the product detail view

Creating Content Fields Groups
Before the fields can be attached to a category and/or product, the custom content Fields and Field Groups need to be created. Field groups are useful when you want to show or hide a related set of fields together.
Go to Content -> Field Group -> New. Set the Context dropdown to Articles or Category.
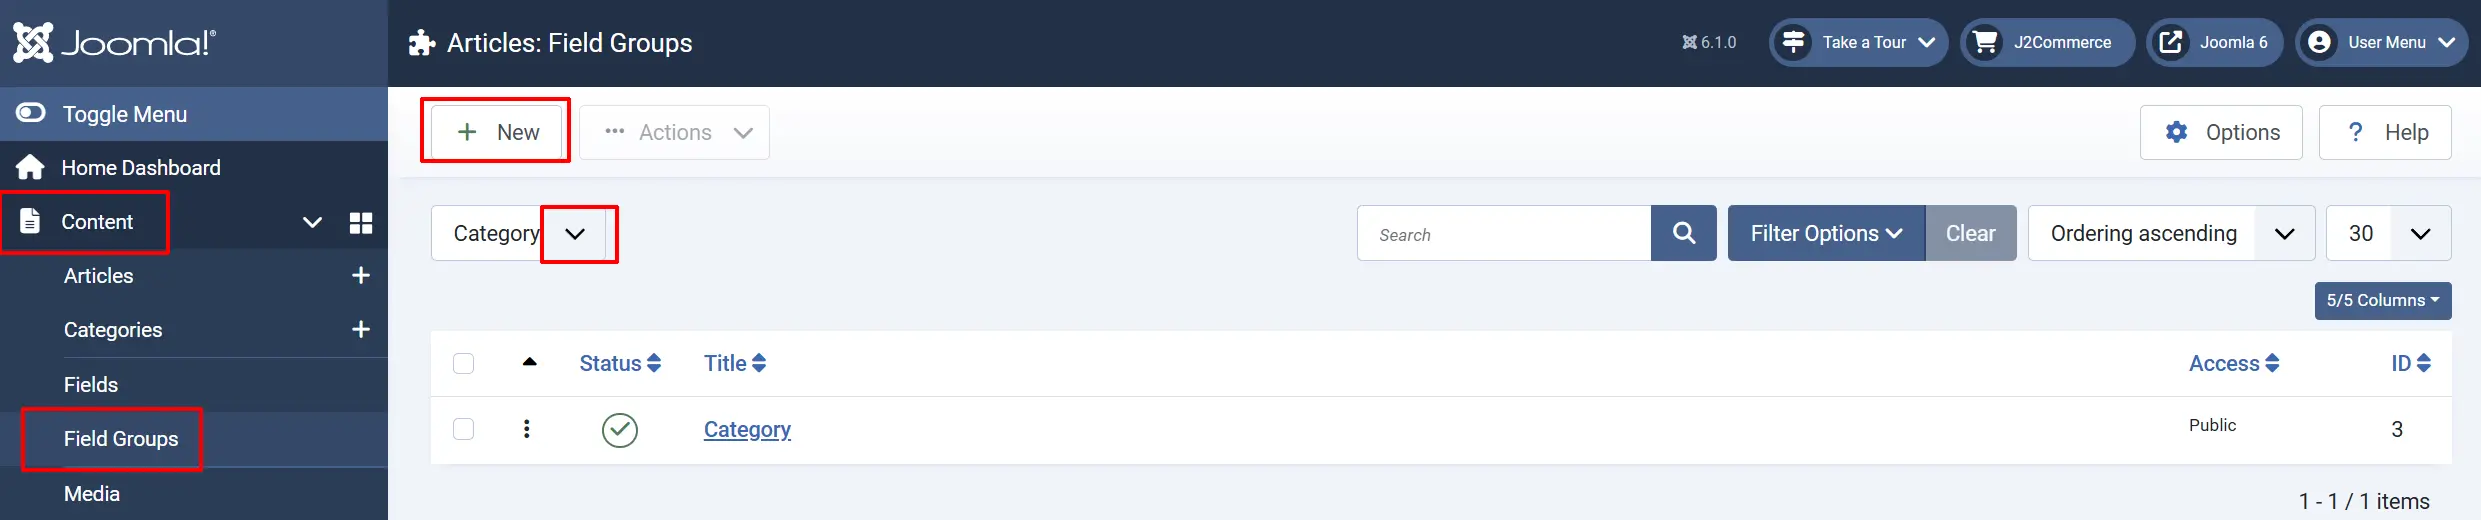
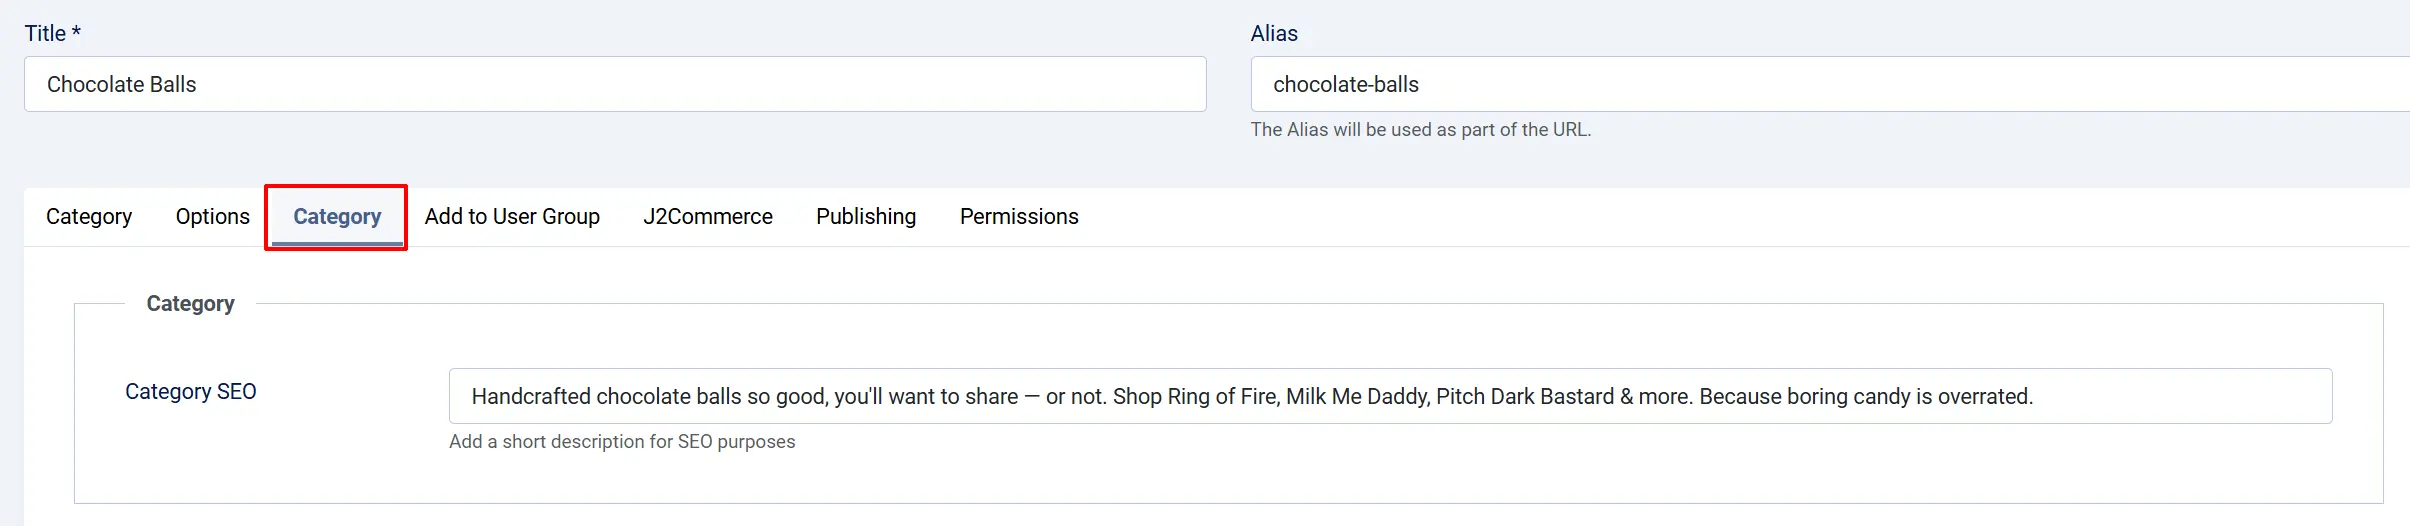
Whatever you name your Field Group will appear as a new tab in the individual products or category level. For example purposes only, we have named the Field Group 'Category'; therefore, the tab is now named 'Category' when you open a category.
Creating Content Fields
Joomla has a built-in Custom Fields system that lets you attach extra data to content items. You create a field once — for example, a text field called "Material" — and Joomla stores and displays its value alongside the article it is assigned to.
The Title and Description that you create in 'Fields' will appear on the frontend once it's been assigned to a product or category
Article Fields
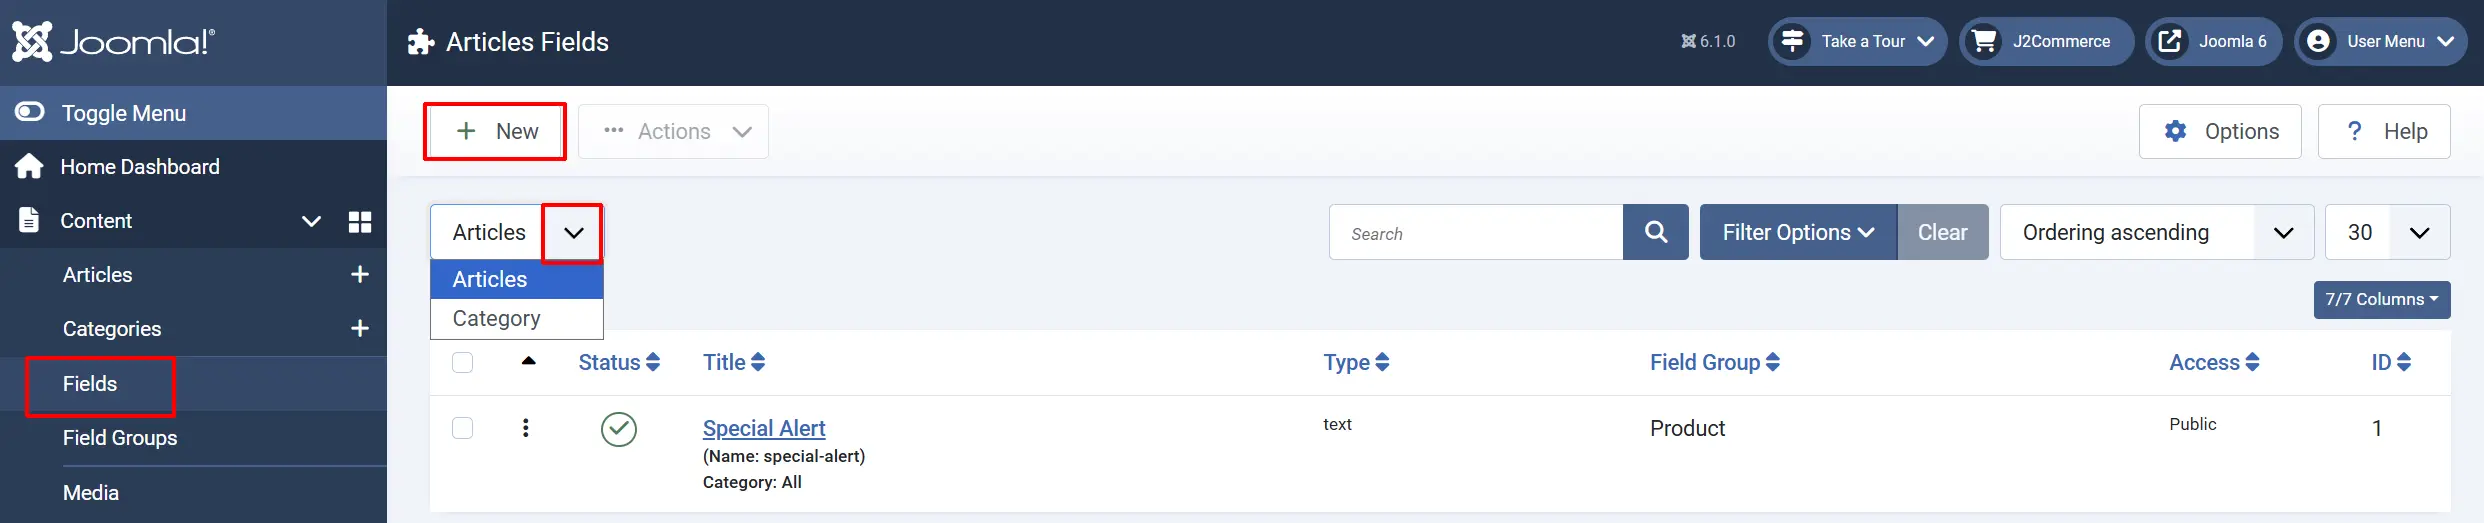
To create a custom field, go to Content -> Fields and click New. Set the Context dropdown to Articles. Fill in a label, choose a field type (Text, List, Textarea, etc.), and save. That field now appears in the article edit form under a Fields tab.
Category Fields
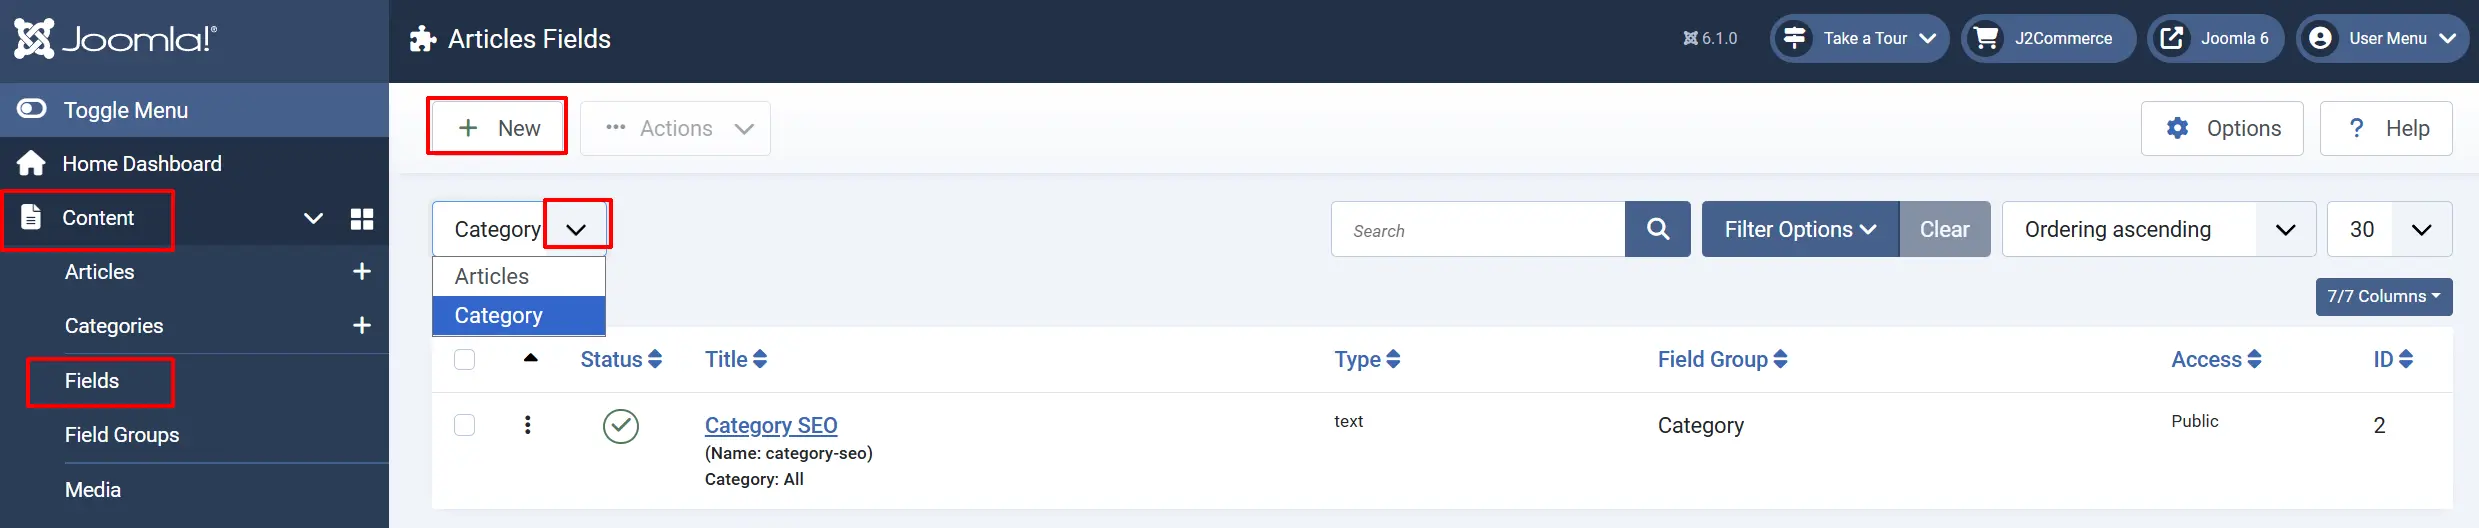
Fields can be organised into groups using Content -> Field. Set the Context dropdown to Category. The shortcode mode described later in this guide supports both individual fields and field groups. A multi-select picker listing all your com_content.article custom fields. Only the fields you select here appear on category (product list) pages. Leave empty to show nothing in the category view even if Pages to Display includes category pages.
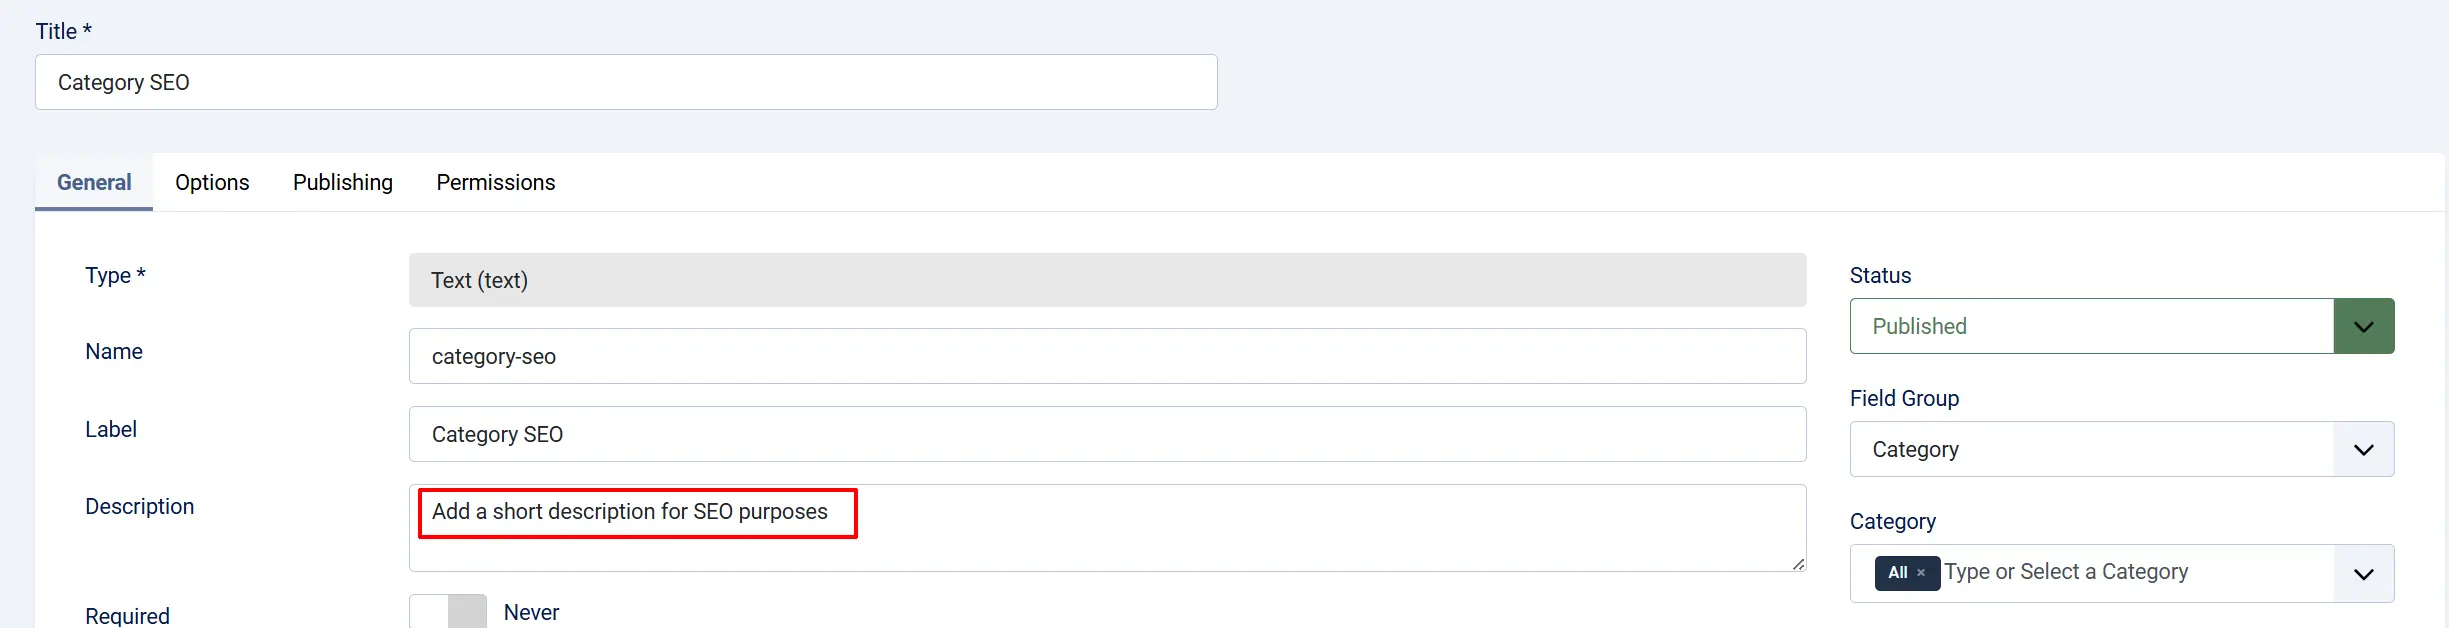
The description section is if you want to explain what should be written on the frontend. The example below shows the description appearing in the Category and the category field group tab
Customise the Fields to a Product
Open your product -> click on your new custom content field tab (in the example below, we named the tab Product but you can name it whatever is appropriate for the field. Same picker, applied to the product detail page. You can select different fields for each view — for example, show only a brief "Material" field on the list page but add "Care Instructions" and "Dimensions" on the detail page.

Frontend Product View
Show Field Label: Set to Yes to display each field's label followed by its value. Set to No to display only the field value.
Bootstrap 5 Accordion

Bootstrap 5 Accordion: Set to Yes to wrap each field value in a collapsible Bootstrap 5 accordion panel. The field label becomes the panel header.
Accordion Threshold (characters): Minimum character count that triggers the accordion wrapper. Field values shorter than this number are displayed inline (no accordion). Default: 10.
Use the accordion when you have long field values — care instructions, ingredient lists, detailed specs — that would push the layout down. Short values like a one-word colour name display inline regardless of the accordion setting.
Debug Mode
Set to Yes to write detailed log entries to administrator/logs/plg_j2commerce_app_contentfields.php. Each log line shows how many fields were resolved for a given article ID. Turn this off in production — it writes on every product page load.
Shortcode Mode Walkthrough

When Display Method is set to Shortcode, the plugin processes tokens inside your article text and replaces them with the rendered field HTML.
Supported tokens:
{field N}
{fieldgroup N}
{fieldgroup *}
Replace N with the numeric ID of the field or field group you want to display. {fieldgroup *} renders all fields attached to the article.
Finding the field ID:
- Go to System -> Manage -> Fields.
- Click the field you want to use.
- The ID appears in the browser URL:
...&id=7means the field ID is7.
Example: To show field 7 inside an article description, place this token in the article text at the exact spot you want it to appear:
{field 7}
The plugin replaces the token with the rendered field output when the page loads. If the field has no value for that article, the token disappears silently.
The Category View Fields and Product View Fields selectors have no effect in shortcode mode — the tokens in the article text control which fields appear and where.
Common Use Cases
Specs panel under the price
Set Display Method to After Price. Under Product View Fields, select the fields that hold your product specifications (dimensions, weight, material). Shoppers see these details right after the price, before deciding whether to add the product to the Cart.
Hidden detail accordion for long descriptions
Set Display Method to End of Product Description and Description Slot to Long Description (Full Text). Enable Bootstrap 5 Accordion and set Accordion Threshold (characters) to 50. Care instructions or warranty text collapses by default and expands on demand, keeping the page clean.
Mixed inline tokens in long descriptions
Set Display Method to Shortcode. In each article, place {field N} tokens directly in the body text where you want fields to appear — between paragraphs, inside a table, or after a heading. This gives you full control over placement on a per-product basis.
Troubleshooting
Fields are not appearing on the page
- Confirm the plugin is enabled under J2Commerce -> Apps -> Content Fields.
- Check Pages to Display — if it is set to None (Hidden), no fields will appear.
- Verify that at least one field is selected in Category View Fields or Product View Fields.
- Open the article attached to the product and confirm the custom field has a saved value. Empty fields produce no output.
- Confirm the custom field context is set to Articles (
com_content.article). Fields created for other contexts (e.g., Contacts) are not visible to this plugin.
Shortcode token appears in the page text
Display Method must be set to Shortcode for tokens to be processed. If it is set to any other option, {field N} tokens are left untouched in the article text.
Debug logs location
When Debug Mode is enabled, logs are written to:
administrator/logs/plg_j2commerce_app_contentfields.php
Each entry shows the number of fields resolved per article ID and the current context. Check this file first when field output is unexpected.