Vendor Management
The Vendor Management app turns your J2Commerce store into a full dealer or wholesaler portal. Approved vendors receive automatic tier-based discounts at checkout, can track their own sales statistics on a personal dashboard, and are notified by email at every stage of the application process. As a store owner you review applications in the admin, assign discount tiers, and let the system handle upgrades automatically based on purchase volume or time.
Requirements
- PHP 8.3.0 +
- Joomla! 6.x
- J2Commerce 6.x
Purchase and Download
Step 1: Go to our J2Commerce website -> Apps
Step 2: Locate the Vendor Management app -> click View Details -> Add to cart -> Checkout.
Step 3: Go to your My Downloads under your profile button at the top right corner and search for the app. Click Available Versions -> View Files -> Download Now
Install the App
In the Joomla Administrator, go to System -> Install -> Extensions.
Upload the app_vendormanagement.zip file or use the Install from URL option.

Enable the App
Once you have installed the app, you will need to enable it. There are two ways you can access the extension.
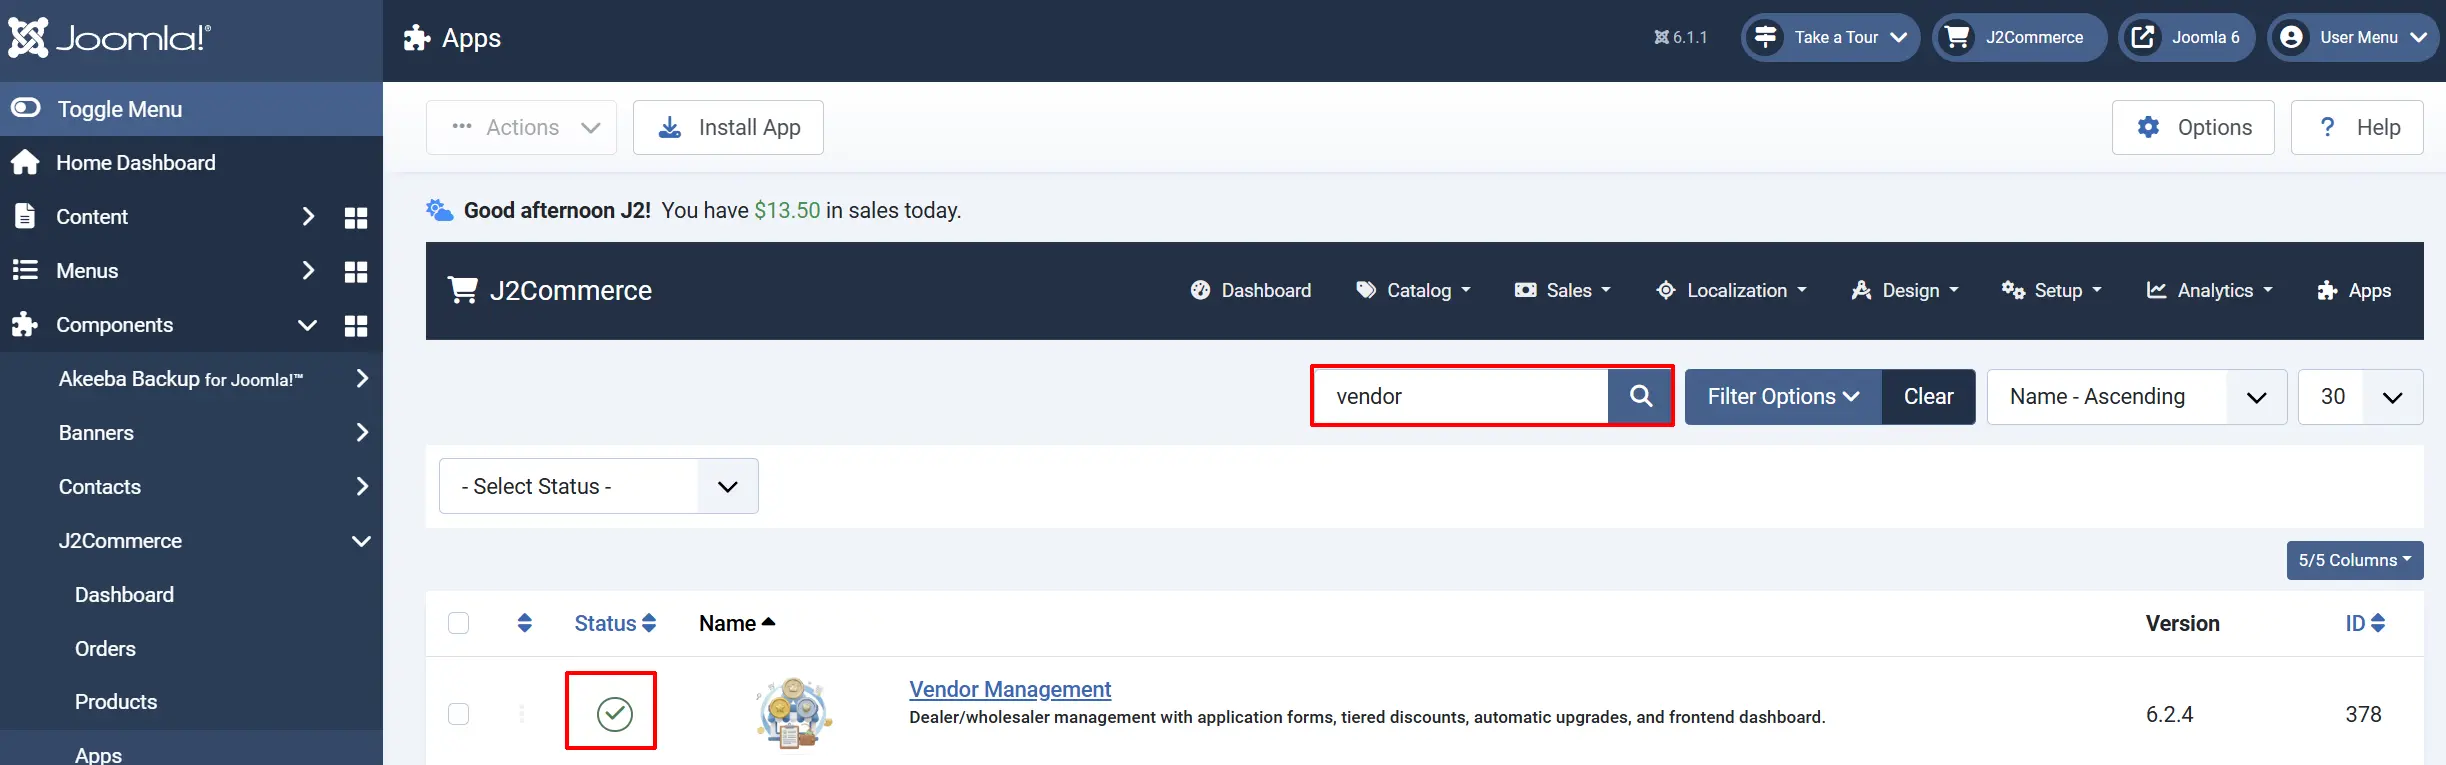
Option A: Go to the J2Commerce icon at the top right corner -> Apps
Option B: Go to Components on the left sidebar -> J2Commerce -> Apps

Look for Vendor Management, click the X, and it will turn into a green checkmark. It is now enabled and ready for setup.
Configure the App
Click the Vendor Management title next to the green checkmark to open the settings.
Click the Toggle Inline Help button in the toolbar to see a description below each field as you configure it.

Basic Settings tab
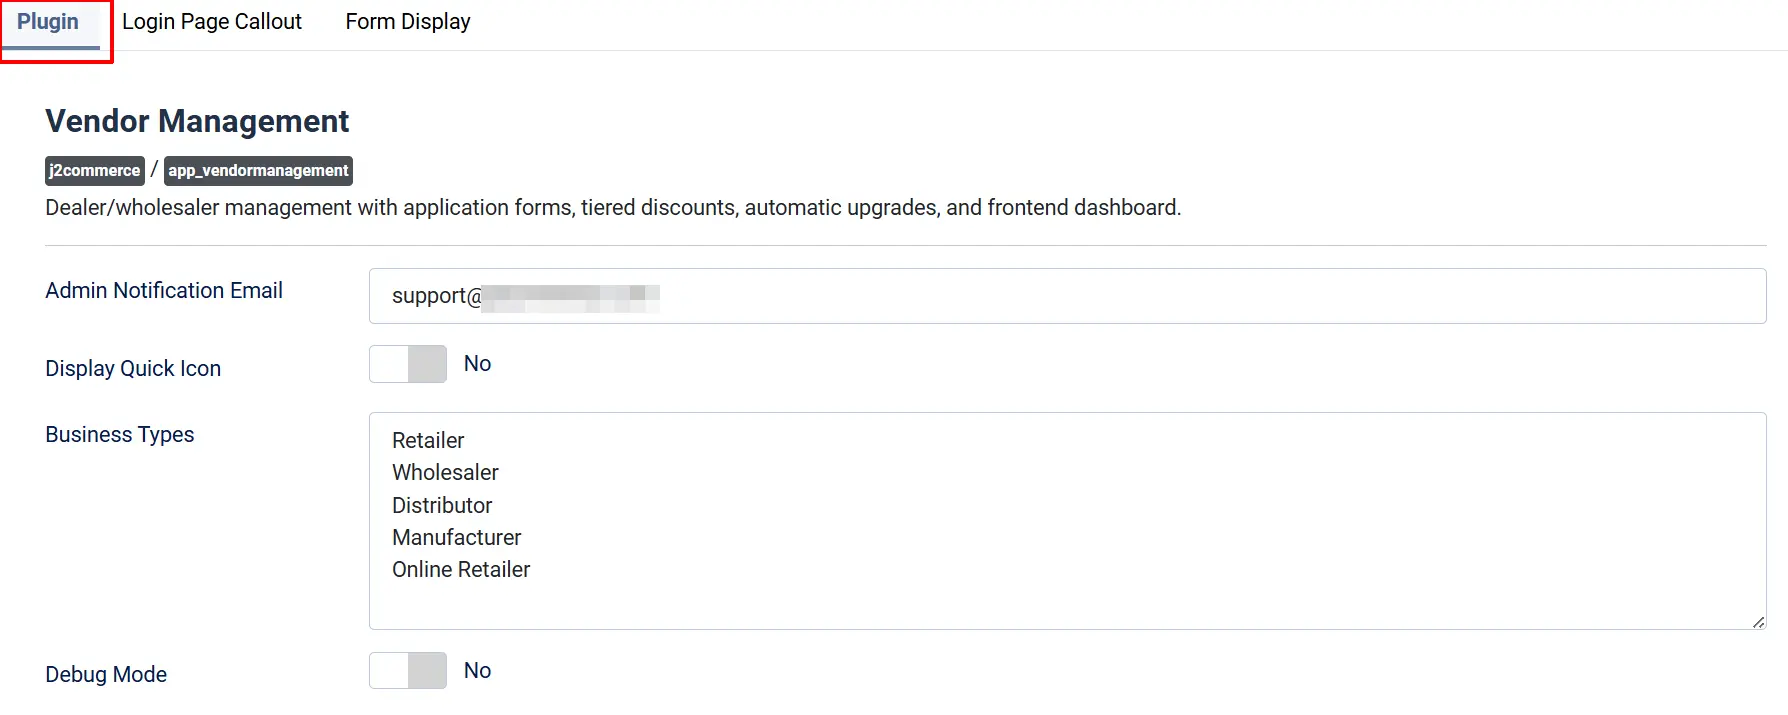
Admin Notification Email: Email address that receives new application notifications. Leave empty to use the site admin email.
Business Types: Enter one business type per line. These options appear in the application form dropdown (e.g., Retailer, Wholesaler, Distributor).
Display Quick Icon: Show a quick-access icon on the Joomla home dashboard. Requires the J2Commerce Quick Icons module.
Quick Icon Title: Label shown on the quick icon. Displays the pending application count automatically.
Debug Mode: Write detailed debug logs to administrator/logs/app_vendormanagement.php. Disable this in production.
Login Callout tab
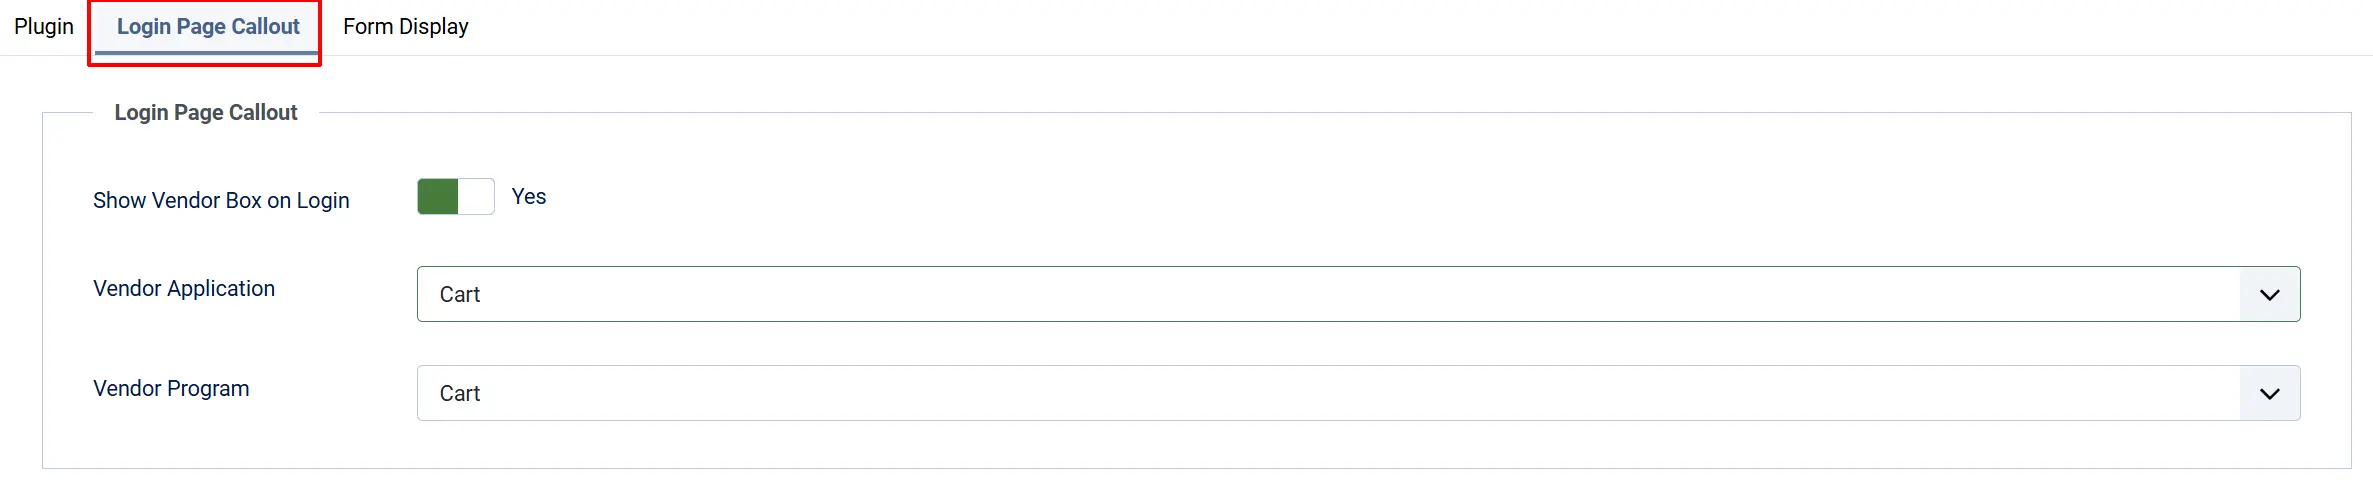
When Show Vendor Box on Login is enabled, guests who visit the vendor application page see a prompt inviting them to log in or learn more about the program before they can submit a form.
Vendor Application: Select the menu item linking to the vendor application form. The link only appears if a menu item is selected.
Vendor Program: Select the menu item linking to the vendor program information page. The link only appears if a menu item is selected.
Form Display tab
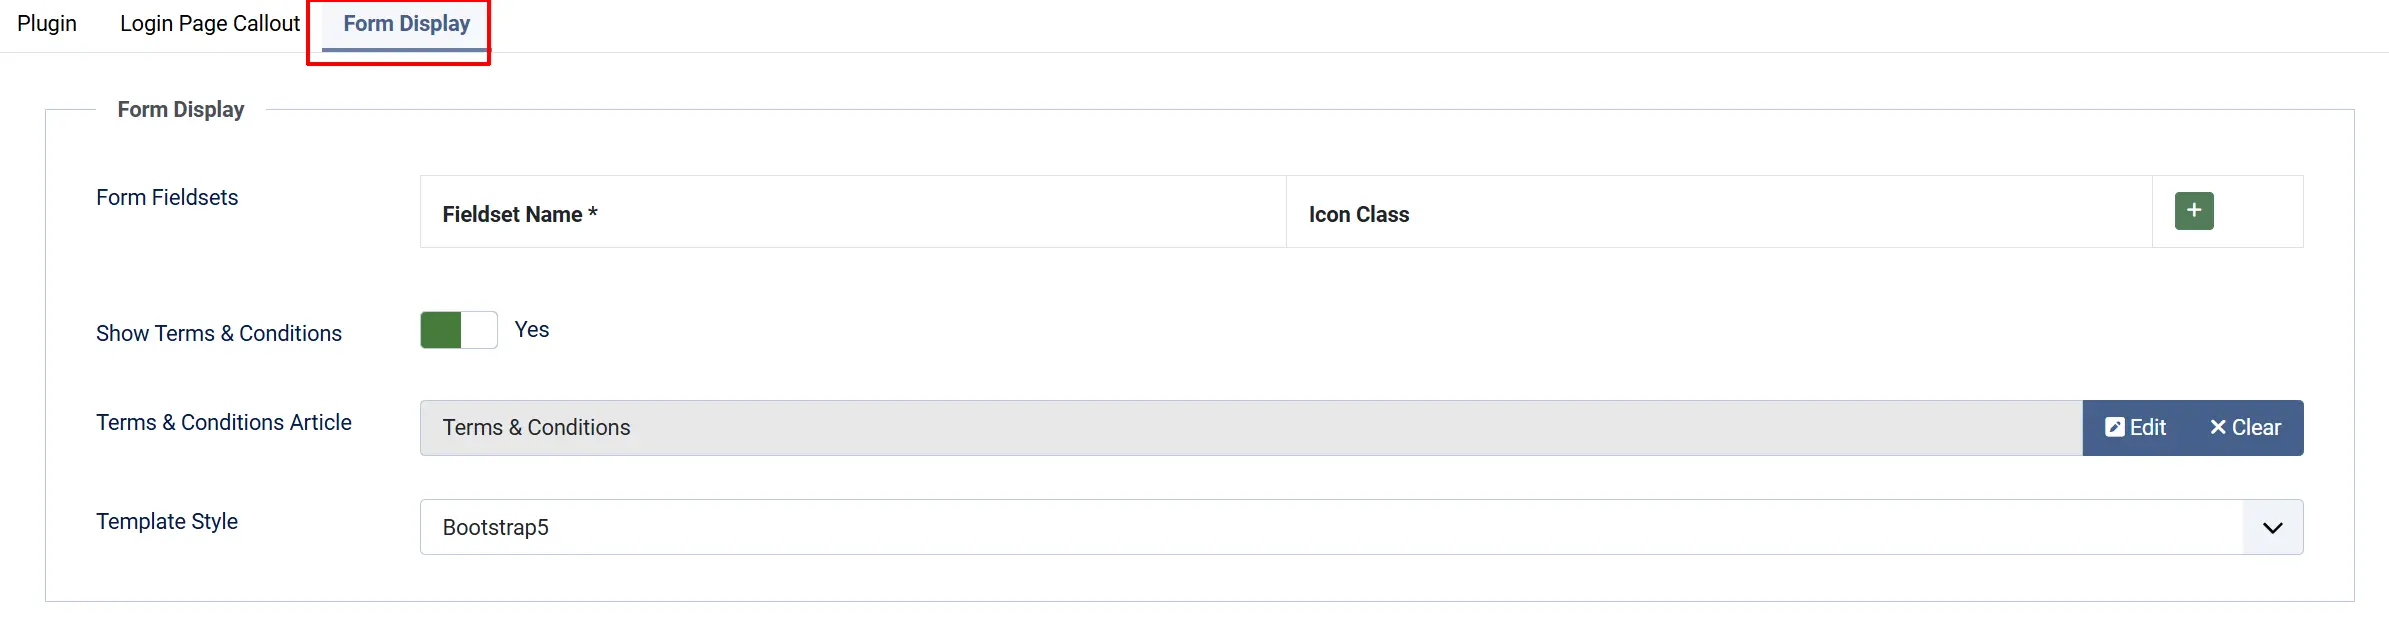
Form Fieldsets: Define named groups that visually organize fields on the application form. Each group has a Name and an optional Icon Class (e.g., fa-solid fa-building).
Show Terms & Conditions: Display a required checkbox before the submit button. Applicants must agree before they can submit.
Terms & Conditions Article: Select or create a Joomla article that opens in a modal when applicants click the terms link.
Template Layout: Choose the frontend template style — bootstrap5 (default) or uikit.
Set Up Discount Tiers
Tiers define the discount levels available in your vendor program. The app ships with Bronze, Silver, Gold, and Platinum as default examples — edit or replace them to fit your program.
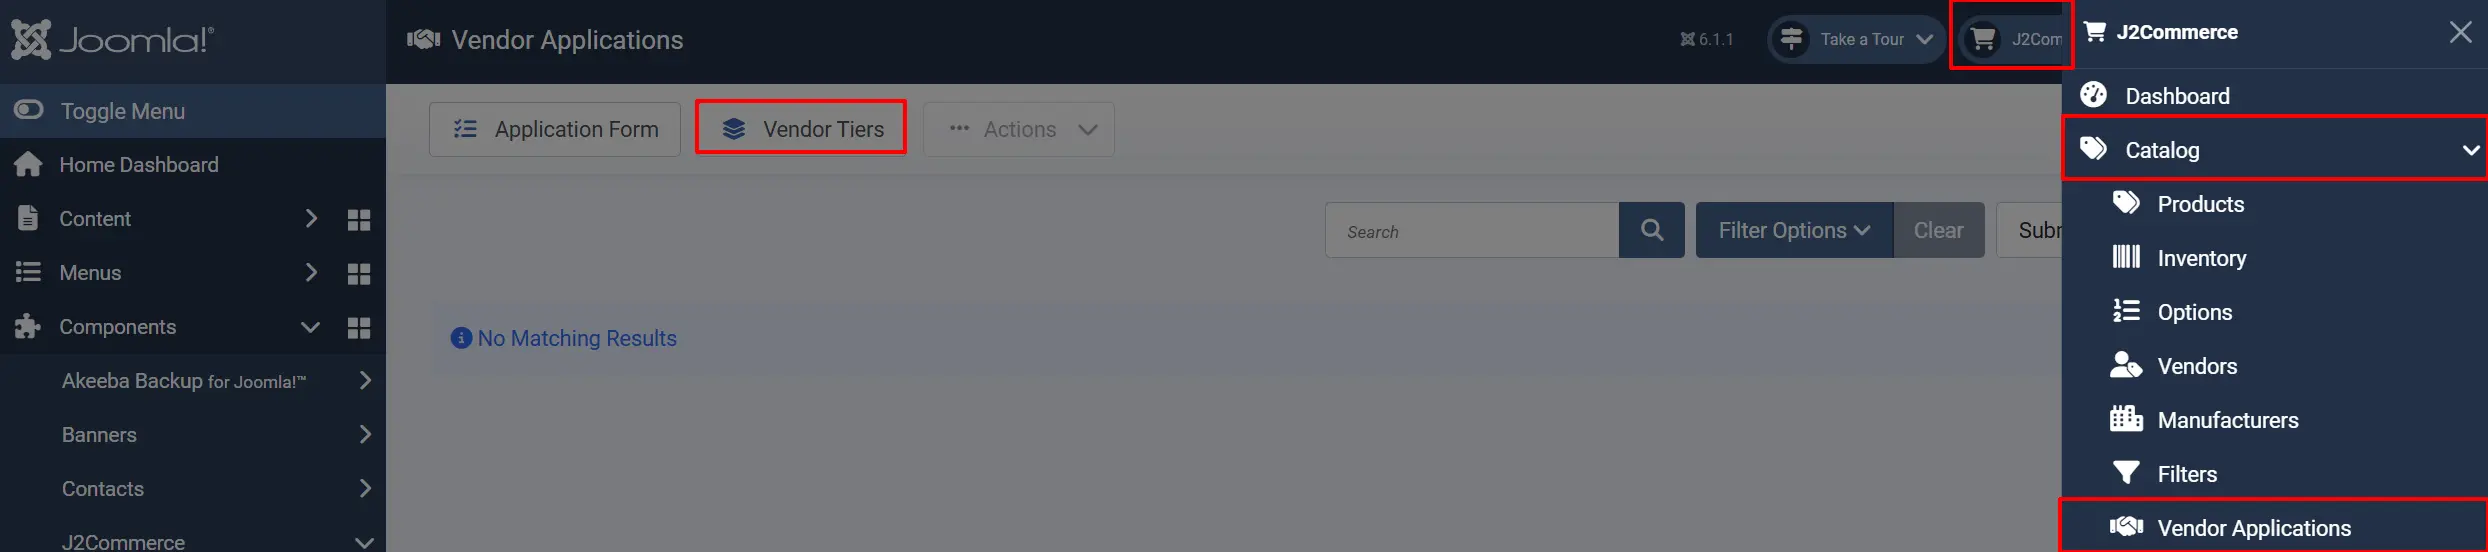
Go to J2Commerce -> Catalog -> Vendor Applications -> click Vendor Tiers in the toolbar.
Create a New Tier

Click New in the toolbar.
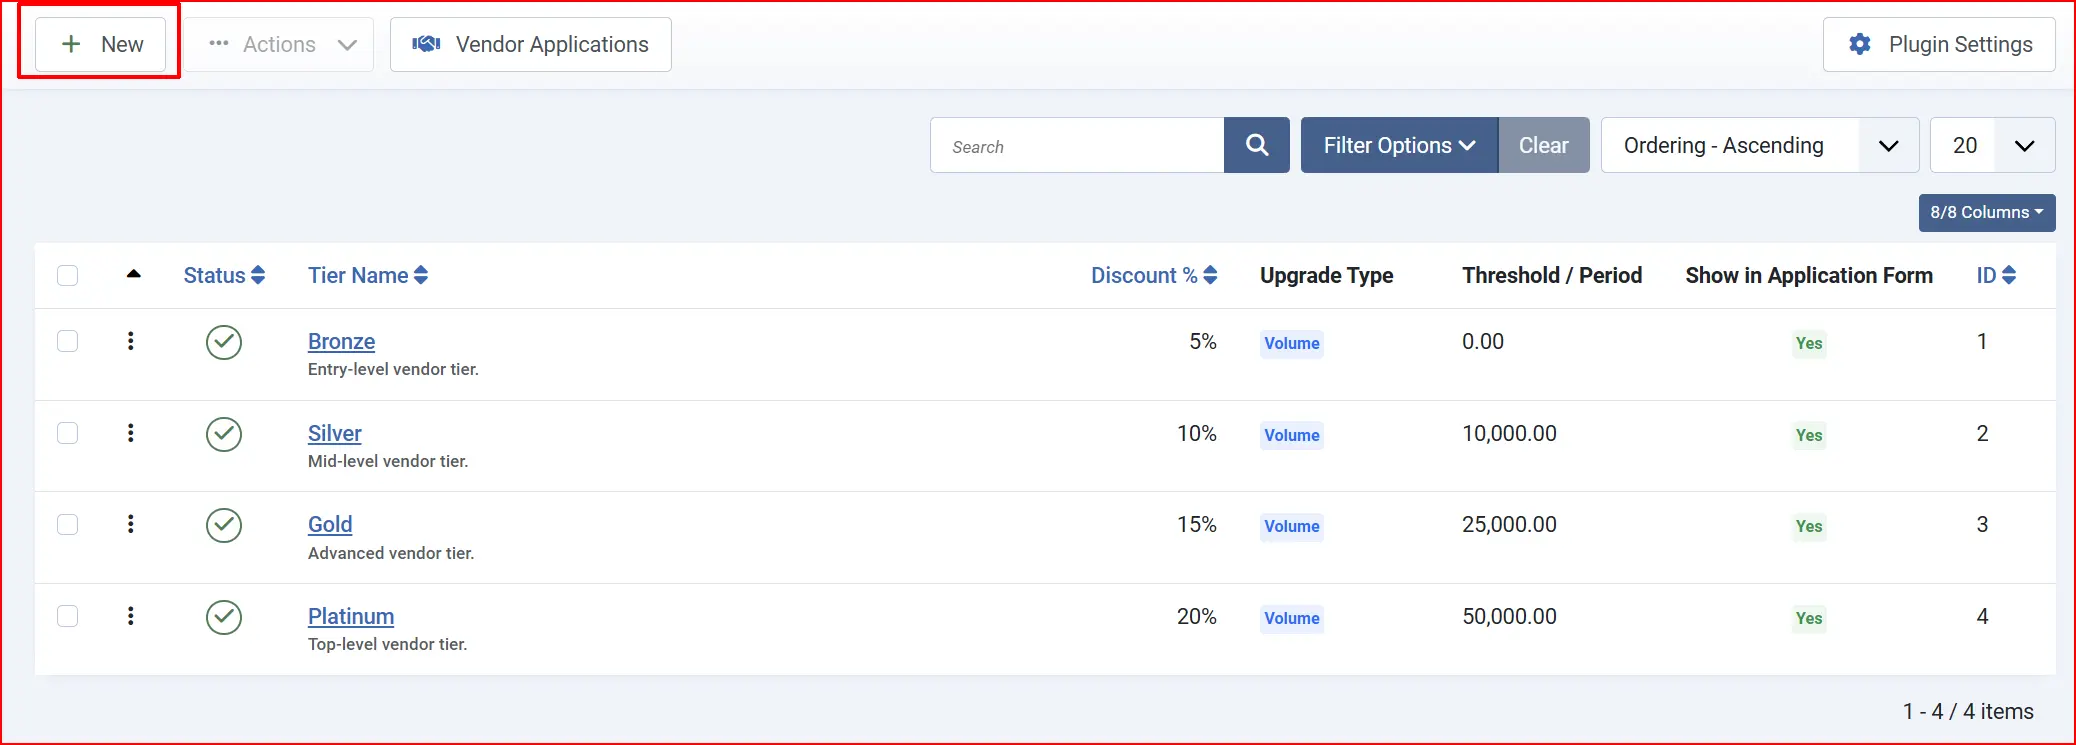
Tier Name: A unique, recognizable name (e.g., Bronze, Silver, Gold).
Description: Internal notes visible only to administrators.
Discount %: The percentage taken off all products for vendors assigned to this tier (0–100).
Upgrade Type: Volume — tier advances when the vendor's year-to-date sales reach a threshold. Time — tier expires after a set number of days.
Volume Threshold: (Volume upgrade only) Year-to-date sales amount required to move to the next tier automatically.
Time Period (Days): (Time upgrade only) Number of days before this tier expires.
**Joomla User Group:**Joomla user group assigned to vendors when they are approved at this tier. Use this to control access to content or pricing.
Show in Application Form
Whether this tier appears as a selectable option in the frontend application form.
Status: Published (active) or Unpublished (hidden from vendors and the application form).
Click Save when finished.
Tier ordering controls automatic upgrade direction — the system promotes vendors to the next higher ordering tier when the volume threshold is met.
Manage the Application Form Fields
The application form is built from J2Commerce Custom Fields that you assign to the Vendor Application Form display area. You can control which fields appear, their order, and whether each one is required.
Go to J2Commerce -> Catalog -> Vendor Applications, then click Application Form in the toolbar.

Add the Recommended Fields
Click Add Recommended Fields to automatically create and enable the standard set of application fields (Company Name, Contact Name, Email, Tax ID, Website, Business Type, Years in Business, Annual Revenue, Comments).
Customize the Field List
- Drag rows to reorder fields — the display order here matches the form order.
- Required column — toggle whether a field is required for this form without affecting other forms on your site.
- Fieldset column — assign each field to a named fieldset group (defined in the plugin's Form Display tab).
- Remove from Form — use the Change Status dropdown in the toolbar to unassign selected fields.
Create Custom Fields
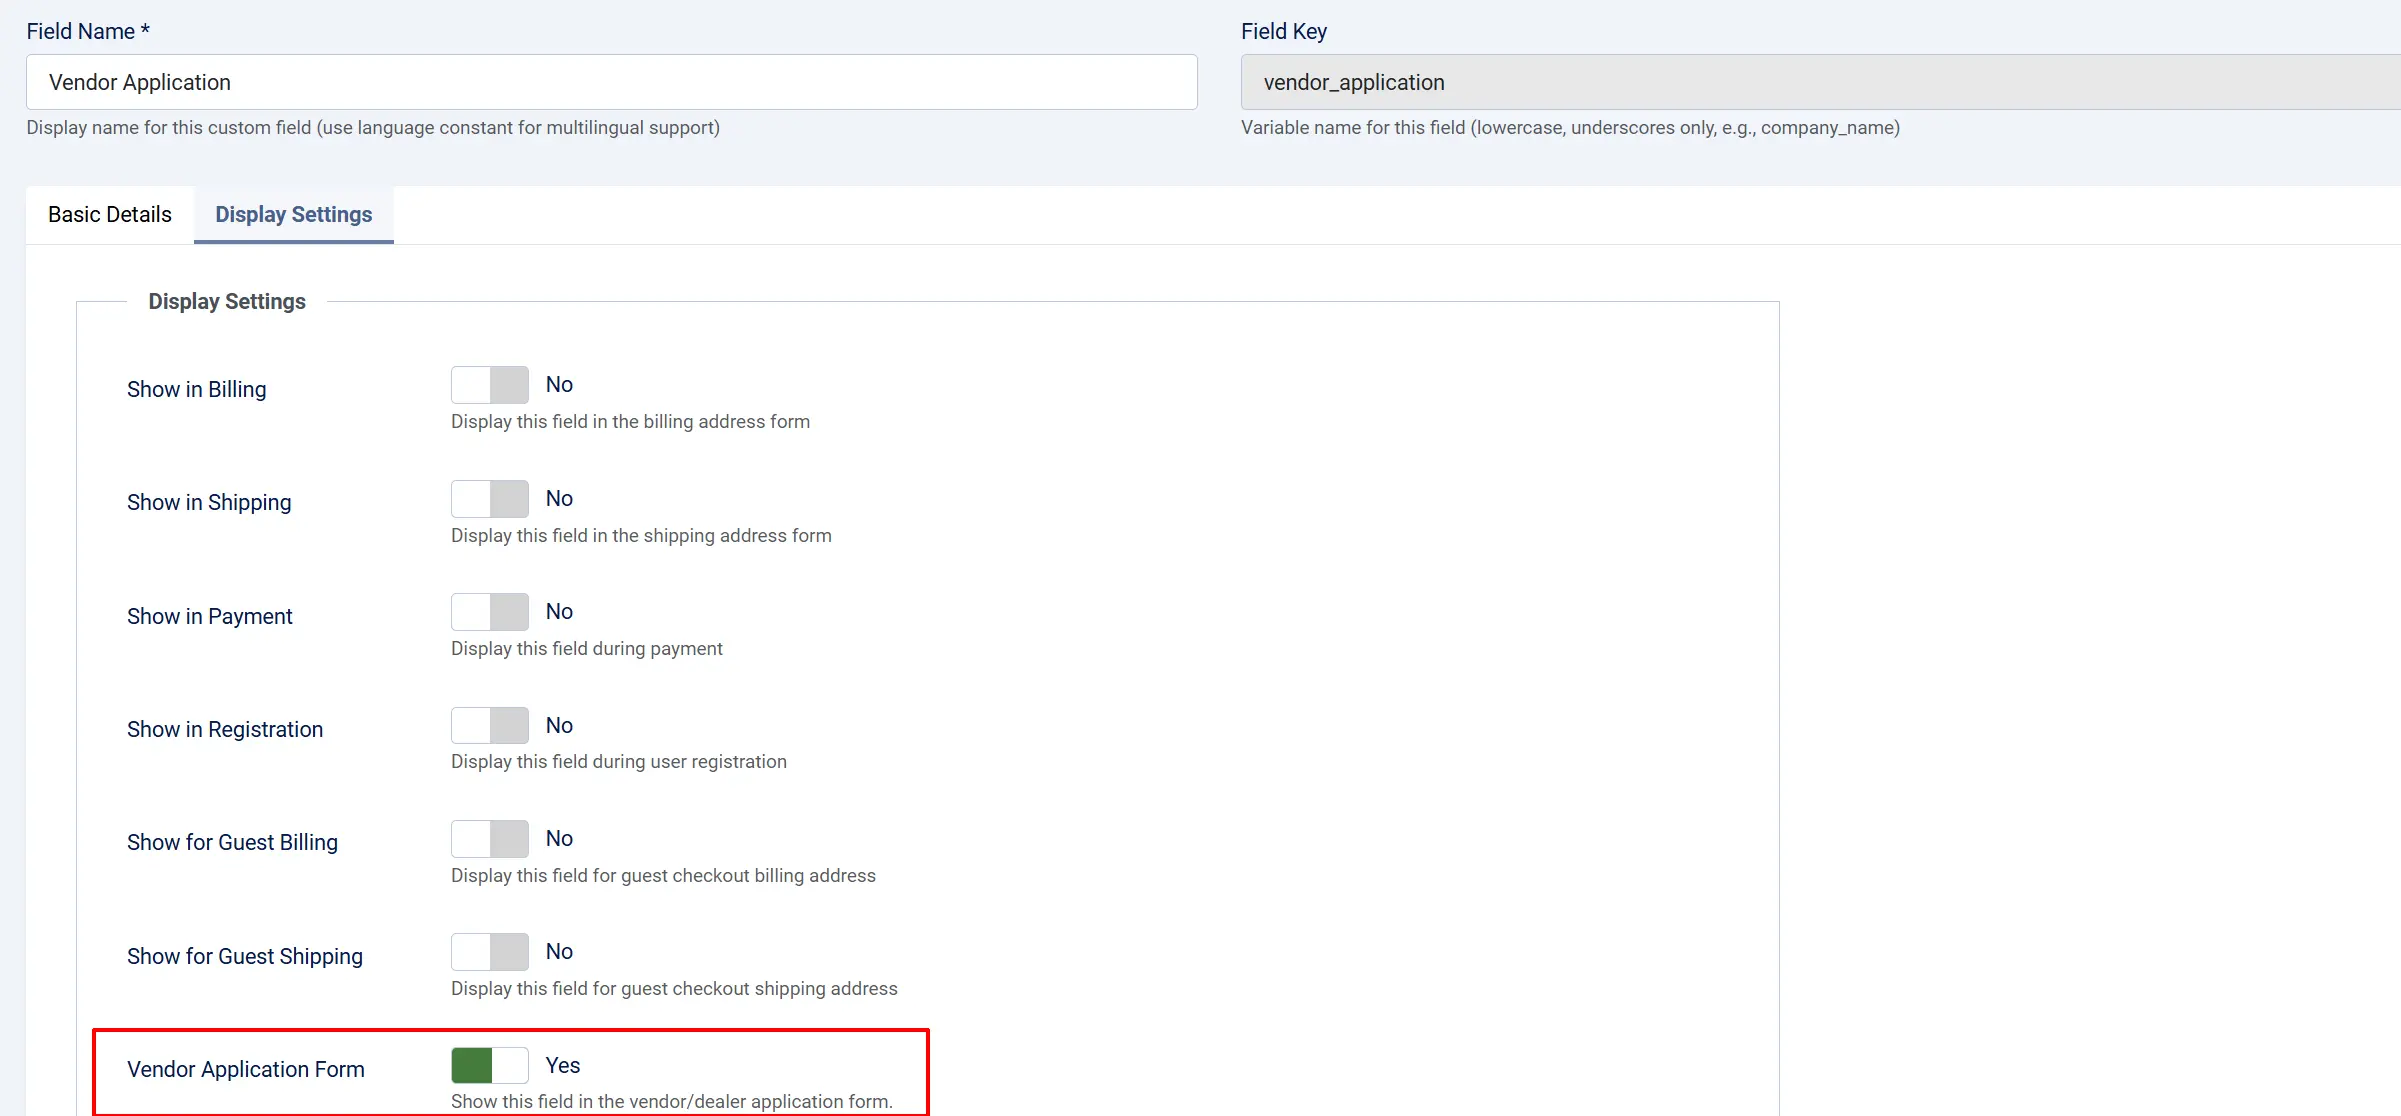
Need a field type not in the list? Go to J2Commerce -> Setup -> Checkout Fields and create a New field. Set its Display Settings to Vendor Application Form so it appears in the Field Management screen.
The plugin also adds a File Upload custom field type, useful for collecting documents such as a business license.
Add a Vendor Application Page to the Menu
Vendors reach the application form through a dedicated menu item.
- Go to Menus -> [your menu] -> click New.
- Under Menu Item Type, choose J2Commerce -> Catalog -> Vendor Application.
- In the Page Display tab, set the heading, intro text (describe your dealer program), and outro text.
- In the Form Display tab, choose whether to show the tier selection dropdown and the benefits comparison table.
- Click Save.
Use the Intro Text field to explain program benefits, minimum order requirements, and how long approval takes. Applicants read this before filling out the form.
Review and Process Applications
When someone submits the application form, you receive an email notification (at the address set in Basic Settings) and the application appears in the admin list.
Go to J2Commerce -> Catalog -> Vendor Application.
The list shows each application's company name, contact, requested tier, status (Pending / Approved / Rejected), submission date, and review date.
Filter Applications: Use the search bar and status dropdown to filter by status or tier. Click a column heading to sort.
Approve an Application
- Click View on the application row to open the detail screen.
- Review the submitted fields and any uploaded documents (click Download Certificate if a tax certificate was uploaded).
- In the Review Actions section, select the tier to assign from the Assign Tier dropdown.
- Check Notify Vendor if you want to send the applicant an approval email.
- Click Approve.
When approved:
- The vendor's Joomla user account is added to the user group defined on the assigned tier.
- A vendor stats record is created to track their purchases.
- The tier discount applies automatically at checkout from that point on.
Reject an Application
- Open the application and click Reject.
- Enter an optional rejection reason.
- Check Notify Vendor to send the applicant a rejection email.
- Click Confirm Rejection.
Bulk Status Changes
Select multiple applications using the checkboxes, then use the Change Status dropdown in the toolbar to set them all to Pending, Approved, or Rejected at once.
How Vendor Discounts Work at Checkout
When an approved vendor adds items to the cart and reaches checkout, the plugin automatically calculates their tier discount:
- J2Commerce fires the discount calculation event during checkout.
- The plugin looks up the vendor's current tier and discount percentage.
- For time-based tiers, it checks whether the tier has expired before applying the discount.
- The discount is applied per line item and shown on the order summary as Vendor Discount (Tier Name — X%).
- Tax on the discount is calculated using the product's tax profile.
The vendor never needs to enter a coupon code — the discount is fully automatic.
Automatic Tier Upgrades (Volume-Based)
Every time an approved vendor places an order, the plugin:
- Updates the vendor's lifetime, year-to-date, and month-to-date sales totals.
- Checks whether the year-to-date total has reached the next tier's volume threshold.
- If the threshold is met, the vendor is automatically upgraded — their Joomla user group is updated and an approval email is sent.
- The vendor's tier progress is recalculated and displayed on their dashboard.
Vendor Dashboard (Frontend)
Approved vendors see a Vendor Dashboard tab on their My Account / My Profile page in the J2Commerce frontend. The tab is visible only to users with an approved application.
The dashboard shows:
- Current Tier — name, discount percentage, member since date, and expiry date for time-based tiers.
- Progress to next tier — a visual progress bar showing how close the vendor is to the next volume threshold, plus the currency amount remaining.
- Statistics cards — Lifetime Sales, Year-to-Date Sales, Month-to-Date Sales, Total Orders, and Last Order date.
- Tier Benefits table — all active tiers with their discount percentages and qualification thresholds, with the vendor's current tier highlighted.
- View Order History link — takes the vendor to their order list.
If the vendor is on the highest available tier, a congratulatory message replaces the progress bar.
Email Notifications
The plugin sends HTML email notifications at three points in the application lifecycle:
| When sent | Recipients | |
|---|---|---|
| Application Received | Immediately after a vendor submits the form | Applicant + admin notification address |
| Application Approved | When an administrator approves and checks Notify Vendor | Applicant |
| Application Rejected | When an administrator rejects and checks Notify Vendor | Applicant |
You can customize the email subjects, body content, and recipients through the J2Commerce Email Templates screen (J2Commerce -> Design -> Email Templates). Look for the Vendor Management email type. The following tags are available in templates:
| Tag | Content |
|---|---|
[APPLICATION_ID] | Unique application identifier |
[USER_NAME] | Applicant contact name |
[COMPANY_NAME] | Applicant company name |
[TIER_NAME] | Assigned tier name |
[DISCOUNT_PERCENT] | Tier discount percentage |
[REJECTION_REASON] | Reason the application was not approved |
[APPLICATION_URL] | Admin link to view the application |
[LOGIN_URL] | Frontend login page URL |
[SUPPORT_EMAIL] | Store support email address |
[SITE_NAME] | Website name |
Tips
- Set up tiers before creating the menu item — the benefits comparison table on the application form is only populated when tiers exist.
- Use user groups per tier — this lets you show tier-specific content, access Joomla articles, or apply other access controls beyond the discount.
- Add intro text to the application menu item — explain your program requirements and benefits clearly so applicants submit complete applications.
- Enable the quick icon — the pending application count in the dashboard icon makes it easy to spot new submissions without navigating into the component.
- Use the File Upload custom field for tax certificates or business licences — applicants can attach PDF, JPG, or PNG files up to 10 MB.
Troubleshooting
Vendor discount does not appear at checkout
Cause: The vendor's application is not approved, or the tier is disabled.
Solution:
- Go to J2Commerce -> Catalog -> Vendor Application.
- Find the vendor's application and confirm its status is Approved.
- Check that the assigned tier is published: Vendor Tiers -> verify the tier shows a green checkmark.
- If the tier is time-based, confirm it has not expired by opening the vendor's application detail and checking the tier start and end dates.
Application form shows "Application Received" message instead of the form
Cause: The logged-in user already has a pending application on file.
Solution: This is expected behavior. The form prevents duplicate submissions. To reset an application, go to J2Commerce -> Catalog -> Vendor Application, open the application, and set its status to Rejected or delete it if it was a test submission.
Vendor Dashboard tab does not appear in My Profile
Cause: The vendor's application is not approved, or their vendor stats record has not been created.
Solution:
- Confirm the application status is Approved in the admin.
- Confirm the approved tier has a non-zero Discount % — a tier with 0% discount is valid but the dashboard tab requires an active tier assignment.
- Clear the site cache: Home Dashboard -> Cache -> Delete All.
Automatic tier upgrade did not happen
Cause: The vendor's year-to-date sales have not yet reached the next tier's volume threshold, or the tier's upgrade type is set to Time rather than Volume.
Solution:
- Go to Vendor Applications and open the vendor's application to see their current tier.
- Go to Vendor Tiers and confirm the next tier in ordering has Upgrade Type set to Volume and a numeric Volume Threshold.
- Review the vendor's year-to-date sales on their dashboard — upgrades only trigger when a new order is placed that pushes the total over the threshold.
Emails are not being sent
Cause: No email template is configured, or the admin notification email is misconfigured.
Solution:
- Go to J2Commerce -> Design -> Email Templates and check for a Vendor Management email type entry. If none exists, the plugin uses built-in fallback templates.
- Verify the Admin Notification Email field in the plugin's Basic Settings contains a valid email address, or leave it empty to use the site default from System -> Global Configuration -> Mail Settings.
- Enable Debug Mode in the plugin settings and check
administrator/logs/app_vendormanagement.phpfor any send errors.