Product Compare
The Product Compare add-on lets shoppers select multiple products and view them side-by-side in a comparison table. A Compare button appears on product pages, category pages, or both — depending on your settings. When a shopper visits the comparison page, they see product images, prices, SKU, stock status, weight, dimensions, specifications, and more, all in one easy-to-read table.
The compare list is stored in the browser session, so it works for both guest shoppers and logged-in customers without requiring any account.
Purchase and Download
The Product Compare app is a separate add-on available from the J2Commerce Extensions Store. It is not included with the core J2Commerce 6 component.
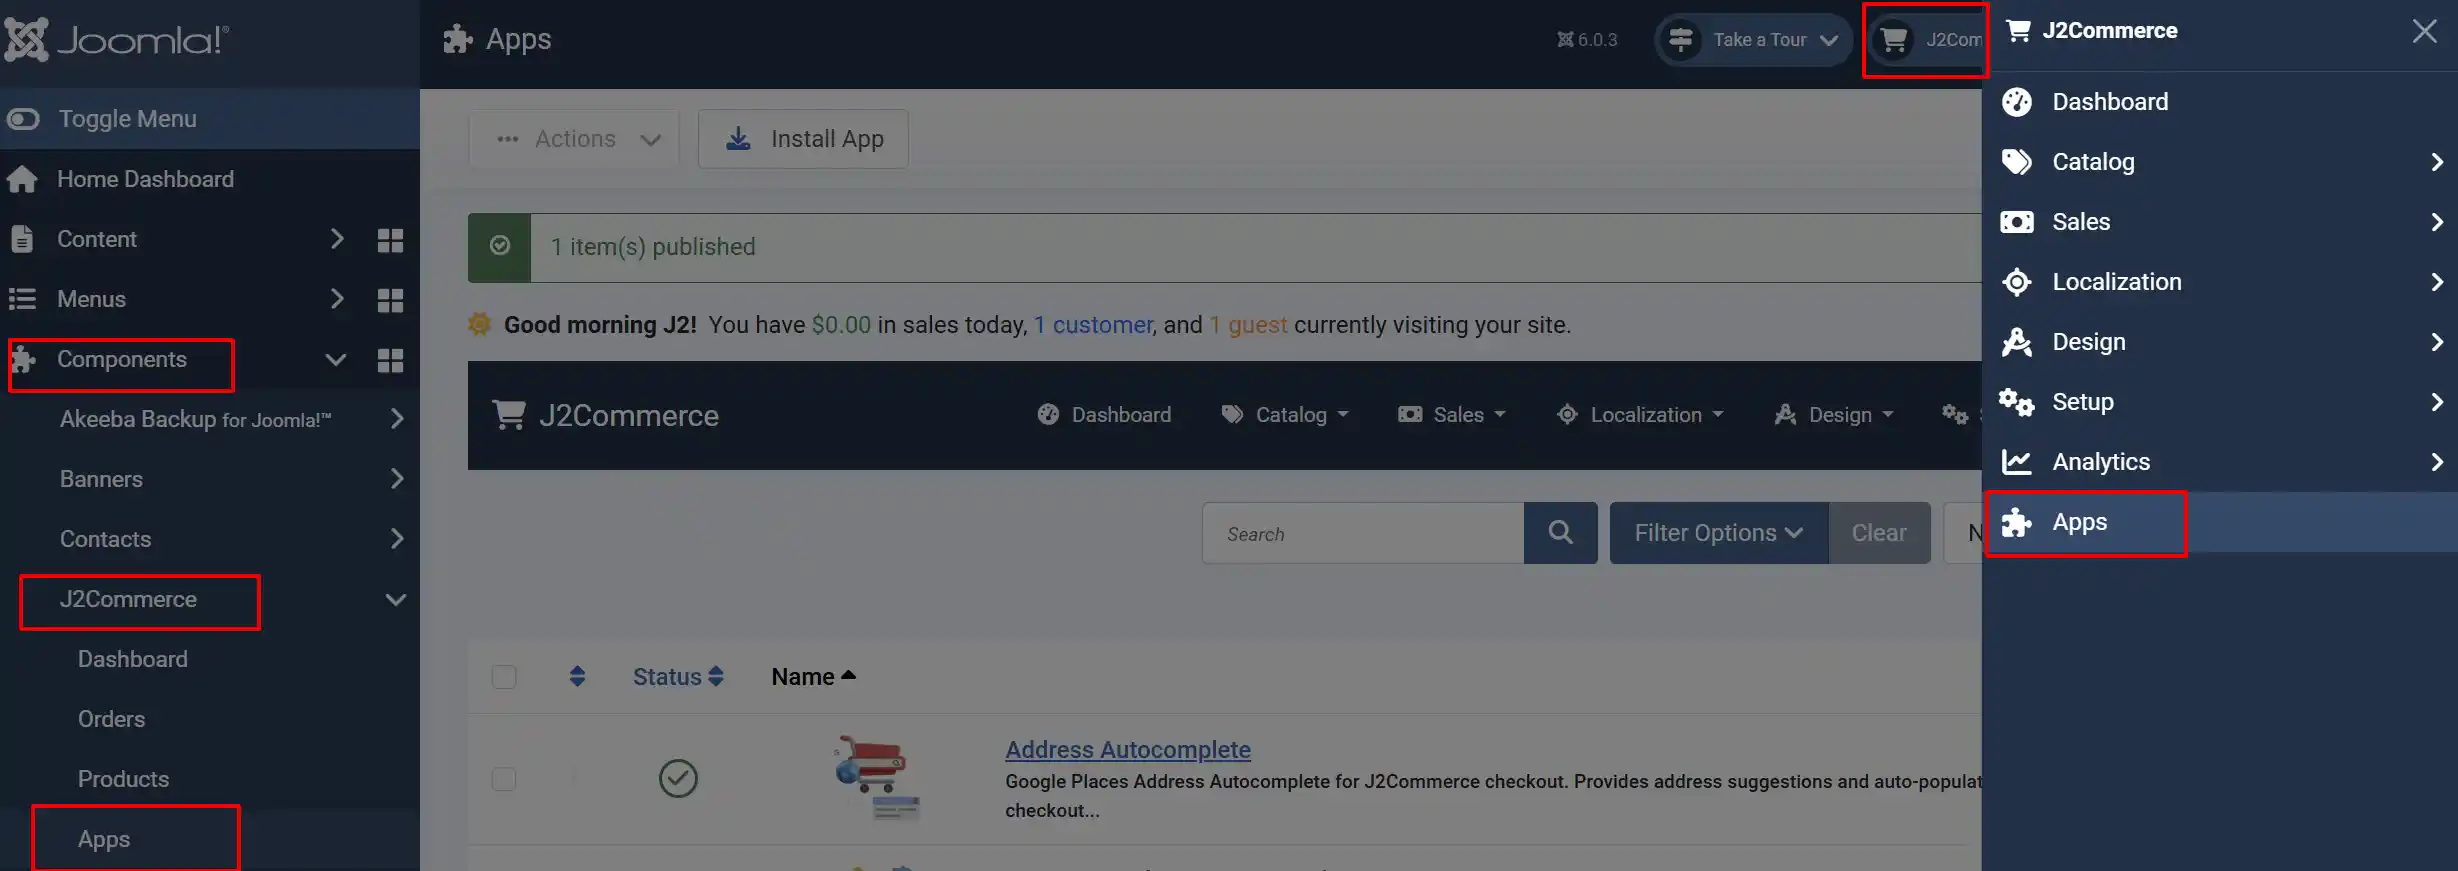
Step 1: Go to the J2Commerce website -> Apps.
Step 2: Locate the Product Compare app -> click View Details -> Add to cart -> Checkout.
Step 3: Go to My Downloads under your profile menu at the top right corner and search for the app. Click Available Versions -> View Files -> Download.
Install the App
You can install this Product Compare App using the Joomla installer. The following steps help you with a successful installation.
In the Joomla admin, go to System -> Install -> Extensions
Upload the app_productcompare.zip file or use the Install from URL option.
 (1)-a6689f12b23b8e992f5c2a169737672f.webp)
The plugin installs and enables automatically.
After installation, go to J2Commerce -> Apps to configure the plugin.
Create a Compare Page Menu Item
Before customers can view their comparison list, you need to create a menu item that points to the compare page. Without this, the compare list link will not work.
- Go to Menus -> [Your Menu] -> Add New Menu Item.
- Set the Menu Item Type to J2Commerce -> Products -> Product Comparison.
- Give the menu item a title such as Compare Products.
- Set the menu item to Published.
- Click Save & Close.
The plugin automatically detects this menu item and uses it to link shoppers to the comparison page after they click Compare on a product.
You can place this menu item in a hidden menu that is not displayed in the navigation — it only needs to exist so J2Commerce can build the correct URL.
Configure the Plugin
Go to J2Commerce -> Apps and click on Product Compare to open its settings.
Click the Toggle Inline Help button in the toolbar and the app will show a description below each field as you configure it.
Basic Settings
Display In: Where to show the Compare button. It controls where the Compare button appears:
- Product View Only — Shows the Compare button only on individual product detail pages.
- Category View Only — Shows a compact icon-only Compare button on product listing and category pages.
- Both Views — Shows the button on both product detail pages and category/listing pages.
Product Link Type: How to link to a product from the compare page. It controls where the product title and image link to when the shopper clicks on a product name in the comparison table. Use J2Commerce Product List to link back to the J2Commerce product view. Use Article Layout if your products are linked to Joomla articles.
Maximum Products to Compare: How many products a shopper can add to their compare list
Display Settings
These settings control which rows appear in the comparison table.
Product Image Type: Use thumbnail or main product image
Product Image Height: Maximum image height in pixels
Show SKU: Display the product SKU row
Show Brand/Manufacturer: Display the manufacturer row
Show Price: Display the price row
Show Stock Status: Display the stock availability row
Show Description: Display the product short description row
Show Weight: Display the product weight row
Show Dimensions: Display the length × width × height row
Show Specifications: Display product filter/specification rows
Show Add to Cart: Display Add to Cart buttons on the compare page
Turn off any rows your store does not use. For example, if your products have no weight data, disable Show Weight to keep the comparison table clean.
Messages
Show message after adding: Display a success message when a product is added
Message text: The text to show in the success message
When Show message after adding is enabled, a small message appears near the Compare button after the shopper clicks it. You can enter a custom message such as "Product added to comparison list!" or leave the field blank to use the built-in default text.
Icons
The Compare button uses Font Awesome icons. You can change these to any valid Font Awesome icon class.
Icon before adding: Icon shown on the Compare button before the product is added.
- Default:
fa-solid fa-arrow-right-arrow-left
Icon after adding: Icon shown after the product has been added to the list
- Default:
fa-solid fa-circle-check
Enter the full Font Awesome class string, for example fa-solid fa-scale-balanced or fa-regular fa-star. The icon appears to the left of the button label.
Advanced
Debug Mode: Write detailed plugin activity to the Joomla log file
Enable Debug Mode only when troubleshooting. Logs are written to [joomla]/logs/app_productcompare.php. Disable this setting in production as it adds overhead to every page where the Compare button appears.
How It Works for Shoppers
Once the plugin is configured and a menu item exists, shoppers can:
- Browse products and click the Compare button on any product page or category listing.
- The product is added to their compare list without the page reloading.
- The button icon changes (for example, from arrows to a checkmark) to confirm the product was added.
- When ready to compare, the shopper clicks the Compare Products link in the menu to open the comparison page.
- The comparison page shows a table with all selected products side-by-side.
- Individual products can be removed using the trash icon under each product image.
- The Clear All button at the top removes all products from the list at once.
- The Continue Shopping button returns the shopper to the previous page or storefront.
Comparison Page Layout
The comparison table adjusts its column widths automatically based on how many products are being compared:
- 1–2 products: wider columns (25% each)
- 3 products: slightly narrower columns
- 4 products: compact columns
- 5 or more products: narrowest columns
The table always shows product images with a remove button, product names linked to the product page, and price (with sale/base price strikethrough if applicable). Attribute rows appear below in the order listed in Display Settings.
If a product has options (variants that require selection), the Add to Cart area shows a View Product Details link instead of an Add to Cart button, directing the shopper to the product page to make their selections.
Tips
- Set Maximum Products to Compare to 3 or 4 for most stores. Very wide tables with 8–10 products become hard to read on smaller screens.
- Use Category View Only if you want to keep product detail pages uncluttered. The icon-only button in the category listing takes up very little space.
- If your products have no physical dimensions (such as digital downloads), disable Show Weight and Show Dimensions to keep the table clean.
- The compare list is tied to the browser session. If a shopper closes their browser and returns, the list is empty — this is by design and requires no configuration.
Troubleshooting
The Compare button does not appear
Cause: The plugin may be disabled, or the Display In setting may not match the page type where you expect to see the button.
Solution:
- Go to J2Commerce -> Apps and confirm the Product Compare plugin is enabled (green toggle).
- Check the Display In setting. If it is set to Product View Only, the button will not appear in category listings. Change it to Both Views if you want it in both places.
- If using a custom template or layout, ensure the template calls the
onJ2CommerceAfterAddToCartButtonevent position. Contact your template developer if you are unsure.
Clicking the Compare button does nothing
Cause: The JavaScript assets may not be loading, or a JavaScript error on the page is blocking execution.
Solution:
- Open your browser's developer tools (F12) and check the Console tab for JavaScript errors.
- Check the Network tab to confirm
compare.jsis loading frommedia/plg_j2commerce_app_productcompare/js/compare.js. - Enable Debug Mode in the plugin settings and check
[joomla]/logs/app_productcompare.phpfor error messages.
The compare page is blank or shows "No items found"
Cause: This usually means no menu item for the comparison page exists, or the shopper navigated to the page directly without adding any products first.
Solution:
- Confirm you created a menu item of type J2Commerce -> Products -> Product Comparison as described in Step 1.
- Add a product using the Compare button on a product page, then click the link to the compare page — the list is only populated during the current session.
The "Compare Products" link does not appear after adding a product
Cause: The plugin cannot find a menu item pointing to the compare page.
Solution:
- Go to Menus and verify a menu item of type J2Commerce -> Products -> Product Comparison exists and is published.
- The menu does not have to be visible in the frontend navigation — it just needs to exist and be published.
Maximum product limit message appears unexpectedly
Cause: The Maximum Products to Compare setting may be set lower than expected.
Solution: Go to J2Commerce -> Apps -> Product Compare -> Basic Settings and increase the Maximum Products to Compare value. The default is 5 and can be set up to 10.