Wishlist
The Wishlist app lets your customers save products for later instead of adding them straight to the cart. A heart icon or text button appears on product pages and product lists, so shoppers can build a list of items they love and come back to them any time. From their wishlist they can add one item or everything to the cart, remove items, and — as guests — keep their list even after they log in.
Requirements
- with PHP 8.3.0 +
- Joomla! 6.x
- J2Commerce 6.x
Purchase and Download
Step 1: Go to our J2Commerce website -> Apps
Step 2: Locate the Wishlist App -> click View Details -> Add to cart -> Checkout.
Step 3: Go to your My Downloads under your profile button at the top right corner and search for the app. Click Available Versions -> View Files -> Download Now
Install the App
You can install this Wishlist App using the Joomla installer. The following steps help you with a successful installation.
In the Joomla admin, go to System -> Install -> Extensions
Upload the plugin ZIP file or use the Install from URL option.
 (1)-a6689f12b23b8e992f5c2a169737672f.webp)
Enable the App
Once you have installed the App, you will need to enable it. There are two ways you can access the App.
Option A: Go to the J2Commerce icon at the top right corner -> Apps
Option B: Go to Components on the left sidebar -> J2Commerce -> Apps

Search for Wishlist, click the X, and it will turn into a green checkmark. It is now enabled and ready for setup.
Configure the App
Once you click on the Wishlist Title next to the green checkmark, you are ready to start setting up the parameters.
Click the Toggle Inline Help button in the toolbar and the app will show a description below each field as you configure it.
Basic Settings tab
The Basic Settings tab controls how the wishlist button looks and how the wishlist page behaves.
Layout Style
Choose the template style for the wishlist page and buttons: Bootstrap 5 or UIkit. Pick the one that matches your site template so everything lines up with the rest of your store.
Wishlist Button Type
Choose how the add-to-wishlist button appears on your product pages:
-
Text - shows a worded button (for example, "Add to Wishlist").
-
Icon - shows a small icon button (for example, a heart). Choosing Icon reveals the two icon fields below.
Button text: The label for the button. Shown only when the type is Text.
Icon CSS class: The Font Awesome class for the button, such as fa-solid fa-heart. Shown only when the type is Icon.
Added to wishlist icon: The Font Awesome class shown once the item is already saved, such as fa-solid fa-heart. Shown only when the type is Icon.
Remove After Adding to Cart
Select 'Yes' to automatically remove a wishlist item once the customer adds it to the cart. Leave it on 'No' (the default) if you want customers to be able to add the same wishlist item to the cart more than once.
Link Products To
Choose where a product name on the wishlist page links to:
-
Product List Layout - the standard J2Commerce product page (default).
-
Article Layout - the linked Joomla article view.
Thumbnail Width
Set the width, in pixels, of product images in the list view of the wishlist page. The default is 50.
Grid Image Height
Set the height, in pixels, of product images when the wishlist page uses the grid view. The range is 50 to 1000 and the default is 250.
NOTE: This only applies when the wishlist menu item is set to the Grid view. See Creating the Wishlist Menu Item.
Redirect to Wishlist
Select 'Yes' to send the customer straight to their wishlist page after they add an item. This is handy for gift-registry style stores. Leave it on 'No' to keep customers on the product page.
Wishlist Link Text
Set the text for the "browse wishlist" link that appears in the confirmation notification after a customer adds an item. The default is Browse Wishlist.
Debug Mode
Select 'Yes' to write debug entries to the Joomla log folder. This helps when troubleshooting.
NOTE: Turn Debug Mode off in production. It is only meant for diagnosing problems.
Creating the Wishlist Menu Item
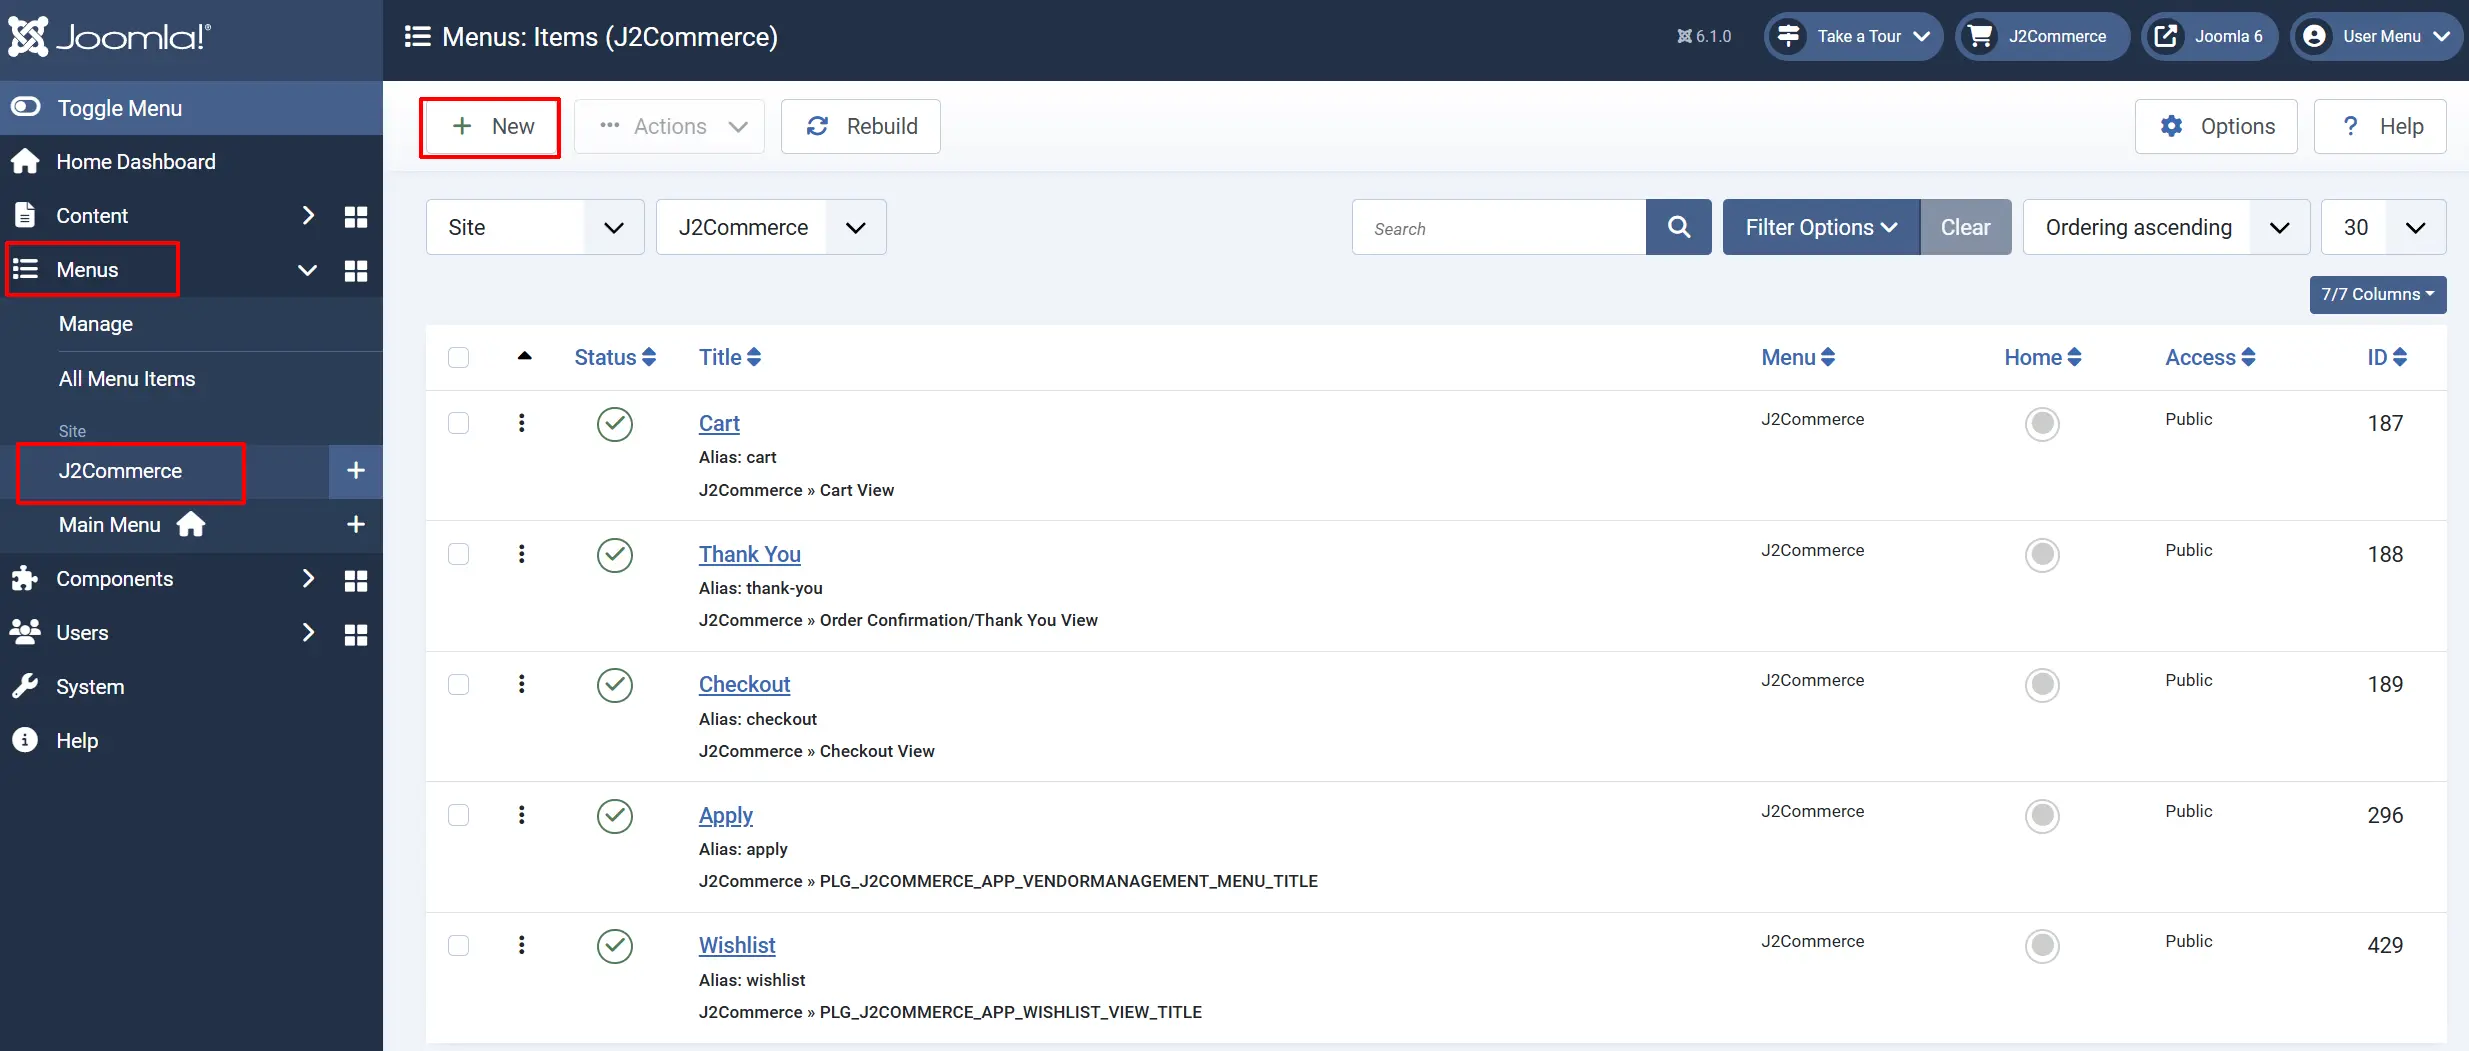
The wishlist page is shown through a dedicated Joomla menu item. You must create this menu item before customers can reach their wishlist.
-
Go to Menus -> J2Commerce -> Add New Menu Item.
-
Click Select next to Menu Item Type.
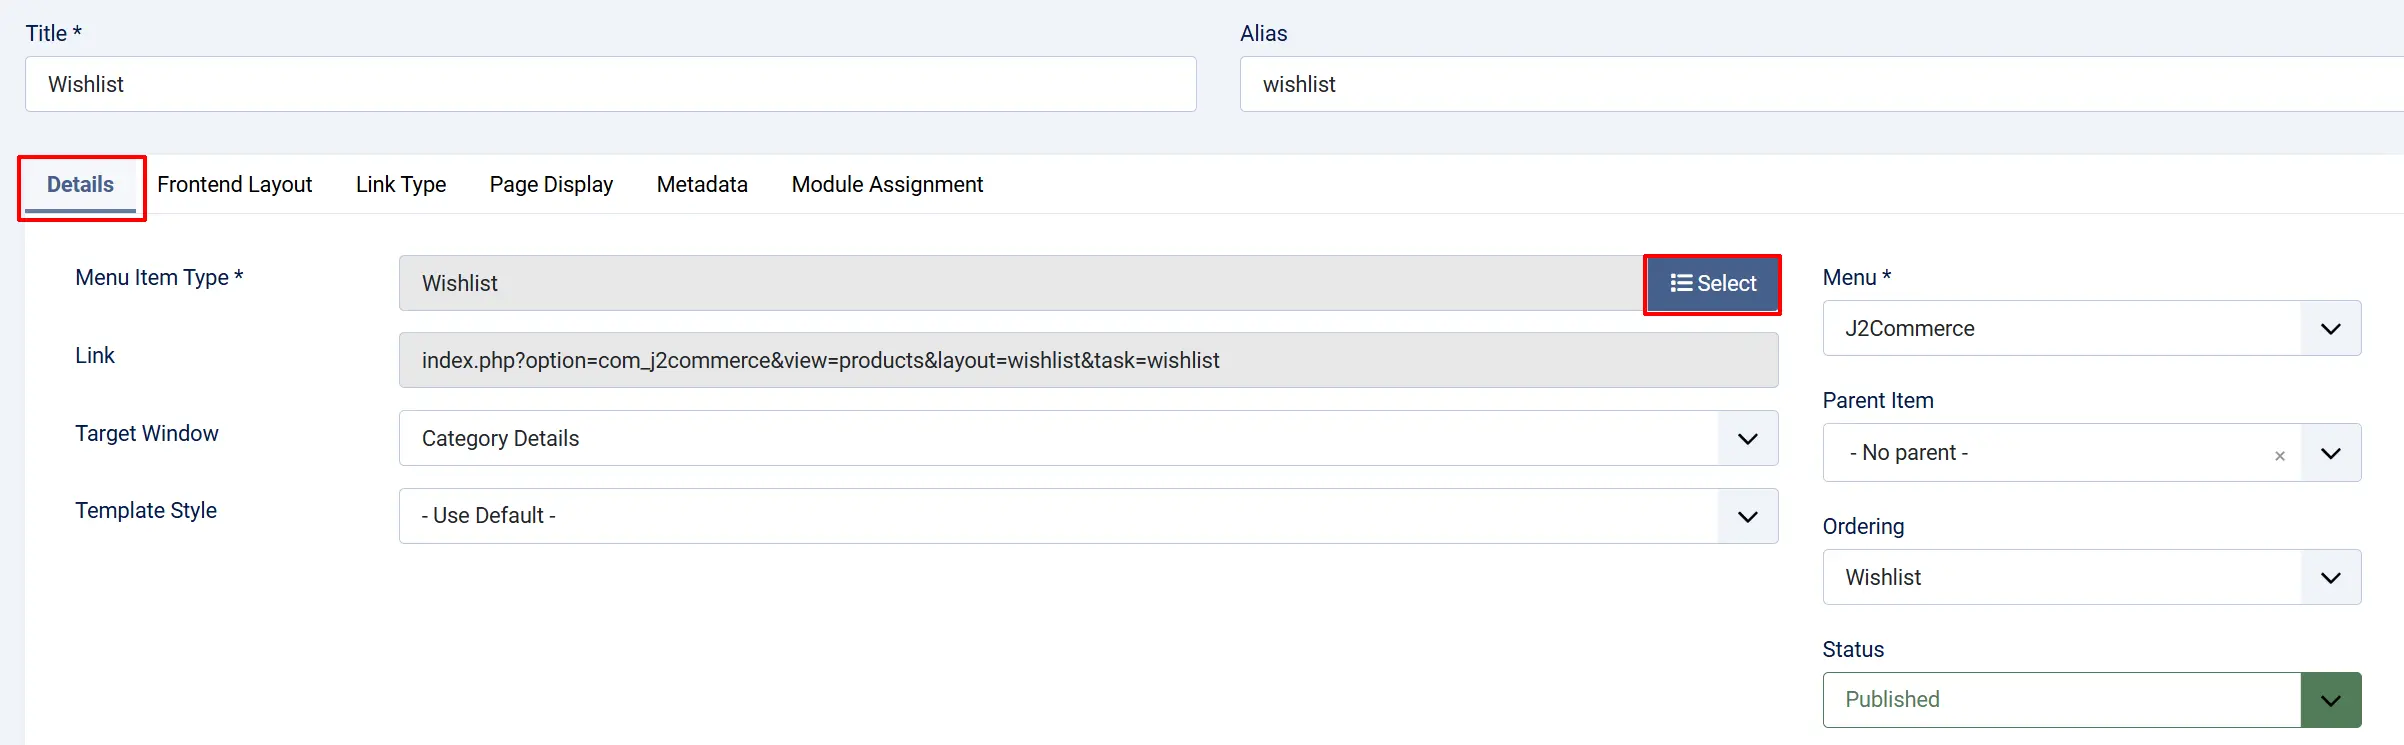
-
Choose J2Commerce -> Wishlist.
-
Set a Menu Title (for example, "My Wishlist").
-
Click Save & Close.
The plugin automatically detects this menu item to build wishlist links across the store.
Frontend Layout

Each wishlist menu item has a View Mode option in its settings:
-
List - one product per row in a table (default).
-
Grid - product cards arranged in a grid, using the Grid Image Height from the app settings.
Setting Up the Wishlist Module
The companion J2Commerce - Wishlist module (mod_j2commerce_wishlist) shows the current wishlist item count and a link to the wishlist page. Place it in your header or navigation area so customers can always see how many items they have saved.
NOTE: The wishlist module is a separate add-on and is not included in the core J2Commerce 6 package. Purchase it from the J2Commerce Extensions Store.
Installing the Module
-
Go to System -> Install -> Extensions and upload the
mod_j2commerce_wishlist.zipfile. -
Go to Content -> Site Modules -> New.
-
Select J2Commerce - Wishlist from the module type list.
NOTE: It is recommended to change the title of the module after creating it, otherwise it will have the default title 'J2COMMERCE-WISHLIST' shown on the frontend. The most common name is just 'Wishlist'.
Module Settings
Display type: Show the counter as a plain Link or a styled Button.
Hide when empty: Hide the module entirely when the wishlist has no items.
Wishlist menu item: Select the menu item you created above. Leave empty for auto-detection.
The module updates its count automatically when a customer adds or removes a wishlist item — no page reload needed.
Managing Saved Wishlists in the Admin
The app adds a Saved Wishlists screen to the J2Commerce dashboard so you can see what your customers have saved.
-
Go to the J2Commerce icon at the top right corner.
-
Open Saved Wishlists (listed under the Products area).
From this screen you can review saved items and remove entries when needed.
How It Works
When a customer browses your store:
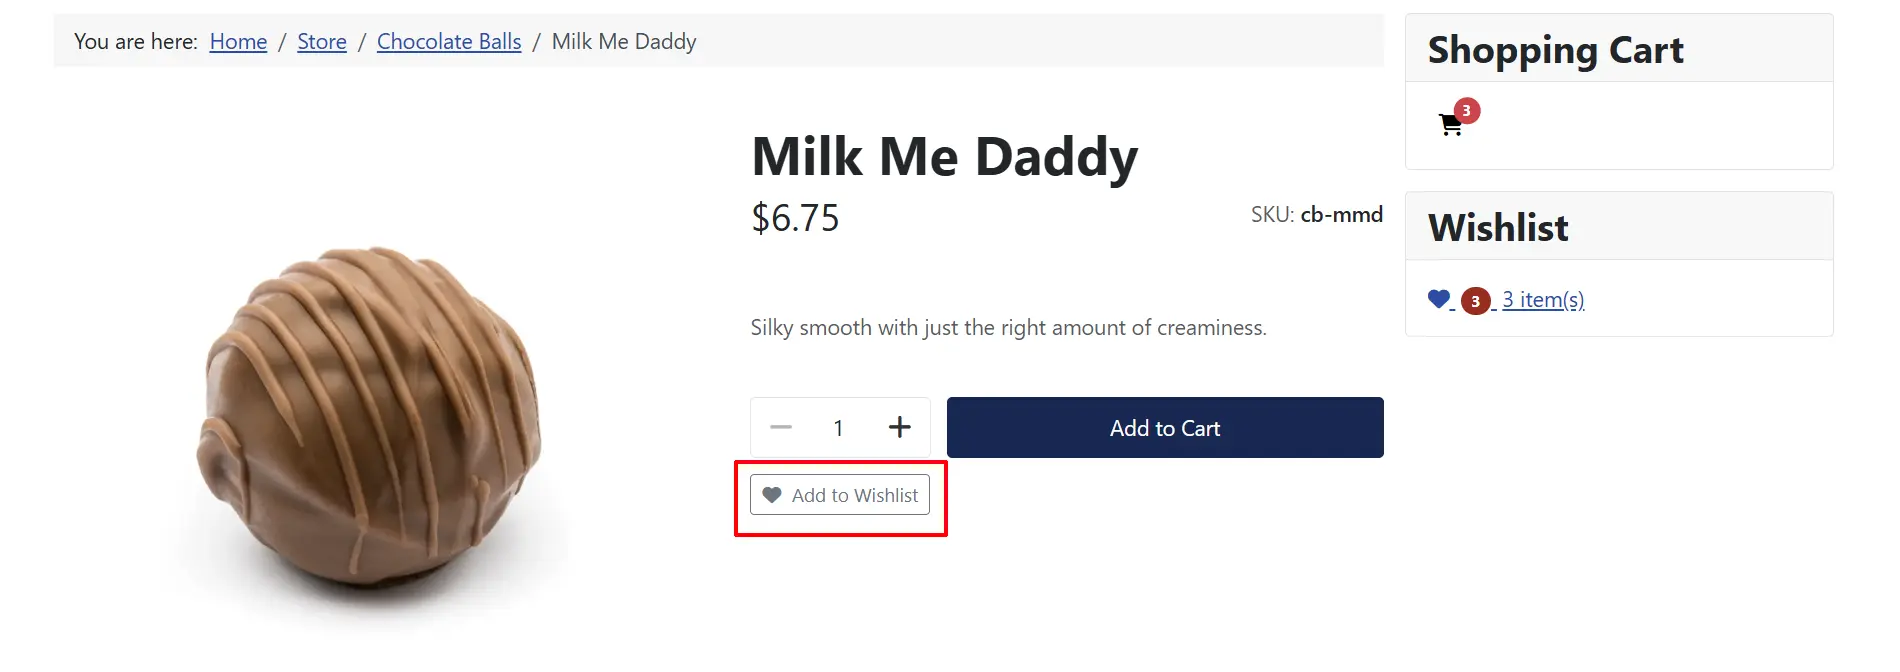
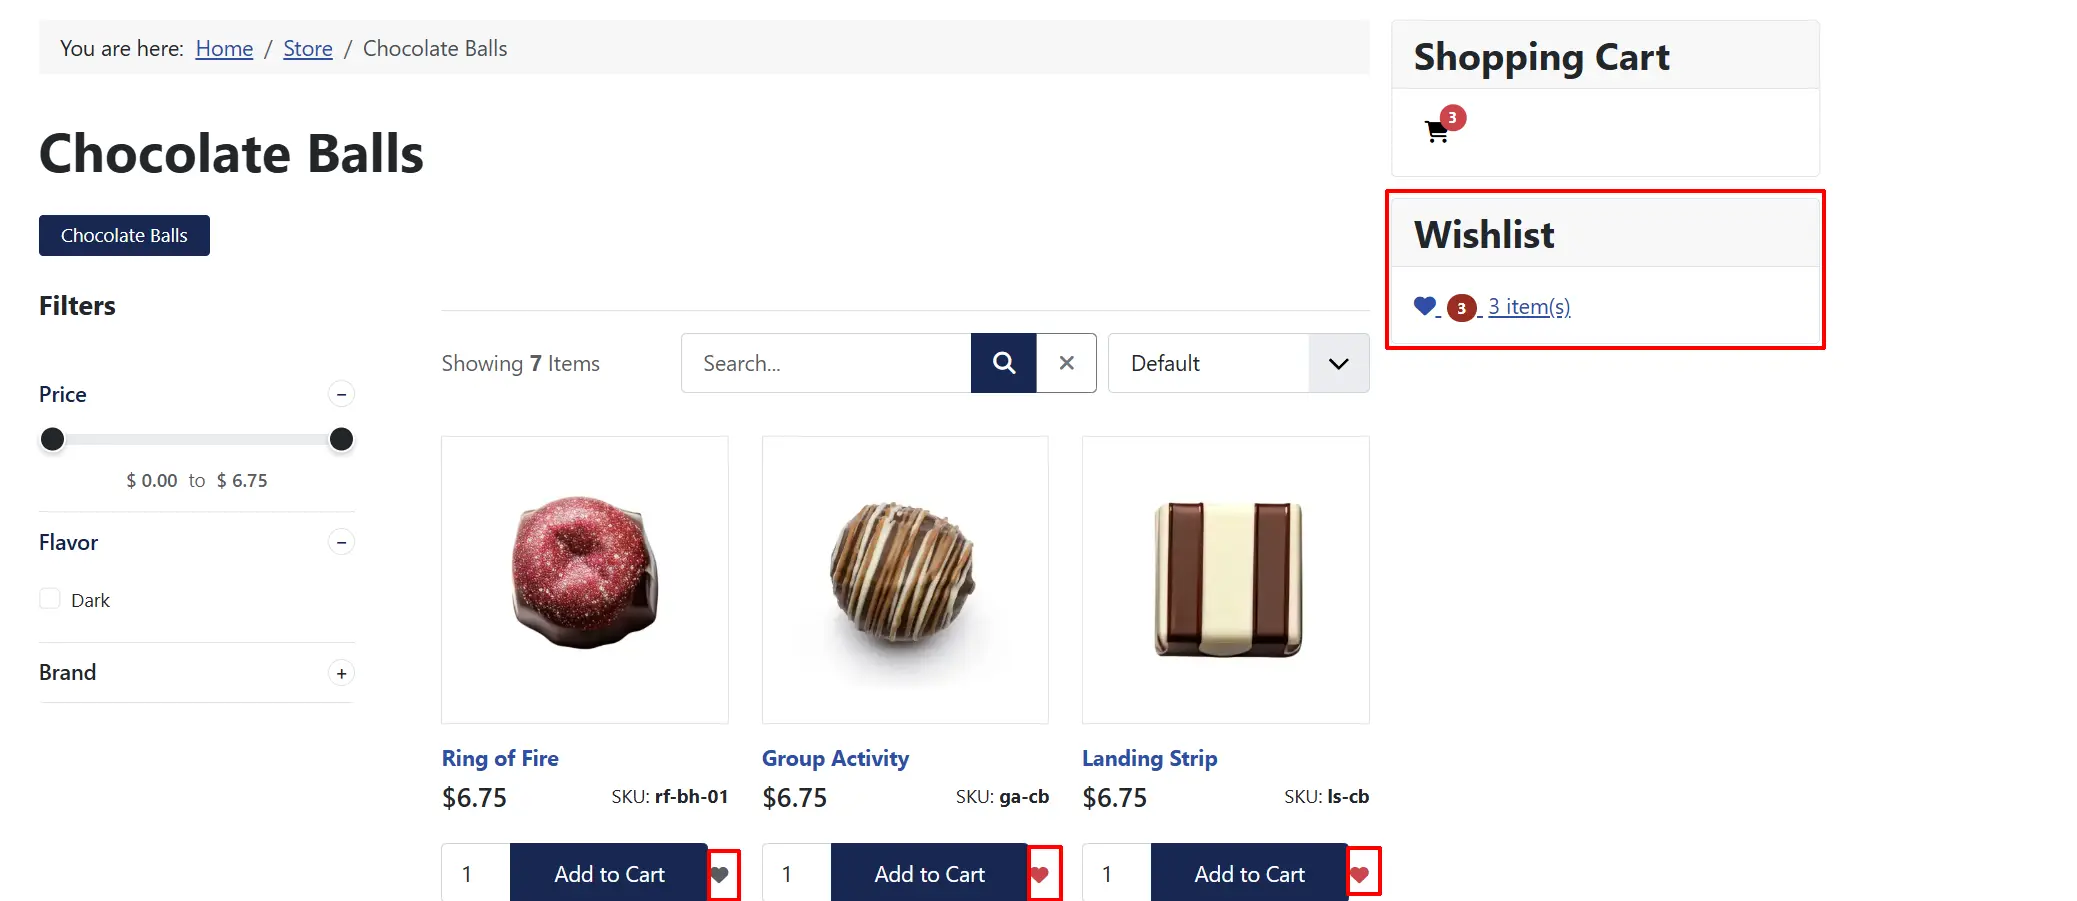
-
An Add to Wishlist button appears below the Add to Cart button on the product page, and as a small icon button in product lists.
-
The customer clicks the button to save the product. The button then switches to an "already saved" state and a short notification appears with a link to the wishlist page.
-
For products with options (such as size or colour), the customer selects their options first, and those options are saved with the wishlist entry.
-
The customer opens the wishlist page from the menu item you created, where they can add items to the cart or remove them.
-
Guest wishlists are stored against the browser session. When the guest logs in, their wishlist automatically merges into their account.
Display Conditions
The Add to Wishlist button appears when:
-
The plugin is enabled in J2Commerce -> Apps -> Wishlist.
-
The active template plugin (app_bootstrap5 or app_uikit) is enabled.
-
The product is published and visible.
The wishlist page appears when:
- A menu item of type J2Commerce -> Wishlist has been created and published.
The "Save wishlist" login prompt appears when:
-
The visitor is not logged in (a guest), and
-
Their wishlist contains at least one item.
Frontend Product View
Frontend Category View
Frontend Wishlist Page
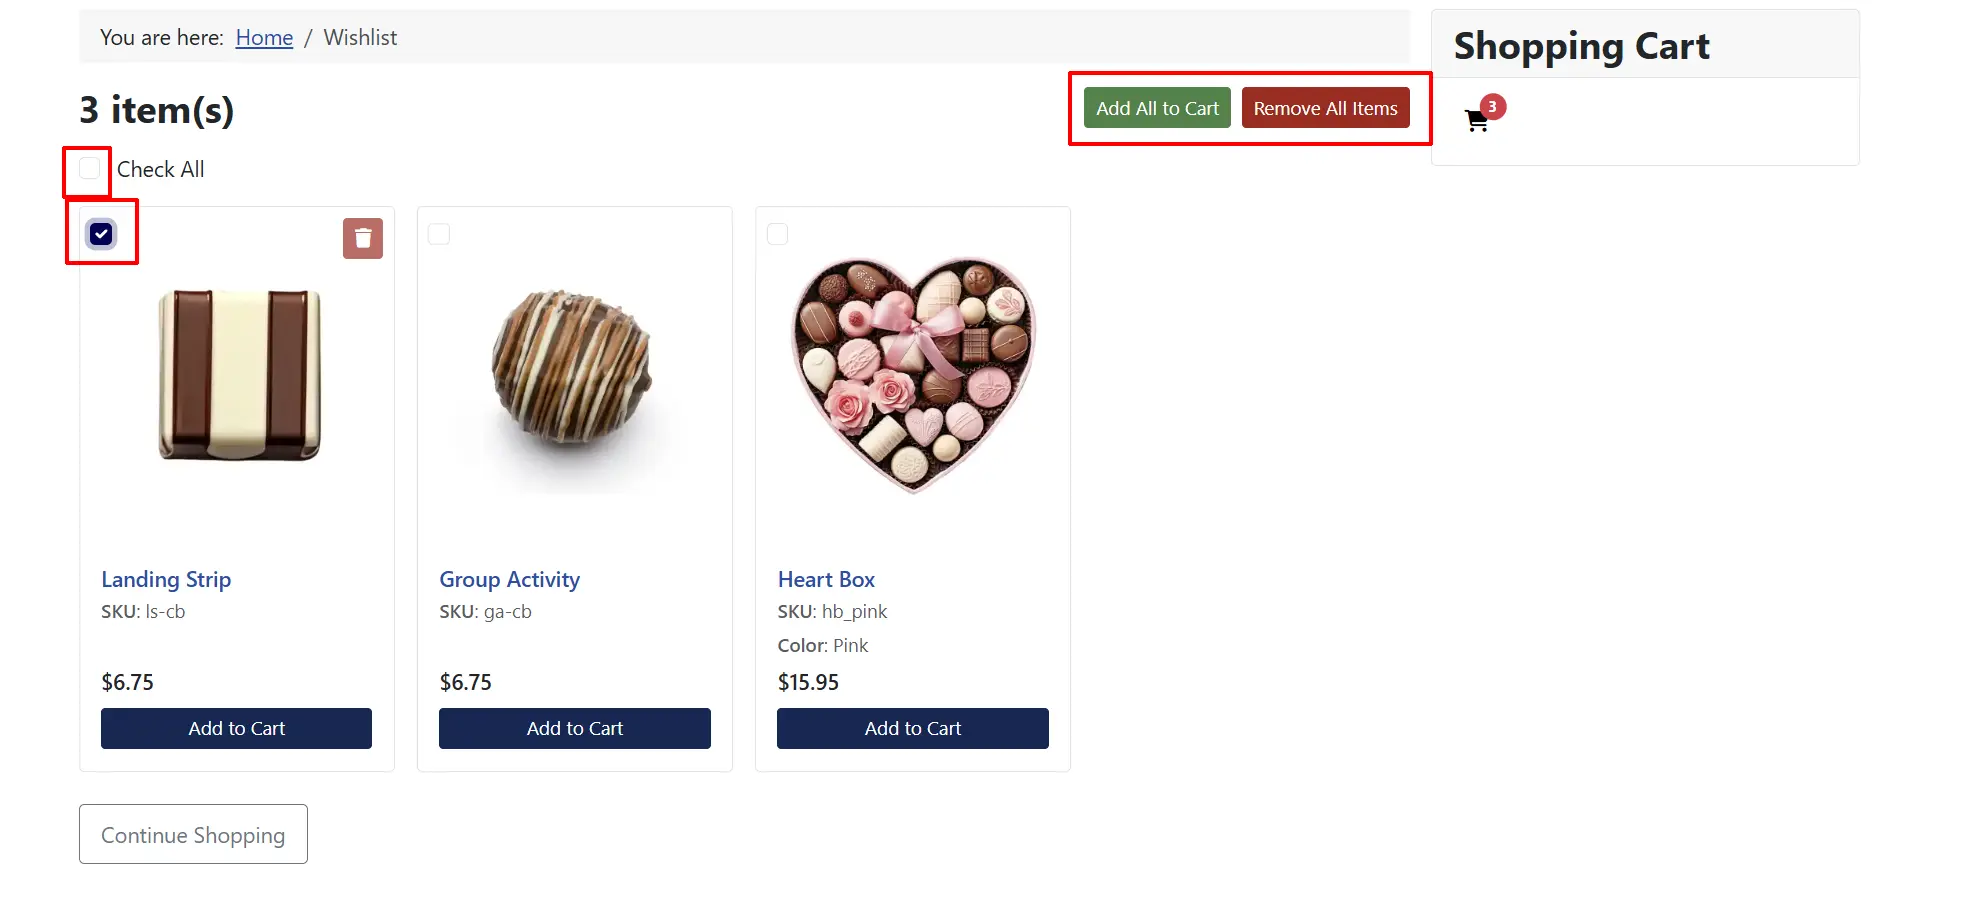
You can add the product to the cart individually, or you can add multiple in bulk by clicking on the boxes in the top left corner.
NOTE: For customers who are not logged in, a 'Save Wishlist' button will appear next to the 'Continue Shopping' button. If they want to save their wishlist, it will redirect them to sign in or create an account.
Tips
-
Use Icon on compact stores - choose the Icon button type when your product lists are tight on space, to keep the cart row tidy.
-
Match your template - set Layout Style to the same framework your site template uses (Bootstrap 5 or UIkit) so the wishlist page looks consistent.
-
Avoid icon clashes - if your template already uses a heart icon elsewhere, change the Icon CSS class to something else, such as
fa-solid fa-bookmark. -
Set the module menu item explicitly - select the Wishlist menu item in the module settings instead of relying on auto-detection, which scans all menu items and adds a small overhead on every page load.
-
Hide the empty module - enable Hide when empty to keep your header uncluttered until a customer saves their first item.
Troubleshooting
Add to Wishlist Button Does Not Appear
Cause: The plugin is disabled, or the active template plugin is not running.
Solution:
-
Go to J2Commerce -> Apps -> Wishlist and verify it shows a green checkmark (enabled).
-
Verify your active template plugin (app_bootstrap5 or app_uikit) is also enabled.
-
If you customised the product cart template, make sure your override still includes the add-to-wishlist button area.
Wishlist Page Is Blank or Shows "No Items"
Cause: The wishlist menu item has not been created, or the customer has not saved anything yet.
Solution:
-
Confirm you created a menu item of type J2Commerce -> Wishlist (see Creating the Wishlist Menu Item).
-
Check that the menu item is published.
-
If the page renders but stays empty, the customer may simply not have added anything. To investigate, set Debug Mode to Yes and check the Joomla logs folder for
j2commerce_app_wishlistentries.
Wishlist Page Layout Looks Broken
Cause: The Layout Style does not match your site template.
Solution:
-
Go to J2Commerce -> Apps -> Wishlist.
-
Set Layout Style to Bootstrap 5 or UIkit to match the framework your site template uses.
-
Click Save.
Module Count Does Not Update After Adding an Item
Cause: The module is cached.
Solution:
-
Open the module settings and set Caching to No Caching.
-
Clear cache: Go to Home Dashboard -> Cache -> Delete All
-
Check the browser console for JavaScript errors that might stop the live update.
Guest Wishlist Items Did Not Carry Over After Login
Cause: The browser session expired, or cookies were cleared between the shopping session and login.
Solution: The merge happens at the moment of login. If the browser session had already expired before the customer logged in, there is no guest wishlist left to merge. This is a normal edge case when cookies expire between visits.
"Add All to Cart" Does Nothing
Cause: No items are checked, or the security token has expired.
Solution:
-
Select at least one item by ticking its checkbox.
-
If the page has been open a long time, refresh it to get a fresh security token, then try again.
The Wishlist page shows all products and random tabs
Cause: The Wishlist Menu hasn't been created or hasn't been set up properly.
Solution: Create a Wishlist Menu item. Go to Menus -> J2Commerce (instructions are above in the doc)