Add to User Group
The Add to User Group app plugin automatically adds a customer to one or more Joomla user groups as soon as their order reaches a status you choose. You can set groups at the individual product level, at the Joomla content category level, or both. Category settings always take priority over product settings.
Common uses include granting access to a members-only content area after purchase, upgrading a customer to a wholesale or dealer group, and controlling what ACL-restricted pages a buyer can see based on what they have bought.
Requirements
- with PHP 8.3.0 +
- Joomla! 6.x
- J2Commerce 6.x
Prerequisites
- J2Commerce 6 is installed and configured.
- At least one product created.
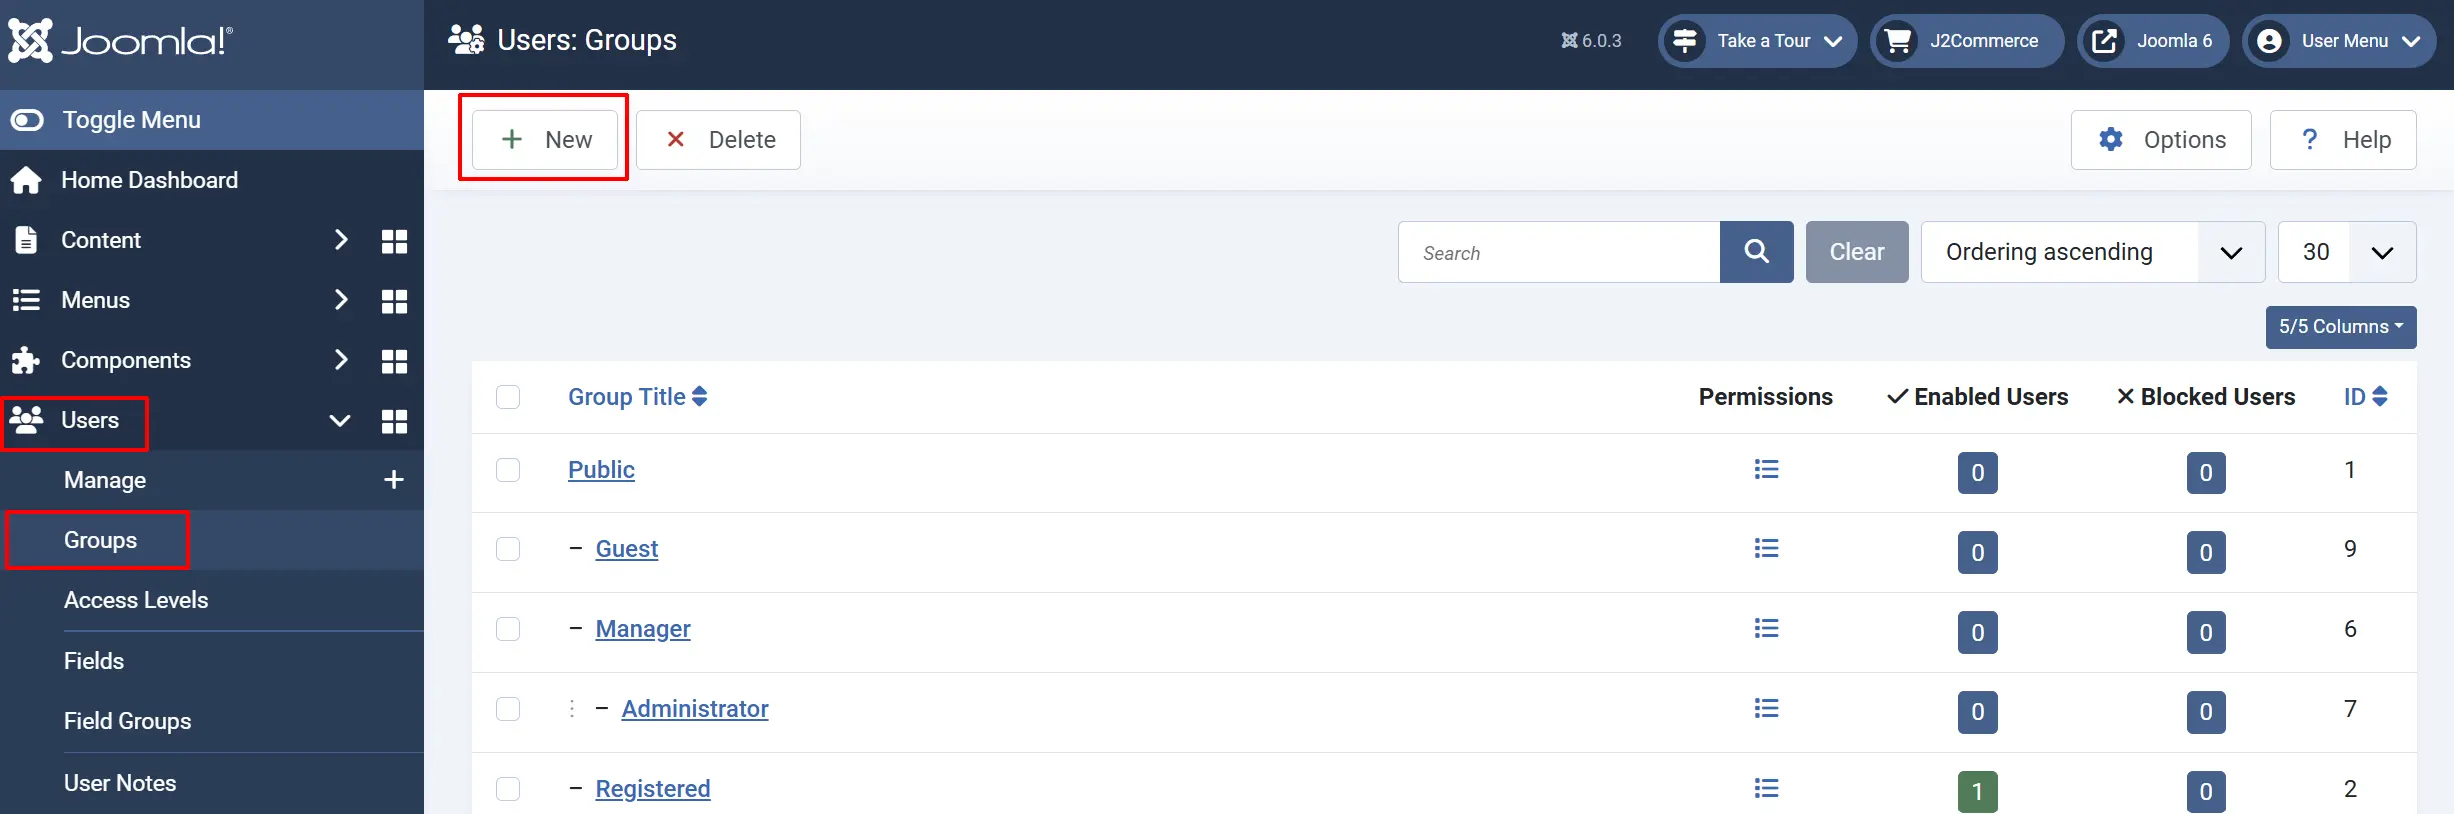
- The Joomla user groups you want to assign must already exist. Create them under Users -> Groups before proceeding.
Purchase and Download
Step 1: Go to our J2Commerce website -> Apps
Step 2: Locate the Add to User Group App -> click View Details -> Add to cart -> Checkout.
Step 3: Go to your My Downloads under your profile button at the top right corner and search for the app. Click Available Versions -> View Files -> Download Now
Install the App
You can install the App using the Joomla installer. The following steps help you with a successful installation.
In the Joomla admin, go to System -> Install -> Extensions
Upload the app_usergroup.zip file or use the Install from URL option.
 (1)-a6689f12b23b8e992f5c2a169737672f.webp)
Quick Setup Overview
- Enable the plugin in Joomla Plugin Manager.
- Set which order statuses trigger group assignment.
- Assign user groups to each product, or to a content category.
- Test by placing an order and confirming the customer lands in the right group.
Enable the App
Once you have installed the App, you will need to enable it. There are three ways you can access the extension.
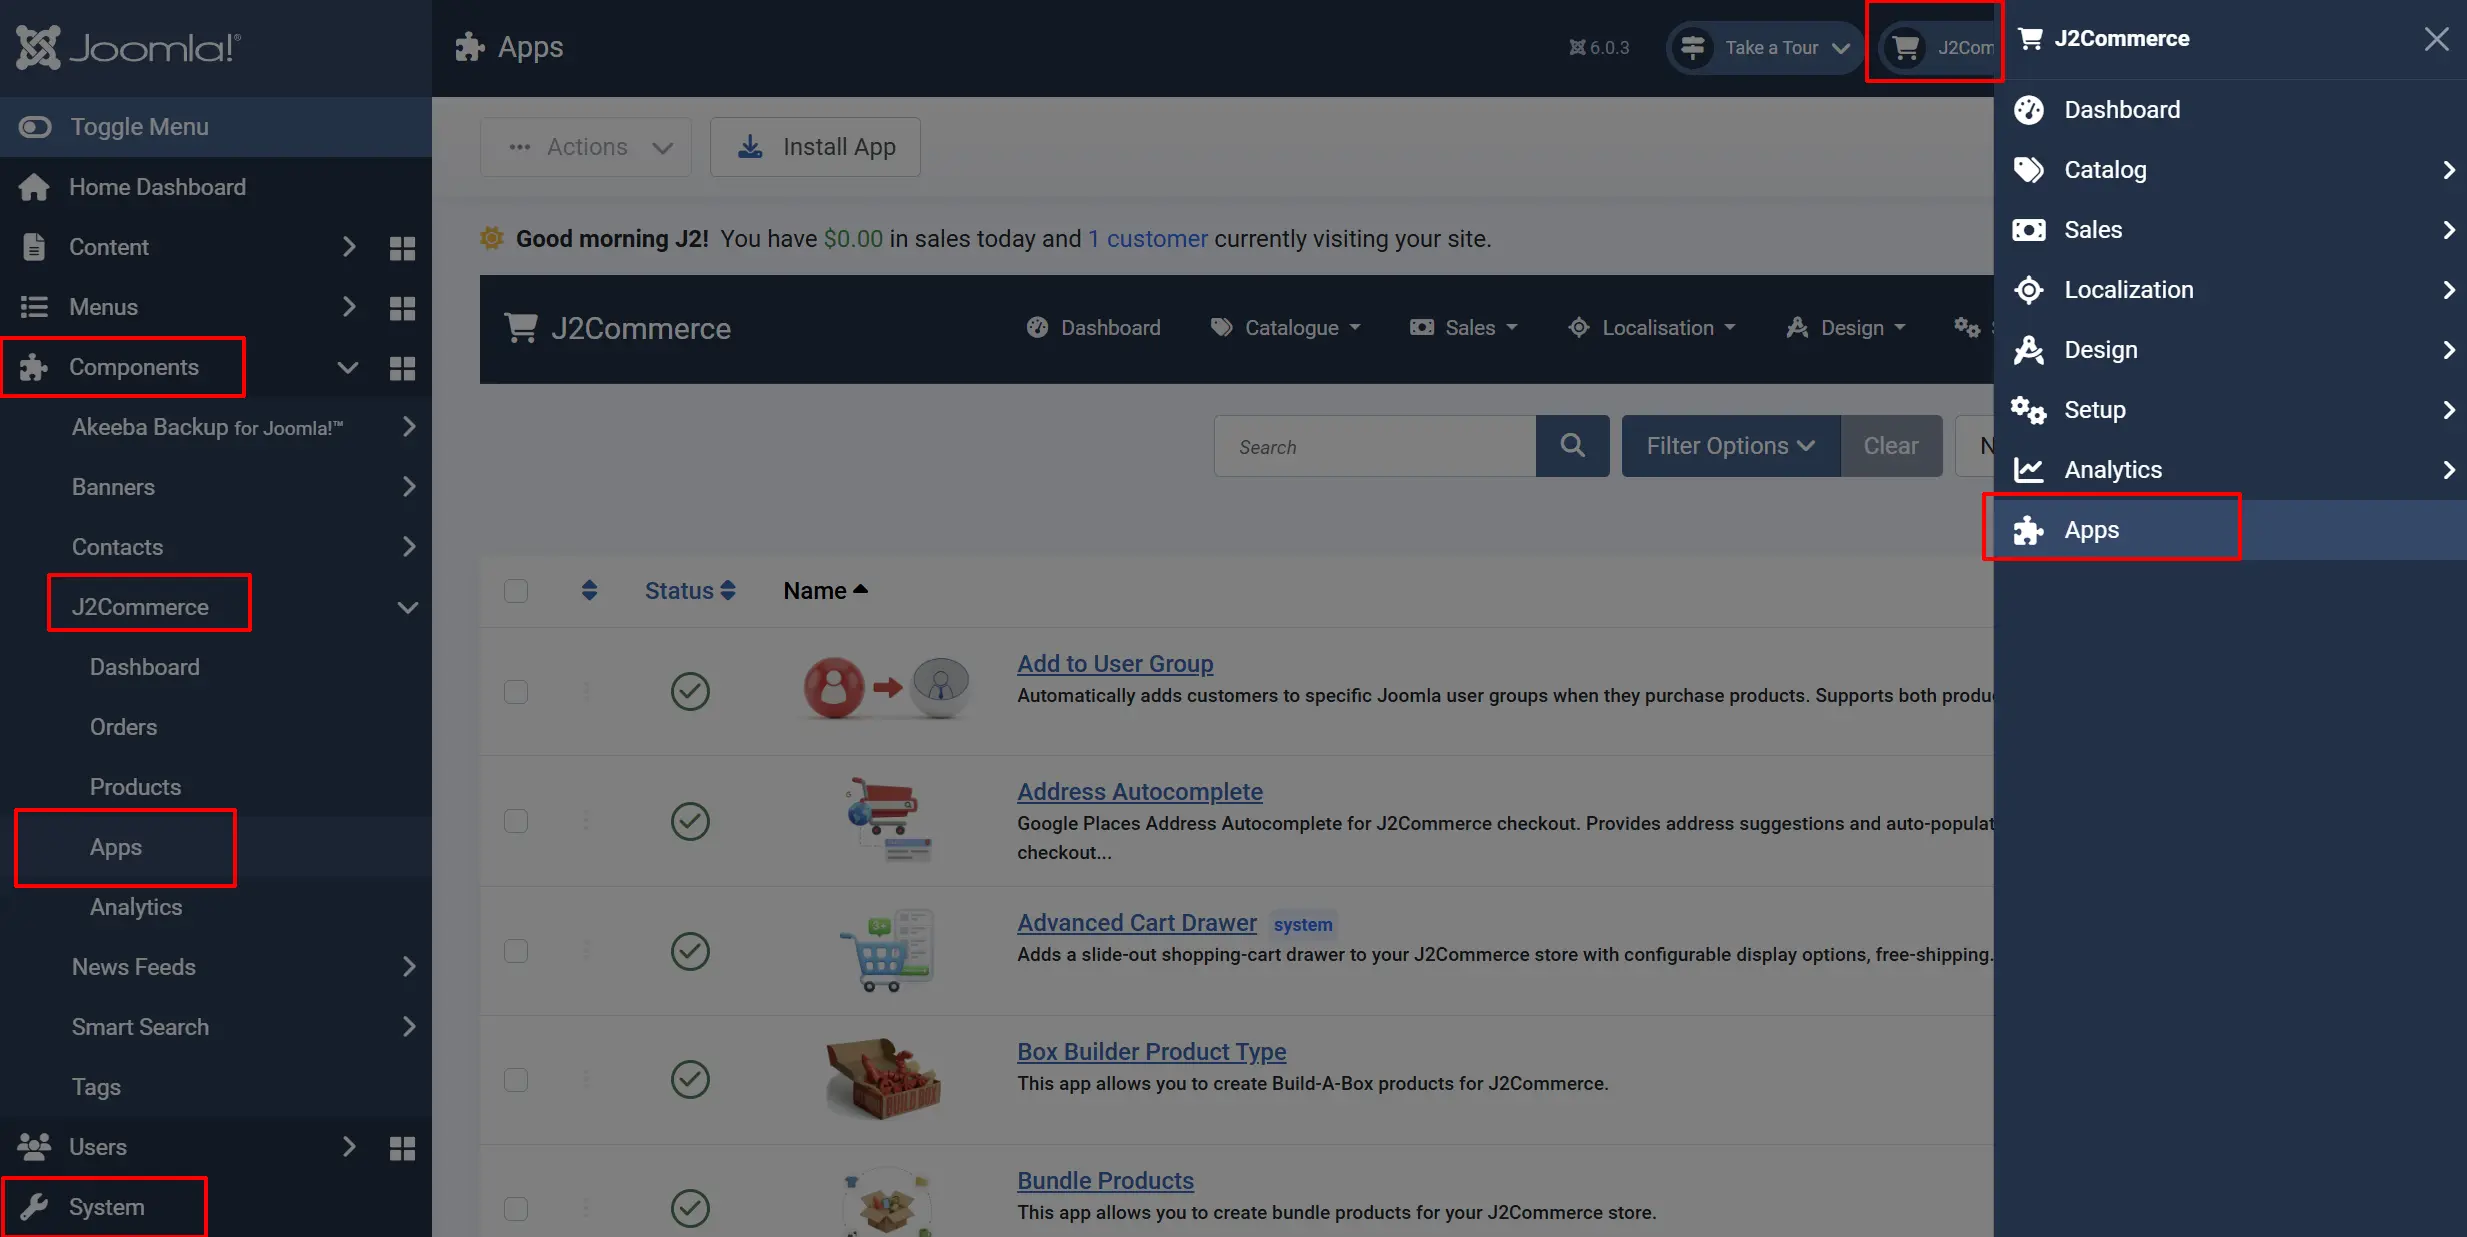
Option A: Go to the J2Commerce icon at the top right corner -> Apps
Option B: Go to Components on the left sidebar -> J2Commerce -> Apps
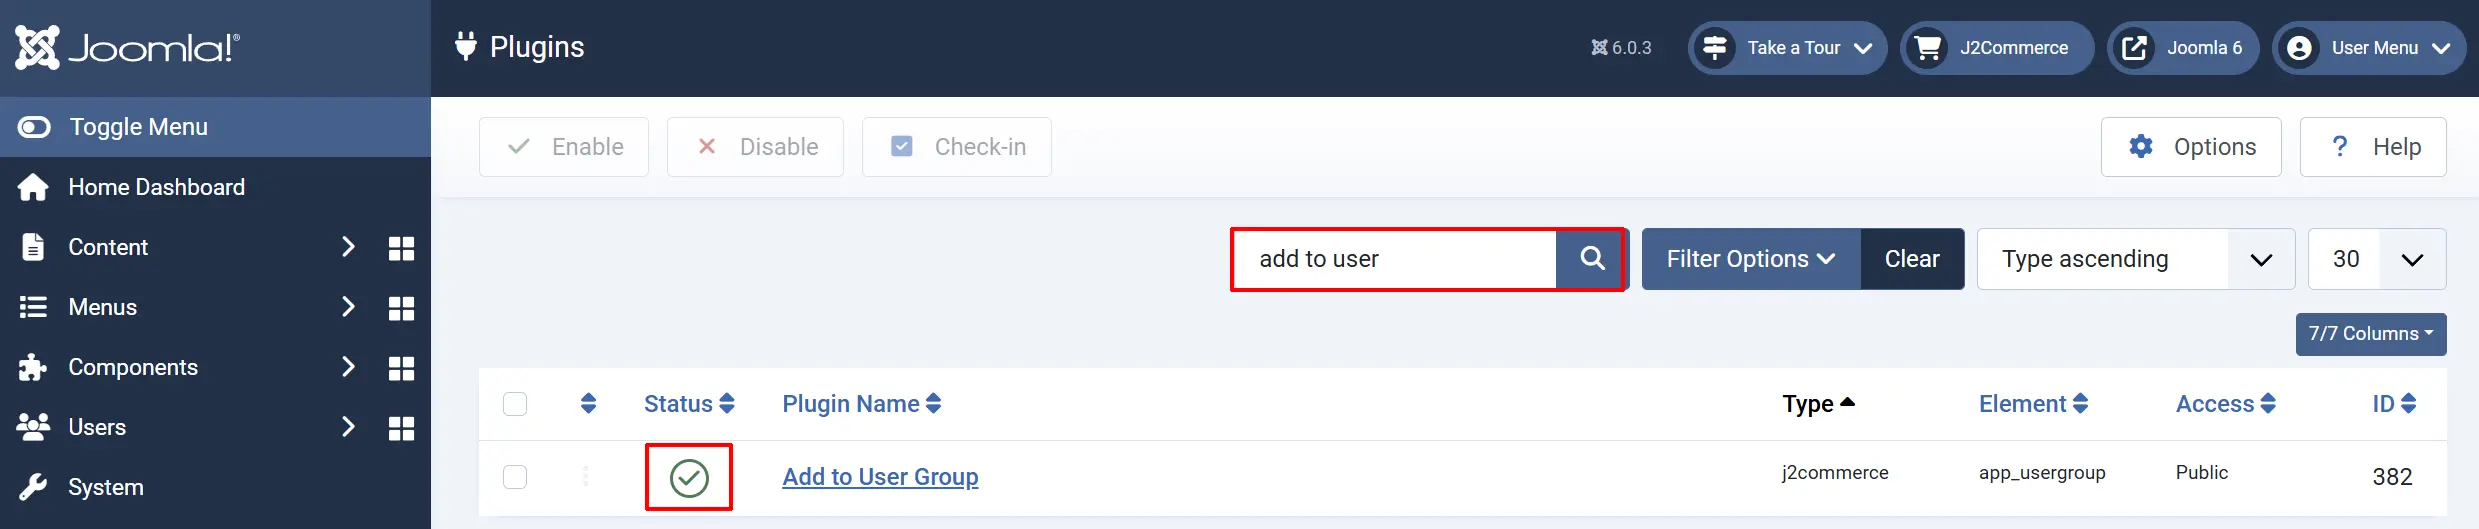
Option C: Go to System -> Manage -> Plugins.
Search for Add to User Group, click the X, and it will turn into a green checkmark. It is now enabled and ready for setup.
Configure the App
Plugin Settings
Click the plugin name to open its settings.
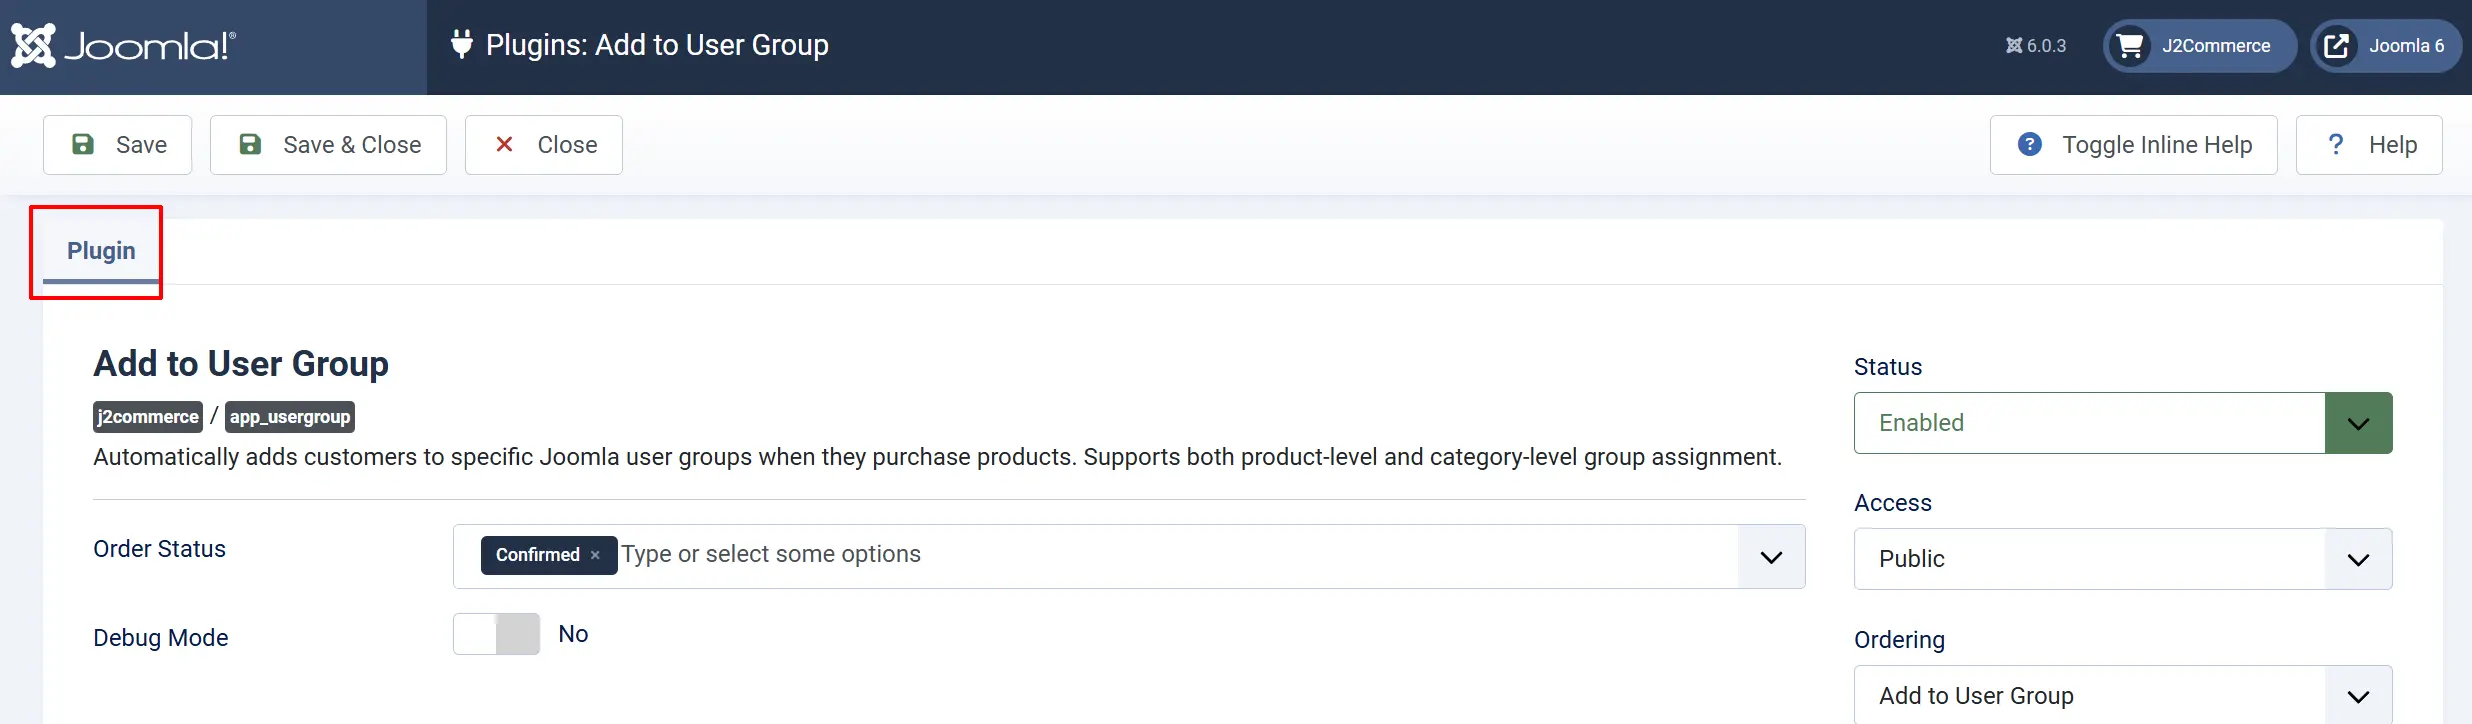
Order Status: The order statuses that trigger user group assignment. When an order reaches any of the selected statuses, the customer is added to the configured groups. Select one or more statuses.
Debug Mode: When enabled, the plugin writes detailed log entries to a file named app_usergroup.php in the Joomla logs directory. Turn this on when troubleshooting; disable it in production.
Tip: Choosing the right order status: Most stores use Confirmed or Processing as the trigger. Using Pending may add customers to groups before payment is verified. Using a completed/shipped status means customers wait longer for access. Choose the status that matches your fulfillment workflow.
Assign User Groups to Products
For each product that should trigger a group assignment, open the product and set the groups in the plugin's tab.
There are three ways you can access the products.
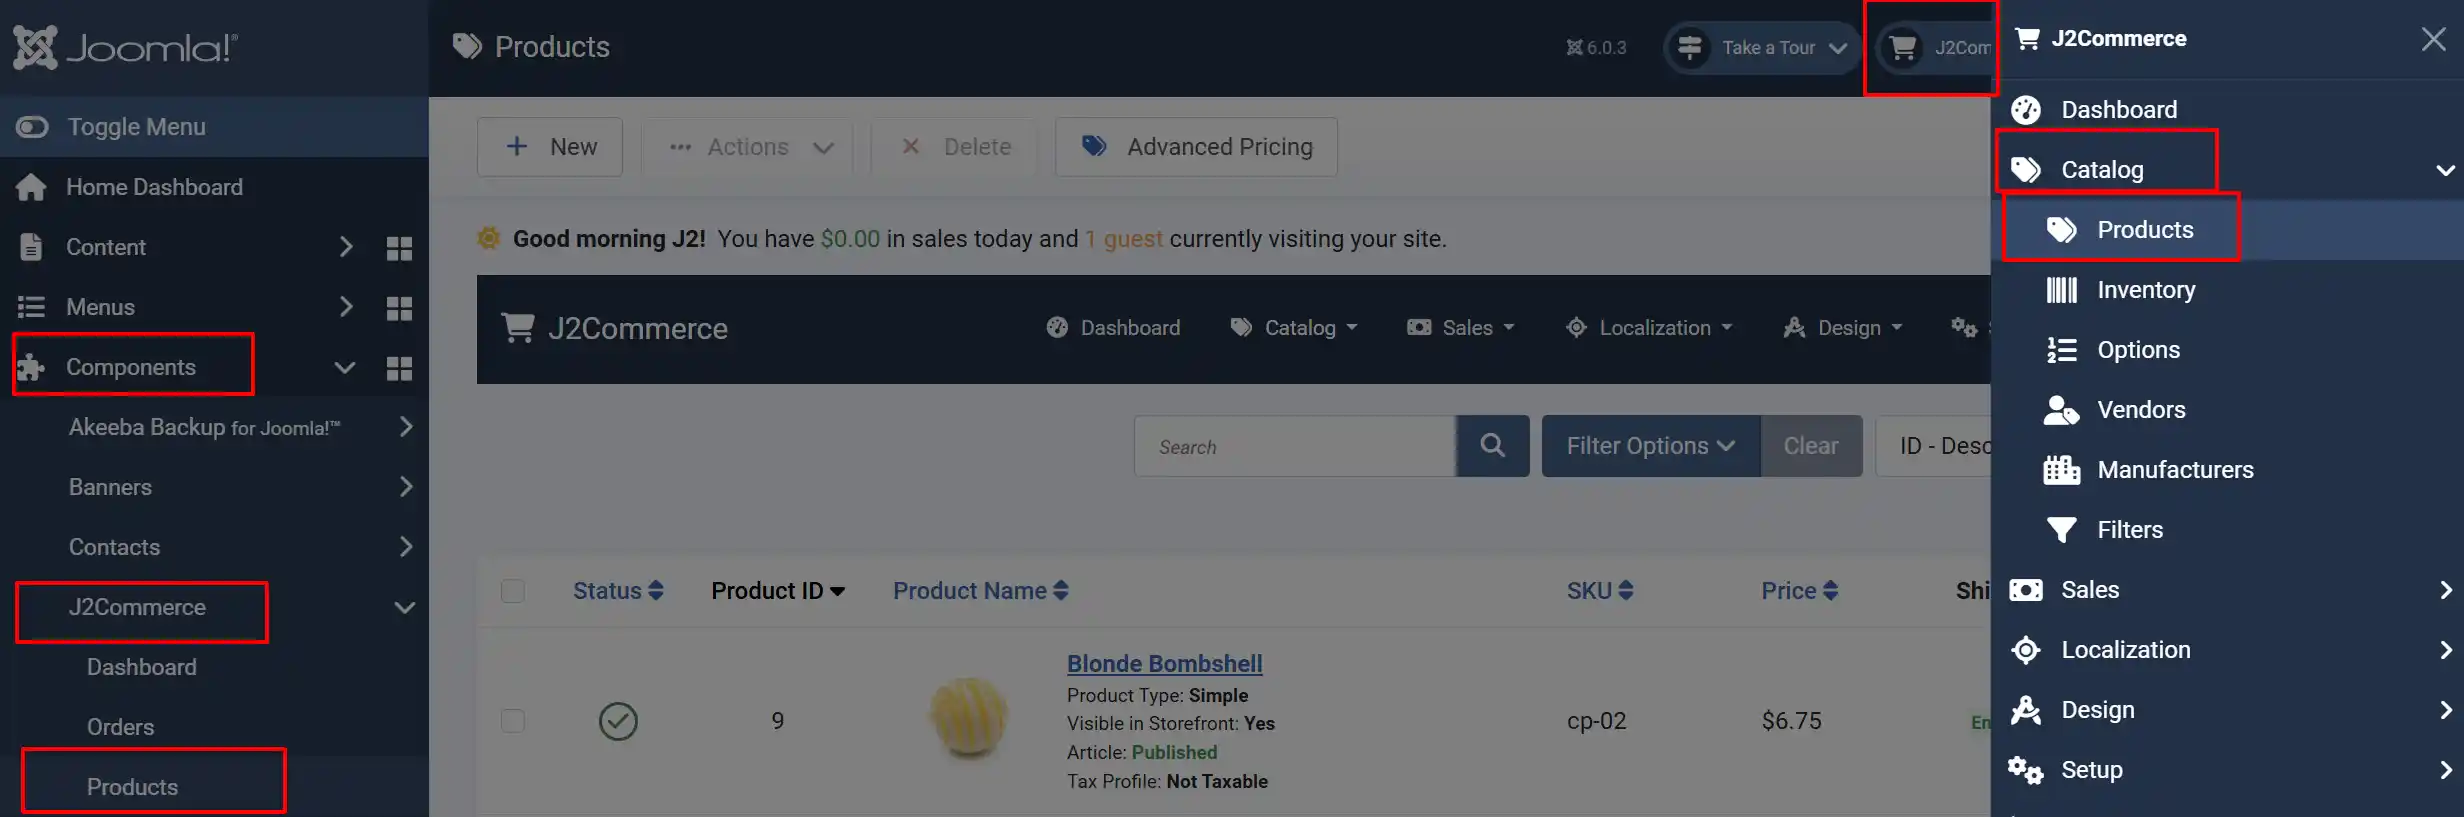
Option A: Go to the J2Commerce icon at the top right corner -> Catalog -> Products
Option B: Go to Components on the left sidebar -> J2Commerce -> Products
Option C: Go to Content -> Categories -> Find the category and then click inside the published/article section
- Click on the product name to edit it.
Go to the J2Commerce tab -> Apps tab
- Scroll down to find the Add to User Group app.
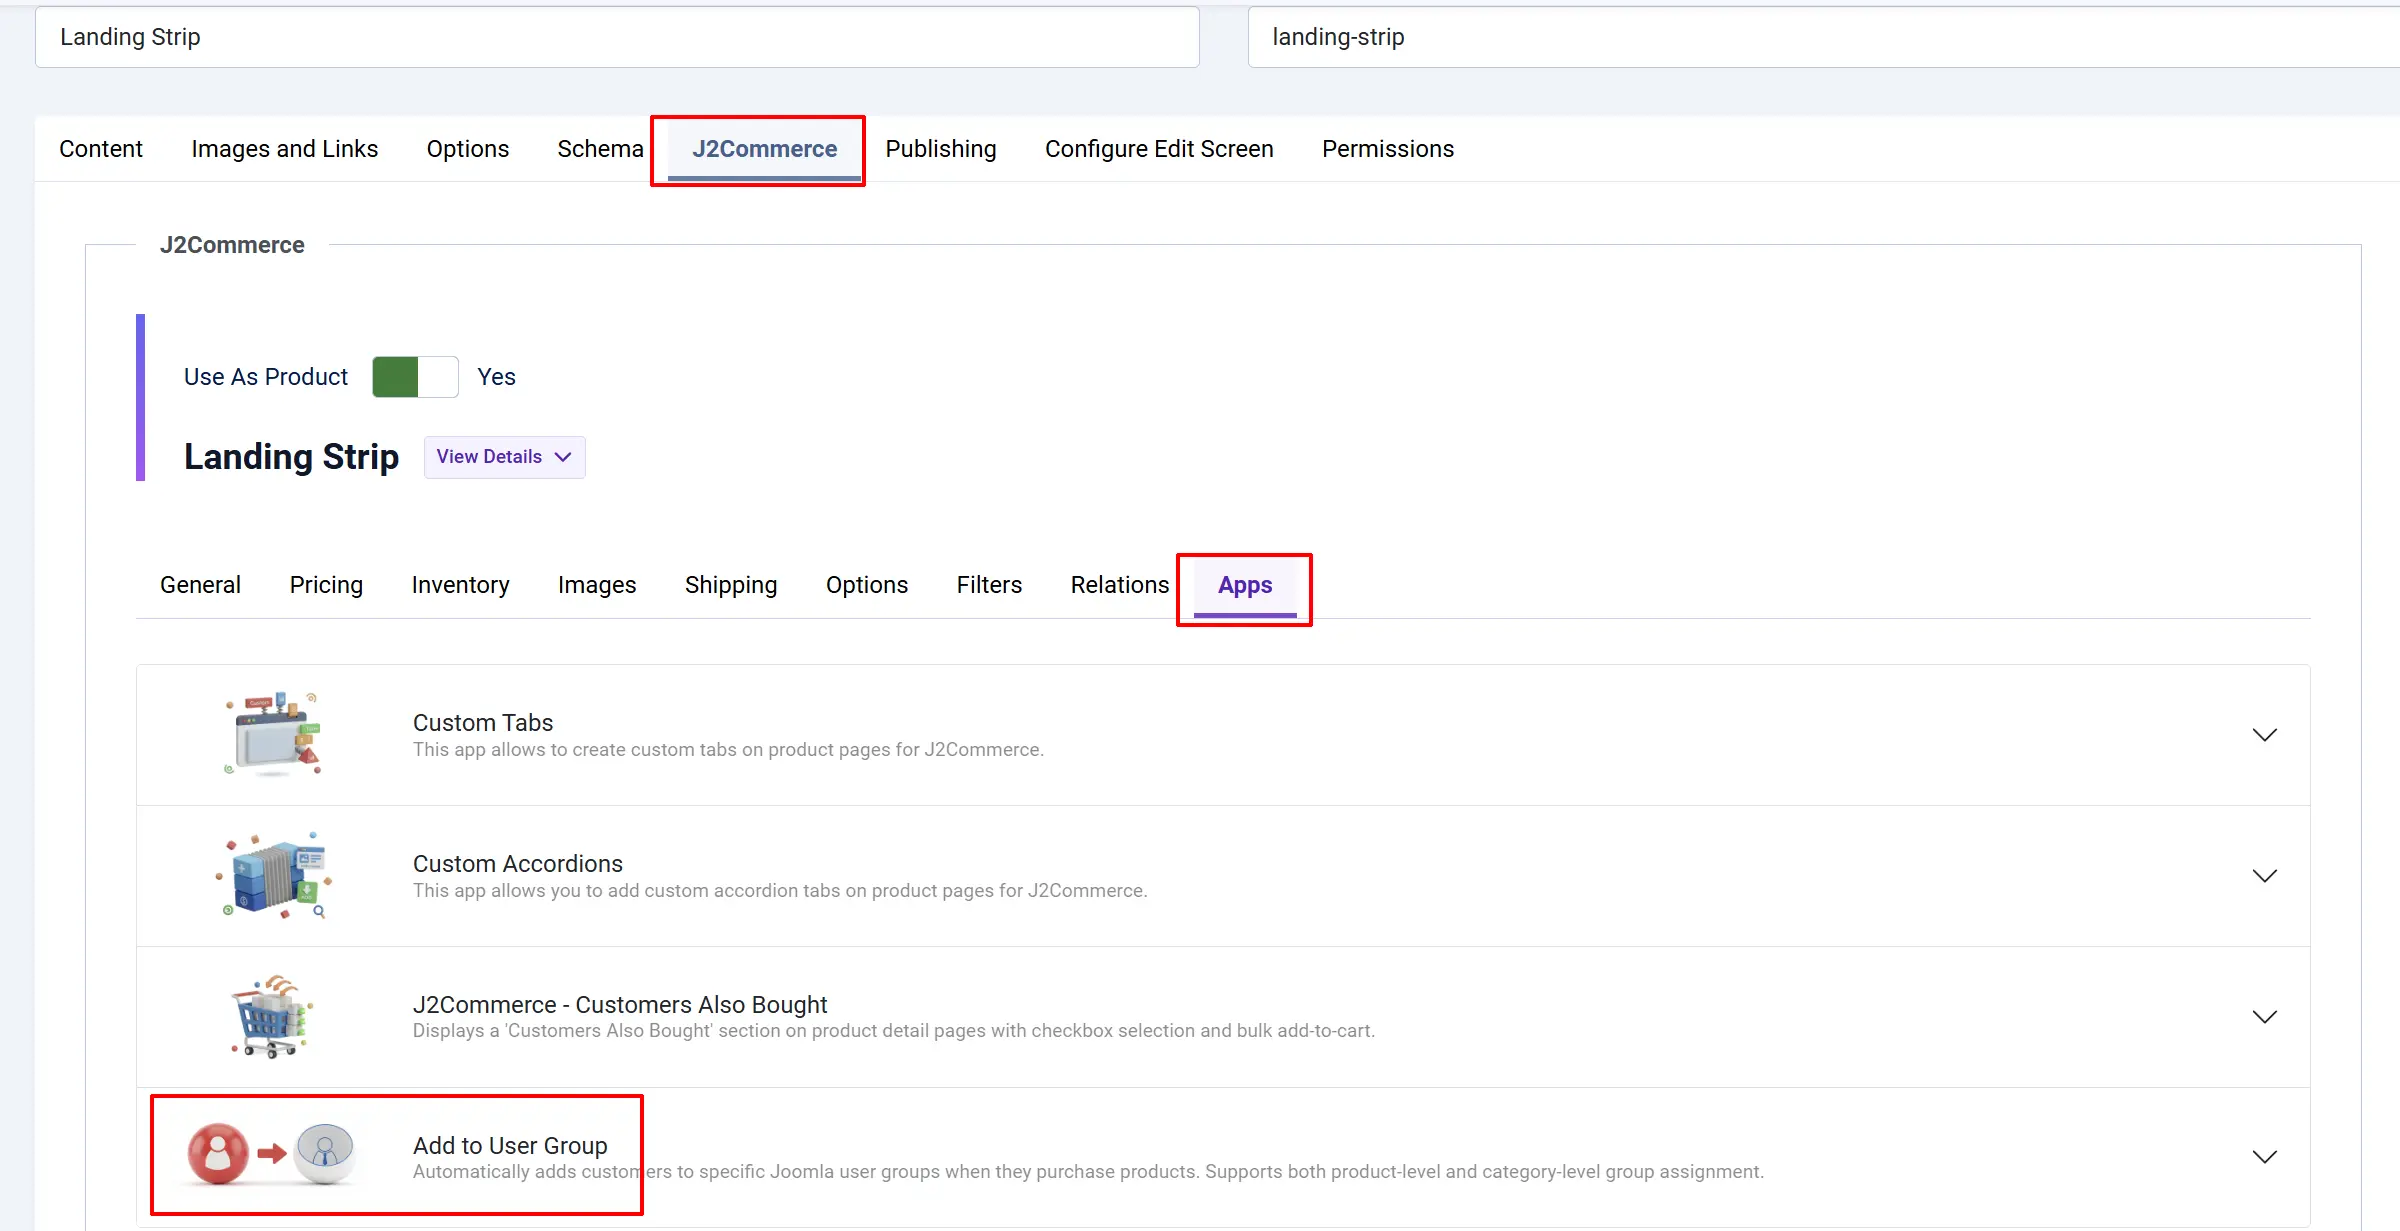
- In the User Group List field, select one or more groups from the dropdown.
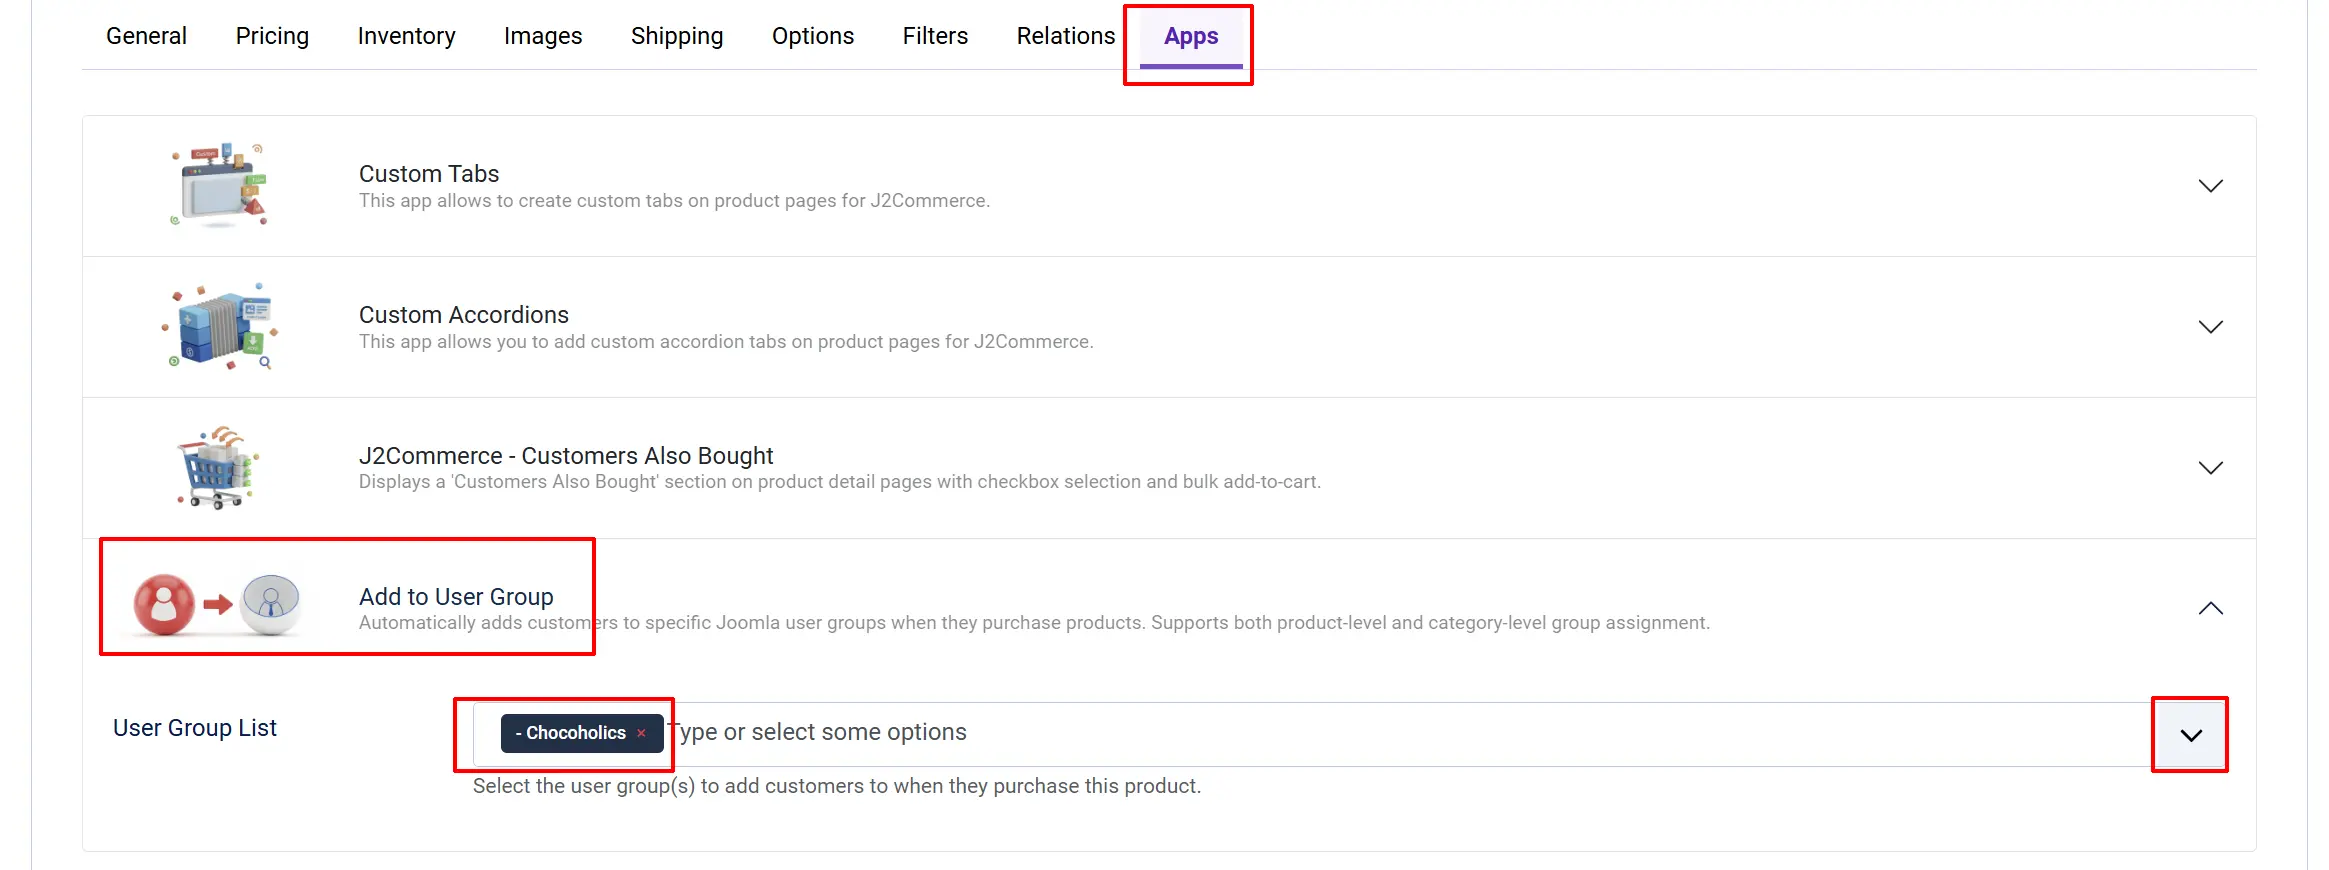
Note: Repeat this for every product that should grant group membership on purchase. Products with no groups selected are simply ignored by this plugin.
Assign User Groups at the Category Level (Optional)
If you have a whole category of products that should all grant the same group, you can set the groups once on the category instead of repeating the setting on each product. When category groups are present, they take over completely — the product-level setting is ignored for that item.
Go to Content -> Categories
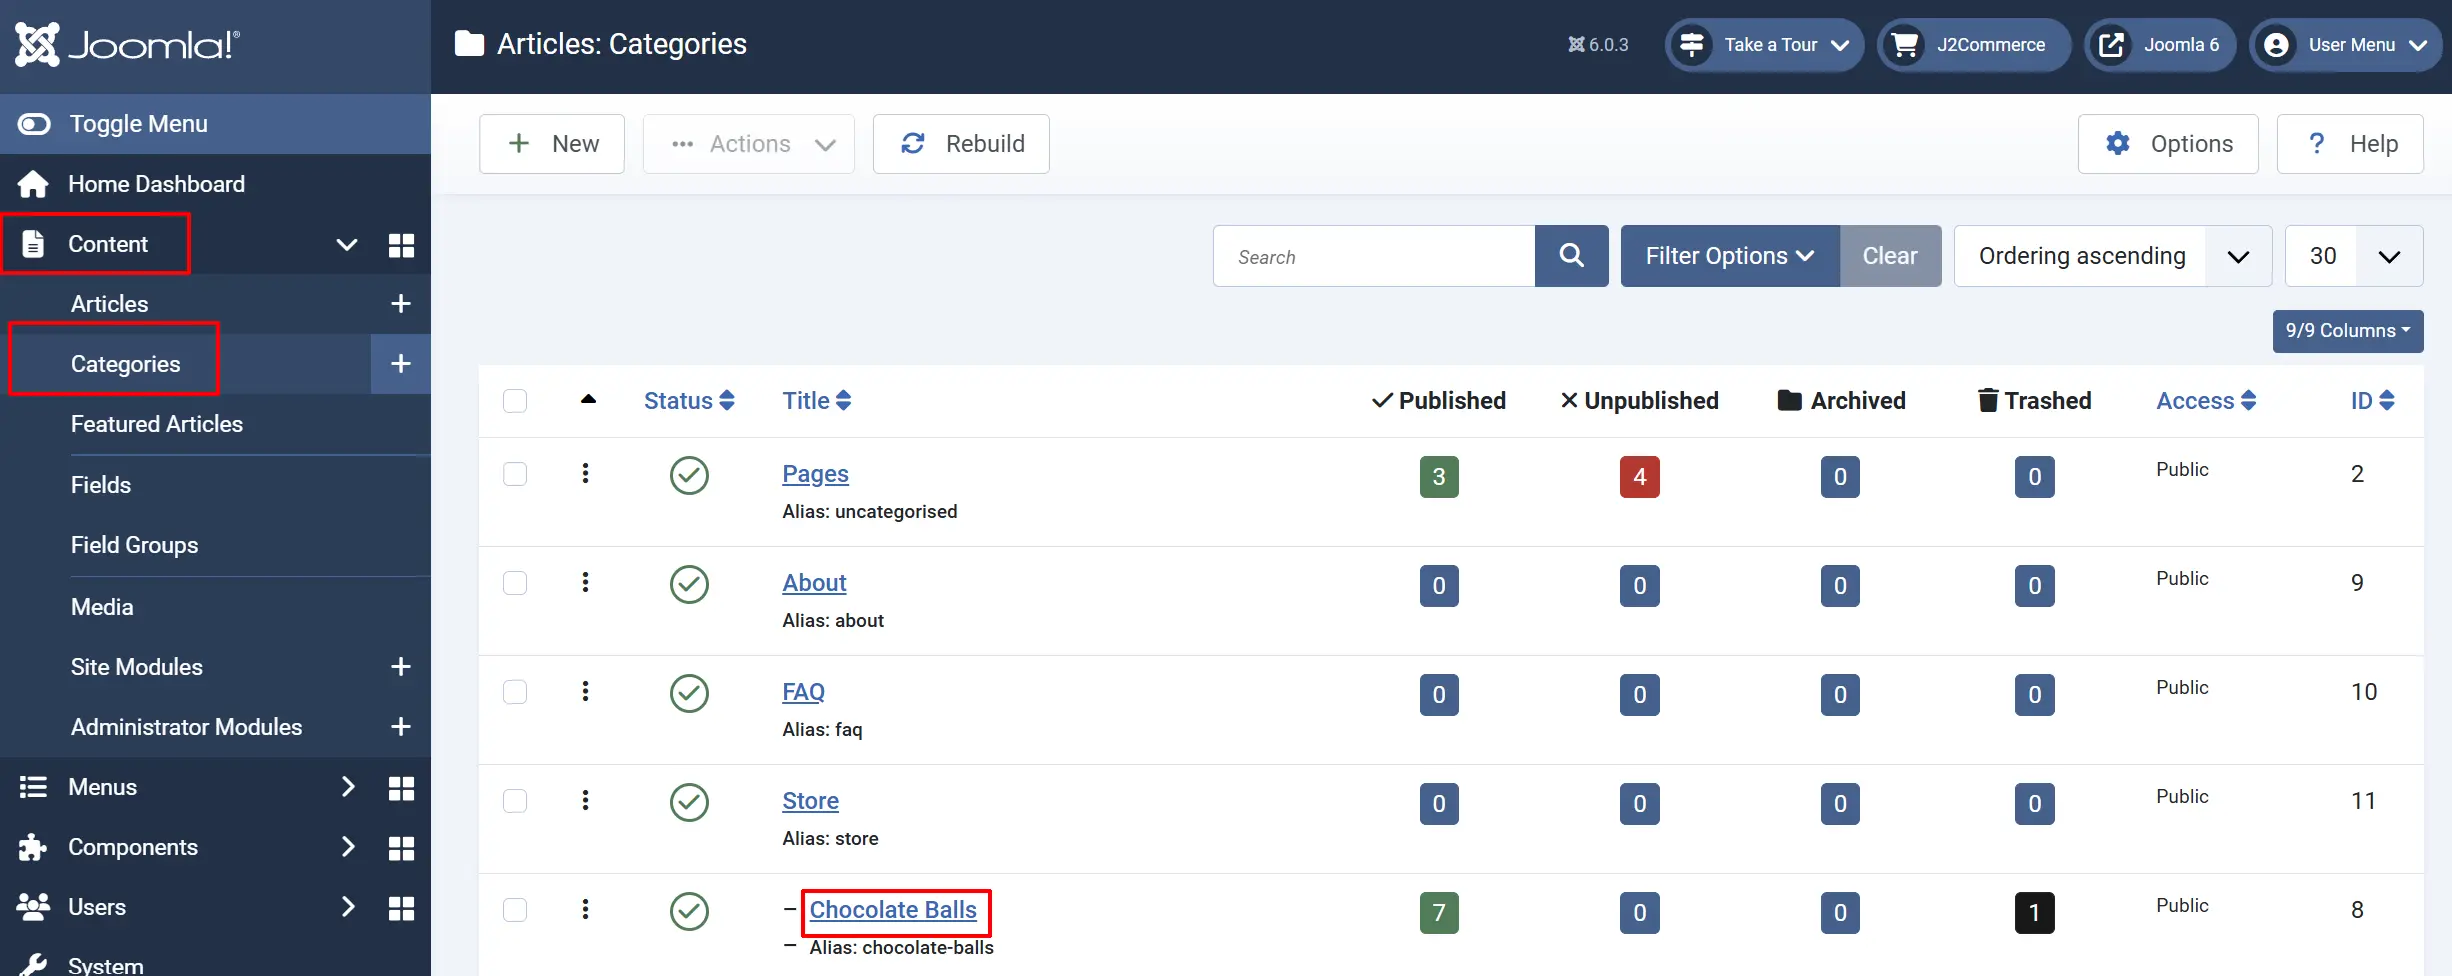
Click the category that contains your products.
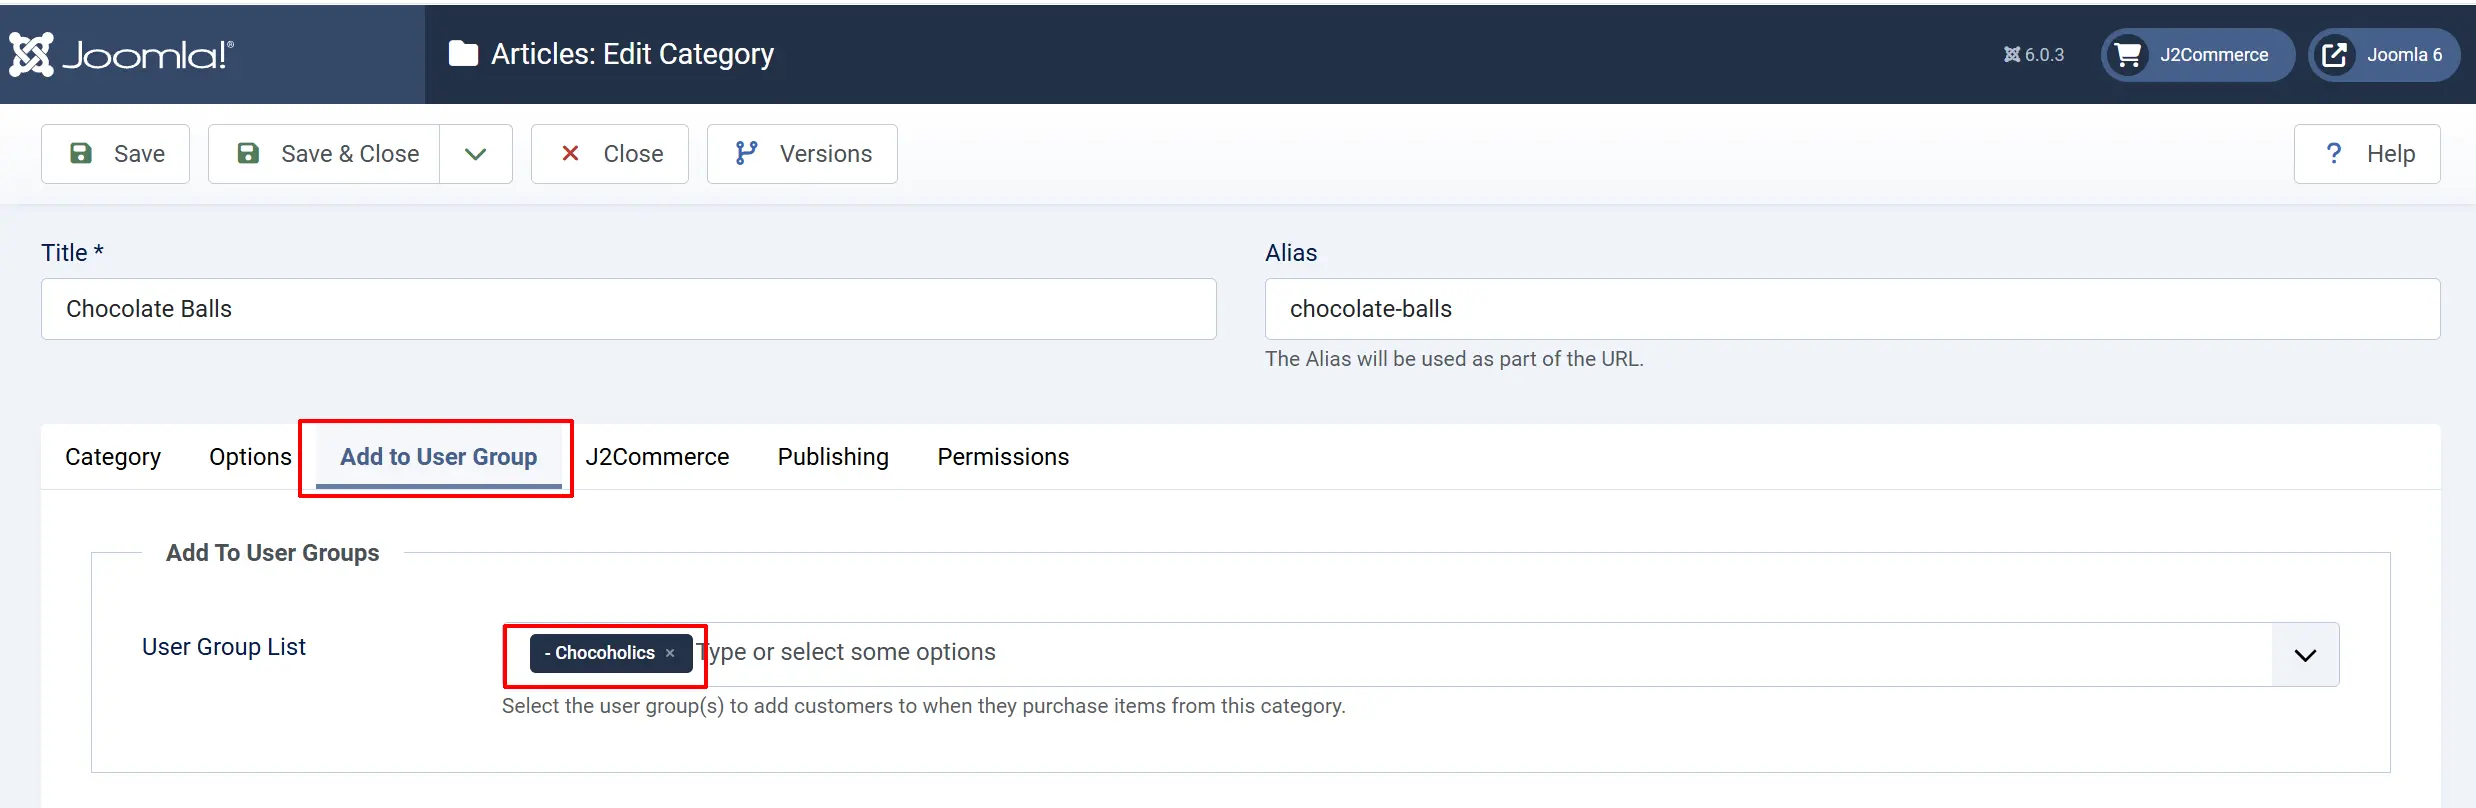
Find the Add To User Groups tab in the category editor.
In the User Group List field, select one or more groups.
Priority rule: If a product belongs to a category that has groups configured, those category groups are used and any product-level groups are ignored. If the category has no groups set, the product-level groups are used as the fallback.
How It Works
When an order's status changes to one of the statuses you configured:
- The plugin reads the order and identifies the customer.
- It loops through every item in the order.
- For each item, it checks whether the product's category has user groups set. If so, it uses those.
- If the category has no groups, it falls back to the product-level groups.
- The customer is added to every collected group using Joomla's built-in user group system.
- A note is added to the order history confirming the assignment.
The plugin handles duplicate group assignments gracefully — if the customer is already in a group, nothing breaks.
Note: Guest customers (users who checked out without a Joomla account) are skipped because there is no Joomla user ID to assign to a group.
Use Case Examples
Members-Only Digital Access
You sell a digital subscription product. Your Joomla site has a Members-Only group that can access restricted articles.
- Create the Members-Only user group under Users-> Groups.
- Set appropriate View Level restrictions on your members-only articles.
- On the subscription product, select Members-Only in the User Group List.
- Set the plugin's Order Status to Confirmed.
When a customer's order is confirmed, they are immediately added to the Members-Only group and can view the restricted content on their next page load.
Wholesale Pricing by Category
You have a Wholesale Products category. Any customer who buys from it should be upgraded to your Wholesale group.
- Create the Wholesale group in Joomla.
- Open the Wholesale Products category in Content -> Categories.
- Set Wholesale in the Add To User Groups tab.
All products in that category will now trigger the group assignment on purchase — no need to configure each product individually.
Troubleshooting
The customer was not added to the group after purchase
-
Check 1 — Order status match. Open the order and note the current status. Go back to the plugin settings and confirm that status is selected in Order Status. If the order is Pending but you have only Confirmed selected, no assignment will happen until the order is confirmed.
-
Check 2 — User group is set on the product or category. Edit the product and check the Add to User Group panel. Make sure at least one group is selected. If the product belongs to a category with groups set, the category groups override the product — verify the category setting too.
-
Check 3 — Guest checkout. If the customer placed the order as a guest (no Joomla account), the plugin cannot assign a group. The plugin only works for registered users with a valid Joomla user ID.
-
Check 4 — Enable debug mode. In the plugin settings, turn on Debug Mode and reproduce the issue by manually changing the order status. Then open the file
[joomla-root]/logs/app_usergroup.phpin a text editor and look for log entries related to that order.
Debug Mode shows "Status X not in configured statuses"
Cause: The order status ID does not match any of the statuses you selected in the plugin.
Solution: Open the plugin settings, expand Order Status, and add the status ID shown in the log entry.
A product in the category is not triggering the category groups
Cause: The category-level setting only applies to products sourced from Joomla content articles (the standard J2Commerce product type linked to com_content).
Solution: Confirm the product was created through the standard J2Commerce workflow and is linked to a content article in the correct category.