Veeqo
Veeqo (an Amazon company) is a multi-carrier order management and shipping platform that connects to USPS, UPS, FedEx, and other carriers. This app links your J2Commerce store to your Veeqo account so you can fulfill orders without leaving your workflow. When an order reaches a status you choose, it is pushed to Veeqo automatically. From the order admin screen you can compare live shipping rates, purchase a carrier label, print or download it, and refresh tracking — all in a few clicks.
Requirements
- PHP 8.3.0 or later
- Joomla 6.x
- J2Commerce 6.x
- An active Veeqo account with at least one warehouse, channel, and delivery method configured
The Rate Shopping feature (live carrier rate comparison and label purchasing) is available for US-based Veeqo accounts only.
Purchase and Download
The Veeqo app is a separate add-on available from the J2Commerce Extensions Store. It is not included with the core J2Commerce 6 component.
Step 1: Go to www.j2commerce.com -> Apps.
Step 2: Locate the Veeqo app -> click View Details -> Add to Cart -> Checkout.
Step 3: Go to My Downloads under your profile button at the top right corner. Search for Veeqo, then click Available Versions -> View Files -> Download Now.
Install the App
In the Joomla Administrator, go to System -> Install -> Extensions.
Upload the veeqo.zip file or use the Install from URL option.

Enable the App
Once you have installed the app, you will need to enable it. There are two ways you can access the extension.
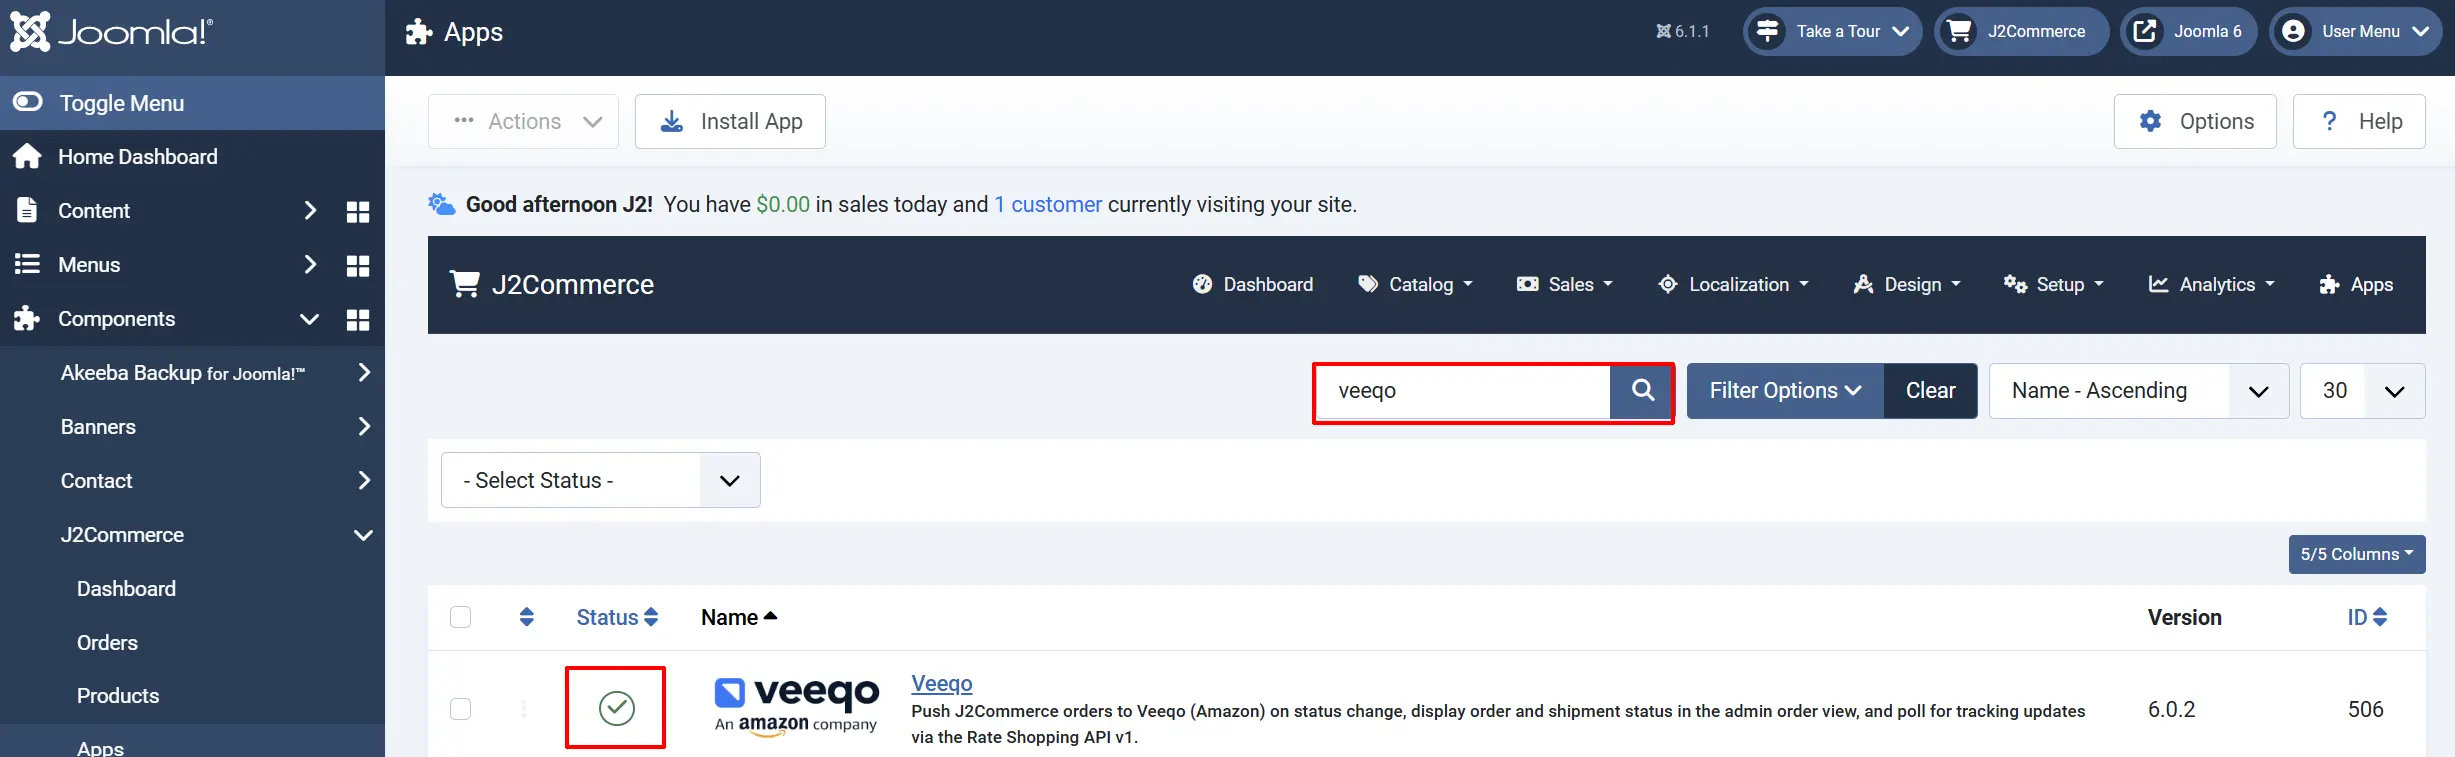
Option A: Go to the J2Commerce icon at the top right corner -> Apps
Option B: Go to Components on the left sidebar -> J2Commerce -> Apps

Look for Veeqo, click the X, and it will turn into a green checkmark. It is now enabled and ready for setup.
Configure the App
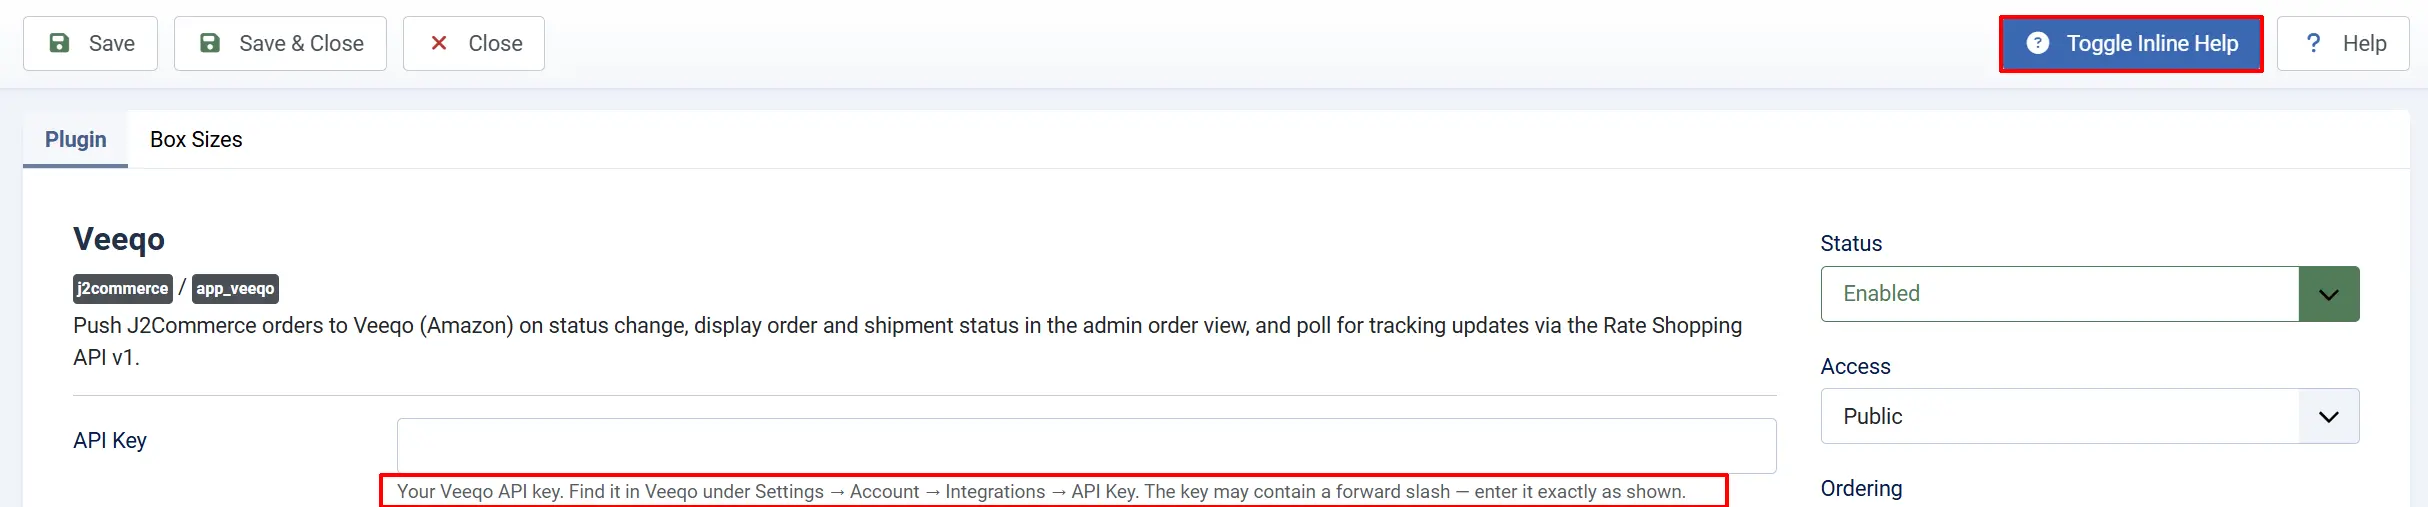
Once you click the Veeqo title next to the green checkmark, you are ready to start setting up the parameters.
Tip: Click the Toggle Inline Help button on any app you install and it will show a description below each field.
Basic Settings tab
API Key
Enter your Veeqo API key here. Find it in Veeqo under Settings -> Account -> Integrations -> API Key. The key may contain a forward slash — copy and paste it exactly as shown.
Save the plugin after entering your API key. The Warehouse, Channel, and Delivery Method dropdowns below will only populate once a valid key is saved.
Warehouse ID
Select the Veeqo warehouse to use as your ship-from location. The dropdown loads the warehouses from your Veeqo account once your API key is saved. If nothing appears, go to Settings -> Warehouses in Veeqo to confirm at least one warehouse exists.
Channel ID
Select the Veeqo sales channel (store) to associate pushed orders with. For orders created via the API, choose the channel with type direct. If the dropdown is empty, ensure your Veeqo account has at least one channel configured.
Delivery Method ID
Select the default Veeqo delivery method for pushed orders. This identifies how the order is expected to ship inside Veeqo. You can override delivery details individually when buying a label.
Auto-create Missing Products
| Option | What happens |
|---|---|
| No (default) | If an order line item's SKU does not exist in your Veeqo catalog, the push fails and shows you which SKUs need to be created in Veeqo first. |
| Yes | Products are created in Veeqo automatically before the order is pushed, using the title, SKU, price, and weight from the order. Newly created products start with zero stock, so the Veeqo order may show as awaiting stock until you set stock levels in Veeqo. |
Sync Inventory Counts
When set to Yes, after each successful order push the app writes your J2Commerce stock levels for every pushed item to Veeqo (for the configured warehouse). This keeps Veeqo's inventory in step with J2Commerce.
Inventory sync requires a paid Veeqo plan. On a free Veeqo account this step is skipped automatically and logged. A skipped sync never blocks the order push itself.
Payment Type
A fallback payment label sent to Veeqo when an order has no recorded payment method. The default is other. For most stores you can leave this as-is — the app maps the J2Commerce payment method (for example, PayPal) to the correct Veeqo payment type automatically.
Push on Order Status
Choose one or more J2Commerce order statuses that should trigger an automatic push to Veeqo. When an order reaches any of the selected statuses, the app sends it to Veeqo immediately. Leave blank to disable automatic pushes and use the manual Push to Veeqo button on each order instead.
Status After Push
Optionally move the J2Commerce order to a specific status after a successful push. Select — No change — to leave the order status unchanged after pushing.
Status When Shipped
Optionally move the J2Commerce order to a specific status when Veeqo reports the shipment as shipped. Select — No change — to skip this automatic status transition.
Enable Rate Shopping API v1
Set to Yes to enable live carrier rate comparison and label purchasing from the order admin screen. When enabled, a Create Label button appears on each order's Veeqo card so you can fetch real-time rates and buy a label without leaving Joomla.
Rate Shopping is available for US-based Veeqo accounts only. If your account is outside the US, set this to No.
Label Format
Choose the file format for purchased shipping labels:
| Format | Best for |
|---|---|
| PDF (default) | Standard desktop printers |
| PNG | Image preview and most office printers |
| ZPL | Thermal label printers (e.g., Zebra) |
| JPEG | Basic image output |
Default Package Weight
A fallback weight used when order items have no weight data stored in J2Commerce. Enter the value in the unit you select in the Weight Unit field below.
Weight Unit
Select the unit for package weight: lb (pounds), oz (ounces), kg (kilograms), or g (grams).
Ship-From Address Fields
These fields define the origin address used by the Rate Shopping API when calculating shipping rates. They are required if Rate Shopping is enabled.
| Field | What to enter |
|---|---|
| Ship-From Name | Your company or warehouse name |
| Ship-From Phone | Contact phone number for the shipping origin |
| Ship-From Street Address | Street address of the warehouse or fulfillment location |
| Ship-From City | City |
| Ship-From ZIP / Postcode | ZIP or postal code |
| Ship-From Country Code | Two-letter country code (e.g., US, GB) |
| Ship-From State / County | State or county code (e.g., CA, TX) |
Debug Logging
Set to Yes to write detailed activity logs to administrator/logs/plg_j2commerce_app_veeqo.php. Useful when troubleshooting failed pushes or unexpected behavior. Leave No for normal day-to-day use.
Box Sizes Tab
The Box Sizes tab is where you define your parcel box presets. When you fetch shipping rates for an order, you pick one of these presets to tell Veeqo the package dimensions. The box's length, width, and height are sent to the Rate Shopping API along with the order weight.
Click Add Box Preset (or the equivalent add button) to create a new row. Each row has these fields:
| Field | Description |
|---|---|
| Name | A friendly label for this box (e.g., "Small Mailer", "Large Box") |
| Length | The box length in the unit selected below |
| Width | The box width |
| Height | The box height |
Dimension Unit
Choose in (inches) or cm (centimeters) for the box dimension values above. All presets use the same unit.
Create a preset for each standard box you use most often. Having three to five presets ready saves time when you are buying labels on busy days.
Day-to-Day Workflow: Fulfilling an Order with Veeqo
Once the app is configured, here is how you fulfill a typical order:
Step 1: Open the Order in J2Commerce
Go to J2Commerce -> Sales -> Orders and click the order you want to fulfill.
Scroll down to the Veeqo Shipping card. If the order has not been pushed yet, you will see the message "This order has not been pushed to Veeqo yet."
Step 2: Push the Order to Veeqo
Option A — Automatic push: If you configured a trigger status (for example, Confirmed), the order was already pushed when its status changed. The Veeqo card shows the Veeqo Order Number and the date it was synced.
Option B — Manual push: Click the Push to Veeqo button on the Veeqo card. The app sends the order to your Veeqo account. A success message confirms the push, and the Veeqo Order Number appears on the card.
Step 3: Re-sync an Order (if you need to update it)
If you edited the order after the first push — changed a quantity, updated the address, or added a note — click Re-sync to Veeqo to send the updated order data.
Keep in mind:
- If the linked Veeqo order is locked (for example, a label was already purchased, or the order is shipped, cancelled, or refunded in Veeqo), the app shows a message explaining why it cannot update the order. Edit it manually in your Veeqo dashboard if needed.
- If the Veeqo order was deleted from Veeqo, re-syncing automatically recreates it.
Step 4: Buy a Shipping Label (US accounts with Rate Shopping enabled)
After the order is pushed, click the Create Label button to expand the rate-shopping panel.
- Select a box from the dropdown (the presets you defined in the Box Sizes tab).
- Click Fetch Shipping Rates. The app contacts Veeqo and returns live carrier rates (via Amazon Shipping — USPS, UPS, FedEx, and others). This may take a few seconds.
- Choose a Carrier from the first dropdown. The second dropdown populates with available services for that carrier.
- Choose a Shipping Method (service level). A summary shows the carrier, service, price, and estimated delivery date.
- Click Buy Label.
Clicking Buy Label purchases a real shipping label and charges the cost to your Veeqo account. A confirmation prompt appears before the purchase completes. The label cost is recorded on the order.
Step 5: Print or Download the Label
Once a label has been purchased, the Veeqo card shows two new buttons:
- Print Label — Opens the label in a new browser tab for printing.
- Download Label — Downloads the label file in your configured format (PDF, PNG, ZPL, or JPEG).
The tracking number and shipment status also appear on the card.
Step 6: Refresh Tracking
Click Refresh Tracking at any time to pull the latest tracking status from Veeqo. Tracking information also updates automatically via the J2Commerce cron task, so the card stays current without manual refreshes on most orders.
How It Works
When an order's status changes in J2Commerce, the app checks whether the new status matches any of your configured Push on Order Status values. If it does, the app creates (or updates) the corresponding customer and order in your Veeqo account and, if configured, writes back inventory counts.
The Veeqo Order ID is stored with the J2Commerce order so every future action — re-sync, rate shopping, label purchase, tracking refresh — is tied to the correct Veeqo record. The cron task polls Veeqo for shipping updates and writes tracking numbers and status changes back to J2Commerce automatically.
Tips
- Set a trigger status that matches your fulfillment point. If you fulfill after payment clears, use "Confirmed" or "Processing." If you fulfill manually, leave the trigger blank and push orders individually.
- Use the Status After Push and Status When Shipped fields to automate your order status flow. For example, move orders to "Sent to Veeqo" after the push, then to "Shipped" when Veeqo marks them dispatched.
- Create box presets before you go live. Having your standard parcel sizes ready speeds up label buying significantly on high-volume days.
- Leave Debug Logging off in production. Turn it on only when you need to diagnose a specific problem, then turn it off again to keep log files manageable.
- Rate Shopping is US only. If your warehouse is outside the US, keep Rate Shopping disabled and buy labels directly inside the Veeqo dashboard.
- Auto-create products is handy during setup when your Veeqo catalog is still empty. Once your SKUs are in Veeqo, turn it off so unexpected SKUs generate an error rather than being silently created.
Troubleshooting
Order Was Not Pushed Automatically
Cause: The order status does not match any value in the Push on Order Status setting, or the API key is not saved.
Solution:
- Go to J2Commerce -> Apps -> Veeqo and verify your API Key is entered and saved.
- Check the Push on Order Status field — confirm the status your orders move to when payment clears is listed there.
- Open the order, scroll to the Veeqo card, and use the Push to Veeqo button to push it manually.
Push Fails with "SKU not found" or Similar Error
Cause: One or more order line items have SKUs that do not exist in your Veeqo product catalog, and Auto-create Missing Products is set to No.
Solution:
Option A: Set Auto-create Missing Products to Yes and push again. Veeqo creates the missing products automatically.
Option B: Log into your Veeqo account, create the missing products with matching SKUs, then push the order again from the J2Commerce order screen.
"No shipping rates returned" After Fetching Rates
Cause: The Rate Shopping API returned no results. This can happen because the Veeqo account is not US-based, the ship-from address is incomplete, or the customer's delivery address is invalid.
Solution:
- Confirm your Veeqo account is US-based. Rate Shopping is only available for US accounts. If not, disable Enable Rate Shopping API v1 in settings.
- Verify all Ship-From Address fields in the plugin settings are filled in (street address, city, ZIP, state, and country code).
- Check the delivery address on the order is complete and valid.
- If the problem persists, enable Debug Logging, re-try the rate fetch, then review the log file at
administrator/logs/plg_j2commerce_app_veeqo.phpfor details.
Re-sync Button Shows a "Locked" Message
Cause: The linked Veeqo order is in a state that prevents updates — a label has already been purchased, or the order is shipped, cancelled, or refunded in Veeqo.
Solution:
The lock message tells you the specific reason. If you need to change the order, log into your Veeqo dashboard and edit it there directly.
Dropdowns for Warehouse / Channel / Delivery Method Are Empty
Cause: The API key has not been saved yet, or it is incorrect.
Solution:
- Enter your API key in the API Key field.
- Click Save in the toolbar.
- Return to the plugin settings — the dropdowns will now query your Veeqo account and populate.
- If they are still empty after saving, click Toggle Inline Help and check the description under the API Key field for guidance. Also verify the key in Veeqo under Settings -> Account -> Integrations -> API Key.
Tracking Number Not Updating
Cause: The J2Commerce cron task is not running, or the order has not shipped in Veeqo yet.
Solution:
- Go to the order and click Refresh Tracking on the Veeqo card to pull the latest status on demand.
- Confirm the J2Commerce cron task is scheduled. Go to System -> Manage -> Plugins and verify the Task — J2Commerce plugin is enabled.
- If tracking still does not appear, confirm the shipment has been dispatched in Veeqo and a tracking number has been assigned there.