Tax Manager
The Tax Manager app gives you fine-grained control over how tax is calculated in your store. Instead of relying solely on the built-in tax profiles, you define reusable Tax Classes — each containing one or more rate rules that match on country, state or province (zone), and postcode. You can also mark specific customer groups as completely tax-exempt, which is useful for wholesale accounts, non-profit organizations, or resellers.
Requirements
- PHP 8.3.0 or later
- Joomla! 6.x
- J2Commerce 6.x
Purchase and Download
This app is a separate add-on available from the J2Commerce Extensions Store. It is not included with the core J2Commerce 6 component.
Step 1: Visit www.j2commerce.com and navigate to Apps.
Step 2: Find Tax Manager, click View Details, then Add to Cart and complete checkout.
Step 3: Go to My Downloads under your profile menu. Click Available Versions -> View Files -> Download Now to save the ZIP file.
Install the App
In the Joomla admin, go to System -> Install -> Extensions.
Upload the app_taxmanager.zip file using the upload panel, or use Install from URL.
Joomla installs and enables the plugin automatically.

Enable the App
Once installed, verify the app is enabled:
Option A: Click the J2Commerce icon in the top-right corner -> Apps.
Option B: Go to Components on the left sidebar -> J2Commerce -> Apps.
Look for Tax Manager in the list. If the status icon shows a red X, click it to enable the app. It will turn into a green checkmark.

Configure the App
Click the Tax Manager title (next to the checkmark) to open its settings.
Click the Toggle Inline Help button in the toolbar and the app will show a description below each field as you configure it.

Basic Settings
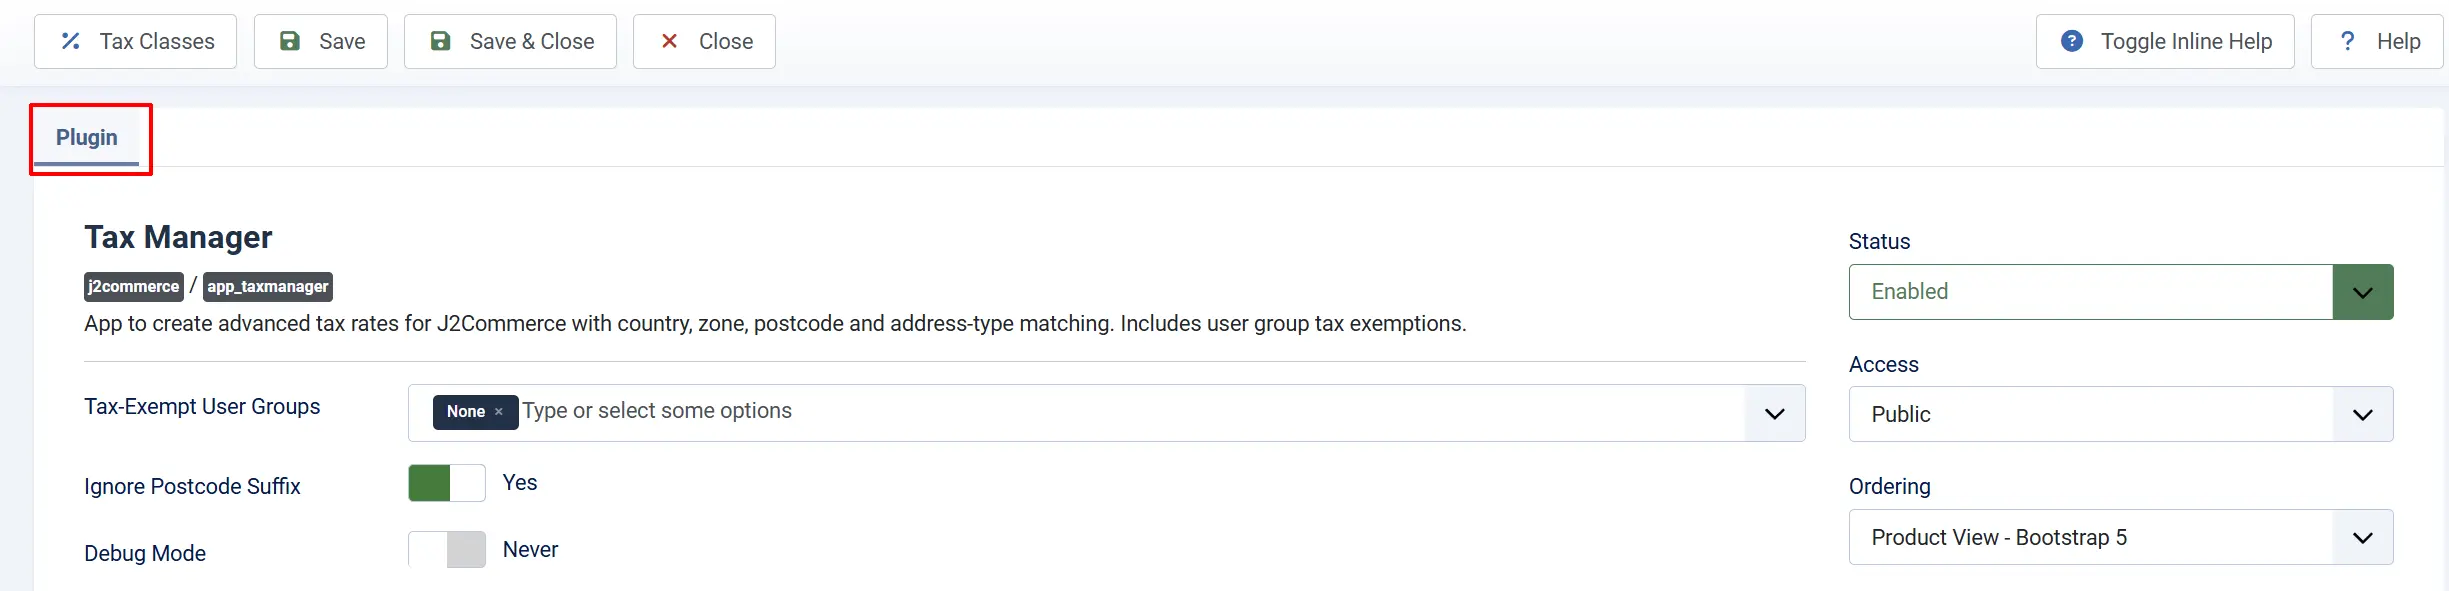
Tax-Exempt User Groups: Users in any selected group will pay no tax on their orders. Leave empty to disable exemptions.
Ignore Postcode Suffix: When enabled, the hyphen suffix on postcodes like 94403-1234 is stripped before matching rates, so 94403 is used for lookup. Enable this if customers may enter postcodes with a hyphen suffix.
Debug Mode: Writes detailed rate-matching logs to administrator/logs/plg_j2commerce_app_taxmanager.php. Useful when a rate is not applying as expected. Disable in production.
Managing Tax Classes
A Tax Class is a named container for a set of tax rate rules. You assign a Tax Class to a product the same way you would assign a standard tax profile, and the Tax Manager applies the matching rates at checkout.
Open the Tax Classes List
There are two ways to reach the Tax Classes screen:
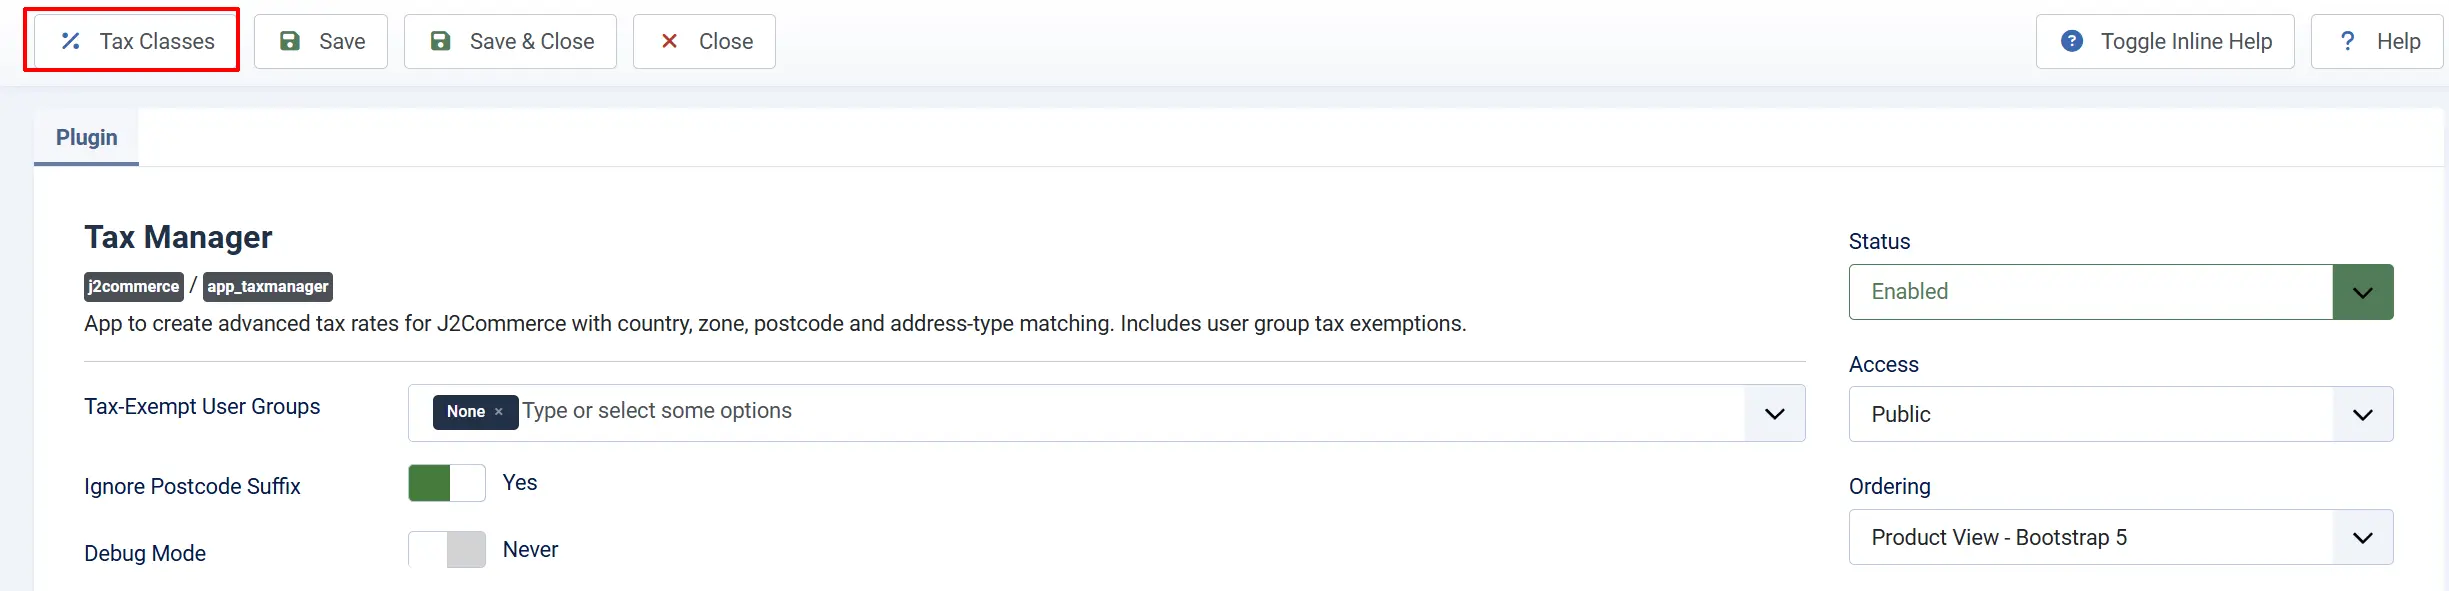
Option A: Go to J2Commerce -> Apps -> Tax Manager -> Tax Classes button in the top toolbar.
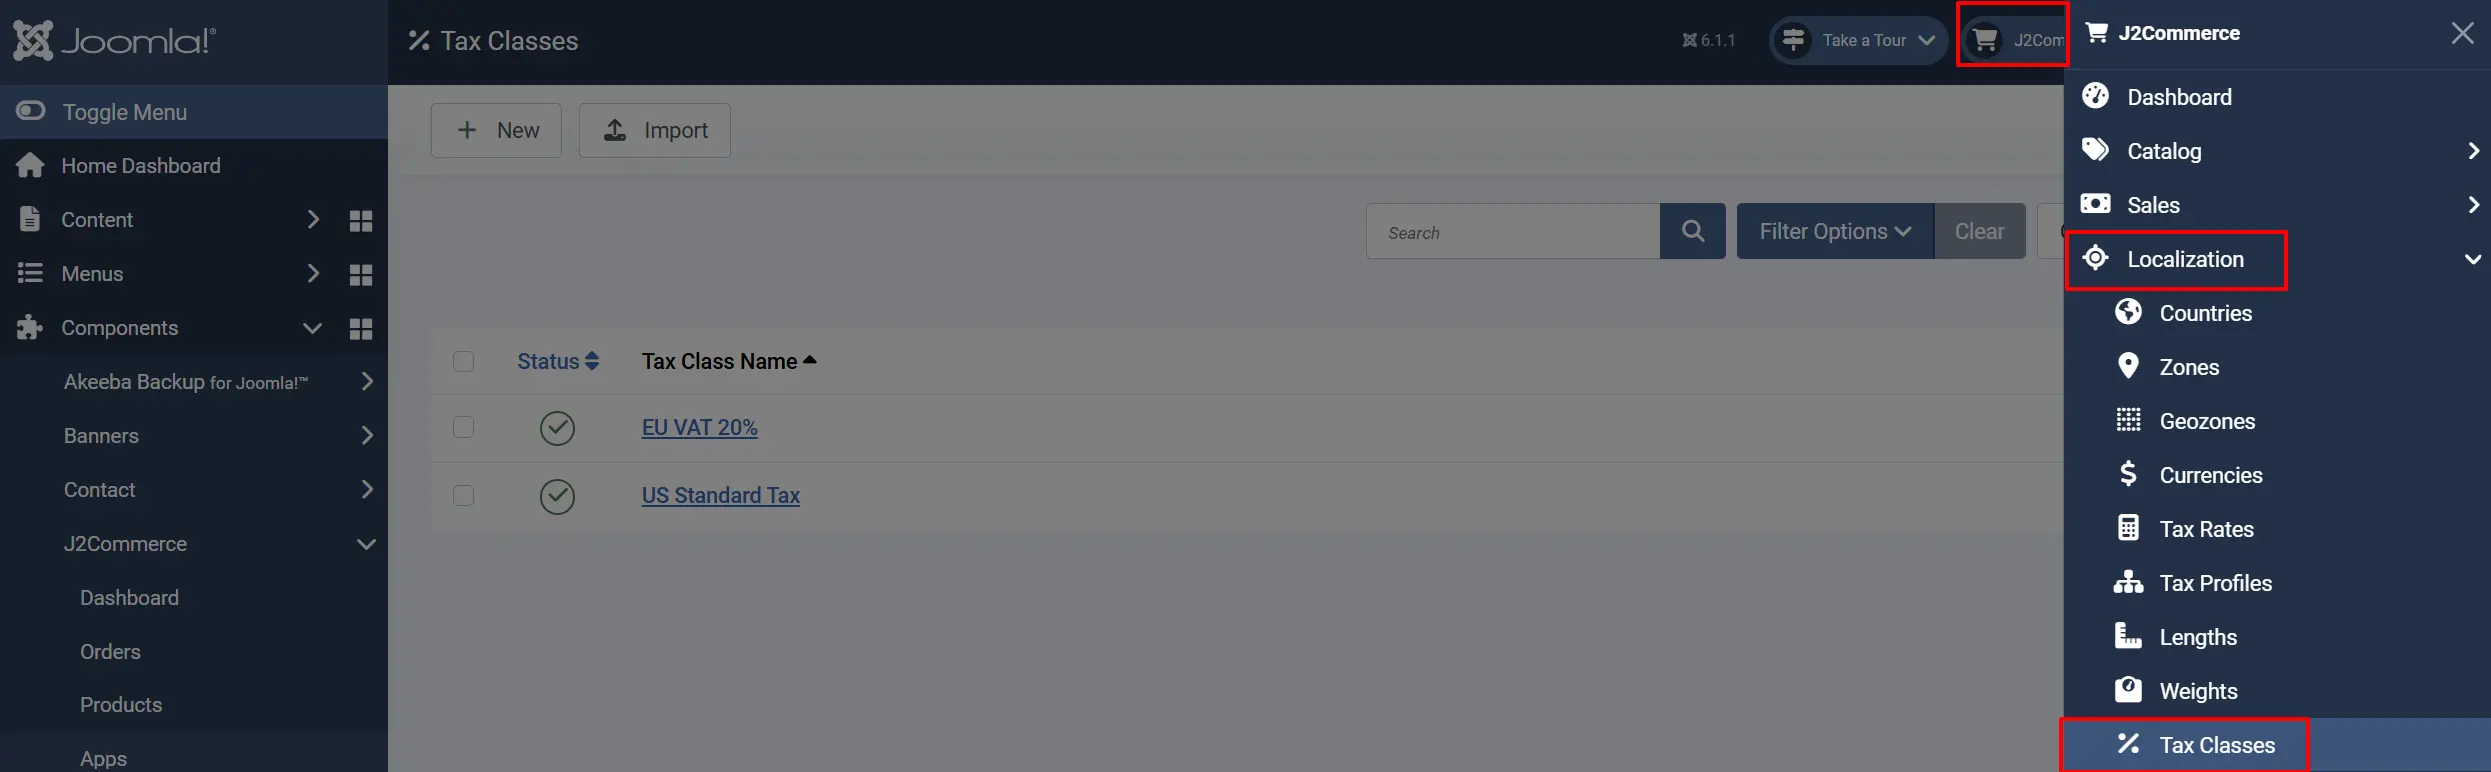
Option B: Go to J2Commerce -> Localization -> Tax Classes
Create a New Tax Class
Click New in the toolbar.
Details tab
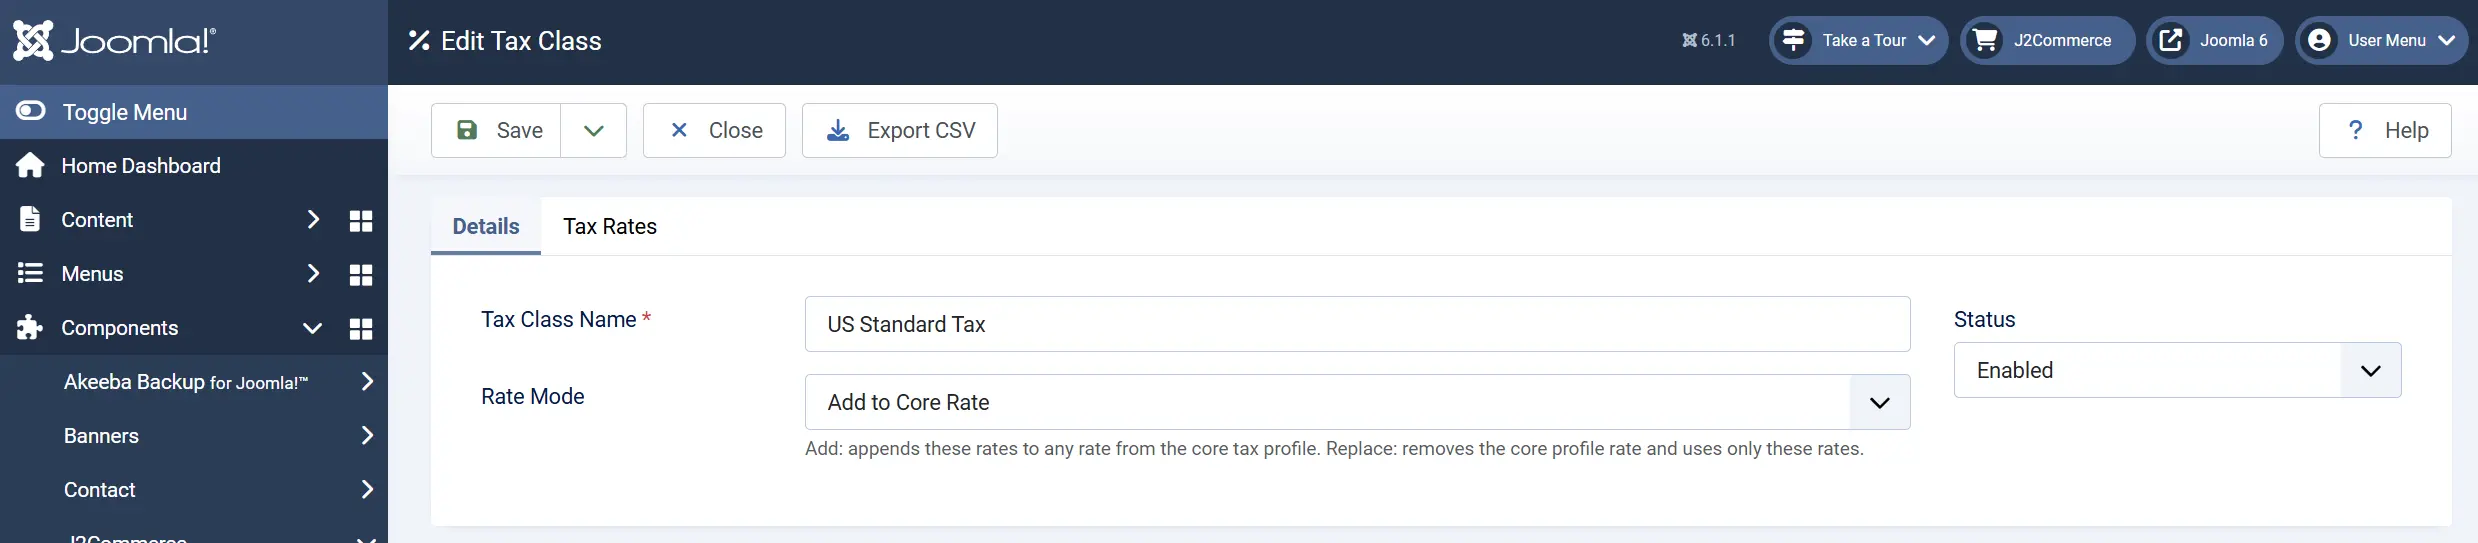
Tax Class Name — for example, US Standard Tax or EU VAT 20%.
Rate Mode:
-
Add to Core Rate: The rates in this class are added on top of any rate from the product's core tax profile.
-
Replace Core Rate: The rates in this class completely replace the core profile rate. Only these rates apply.
Add Tax Rates to a Class
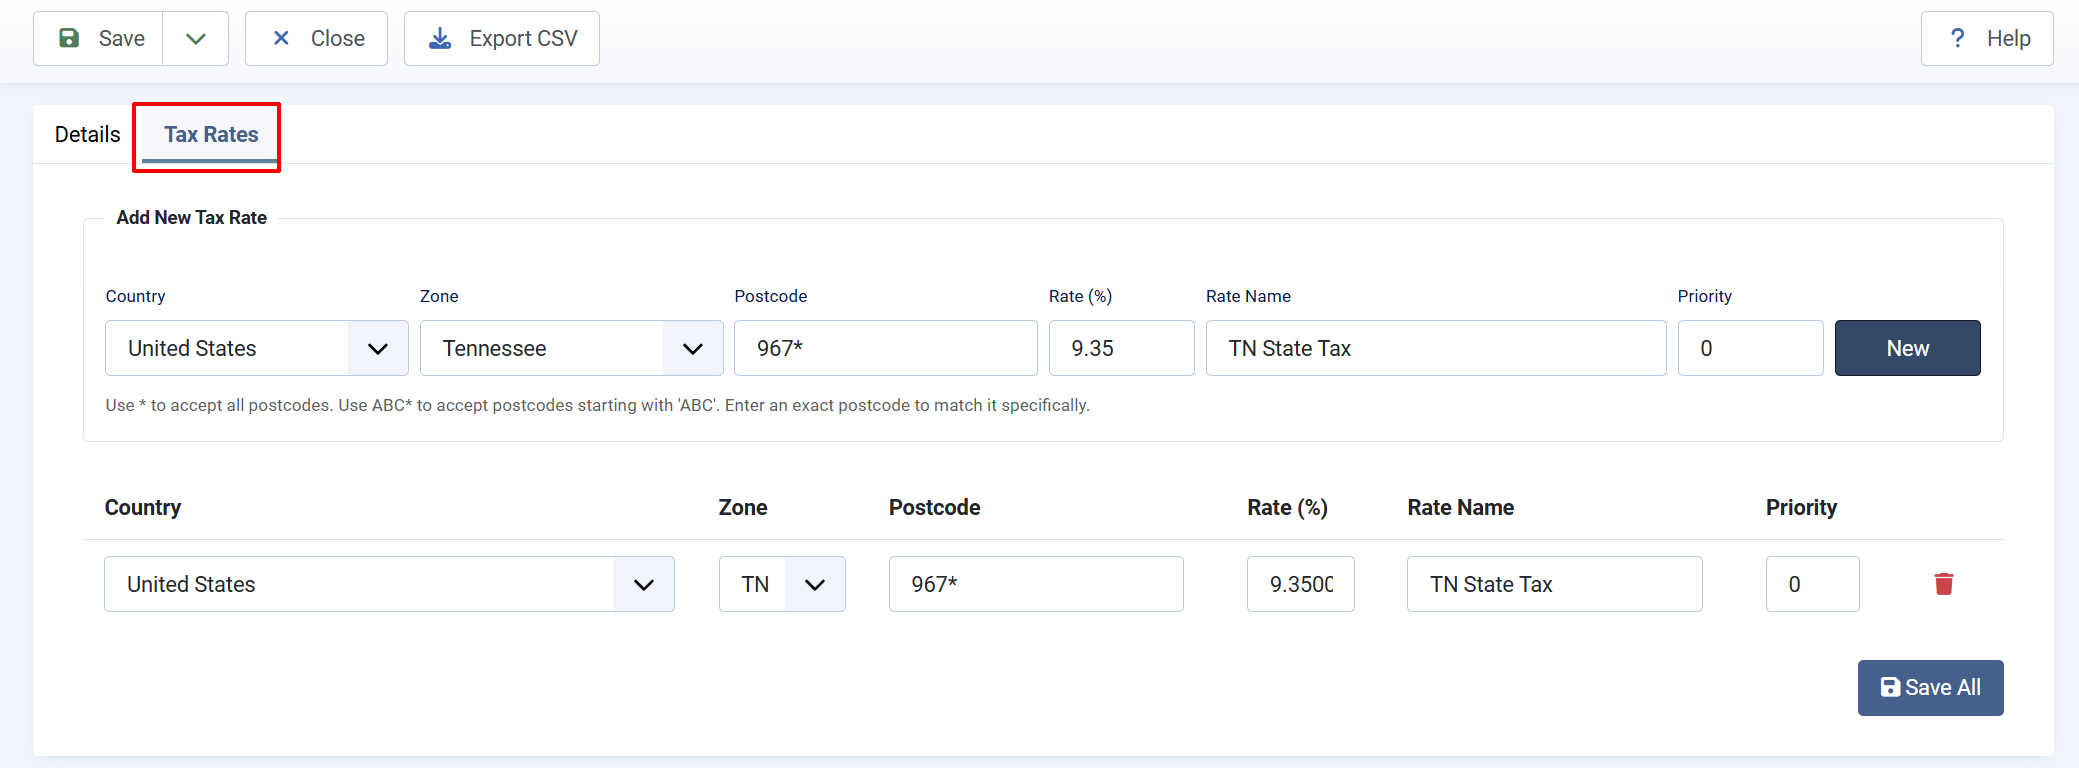
After saving a Tax Class, the Tax Rates table appears at the bottom of the edit screen. Each row targets a specific combination of country, zone, and postcode.
Click Add New Tax Rate to add a row, then fill in the fields:
Country: Two-letter ISO country code, or * for all countries. Example;US, GB, *
Zone: State or province code, or * for all zones. Example; CA, TX, *
Postcode: Exact postcode, a prefix with wildcard (940*), or * for all postcodes. Example; 94403, 940*, *
Rate (%): The tax percentage to apply. Example; 8.25
Rate Name: A display label for this rate. Example; CA State Tax
Priority: Sort order when multiple rates match. Lower numbers apply first. Example; 0
Postcode Matching Tips
- Use
*to match any postcode. - Use a prefix like
940*to match all postcodes that begin with940. - Enter an exact postcode such as
94403to match only that postcode. - If your customers enter postcodes with a hyphen suffix (for example, US ZIP+4 codes like
94403-1234), enable Ignore Postcode Suffix in the plugin settings so the suffix is stripped before matching.
Import and Export Tax Rates (CSV)
For stores with many rates — such as US state-by-state tax tables — you can import and export rates as CSV files rather than entering them manually.

To export: Open a Tax Class and click Export CSV in the toolbar. The file downloads with columns in this order:
taxrate_country, taxrate_zone, taxrate_zip, taxrate_rate, taxrate_name, taxrate_priority
To import: From the Tax Classes list, click Import in the toolbar. Select your CSV file, choose the correct delimiter (comma by default), and click Upload. Each row in the CSV adds a new rate to the selected class.
The required CSV columns are:
taxrate_country: Two-letter ISO code or *
taxrate_zone: Zone/state code or *
taxrate_zip: Postcode, prefix wildcard, or *
taxrate_rate: Tax percentage as a number, e.g. 8.25
taxrate_name: Display name for the rate
taxrate_priority: Integer sort priority
Duplicate a Tax Class
On the edit screen for any existing Tax Class, click the Save as Copy option from the Save dropdown. This creates a new class named [Original Name] (2) with all rate rows copied. You can then rename and edit the copy independently.
Enable or Disable a Tax Class
On the Tax Classes list, click the status icon next to a class to toggle it on or off. Disabled classes do not appear as selectable tax profiles and do not apply any rates at checkout.
You can also select multiple classes with the checkboxes and use the Enable or Disable toolbar button to bulk-change status.
Assign a Tax Class to a Product

Tax Classes created in Tax Manager appear in the same dropdown as standard core tax profiles. To assign one:
- Go to J2Commerce -> Catalog -> Products.
- Click a product to edit it.
- Open the J2Commerce tab -> Pricing tab (or General tab, depending on your layout).
- Find the Tax Profile field and select your Tax Manager class from the dropdown.
Tax-Exempt User Groups
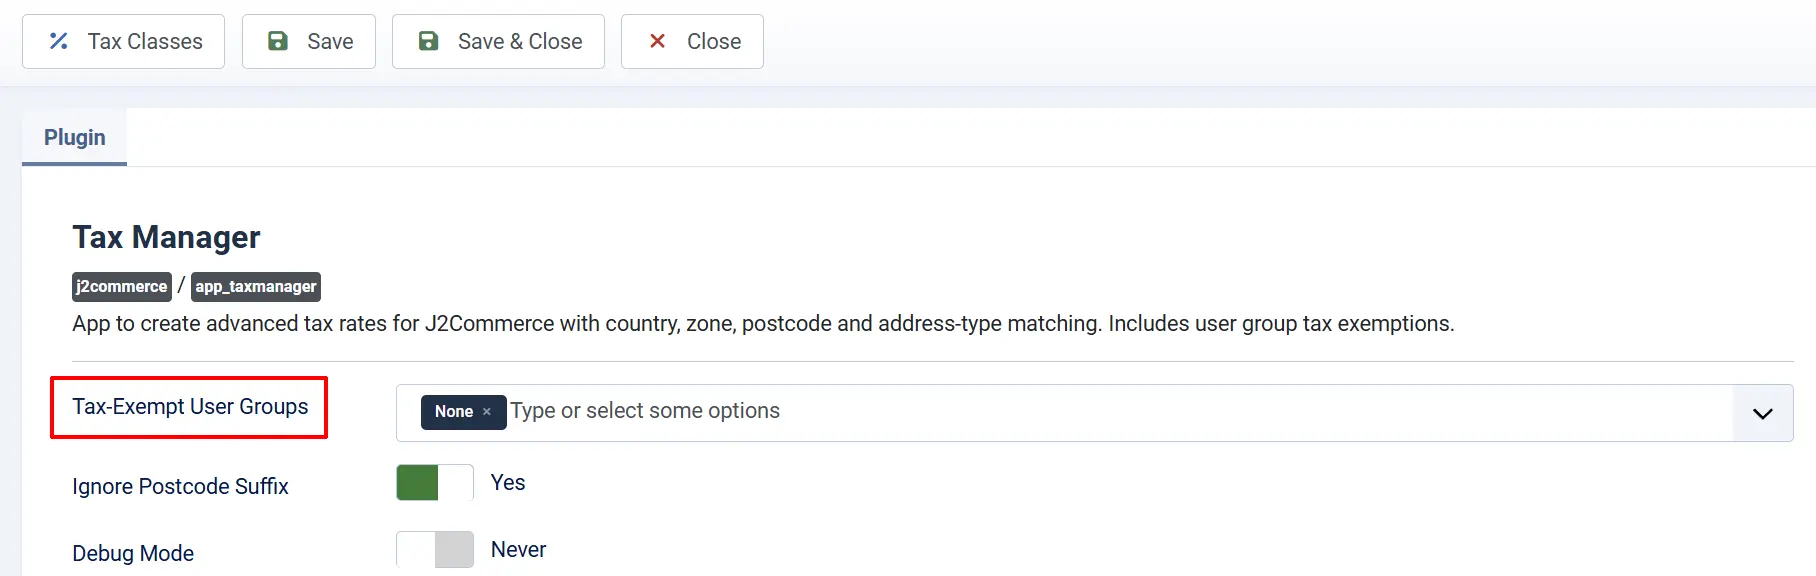
If you need certain customers — such as wholesale buyers or charities — to pay no tax at all, use the Tax-Exempt User Groups setting:
- Open the Tax Manager app settings (J2Commerce -> Apps -> Tax Manager).
- Under Tax-Exempt User Groups, select one or more Joomla user groups.
Any logged-in customer who belongs to one of those groups will have their tax profile set to zero at checkout, regardless of which Tax Class or core tax profile is assigned to the product.
Guests (not logged in) are never treated as tax-exempt via this feature.
How Tax Is Calculated
When a customer reaches checkout, Tax Manager checks the customer's address against all rates in the assigned Tax Class:
- Tax Manager reads your store's Tax Calculation Basis setting (billing address or shipping address) from J2Commerce -> Setup -> Configuration -> Product Settings tab -> Tax section.
- It looks up the customer's country, zone, and postcode from that address.
- It matches rates from the Tax Class by country (exact or
*), then by zone (exact or*), then by postcode (exact, prefix wildcard, or*). - Depending on the Rate Mode setting on the Tax Class, matched rates either replace or add on top of the product's core tax profile rate.
- Duplicate rates (same name and percentage) are automatically de-duplicated.
Tips
- Name rates clearly — a name like
CA State Tax 7.25%in the Rate Name field makes invoices and order summaries easier for customers to read. - Use wildcard country and zone sparingly — the most specific rule that matches wins nothing; all matching rows are applied, so overly broad wildcards can stack unexpectedly.
- Test with Debug Mode on — enable Debug Mode temporarily and place a test order. Open
administrator/logs/plg_j2commerce_app_taxmanager.phpto see exactly which rates matched and why. - Export before bulk edits — download a CSV backup of a Tax Class before making large changes, so you can re-import if something goes wrong.
- Combine with tax-exempt groups — you can use Tax Classes for your standard rates and tax-exempt groups for wholesale customers, both managed from one place.
Troubleshooting
No Tax Is Being Applied at Checkout
Cause: The Tax Class is disabled, the product has no Tax Class assigned, or no rates match the customer's address.
Solution:
- Go to J2Commerce -> Apps -> Tax Manager and verify the green checkmark is showing (app is enabled).
- Go to J2Commerce -> Catalog -> Products, edit the product, and confirm a Tax Class is selected in the Tax Profile field.
- Open the Tax Class and check that at least one rate is configured and the class itself is enabled (green checkmark on the list).
- Enable Debug Mode in the Tax Manager settings, place a test order, and check the log at
administrator/logs/plg_j2commerce_app_taxmanager.phpto see the matching result.
Tax Class Does Not Appear in the Product Tax Profile Dropdown
Cause: The Tax Class is disabled.
Solution:
- Go to the Tax Classes list.
- Click the status icon for the class to enable it.
- Clear the Joomla cache: go to Home Dashboard -> Cache -> Delete All.
- Return to the product edit screen and check the dropdown again.
CSV Import Fails
Cause: Missing required columns, wrong delimiter, or empty file.
Solution:
- Open your CSV in a plain text editor and verify the first row contains the exact headers:
taxrate_country,taxrate_zone,taxrate_zip,taxrate_rate,taxrate_name,taxrate_priority. - Ensure each data row has all six columns, even if a value is
*. - If your CSV uses semicolons or tabs as separators, change the Delimiter setting in the import dialog to match.
- Verify the file is not empty and contains at least one data row after the header.
Tax-Exempt Users Are Still Being Charged Tax
Cause: The user is not logged in, or the user's Joomla group is not selected in the Tax-Exempt User Groups setting.
Solution:
- Go to J2Commerce -> Apps -> Tax Manager settings.
- Verify the correct user group is selected under Tax-Exempt User Groups and click Save.
- Confirm the customer is logged in to their account before reaching checkout. Guests are not eligible for group-based exemptions.
- Go to System -> Manage -> Users, open the customer's account, and check that their user group matches one of the selected exempt groups.