QuickPay Payments
QuickPay is a Danish payment service provider used widely across Denmark and the broader Nordic region. A single QuickPay account gives you Dankort (Denmark's national debit card), Visa, Mastercard, MobilePay, Vipps, Swish, Klarna, iDEAL, SOFORT, Trustly, Apple Pay, Google Pay, and a range of other regional methods without integrating each one separately.
Requirements
- J2Commerce 6.0 or later installed and active
- Joomla 6.0 or later
- A QuickPay account (free to create; see below)
- Your site must be publicly reachable over HTTPS so QuickPay can deliver callback notifications
QuickPay uses one API host for both testing and production — there is no separate sandbox URL. The account you connect to (a test/demo account or your live merchant account) determines whether transactions are real. See Set Up a QuickPay Account below.
Set Up a QuickPay Account
If you already have a QuickPay account and API credentials, skip ahead to Purchase and Download.
Create a QuickPay Account
- Go to quickpay.net and sign up for an account.
- Complete the onboarding steps — business details, address, and bank account information.
- QuickPay reviews and activates your account before you can accept live payments. You can also request a free test/demo account to try the integration first.
Get Your Credentials
All of your plugin credentials come from the QuickPay Manager (your account dashboard):
- Log in to the QuickPay Manager.
- Note your Merchant ID — shown at the top of the QuickPay Manager.
- Go to Settings -> Users (or API keys, depending on your account) to create an API User with a Payments-scoped key. This is your API User Key.
- Go to Settings -> Integration to find your Private Key — used to verify that callback notifications really came from QuickPay.
- If you plan to build a classic HTML Payment Window form instead of the default Payment Link flow, also note the Agreement ID and Payment Window Key from the same Integration page.
Most stores only need the Merchant ID, API User Key, and Private Key. The Payment Window Key and Agreement ID are only required if you build a custom classic HTML payment form — the plugin's default Payment Link flow does not need them.
Purchase and Download
This plugin is a separate add-on available from the J2Commerce Extensions Store. It is not included with the core J2Commerce 6 component.
Step 1: Go to the J2Commerce website -> Payment Plugins
Step 2: Locate the QuickPay plugin -> click View Details -> Add to Cart -> Checkout
Step 3: Go to My Downloads under your profile button at the top right corner. Click Available Versions -> View Files -> Download Now
Install the Plugin
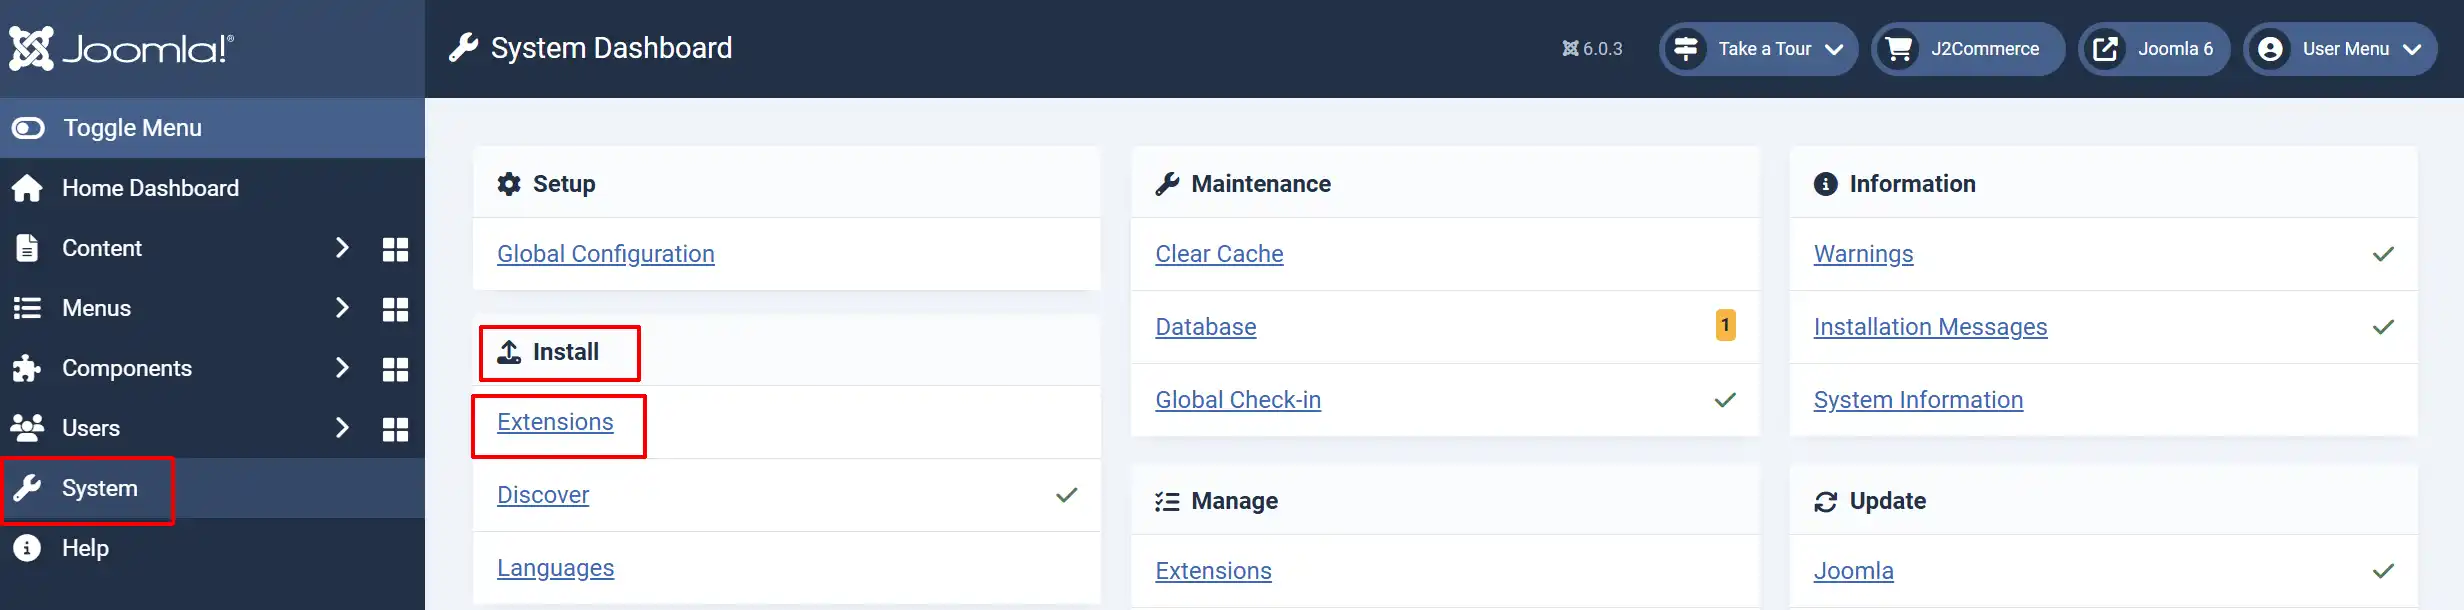
In the Joomla Administrator, go to System -> Install -> Extensions.
Upload the plg_j2commerce_payment_quickpay.zip ZIP file or use the Install from URL option.
Enable the Plugin
The plugin installs and enables itself automatically. No separate enable step is needed. However, it's important to know where to go to enable or disable it in the future.
There are two ways to reach the Payments list.
Option A: Go to the J2Commerce icon at the top right corner -> Setup -> Payment Methods
Option B: Go to Components on the left sidebar -> J2Commerce -> Setup -> Payment Methods
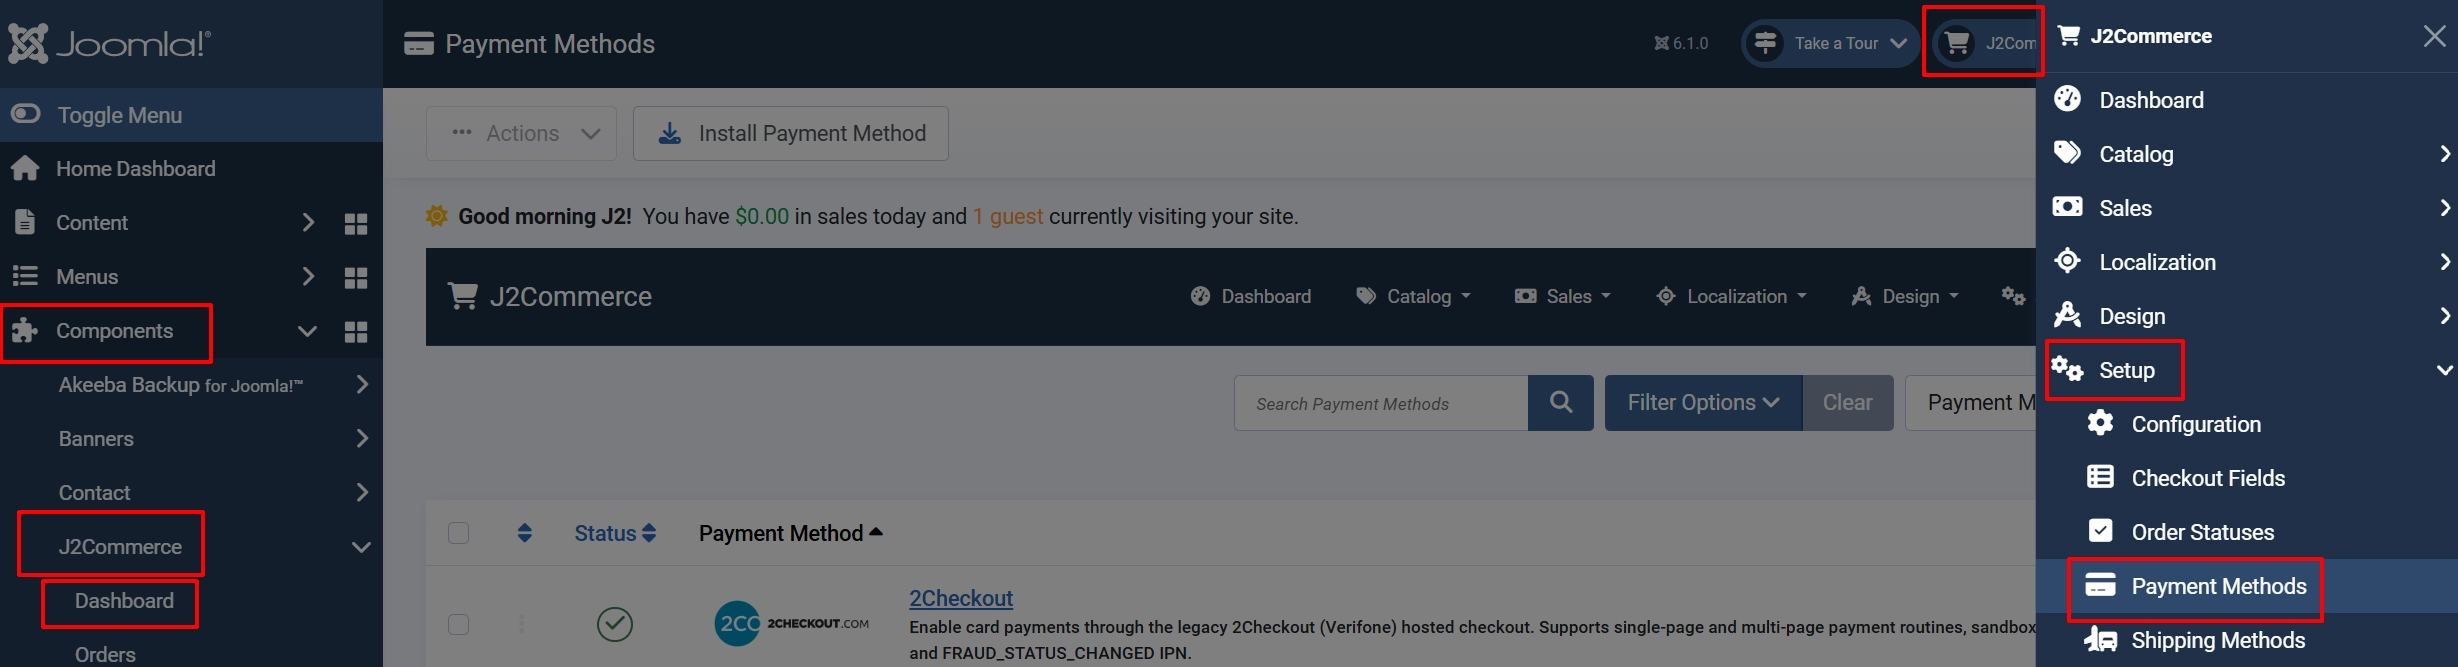
To help you narrow down the list, you can do a search for QuickPay, click the X, and it will turn into a green checkmark. It is now enabled and ready for setup.
Configure the Plugin
Click the QuickPay title next to the green checkmark to open settings.
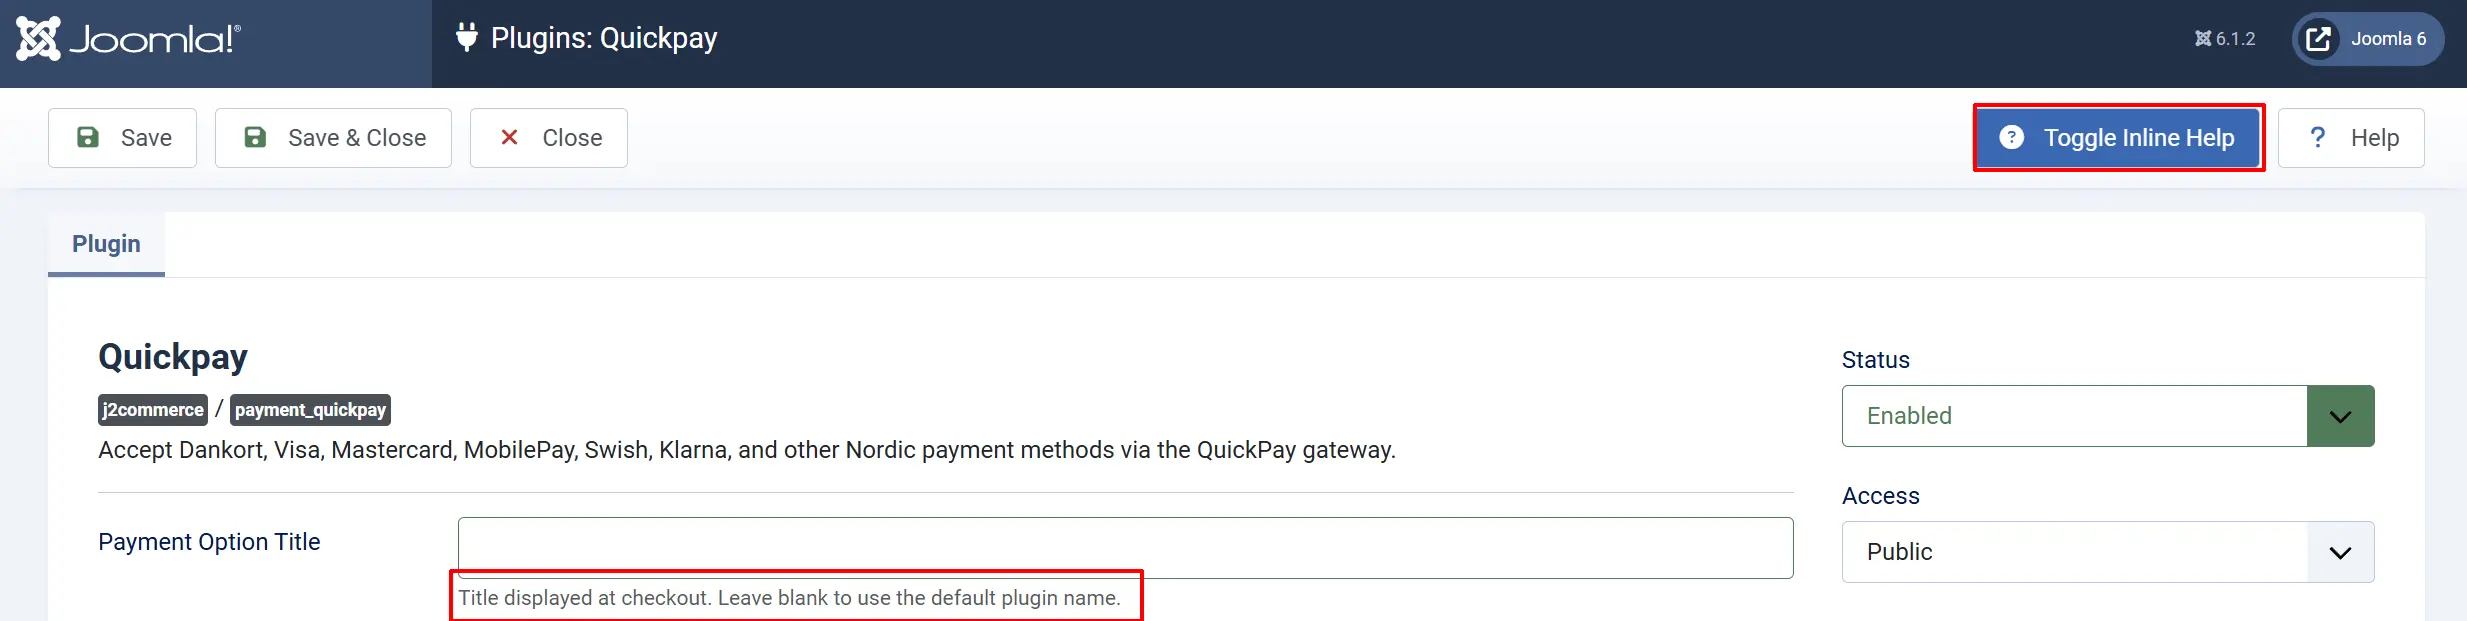
Click the Toggle Inline Help button at the top of any plugin screen to reveal a description below every field.
Display Settings
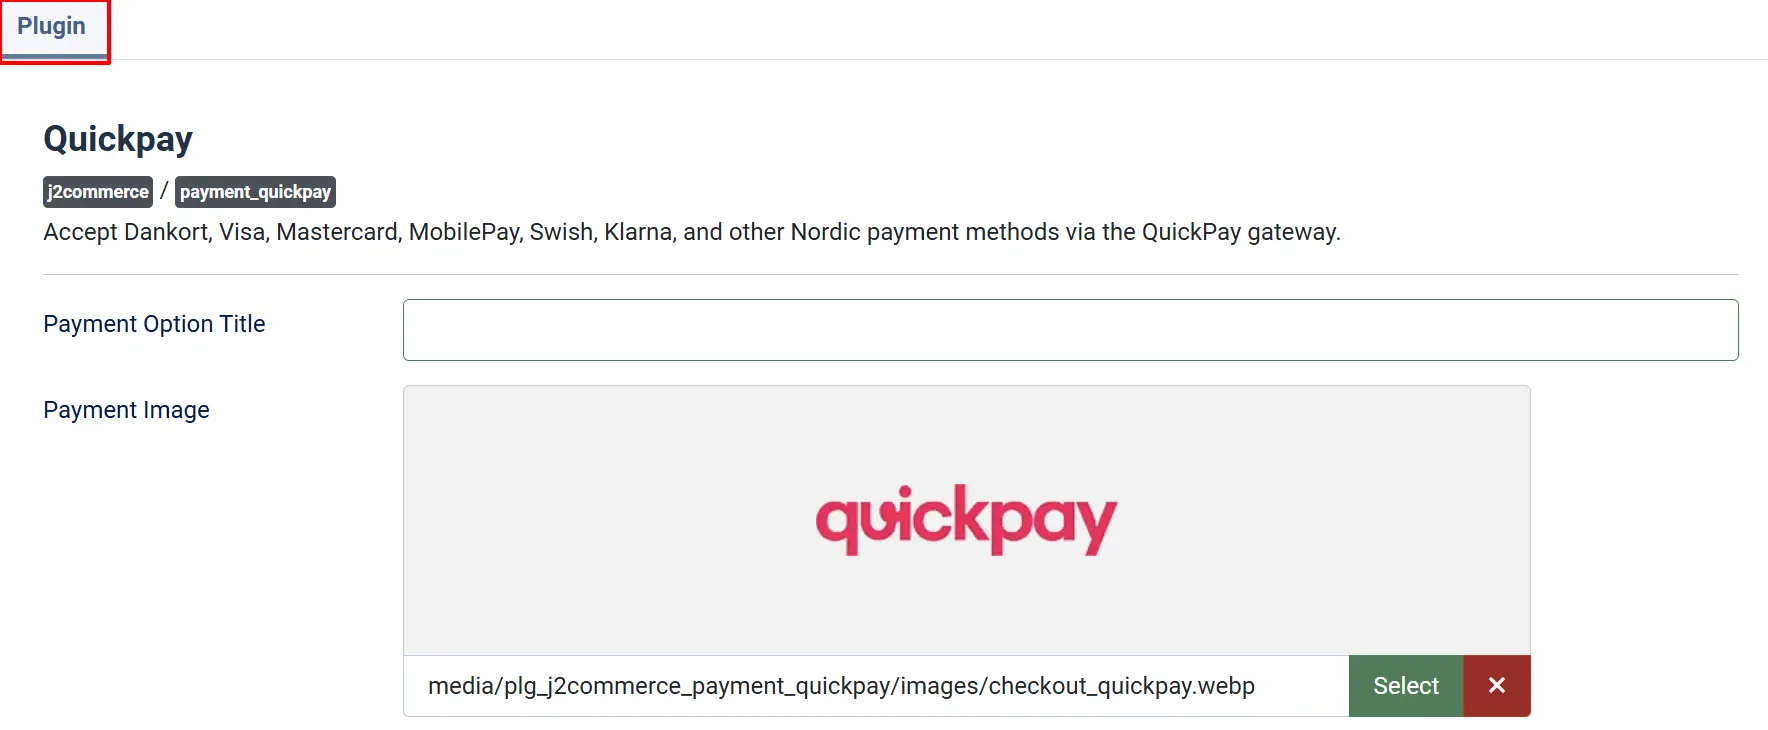
Payment Option Title — The label shown to customers at checkout. Leave blank to use the default name "QuickPay."
Payment Image — An optional image shown alongside the payment option at checkout. Defaults to a bundled QuickPay checkout icon.
Account Credentials
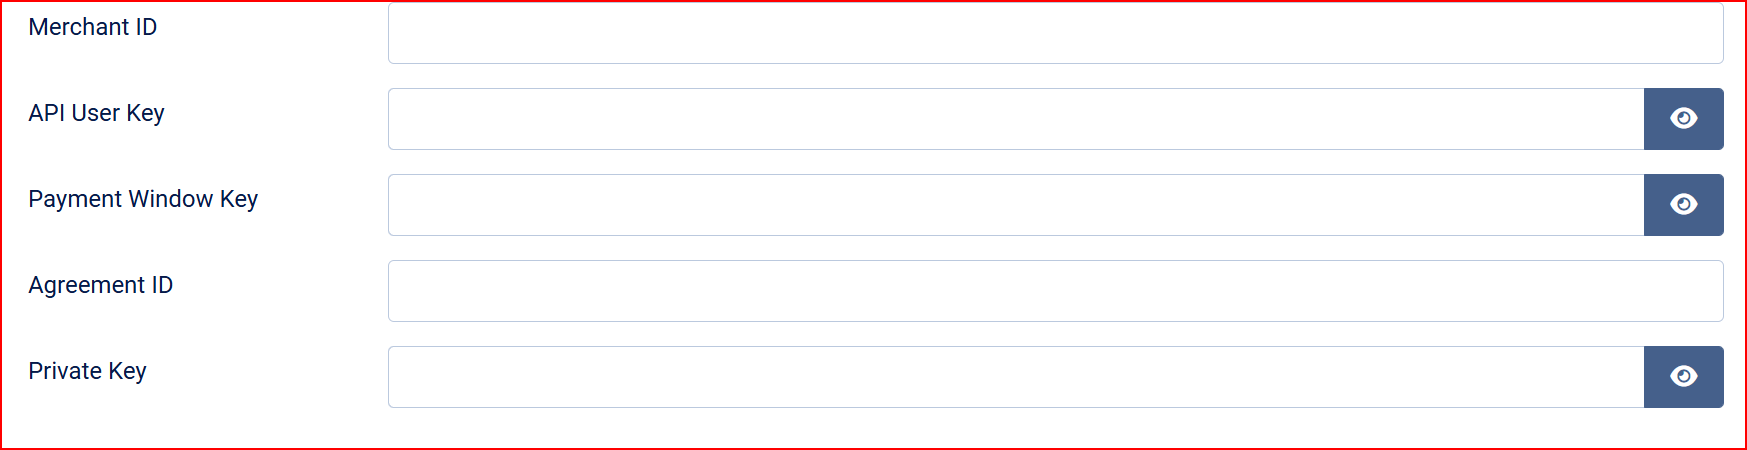
Merchant ID — Your QuickPay account/merchant number, shown in the QuickPay Manager.
API User Key — The server-side API User key used to authenticate REST API calls. QuickPay uses HTTP Basic authentication with a blank username and this key as the password.
Payment Window Key — The agreement API key used only if you build a classic HTML Payment Window form. Not required for the default Payment Link flow the plugin uses.
Agreement ID — The Payment Window agreement ID shown in the QuickPay Manager. Only needed alongside the Payment Window Key.
Private Key — Used to verify inbound QuickPay callback notifications (via the QuickPay-Checksum-Sha256 header). Keep this value secret — anyone with it could forge payment notifications to your store.
There is no test/live toggle in this plugin. Whether transactions are real depends entirely on which QuickPay account (test/demo or live merchant account) the credentials above belong to.
Auto-Capture

Auto-Capture (default: No) — Controls whether an authorized payment is charged immediately or held for manual review:
| Setting | Behavior |
|---|---|
| No (default) | QuickPay authorizes the payment but does not take the money. You capture it manually from the order view once you are ready to fulfill the order. |
| Yes | QuickPay captures the payment automatically right after authorization, just like a normal one-step card charge. |
See Capturing Payments below for how manual capture works.
Payment Methods
Enabled Payment Methods — Select which QuickPay payment methods to offer at checkout. Leave this field empty to allow all methods that are enabled on your QuickPay account.
| Method | Notes |
|---|---|
| Credit Card | Generic card option (Visa/Mastercard/etc. grouped) |
| Dankort | Denmark's national debit card |
| Visa | International |
| Visa Electron | Debit variant |
| Mastercard | International |
| Mastercard Debit | Debit variant |
| Maestro | International debit |
| American Express | International |
| Diners Club | International |
| JCB | Primarily Japan/Asia |
| MobilePay | Popular Danish/Nordic mobile wallet |
| MobilePay Subscriptions | MobilePay's recurring-payment variant |
| Vipps | Norwegian mobile wallet |
| Vipps via QuickPay | Alternate Vipps integration path |
| Swish | Swedish mobile payment method |
| PayPal | Requires PayPal activation in QuickPay |
| Klarna | Buy now, pay later / installments |
| iDEAL | Netherlands bank transfer |
| SOFORT Banking | Austria, Belgium, Germany, Switzerland |
| Trustly | Bank payments across the Nordics and Europe |
| ViaBill | Danish buy now, pay later |
| Resurs Bank | Nordic consumer financing |
| ANYDAY Split | Installment payments |
| Unzer Pay Later Invoice | DACH invoice-based payment |
| Paysafecard | Prepaid voucher, popular across Europe |
| Forbrugsforeningen af 1886 | Danish consumer association payment card |
| Apple Pay | Requires HTTPS and a compatible device |
| Google Pay | Requires HTTPS |
Payment methods must also be enabled on your QuickPay account before they appear at checkout — selecting them here only filters the list; it does not activate them at QuickPay. Check your QuickPay Manager account settings for which methods are available to you.
Supported Currencies — Only offer QuickPay for carts in these currencies. Leave empty to offer QuickPay in every currency.
QuickPay can only process currencies that your active acquirer supports. Check QuickPay Manager -> Settings -> Acquirers before assuming a currency will work — a mismatch causes the payment to be rejected. See Currency not supported by acquirer in Troubleshooting.

Enable Saved Cards (default: Yes) — Allow customers to save a card for future non-scheduled purchases. Saved cards are also used for automatic subscription renewals. See Saved Cards and Subscription Renewals below.
Enable Subscriptions (default: Yes) — Allow this payment method to be used for recurring subscription products via the QuickPay Subscriptions API. Requires the J2Commerce Subscription Product app.
Order Status
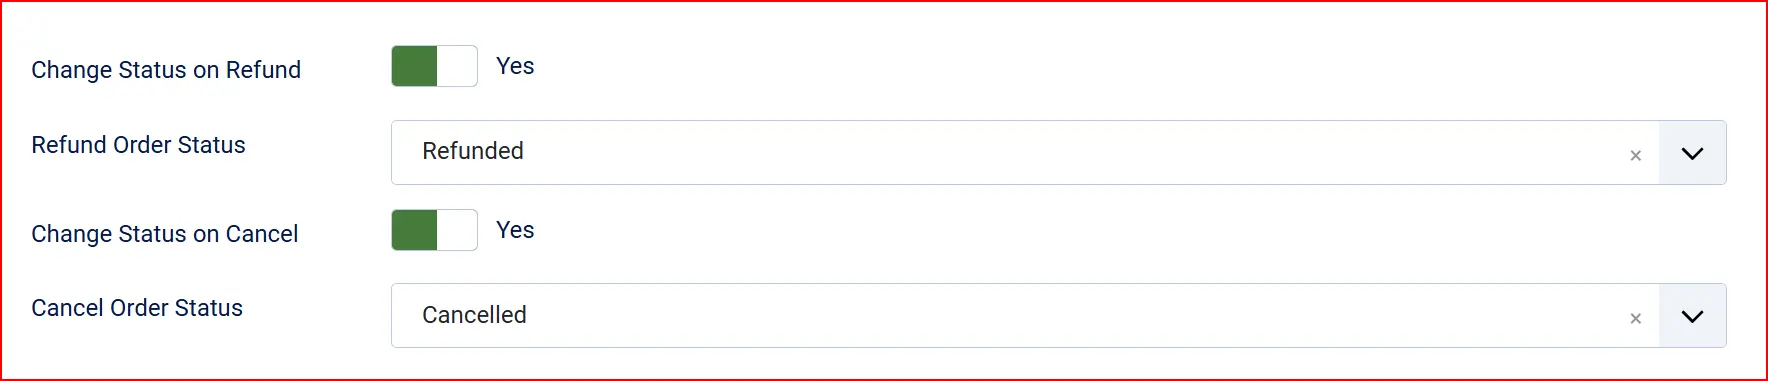
Confirmed Payment Status — Order status to set when QuickPay confirms a captured payment.
Change Status on Refund — Automatically update the order status when a refund is issued.
- Refund Order Status — Order status to set after a successful refund.
Change Status on Cancel — Automatically update the order status when a payment is cancelled/voided.
- Cancel Order Status — Order status to set after a payment is cancelled/voided.
If the status you want is not listed in a dropdown, create a new one first by going to J2Commerce -> Setup -> Order Statuses.
Callback URL

Callback URL — This read-only field displays the URL QuickPay uses to notify your store when a payment, subscription, or card status changes. The URL is generated automatically and sent automatically with every payment/subscription/card request — no manual dashboard registration is required.
Click the Copy URL button next to the field to copy it to your clipboard if you need it for reference.
Callback URL Override (dev) — Advanced/development only. When the site runs behind a tunnel (for example, ngrok), enter the full public callback URL here so QuickPay can reach it. Leave this empty in production.
QuickPay cannot deliver callbacks to a local development server or private address. Until your store is running on a live, publicly accessible domain, the automatically generated Callback URL will not be reachable by QuickPay.
Template Style and Geo Zone

Template Style — Select the CSS framework for this plugin's customer-facing templates (defaults to Bootstrap 5).

Geo Zone — Restrict QuickPay to customers in a specific geographic zone. Select a geozone you have defined in J2Commerce. Leave blank to show QuickPay to all customers regardless of location.
Surcharge
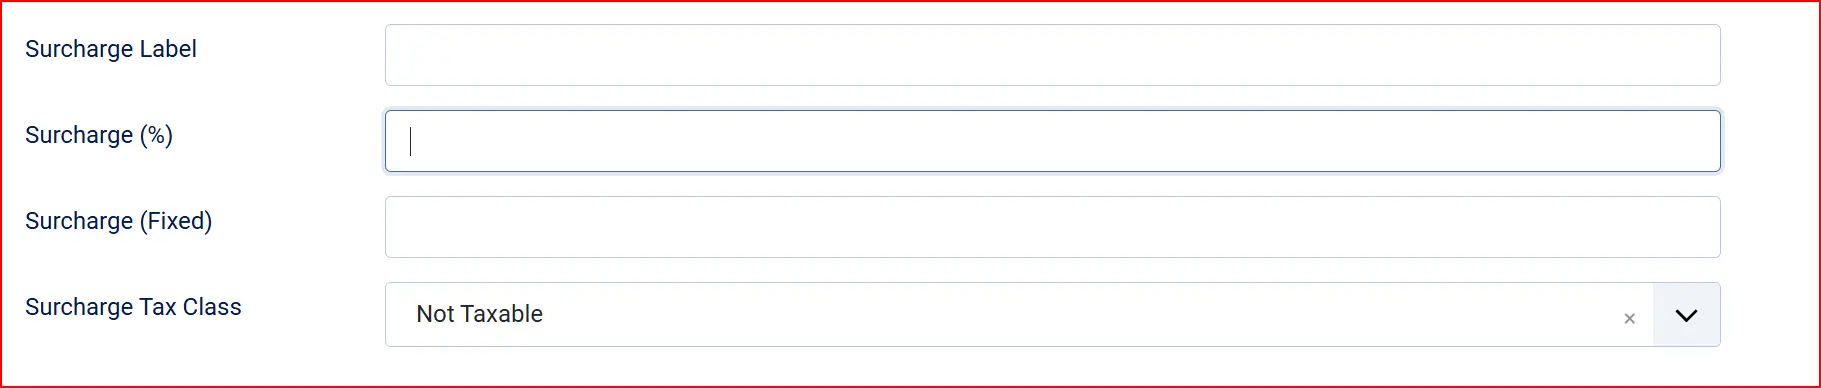
Add an optional extra fee for customers who pay via QuickPay. Check your local laws before using surcharges — they are regulated in some countries.
Surcharge Label — The name shown for the surcharge line item at checkout. Leave blank to use the default label "QuickPay Payment Surcharge."
Surcharge (%) — A percentage of the order subtotal added as a surcharge.
Surcharge (Fixed) — A flat amount added to every order.
Surcharge Tax Class — A tax profile to apply to the surcharge. Leave blank if no tax applies.
Order Value Restrictions

Minimum Order Subtotal — Hide QuickPay when the order subtotal is below this amount. Leave blank for no minimum.
Maximum Order Subtotal — Hide QuickPay when the order subtotal exceeds this amount. Leave blank for no maximum.
Custom Messages
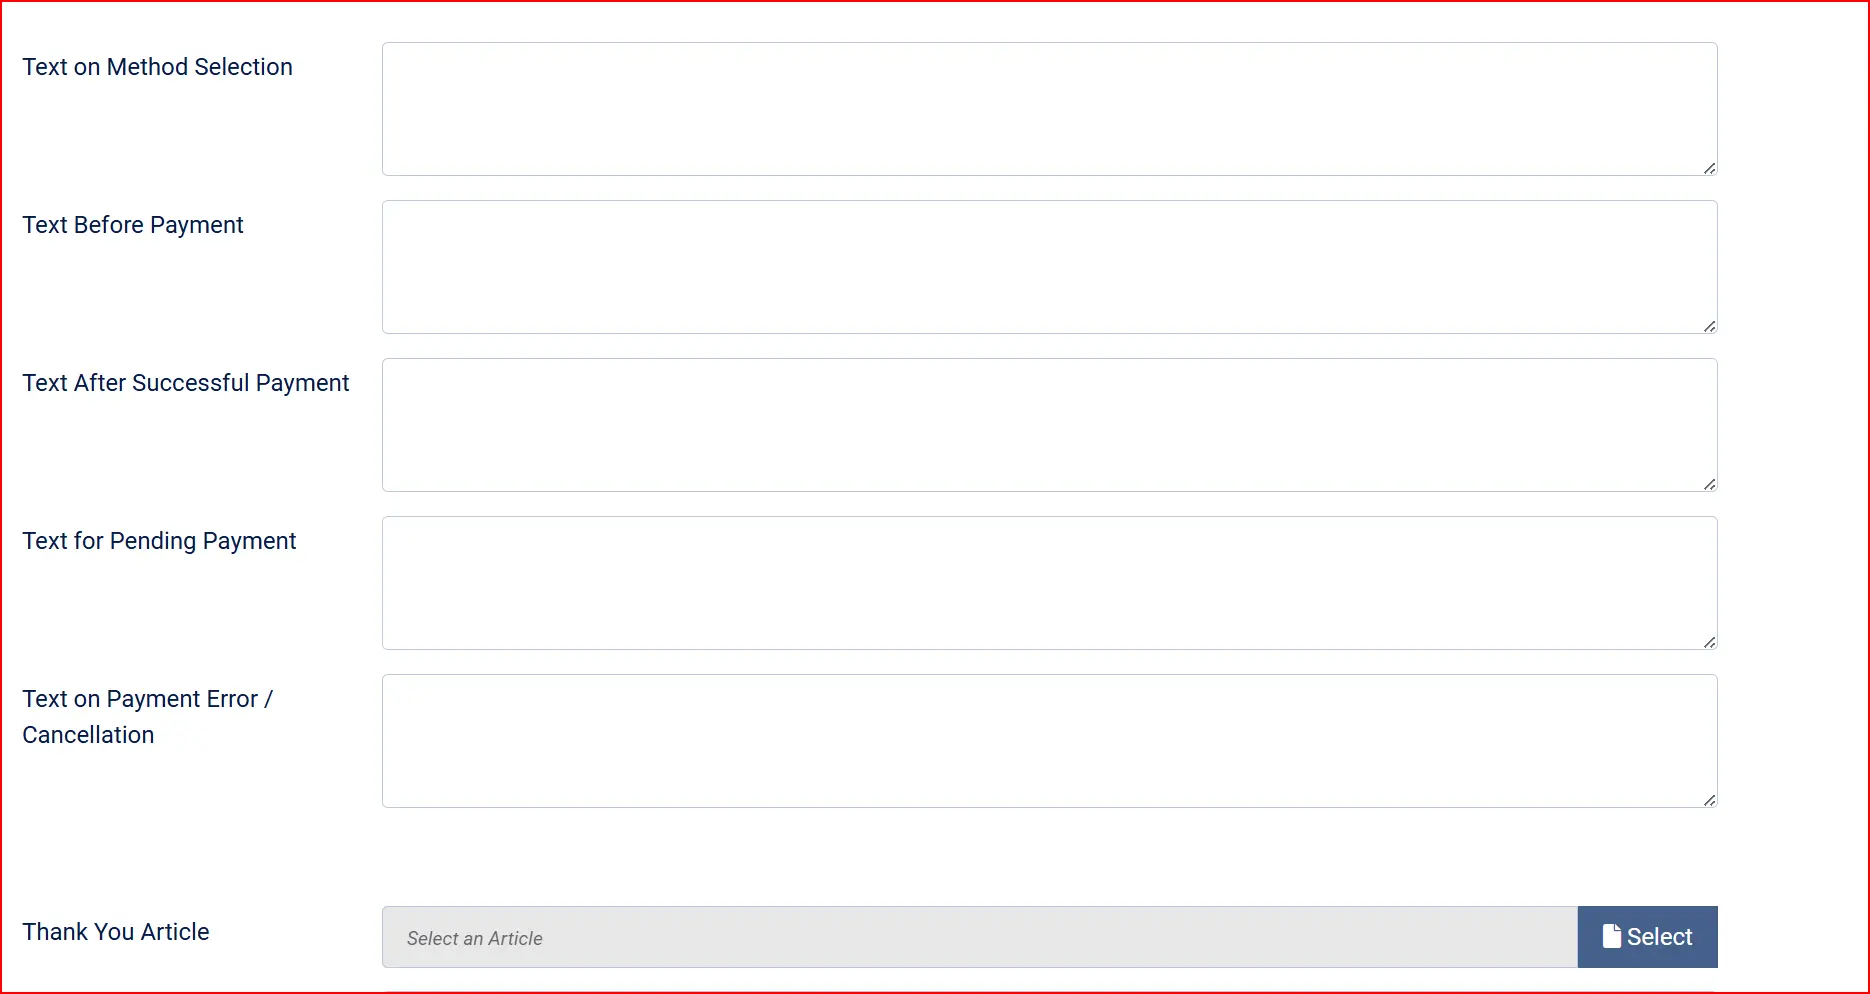
These text fields let you set messages shown to customers at different points in the payment process. Leave any field blank to use the built-in default message.
Text on Method Selection — Shown when the customer selects QuickPay as their payment method.
Text Before Payment — Shown on the confirmation screen before the customer is redirected to QuickPay.
Text After Successful Payment — Shown after the customer returns from QuickPay with a successful payment.
Text for Pending Payment — Shown while QuickPay is still processing the payment asynchronously.
Text on Payment Error / Cancellation — Shown when the payment fails or is canceled by the customer.
Thank You Article and Pay Button
Thank You Article — Select a Joomla article to display as a thank-you message after payment. Leave blank to use J2Commerce's default confirmation message.

Pay Button Label — The label on the button that redirects the customer to QuickPay. Default: Pay Now.
Debug Mode
Debug Mode — When set to Yes, the plugin writes QuickPay API calls to the Joomla log file. Enable this only while troubleshooting, then set it back to No for production.
How the Checkout Works
QuickPay uses a hosted redirect flow:
The customer adds items to the cart and proceeds to checkout.
At the payment step, QuickPay (or your custom display name) appears as an option.
If a returning, logged-in customer has a saved payment method, they see it listed first with an option to use a new method instead. Otherwise, if multiple payment methods are configured, a method selector lets them pick Dankort, Visa, MobilePay, or another available method.
The customer clicks the pay button (labeled Pay Now by default) and is redirected to QuickPay's secure hosted payment window to complete payment.
QuickPay redirects the customer back to your site once payment is complete or canceled. The browser return alone does not finalize the order — it simply shows a pending/processing message.
Separately, QuickPay sends a server-to-server callback notification to the Callback URL. J2Commerce verifies the notification's checksum and uses it to set the final order status, so the order finalizes correctly even if the customer's browser return is interrupted.
Saved-card charges are the one exception — when a returning customer pays with a saved card, the charge result comes back synchronously in the same request, so the order can often be marked paid immediately without waiting on the callback. The callback still fires as a safety net for cases like a required 3-D Secure step.
Capturing Payments
When Auto-Capture is set to No (the default), QuickPay only authorizes the payment at checkout — the customer's card or account is not charged yet.
To capture a payment manually:
- Go to J2Commerce -> Sales -> Orders and open the order.
- Look for the Payment section on the order detail screen.
- Click Capture to charge the authorized amount.
- Confirm the capture.
Once captured, the order status updates to the Confirmed Payment Status configured in the plugin settings. A captured payment can no longer be canceled — use Refunds instead.
If Auto-Capture is set to Yes, this step is not needed — QuickPay captures automatically right after authorization.
Going Live
When you are ready to accept real payments:
- Confirm your QuickPay account is fully verified and approved for live transactions in the QuickPay Manager.
- Enter your live Merchant ID, API User Key, and Private Key in the plugin settings (replace any test/demo account credentials).
- Click Save.
- Place a small real transaction to confirm the payment flow works end-to-end.
- Set Debug Mode to No.
Going live checklist:
- Live Merchant ID, API User Key, and Private Key entered in the plugin settings
- Debug Mode set to No
- Payment methods you want to offer are enabled on your live QuickPay account
- Supported Currencies match the currencies your acquirer actually supports
- Your site is publicly accessible over HTTPS so QuickPay can deliver callbacks
- You have tested at least one real payment end-to-end
Refunds
You can issue a full or partial refund directly from the order in the J2Commerce admin:
- Go to J2Commerce -> Sales -> Orders and open the order.
- Look for the Payment section on the order detail screen.
- Click Refund (Full) to return the entire captured amount, or Refund (Partial) to enter a specific amount up to the maximum refundable amount shown.
- Confirm the refund.
J2Commerce sends the refund request to QuickPay via the API. Refunds can only be issued against a captured payment — an authorized-but-not-yet-captured payment must be canceled instead.
If Change Status on Refund is enabled, the order status updates automatically after the refund is processed.
Saved Cards and Subscription Renewals
When Enable Saved Cards is turned on (the default), the plugin supports saved payment methods and automatic subscription renewals:
- The customer can add a card from their account without making a purchase, or save a card during checkout. QuickPay confirms the card is valid through a hosted card authorization step, then the card is stored for future use.
- On subsequent orders, logged-in customers see their saved payment method at checkout and can pay without re-entering details.
- QuickPay card tokens are single-use, so behind the scenes the plugin mints a fresh charge token from the stored card each time it is used — this is transparent to the customer.
- On each subscription renewal, J2Commerce charges the subscription automatically through QuickPay's recurring payment API — no redirect to QuickPay is needed for automatic billing cycles.
This requires the J2Commerce Subscription Product app. The customer must complete an initial payment to establish the subscription (or saved card) before automatic renewals can be processed.
If a saved card requires additional bank verification (Strong Customer Authentication), it cannot be charged in one click. In that case the customer sees a message asking them to choose "Use a new payment method" and complete the payment in QuickPay's secure window instead.
Troubleshooting
Payment methods do not appear at checkout
Cause: No payment methods are enabled on your QuickPay account, or your credentials are incorrect.
Solution:
- Verify the Merchant ID, API User Key, and Private Key in the plugin settings are correct.
- Log in to the QuickPay Manager and confirm at least one payment method is enabled on your account.
- Enable Debug Mode and check the Joomla log for API errors.
Order status does not update after payment / callback unreachable
Cause: QuickPay could not reach your site's Callback URL, so the payment notification was never received.
Solution:
- Confirm your site is publicly accessible over HTTPS — QuickPay cannot deliver callbacks to a local development server or a site behind a password-protected staging environment.
- If you are testing locally, use the Callback URL Override (dev) field with a public tunnel URL (for example, from ngrok).
- Enable Debug Mode and reproduce a test payment to see whether the callback is being received and processed.
- Verify that no server firewall or CDN WAF rule is blocking POST requests to
index.php?option=com_ajax&...from QuickPay's servers.
Capture failed
Cause: The payment was already captured, canceled, or expired before you clicked Capture, or the QuickPay API was temporarily unavailable.
Solution: Refresh the order view to see the current payment state. If the state still shows "authorized," enable Debug Mode, retry the capture, and check the Joomla log for the specific error returned by QuickPay.
Currency not supported by acquirer
Cause: QuickPay can only process currencies that your active acquirer supports. A currency enabled in J2Commerce but not supported by your acquirer will be rejected by QuickPay.
Solution: Log in to the QuickPay Manager and go to Settings -> Acquirers to see which currencies your acquirer accepts. Update the Supported Currencies field in the plugin settings to match, or leave it blank only if all of your active currencies are supported.
Saved card cannot be charged (SCA required)
Cause: The saved card requires additional bank verification (Strong Customer Authentication) that cannot be completed without the customer present in QuickPay's payment window.
Solution: This is expected behavior for certain cards, especially in the EEA. Direct the customer to choose "Use a new payment method" at checkout so they can complete the 3-D Secure step directly with QuickPay.
FAQ
Does QuickPay require a separate sandbox environment? No. QuickPay uses one API host for both testing and live payments — connect to a test/demo QuickPay account to test, and to your live merchant account to accept real payments. There is no key-prefix or URL toggle like some other gateways.
Does QuickPay require a separate callback registration in the QuickPay Manager? No. The Callback URL is generated automatically and sent with every payment, subscription, and card request the plugin makes — you do not need to register a static callback endpoint in the QuickPay Manager.
Can I offer only specific payment methods instead of all of them? Yes. Use the Enabled Payment Methods field in the plugin settings to select the methods you want. Leave it blank to show all methods enabled on your QuickPay account.
What is the difference between Auto-Capture Yes and No? With Auto-Capture off (the default), QuickPay authorizes the payment and you capture it manually from the order view when ready. With Auto-Capture on, QuickPay captures the payment automatically right after authorization.
Can I use QuickPay with multiple currencies? Yes, as long as your acquirer supports them. Use the Supported Currencies field to restrict QuickPay to currencies your acquirer accepts.
What happens if the customer's browser closes mid-redirect? J2Commerce checks the payment status when the customer returns to your site. If the return is interrupted, QuickPay's callback notification will still finalize the order once your site is reachable.