Mercury ACH Bank Payment
The Mercury ACH Bank Payment plugin connects your J2Commerce store to your Mercury business bank account. Mercury is a US business banking platform — it is not a card gateway. This plugin is designed for stores that want to accept ACH bank transfers as a payment option.
The plugin operates in two modes depending on your Mercury plan:
- Invoice mode — requires a paid Mercury plan with AR (Accounts Receivable) enabled. Mercury creates a hosted payment page for each order and redirects the customer there to pay by ACH debit or card (if your Mercury account has Stripe connected). The order is confirmed automatically when Mercury reports the invoice as paid.
- Reconcile mode — works with any Mercury account, including the free plan. Your account number and routing number are displayed to the customer at checkout, along with a unique order reference. They initiate the bank transfer themselves. A background task (cron) polls your account for matching incoming transactions and confirms the order automatically when a match is found.
Because both modes involve bank transfers, orders are not confirmed in real time. ACH transfers typically take 2 to 3 business days to settle. The plugin places orders in a pending status immediately at checkout and updates them to paid once the funds arrive.
Mercury is a US-only banking service. This plugin is intended for US-based stores. Your Mercury account must be set up and active before you configure the plugin.
Requirements
- Joomla 6.x
- J2Commerce 6.x
- PHP 8.3 or later
- A Mercury business bank account (mercury.com)
- A Mercury API token (generated in your Mercury dashboard)
- For invoice mode: a paid Mercury plan with AR (Accounts Receivable) enabled
- The J2Commerce cron task must be configured and running for automatic order confirmation
Get Your Mercury API Token
Before configuring the plugin, generate an API token in your Mercury dashboard.
- Log in to your Mercury dashboard at app.mercury.com.
- Go to Settings -> API.
- Generate a new API token and copy it immediately — Mercury only shows the full token value once.
- The token must include the
secret-token:prefix when you paste it into the plugin. For example:secret-token:mercury_production_wma_...
For sandbox testing, use the Mercury sandbox dashboard at app.mercury.com (sandbox tokens begin with mercury_sandbox_wma_).
Save your API token to a secure location before leaving the Mercury settings page. You will not be able to view the full token again after closing the page.
Purchase and Download
This plugin is a separate add-on available from the J2Commerce Extensions Store. It is not included with the core J2Commerce 6 component.
- Go to the J2Commerce website and locate Mercury ACH Bank Payment.
- Add it to your cart and complete checkout.
- Go to My Downloads under your account profile.
- Click Available Versions -> View Files -> Download Now to download the ZIP file.
Installing the Plugin
You can install this Mercury ACH Bank Payment plugin using the Joomla installer. The following steps help you with a successful installation.
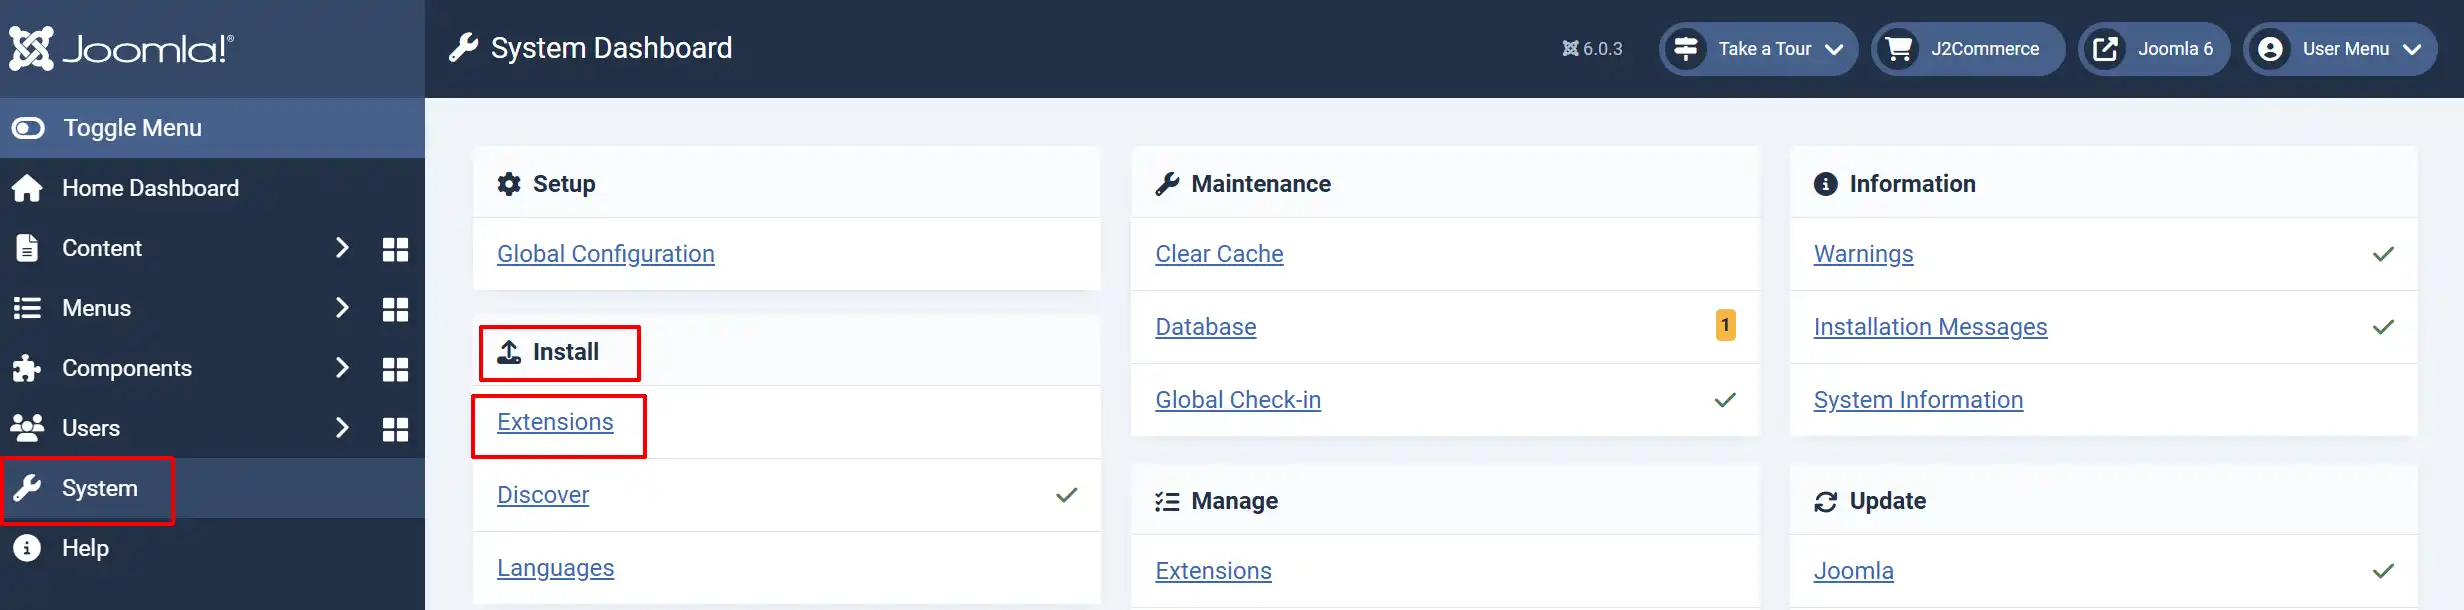
In the Joomla admin, go to System -> Install -> Extensions
Upload the payment_mercury.zip file or use the Install from URL option.
Enable the Plugin
Once you have installed the extension, you will need to enable it. There are two ways you can access the extension.
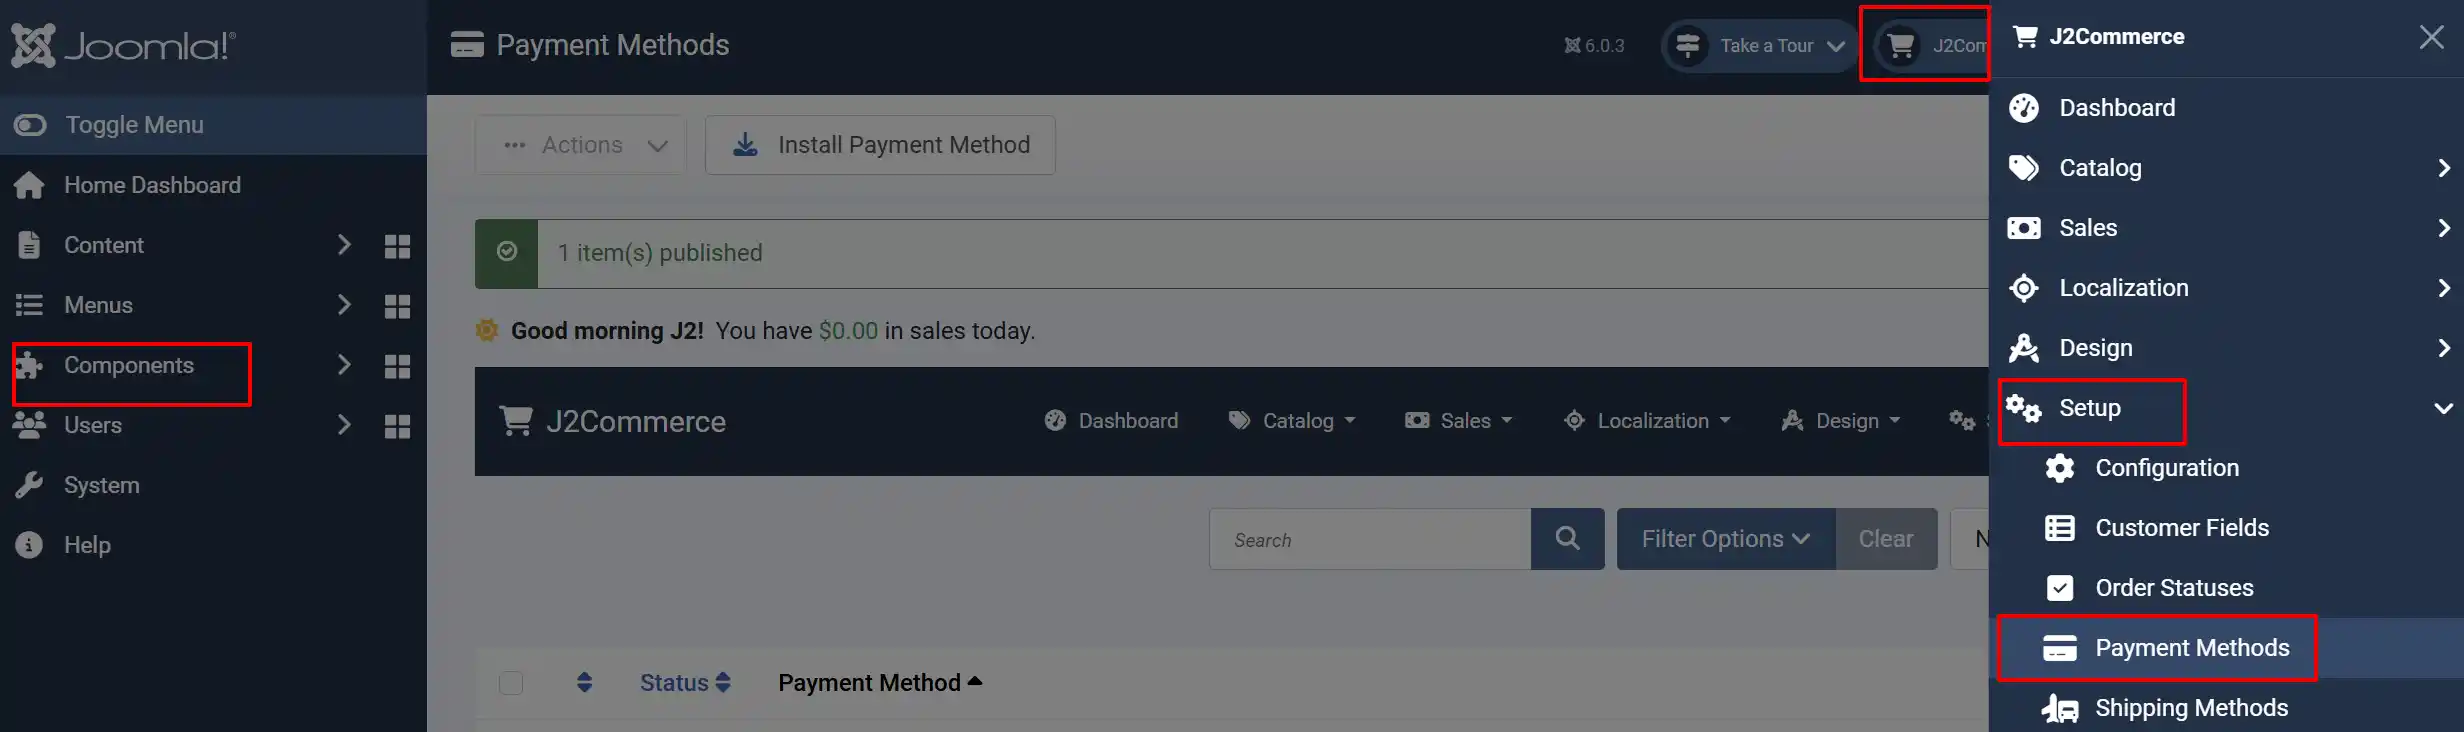
Option A: Go to the J2Commerce icon at the top right corner -> Setup -> Payment Methods
Option B: Go to Components on the left sidebar -> J2Commerce -> Dashboard -> Setup -> Payment Methods
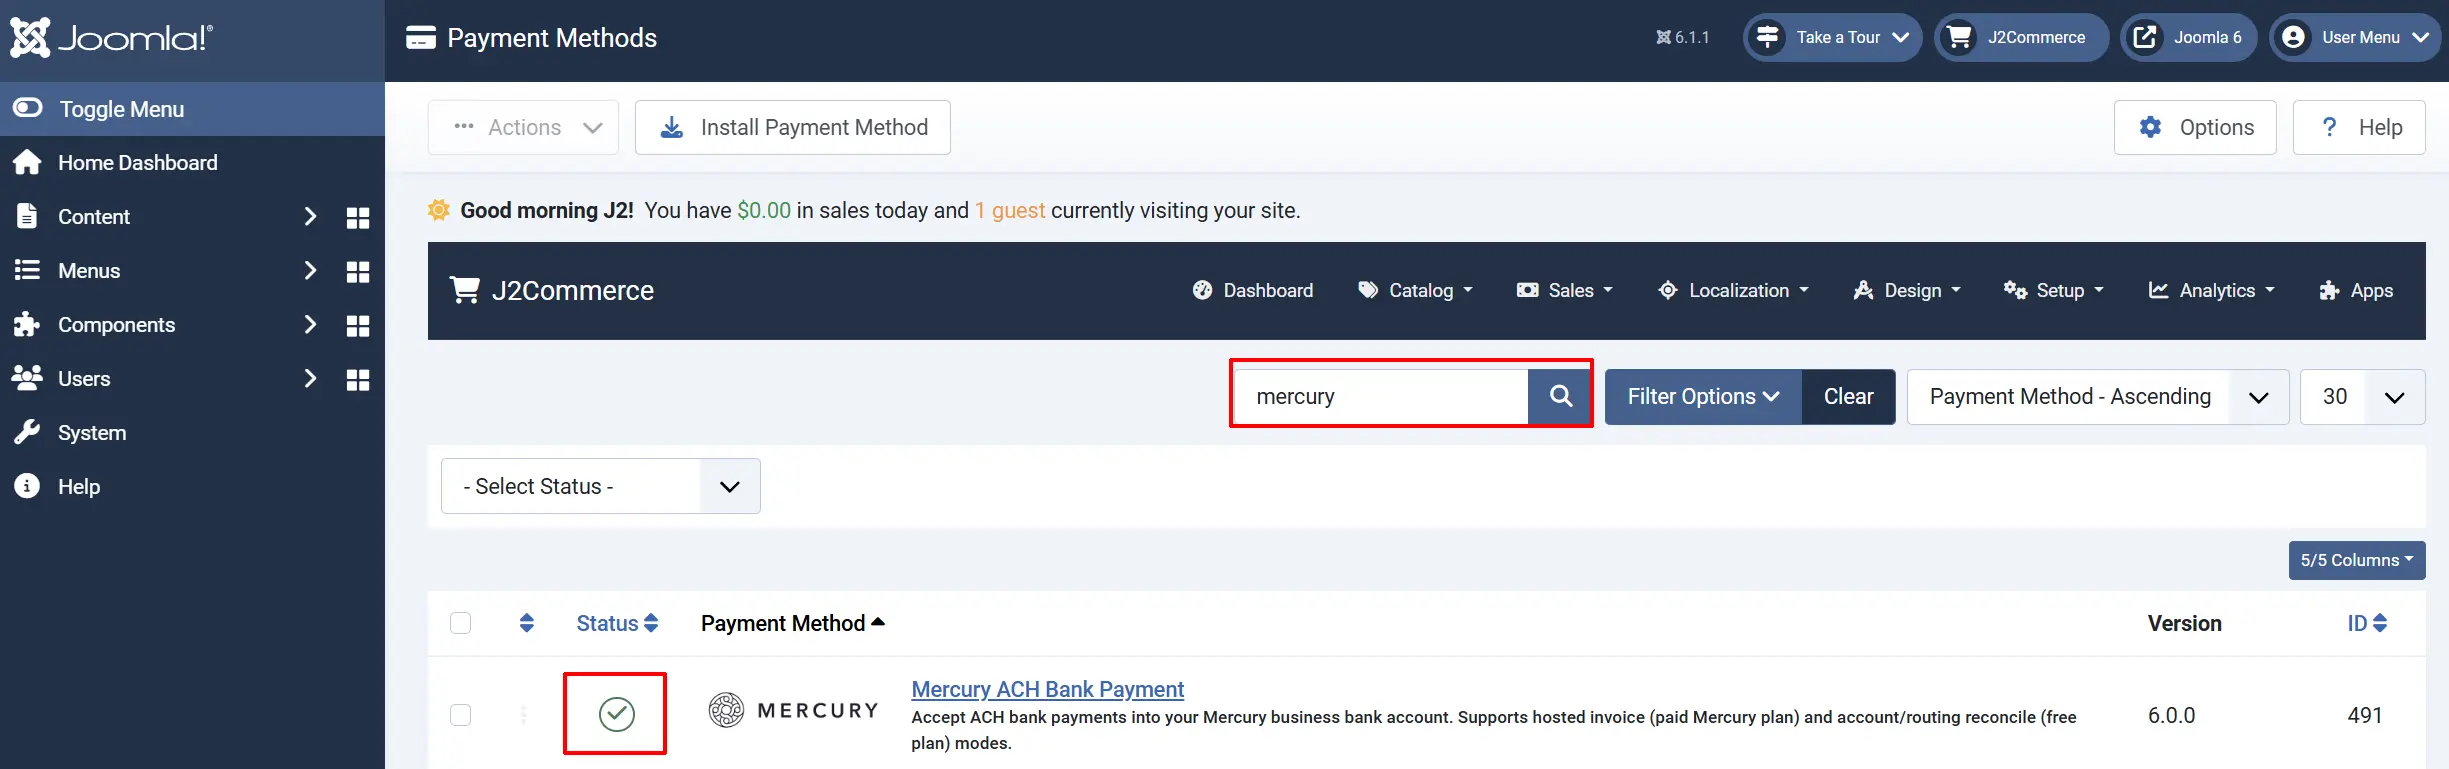
Look for Mercury ACH Bank Payment, click the X, and it will turn into a green checkmark. It is now enabled and ready for setup.
Configure the Plugin
Click Mercury ACH Bank Payment to open the settings screen.
Click the Toggle Inline Help button at the top of any plugin settings screen to show a description below each field.

Appearance
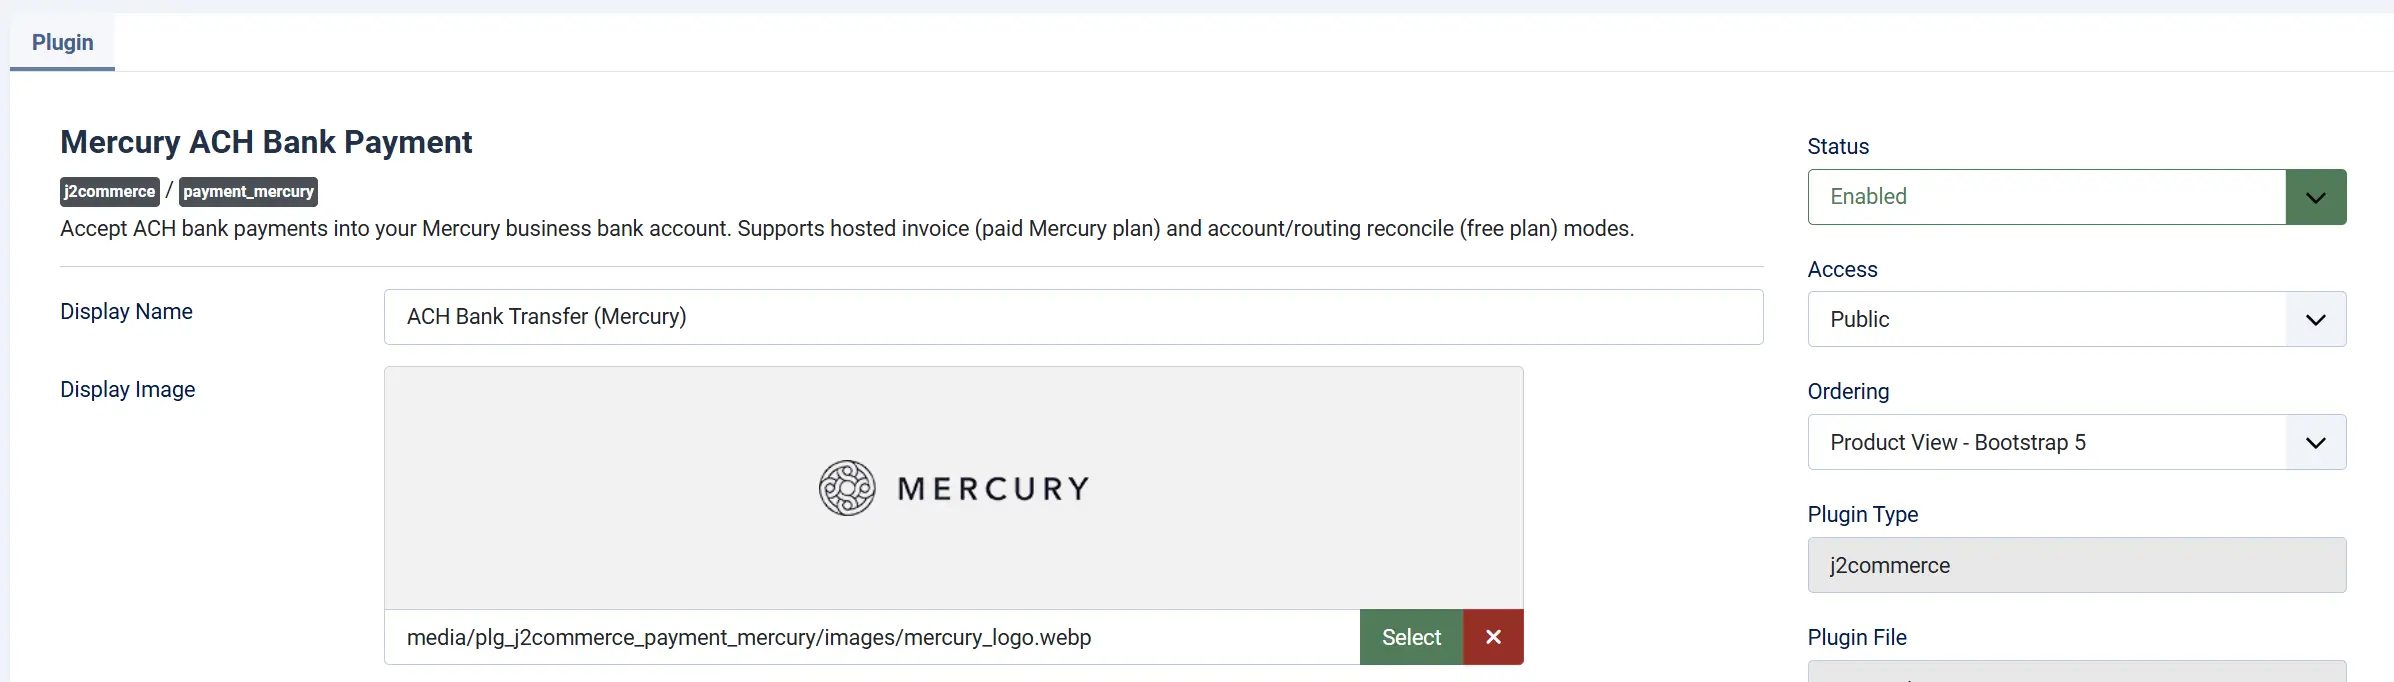
Display Name: The name shown to customers on the checkout page. Defaults to ACH Bank Transfer (Mercury). Change this to something that makes sense for your customers, such as "Pay by Bank Transfer."
Display Image: An optional logo or image to show next to the payment method at checkout. The plugin includes a Mercury logo that is used by default.
Credentials
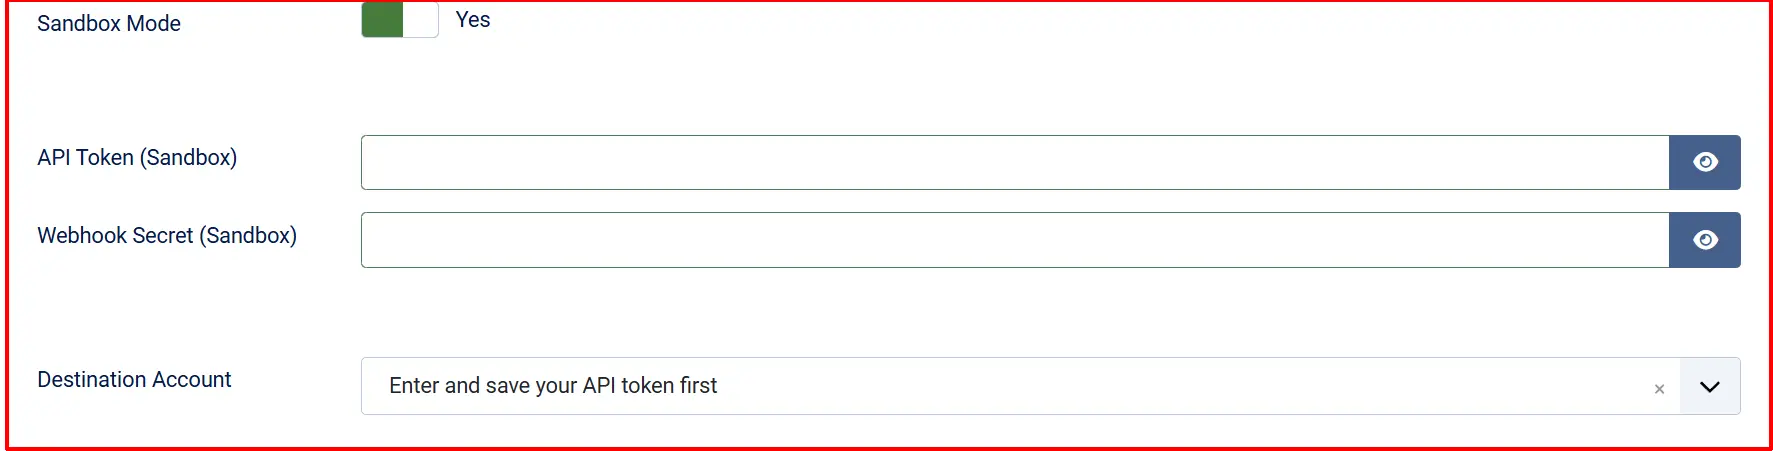
Sandbox Mode: When turned on, the plugin connects to the Mercury sandbox environment (api-sandbox.mercury.com) instead of production. Use this for testing before you go live.
When Sandbox Mode is on, the API Token (Sandbox) and Webhook Secret (Sandbox) fields are shown. When Sandbox Mode is off, the API Token (Live) and Webhook Secret (Live) fields are shown.
API Token (Live): Sandbox Mode off
Your Mercury production API token. Must include the secret-token: prefix.
Webhook Secret (Live): Sandbox Mode off
The signing secret from your Mercury webhook endpoint. Used to verify incoming transaction.created events. Leave blank to skip webhook verification.
API Token (Sandbox): Sandbox Mode on
Your Mercury sandbox API token.
Webhook Secret (Sandbox): Sandbox Mode on
The signing secret for your sandbox webhook endpoint.
Destination Account: The Mercury account where payments should land. This dropdown is loaded live from the Mercury API using the token you entered. It lists all accounts on your Mercury account.
Enter and save your API token first, then return to this field — the dropdown will populate with your available accounts. Both Invoice mode (which sends payments to this account) and Reconcile mode (which polls this account for incoming transactions) require this field to be set.
ACH Mode
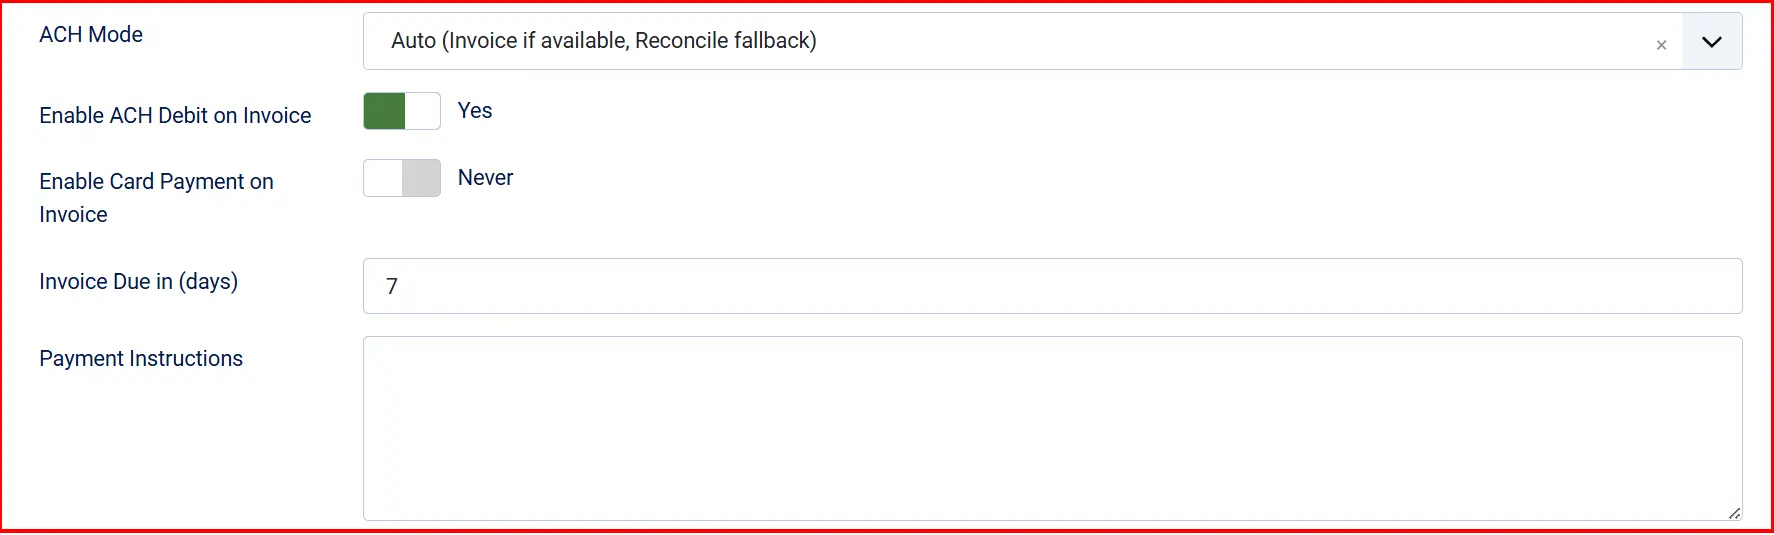
ACH Mode: Controls how the payment is processed at checkout. Three options are available:
-
Auto (Invoice if available, Reconcile fallback): Attempts Invoice mode first. If Mercury reports that AR (Accounts Receivable) is not available on your plan, the plugin falls back to Reconcile mode automatically. This is the default.
-
Hosted Invoice (paid Mercury plan): Always uses Invoice mode. A Mercury-hosted payment page is created for each order. Requires a paid Mercury plan with AR enabled.
-
Account/Routing Reconcile (free plan): Always shows account and routing details to the customer. Works on any Mercury plan.
What does each mode mean for your customers?
In Hosted Invoice mode, the customer reaches a payment step at checkout, sees a "Pay Now via Mercury" button, and is redirected to a secure Mercury-hosted payment page. There they can pay by ACH debit or by card (if your account has Stripe connected). After paying, they return to your store's order confirmation page. The order moves to a pending status immediately; the confirmation happens automatically once Mercury confirms the invoice as paid.
In Reconcile mode, the customer sees your account number, routing number, and a unique payment reference at checkout. They leave your site and initiate the transfer from their own bank. The order moves to pending immediately. Your store polls Mercury for matching incoming transactions in the background and confirms the order automatically when a match is found based on the amount and the order reference in the memo.
Reconcile Mode Options: This field appears when ACH Mode is set to Account/Routing Reconcile or Auto.
- Payment Instructions: Custom instructions shown to the customer alongside the bank account details. For example: "Please include your order number in the payment memo so we can match your payment quickly." Leave blank to show the standard account details only.
Invoice Mode Options
These fields appear when ACH Mode is set to Hosted Invoice or Auto.
Enable ACH Debit on Invoice: Allow customers to pay the invoice by ACH bank debit. No Stripe account required.
Enable Card Payment on Invoice: Allow customers to pay the invoice by card. Requires a Stripe account connected to your Mercury organisation.
Invoice Due in (days): Number of days from today until the invoice is due.
Order Statuses

These settings control which J2Commerce order status is applied when specific payment events occur.
Confirmed Order Status: Status applied when payment is confirmed — either when the Mercury invoice is reported as Paid, or when the cron finds a matching inbound transaction.
Pending Order Status: Status applied immediately at checkout while the bank transfer is awaited.
Failed Order Status: Status applied when a Mercury invoice is cancelled or a payment error occurs.
If the status you want is not listed in a dropdown, create a new one first by going to J2Commerce -> Setup -> Order Statuses.

Surcharge

Add an optional handling fee when a customer chooses Mercury ACH.
Surcharge Name: The label shown to the customer (for example, "Bank transfer fee")
Surcharge Percent: A percentage of the order subtotal added as a fee
Surcharge Fixed: A fixed amount added regardless of order size
Surcharge Tax Class: A tax profile to apply to the surcharge — leave blank if no tax applies
Leave both Surcharge Percent and Surcharge Fixed empty to charge no surcharge.
GeoZone and Order Value Restrictions

Geozone Restriction: Limit this payment method to customers in a specific geozone — leave blank to allow all locations
Minimum Order Subtotal: Hide this option when the cart subtotal is below this amount
Maximum Order Subtotal: Hide this option when the cart subtotal is above this amount

Template Layout
Template Layout: Select the layout template used to render the checkout payment step. Leave on the default unless you have a custom layout installed. This setting adapts to your store's active frontend framework (Bootstrap 5 or UIkit).
Dashboard Icon
Show Dashboard Icon: Add a quick-access shortcut to the J2Commerce dashboard that filters to orders paid via Mercury.
Dashboard Icon Label: The label for the shortcut. Defaults to "Mercury ACH Bank Payment" if left blank. This field is only shown when Show Dashboard Icon is enabled.
Debug Mode
Debug Mode: Records API requests and responses in the Joomla log at logs/payment_mercury.php.
Only enable this when diagnosing a specific problem. Disable it on live sites — debug logs may include API responses containing account details.
How Checkout Works for Customers
Invoice Mode
The customer adds items to their cart and proceeds to checkout.
At the payment step, they select ACH Bank Transfer (Mercury)
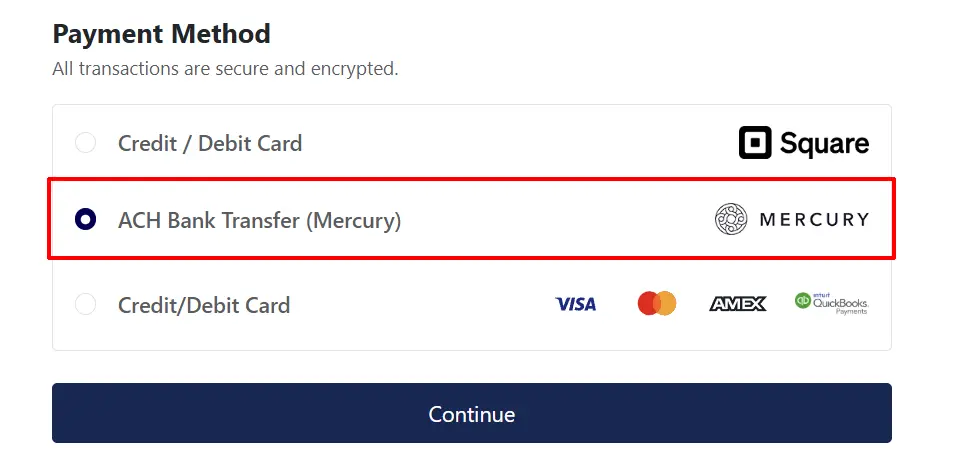
Clicking the button takes them to a Mercury-hosted page where they enter their bank details and authorise the payment.
After paying, they are returned to the store and see an order confirmation page.
Their order shows a pending status. It is confirmed automatically (typically within 2 to 3 business days) when Mercury reports the invoice as paid.
Reconcile Mode
- The customer adds items to their cart and proceeds to checkout.
- At the payment step, they select ACH Bank Transfer (Mercury) and see the transfer details — account name, routing number (ABA), account number, and a unique payment reference.
- They note the details and initiate the transfer from their own online banking. They must include the payment reference in the transfer memo.
- Their order shows a pending status. It is confirmed automatically once the cron task finds a matching incoming transaction in your Mercury account.
In Reconcile mode, always encourage your customers to include the order reference in the payment memo. This is what the plugin uses to match the transaction to the correct order automatically. Without a memo match, the cron will log the transaction as a possible match and require manual confirmation from the admin.
Automatic Order Confirmation (Cron)
Mercury payments are not instant. The plugin relies on a background polling task to detect when money arrives and confirm orders.
You must have the J2Commerce cron task configured for orders to be confirmed automatically. Without a running cron, pending orders will stay in the pending status even after the customer has paid.
To verify your cron is running:
- Go to System -> Scheduled Tasks.
- Confirm the J2Commerce Cron task is enabled and has a recent last-run time.
If your cron is not yet configured, follow the instructions in J2Commerce -> Setup -> Configuration -> Cron.
The cron polls pending Mercury orders and checks the following:
- Invoice mode orders: Calls the Mercury API to check if the invoice status has changed to Paid or Cancelled.
- Reconcile mode orders: Calls the Mercury API to list recent inbound transactions on the destination account. If a transaction matches the order total and contains the order reference in the memo, the order is confirmed. If the amount matches but there is no memo match, the plugin logs a possible match and waits for admin confirmation.
Mercury webhooks (real-time notifications) are supported in production as a supplement to cron polling. Webhooks speed up reconcile detection when a transaction.created event arrives. However, Mercury does not send webhook events for invoice status changes — cron polling is the only way to detect invoice payments.
Setting Up Webhooks (Optional, Production Only)
Webhooks are not required, but they allow the plugin to react more quickly to incoming transactions in Reconcile mode.
Mercury only delivers webhooks to publicly accessible HTTPS URLs — they cannot reach a site running on localhost.
-
In your Mercury dashboard, go to Settings -> Webhooks (or the equivalent in your Mercury plan).
-
Create a new webhook endpoint pointed at:
https://your-site.com/index.php?option=com_ajax&plugin=payment_mercury&format=raw&action=webhookReplace
your-site.comwith your actual domain. -
Mercury shows you a signing secret when you create the endpoint. Copy it immediately — it will not be shown again.
-
Paste the secret into the Webhook Secret (Live) field in the plugin settings.
-
Click Save.
The plugin verifies each incoming webhook using HMAC-SHA256. Only genuine events from Mercury can update your orders.
Manually Confirming a Payment (Admin)
In Reconcile mode, if a transaction matches the order amount but not the memo reference, the plugin logs the match as ambiguous and does not automatically confirm the order. You can confirm these manually from the admin order screen.
- Go to J2Commerce -> Sales -> Orders and open the relevant order.
- In the right sidebar, locate the Mercury Payment panel.
- Optionally enter the Mercury transaction ID from your Mercury dashboard (this is for your own records).
- Click Confirm Payment Received.
The order status updates to the Confirmed Order Status set in the plugin configuration, and the transaction ID is stored on the order.
Testing the Plugin
- Enable Sandbox Mode in the plugin settings and enter your Mercury sandbox API token.
- Select your destination account from the Destination Account dropdown.
- Choose Account/Routing Reconcile as the ACH Mode for testing — this avoids requiring a paid plan.
- Place a test order on your storefront and confirm the checkout screen shows the bank transfer details.
- Confirm the order appears in J2Commerce -> Sales -> Orders with the correct pending status.
- Use the admin Confirm Payment Received button on the order to manually move it to the confirmed status, verifying the admin sidebar is working correctly.
- Enable Debug Mode temporarily and check the Joomla log under System -> Logs for any API errors.
- When everything is working, turn off Sandbox Mode and replace the sandbox token with your live token.
Remember to turn off Sandbox Mode before accepting real orders. Sandbox mode tokens only connect to Mercury's test environment — no real transactions are processed.
Troubleshooting
The Destination Account dropdown is empty
Cause: The API token has not been saved yet, or the token is missing the secret-token: prefix.
Solution:
- Go to J2Commerce -> Setup -> Payment Methods -> Mercury ACH Bank Payment.
- Verify the API Token field contains the full token including the
secret-token:prefix. For example:secret-token:mercury_production_wma_abc123... - Click Save, then re-open the settings. The Destination Account dropdown should now load your accounts.
- If it still shows empty, enable Debug Mode and check System -> Logs for any API authentication errors.
Orders are stuck in a pending status
Cause: The cron task is not running, or the incoming transaction does not match the order.
Solution:
- Go to System -> Scheduled Tasks and confirm the J2Commerce cron is enabled and has run recently.
- In Reconcile mode, verify the customer included the order reference number in their transfer memo. If they did not, the cron will not match the transaction automatically — use the admin Confirm Payment Received button instead.
- In Invoice mode, check the Mercury dashboard to confirm the invoice status. If the invoice shows Paid in Mercury but the J2Commerce order is still pending, enable Debug Mode and run the cron manually by visiting the cron URL, then check the logs.
The hosted invoice pay page shows an error or does not load
Cause: Your Mercury plan may not have AR (Accounts Receivable) enabled, or the destination account ID is not set.
Solution:
- Confirm your Mercury account has AR enabled (this requires a paid Mercury plan). If not, change ACH Mode to Account/Routing Reconcile.
- Verify the Destination Account field is populated in the plugin settings.
- Enable Debug Mode and attempt a test checkout to see the exact API response in the log.
Reconcile mode shows blank account or routing number
Cause: The plugin could not retrieve account details from Mercury — often due to a missing or incorrect API token, or the destination account not being set.
Solution:
- Verify the API Token is correct and saved, and that Destination Account is selected.
- Confirm the token has permission to read account details (standard API tokens include this by default).
- Enable Debug Mode and check the log for any errors from the account fetch call.
Webhook signature verification fails
Cause: The webhook secret in the plugin does not match the secret Mercury generated for the endpoint, or the secret is missing.
Solution:
- Go to J2Commerce -> Setup -> Payment Methods -> Mercury ACH Bank Payment.
- Verify the Webhook Secret (Live) field contains the signing secret exactly as shown when you created the webhook in the Mercury dashboard.
- The signing secret is only shown once at creation time. If you did not copy it, delete the webhook in Mercury and create a new one to get a fresh secret.
- Remember that Mercury webhooks only fire in production — they do not work with sandbox tokens.
The plugin falls back to Reconcile mode even though ACH Mode is set to Invoice
Cause: Your Mercury account does not have AR (Accounts Receivable) available. The plugin detects this automatically and switches to Reconcile mode.
Solution:
- Check your Mercury plan — AR is only available on paid Mercury plans.
- If you are on a free plan, change ACH Mode to Account/Routing Reconcile to make the intent explicit.
- If you believe your plan includes AR, contact Mercury support to confirm the feature is enabled on your account.