Mollie Payments
Mollie is a Dutch payment service provider popular across Europe that offers a single integration covering a wide range of payment methods — iDEAL, Bancontact, credit cards, SOFORT Banking, Apple Pay, Klarna Pay Later, Klarna Slice It, KBC/CBC, Belfius, EPS, Giropay, Przelewy24, Trustly, Twint, Voucher, and more. Rather than setting up separate payment gateways for each country, you activate one Mollie account and Mollie surfaces the right methods automatically based on the buyer's location and currency.
Requirements
- J2Commerce 6.0 or later installed and active
- Joomla 6.0 or later
- A Mollie account (free to create; see below)
- Your business must be based in a country Mollie supports — primarily the EU, UK, Norway, and Switzerland
- Your site must be publicly reachable over HTTPS so Mollie can deliver webhook notifications
Set Up a Mollie Account
If you already have a Mollie account and API keys, skip ahead to Install the Plugin.
Create a Mollie Account
- Go to mollie.com and click Create free account.
- Enter your email address and create a password.
- Verify your email address when Mollie sends you a confirmation email.
- Complete the onboarding steps — business name, address, website URL, and bank account details.
- Mollie reviews your account (usually within one business day) before activating live payments.
Get Your API Keys
After your account is active:
- Log in to the Mollie Dashboard.
- Click Developers in the left navigation, then API keys.
- You will see two keys: a Live API key (starts with
live_) and a Test API key (starts withtest_). - Copy both keys and store them safely.
The key prefix tells you the environment — there is no separate sandbox toggle in the plugin. Enter a test_ key to run in test mode; enter your live_ key to accept real payments. You switch environments simply by changing the key.
Purchase and Download
This plugin is a separate add-on available from the J2Commerce Extensions Store. It is not included with the core J2Commerce 6 component.
Step 1: Go to the J2Commerce website -> Payment Plugins
Step 2: Locate the Mollie Payments plugin -> click View Details -> Add to Cart -> Checkout
Step 3: Go to My Downloads under your profile button at the top right corner. Click Available Versions -> View Files -> Download Now
Install the App
In the Joomla Administrator, go to System -> Install -> Extensions.
Upload the plg_j2commerce_payment_mollie.zip ZIP file or use the Install from URL option.

Enable the App
The plugin installs and enables itself automatically. No separate enable step is needed. However, it's important to know where to go to enable or disable it in the future .
There are two ways to reach the Apps list.
Option A: Go to the J2Commerce icon at the top right corner -> Apps
Option B: Go to Components on the left sidebar -> J2Commerce -> Apps

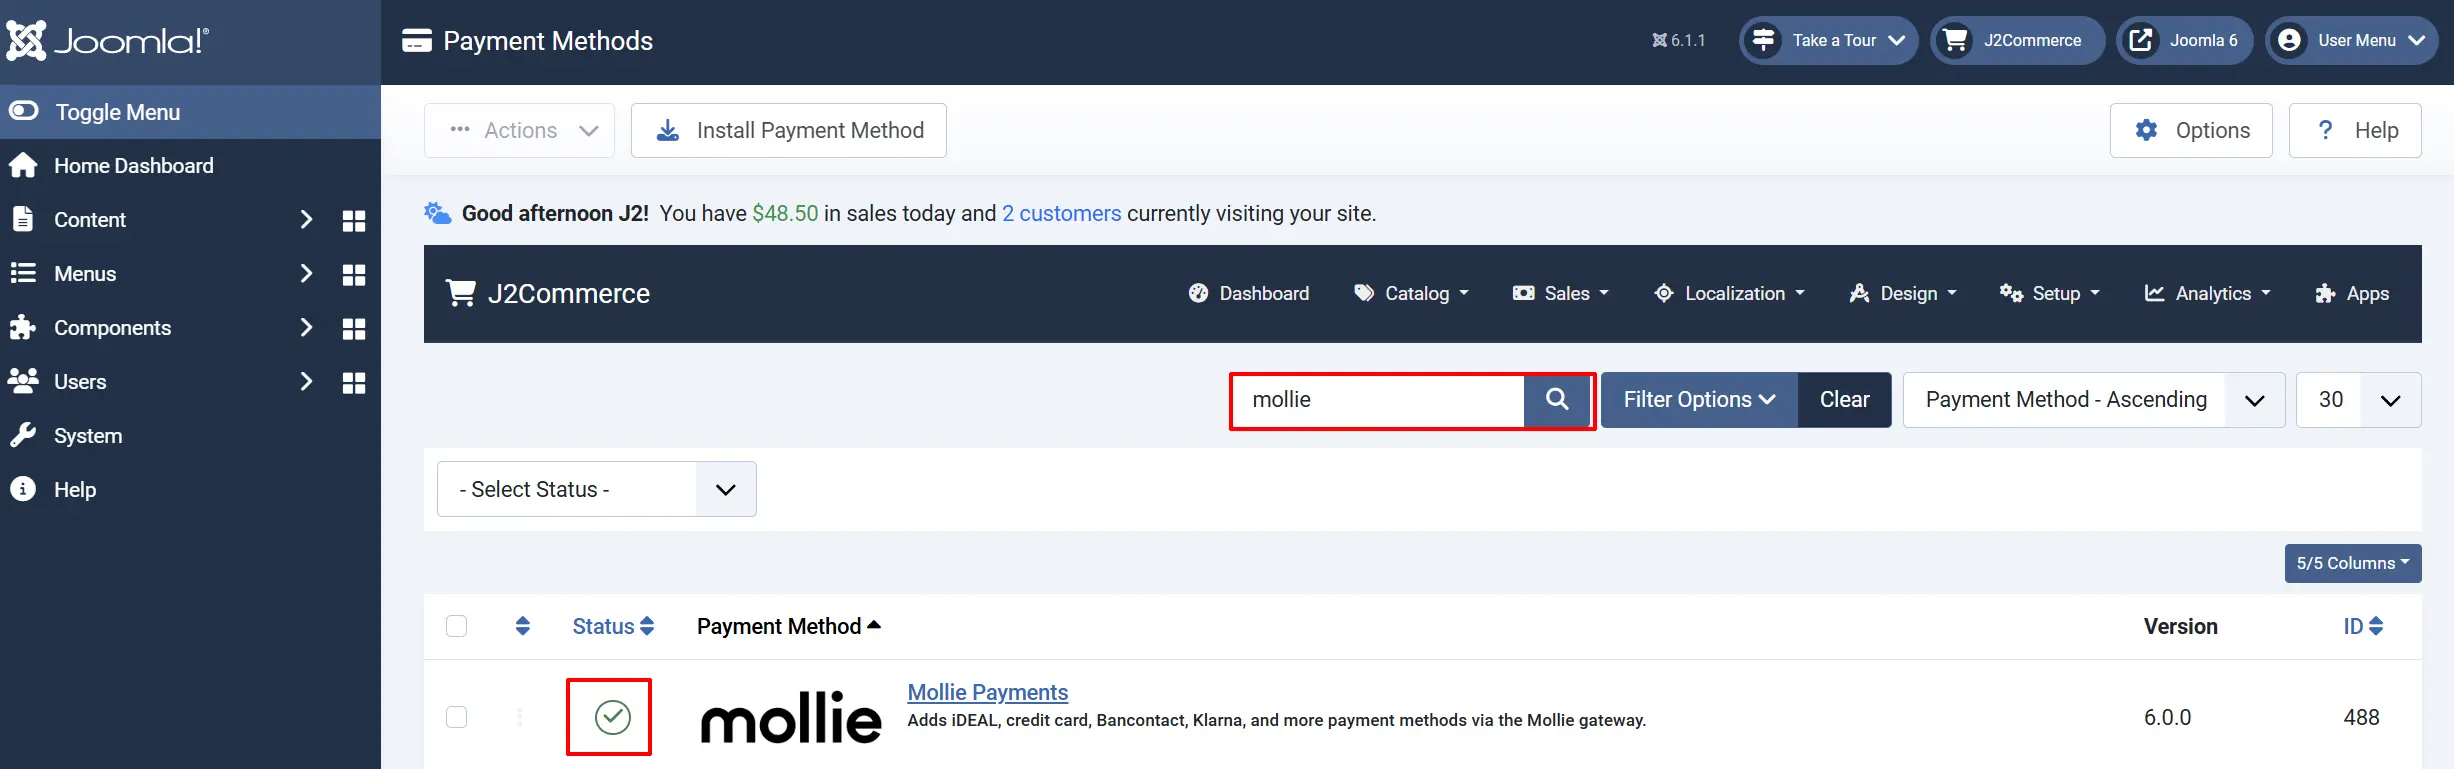
To help you narrow down the list, you can do a search for Mollie Payments, click the X, and it will turn into a green checkmark. It is now enabled and ready for setup.
Configure the Plugin
Click the Mollie Payments title next to the green checkmark to open settings.
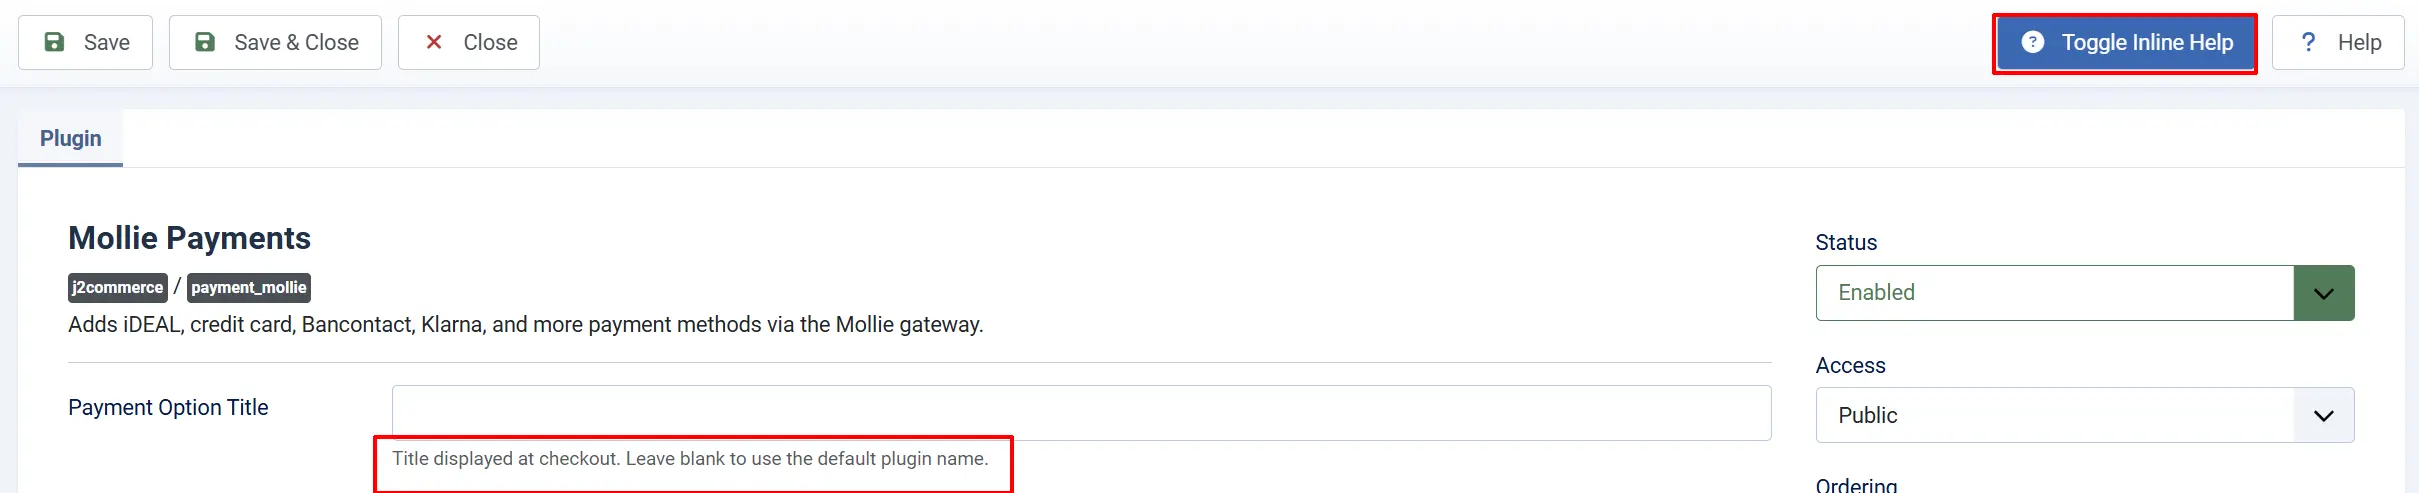
Click the Toggle Inline Help button at the top of any plugin screen to reveal a description below every field.
Display Settings tab
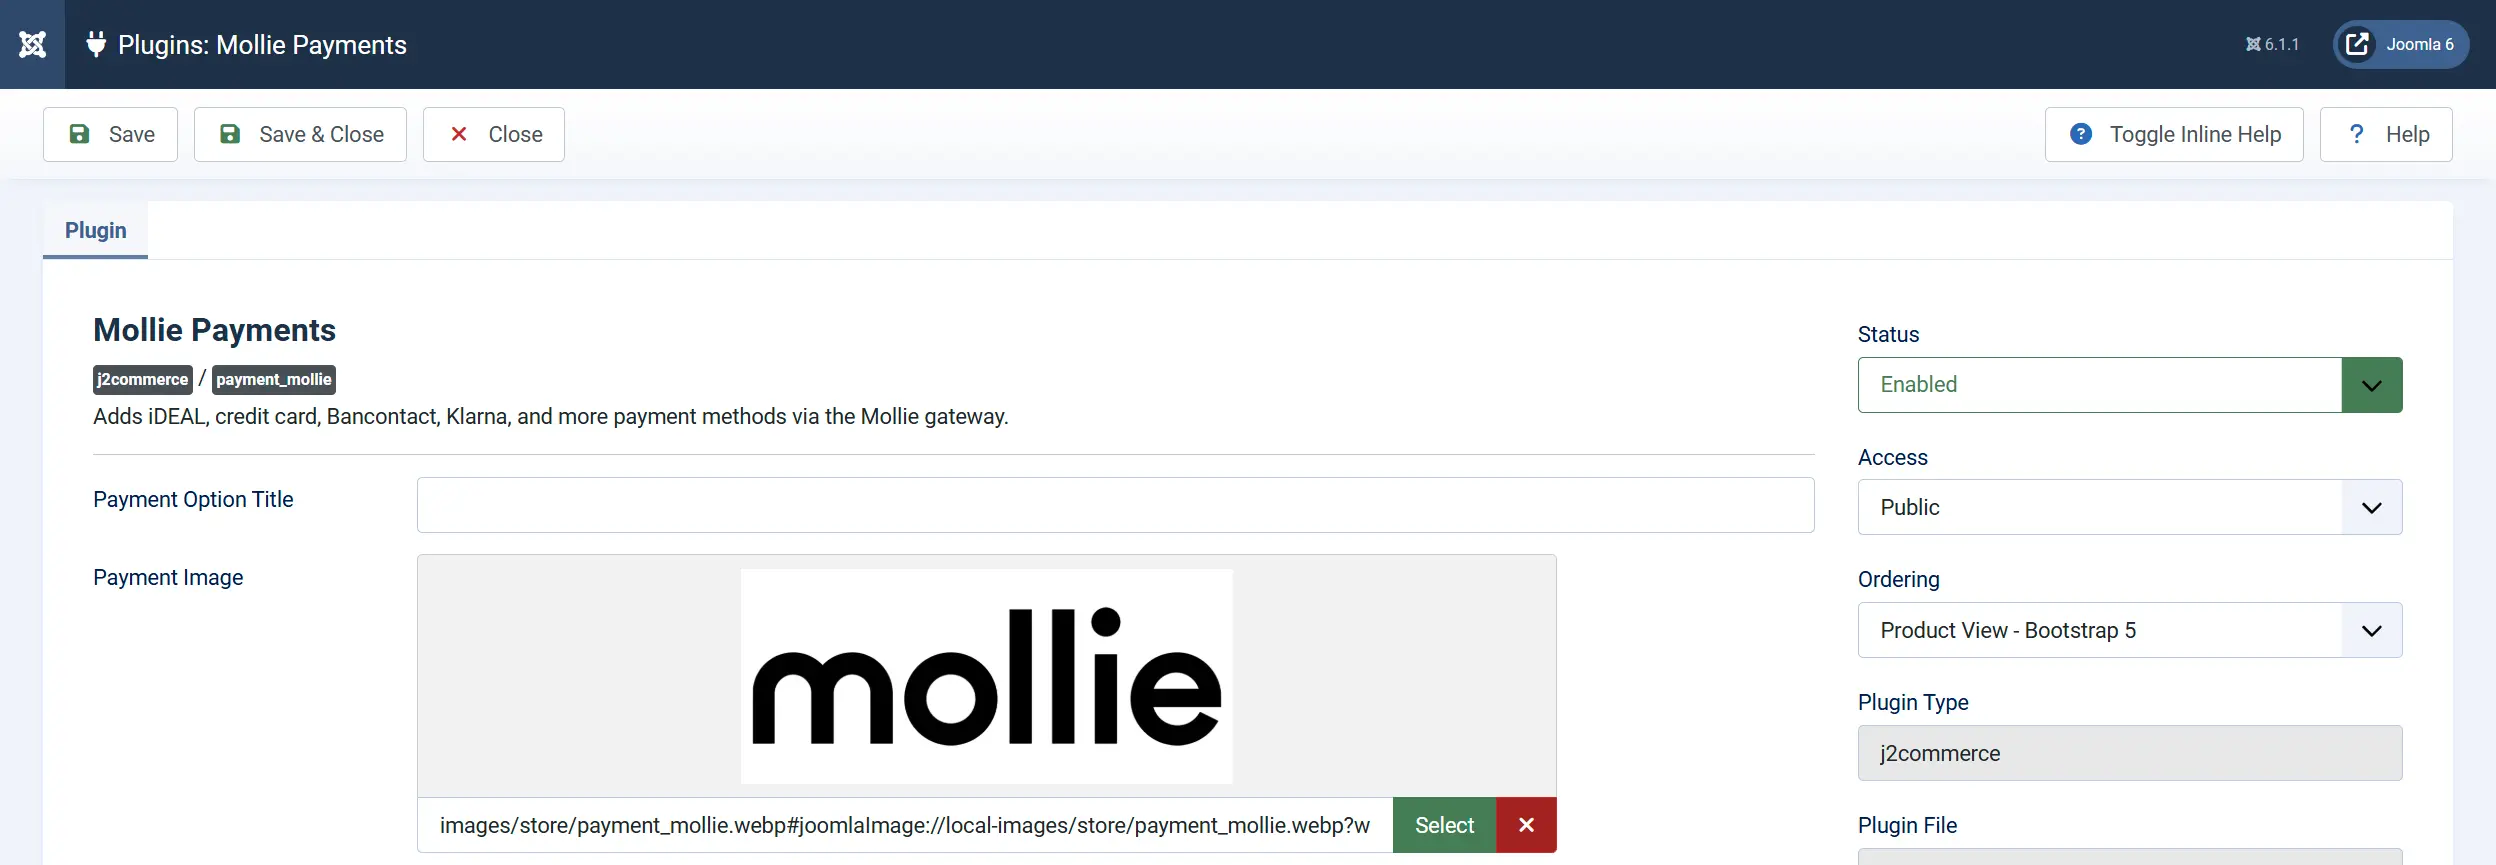
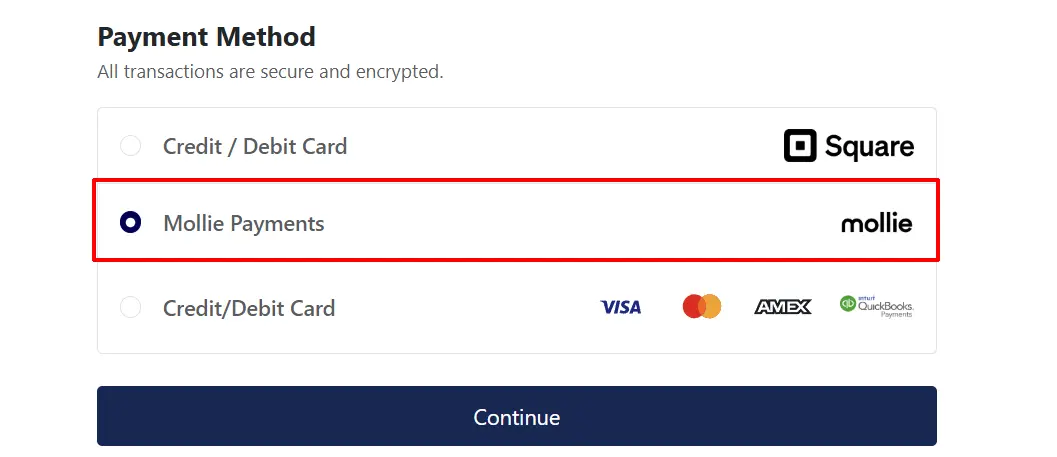
Payment Option Title — The label shown to customers at checkout. Leave blank to use the default name "Mollie Payments".
Payment Image — An optional image shown alongside the payment option at checkout. Upload from your media manager, or leave blank to show text only.
API Key

API Key — Enter your Mollie API key here. This single field controls both the environment and authentication:
There is no separate sandbox toggle. The key prefix is the environment selector.
| Key prefix | Effect |
|---|---|
test_... | Test mode — no real money is processed |
live_... | Live mode — real payments are accepted |
Order Description — The description that appears on the customer's bank or card statement. Maximum 29 characters. Use the placeholder [INVOICE] to insert the invoice number automatically. Default: [INVOICE].
Payment Methods

Enabled Payment Methods — Select the specific Mollie payment methods you want to offer at checkout. Leave this field empty to show all payment methods that are active in your Mollie account.
The following methods are available in the selector:
| Method | Notes |
|---|---|
| iDEAL | Bank transfer — Netherlands |
| Credit Card | Visa, Mastercard, Amex |
| Bancontact | Belgium |
| SOFORT Banking | Austria, Belgium, Germany, Switzerland |
| Bank Transfer | Manual bank transfer via Mollie |
| PayPal | Requires PayPal activation in Mollie |
| KBC/CBC Payment | Belgium |
| Belfius Direct Net | Belgium |
| Klarna Pay Later | Buy now, pay later |
| Klarna Slice It | Installment payments |
| Voucher | Gift/meal voucher (Belgium, Netherlands) |
| Apple Pay | Requires HTTPS and compatible device |
| EPS | Austria |
| Giropay | Germany |
| Przelewy24 | Poland |
| Twint | Switzerland |
| Trustly | Nordics and Europe |
Payment methods must also be activated in your Mollie Dashboard before they appear at checkout — enabling them here only filters the list; it does not activate them at Mollie. See Activate Payment Methods in Mollie below.
Translate Payment Method Names — When set to Yes, method names are looked up from language overrides using the PLG_J2COMMERCE_PAYMENT_MOLLIE_METHOD_* key prefix, letting you rename methods in your site's language. When set to No (default), method names come directly from Mollie.
Enable Saved Cards: Allow customers to save their payment method for future purchases and subscriptions. When set to Yes (the default), logged-in customers can save their payment method after checkout for faster future purchases. Saved cards are also used for automatic subscription renewals.
Saved payment methods are displayed to the customer on their next visit so they can check out without re-entering details.
Order Status

Confirmed Payment Status: Order status to set when Mollie confirms a successful payment.
Change Status on Refund: Automatically update the order status when a refund is issued.
- Refund Order Status: Order status to set after a successful refund.
If the status you want is not listed in a dropdown, create a new one first by going to J2Commerce -> Setup -> Order Statuses.

Webhook URL

Webhook URL — This read-only field displays the URL that Mollie uses to notify your store when a payment status changes. The URL is generated automatically based on your site address.
Click the Copy URL button next to the field to copy it to your clipboard.
Unlike some other payment gateways, you do not need to register the webhook URL in the Mollie Dashboard. J2Commerce passes the webhook URL directly to Mollie when creating each payment, so Mollie always knows where to send notifications without any extra setup.
Geo Zone and Template Style

Template Style: Select the CSS framework for this plugin's customer-facing templates
Geo Zone — Restrict Mollie Payments to customers in a specific geographic zone. Select a geozone you have defined in J2Commerce. Leave blank to show Mollie to all customers regardless of location.
Order Value Restrictions

Add an optional extra fee for customers who pay via Mollie. You can use a percentage, a fixed amount, or both together. Check your local laws before using surcharges — they are regulated in some countries.
Surcharge

Add an optional extra fee for customers who pay via Mollie. Check your local laws before using surcharges — they are regulated in some countries.
Surcharge Label: The name shown for the surcharge line item at checkout. Leave blank to use the default label "Mollie Payment Surcharge".
Surcharge (%): A percentage of the order subtotal added as a surcharge.
Surcharge (Fixed): A flat amount added to every order.
Surcharge Tax Class: A tax profile to apply to the surcharge. Leave blank if no tax applies.
Custom Messages
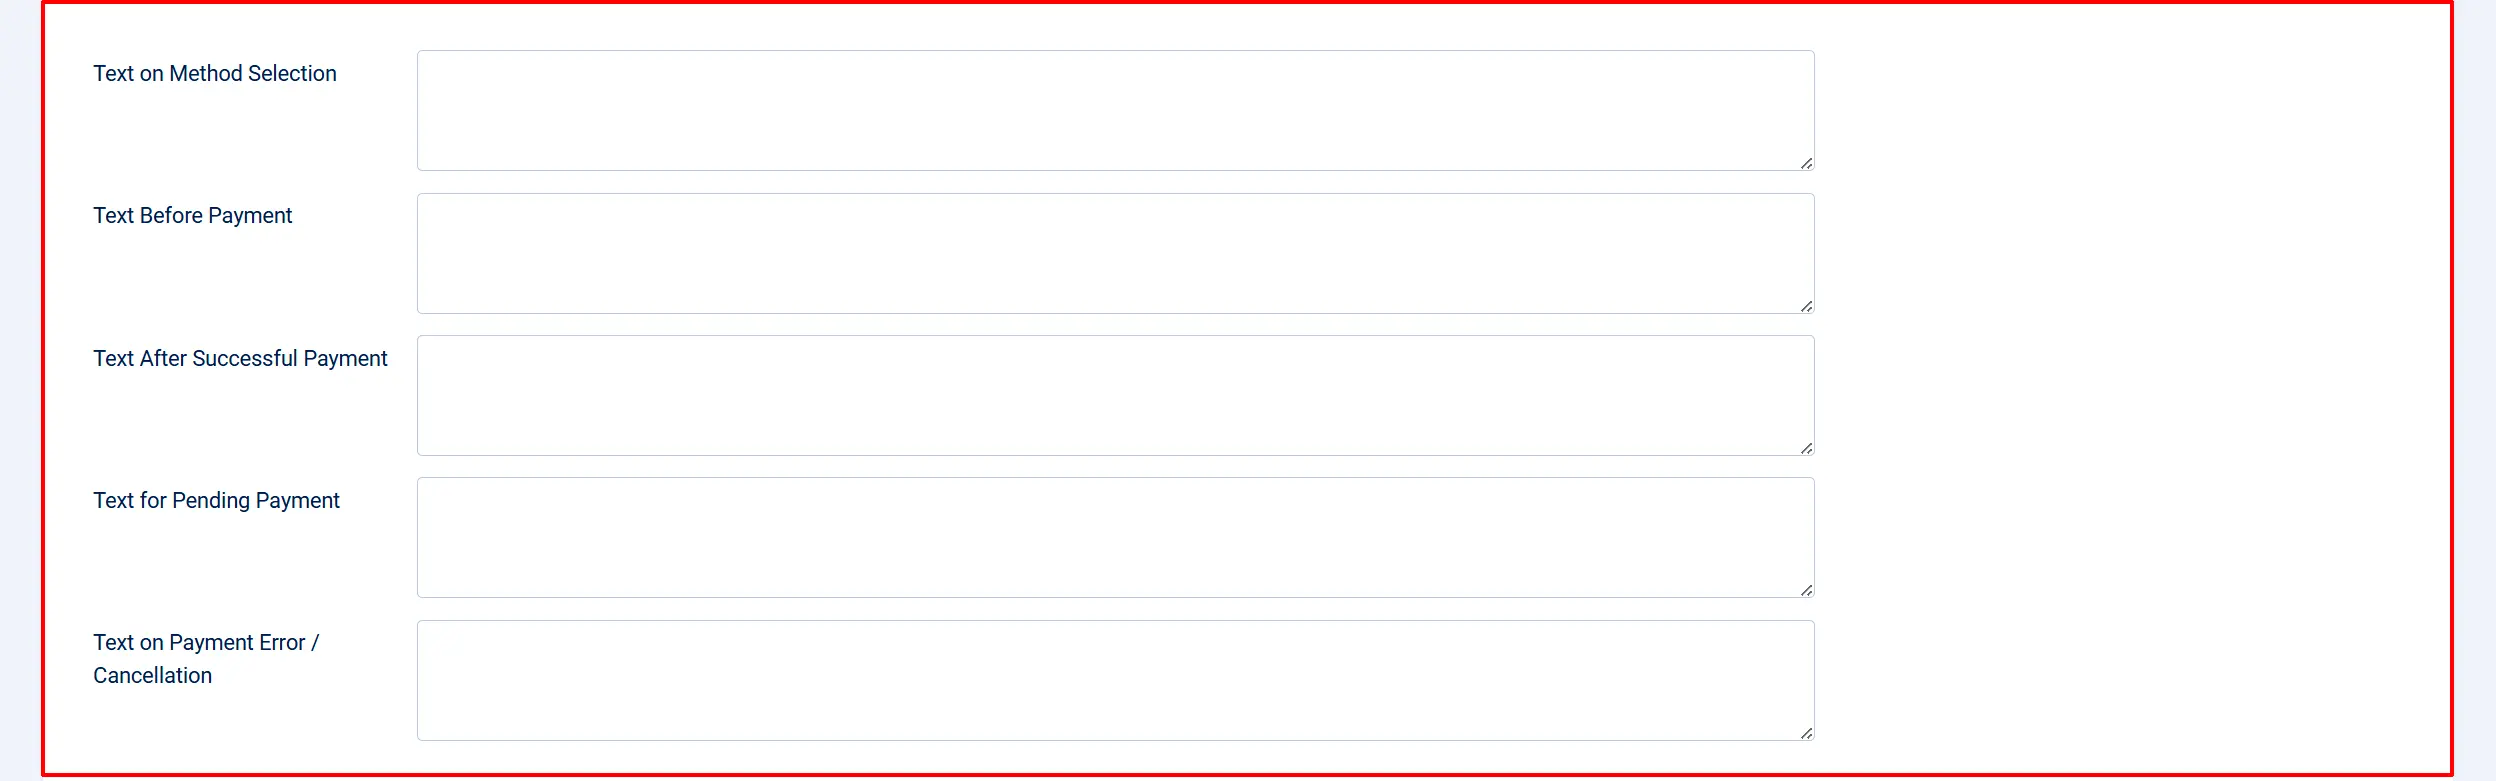
These text fields let you set messages shown to customers at different points in the payment process. Leave any field blank to use the built-in default message.
Text on Method Selection: After the customer selects Mollie as their payment method at the payment step
Text Before Payment: On the confirmation screen before the customer clicks the pay button to go to Mollie
Text After Successful Payment: After the customer returns from Mollie with a successful payment
Text for Pending Payment: When Mollie reports the payment as open or pending (e.g., bank transfer not yet settled)
Text on Payment Error / Cancellation: When the payment fails, expires, or is canceled by the customer
Thank You Article

Thank You Article — Select a Joomla article to display on the order confirmation page after a successful payment. Leave blank to use J2Commerce's default confirmation message.
Pay Button Label
Pay Button Label — The label on the button that redirects the customer to Mollie. Default: Pay Now.
Debug Mode
Debug Mode — When set to Yes, the plugin writes Mollie API calls and responses to administrator/logs/plg_j2commerce_payment_mollie.php. Enable this only while troubleshooting, then set it back to No for production.
Activate Payment Methods in Mollie
Before a payment method appears at checkout, it must be active in your Mollie account:
- Log in to the Mollie Dashboard.
- Go to Settings -> Payment methods.
- Click Activate next to any method you want to use.
- Some methods (for example, Klarna and Apple Pay) require additional verification steps — follow the prompts in Mollie.
Payment methods are also shown based on the customer's location and the order currency. A customer in the Netherlands will see iDEAL; a customer in Belgium will see Bancontact. You do not need to configure this — Mollie handles it automatically.
How the Checkout Works
The Mollie checkout uses a redirect flow:
The customer adds items to the cart and proceeds to checkout.
At the payment step, Mollie Payments (or your custom display name) appears as an option.
The customer selects Mollie. If you have multiple payment methods active, a method selector appears where the customer picks iDEAL, credit card, Bancontact, or another method. For iDEAL, a bank selector (issuer) also appears.
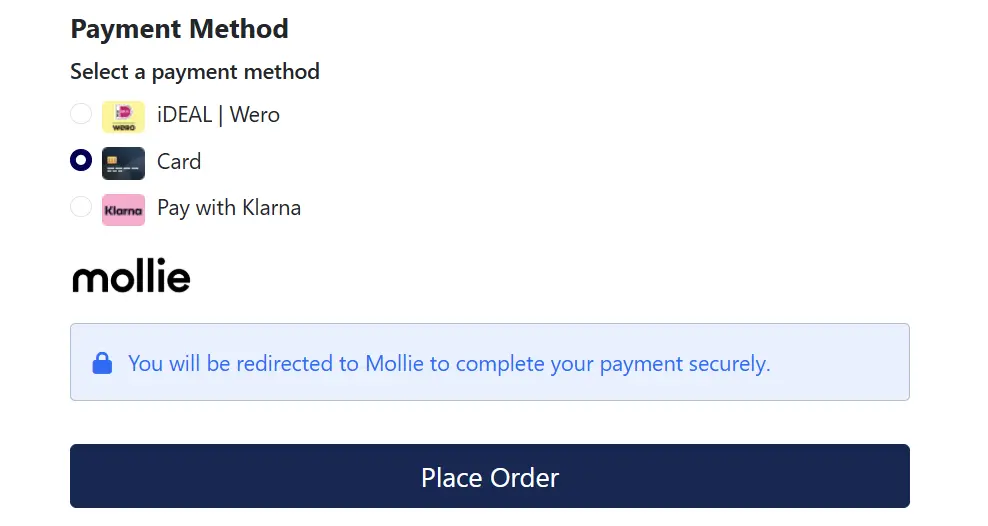
After choosing a method, the customer clicks the pay button and is redirected to Mollie's secure hosted payment page.
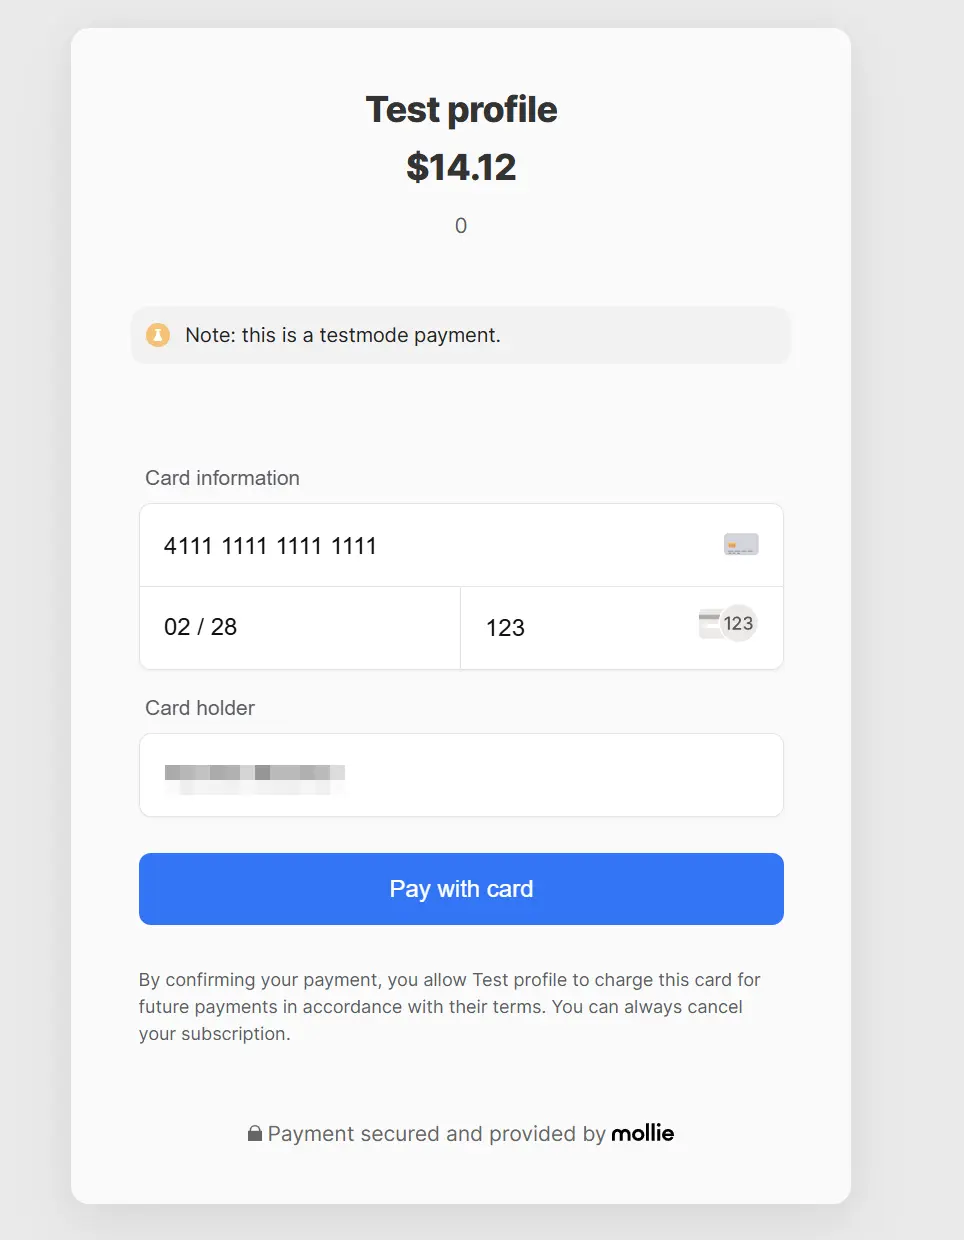
The customer completes payment on Mollie's servers.
Mollie redirects the customer back to your site. J2Commerce checks the payment status and updates the order accordingly.
Separately, Mollie sends a webhook notification to your store. J2Commerce processes this notification to apply the final status in case the redirect was interrupted.
Test Mode
Use your test_ API key to run test payments — no real money is processed.
- Enter your
test_...key in the API Key field and save. - Place a test order on the frontend.
- On the Mollie hosted payment page, you will see test payment options — select a status (Paid, Canceled, Expired) to simulate each outcome.
- Return to your store and verify the order status updated correctly.
- Check
administrator/logs/plg_j2commerce_payment_mollie.php(with Debug Mode on) to see the full API exchange.
Mollie does not charge fees for test transactions.
Going Live
When you are ready to accept real payments:
- Log in to the Mollie Dashboard and complete any pending account verification steps.
- In the plugin settings, replace the
test_key with yourlive_key. - Click Save.
- Place a small real transaction to confirm the payment flow works end-to-end.
- Set Debug Mode to No.
Going live checklist:
- Live API key (
live_...) entered in the API Key field - Debug Mode set to No
- Payment methods you want to offer are activated in your Mollie Dashboard
- Your site is publicly accessible over HTTPS
- You have tested at least one real payment end-to-end
Refunds

You can issue a full or partial refund directly from the order in the J2Commerce admin:
- Go to J2Commerce -> Orders and open the order.
- Look for the Payment section on the order detail screen.
- Click Refund (Full) to return the entire amount, or Refund (Partial) to enter a specific amount.
- Confirm the refund.
J2Commerce sends the refund request to Mollie via the API. The customer receives their refund according to Mollie's processing timeline for their payment method (typically 2–5 business days for bank transfers, faster for card payments).
If Change Status on Refund is enabled, the order status updates automatically after the refund is processed.
Saved Cards and Subscription Renewals
When Enable Saved Cards is turned on (the default), the plugin supports saved payment methods and automatic subscription renewals:
- On the first payment, J2Commerce creates a Mollie customer record and establishes a billing mandate (authorization). The customer's Mollie profile is stored for future use.
- On subsequent orders, logged-in customers see their saved payment method at checkout and can pay without re-entering details.
- On each subscription renewal, J2Commerce charges the stored customer profile using Mollie's recurring payment API — no redirect to Mollie is needed for automatic billing cycles.
This requires the J2Commerce Subscription Product app. The customer must complete an initial payment to establish the mandate before automatic renewals can be processed.
Troubleshooting
Payment methods do not appear at checkout
Cause: No payment methods are active in your Mollie account, or the API key is incorrect.
Solution:
- Verify the API Key in the plugin settings is correct and starts with
live_ortest_. - Log in to the Mollie Dashboard -> Settings -> Payment methods and confirm at least one method is activated.
- Enable Debug Mode and check
administrator/logs/plg_j2commerce_payment_mollie.phpfor API errors.
Order status does not update after payment
Cause: Mollie could not reach your site's webhook URL, so the payment notification was never received.
Solution:
- Confirm your site is publicly accessible over HTTPS — Mollie cannot deliver webhooks to a local development server or a site behind a password-protected staging environment.
- Mollie automatically retries webhook delivery on failure. Check the Mollie Dashboard -> Developers -> Webhooks (or the payment detail page) to see delivery attempts and any error codes.
- Enable Debug Mode and reproduce a test payment to see whether the webhook is being received and processed.
- Verify that no server firewall or CDN WAF rule is blocking POST requests to
index.php?option=com_ajax&...from Mollie's IP ranges.
Key prefix mismatch
Cause: A test_ key is in the field but the store expects live payments (or vice versa).
Solution: The key prefix is the only environment selector. Check that the key in the API Key field matches your intent — live_ for production, test_ for testing. There is no separate sandbox toggle.
Currency amount rejected by Mollie
Cause: Some currencies must be formatted without decimal places (for example, JPY), while others require exactly two decimal places. A mismatch causes Mollie to reject the payment.
Solution: The plugin reads the number of decimal places from your J2Commerce currency settings and formats amounts accordingly. Make sure your currency in J2Commerce -> Setup -> Currencies has the correct Decimal Places value for your currency. Japanese Yen (JPY) should be 0; Euro and US Dollar should be 2.
Customer canceled the payment but the order status did not update to Canceled
Cause: The customer closed the Mollie payment window without completing or explicitly canceling the payment. In this case the Mollie status is canceled (single l — Mollie's own spelling) and the webhook fires shortly after. If your site was unreachable, the webhook may not have been delivered yet.
Solution: Wait a few minutes for the Mollie webhook retry cycle. If the order status still shows the wrong state, open the order in J2Commerce -> Orders and manually update the status. Check the debug log for any webhook delivery failure.
Surcharge not showing at checkout
Cause: Surcharge fields are blank, or the order subtotal does not include the surcharge in the displayed total before the payment step.
Solution: Verify that Surcharge (%) or Surcharge (Fixed) contains a numeric value in the plugin settings. Surcharges are applied when the customer selects Mollie as their payment method.
Mollie Payments is not visible to some customers
Cause: A Geo Zone restriction, Minimum Order Subtotal, or Maximum Order Subtotal setting is filtering out those customers.
Solution: Check the Geo Zone, Minimum Order Subtotal, and Maximum Order Subtotal fields in the plugin settings. Leave them blank to show Mollie to all customers without restrictions.
FAQ
Does Mollie require a separate webhook registration in the Mollie Dashboard? No. J2Commerce passes the webhook URL directly to Mollie each time it creates a payment. You do not need to configure a static webhook endpoint in the Mollie Dashboard.
Which countries does Mollie support? Mollie supports businesses based in Austria, Belgium, Finland, France, Germany, Italy, Luxembourg, Netherlands, Poland, Portugal, Spain, Switzerland, and the UK, among others. Check mollie.com/en/countries for the current list.
Can I offer only specific payment methods instead of all of them? Yes. Use the Enabled Payment Methods field in the plugin settings to select the methods you want. Leave it blank to show all methods that are active in your Mollie account.
What happens if the customer's browser closes mid-redirect? J2Commerce checks the payment status when the customer returns to your site. If the return is interrupted, Mollie's webhook will still fire and update the order status automatically once your site is reachable.
Can I use Mollie with multiple currencies? Yes. Mollie supports multiple currencies. The currency used for each payment is determined by your store's active currency at the time of checkout. Ensure the currency is enabled in your Mollie account.
What does "Klarna Slice It" mean? Klarna Slice It is Klarna's installment payment option — the customer pays in fixed monthly installments. Klarna Pay Later lets the customer pay within 14 to 30 days after delivery. Both are managed by Klarna and require Klarna activation in your Mollie account.