Viva.com Payment
The Viva.com Payment plugin connects your J2Commerce store to Viva.com (formerly Viva Wallet), a European payment platform that supports cards, digital wallets, and local payment methods across Europe. When a customer pays, they are redirected to a secure Viva-hosted payment page to enter their card details, and then returned to your store automatically when the payment is complete.
Because card data is entered and handled entirely on Viva's own servers, your store qualifies for the simplest level of PCI security compliance (SAQ-A) — card numbers never touch your server. The plugin also supports:
- Saved cards — returning customers can check out faster with a saved card on file
- Subscription renewals — saved cards can be charged automatically when you use the J2Commerce Subscriptions add-on
- Pre-authorization — reserve funds without charging, then capture when you are ready to ship
- Instalments — offer customers a split-payment option (Greece-registered accounts only)
- Full and partial refunds — issue refunds directly from the J2Commerce order screen
- Void/cancel — release a pre-authorized hold before it is captured
Requirements
- Joomla 6.x
- J2Commerce 6.x
- PHP 8.3 or later
- A Viva.com merchant account (demo or live)
- Your store must be accessible over HTTPS
Get Your Viva Credentials
Before configuring the plugin, you need four pieces of information from the Viva banking app. Viva uses two separate sets of credentials for different operations:
- Smart Checkout credentials (OAuth2): Used to create orders on the Viva-hosted payment page. These are your Client ID and Client Secret.
- Classic API credentials (Basic auth): Used for capture, void, refund, and recurring charges. These are your Merchant ID and API Key.
Where to find them
- Log in to the Viva banking app at www.vivapayments.com (or the demo portal for testing).
- Go to Settings -> API Access.
- Under the Smart Checkout section, copy your Client ID and Client Secret.
- Your Merchant ID and API Key appear in the same screen under the classic API credentials section.
Viva uses entirely separate credentials and portal URLs for demo and live environments. The demo (sandbox) environment is at demo.vivapayments.com. Keep the Viva portal open while you configure the plugin in Joomla — you will also need to set return URLs and register a webhook URL from the plugin settings screen.
Purchase and Download
This plugin is a separate add-on available from the J2Commerce Extensions Store. It is not included with the core J2Commerce 6 component.
- Go to the J2Commerce website and locate Viva.com Payment.
- Add it to your cart and complete checkout.
- Go to My Downloads under your account profile and find the plugin.
- Click Available Versions -> View Files -> Download Now to download the ZIP file.
Installing the Plugin
You can install this Viva.com Payment plugin using the Joomla installer. The following steps help you with a successful installation.
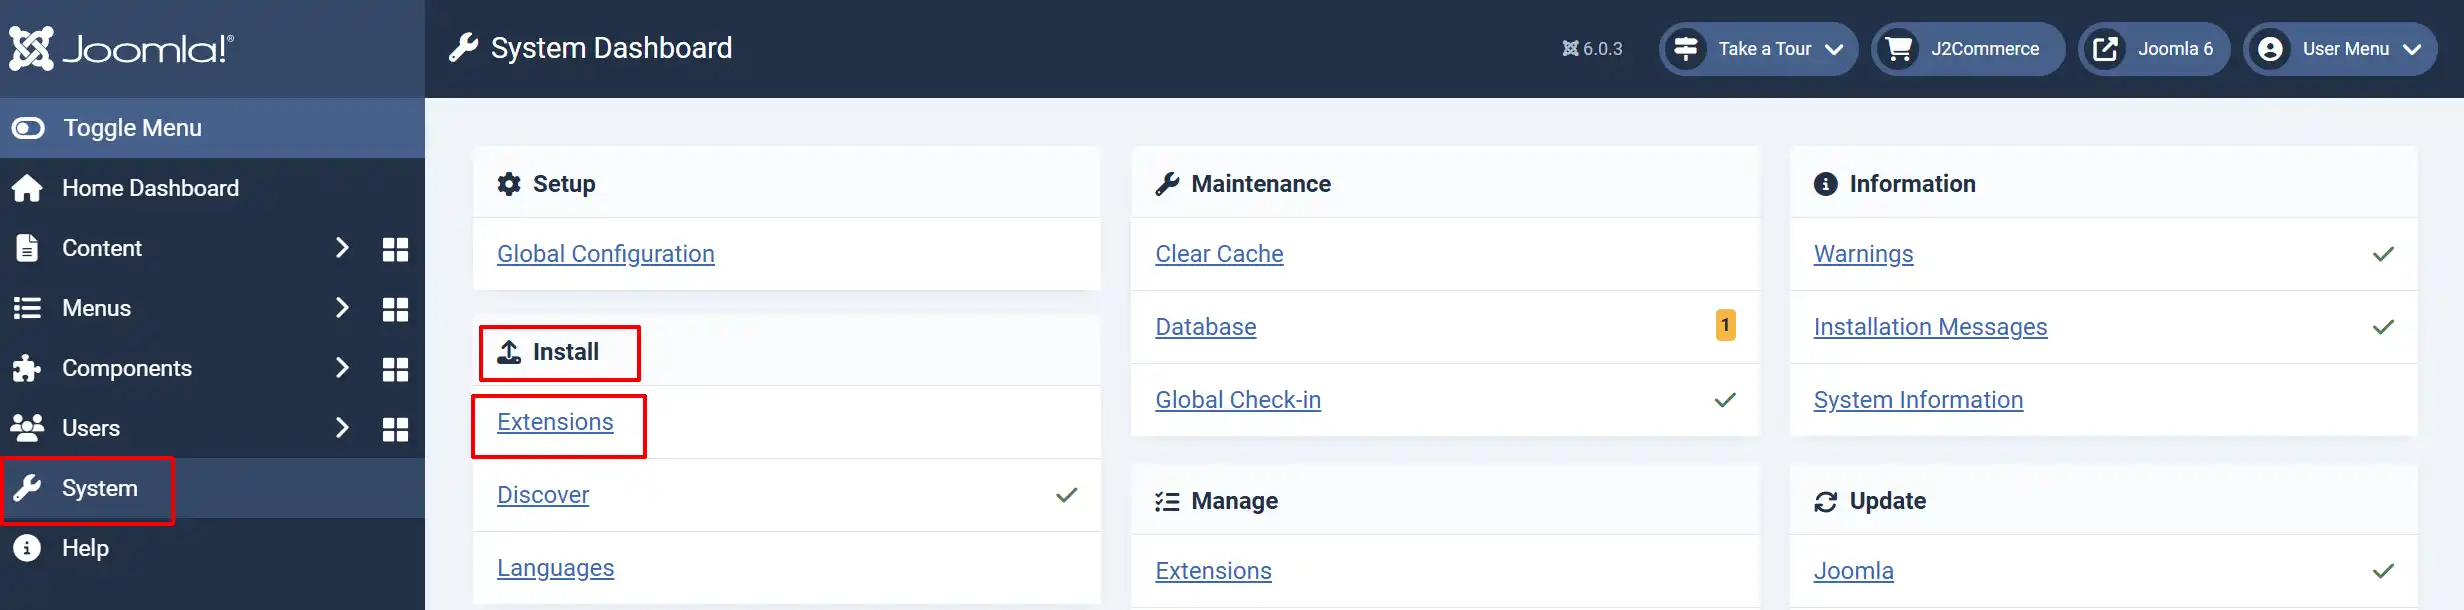
In the Joomla admin, go to System -> Install -> Extensions
Upload the payment_viva.zip file or use the Install from URL option.
Enable the Plugin
Once you have installed the extension, you will need to enable it. There are two ways you can access the extension.
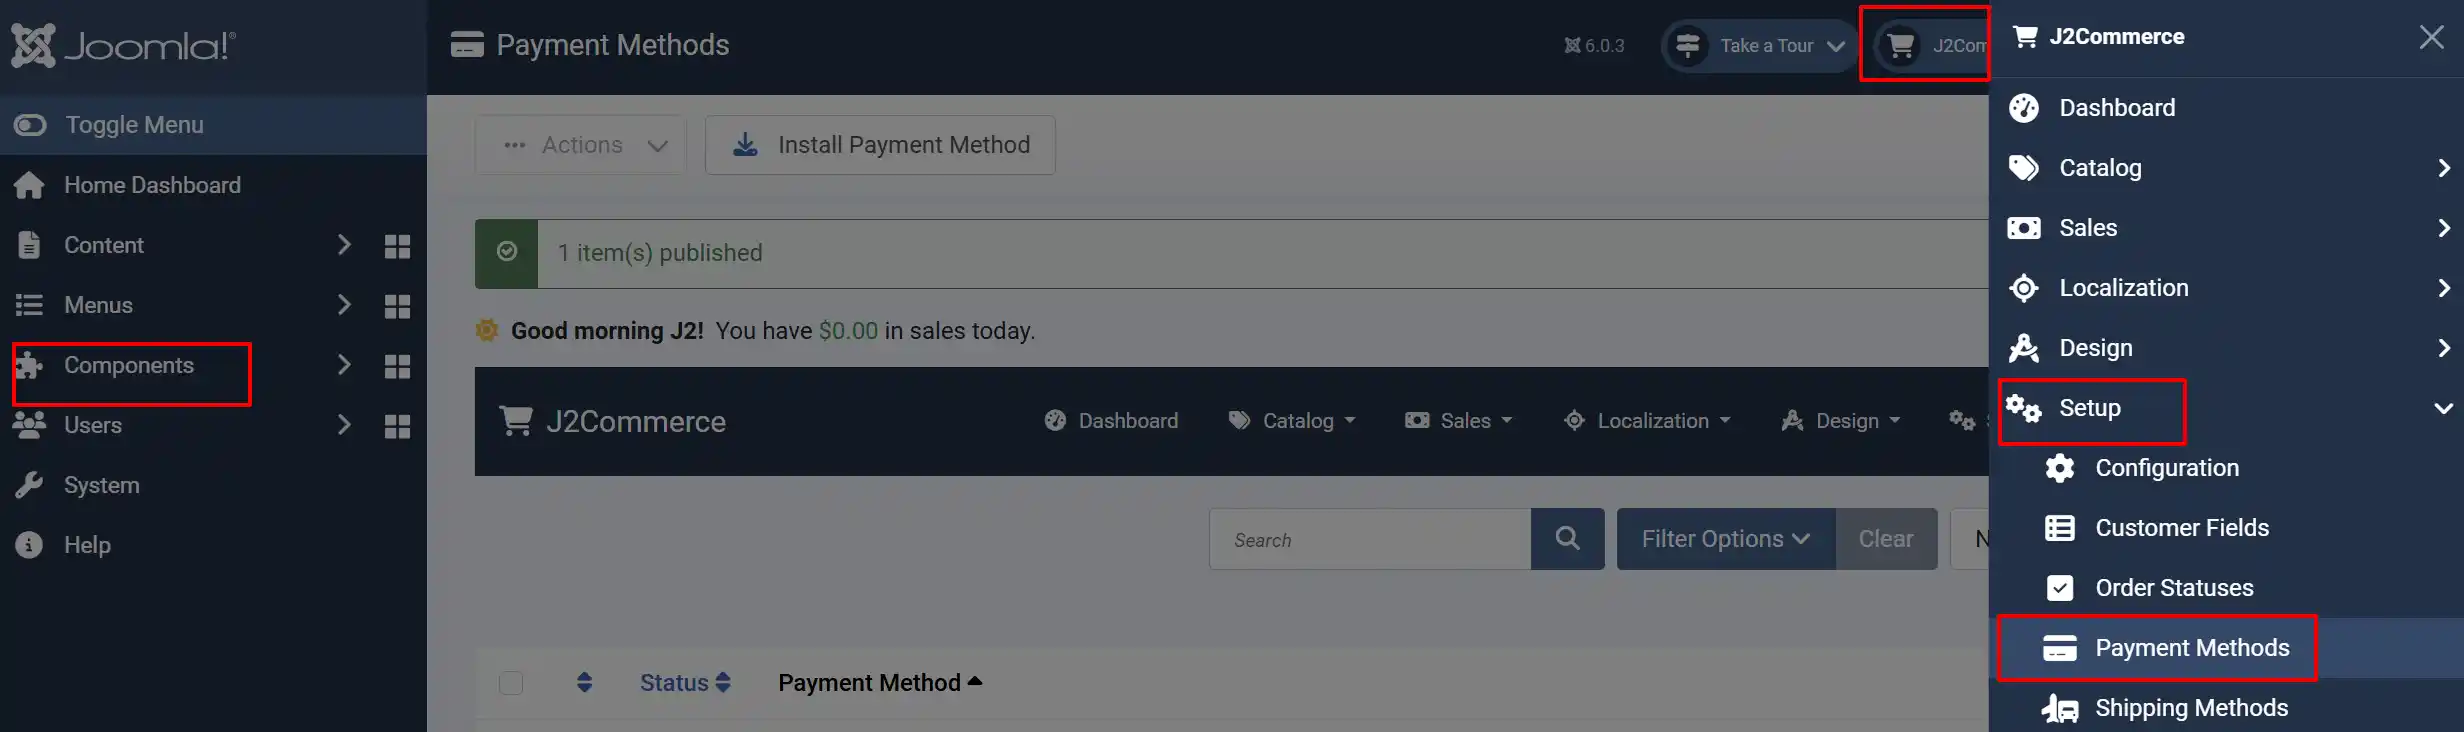
Option A: Go to the J2Commerce icon at the top right corner -> Setup -> Payment Methods
Option B: Go to Components on the left sidebar -> J2Commerce -> Dashboard -> Setup -> Payment Methods
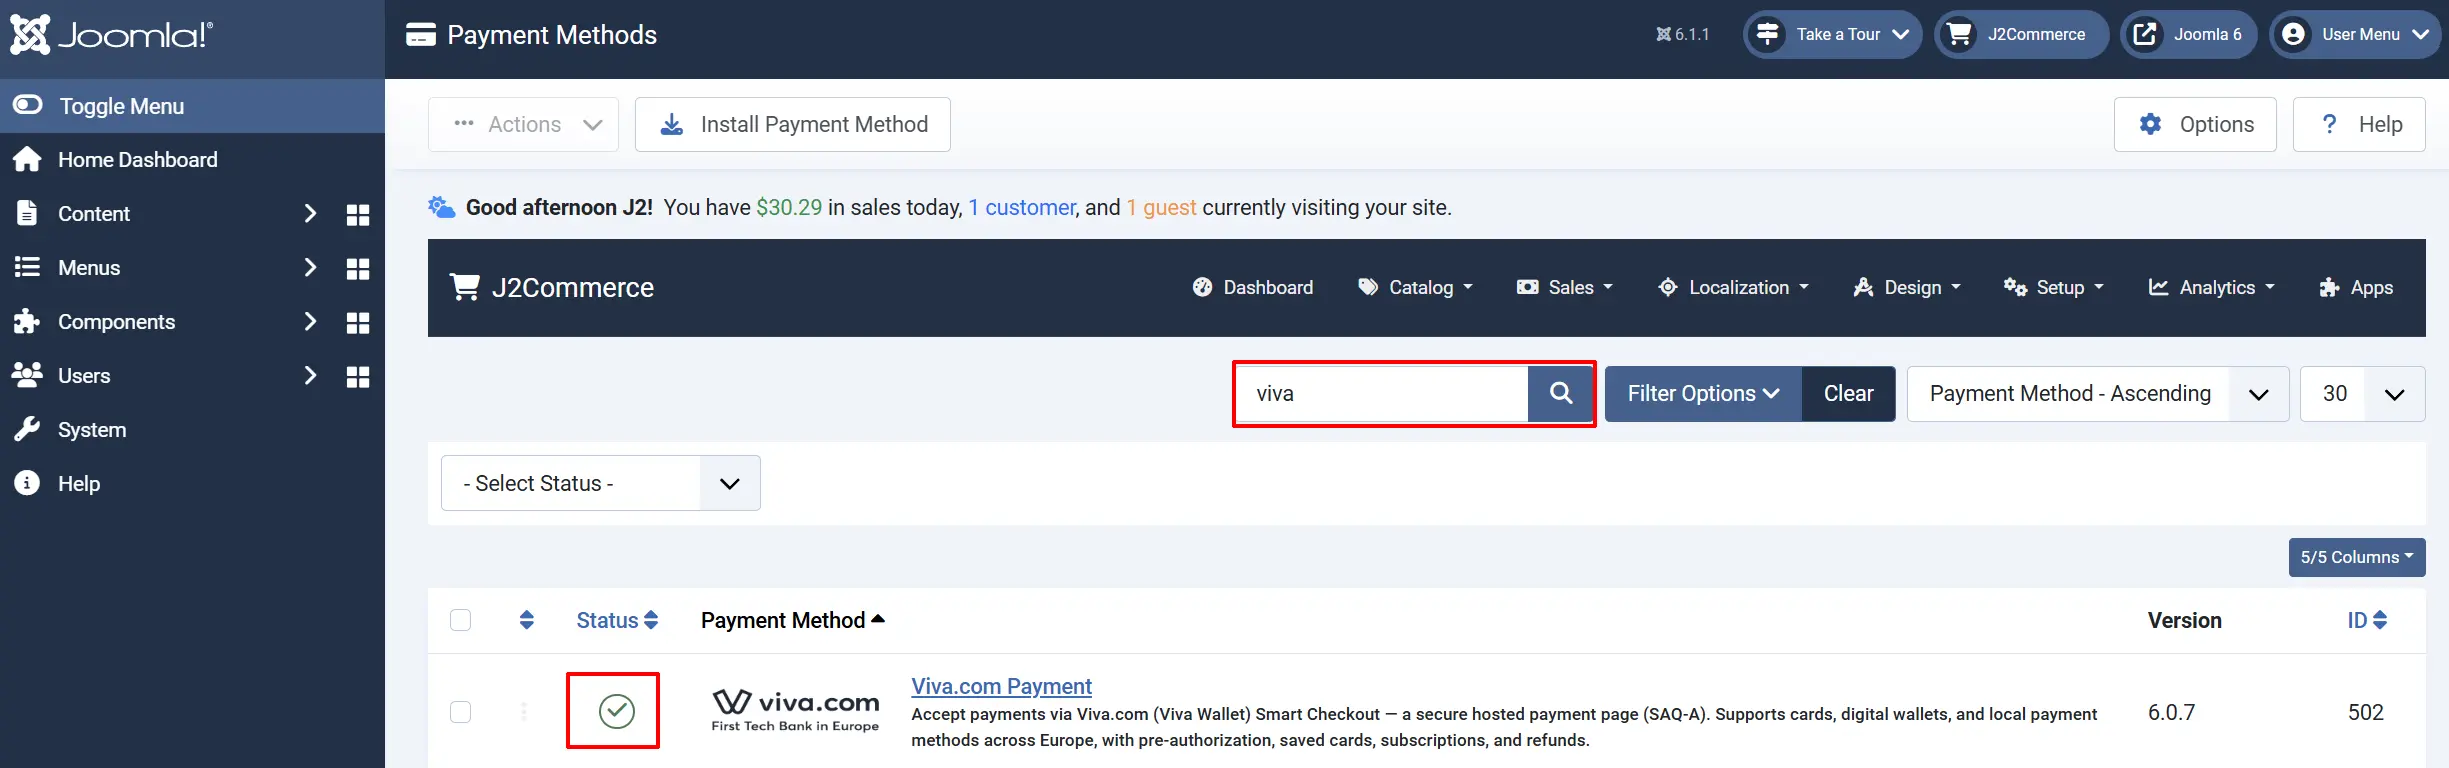
Look for Viva.com Payment, click the X, and it will turn into a green checkmark. It is now enabled and ready for setup.
Configuring the Plugin
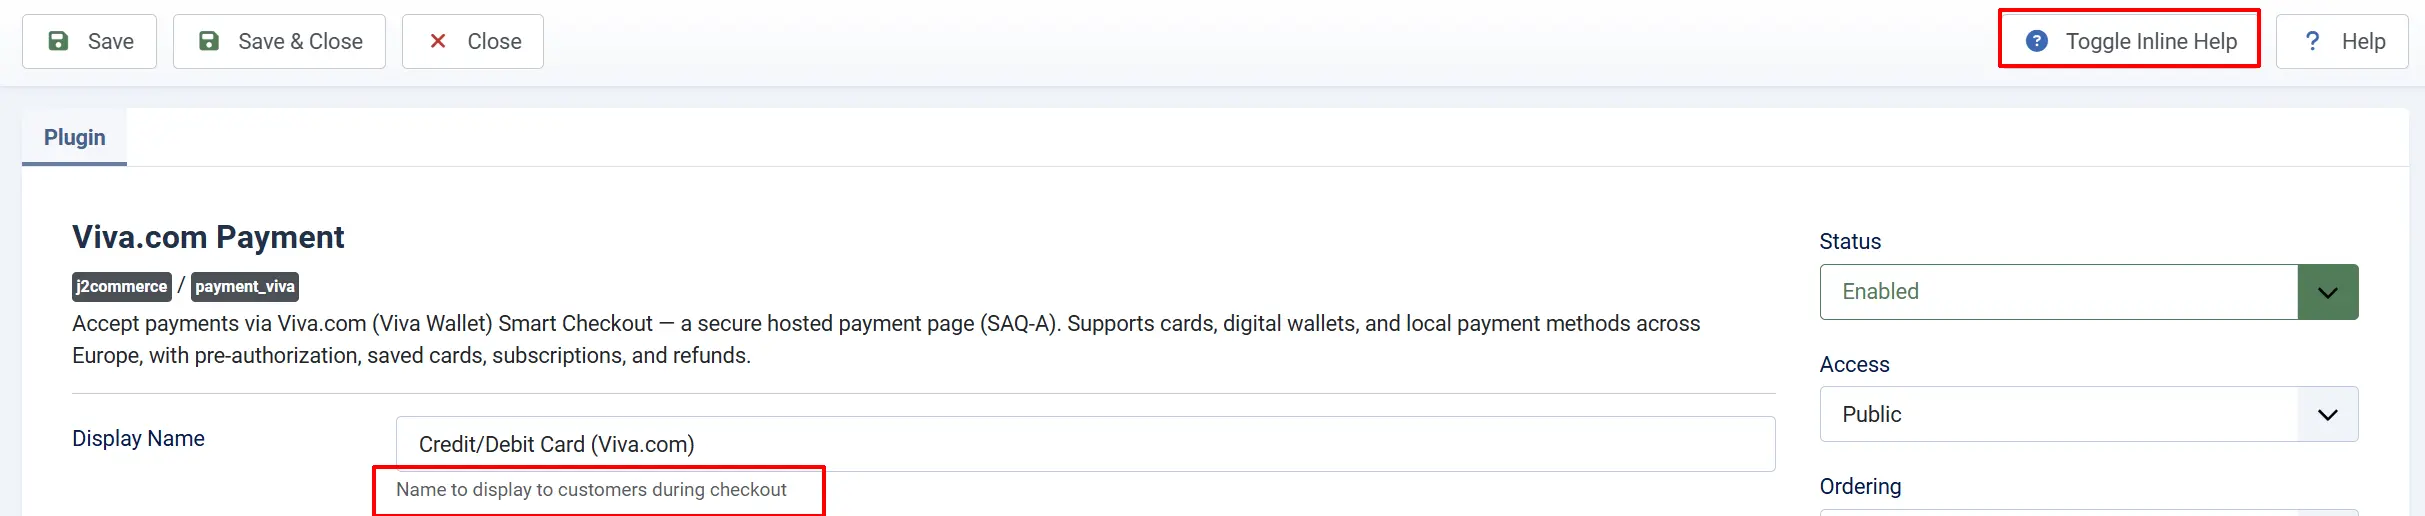
After enabling the plugin, click the Viva.com Payment title to open the settings.
Tip: Click on the Toggle Inline Help button on any app/plugin you install and it will show a description below each section. See image below
Display Settings tab
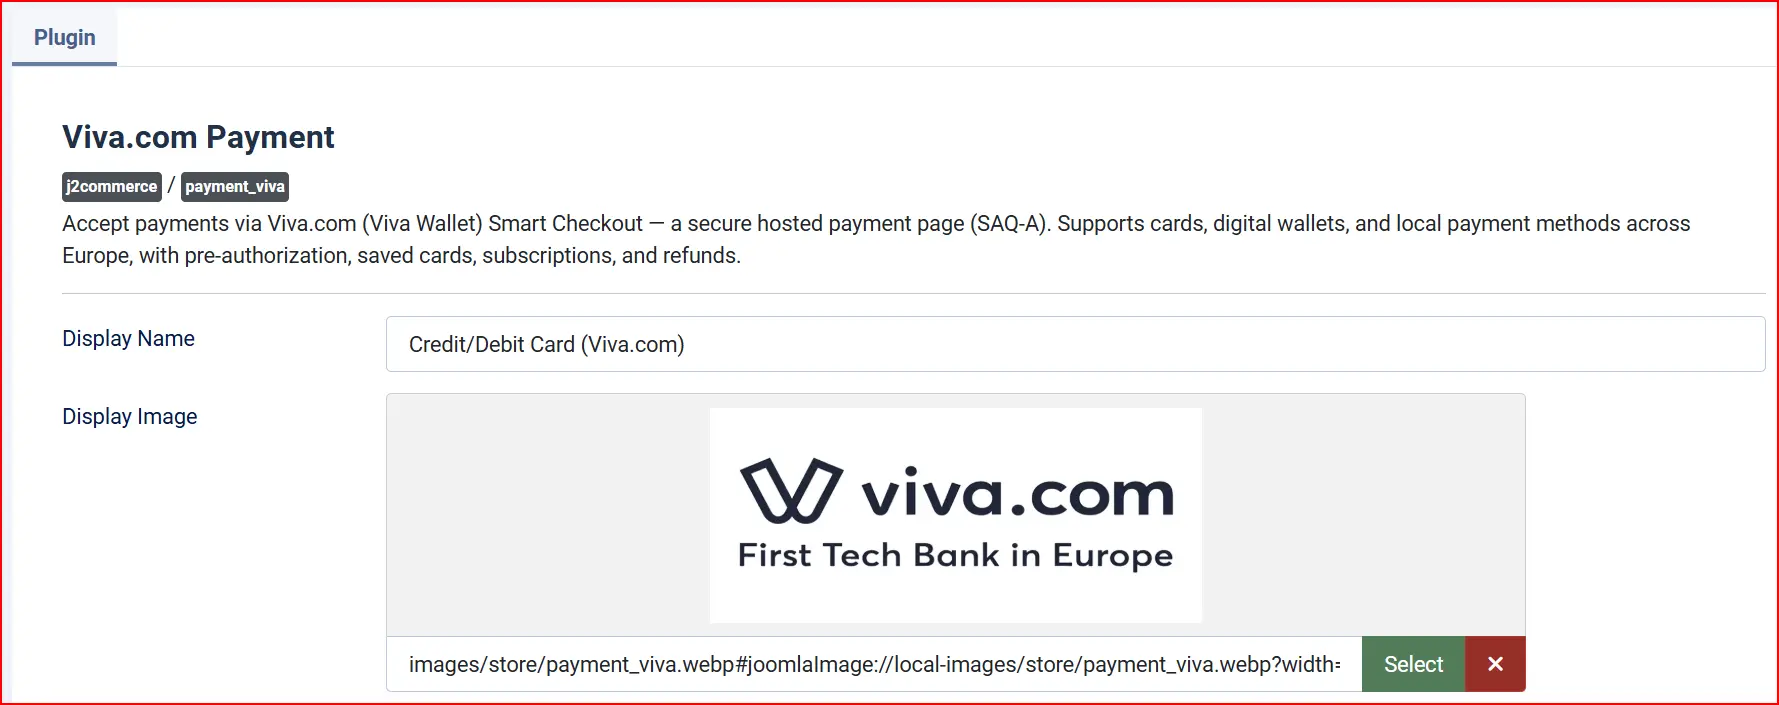
Display Name: The label shown to customers on the checkout page. The default is Credit/Debit Card (Viva.com). Change this to whatever makes sense for your store — for example, "Pay by Card" or "Viva.com".
Display Image: An optional logo or card-brand image shown next to the payment method name at checkout. Leave blank to show only the display name.
Credentials
Demo / Test Mode: When turned on, the plugin connects to the Viva demo environment (demo.vivapayments.com). All transactions are simulated — no real money is moved.
Viva uses an entirely separate portal and separate credentials for demo and live. You must have a Viva demo merchant account and enter its credentials in the Demo credential fields below. You cannot use your live credentials to test in demo mode.
Enable this during initial setup and testing. When demo mode is active, a warning banner appears on the J2Commerce dashboard as a reminder. Turn it off only when you are ready to accept real payments.
Live Credentials
When enabled, all transactions are sent to the Viva demo environment (demo.vivapayments.com).
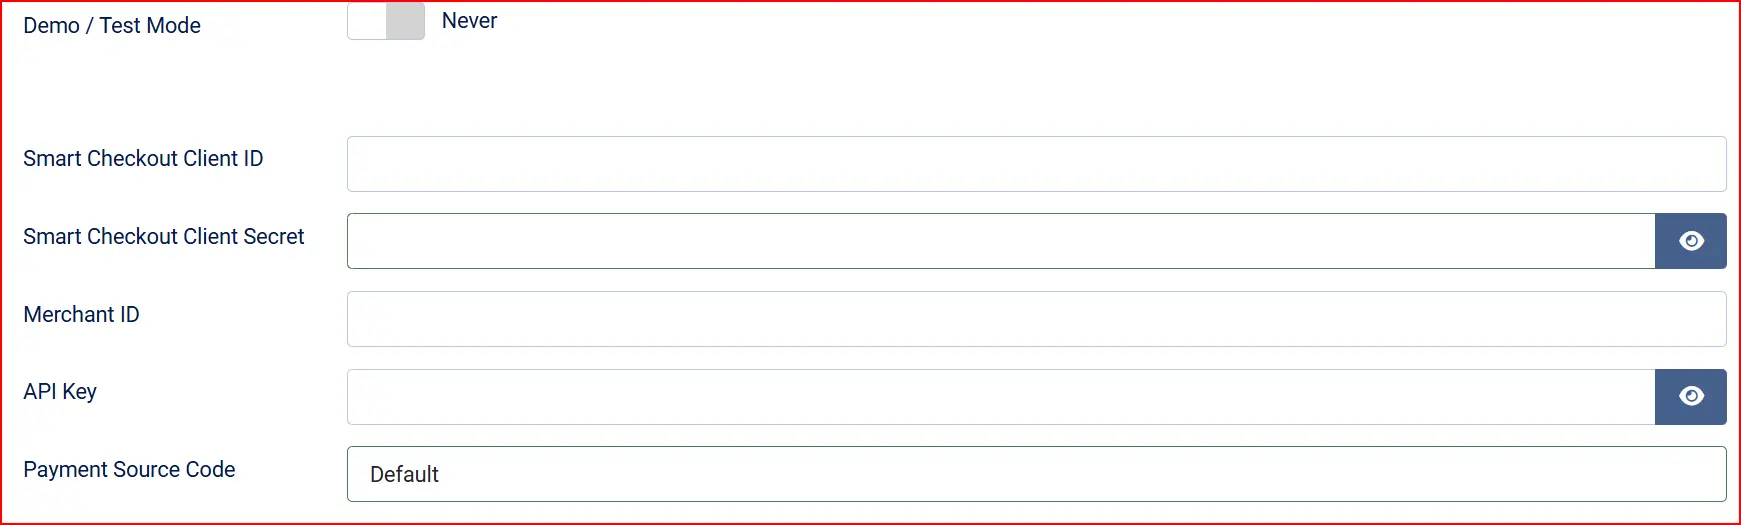
These fields appear when Demo / Test Mode is turned off.
Smart Checkout Client ID: Your Viva Smart Checkout OAuth2 Client ID (xxx.apps.vivapayments.com). Found in the Viva banking app under Settings > API Access. Your live Viva OAuth2 Client ID — used to create Smart Checkout orders. Found in the Viva banking app under Settings -> API Access
Smart Checkout Client Secret: Your live Viva OAuth2 Client Secret. Never exposed to the browser
Merchant ID: Your Viva Merchant ID (GUID). Used as the Basic-auth username for capture, void, refund, and recurring charges.
API Key: Your Viva API Key. Used as the Basic-auth password. Never exposed to the browser or logged.
Payment Source Code: The 4-digit code of the payment source created in your Viva account (case-sensitive). Defaults to 'Default'. Required if you have multiple payment sources
Sandbox Credentials
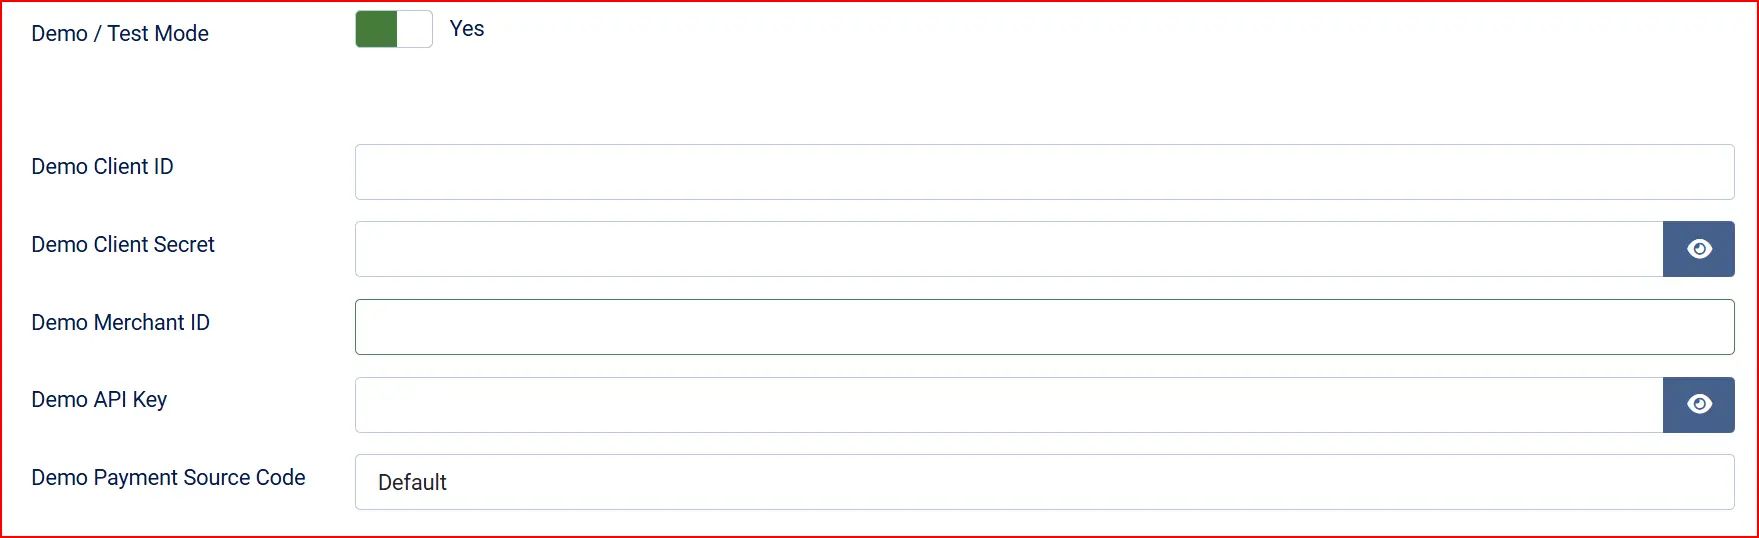
These fields appear when Demo / Test Mode is turned on. They work identically to the live fields but connect to your SumUp test merchant account.
Demo Client ID: Your Viva Smart Checkout OAuth2 Client ID (xxx.apps.vivapayments.com). Found in the Viva banking app under Settings > API Access. Your live Viva OAuth2 Client ID — used to create Smart Checkout orders. Found in the Viva banking app under Settings -> API Access
Demo Client Secret: Your Viva Smart Checkout OAuth2 Client Secret. Never exposed to the browser or logged.
Demo Merchant ID: Your Viva Merchant ID (GUID). Used as the Basic-auth username for capture, void, refund, and recurring charges.
Demo API Key: Your Viva API Key. Used as the Basic-auth password. Never exposed to the browser or logged.
Demo Payment Source Code: The 4-digit code of the payment source created in your Viva account (case-sensitive). Defaults to 'Default'. Required if you have multiple payment sources
Payment Source
Viva organizes payments into payment sources. Each source has its own Success URL, Failure URL, and return settings. The plugin defaults to a source named Default. If you have created a custom payment source in your Viva account, note its Source Code (a short code such as 9876).
Return URLs
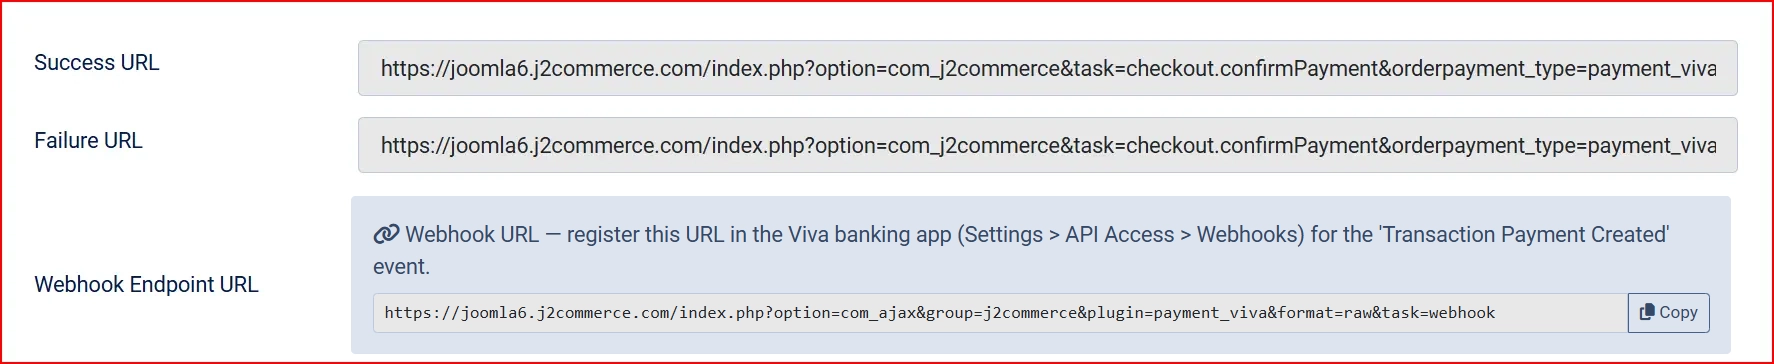
After completing the payment on Viva's page, Viva redirects the customer back to your store using the Success URL and Failure URL configured on your payment source — not via the API. You must copy these URLs from the plugin settings screen and paste them into your Viva payment source. Without this step, customers will not be redirected back to your store after payment.
-
Success URL: Copy this into the Success URL field of your Viva payment source in the Viva banking app. Viva redirects the customer here after a successful payment so the order confirmation page appears
-
Failure URL: Copy this into the Failure URL field of your Viva payment source. Viva redirects the customer here when a payment fails or is cancelled
Viva Smart Checkout reads the return URLs from the payment source configuration in your Viva banking account — they are not sent via the API. If you do not set these, the customer will remain on Viva's own page after payment and never see your store's order confirmation page.
Webhook URL
Webhook Endpoint URL: This read-only field shows the URL to register in the Viva banking app (Settings -> API Access -> Webhooks) for the Transaction Payment Created event. Copy this URL and paste it into your Viva webhook settings.
Viva sends a payment notification to your store via a webhook. You must register this URL in the Viva banking app so Viva knows where to send the notification.
- In the Viva banking app, go to Settings -> API Access -> Webhooks.
- Add a new webhook for the Transaction Payment Created event.
- Paste the Webhook Endpoint URL displayed in the plugin settings screen.
Viva webhooks are not signed with a cryptographic key. Instead, Viva verifies ownership at registration time by sending a GET request to your webhook URL — the plugin responds with a key fetched from the Viva API. At runtime, whenever a webhook POST arrives, the plugin always re-fetches the transaction from Viva's API before updating your order. Your orders are never updated based on the raw incoming webhook alone.
Multicurrency Account
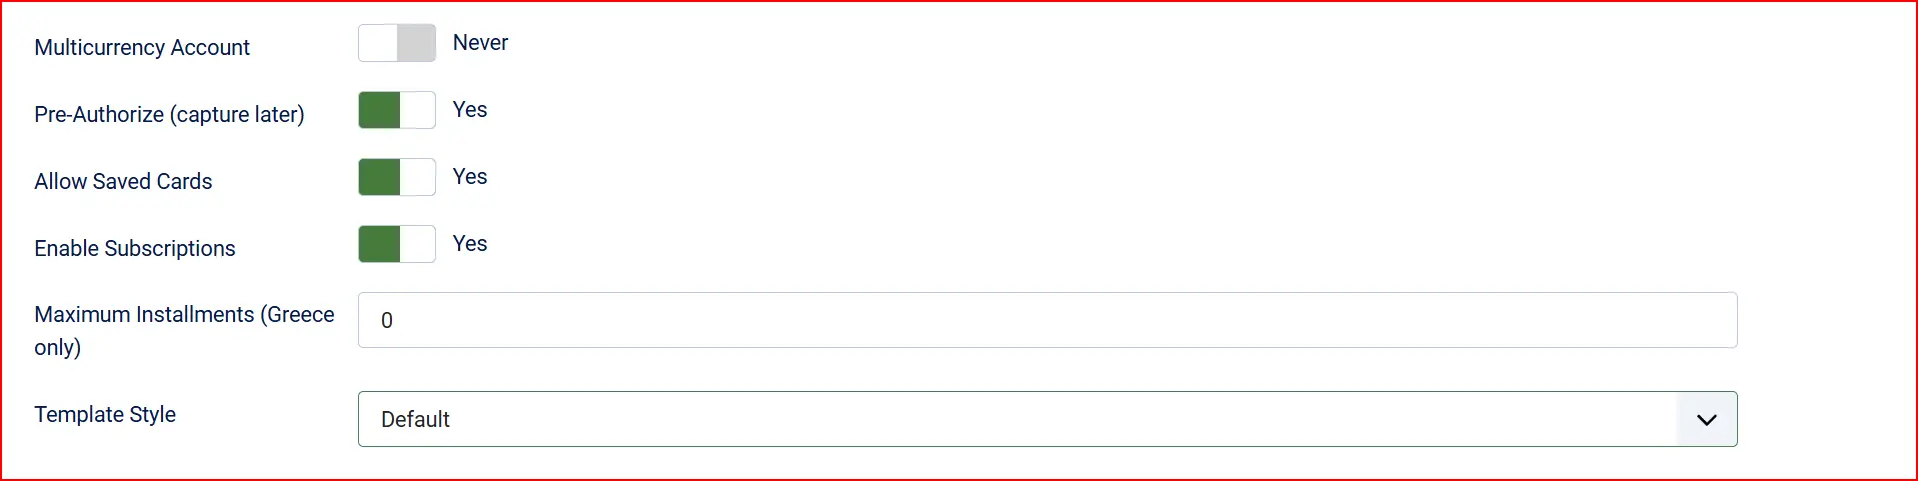
Multicurrency Account: Leave this off for most stores. Enable it only if your Viva account is configured to support multiple currencies.
On a single-currency Viva account, the currency for your payment source is fixed in your Viva settings. Sending an explicit currency code from J2Commerce would conflict with that setting and be rejected by Viva. This is why the setting defaults to off. If you have a multicurrency Viva account and your store sells in multiple currencies, turn this on so the order currency is passed correctly.
Pre-Authorize (capture later)
Pre-Authorize (capture later): When turned on, Viva reserves the funds on the customer's card without charging immediately. You then capture the payment manually from the order screen when you are ready to ship.
Pre-authorization is not compatible with subscriptions or instalments. If you enable subscriptions or instalments, leave pre-authorization off.
Allow Saved Cards
Allow Saved Cards: When turned on, logged-in customers can save their card at checkout for faster future purchases. Saved cards are also used for automatic subscription renewals when the J2Commerce Subscriptions add-on is installed.
Saved cards are available to logged-in customers only. Guest shoppers check out without this option.
Enable Subscriptions
Enable Subscriptions: When turned on, the plugin supports recurring payment charges via the J2Commerce Subscriptions add-on. The first payment saves a recurring key; future renewals are charged automatically without requiring 3D Secure.
Subscriptions require the J2Commerce Subscriptions add-on to be installed and enabled. Enable subscriptions is not compatible with pre-authorization or instalments.
Maximum Instalments (Greece only)
Maximum Instalments (Greece only): Set the maximum number of instalments to offer customers (1–36). Set to 0 to disable instalments. This option is available only for Viva accounts registered in Greece, and is not compatible with subscriptions or pre-authorization.
Template Style: If your theme includes a custom checkout template override for the Viva payment form, select it here. Leave blank to use the default layout.
Order Statuses
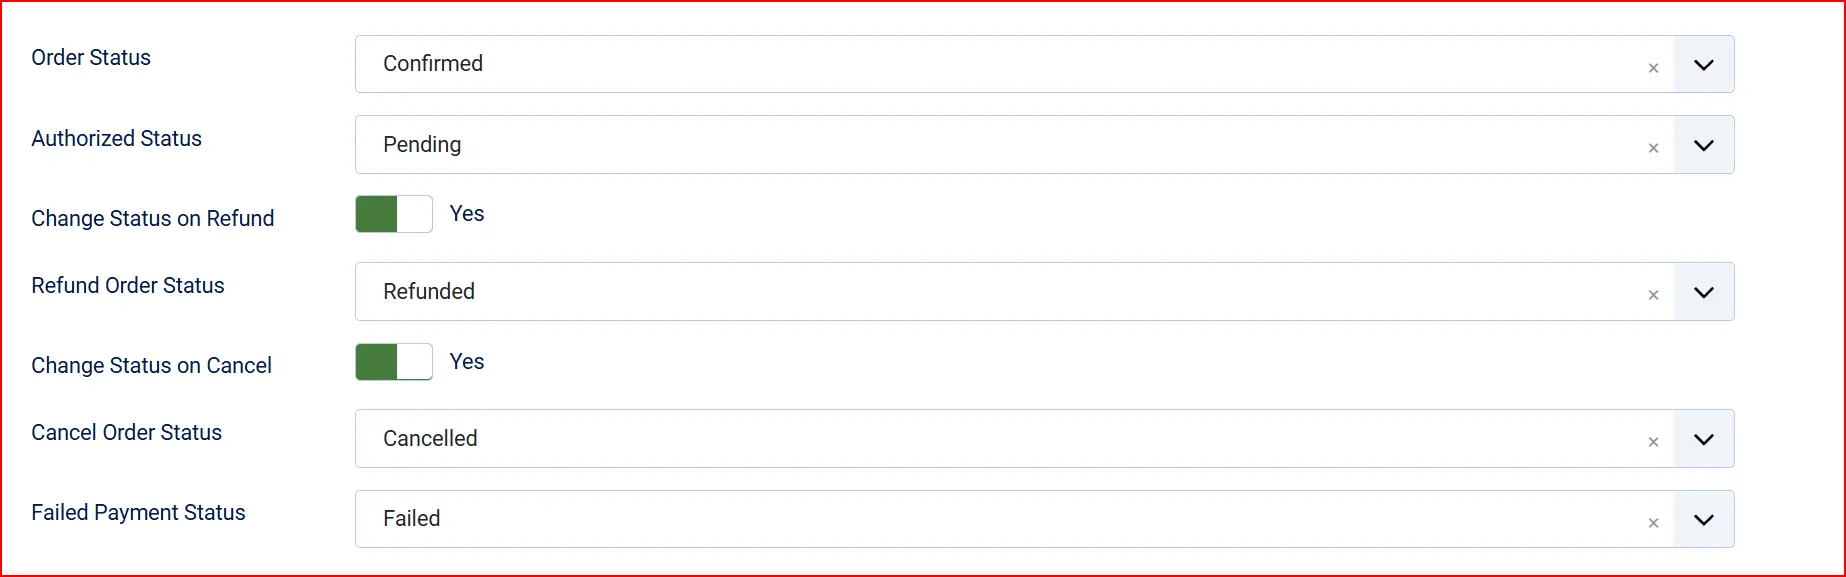
These settings control which J2Commerce order status is applied when specific payment events occur.
Order Status (Payment Success): Status applied when Viva confirms a successful payment
Authorised Status: Status applied when a pre-authorized payment is reserved but not yet captured — only visible when Pre-Authorize is enabled
Change Status on Refund: When turned on, automatically updates the order status after a refund is processed
- Refund Order Status: The status to apply after a refund — only visible when Change Status on Refund is enabled
Change Status on Cancel: When turned on, automatically updates the order status after a payment is voided
- Cancel Order Status: The status to apply after a void — only visible when Change Status on Cancel is enabled
Failed Payment Status: Status applied when a payment fails or expires
If the status you want is not listed in a dropdown, create a new one first by going to J2Commerce -> Setup -> Order Statuses.

Surcharge

Add an optional handling fee when a customer chooses Viva.com.
Surcharge Name: The label shown to the customer (for example, "Card processing fee")
Surcharge Percent: A percentage of the order total added as a fee (for example, 1.5 for 1.5%)
Surcharge Fixed: A fixed amount added regardless of order size
Surcharge Tax Class: A tax profile to apply to the surcharge — leave blank if no tax applies
Leave both Surcharge Percent and Surcharge Fixed empty to charge no surcharge.
GeoZone and Order Value Restrictions

Geozone Restriction: Limit Viva.com to customers in a specific geozone — leave blank to allow all locations
Minimum Order Subtotal: Hide Viva.com as a payment option when the cart subtotal is below this amount
Maximum Order Subtotal: Hide Viva.com when the cart subtotal is above this amount
Custom HTML Messages
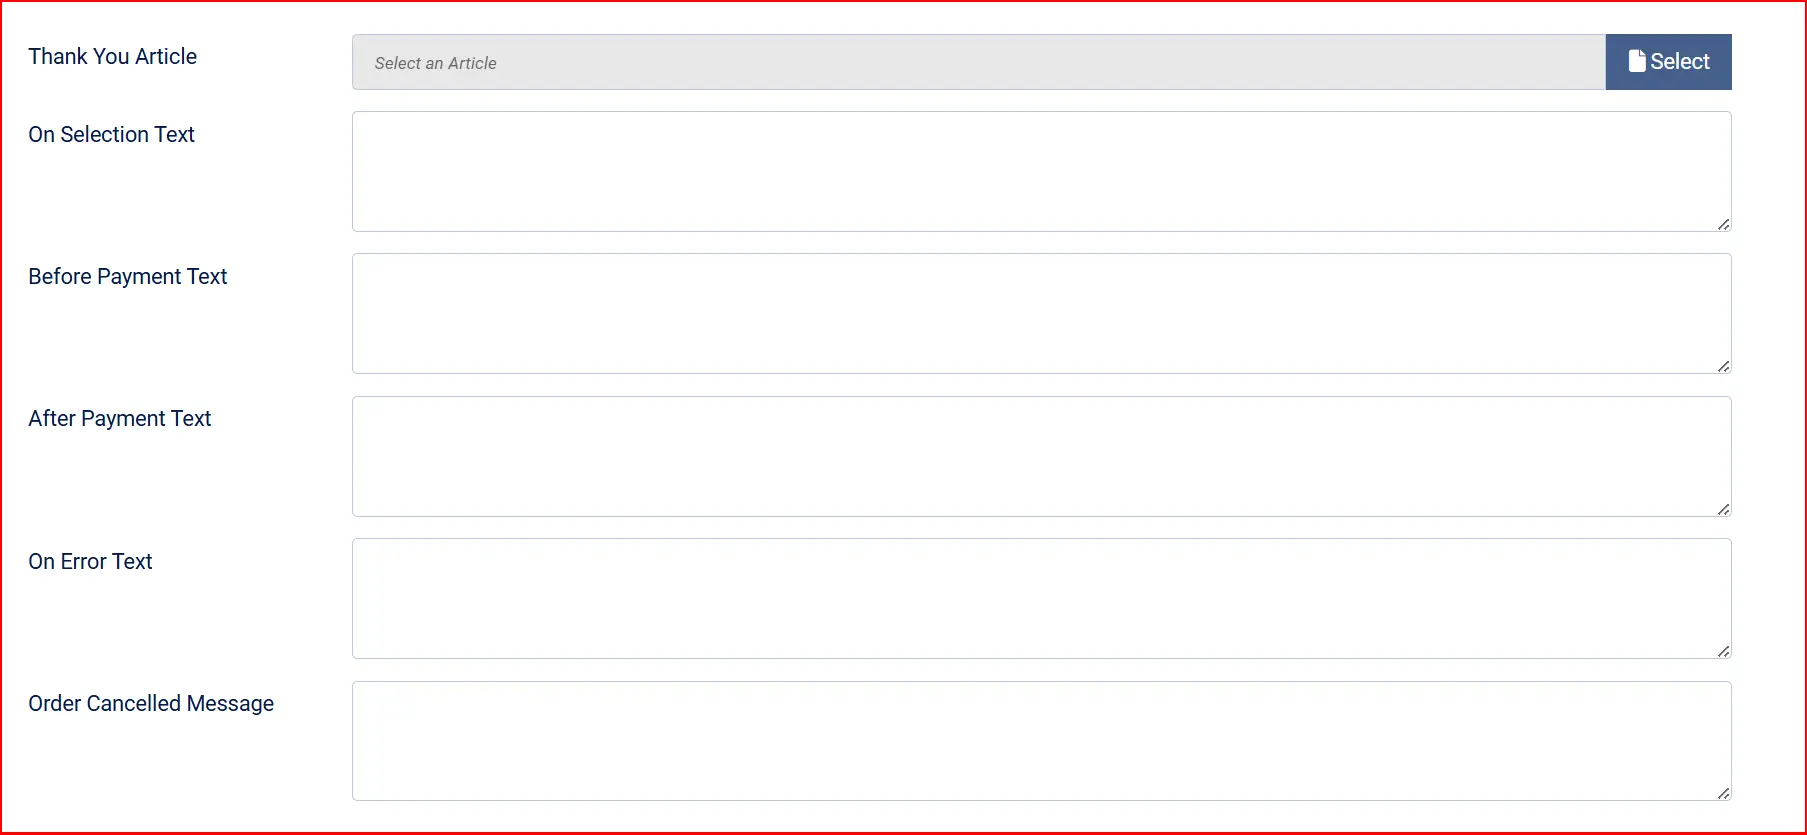
These optional fields let you inject custom text or HTML at different points in the payment flow.
Thank-You Article: Optional Joomla article shown on the order confirmation page after successful payment
On Selection Text: Displayed when the customer selects Viva.com as their payment method
Before Payment Text: Displayed just before the customer is redirected to Viva's payment page
After Payment Text: Displayed on the confirmation page after a successful payment
On Error Text: Displayed when a payment attempt fails
Order Cancelled Message: Displayed when the customer cancels or navigates away
Dashboard Icon

Show Dashboard Icon: Add a quick-access shortcut for this plugin to the J2Commerce dashboard.
Icon Label: The label for the shortcut icon. Defaults to "Viva.com Payment" if left blank.
Debug Mode
Debug Mode: Records detailed API request and response data in the Joomla log file (logs/payment_viva.php).
Only enable this when diagnosing a specific problem. Disable it on live sites — debug logs can contain sensitive data. Card data and secrets are never logged regardless of this setting.
How Checkout Works for Customers
The customer adds items to their cart and proceeds to checkout.
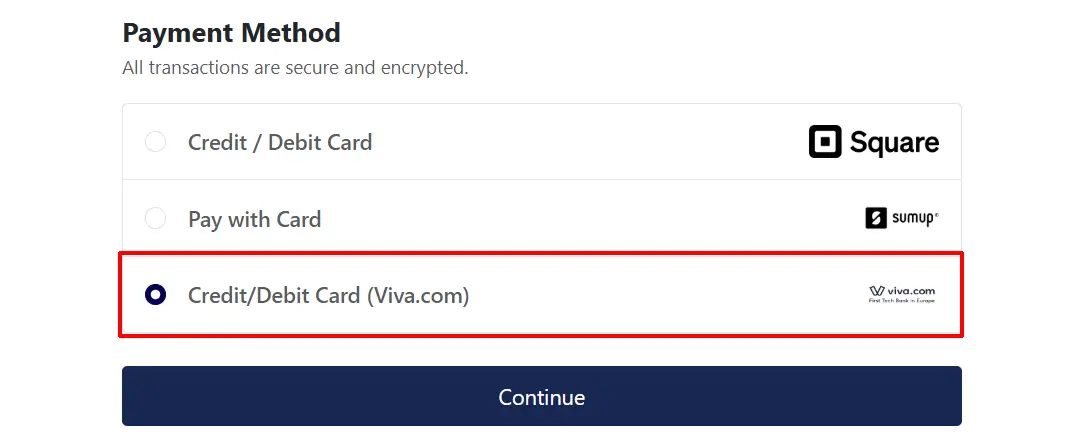
On the payment step, the customer sees the Viva.com payment option with a notice that they will be redirected to a secure Viva-hosted payment page.
If the customer is logged in and has saved cards on file (and Allow Saved Cards is enabled), they see a list of saved cards and can select one or choose to enter a new card.
The customer clicks to pay. J2Commerce sends the order to Viva and receives a redirect link. The customer is sent to Viva's own hosted payment page.
The customer enters their card details on Viva's secure page and submits payment.
Viva processes the payment and redirects the customer back to your store using the Success URL configured on your payment source.
J2Commerce finalizes the order, clears the cart, and shows the order confirmation page.
If Pre-Authorize is enabled, step 5 reserves funds on the card but does not charge it immediately. You capture the payment from the order screen when you are ready.
Managing Payments from the Order Screen
After an order is placed, you can take follow-up actions directly from the J2Commerce order detail page.
Go to J2Commerce -> Sales -> Orders -> click the order number to open it. The Viva.com action buttons appear in the payment section.
Capture Payment
Capture Payment is available when Pre-Authorize is enabled and the payment is in an authorized (reserved) state. Clicking Capture Payment charges the customer's card for the authorized amount.
Once captured, the payment cannot be voided — use Issue Refund if you need to return money to the customer.
Void Payment
Void Payment is available when the payment is in an authorized (pre-auth) state and has not yet been captured. Voiding releases the hold on the customer's card without charging them.
Issue a Refund
You can refund a completed (captured) payment in full or in part.
- Open the order in J2Commerce -> Sales -> Orders.
- Click Issue Refund.
- Choose Full refund to return the entire amount, or enter a smaller amount for a partial refund (up to the maximum refundable amount shown).
- Click Process Refund to confirm.
The refund is submitted to Viva. The customer's card is credited within a few business days depending on their bank.
If Change Status on Refund is enabled, the order status updates automatically after the refund is processed.
Tips
- Set the return URLs first — before you do any test payments, copy the Success URL and Failure URL from the plugin settings into your Viva payment source. Without them, customers land on Viva's own thank-you page instead of your store's confirmation page.
- Use a dedicated demo account for testing — Viva demo and live environments are completely separate. Create a demo merchant account at
demo.vivapayments.comand enter those credentials in the Demo credential fields. - Leave Multicurrency off for single-currency stores — if your Viva account is tied to a single currency (the most common setup), sending an explicit currency code causes Viva to reject the payment with a 403 error. Only turn this on if your Viva account explicitly supports multiple currencies.
- Pre-auth is ideal for made-to-order products — if you produce items only after payment, pre-authorization lets you confirm the customer's card is valid before you start production, then capture when you ship.
- Partial refunds are supported — you can refund any amount up to the original order total. The maximum refundable amount is shown clearly in the refund dialog.
- Saved cards persist between orders — a customer who saves a card today can use it on any future order without re-entering their details, as long as Allow Saved Cards remains enabled.
Troubleshooting
The payment option does not appear at checkout
Cause: The plugin is not enabled, credentials are missing, or a geozone or subtotal restriction is hiding it.
Solution:
- Go to J2Commerce -> Setup -> Payment Methods and verify Viva.com shows a green enabled indicator.
- Open the plugin settings and confirm all four credential fields are filled in for the active environment (live or demo).
- Check whether a Geozone Restriction or Minimum/Maximum Order Subtotal is configured — these will hide the option for customers who do not qualify.
- Clear the Joomla cache: System -> Clear Cache -> Delete All.
Customers are not returned to my store after payment
Cause: The Success URL is not configured in the Viva payment source, or it points to the wrong URL.
Solution:
- Open the plugin settings in J2Commerce and copy the Success URL shown in the read-only field.
- Log in to the Viva banking app, go to Settings -> API Access, and open your payment source.
- Paste the Success URL into the Success URL field and save.
- Do the same for the Failure URL using the value shown in the plugin settings.
Orders are stuck in a pending status after payment
Cause: The webhook URL is not registered in the Viva banking app, or Viva cannot reach your store to send the notification.
Solution:
- Open the plugin settings and copy the Webhook Endpoint URL.
- Log in to the Viva banking app, go to Settings -> API Access -> Webhooks, and add the URL for the Transaction Payment Created (event type 1796) event.
- Confirm your site is publicly reachable over HTTPS — Viva cannot send notifications to a site running on localhost or a private network.
- Enable Debug Mode in the plugin settings, attempt a test payment, then check System -> Logs for any errors.
Payment rejected with a currency error
Cause: The Multicurrency Account setting is turned on but your Viva account is set up for a single currency. Sending an explicit currency code to a single-currency account causes Viva to return a 403 error.
Solution:
- Go to the plugin settings and set Multicurrency Account to No.
- Clear the Joomla cache: System -> Clear Cache -> Delete All.
- Test a payment. The currency is now taken from your Viva payment source settings rather than being sent explicitly.
Missing credentials warning on the J2Commerce dashboard
Cause: One or more of the four credential fields is empty for the currently active environment (live or demo).
Solution:
- Go to J2Commerce -> Setup -> Payment Methods -> Viva.com Payment.
- Fill in all four fields: Client ID, Client Secret, Merchant ID, and API Key for the active environment.
- Click Save. The warning clears automatically once all credentials are present.
Refund fails with an error
Cause: The refund amount exceeds the original charge, or the transaction is not in a refundable state.
Solution:
- Confirm the refund amount does not exceed the maximum shown in the refund dialog.
- Check that the original transaction was completed (captured) successfully — pre-authorized orders that were never captured cannot be refunded; void them instead.
- Enable Debug Mode and retry the refund, then review System -> Logs for the specific error returned by Viva.
Void button is not visible on the order
Cause: The void action is only available for pre-authorized transactions. If pre-authorization is not enabled, or if the payment has already been captured, the void button does not appear.
Solution:
- Confirm Pre-Authorize (capture later) is enabled in the plugin settings.
- Check the order status — if the transaction has already been captured or settled, it cannot be voided. Issue a refund instead.