Rapyd Payment
Rapyd is a global fintech infrastructure provider that lets you accept a wide variety of payment methods — credit and debit cards, e-wallets, bank transfers, and cash-based local methods — in over 100 countries. Instead of building separate integrations for each region, you connect once to Rapyd and let their hosted checkout page surface the right options for each customer.
The checkout experience is a redirect flow: when a customer chooses Rapyd at checkout, they are sent to a secure Rapyd-hosted payment page to complete their purchase, then returned to your store. Your servers never touch raw card numbers, which keeps your PCI compliance requirements at the simplest level (SAQ-A).
The plugin also supports:
- Sandbox / test mode with separate credentials so you can test without processing real payments
- Authorize-then-capture — reserve funds when the order is placed and charge them later when you ship
- Saved payment methods — returning customers can pay with a stored card
- Subscription renewals — saved payment methods are charged automatically with the J2Commerce Subscription Product app
- Refunds directly from the J2Commerce order screen
- Cancel / void of authorized-but-not-yet-captured payments from the order screen
- Surcharges — add a percentage or fixed fee for customers who pay via Rapyd
Requirements
- J2Commerce 6.0 or later installed and active
- Joomla 6.0 or later
- PHP 8.3 or later
- A Rapyd account (free to create; see below)
- Your site must be publicly reachable over HTTPS so Rapyd can deliver webhook notifications
Set Up a Rapyd Account
If you already have a Rapyd account and API keys, skip ahead to Install the Plugin.
Create a Rapyd Account
- Go to rapyd.net and click Get Started or Sign Up.
- Enter your business details to create an account.
- Verify your email address when Rapyd sends you a confirmation.
- Complete the onboarding steps in the Rapyd Client Portal — business information, website URL, and payout bank account.
- Rapyd reviews new accounts before enabling live payments. Sandbox access is usually available immediately.
Get Your API Keys
After your account is active:
-
Log in to the Rapyd Client Portal.
-
Navigate to Developers in the left sidebar, then click API Keys.
-
You will find two sets of credentials:
- Live — a Live Access Key and Live Secret Key, used for real transactions
- Sandbox — a Sandbox Access Key and Sandbox Secret Key, used for testing
-
Copy all four keys and store them safely. The Secret Key is shown only once on some accounts — if you miss it, you will need to regenerate it.
Your Access Key starts with rak_ and your Secret Key starts with rsk_. Both are required — the plugin uses your Access Key to identify your account and your Secret Key to sign API requests (it is never sent to the browser).
Register the Webhook URL
Before configuring the plugin, you need to tell Rapyd where to send payment status notifications:
- In the Rapyd Client Portal, go to Developers -> Webhooks.
- Click Add Webhook.
- In the URL field, paste the Webhook Endpoint URL that the plugin will show you after installation (see Webhook Endpoint URL below).
- Select the events you want to receive — at minimum, enable payment-related events such as
PAYMENT_COMPLETED,PAYMENT_FAILED, andPAYMENT_CANCELED. - Save the webhook.
Rapyd uses the registered webhook URL to verify the signature on incoming webhook calls. The plugin will reject webhook calls from URLs not registered in the Rapyd Client Portal.
Purchase and download
This plugin is a separate add-on available from the J2Commerce Extensions Store. It is not included with the core J2Commerce 6 component.
- Go to the J2Commerce website and locate Rapyd Payment.
- Add it to your cart and complete checkout.
- Go to My Downloads under your account profile and find the plugin.
- Click Available Versions -> View Files -> Download Now to download the ZIP file.
Install the plugin
In the Joomla Administrator, go to System -> Install -> Extensions.
Upload the plg_j2commerce_payment_rapyd.zip file.

Enable the Plugin
Once you have installed the App, you will need to enable it. There are two ways you can access the App.
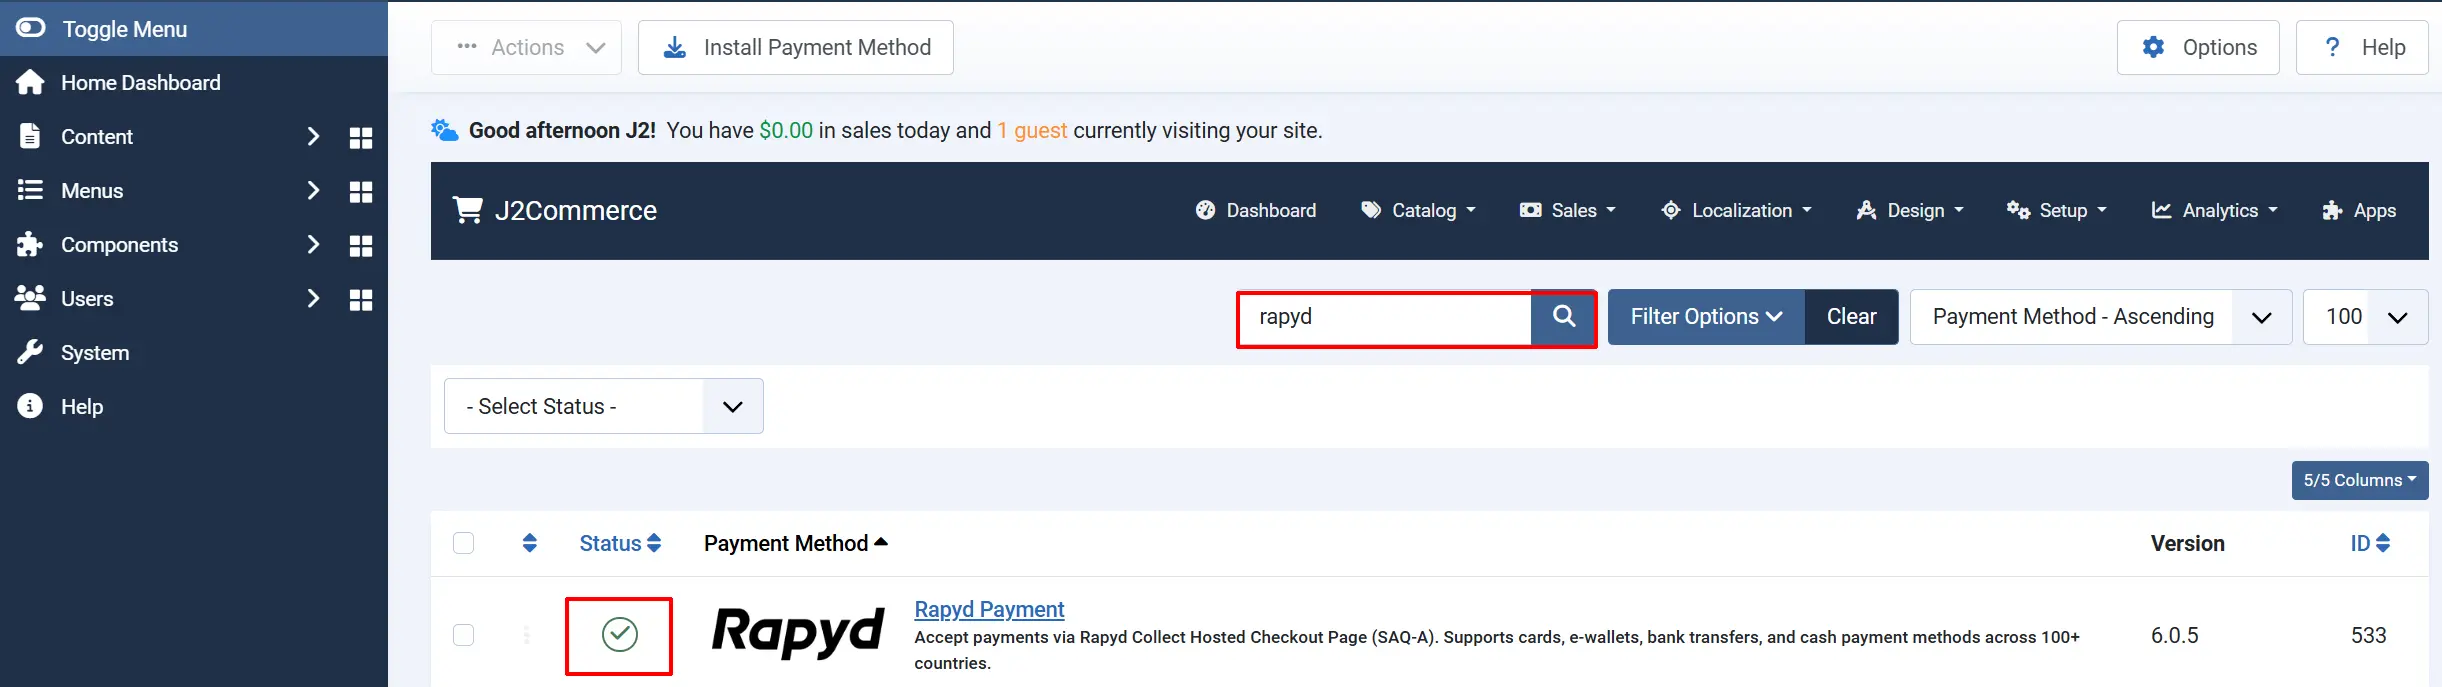
Option A: Go to the J2Commerce icon at the top right corner -> Setup -> Payment Methods
Option B: Go to Components on the left sidebar -> J2Commerce -> Dashboard -> Setup -> Payment Methods

To help you narrow down the list, you can do a search for Rapyd Payment, click the X, and it will turn into a green checkmark. It is now enabled and ready for setup.
Configure the Plugin
Click the Toggle Inline Help button at the top of any plugin configuration page to show a short description beneath each field.

Display Settings
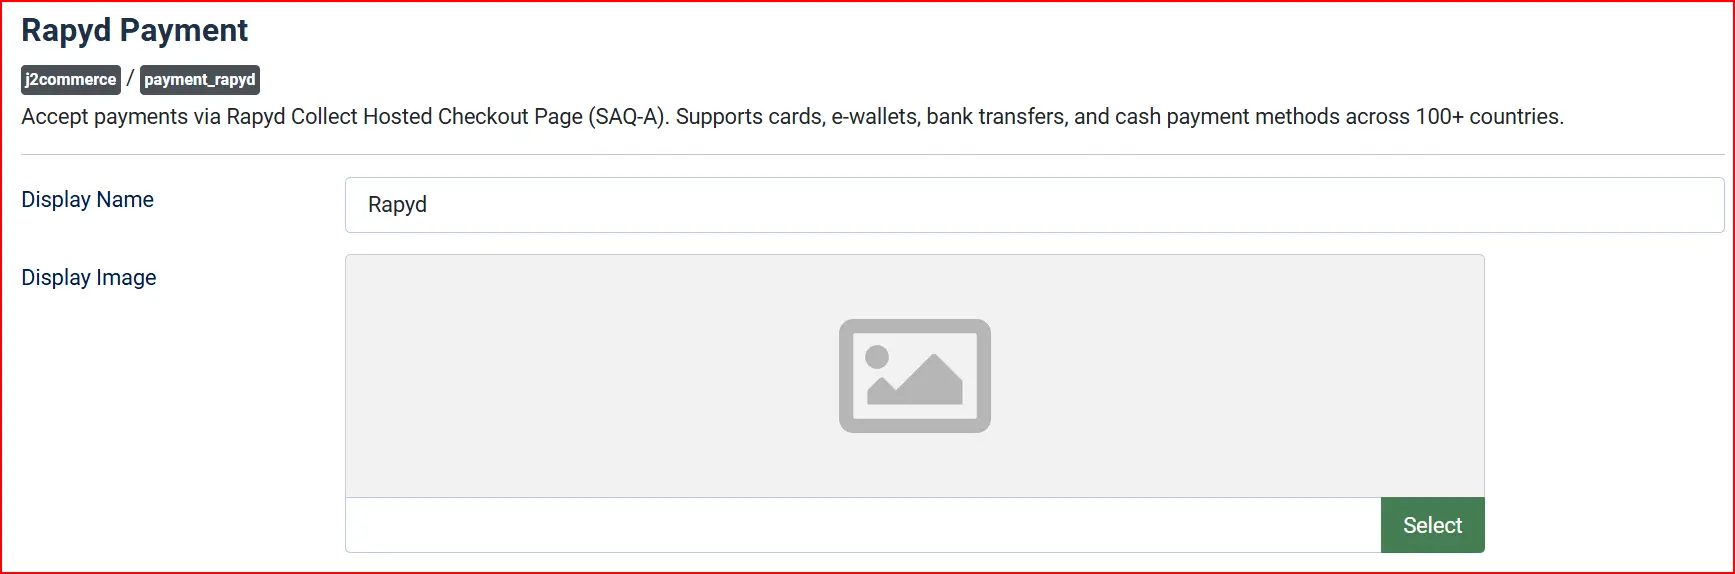
Display Name: The label shown to customers at checkout. The default value is Rapyd. Change this to anything that makes sense for your customers, such as "Pay by Card" or "Rapyd Checkout".
Display Image — An optional image shown alongside the payment option at checkout. Select one from your media manager, or leave blank to show text only.
Credentials
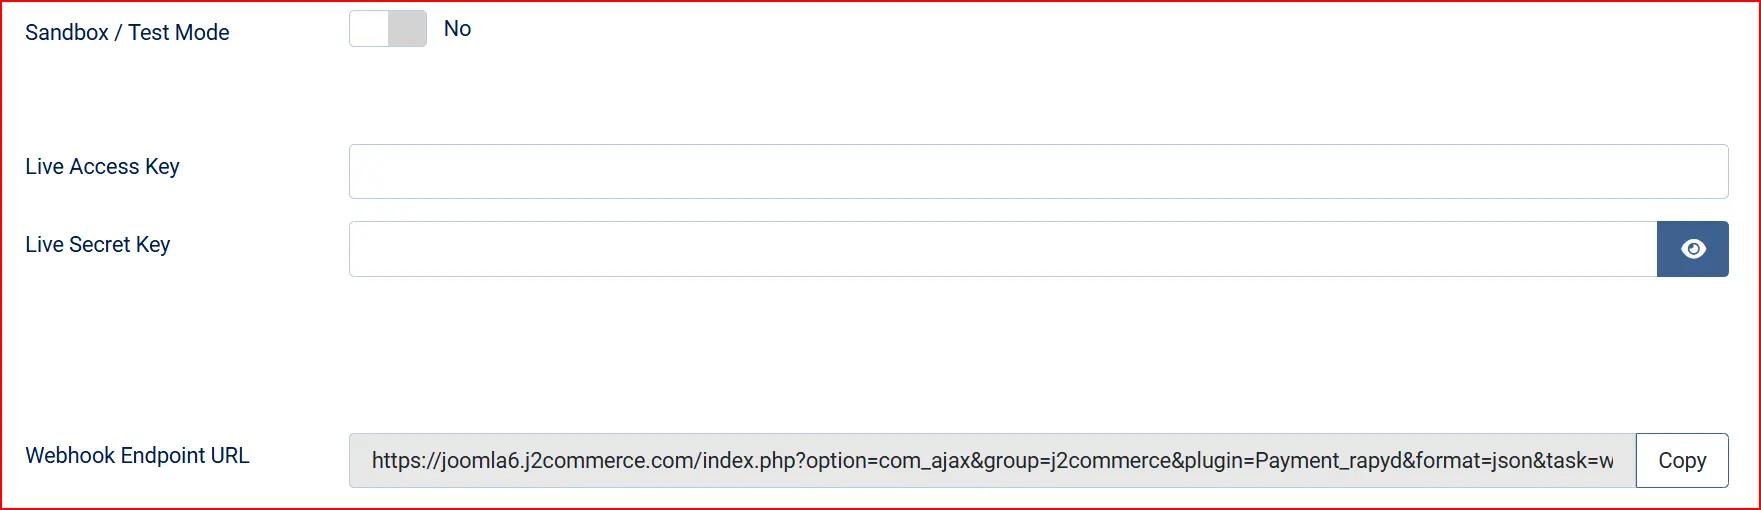
Sandbox / Test Mode — Toggle this switch to choose between test and live environments.
-
No: Live mode — real payments are processed using your Live credentials
-
Yes: Sandbox mode — test transactions are sent to Rapyd's sandbox environment; no real money is processed
When Sandbox / Test Mode is set to Yes, a warning banner appears at checkout reminding you (and your team) that no real payments are being processed.
API Credentials
The plugin keeps live and sandbox credentials separate so you can switch environments without losing either set of keys.
Live Access Key — Your Rapyd live access key (starts with rak_). Shown only when Sandbox / Test Mode is set to No.
Live Secret Key — Your Rapyd live secret key (starts with rsk_). Used to sign API requests; never sent to the browser or written to logs. Shown only when Sandbox / Test Mode is set to No.
Sandbox Access Key — Your Rapyd sandbox access key. Shown only when Sandbox / Test Mode is set to Yes.
Sandbox Secret Key — Your Rapyd sandbox secret key. Shown only when Sandbox / Test Mode is set to Yes.
Webhook Endpoint URL
Webhook Endpoint URL — This read-only field displays the URL that Rapyd uses to notify your store when a payment status changes. The URL is generated automatically based on your site address.
Copy this URL and register it in the Rapyd Client Portal under Developers -> Webhooks (see Register the Webhook URL above). Rapyd requires the webhook URL to be registered before it will send signed webhook calls to your store.
Payment Capture

Payment Capture — Controls when funds are actually collected from the customer's payment method.
-
Auto Capture (recommended): Funds are captured immediately when the customer completes payment on the Rapyd-hosted page
-
Authorize Only: Funds are reserved (a hold is placed) but not charged. You manually capture from the order screen when you are ready to ship
Authorize Only mode is useful when you want to verify stock availability before charging the customer. The authorized payment can also be canceled (voided) from the order screen to release the hold without any charge.
Allow Saved Payment Methods — When set to Yes, logged-in customers can save their payment method during checkout for faster future purchases. This also enables automatic subscription renewals when used with the Subscription Product app.
Enable Subscriptions — Set to Yes if you use the Subscription Product app and want Rapyd to process automatic recurring billing. Requires Allow Saved Payment Methods to also be enabled.
Template Style — Selects the visual layout used to render the Rapyd payment section on the checkout page. J2Commerce automatically picks the correct template for your active front-end theme (Bootstrap 5 or UIkit). Leave this at the default unless you have a custom layout.
Order Status
These settings control what order status J2Commerce sets at each point in the payment lifecycle.
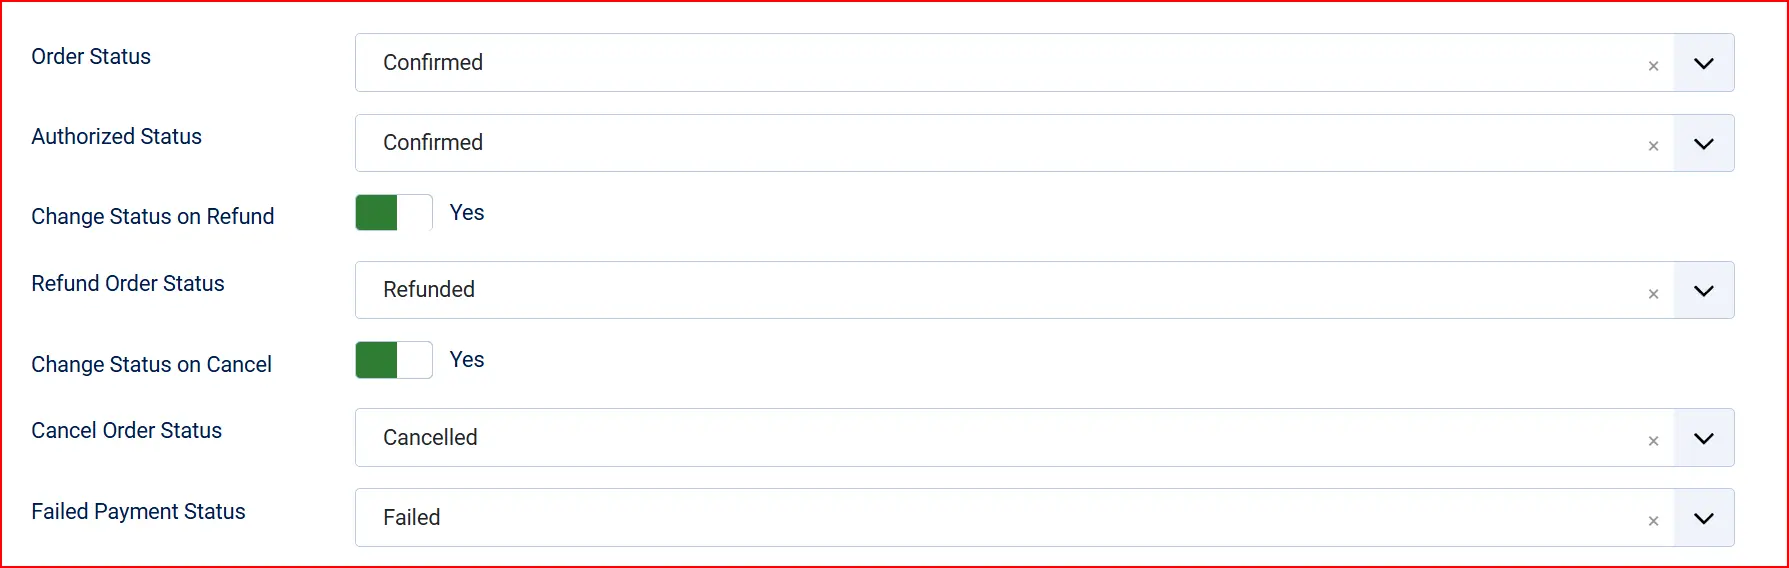
Order Status (after successful payment) — The status applied when a payment is captured successfully.
Authorized Status — The status applied when a payment is authorized but not yet captured (only visible when Payment Capture is set to Authorize Only).
Change Status on Refund — Set to Yes to automatically move the order to a specific status when a refund is issued.
Refund Order Status — The status to apply when a refund is processed (only visible when Change Status on Refund is Yes).
Change Status on Cancel — Set to Yes to automatically move the order to a specific status when a payment is canceled or voided.
Cancel Order Status — The status to apply when a payment is canceled (only visible when Change Status on Cancel is Yes).
Failed Payment Status — The status applied when a payment fails or expires.
If the status you want is not listed in a dropdown, create a new one first by going to J2Commerce -> Setup -> Order Statuses.

Surcharge (Optional)

Add an optional extra fee for customers who pay via Rapyd. You can use a percentage, a fixed amount, or both together. Check your local laws before enabling surcharges — they are regulated in some regions.
Surcharge Label — The name for the surcharge line that appears in the cart. Example: "Payment Processing Fee".
Surcharge Percent — A percentage of the order subtotal added as a surcharge. Example: enter 2.5 for 2.5%.
Surcharge Fixed Amount — A flat amount added to every order. Example: enter 1.00 for a $1.00 fee.
Surcharge Tax Class — Select a tax profile to apply tax to the surcharge amount. Leave blank to add the surcharge without tax.
Restrictions

Allowed Geo Zone — Restrict this payment method to customers in a specific geographic zone you have configured in J2Commerce. Leave at the default (all zones) to show Rapyd to all customers regardless of location.
Minimum Subtotal — The smallest order subtotal required to show this payment method. Enter 0 (or leave blank) for no minimum.
Maximum Subtotal — The largest order subtotal for which this payment method is shown. Enter 0 (or leave blank) for no maximum.
Custom Messages

These text fields let you show messages to customers at different points in the payment process. Leave any field blank to use the built-in default.
Thank You Article — Select a Joomla article to display on the order confirmation page after a successful payment. Useful for showing a custom thank-you message, next-step instructions, or a downloadable guide. Leave blank to use J2Commerce's default confirmation message.
Text on Selection: After the customer selects Rapyd as their payment method at the payment step
Text Before Payment: On the confirmation screen before the customer clicks the pay button to go to Rapyd
Text After Payment: After the customer returns from Rapyd with a successful payment
Text on Error: When the payment fails or encounters an error
Text on Cancel: When the customer cancels the payment and returns to the store
Dashboard Icon

Show Dashboard Icon — When set to Yes, a Rapyd shortcut icon appears on the J2Commerce admin dashboard for quick access. Default: No.
- Dashboard Icon Label — The label displayed below the dashboard icon. Only visible when Show Dashboard Icon is set to Yes.
Debug Mode
Debug Mode — When set to Yes, the plugin writes Rapyd API calls and responses to administrator/logs/plg_j2commerce_payment_rapyd.php. Enable this only while troubleshooting, then set it back to No before going live. Never leave Debug Mode enabled on a production site.
How the Checkout Works
The Rapyd checkout uses a redirect flow:
- The customer adds items to the cart and proceeds to checkout.
- At the payment step, Rapyd (or your custom display name) appears as an option.
- If you have enabled saved payment methods and the customer has a saved card, they can choose it without being redirected.
- For new payments, the customer clicks the pay button and is redirected to the Rapyd-hosted checkout page.
- On the Rapyd page, the customer selects their preferred payment method (card, e-wallet, bank transfer, or local method depending on their country) and completes payment.
- Rapyd redirects the customer back to your store. J2Commerce checks the payment status and updates the order accordingly.
- Rapyd also sends a webhook notification to your store so the order status is updated even if the return redirect is interrupted.
Test Mode
Use your sandbox credentials to run test payments — no real money is processed.
- Set Sandbox / Test Mode to Yes in the plugin settings.
- Enter your Sandbox Access Key and Sandbox Secret Key.
- Click Save.
- Place a test order on the frontend.
- On the Rapyd sandbox checkout page, use Rapyd's test card numbers to simulate successful and failed payments.
- Return to your store and verify the order status updated correctly.
- Check
administrator/logs/plg_j2commerce_payment_rapyd.php(with Debug Mode on) to see the full API exchange.
Rapyd does not charge fees for sandbox transactions.
Going Live
When you are ready to accept real payments:
- Set Sandbox / Test Mode to No in the plugin settings.
- Enter your Live Access Key and Live Secret Key.
- Verify the Webhook Endpoint URL is registered in your Rapyd Client Portal.
- Click Save.
- Place a small real transaction to confirm the payment flow works end-to-end.
- Set Debug Mode to No.
Going live checklist:
- Sandbox / Test Mode set to No
- Live Access Key (
rak_...) entered - Live Secret Key (
rsk_...) entered - Webhook Endpoint URL registered in the Rapyd Client Portal
- Debug Mode set to No
- Site accessible over HTTPS
- At least one end-to-end payment tested
Refunds
You can issue a full or partial refund directly from the order screen in J2Commerce admin. Refunds are only available after a payment has been fully captured (not for authorized-only payments — cancel those instead).
- Go to J2Commerce -> Orders and open the order.
- Scroll to the Payment section on the order detail screen.
- Click Issue Refund.
- To refund the full amount, click Full refund. To refund a partial amount, enter the amount in the Refund Amount field and click Process Refund.
- J2Commerce sends the refund request to Rapyd via the API. The customer receives their refund according to Rapyd's processing timeline (typically 5–10 business days for cards, faster for e-wallets).
Capture and Cancel (Authorize Only Mode)
If you have set Payment Capture to Authorize Only, two additional buttons appear on the order screen.
Capture Payment — Collects the funds that were previously authorized. Use this when you are ready to ship and want to charge the customer. Once captured, the payment cannot be canceled — only refunded.
Cancel Payment — Releases the authorization hold without charging the customer. Use this if the order cannot be fulfilled and you want to release the funds back to the customer immediately. This action cannot be undone.
Subscriptions and Recurring Payments
If you use the Subscription Product app alongside Rapyd Payments, the plugin supports automatic recurring billing:
- Enable Allow Saved Payment Methods and Enable Subscriptions in the plugin settings.
- On the first subscription payment, the customer's payment method is saved to their account profile.
- On each renewal cycle, J2Commerce charges the saved payment method automatically — no redirect to Rapyd is needed for subsequent billing.
The customer must complete a successful initial payment to establish the saved payment method. Without it, automatic renewals cannot run.
Troubleshooting
The payment option does not appear at checkout
Cause: The plugin is disabled, the API credentials are missing, or the order subtotal falls outside the configured minimum or maximum.
Solution:
- Go to J2Commerce -> Setup and confirm Rapyd Payment shows a green checkmark.
- Open the plugin settings and verify the correct Access Key and Secret Key are entered for the active mode (live or sandbox).
- Check the Minimum Subtotal and Maximum Subtotal fields — if set, confirm the test order falls within range.
- If a Geo Zone is configured, verify the test customer's billing address is in that zone.
Order status does not update after payment
Cause: The Rapyd webhook could not reach your site, so the payment notification was never delivered.
Solution:
- Confirm the Webhook Endpoint URL shown in the plugin settings is registered in the Rapyd Client Portal under Developers -> Webhooks.
- Confirm your site is publicly accessible over HTTPS — Rapyd cannot deliver webhooks to a local development server or a password-protected staging environment.
- Enable Debug Mode and reproduce a test payment. Check
administrator/logs/plg_j2commerce_payment_rapyd.phpto see whether the webhook arrived and how it was processed. - Check for server firewall or CDN rules that may be blocking POST requests from Rapyd's IP addresses.
Sandbox mode is active but real credentials are saved
Cause: The Sandbox / Test Mode toggle is set to Yes while live keys are entered in the sandbox fields (or vice versa).
Solution: The plugin uses whichever credentials match the current mode. When Sandbox / Test Mode is Yes, only the Sandbox Access Key and Sandbox Secret Key are used — the live fields are ignored. Double-check both sets of fields match the correct environment.
Refund button is not showing on the order
Cause: The payment has not been fully captured yet, or the order has already been fully refunded.
Solution:
- The Issue Refund button only appears when the Rapyd payment status is
CLO(closed/captured). If the payment is inACT(authorized) status, use Cancel Payment instead to void the hold. - If the order shows as already refunded, the maximum refundable amount is zero — no further refunds can be issued.
- Enable Debug Mode and check the log file to see the current payment status stored for the order.
Capture button is not showing on the order
Cause: The plugin is set to Auto Capture mode, or the payment has already been captured or canceled.
Solution:
- Go to the plugin settings and verify Payment Capture is set to Authorize Only. The Capture button only appears in this mode.
- The Capture button only appears while the payment status is
ACT(authorized). Once captured (CLO) or canceled (CAN), the button is no longer shown.
"Rapyd API credentials are not configured" error at checkout
Cause: The Access Key or Secret Key field for the active mode is empty.
Solution:
- Open the plugin settings.
- Check which mode is active — Sandbox / Test Mode Yes or No.
- Enter the corresponding keys: Sandbox Access Key and Sandbox Secret Key for sandbox mode, or Live Access Key and Live Secret Key for live mode.
- Click Save.
FAQ
Does the customer stay on my site during payment? No. Rapyd uses a redirect checkout model — the customer is redirected to a Rapyd-hosted payment page, then returned to your store after completing (or canceling) their payment. This keeps your store PCI-compliant at the SAQ-A level because card data never passes through your servers.
Can I use Rapyd with multiple currencies? Yes. Rapyd supports a large number of currencies. The currency used for each payment is determined by your store's active currency at the time of checkout. Check the Rapyd Client Portal to confirm your account supports the currencies you want to accept.
What happens if the customer closes their browser before returning from Rapyd? Rapyd sends a webhook notification to your store regardless of whether the customer completes the return redirect. As long as your webhook URL is registered and your site is reachable, J2Commerce will update the order status automatically.
Can I use both Authorize Only and Auto Capture on different orders? No. The Payment Capture setting applies to all orders processed through this plugin. If you need different capture behavior for different products, contact the J2Commerce support team about your use case.
Does Rapyd support all countries? Rapyd operates in over 100 countries and supports hundreds of payment methods. Not every payment method is available in every country. The Rapyd-hosted checkout page automatically shows the payment options that are available and activated for the customer's location.
Where do I find test card numbers for the sandbox? Rapyd provides test cards and test payment method details in their developer documentation. Log in to the Rapyd Client Portal and visit the Developers section, or search for "Rapyd test payment methods" in their documentation portal.