Dojo Payment
Dojo (formerly Paymentsense) is a UK-based card acquirer and payment platform built for retail, hospitality, and small-to-medium businesses. This plugin connects your J2Commerce store to Dojo's hosted checkout flow — your customer is redirected to a secure page on pay.dojo.tech to enter their card details. Card data never passes through your server, so you qualify for the simplest PCI self-assessment questionnaire (SAQ-A).
This plugin is a separate add-on available from the J2Commerce Extensions Store. It is not included with the core J2Commerce component.
Currency requirement: British Pounds (GBP) only. Dojo is a UK acquirer and does not process other currencies through this integration. The plugin hides itself automatically if the cart is in any other currency.
Before you start
Before configuring the plugin, make sure you have:
- A Dojo merchant account. Apply at dojo.tech. A UK business is required.
- Your API Key from the Dojo developer portal.
- Your store base currency or the customer cart currency set to GBP.
- SSL (HTTPS) active on your Joomla site. Dojo will not redirect to HTTP return URLs.
Purchase and download
This plugin is a separate add-on available from the J2Commerce Extensions Store. It is not included with the core J2Commerce 6 component.
- Go to the J2Commerce website and locate Dojo.
- Add it to your cart and complete checkout.
- Go to My Downloads under your account profile and find the plugin.
- Click Available Versions -> View Files -> Download Now to download the ZIP file.
Install the plugin
In the Joomla Administrator, go to System -> Install -> Extensions.
Upload the plg_j2commerce_payment_dojo.zip file.

Enable the Plugin
Once you have installed the App, you will need to enable it. There are two ways you can access the App.
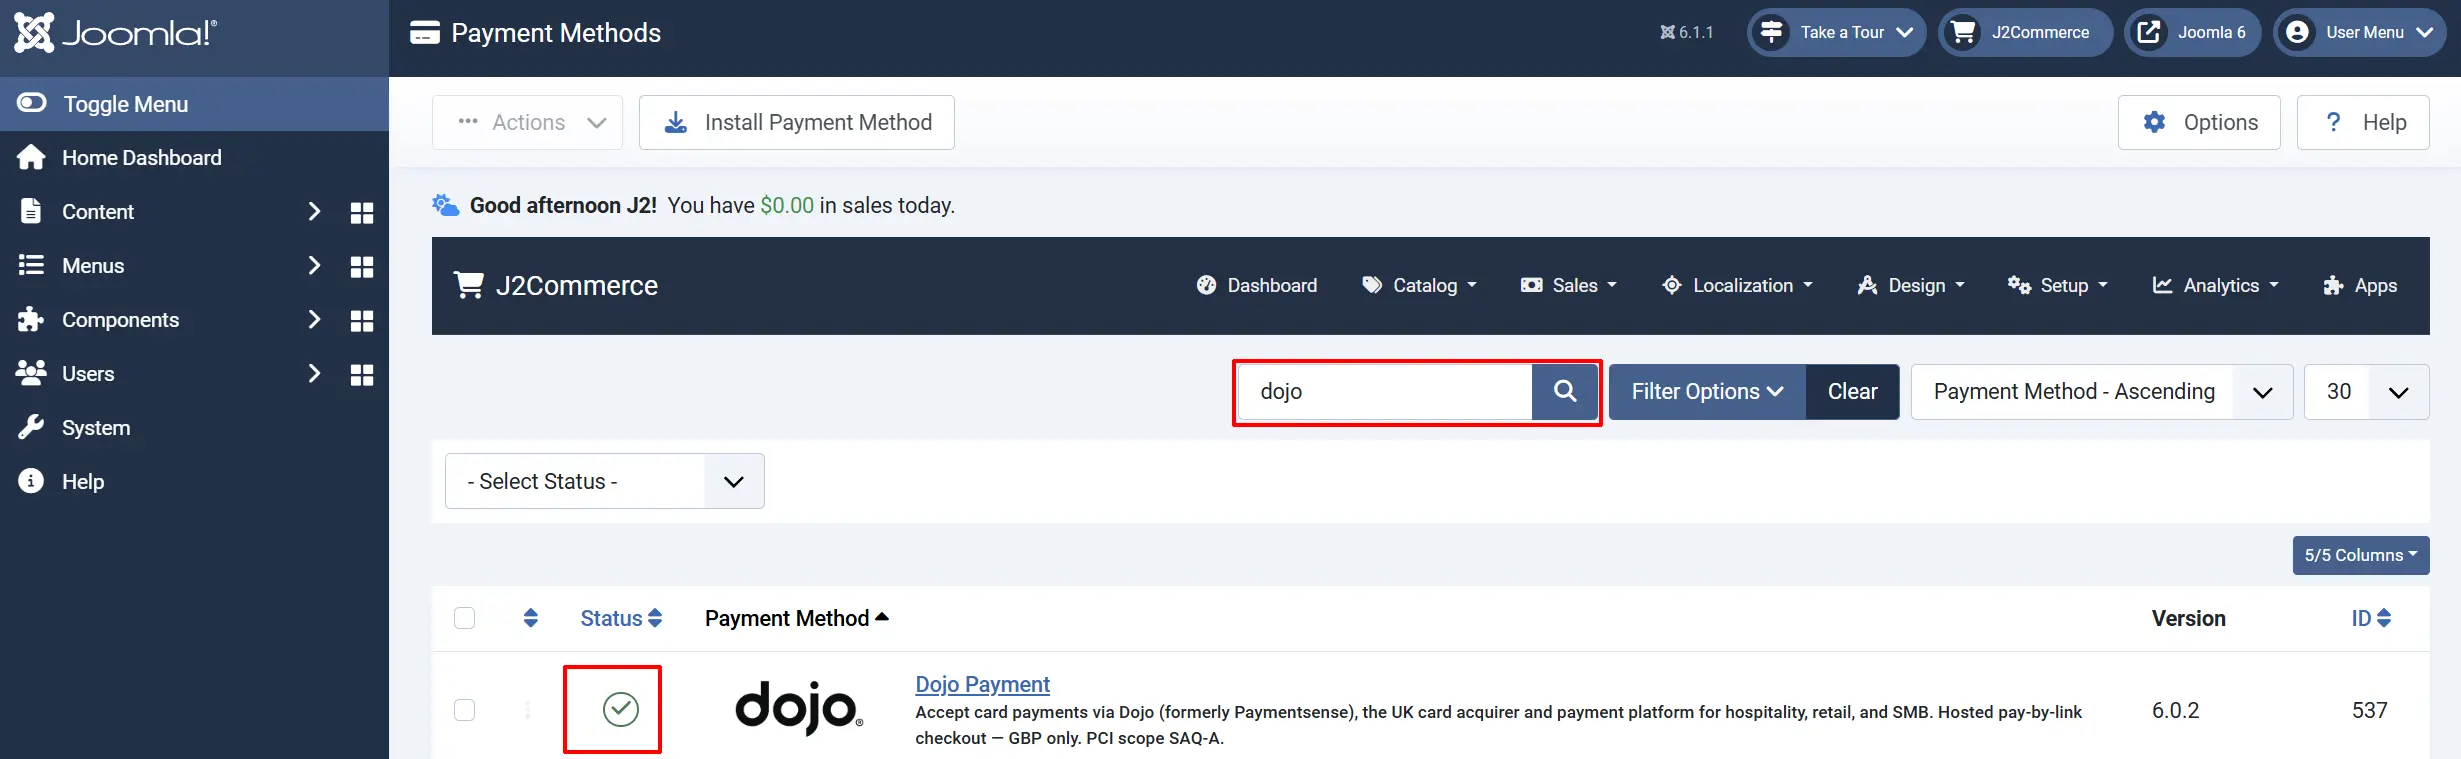
Option A: Go to the J2Commerce icon at the top right corner -> Setup -> Payment Methods
Option B: Go to Components on the left sidebar -> J2Commerce -> Dashboard -> Setup -> Payment Methods

To help you narrow down the list, you can do a search for Dojo, click the X, and it will turn into a green checkmark. It is now enabled and ready for setup.
Configure the Plugin
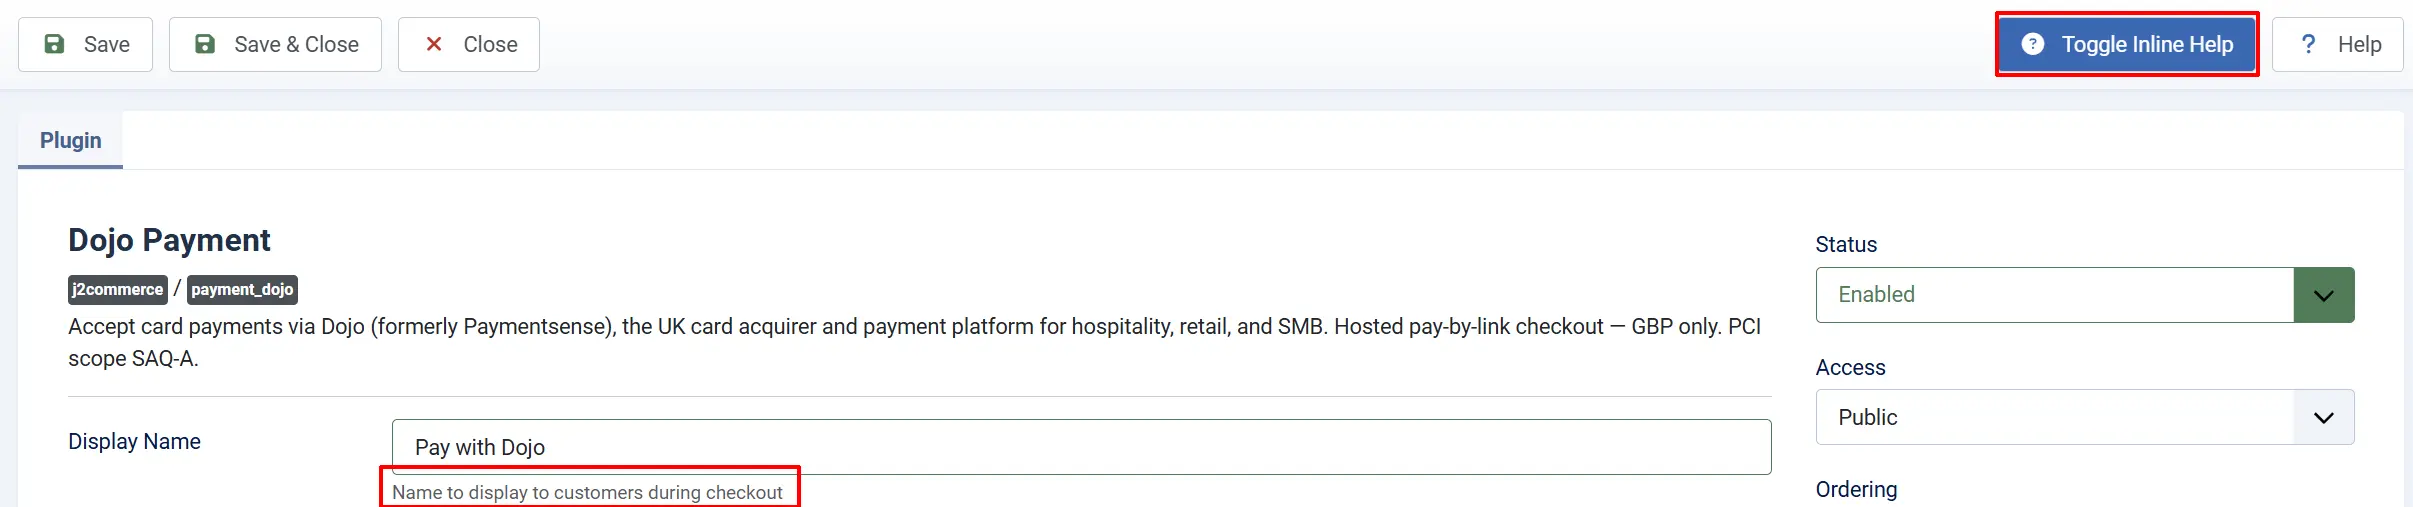
Click the Toggle Inline Help button at the top of any plugin configuration page to show a short description beneath each field.
Display Settings
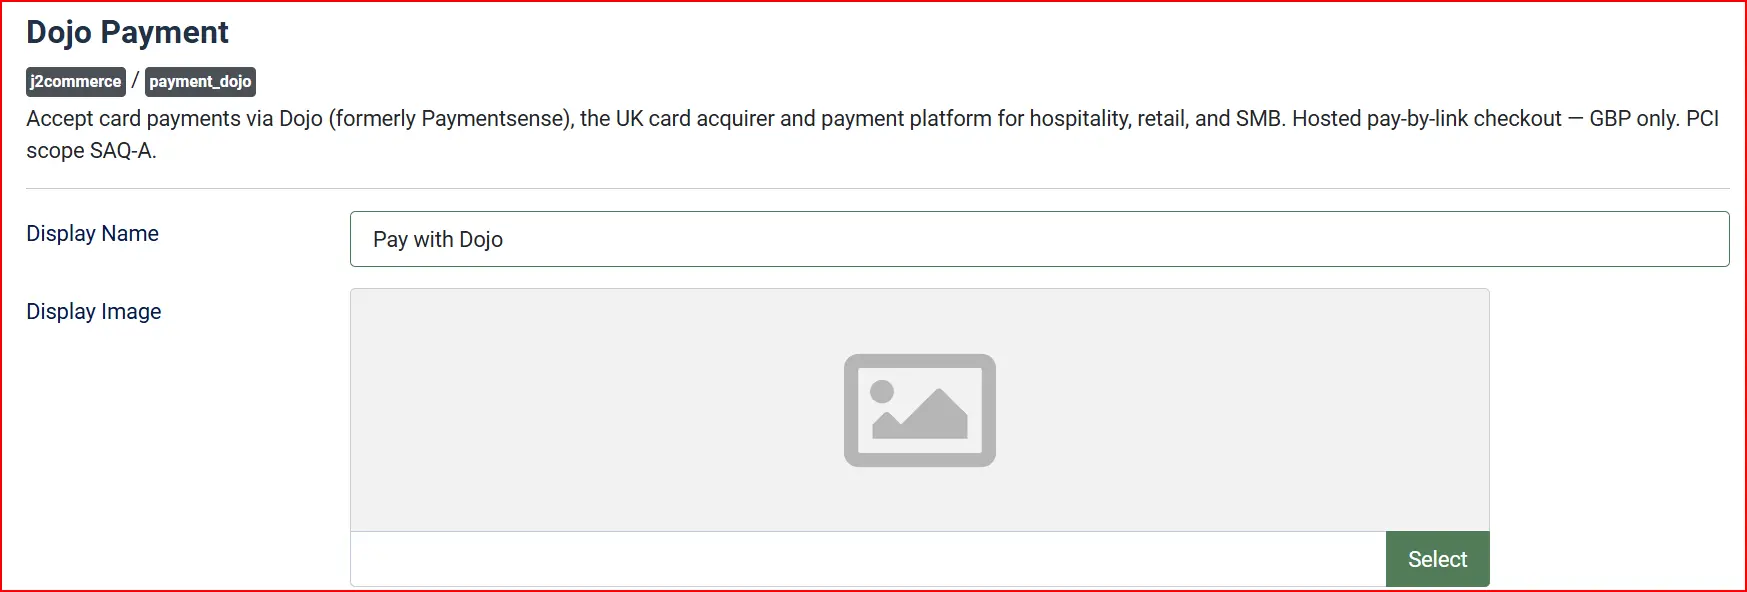
Display Name: controls the label customers see at checkout. The default is "Pay with Dojo". Change it to anything that matches your store's language and tone.
Display Image: Optional logo shown alongside the payment method name.
Credentials

The plugin ships with Sandbox Mode turned on by default. In sandbox mode it uses your sandbox API key (from the Dojo developer portal) and routes transactions to Dojo's test environment. No real money is processed. When Yes, uses the sandbox API key and Dojo's test environment. When No, uses the live API key.
API key
Live API Key: Your production API key from the Dojo developer portal. Only shown when Sandbox Mode is off.
Sandbox API Key: Your test API key from the Dojo developer portal. Only shown when Sandbox Mode is on.
The API key authenticates every request your store sends to Dojo. Treat it like a password. Never share it, post it in a support ticket, or commit it to version control.
Charge mode

The Charge Mode setting controls whether funds are captured immediately or held for manual capture.
-
Sale (capture immediately): Dojo captures funds as soon as the customer pays. The order is marked paid at once.
- When to use: Most stores — physical goods, services, digital downloads.
-
Authorise (capture manually): Dojo holds the funds but does not settle them. You must log in to the Dojo terminal and manually capture within 1 day.
- When to use: Pre-orders, made-to-order items, or cases where you want to inspect the order before charging.
See Authorise mode for details on what the manual capture step involves.
Order statuses

Configure how order states map to payment outcomes:
- Paid Order Status — applied when Dojo confirms a successful Captured payment. Default: Confirmed.
- Authorised Order Status — applied when Dojo returns status
Authorised(funds held, manual capture pending). Tip: create a distinct status such as "Processing" or "Awaiting Capture" so you can identify orders needing manual action in the Dojo terminal. - Failed Order Status — applied when payment fails, is cancelled, or fails verification. Default: Failed.
If the status you want is not listed in a dropdown, create a new one first by going to J2Commerce -> Setup -> Order Statuses.

Surcharge

You can add an optional surcharge for customers who pay by card. Leave all three fields at their defaults if you do not want a surcharge.
Surcharge Name: Label shown on the order summary for the surcharge line. Example: "Credit card processing fee". Leave blank to add no surcharge.
Surcharge Percent: A percentage of the order subtotal added as a surcharge. Example: 2.5 adds a 2.5% surcharge.
Surcharge Fixed: A fixed currency amount added as a surcharge. Example: Applied in addition to the percent surcharge if both are set.
Surcharge Tax Class: Optional tax profile applied to the surcharge amount. Example: Select a tax profile from the dropdown if your jurisdiction requires tax on payment surcharges.
The surcharge fields are included for forward compatibility. The J2Commerce 6 core does not yet dispatch the onJ2CommerceCalculateFees event that activates surcharge calculations. This affects all payment plugins in J2Commerce 6, not just Dojo. Surcharges will become functional in a future core release.
Availability restrictions

Minimum Subtotal: Hide this payment method if the order subtotal is below this amount. Leave empty for no minimum.
Maximum Subtotal: Hide this payment method if the order subtotal is above this amount. Leave empty for no maximum.
Geozone Restriction: Limit this payment method to customers in a specific geozone. Leave empty to allow all countries.
The plugin also enforces a hard currency gate: if the cart currency is not GBP, the Dojo payment option does not appear.
Checkout messages
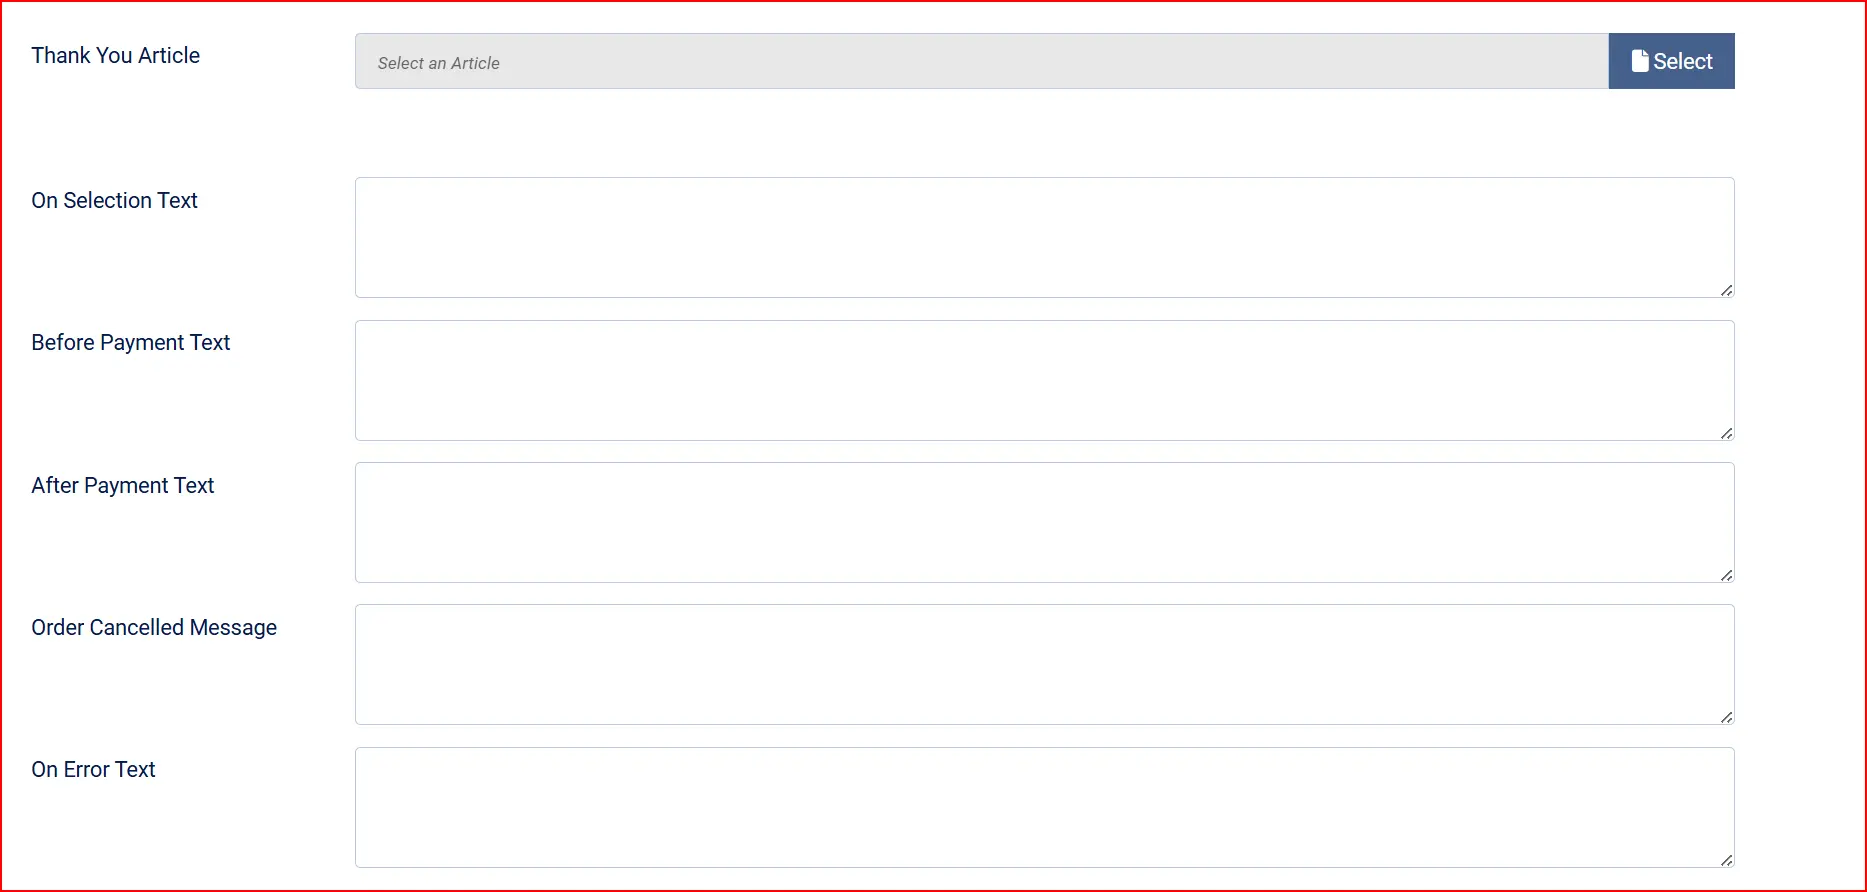
Custom text shown to the customer at different points in the payment flow. Leave empty to use the built-in defaults.
Thank You Article: Optional Joomla article shown on the post-payment page.
On Selection: When the customer selects Dojo as their payment method.
On Before Payment: On the pre-payment screen, just before redirect to Dojo.
On After Payment: After the customer returns from Dojo following successful payment.
On Cancel Payment: When the customer cancels at the Dojo checkout page.
On Error Payment: When an error occurs during processing.
Other settings

Place Order Button Text: Text on the button that submits the order and starts the redirect.
Show Dashboard Icon: Show a shortcut icon on the J2Commerce dashboard.
Debug Logging: Write detailed payment events to the Joomla log. Errors are always logged regardless of this setting.
How the payment flow works
-
Customer selects Dojo at checkout. The plugin checks that the cart currency is GBP and that the order total and geozone match any restrictions you set. If everything passes, the Dojo option appears.
-
Customer clicks "Place Order". J2Commerce calls the plugin. The plugin sends a request to the Dojo API (
https://api.dojo.tech/payment-intents) to create a payment intent for the order amount. Dojo returns a hosted checkout URL. -
Customer is redirected to Dojo's checkout page. The page at
pay.dojo.tech/checkout/[intent-id]is hosted entirely by Dojo. Your server is not involved in capturing card data. The customer enters their card details and authenticates (including 3D Secure where required). -
Dojo redirects the customer back to your store. After the customer pays (or cancels), Dojo sends them back to your store's return URL with query parameters including the payment intent ID.
-
The plugin verifies the result. Before marking anything as paid, the plugin runs three checks:
- Status check: The plugin fetches the payment intent from the Dojo API and reads its status (
Captured,Authorized,Canceled, etc.). - Reference check: The intent's reference field must match the J2Commerce order ID.
- Amount check: The intent amount in pence must match the order total (within 1 penny). Only when all three checks pass does the plugin update the order status.
- Status check: The plugin fetches the payment intent from the Dojo API and reads its status (
-
Order status is updated and customer sees the result. Captured → paid status. Authorized → authorised status. Cancelled or failed → failed status.
What you do NOT have to manage
- PCI DSS card data forms: Card data goes directly to Dojo's certified infrastructure. You qualify for SAQ-A.
- 3D Secure prompts: Dojo's hosted page handles 3DS automatically for all cards that require it.
- Currency conversion: Dojo processes GBP only. The plugin enforces this by not displaying itself for non-GBP carts.
Authorise mode
When Charge Mode is set to Authorise, Dojo holds the customer's funds but does not settle them immediately. You have up to 1 day to capture the payment manually.
How to capture an authorised payment
- Log in to your Dojo merchant portal or terminal.
- Find the transaction by the payment intent ID (visible in the J2Commerce order details under Transaction ID).
- Capture the payment. Dojo will then settle the funds.
If you do not manually capture an authorised payment within 1 day, Dojo automatically voids the hold and releases the funds back to the customer. The order in J2Commerce will remain in the "Authorised" status — you must manually update it to a cancelled or failed status.
Recommended setup for Authorise mode
Set Authorised Order Status to a distinct status such as "Processing" or "Awaiting Capture" (create it in J2Commerce -> Setup -> Order Statuses). This lets you filter your orders list to find all orders waiting for manual capture before the 1-day deadline.
Sandbox testing
Getting sandbox credentials
- Sign up for a Dojo developer account.
- Create a sandbox app in the developer portal to receive a sandbox API key.
- Enter the sandbox API key in the plugin settings under Sandbox API Key.
Test card numbers
Use these card numbers on the Dojo sandbox checkout page. Use any future expiry date and any 3-digit CVC.
| Card | Number | Expected result |
|---|---|---|
| Visa (success) | 4111 1111 1111 1111 | Payment approved and captured |
| Mastercard (success) | 5500 0000 0000 0004 | Payment approved and captured |
| Any card (decline) | 4000 0000 0000 0002 | Payment declined |
Dojo periodically updates their sandbox test card numbers. Check the Dojo developer documentation for the current test cards if the above do not work.
Verifying debug logs
- Set Debug Logging to Yes in the plugin settings.
- Place a test order and complete payment on the sandbox.
- Open
administrator/logs/payment_dojo.phpin a text editor. - Look for entries showing the payment intent ID, the status returned by the Dojo API, and the three verification checks (status, reference, amount). A successful flow produces a
Capturedstatus with all three checks passing.
Troubleshooting
Dojo does not appear at checkout
Most common cause: The cart currency is not GBP.
Solution:
- Go to J2Commerce -> Setup -> Configuration -> Store tab and confirm your store currency is GBP.
- If you use multi-currency, make sure the active currency at checkout is GBP.
- Check that Minimum Subtotal and Maximum Subtotal are not excluding the current order total.
- Check that Geozone Restriction (if set) includes the customer's billing country.
"Sandbox Mode is enabled but no Sandbox API Key is configured"
Solution: Go to the plugin settings, confirm Sandbox Mode is set to Yes, and enter your Dojo sandbox API key in the Sandbox API Key field. The sandbox and live keys are separate fields that appear only when their corresponding mode is active.
"Could not contact the Dojo gateway"
Cause: The plugin could not reach api.dojo.tech.
Solution:
- Check that your server can make outbound HTTPS connections on port 443.
- Confirm the API key is correct with no leading or trailing spaces.
- In sandbox mode, confirm the sandbox key is entered (not the live key).
- Check your server's outbound firewall rules — some managed hosting environments restrict external API calls.
Payment failed verification — order not marked paid
Cause: One of the three verification checks (status, reference, or amount) did not pass when the customer returned to your store.
Solution:
- Enable Debug Logging and repeat the test transaction.
- Open
administrator/logs/payment_dojo.phpand find the verification failure message. It will indicate which check failed. - If the reference check failed, confirm the order was not deleted or modified between when the customer left and when they returned.
- If the amount check failed by more than 1 penny, this is a security rejection indicating a possible tampered redirect. Contact J2Commerce support with the log entry.
Authorised order not captured — funds released back to customer
Cause: A payment in Authorise mode was not manually captured in the Dojo terminal within the 1-day window.
Solution:
- Confirm the order in the Dojo merchant portal to check its status.
- If the authorisation has expired and funds were released, you will need to ask the customer to re-order.
- To prevent this in future, set the Authorised Order Status to a distinct status you actively monitor, or switch Charge Mode to Sale if your fulfilment model allows immediate capture.
"The payment intent could not be verified"
Cause: The plugin fetched the payment intent from the Dojo API but its reference field did not match the J2Commerce order ID, or the API call failed.
Solution:
- Enable Debug Logging and look for the full API response in
administrator/logs/payment_dojo.php. - Confirm the API key used in the plugin matches the key that originally created the payment intent (this matters when switching between sandbox and live mode).
Related topics
- Geozones — restrict payment methods by country or region
- Order Statuses — create and configure the statuses used for paid, authorised, and failed orders
- Design: Shipping and Payment Overrides — customise the pre-payment redirect template