Simplify Payments (Mastercard Simplify Commerce)
Warning: Mastercard discontinued Simplify Commerce for new merchant enrollments in 2025. This plugin is for existing merchants with active Simplify Commerce accounts only. If you do not already have an active account, you cannot sign up for a new one. Plan a migration to Mastercard Payment Gateway Services (MPGS) or another processor as soon as possible. See Migrating to a replacement gateway at the end of this guide.
Simplify Payments processes credit and debit card payments directly at checkout using Mastercard's Simplify Commerce platform. Card details are captured by a JavaScript library (Simplify.js) running in the customer's browser, converted into a single-use token, and only that token is sent to your server. Raw card numbers never travel through your Joomla site, which keeps your PCI compliance scope at SAQ-A-EP rather than the much heavier SAQ-D.
This plugin is a separate add-on available from the J2Commerce Extensions Store. It is not included with the core J2Commerce component.
Requirements
- J2Commerce 6.0.0 or later installed and active
- An active Mastercard Simplify Commerce merchant account (sandbox and live key pairs)
- HTTPS (SSL) on your storefront — required for card tokenization
- PHP cURL extension enabled on your server
- PHP JSON extension enabled on your server
Purchase and download
This plugin is a separate add-on available from the J2Commerce Extensions Store. It is not included with the core J2Commerce 6 component.
- Go to the J2Commerce website and locate Simplify Payment.
- Add it to your cart and complete checkout.
- Go to My Downloads under your account profile and find the plugin.
- Click Available Versions -> View Files -> Download Now to download the ZIP file.
Install the plugin
In the Joomla Administrator, go to System -> Install -> Extensions.
Upload the plg_j2commerce_payment_simplifypayment.zip file.

Enable the Plugin
Once you have installed the App, you will need to enable it. There are two ways you can access the App.
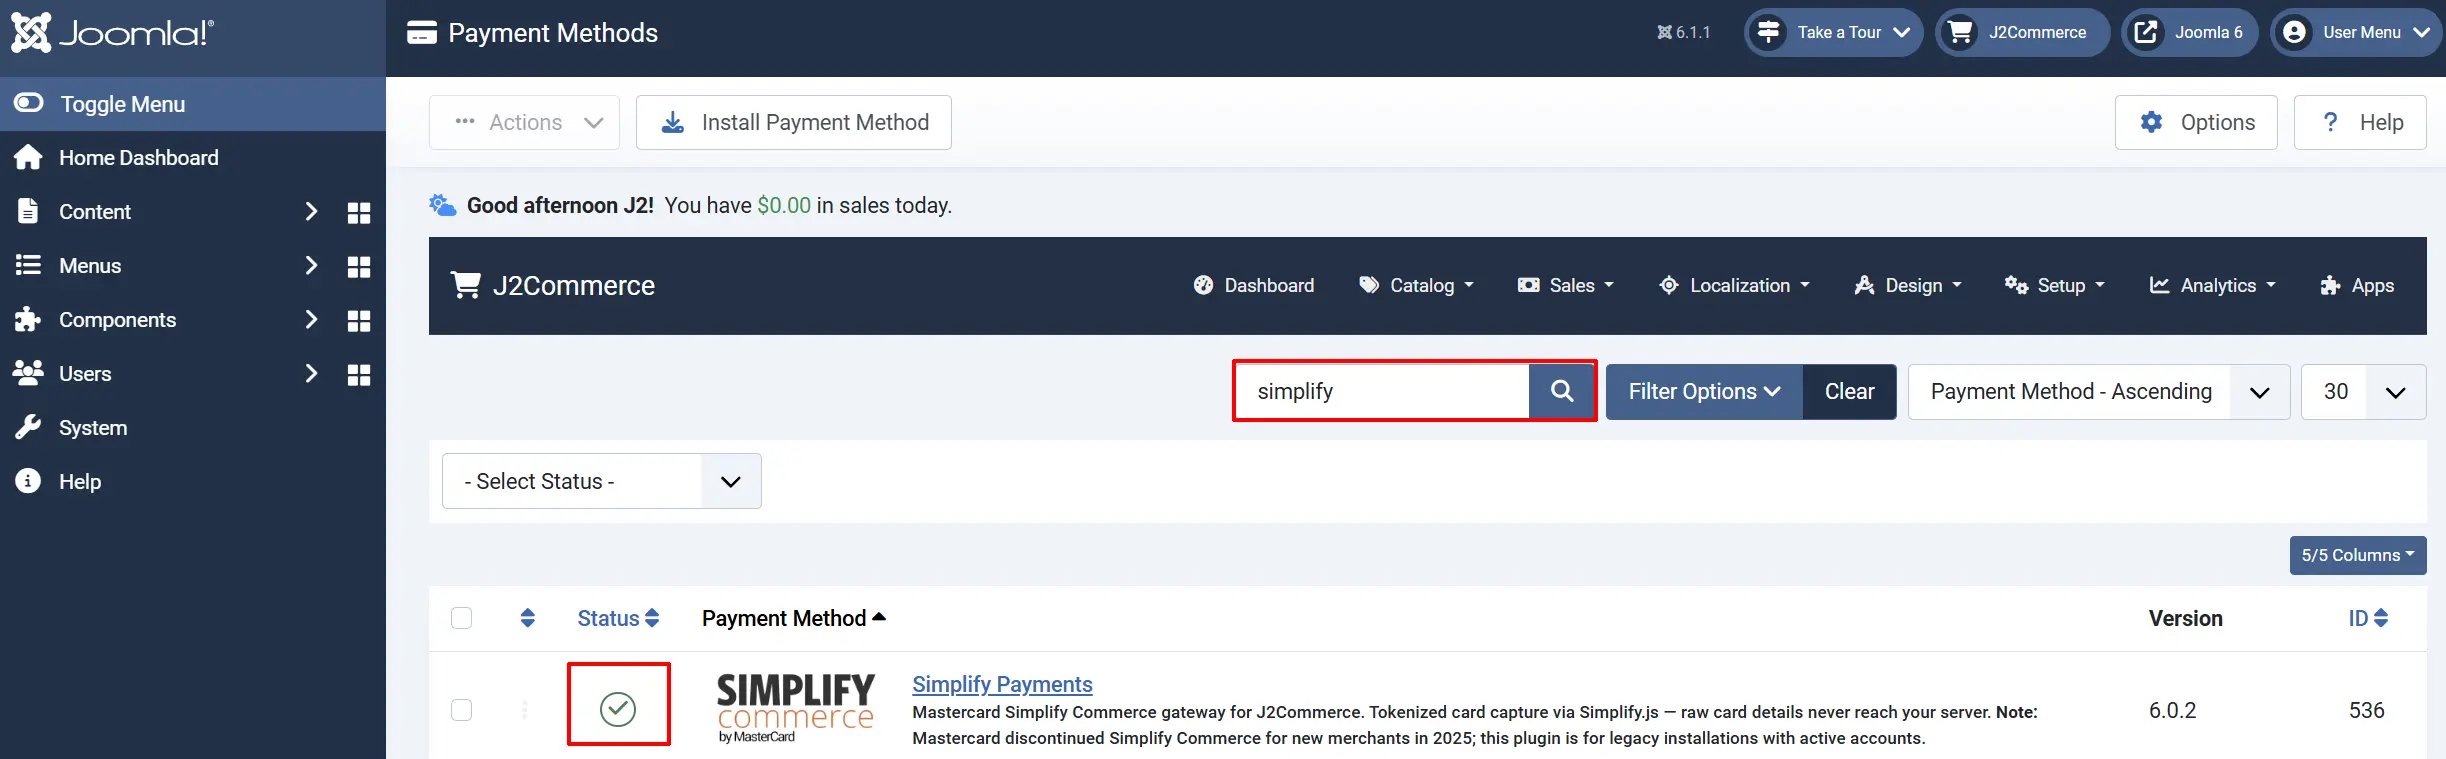
Option A: Go to the J2Commerce icon at the top right corner -> Setup -> Payment Methods
Option B: Go to Components on the left sidebar -> J2Commerce -> Dashboard -> Setup -> Payment Methods

To help you narrow down the list, you can do a search for Simplify Payment, click the X, and it will turn into a green checkmark. It is now enabled and ready for setup.
Configure the Plugin
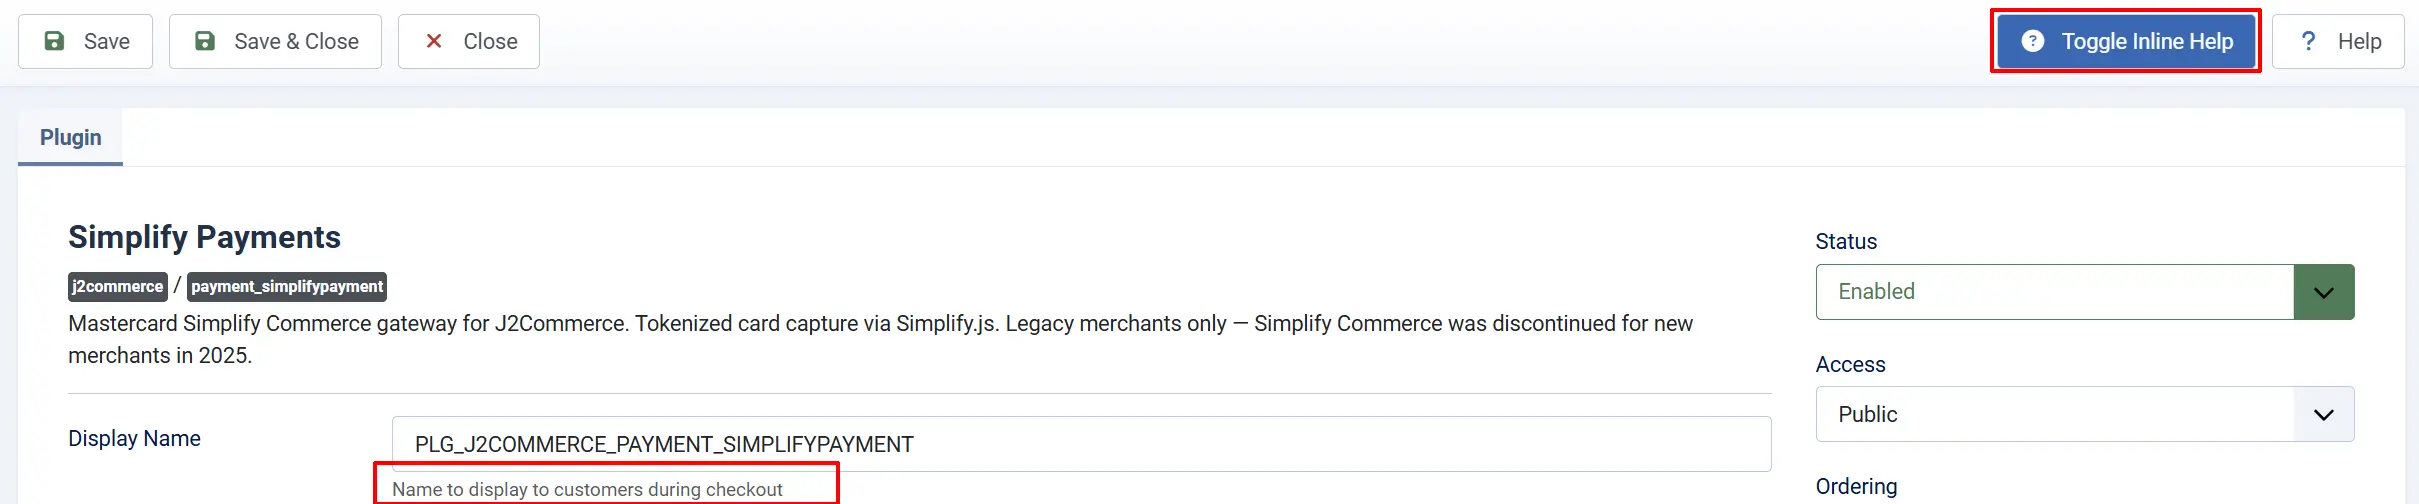
Click the Toggle Inline Help button at the top of any plugin configuration page to show a short description beneath each field.
Display Settings
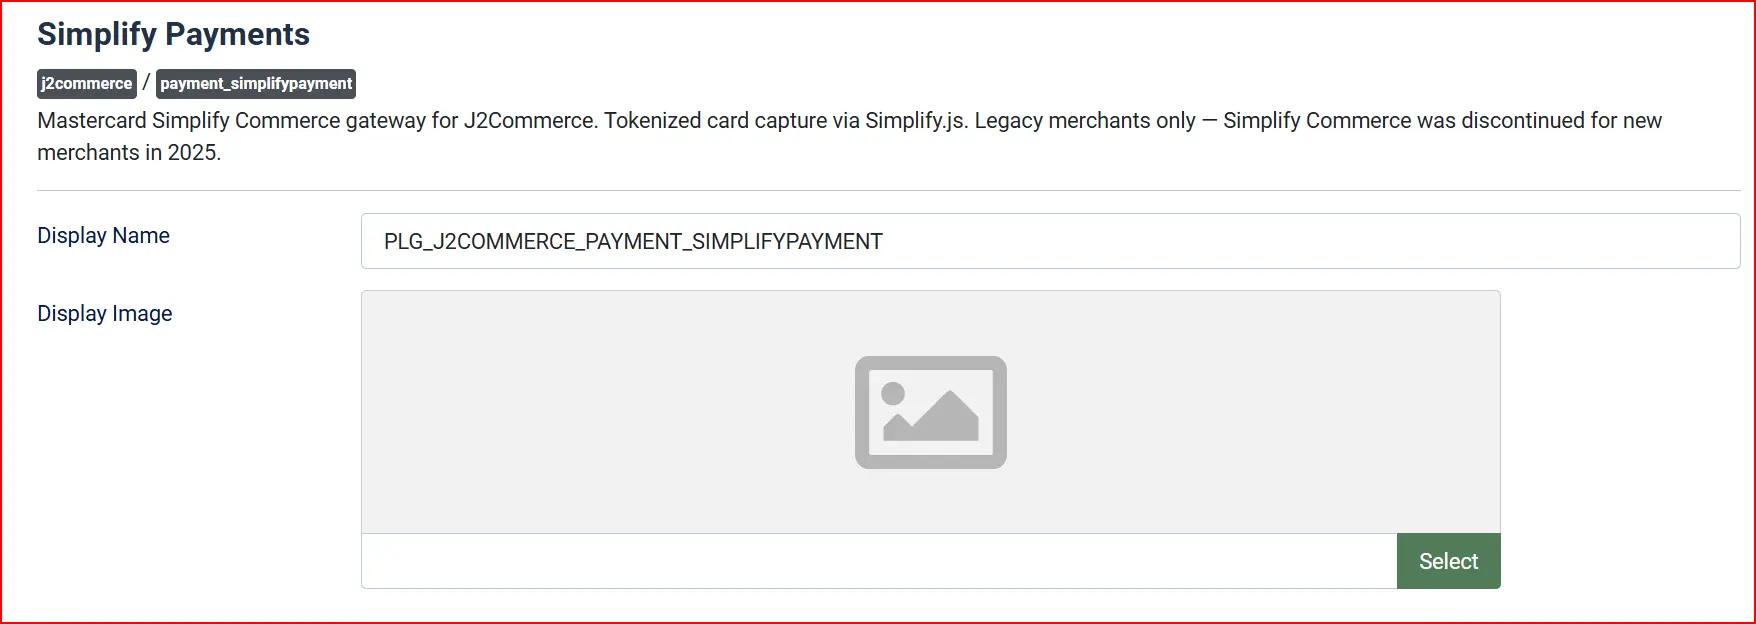
Display Name: The payment option label shown to customers at checkout. Note: Change to something like "Credit / Debit Card" for a cleaner storefront.
Display Image: An optional image shown alongside the payment option name. Note: Use the Joomla media picker to select an image from your media library.
Credentials
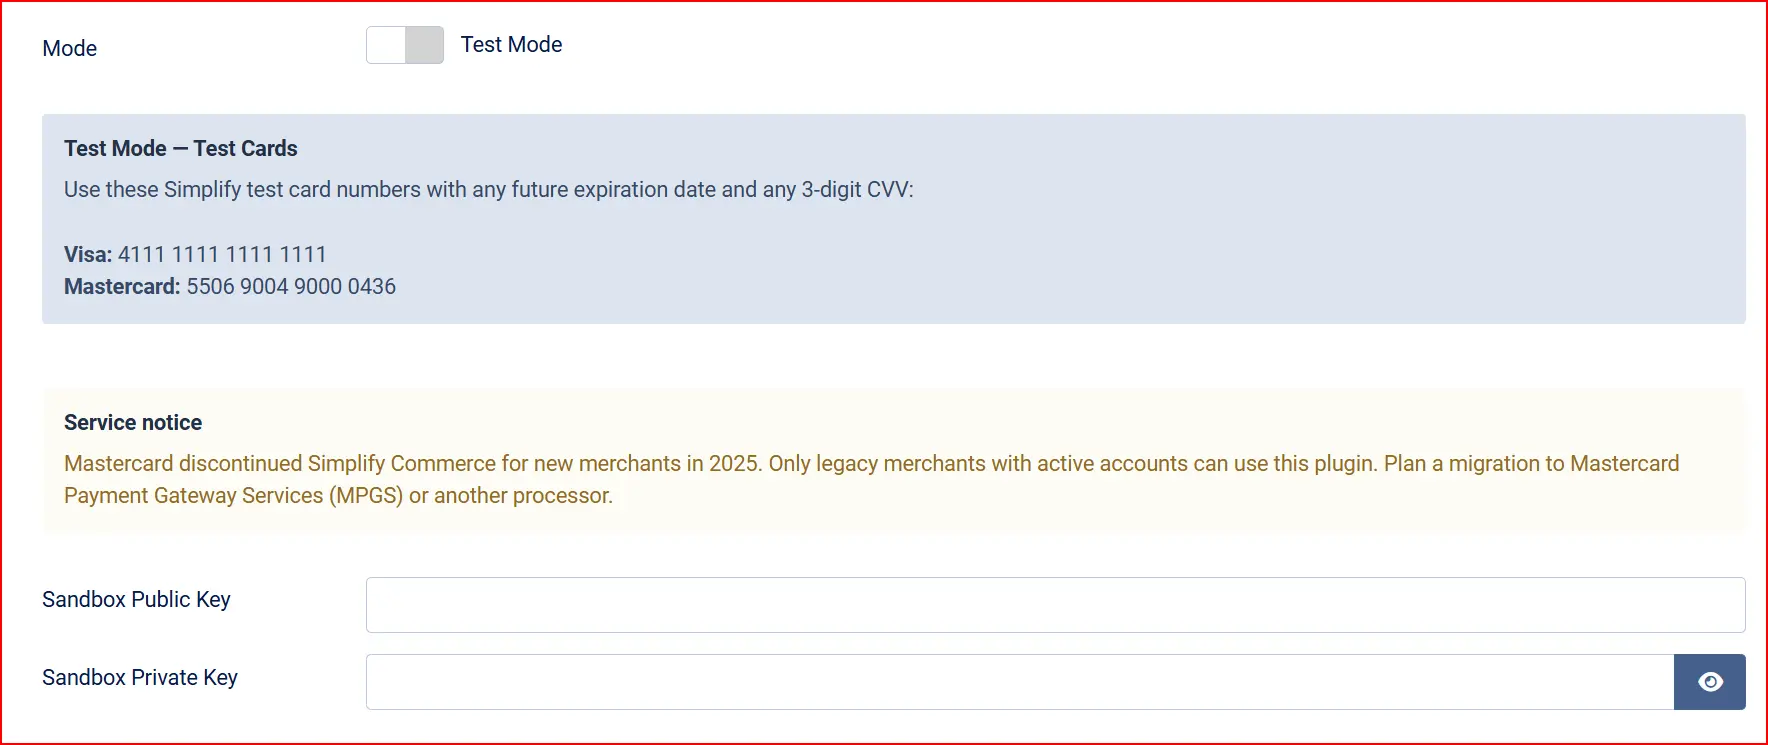
Mode: Toggle between Test Mode and Live Mode. Note: Always test thoroughly in sandbox before switching to Live
When Test Mode is active, a blue information banner shows the sandbox test card numbers directly in the admin panel for convenience.
API Keys
The plugin uses two sets of API keys — sandbox keys for testing and live keys for real transactions. The fields that appear change depending on which mode you have selected.
Warning: Your private keys must stay secret. Never share them, post them in support forums, or commit them to version control. The private key is stored securely in your Joomla database and is never sent to the customer's browser.
Test Mode keys (visible when Mode is set to Test):
Sandbox Public Key: Your Simplify sandbox public key (starts with sbpb_). Note: Sent to the customer browser so Simplify.js can tokenize the card.
Sandbox Private Key: Your Simplify sandbox private key. Note: Used only on your server to authorize the charge.
Live Mode keys (visible when Mode is set to Live):
Live Public Key: Your Simplify live public key (starts with lvpb_).
Live Private Key: Your Simplify live private key.
Warning: The original J2Store version of this plugin had a bug where Live mode keys were never read correctly, causing every live charge to fail with an authentication error. This bug is fixed in the J2Commerce version. If you are migrating from J2Store, re-enter your live keys after upgrading to make sure they are saved under the correct field names.
You can find all four keys in your Simplify Commerce merchant dashboard under Account -> API Keys.
Accepted Card Types

Accepted Card Types: Which card brand icons are displayed next to the payment option at checkout.
This field controls icon display only. Simplify Commerce itself determines which cards your account accepts — removing a brand here does not block that card from being charged.
Surcharge

You can add an optional surcharge for customers who pay by card. Leave all three fields at their defaults if you do not want a surcharge.
Surcharge Name: Label shown on the order summary for the surcharge line. Example: "Credit card processing fee". Leave blank to add no surcharge.
Surcharge Percent: A percentage of the order subtotal added as a surcharge. Example: 2.5 adds a 2.5% surcharge.
Surcharge Fixed: A fixed currency amount added as a surcharge. Example: Applied in addition to the percent surcharge if both are set.
Surcharge Tax Class: Optional tax profile applied to the surcharge amount. Example: Select a tax profile from the dropdown if your jurisdiction requires tax on payment surcharges.
Restrictions

Minimum Subtotal: Hide this payment option when the cart subtotal falls below this amount. Note: Set to 0 to show for all cart values.
Maximum Subtotal: Hide this payment option when the cart subtotal exceeds this amount. Note: Set to -1 for no upper limit.
Order Status

Payment Status: Order status applied when Simplify approves the charge successfully. Note: When this status is set, J2Commerce fires the full order status change pipeline — notifications, order history, invoice email, and download grants all trigger automatically.
Decline Status: Order status applied when Simplify declines the charge or an error occurs. Note: The order is updated through the same pipeline, so the customer receives a decline notification if you have one configured.
NOTE: If the status you want isn't listed in the dropdown menu, you can create a new one by going to J2Commerce -> Setup -> Order Statuses

Geozone Restriction

Geozone Restriction: Limit this payment option to customers in a specific geozone. Note: Select a geozone from the dropdown to hide Simplify Payments for customers outside that region. Leave blank to offer it worldwide.
Subscription Products

Support Subscriptions: Allow this gateway to be chosen for orders containing subscription products. Note: See Subscription products below for important limitations.
Custom HTML Messages
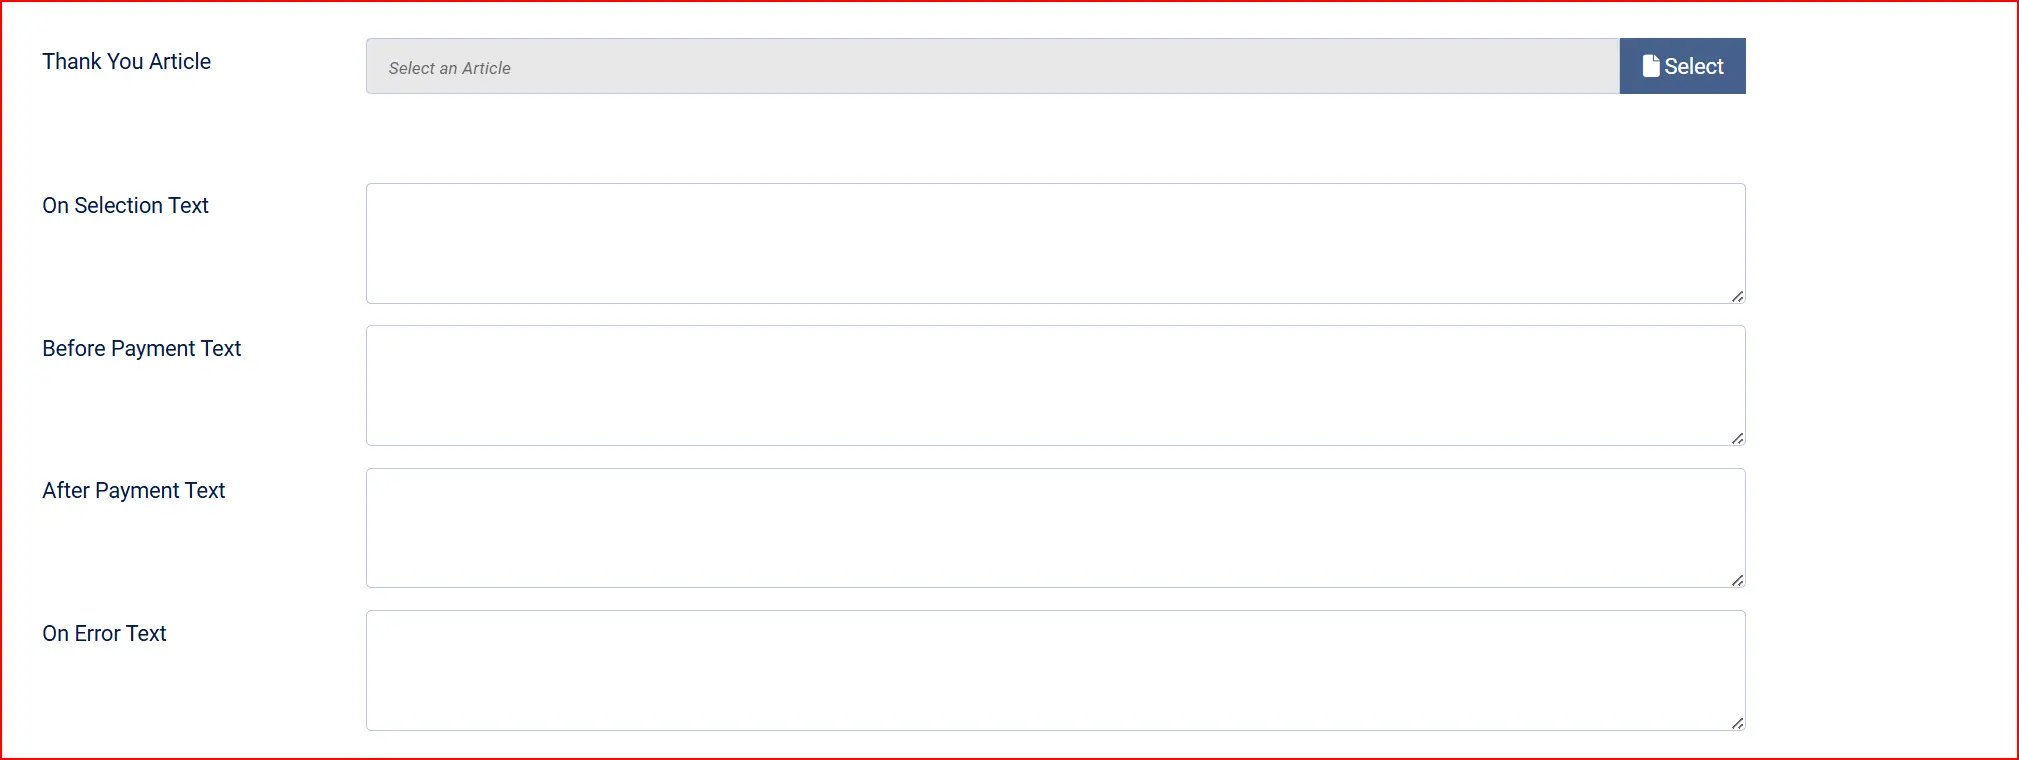
Thank You Message Article: An optional Joomla article displayed on the order confirmation page after a successful payment.
These four fields let you inject custom HTML or text into specific points of the checkout flow. They are optional and most stores leave them blank.
On Selection: HTML shown in the payment panel when the customer selects Simplify Payments at checkout but before they enter card details. Use this for payment instructions or terms notices.
On Before Payment: HTML shown on the card entry screen before the customer submits.
On After Payment: HTML shown on the confirmation screen after a successful payment.
On Error Payment: HTML shown when the payment fails.
Advanced
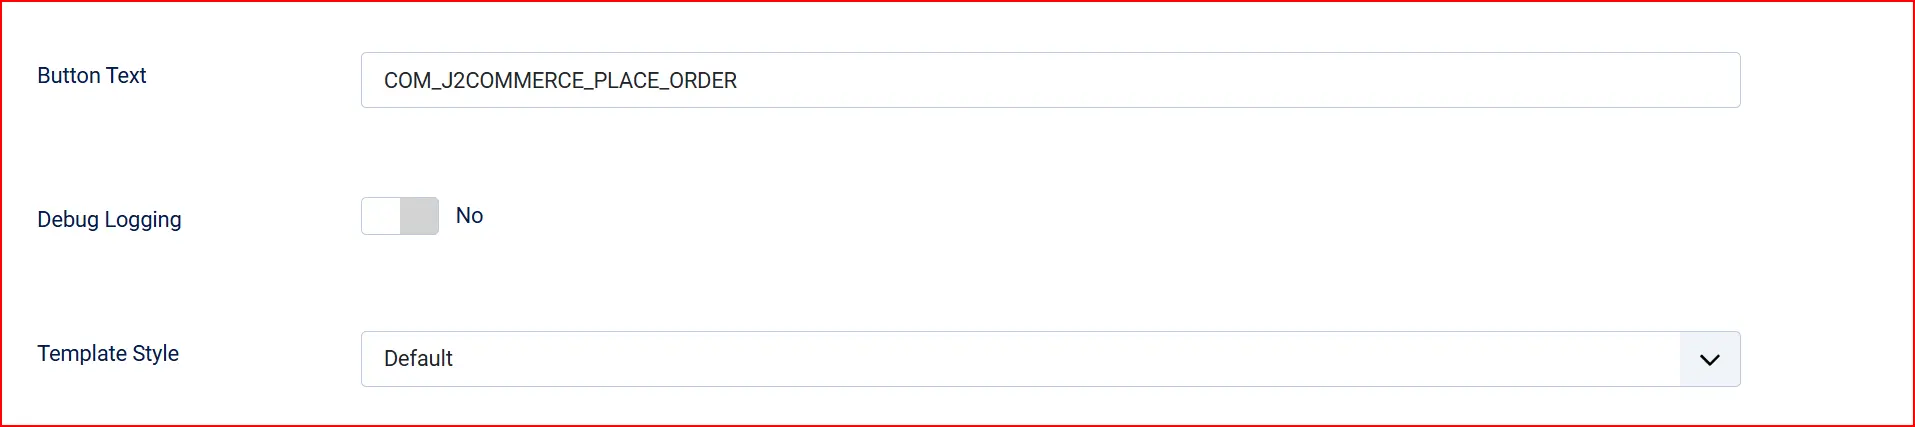
Button Text: Label on the submit button at the card entry step. Note: Change to "Pay Now" or similar if preferred.
Debug Logging: Write plugin activity to the Joomla log file.
Note: Enable this temporarily when troubleshooting. Disable in production — logs are stored at administrator/logs/plg_j2commerce_payment_simplifypayment.log.php. Do not leave enabled long-term.
Layout Template: Which frontend framework layout to use for the payment form. Leave blank to use your store's default (Bootstrap 5 or UIkit). Change only if you have overridden layouts.
Testing in sandbox
Before accepting real payments, complete a full test checkout in sandbox mode.
Setup for testing
- Set Mode to Test Mode.
- Enter your sandbox keys (from your Simplify dashboard, starts with
sbpb_for public andsbpk_for private). - Save the plugin settings.
- Open your store in a browser and add a product to the cart.
Test card numbers
Use the following card numbers with any future expiry date (e.g., 12/30) and any 3-digit CVV (e.g., 123):
Test Mode — Test Cards
Use these Simplify test card numbers with any future expiration date and any 3-digit CVV:
**Visa:**4111 1111 1111 1111
**Mastercard:**5506 9004 9000 0436
Expected results
| Action | Expected outcome |
|---|---|
| Enter a valid test card and click Place Order | Payment approved — order status changes to your configured Payment Status (default: Confirmed). Confirmation page loads. |
Enter card number 4000 0000 0000 0002 (generic Simplify decline number) | Payment declined — order status changes to your configured Decline Status (default: Failed). Error message shown to customer. |
| Leave card fields empty and click Place Order | Client-side validation fires — browser displays inline field errors without submitting the form. |
Note: All charges against sandbox keys are simulated — no money changes hands. Transactions appear in your Simplify Commerce sandbox dashboard for review.
Going live
Once testing is complete and you are satisfied with the checkout flow:
- Log in to your Simplify Commerce merchant dashboard and note your live public key and live private key.
- In J2Commerce, go to J2Commerce -> Setup -> Payment Methods -> Simplify Payments.
- Switch Mode to Live Mode. The sandbox key fields hide and the live key fields appear.
- Enter your Live Public Key and Live Private Key.
- Click Save & Close.
- Place a real test order for a small amount (e.g., $1.00) using a real card to confirm end-to-end.
- Verify the charge appears in your live Simplify Commerce merchant dashboard.
- Verify the order status in J2Commerce updates correctly and that any order confirmation emails arrive.
Warning: Do not leave Debug Logging enabled in production. Log files can grow large and may contain details about payment requests.
Subscription products
If your store uses subscription products (via the app_subscriptionproduct add-on), Simplify Payments can accept the initial subscription payment. The Support Subscriptions setting must be set to Yes.
Limitations in the current release:
- The initial payment for a new subscription processes normally.
- When a renewal cycle is due, the plugin emits a "Pending Renewal Payment" event. This means the renewal is flagged for manual review rather than charged automatically.
- Full unattended card-on-file renewal (charging the stored card automatically on each cycle) is planned for a future release.
What this means in practice: For subscription stores, plan to monitor pending renewal orders in J2Commerce -> Sales -> Orders and manually confirm or follow up with customers on renewal cycles until the automated renewal feature is released.
Troubleshooting
"Payment SDK failed to load" — checkout shows an error before the card form appears
Cause: The Simplify.js library loaded from simplify.com was blocked by a browser extension, a content security policy, or a network issue.
Solution:
- Check your browser console (F12 -> Console) for a blocked resource error pointing to
https://www.simplify.com/commerce/v1/simplify.js. - If a Content Security Policy header on your site blocks external scripts, add
simplify.comto yourscript-srcallow-list. - Ask the customer to disable ad-blocking extensions temporarily and retry.
- Confirm your server has outbound HTTPS access to
simplify.com(some restrictive hosting environments block external calls).
Card tokenization fails — "We could not validate your card"
Cause: Simplify.js was unable to create a token from the entered card details. This can happen if the public key is wrong or expired.
Solution:
- Confirm the correct sandbox or live public key is saved in the plugin settings — the key prefix should be
sbpb_for sandbox orlvpb_for live. - In Test Mode, verify you are using a supported test card number (see Test card numbers above).
- Enable Debug Logging, reproduce the error, then check
administrator/logs/plg_j2commerce_payment_simplifypayment.log.phpfor detail. - Disable debug logging after investigation.
Every live charge fails with an authentication error
Cause: This is the known live-key bug from the original J2Store version. If you migrated from J2Store, the live keys may not have been stored under the correct field names.
Solution: Go to J2Commerce -> Setup -> Payment Methods -> Simplify Payments, switch Mode to Live Mode, re-enter both the Live Public Key and Live Private Key, then save. The J2Commerce version of the plugin reads these fields correctly.
Declined cards — customer sees "Your card was declined"
Cause: Simplify Commerce rejected the charge. Decline reasons include insufficient funds, card limits, or issuer restrictions.
Solution: This is a normal payment outcome — advise the customer to try a different card or contact their bank. If all cards are declined including valid test cards in sandbox, check that the correct key pair is saved and that you are using the test card numbers in Test Mode.
"Payment configuration is incomplete. Please contact the store."
Cause: The plugin attempted to process a payment but found the public key field is empty.
Solution: Open the plugin settings, confirm the correct key for the active mode is entered, and save.
"Simplify Commerce account not enrollable" error from the Simplify API
Cause: The gateway returned a response indicating your Simplify Commerce account cannot accept new transactions. This typically means the merchant account is suspended or has been closed as part of the 2025 discontinuation.
Solution: Contact Mastercard Simplify Commerce support to verify your account status. If the account has been closed, you will need to migrate to another payment processor. See Migrating to a replacement gateway.
Order confirmation email or download grants do not trigger after payment
Cause: In very old J2Store installations, a different version of this plugin may have been writing the order status directly to the database, bypassing J2Commerce's event system.
Solution: The J2Commerce version of this plugin routes all order status changes through OrderModel::updateOrderStatus(), which fires the full notification and event pipeline. If you have upgraded from J2Store and still see missing emails, check that your order notification templates are configured under J2Commerce -> Configuration -> Emails.
What is new compared to the J2Store version
The J2Commerce version of this plugin includes several important improvements over the original J2Store plugin:
Client-side tokenization is now the primary flow. The original J2Store plugin submitted raw card numbers (cardholder name, full card number, expiry, CVV) directly to your server in a POST request, placing you under PCI SAQ-D scope. The J2Commerce version uses Simplify.js to tokenize card details in the customer's browser. Only a one-time token reaches your server — your site never sees the raw card number. This reduces your PCI scope to SAQ-A-EP.
Live key bug is fixed. The original plugin read public_key and private_key but the XML configuration stored the live values under live_public_key and live_private_key. This meant live mode was effectively broken — every charge returned a 401 authentication error. The J2Commerce version reads the correct field names.
Order status changes now fire the full event pipeline. The original plugin wrote order status directly to the database, skipping J2Commerce's status change events. This meant notifications, order history entries, invoice emails, and digital download grants did not fire on Simplify approvals. The J2Commerce version routes every status change through OrderModel::updateOrderStatus() so the entire pipeline runs correctly.
Currency decimal handling is corrected. The original plugin hardcoded a multiply-by-100 conversion for all currencies. Simplify Commerce supports currencies with different decimal structures. The J2Commerce version reads the currency's decimal configuration from J2Commerce and converts accordingly.
Surcharge, subtotal limits, and geozone restriction are added. The original plugin had no built-in surcharge or geographic restriction support. These are now standard configuration fields consistent with other J2Commerce payment plugins.
Migrating to a replacement gateway
Because Mastercard discontinued Simplify Commerce for new merchants in 2025 and existing accounts may be closed or restricted without notice, it is strongly recommended to plan a transition to a supported alternative.
Mastercard-recommended path: Mastercard Payment Gateway Services (MPGS) is the official successor. Contact your Mastercard account representative or visit mpgs.mastercard.com to begin merchant enrollment.
Other J2Commerce-compatible alternatives: The J2Commerce Extensions Store offers plugins for Stripe, PayPal, Square, and other major gateways. These are actively maintained and provide full card-on-file and subscription renewal support.
Migration steps (general):
- Sign up with your chosen replacement gateway and obtain API credentials.
- Install the corresponding J2Commerce payment plugin.
- Run a test order through the new gateway in sandbox mode.
- Once satisfied, switch the new gateway to live and set it as the default payment method.
- Disable the Simplify Payments plugin once all pending orders have cleared.