2Checkout (Verifone) — Legacy Redirect Gateway
Note: 2Checkout was acquired by Verifone in 2021. The legacy hosted-redirect API used by this plugin still processes transactions for existing merchants, but Verifone has closed new merchant onboarding for 2CO accounts. If you do not already have an active 2Checkout vendor account, you cannot create one. This plugin is a bridge for stores migrating from J2Store to J2Commerce that already have an established 2CO relationship.
When a customer places an order, they are redirected from your site to the 2Checkout-hosted payment page, enter their card or payment details there, and then return to your store. No card data ever passes through your Joomla server. After the customer returns, 2Checkout also sends a background notification (called an INS or IPN) so your store updates the order status reliably even if the customer closes the browser before the return page loads.
This plugin is a separate add-on available from the J2Commerce Extensions Store. It is not included with the core J2Commerce component.
Prerequisites
Before you configure this plugin, have the following items ready from your 2Checkout / Verifone merchant dashboard: If you don't already have a 2Checkout account, you can sign up for one at https://www.2checkout.com/partners/developer/.
- Account Number (SID) — your numeric vendor account identifier, shown in the dashboard under Account -> Account Information
- Secret Word — a passphrase you set under Account -> Site Management; this value is used to verify the hash on 2Checkout's return URL and on the INS notification
- PHP cURL extension enabled on your server
- J2Commerce 6.0.0 or later installed and active
Purchase and Download
The 2Checkout app is a premium add-on available from the J2Commerce extension directory.
Step 1: Go to our J2Commerce website -> Apps
Step 2: Locate the 2Checkout App -> click View Details -> Add to cart -> Checkout.
Step 3: Go to your My Downloads under your profile button at the top right corner and search for the app. Click Available Versions -> View Files -> Download
Install the Plugin
In the Joomla Administrator, go to System -> Install -> Extensions.
Upload the payment_2checkout.zip package ZIP file or use the Install from URL option.

Enable the Plugin
Once you have installed the App, you will need to enable it. There are two ways you can access the App.
Option A: Go to the J2Commerce icon at the top right corner -> Setup -> Payment Methods
Option B: Go to Components on the left sidebar -> J2Commerce -> Dashboard -> Setup -> Payment Methods
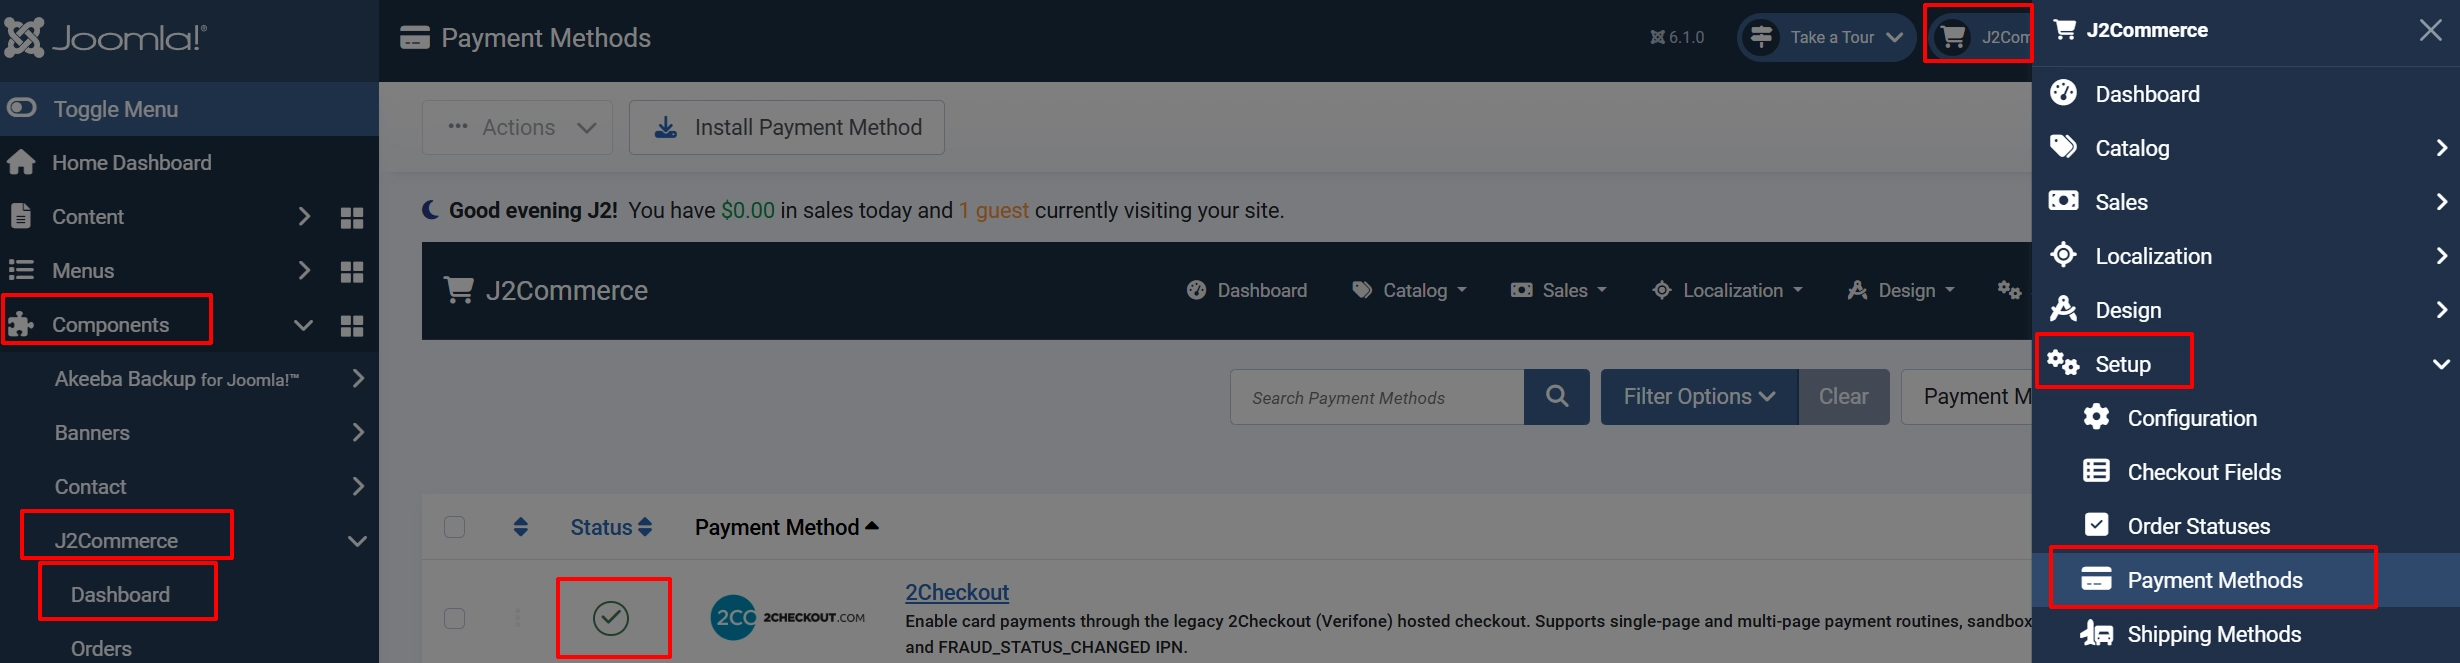
To help you narrow down the list, you can do a search for 2Checkout, click the X, and it will turn into a green checkmark. It is now enabled and ready for setup.
Configuration
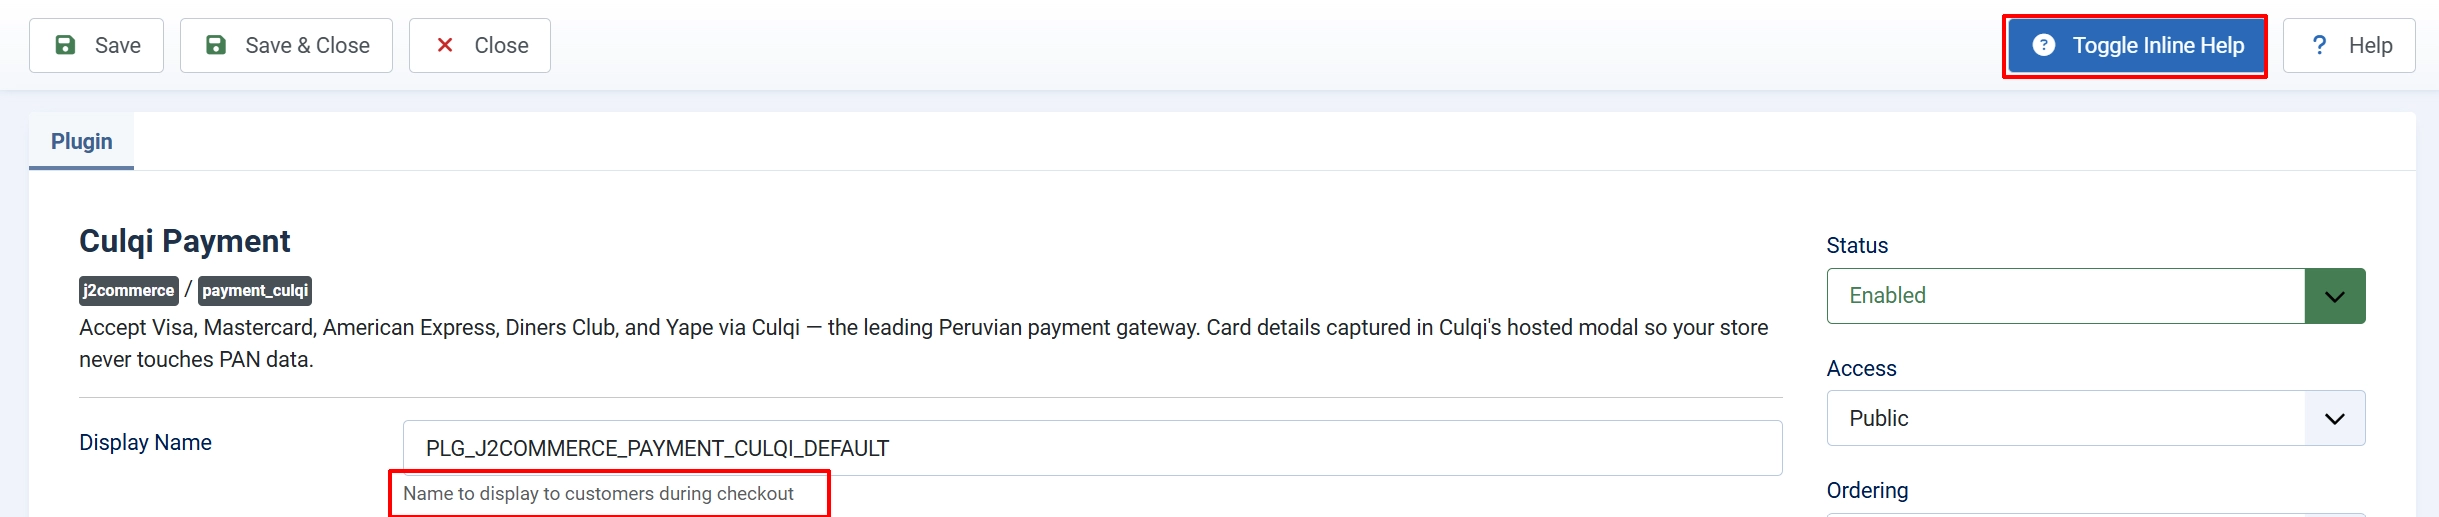
Tip: Click on the Toggle Inline Help button on any app/plugin you install and it will show a description below each section. See image below
Basic Settings tab
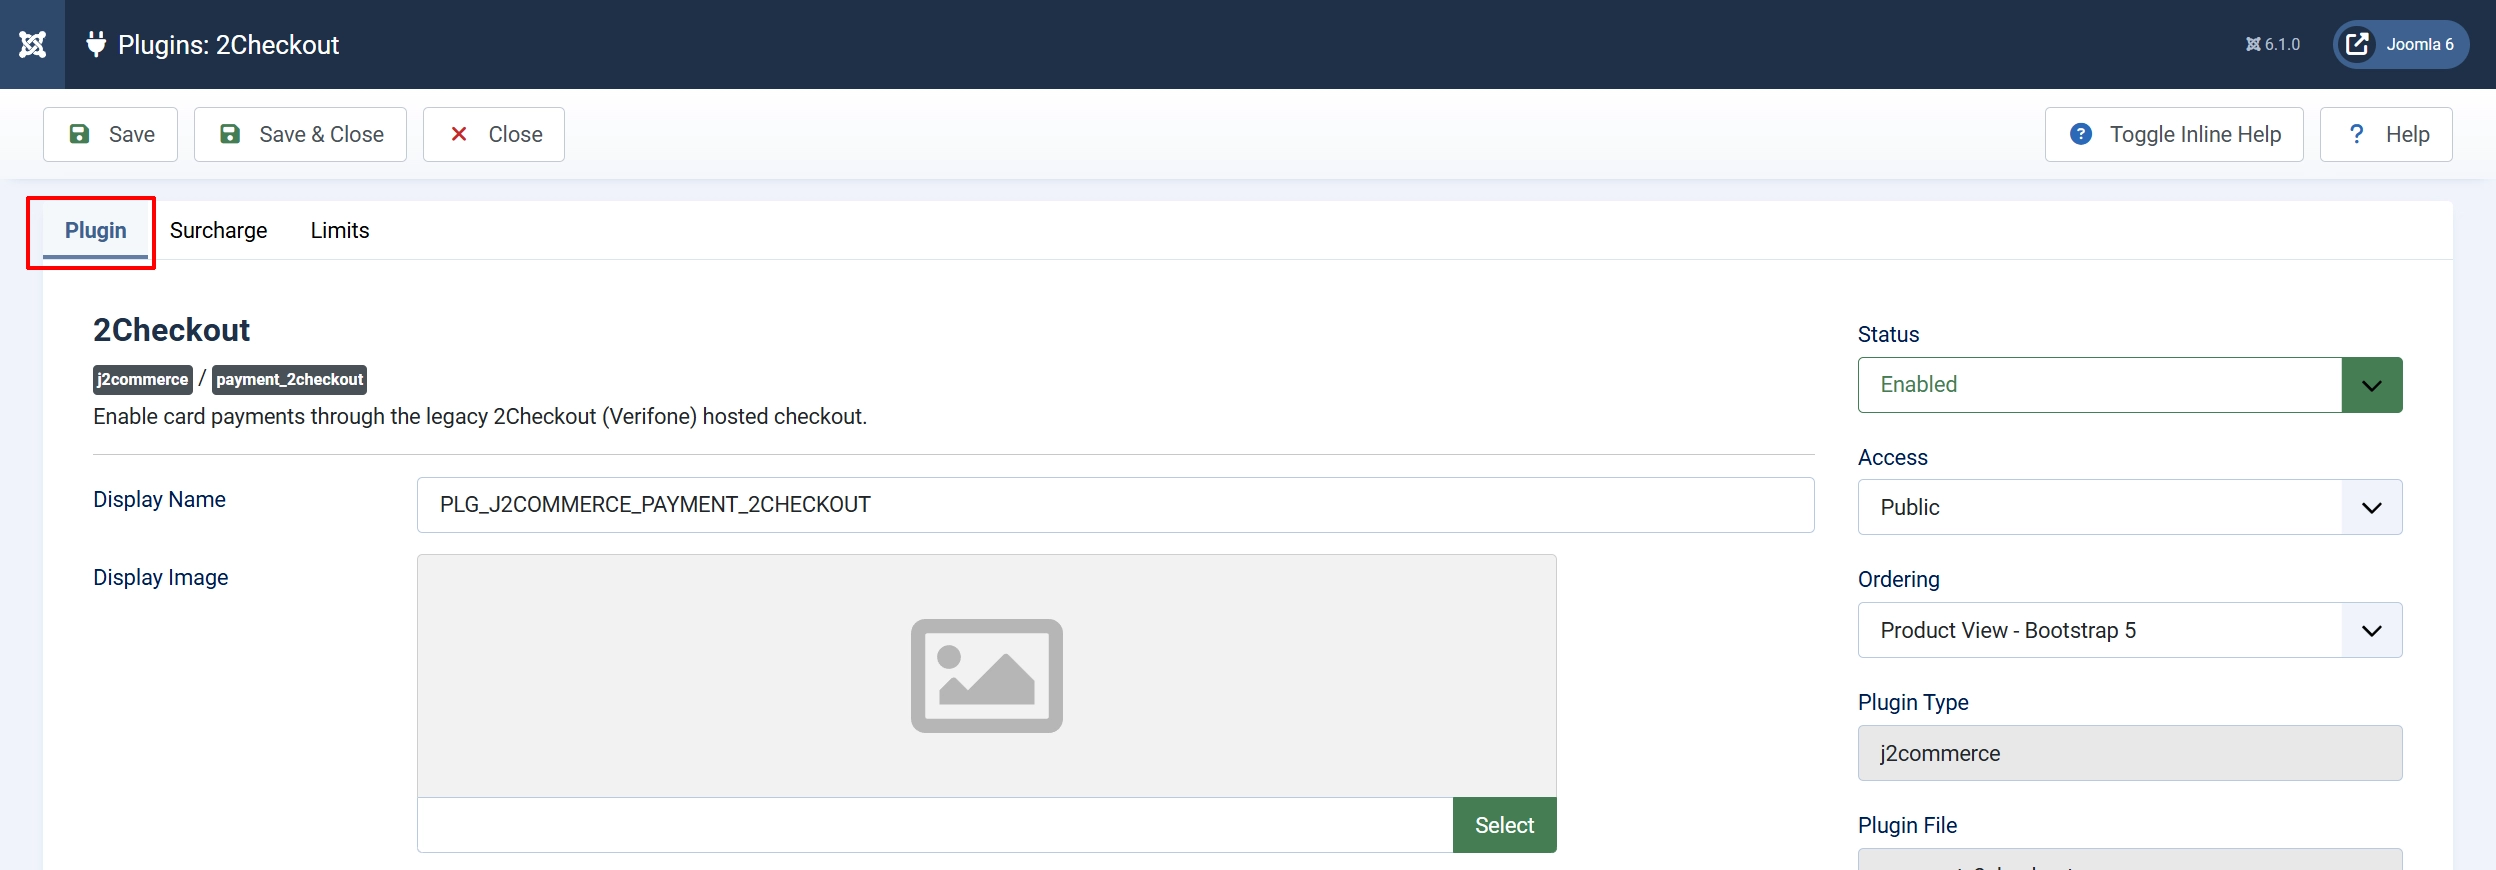
Display Name: The payment option label shown to customers at checkout.
Display Image: Optional image shown next to the payment method name on the checkout page. Use the media picker to choose from your library.

Account Number (SID): Your 2Checkout vendor account number. Find it in the 2Checkout dashboard under Account -> Account Information.
Secret Word: Your 2Checkout secret word, configured on the 2Checkout website under Account -> Site Management. Used to verify the integrity of both the return-URL hash and the fraud-status INS notification.
Sandbox Mode: When enabled, transactions route to sandbox.2checkout.com. Use a sandbox vendor account for testing; never enable this on a live store.
IPN URL: Informational field — shows the INS URL you must paste into your 2Checkout vendor area. See 2Checkout Vendor Area Setup below.

Automatic Language: When enabled, J2Commerce detects the active Joomla site language and forwards it to the 2Checkout payment page automatically.
Default Language: The fallback language sent to the 2Checkout payment page when automatic detection is off.
Default Payment Method: Pre-selects a payment method on the 2Checkout hosted page (multi-page mode only). Options: Credit Card, Check, Acculynk PIN-Debit, PayPal, PayPal Later.
Page Type: Choose how the 2Checkout hosted page is structured.
-
Single Page Payment Routine displays everything on one screen and supports intangible (digital) products only.
-
Multi-Page Payment Routine works with all product types and all payment methods.
Skip Landing: Skip the 2Checkout order-review confirmation page and take the customer directly to the payment form.
Send Shipping Address: Forward the customer's shipping address fields to the 2Checkout payment page. Disable this for purely digital products to keep the checkout form shorter.

Thank-You Article: Optional — select a Joomla article to display on the confirmation page after a successful payment. Leave empty to show only the default confirmation message.
Restrict to Geo Zone: Only show 2Checkout as a payment option when the customer's billing address falls inside the selected geo zone. Leave empty to offer 2Checkout to all customers.
Order Status: The J2Commerce order status applied when a payment is confirmed by 2Checkout. Defaults to Confirmed.
NOTE: If the status you want isn't listed in the dropdown menu, you can create a new one by going to J2Commerce -> Setup -> Order Statuses
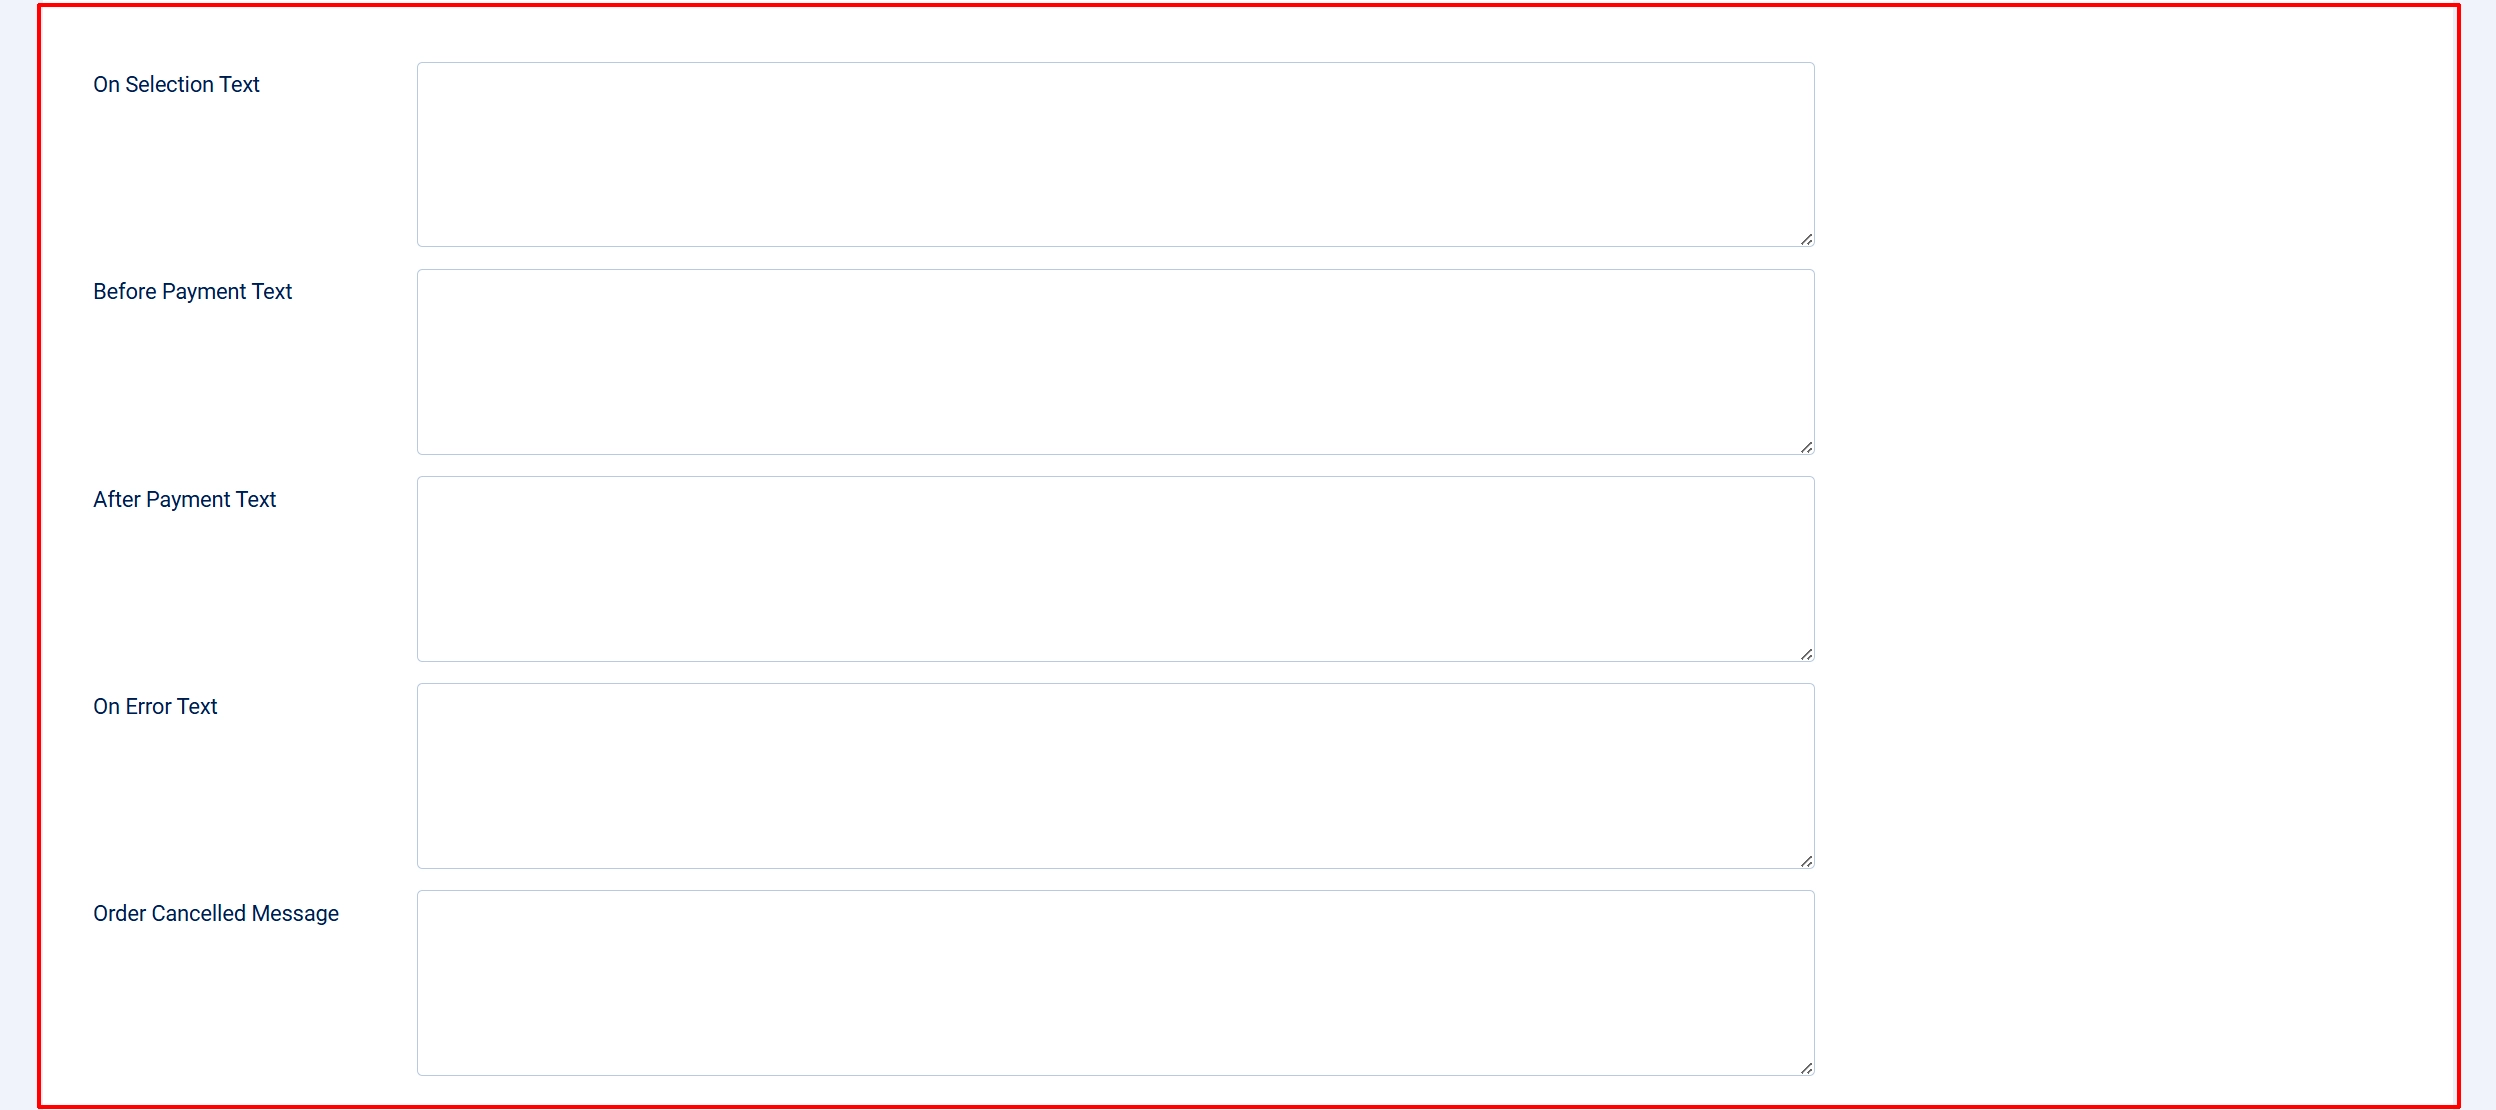
On Selection Text: Custom HTML or text displayed when the customer selects 2Checkout as their payment method during checkout.
Before Payment Text: Text displayed on the page just before the customer is redirected to 2Checkout. Use this for instructions such as "You will be redirected to a secure payment page."
After Payment Text: Text shown on the confirmation page after a successful payment return. Leave empty for the default thank-you message.
On Error Payment Text: Text shown if an error occurs (e.g., hash mismatch, invalid order). Keep this user-friendly and avoid technical details.
Cancel Payment Text: Text shown if the customer cancels payment on the 2Checkout page.

Button Text: Label on the button that sends the customer to the 2Checkout payment page.
Debug Logging: Write request and response details to logs/payment_2checkout.php in your Joomla logs directory. Turn this off in production once everything is confirmed working.
Surcharge Settings tab
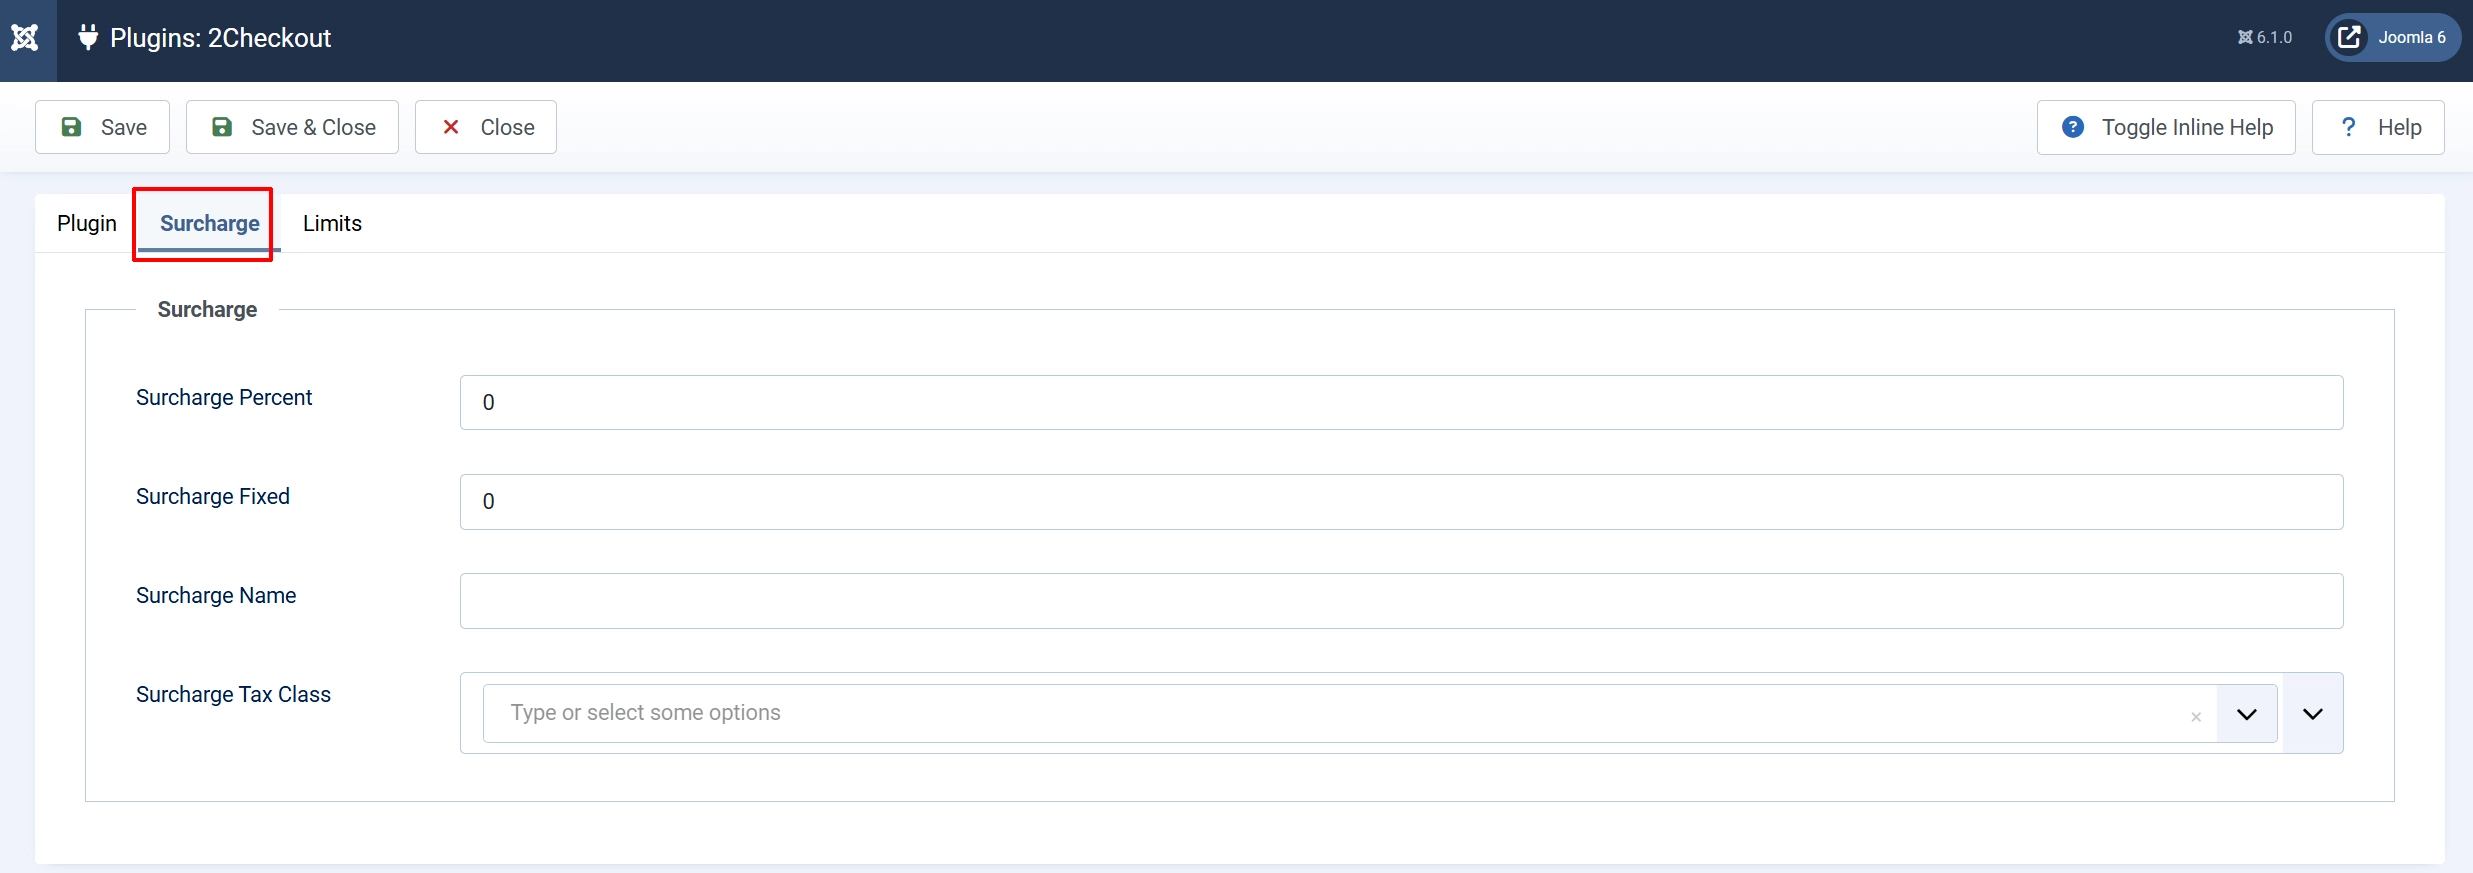
Use the Surcharge tab to add an optional fee when customers pay with 2Checkout. Both fields can be used together — for example, 1.5% plus a $0.30 fixed fee.
Surcharge Percent: Add a percentage of the order subtotal, shipping, and shipping tax as a surcharge. Enter 1.5 for 1.5%.
Surcharge Fixed: Add a flat fee on top of any percentage surcharge. Enter 0.30 for 30 cents.
Surcharge Name: The label shown in the cart for the surcharge line item (e.g., "Payment Processing Fee").
Surcharge Tax Class: Assign a tax profile to the surcharge if it should be taxed in your jurisdiction. Leave empty for no tax on the surcharge.
Limits Settings tab
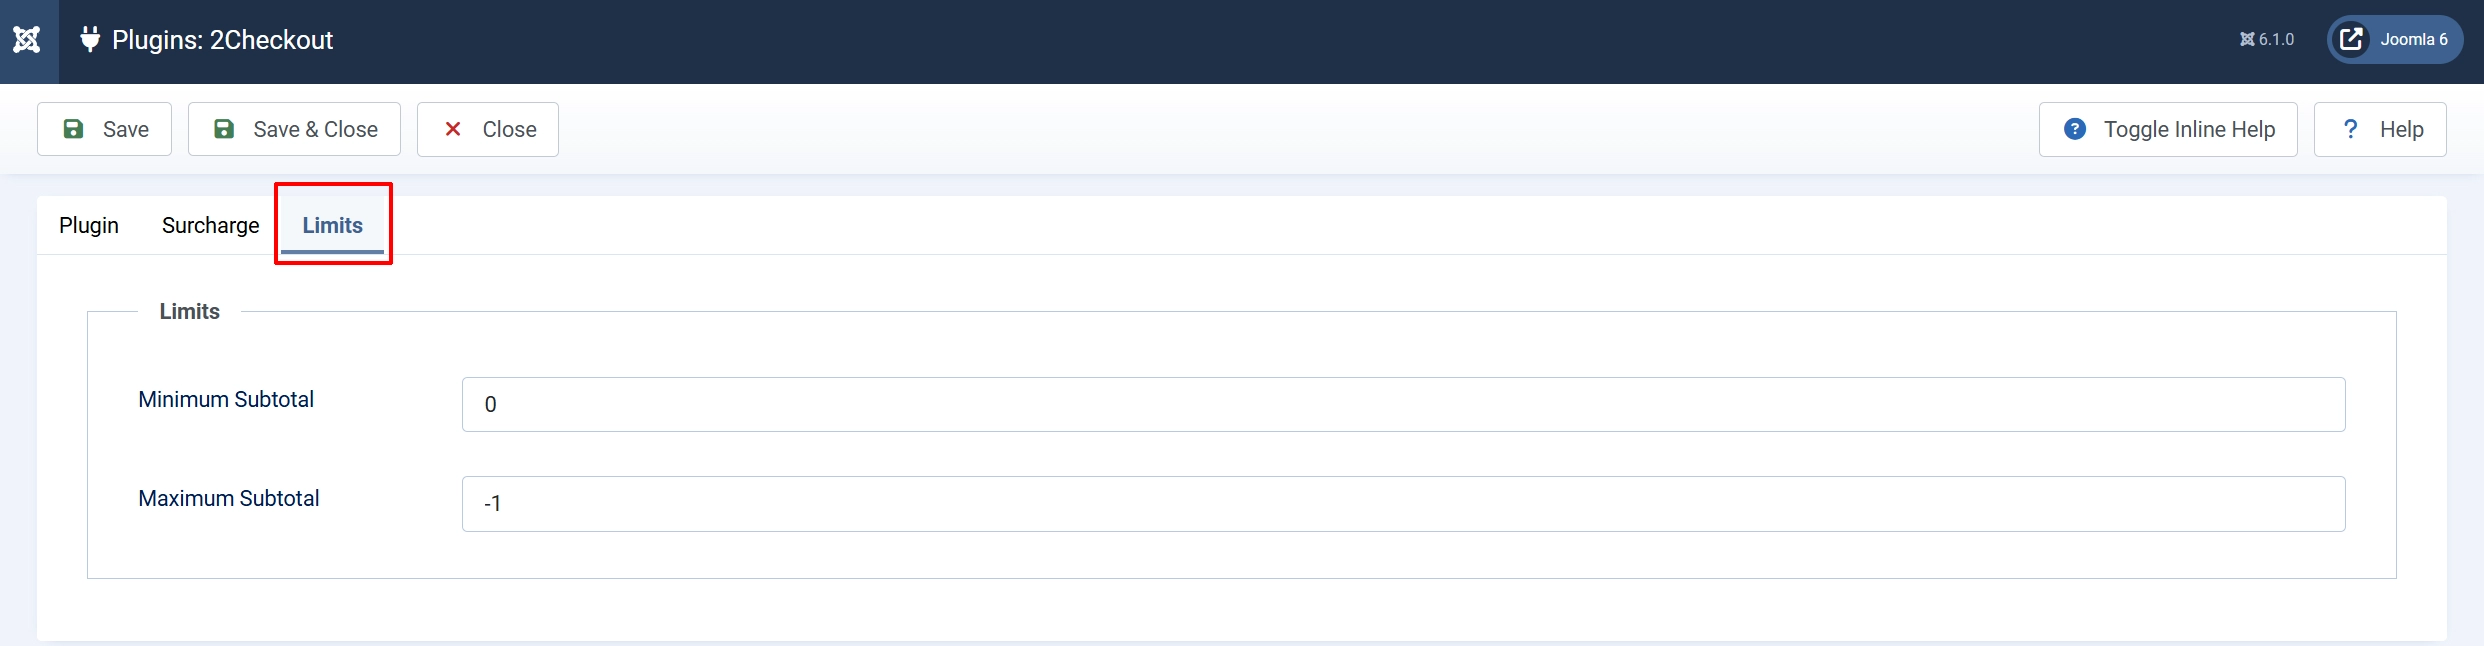
Use the Limits tab to restrict when 2Checkout appears as a payment option based on the order subtotal.
Minimum Subtotal: Hide 2Checkout if the cart subtotal is below this amount. Set to 0 to apply no minimum.
Maximum Subtotal: Hide 2Checkout if the cart subtotal exceeds this amount. Set to -1 to apply no maximum.
2Checkout Vendor Area Setup
You must register a notification URL in your 2Checkout merchant dashboard. Without this, your store will not receive fraud-status updates in the background, and orders may remain in a pending state even after 2Checkout approves the payment.
-
Log in to your 2Checkout / Verifone Central dashboard.
-
Go to Account -> Site Management.
-
Under the INS (Instant Notification Service) section, locate the Notification URL or INS URL field.
-
Paste the following URL (replace
https://yoursite.comwith your store's actual domain):
https://yoursite.com/index.php?option=com_j2commerce&view=checkout&task=checkout.confirmPayment&orderpayment_type=payment_2checkout&paction=validate
- Save the setting.
Tip: This same URL is shown as a read-only note inside the plugin settings panel (the IPN URL field) so you can copy it directly from J2Commerce without having to type it manually.
Sandbox Testing
To test the full payment flow before going live:
-
Enable Sandbox Mode in the plugin settings.
-
Make sure your Account Number (SID) and Secret Word are for your sandbox account, not your live account.
-
Place a test order on your storefront.
-
On the 2Checkout-hosted sandbox payment page, use one of the following test card numbers:
| Card Brand | Number | Expiry | CVV |
|---|---|---|---|
| Visa | 4000000000000002 | Any future date | Any 3 digits |
| Mastercard | 5200000000000007 | Any future date | Any 3 digits |
| Discover | 6011000000000004 | Any future date | Any 3 digits |
-
Complete the payment. You will be redirected back to your store.
-
Check J2Commerce -> Sales -> Orders to verify the order status changed to Confirmed.
-
When ready for live traffic, switch Sandbox Mode to No and update your SID and Secret Word with your live account credentials.
Frontend View
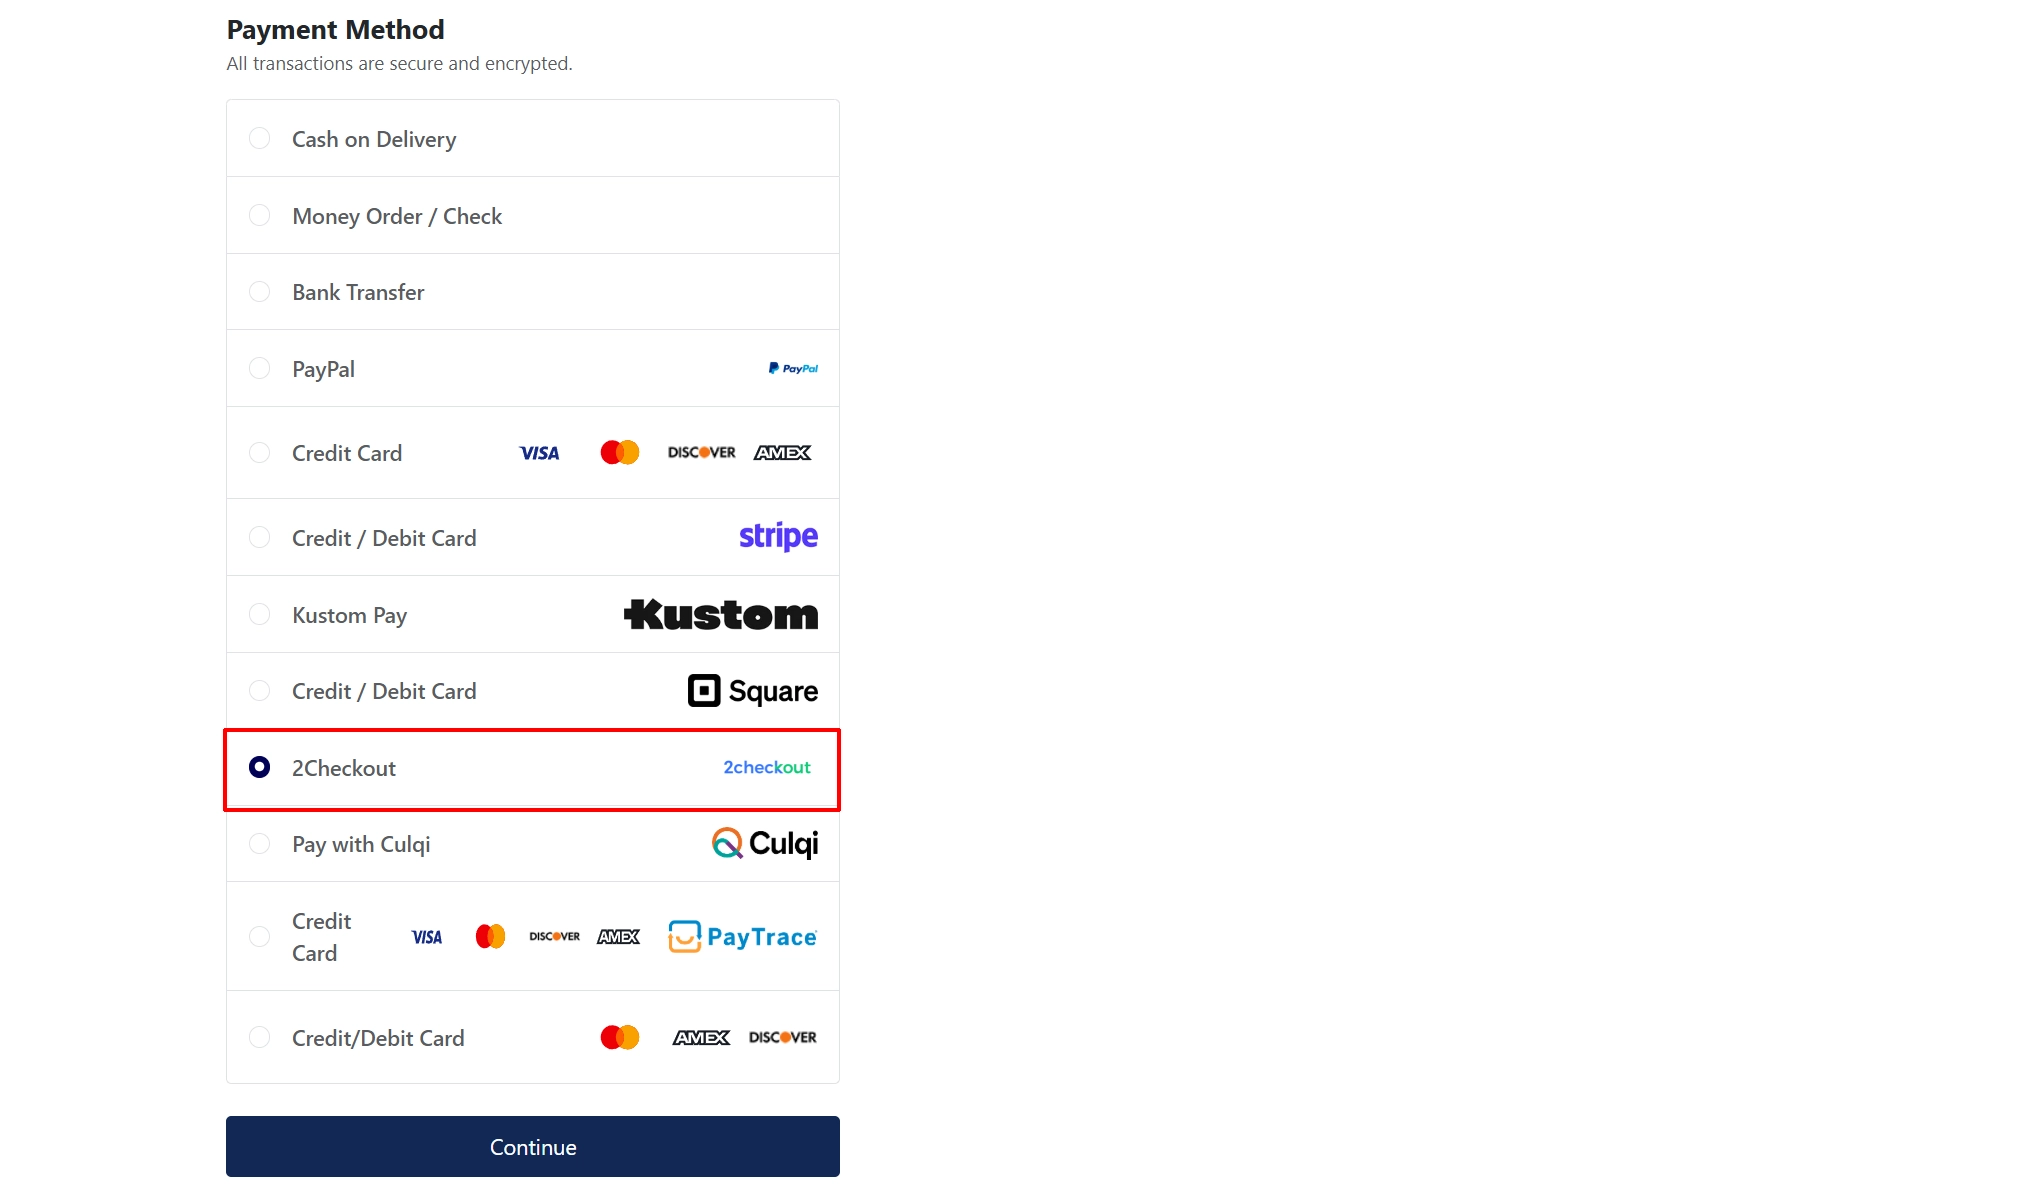
Order Flow
Here is what happens from the customer's perspective and behind the scenes:
- The customer adds items to the cart and proceeds to checkout.
- On the payment step, they select 2Checkout and click Place Order (or whatever button text you configured).
- J2Commerce builds a hidden POST form pre-filled with the order total, billing address, shipping address (if enabled), and your SID, then submits it to the 2Checkout payment page.
- The customer enters their card details (or selects PayPal, check, or another available method) on the secure 2Checkout-hosted page.
- After the customer submits payment, 2Checkout redirects them back to your store at the return URL. J2Commerce verifies the MD5 hash using your Secret Word and confirms the payment total matches the stored order total. If both checks pass, the order status is updated to Confirmed and the customer sees your confirmation message.
- In parallel, 2Checkout sends a background INS notification to the URL you registered in step 4 of 2Checkout Vendor Area Setup. This updates the order status based on the fraud review result (pass, fail, or wait) and records the transaction details without relying on the customer's browser being open.
Status Mapping
2Checkout communicates payment and fraud results through two channels: the return URL redirect and the background INS notification. The plugin maps these results to J2Commerce order statuses as follows.
Return URL (customer redirect):
| 2Checkout Result | J2Commerce Status | Condition |
|---|---|---|
invoice_status = approved and hash valid | Confirmed (status 1, or your configured status) | Payment accepted |
| Hash mismatch or not approved | Failed (status 3) | Security check failed |
INS Fraud Status notification:
2Checkout fraud_status | J2Commerce Status | Meaning |
|---|---|---|
pass | Confirmed (your configured Confirmed Order Status) | Fraud review passed |
fail | Failed (status 3) | Fraud review flagged the transaction |
wait | Pending (status 4) | Fraud review is still in progress |
Troubleshooting
"The MD5 hash did not match."
Cause: The Secret Word in your plugin settings does not match the one set in your 2Checkout dashboard, or the order total used in the hash calculation changed between checkout and return (for example, a currency rounding difference).
Solution:
- Log in to your 2Checkout dashboard and go to Account -> Site Management.
- Copy the Secret Word exactly as it appears, including any capital letters, numbers, or special characters.
- Paste it into the Secret Word field in the J2Commerce plugin settings.
- Save and retry a test transaction.
- If the error persists with matching values, enable Debug Logging and review
logs/payment_2checkout.phpin your Joomla logs directory for the exact values being compared.
"There was an error in the payment process"
Cause: The order ID in the return URL does not match any order in J2Commerce, or the order was placed with a different payment method and 2Checkout is sending a notification for the wrong gateway.
Solution:
- Enable Debug Logging in the plugin settings.
- Complete a test transaction and then open
logs/payment_2checkout.phpin your Joomla logs directory. - Look for
Return-URL gateway mismatchororder_id=entries to identify what is being received versus what J2Commerce expects. - If you see
order_idas empty, check that your server does not strip query string parameters at the return URL.
Orders stay in Pending after a successful payment
Cause: The INS (background notification) URL was not registered in your 2Checkout dashboard, or the URL is unreachable from the 2Checkout servers (for example, a firewall or a staging site on a private network).
Solution:
- Confirm the INS URL is set correctly in your 2Checkout dashboard (see 2Checkout Vendor Area Setup).
- Make sure your store is publicly accessible at that URL.
- Enable Debug Logging and check
logs/payment_2checkout.phpfor entries taggedFraud Status URL response. If there are none, 2Checkout's INS call is not reaching your server.
Debug log location
When Debug Logging is enabled, all request and response data (with sensitive fields like hash keys and card numbers removed) is written to:
[Joomla root]/logs/payment_2checkout.php
Open this file in a text editor to review the raw data exchanged between J2Commerce and 2Checkout. Disable debug logging once you have finished troubleshooting.
Migration from J2Store
If you were using the 2Checkout payment plugin on a J2Store store and have migrated to J2Commerce using the J2Commerce migration tool, your plugin parameters are carried over automatically. The field names (SID, Secret Word, sandbox flag, language settings) are identical between the J2Store and J2Commerce versions of this plugin, so no manual reconfiguration is needed.
The INS URL format has not changed. If you previously registered a notification URL in your 2Checkout dashboard, it remains valid. The paction=validate handler still processes FRAUD_STATUS_CHANGED notifications the same way as before.
What's New in J2Commerce
The J2Commerce version of this plugin includes several improvements over the original J2Store plugin:
- Timing-safe hash verification — the MD5 hash comparison on both the return URL and the INS notification now uses a constant-time comparison function, closing a theoretical timing-attack vector present in the J2Store version.
- IDOR protection — when processing a return or notification, the plugin verifies that the incoming gateway identifier matches
payment_2checkoutand that the reported order total matches the stored total before updating any order record. - Full order status event chain — order status changes now route through J2Commerce's
OrderModel::updateOrderStatusmethod, which fires theonJ2CommerceOrderStatusChangeevent. This means order notification emails, webhooks, and any other status-change listeners registered by other plugins work correctly with 2Checkout payments. - Sensitive data stripped from logs — the debug log never records the MD5 hash key, card numbers, CVV values, or your Secret Word. Only non-sensitive transaction fields are written.
- Native Joomla 6 MVC — all FOF 2 framework dependencies have been removed. The plugin runs entirely on native Joomla services with full PHP 8.3 strict-type support.
- Configurable success status — the Confirmed Order Status setting lets you map a successful 2Checkout payment to any J2Commerce order status, not just the hard-coded default.
- Surcharge support — add a percentage and/or fixed fee when customers choose 2Checkout, identical to the surcharge system used by other J2Commerce payment plugins.
- Subtotal limits — show or hide 2Checkout based on minimum and maximum cart subtotal thresholds.