Redde Payment
The Redde Payment plugin lets your J2Commerce store accept Visa, Mastercard, and other major credit and debit cards through your Redde account (Redde is powered by the Maverick Payments gateway). Customers can pay without ever leaving your checkout, and you manage captures, refunds, and voids directly from the J2Commerce order screen.
You can collect card details right on your checkout page (Direct mode) or send shoppers to a secure Redde-hosted payment page (Hosted Form mode). Logged-in customers can also save a card for faster checkout next time, and you can turn on 3-D Secure for extra fraud protection.
Requirements
- PHP 8.3.0 +
- Joomla! 6.x
- J2Commerce 6.x
- A Redde / Maverick Payments merchant account
- Your store must be reachable over HTTPS (required for card payments and for the gateway to send webhook notifications)
Get Your Redde Credentials
Before you configure the plugin, log in to your Redde Dashboard and collect the following. You will find separate values for Sandbox (testing) and Live (real payments).
- Gateway API Token — under Developers. This authorizes card transactions (sale, refund, authorize, capture).
- Terminal ID — under Terminals. This is the system terminal ID sent on every transaction. It is required — payments will fail without it.
- Dashboard API Token — under Developers. Used for saved cards and recurring payments.
- DBA ID — under Merchant. Used together with the Dashboard token for saved cards.
- Webhook Signature Secret — the SHA-512 signing secret set on your webhook endpoint. Used to verify that notifications genuinely come from Redde.
The Terminal ID, DBA ID, and merchant ID are different values. Be sure to copy the Terminal ID exactly as shown in the Dashboard.
Purchase and download
This plugin is a separate add-on available from the J2Commerce Extensions Store. It is not included with the core J2Commerce 6 component.
- Go to the J2Commerce website and locate Redde.
- Add it to your cart and complete checkout.
- Go to My Downloads under your account profile and find the plugin.
- Click Available Versions -> View Files -> Download Now to download the ZIP file.
Install the plugin
In the Joomla Administrator, go to System -> Install -> Extensions.
Upload the plg_j2commerce_payment_redde.zip file.

Enable the Plugin
Once you have installed the App, you will need to enable it. There are two ways you can access the App.
Option A: Go to the J2Commerce icon at the top right corner -> Setup -> Payment Methods
Option B: Go to Components on the left sidebar -> J2Commerce -> Dashboard -> Setup -> Payment Methods

To help you narrow down the list, you can do a search for Redde, click the X, and it will turn into a green checkmark. It is now enabled and ready for setup.
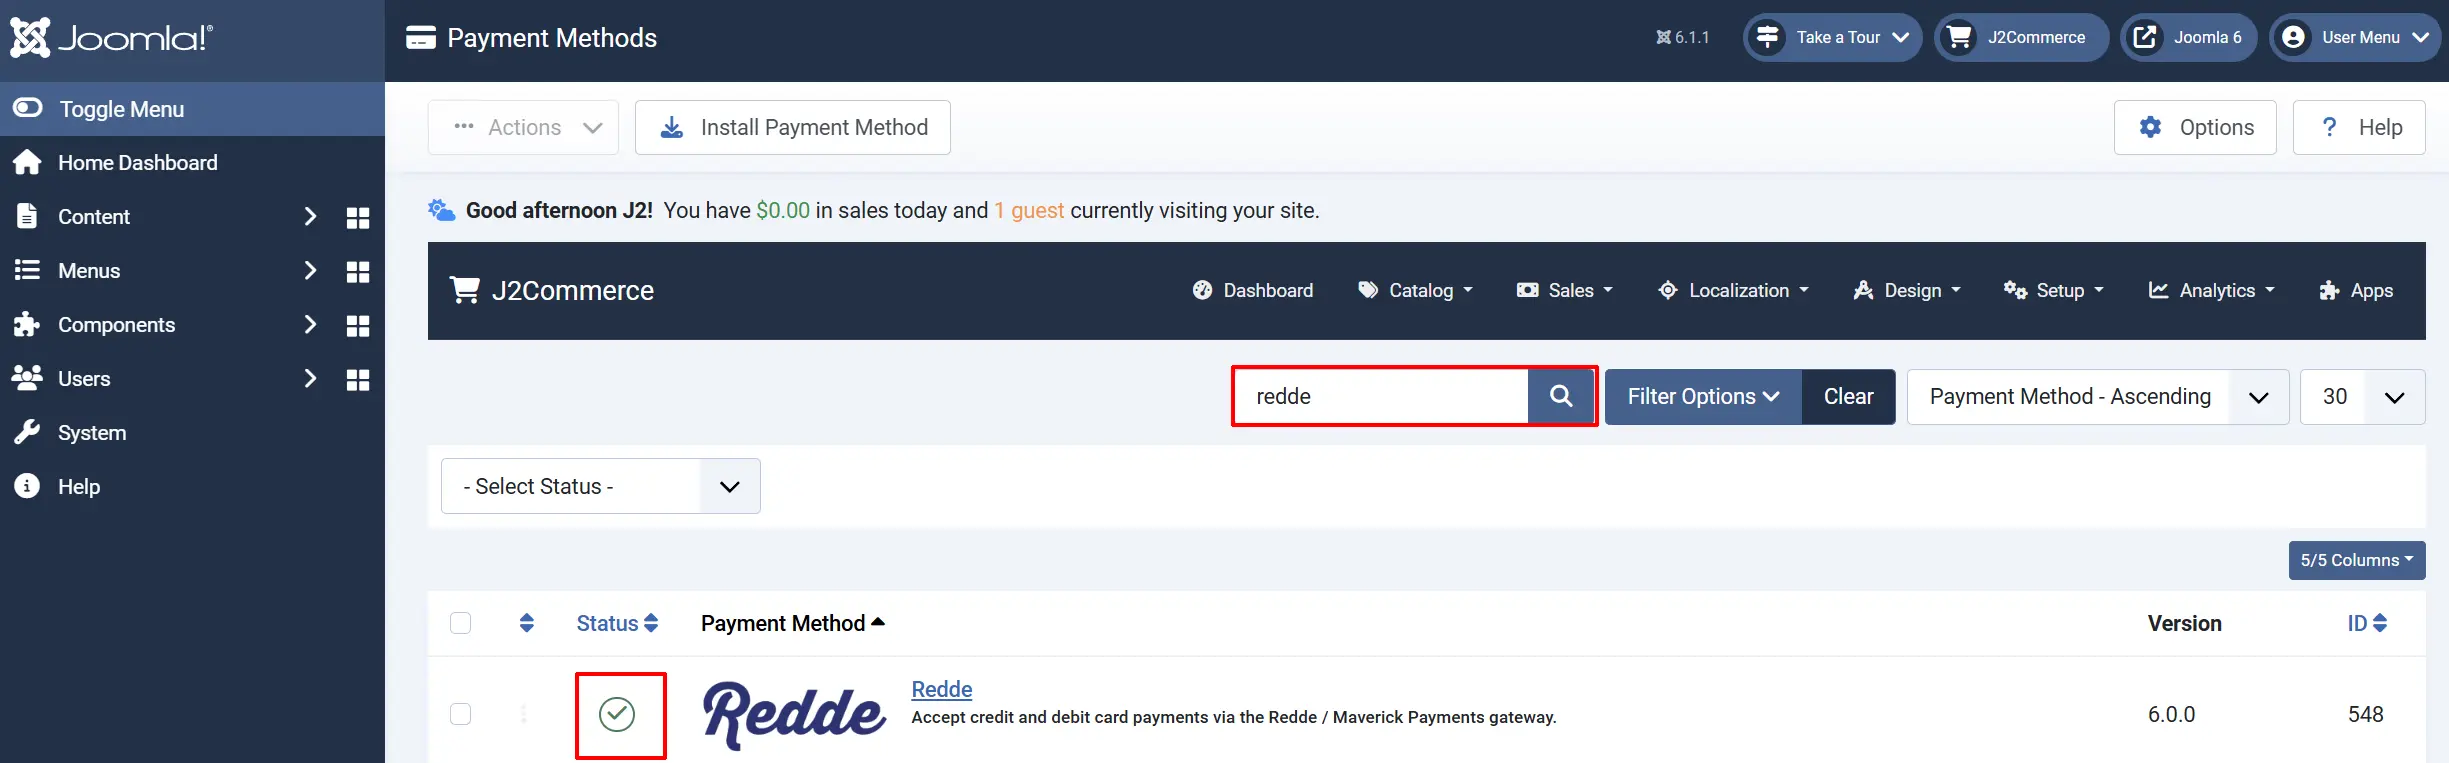
Configure the plugin
Click the Redde title next to the green checkmark to open the configuration screen.
Click the Toggle Inline Help button at the top of any plugin configuration page to show a short description beneath each field.

Display Settings
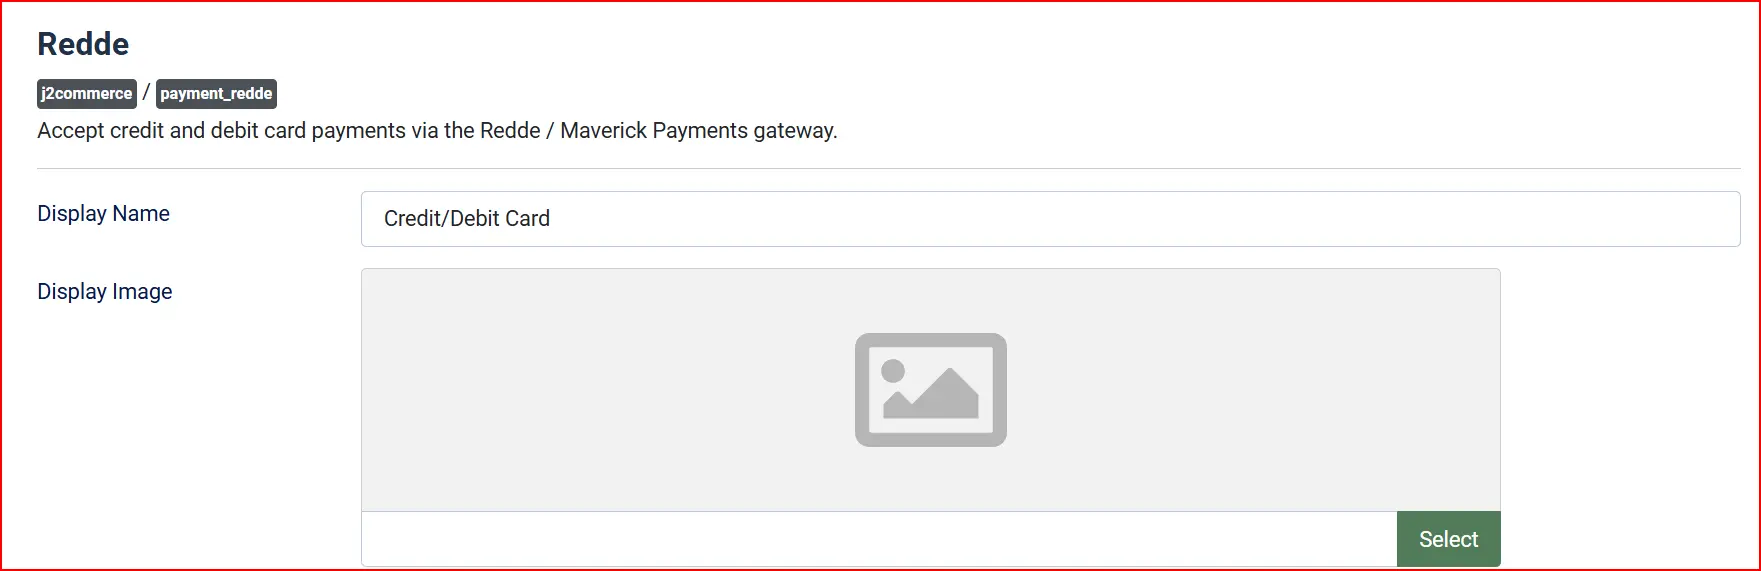
Display Name — the label customers see at checkout (default: Credit/Debit Card).
Display Image — an optional logo shown next to the payment option.
API Credentials
Mode — choose Sandbox (Testing) while you set things up, then switch to Live (Production) to take real payments. The plugin shows the matching credential fields depending on which environment you pick.
In Sandbox mode no real money is taken, and the plugin displays a reminder that you are in test mode.
Credentials
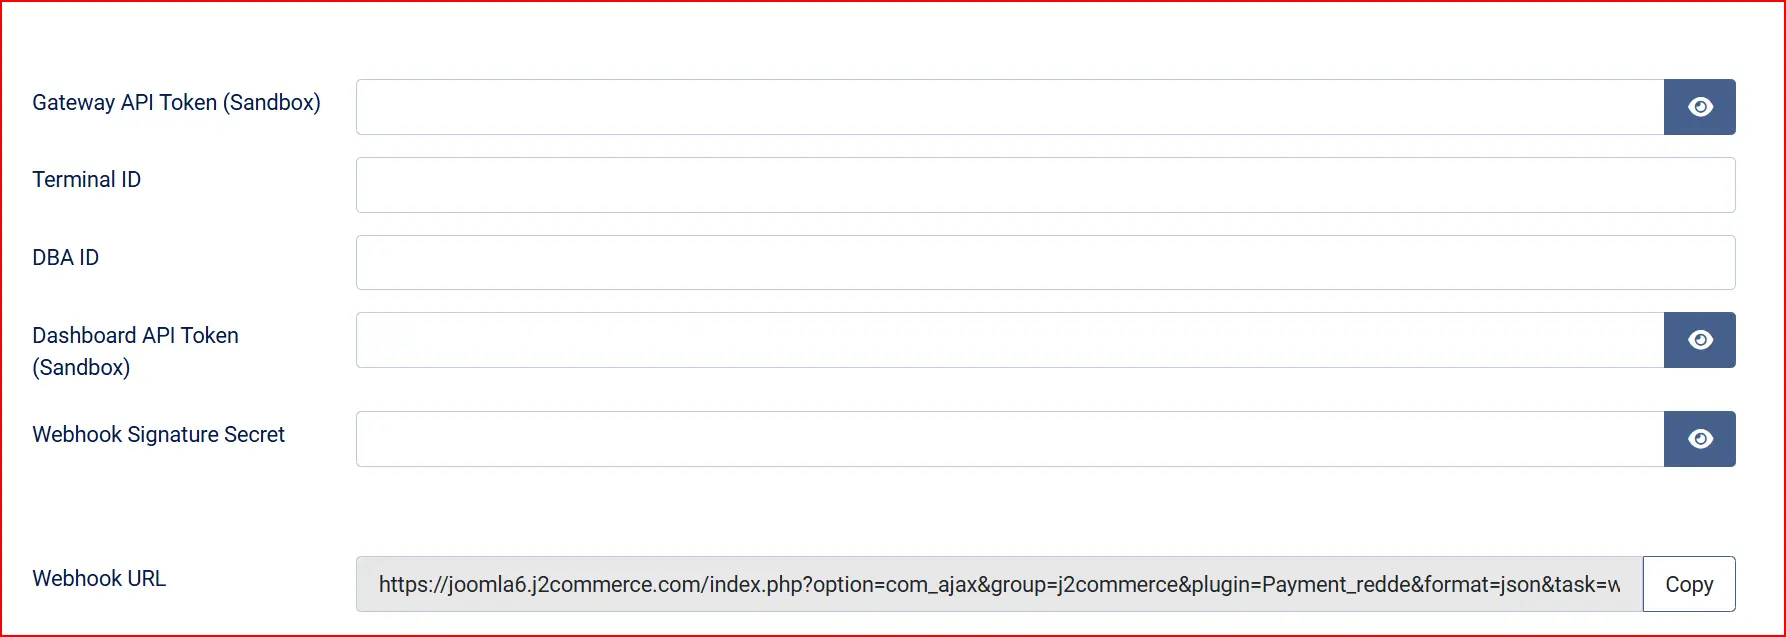
Enter the tokens you collected from your Redde Dashboard:
Gateway API Token: Bearer access token for the sandbox gateway host (sandbox-gateway.maverickpayments.com). Find it in your Redde Dashboard under Developers.
Terminal ID (required): The Redde/Maverick terminal ID (system terminal id) sent on every gateway transaction. Find it in your Dashboard under Terminals.
DBA ID: The DBA (merchant) ID used for vaulted cards and recurring payments. Find it in your Dashboard under Merchant.
Dashboard API Token: Bearer access token for the sandbox dashboard host (sandbox-dashboard.maverickpayments.com), used for the customer vault and recurring payments.
Webhook Signature Secret: The SHA-512 signing secret configured for your webhook endpoint in the Redde Dashboard. Used to verify incoming webhook notifications.
Webhook URL
Webhook URL — the plugin displays the address you must paste into your Redde Dashboard webhook settings. This lets Redde notify your store when a payment is confirmed. Click Copy to copy it.
If the Webhook URL shows a local address (such as localhost), the gateway cannot reach it. Use your public store URL, or a tunnel such as ngrok, when testing.
Integration Method

-
Integration Method — choose how card details are collected:
- Direct (On-site Card Fields) — customers type their card on your checkout page. This enables the Saved Cards and 3-D Secure options below.
- Hosted Form (Redirect) — customers are sent to a secure Redde-hosted page to pay, then returned to your store.
Payment Action
-
Payment Action — choose what happens when a customer pays:
- Authorize and Capture (Sale) — charges the card immediately.
- Authorize Only — places a hold on the card; you Capture it later from the order screen.
Card Features (Direct mode only)

Allow Saved Cards — let logged-in customers securely save a card for faster checkout next time.
Enable 3-D Secure — turn on 3-D Secure 2 authentication for extra fraud protection. Your Redde terminal must have 3-D Secure enabled for this to work.
Template Style: Choose the checkout layout style — Bootstrap 5 or UIkit. Defaults to your site's active J2Commerce theme.
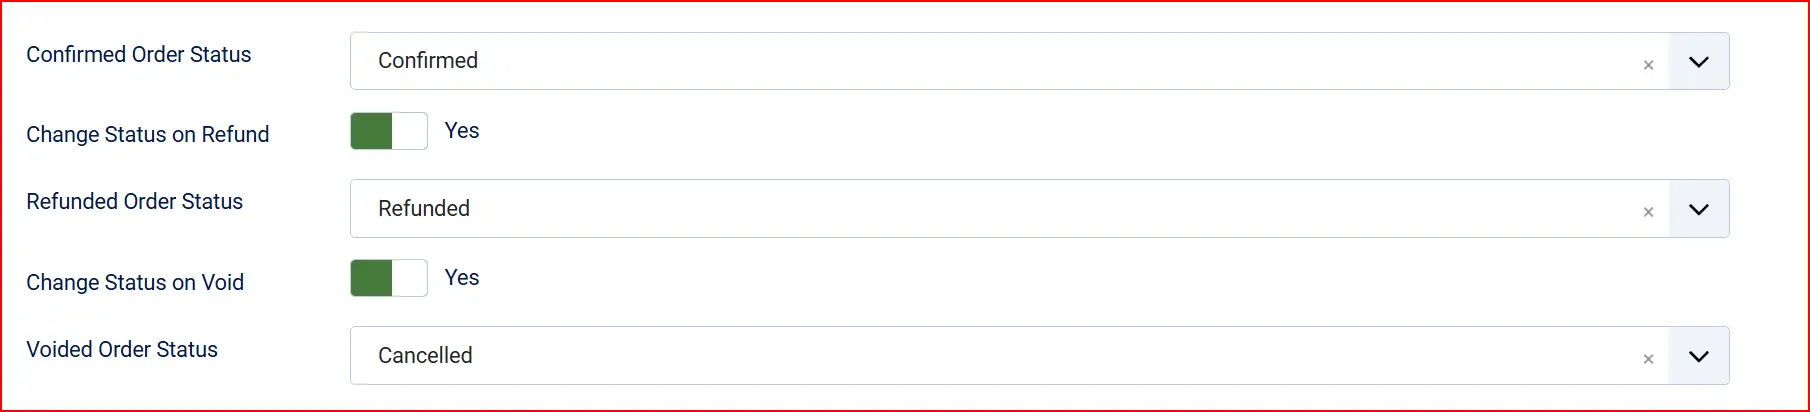
Order Status
Order Status — the status applied after a successful payment.
Authorized Order Status — (shown when Payment Action is Authorize Only) the status applied when a payment is authorized but not yet captured.
Change Status on Refund / Refunded Order Status — optionally move the order to a chosen status when you issue a refund.
Change Status on Void / Voided Order Status — optionally move the order to a chosen status when you void a payment.
If the order status you want is not listed, create it first under J2Commerce -> Setup -> Order Statuses.

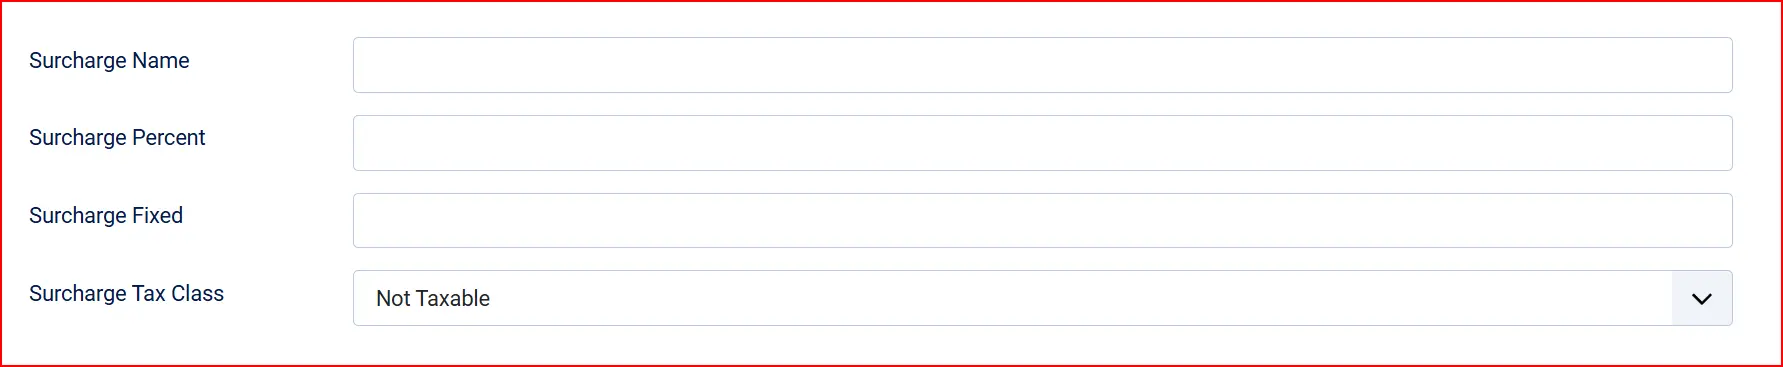
Surcharge (optional)
Add a fee for paying by card:
Surcharge Name — the label shown on the order.
Surcharge Percent — a percentage of the order total.
Surcharge Fixed — a flat amount.
Surcharge Tax Class — the tax profile applied to the surcharge.
Restriction (optional)

Control when Redde is offered at checkout:
Geozone Restriction — show Redde only to customers in a chosen geographic zone.
Minimum Order Subtotal: Hide this payment method for orders below this amount. Enter -1 to disable the limit.
Maximum Order Subtotal: Hide this payment method for orders above this amount. Enter -1 to disable the limit.
Checkout Messages
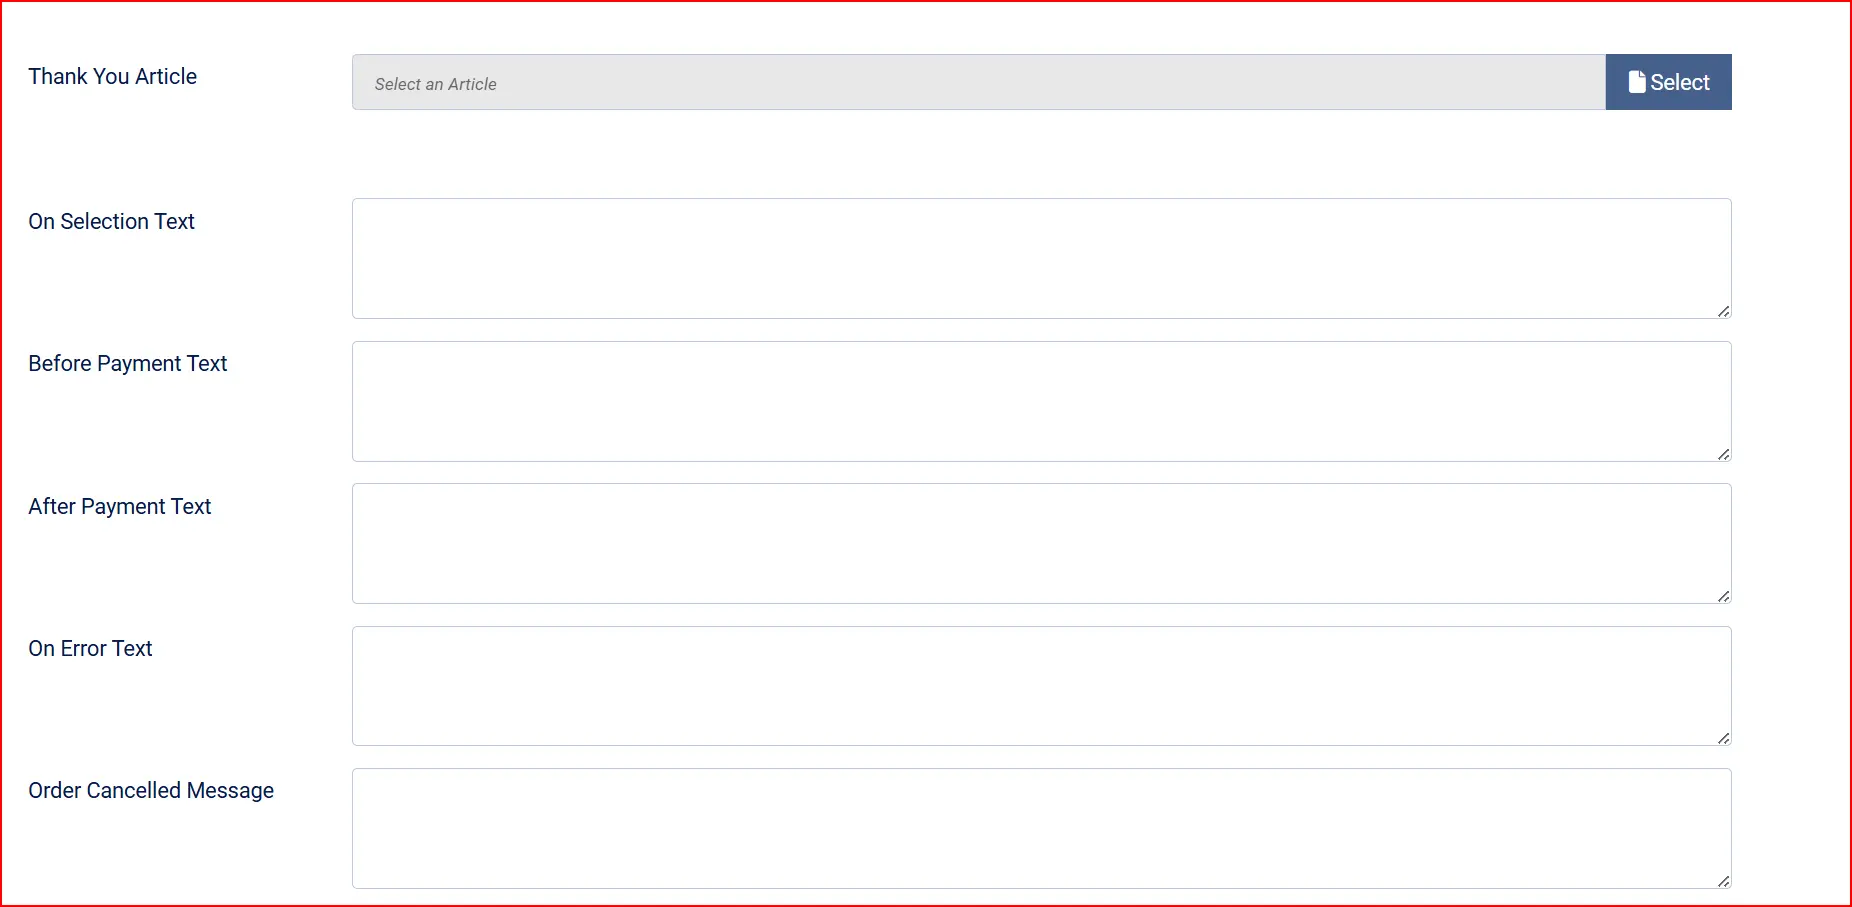
These optional text fields let you customise what customers see at each stage of the payment flow.
Thank-You Article: Optional Joomla article to display after a successful payment
On Before Payment: Text shown before the customer is redirected to Barclaycard
On After Payment: Text shown on the order confirmation page after a successful payment
On Error: Text shown when a payment error occurs
On Cancel: Text shown when the customer cancels on the Barclaycard page
Advanced Settings

Show Dashboard Icon: Adds a shortcut icon for this plugin to the J2Commerce dashboard
Icon Label: Custom label for the dashboard icon
Debug Logging — log gateway requests and responses (with sensitive data masked) to the Joomla log to help troubleshoot. Turn this off in production.
How It Works
When a customer reaches checkout:
- Redde appears as a payment option (subject to your geozone and subtotal rules).
- In Direct mode the customer enters their card on your page; in Hosted Form mode they are redirected to Redde to pay.
- If 3-D Secure is enabled, the customer may be asked to confirm the payment with their bank.
- The gateway charges (or authorizes) the card and returns the result.
- Redde sends a signed webhook notification, which the plugin verifies and uses to confirm the order.
- The order status is updated according to your Order Status Mapping settings.
Redde processes in US Dollars. If your store sells in another currency, J2Commerce converts the order total to the gateway amount automatically — the customer is still shown your store currency.
Managing Payments from the Order
Open any Redde order in J2Commerce -> Sales -> Orders and use the buttons in the order view:
- Capture — collect a payment that was placed on hold using Authorize Only.
- Void — cancel a payment before it settles. This cannot be undone.
- Refund — return money to the customer. Enter an amount for a partial refund, or leave it for the full amount.
Saved Cards
When Allow Saved Cards is enabled (Direct mode), logged-in customers can tick Save this card for future purchases at checkout. On their next order they can choose Use a saved card instead of re-entering the details, or Use a new card. Card details are stored securely in the gateway's vault — never on your site.
Tips
- Test in Sandbox first — complete a full test order in Sandbox mode before switching to Live.
- Double-check the Terminal ID — a missing or wrong Terminal ID is the most common cause of failed payments.
- Set up the webhook early — paste the Webhook URL into your Redde Dashboard so order confirmations arrive reliably.
- Use Authorize Only for pre-orders — place a hold now and capture when you ship.
- Disable Debug Logging in production — leave it on only while troubleshooting.
Troubleshooting
Redde Does Not Appear at Checkout
Cause: The plugin is disabled, or an availability rule is excluding the cart.
Solution:
- Go to J2Commerce -> Setup -> Payments and confirm Redde shows a green checkmark (enabled).
- Check the Geozone Restriction and Minimum / Maximum Subtotal settings — the current cart may fall outside them.
- Confirm the customer's address falls inside the selected geozone.
"Gateway token is not configured" Message
Cause: The Gateway API Token for the selected environment is empty.
Solution:
- Open the plugin settings and confirm you are on the correct Environment/Mode (Sandbox vs Live).
- Paste the matching Gateway API Token from your Redde Dashboard and save.
Payments Are Declined or Fail
Cause: Missing Terminal ID, wrong environment, or a card issue.
Solution:
- Confirm the Terminal ID is entered exactly as shown in your Dashboard (required on every transaction).
- Make sure the Environment/Mode matches your credentials (Sandbox tokens only work in Sandbox).
- Ask the customer to verify their card details or try a different card.
- Turn on Debug Logging temporarily and review the Joomla log for the gateway's response.
Orders Stay Unpaid After a Successful Payment
Cause: Redde cannot reach your webhook URL.
Solution:
- In the plugin settings, copy the Webhook URL and confirm it is set in your Redde Dashboard.
- Make sure the URL is publicly reachable over HTTPS (not a local address).
- Confirm the Webhook Signature Secret in the plugin matches the one in your Dashboard.
3-D Secure Is Not Triggering
Cause: 3-D Secure is off, or it is not enabled on your terminal.
Solution:
- Set Enable 3-D Secure to Yes in the plugin (Direct mode only).
- Confirm 3-D Secure is enabled for your terminal in the Redde Dashboard.