Affirm (Pay Over Time)
Affirm is a buy-now-pay-later financing platform that lets your customers split a purchase into monthly payments — without a credit card. At checkout, shoppers click Pay with Affirm, complete a quick financing application inside a secure Affirm pop-up, and return to your store with their order confirmed. The whole process takes about a minute and requires no card vault on your end.
This plugin is a separate add-on available from the J2Commerce Extensions Store. It is not included with the core J2Commerce 6 component.
Requirements
- J2Commerce 6.0 or later installed and active
- Joomla 6.0 or later
- An approved Affirm merchant account — apply at affirm.com or contact Affirm directly
- Sandbox and live API keys (Public Key and Private Key) from your Affirm merchant dashboard
- Affirm is available for United States (USD), Canada (CAD), and United Kingdom (GBP) only
Set Up an Affirm Merchant Account
If you already have Affirm API credentials, skip to Enable the Plugin.
- Apply for an Affirm merchant account at affirm.com or contact Affirm's merchant support team.
- Once approved, log into your Affirm merchant dashboard.
- Navigate to the API keys section and note your Public Key and Private Key for both the sandbox and live environments.
- Keep the Private Key secret — treat it like a password and never share it or paste it anywhere public.
The Public Key is safe for the browser and is used by the Affirm.js checkout widget. The Private Key stays on your server and is used only for server-to-server API calls.
Affirm provides a separate set of sandbox (test) API keys. You can test the full checkout flow without processing real loans before you go live.
Purchase and download
This plugin is a separate add-on available from the J2Commerce Extensions Store. It is not included with the core J2Commerce 6 component.
- Go to the J2Commerce website and locate Affirm.
- Add it to your cart and complete checkout.
- Go to My Downloads under your account profile and find the plugin.
- Click Available Versions -> View Files -> Download Now to download the ZIP file.
Install the plugin
In the Joomla Administrator, go to System -> Install -> Extensions.
Upload the plg_j2commerce_payment_affirm.zip file.

Enable the Plugin
Once you have installed the App, you will need to enable it. There are two ways you can access the App.
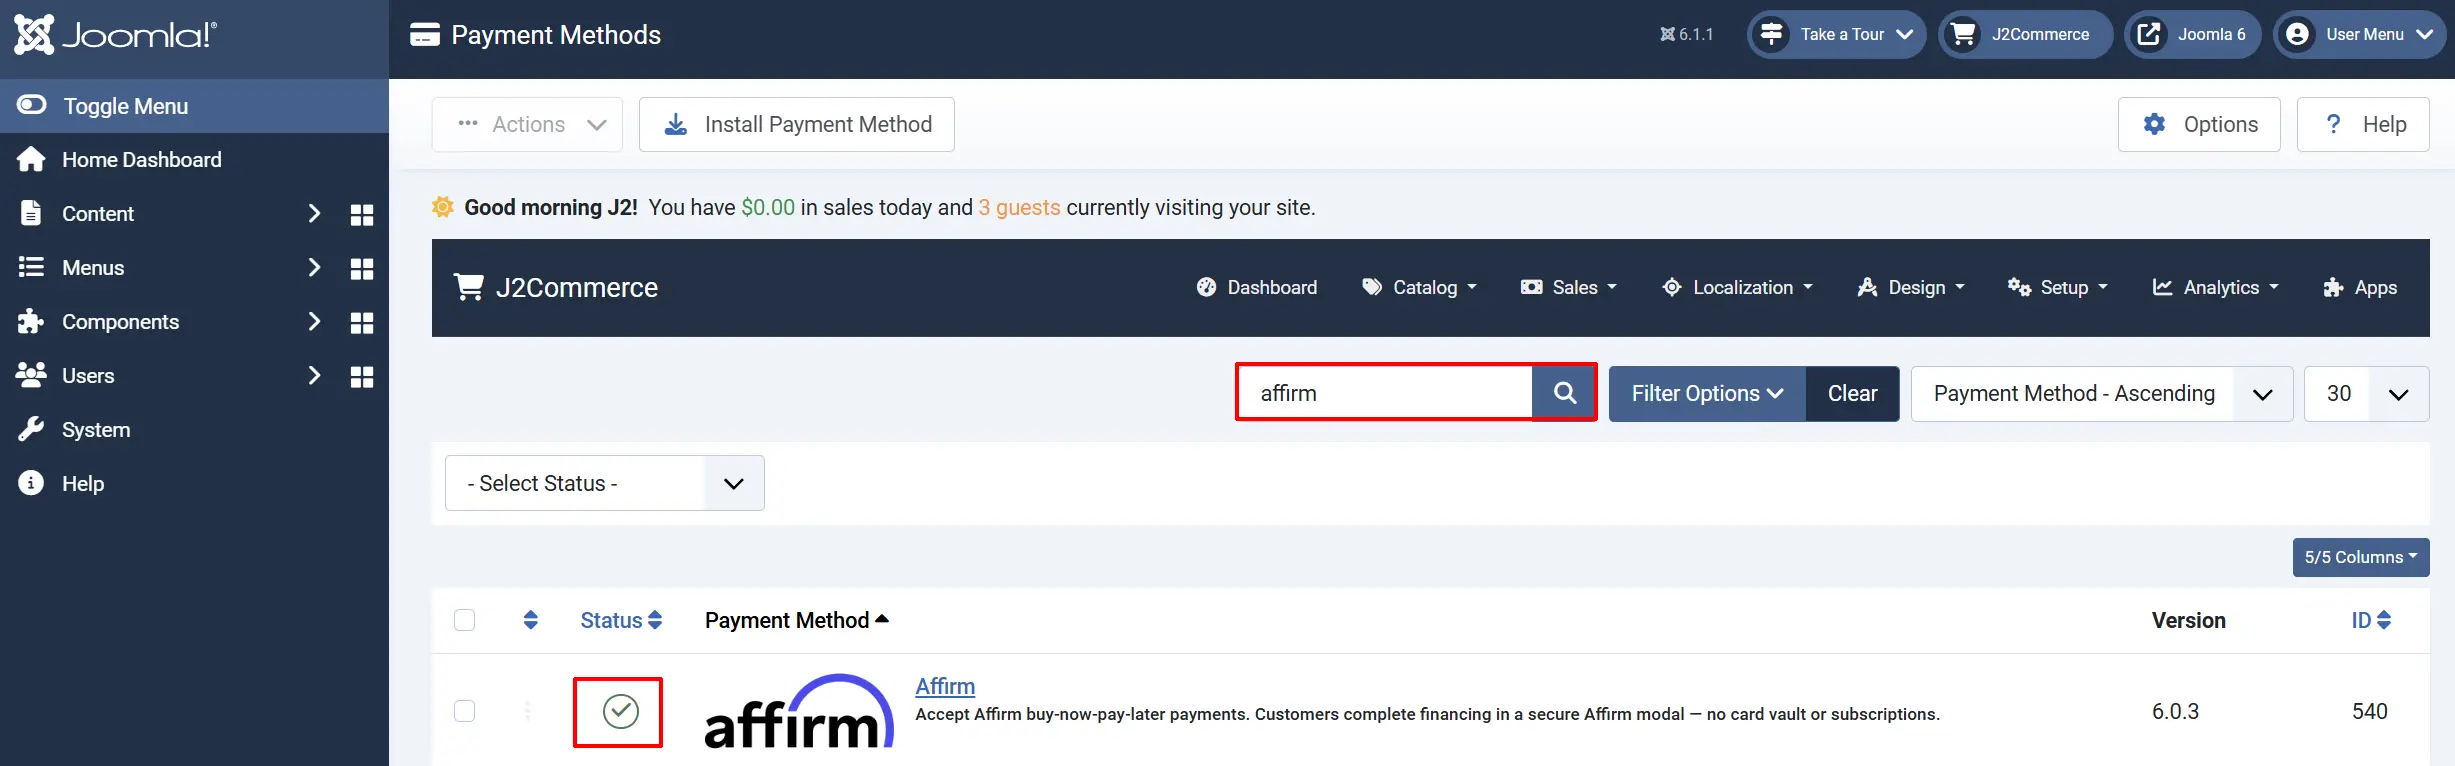
Option A: Go to the J2Commerce icon at the top right corner -> Setup -> Payment Methods
Option B: Go to Components on the left sidebar -> J2Commerce -> Dashboard -> Setup -> Payment Methods

To help you narrow down the list, you can do a search for Affirm, click the X, and it will turn into a green checkmark. It is now enabled and ready for setup.
Configure the plugin
Click the Affirm title next to the green checkmark to open the configuration screen.
Click the Toggle Inline Help button at the top of any plugin configuration page to show a short description beneath each field.
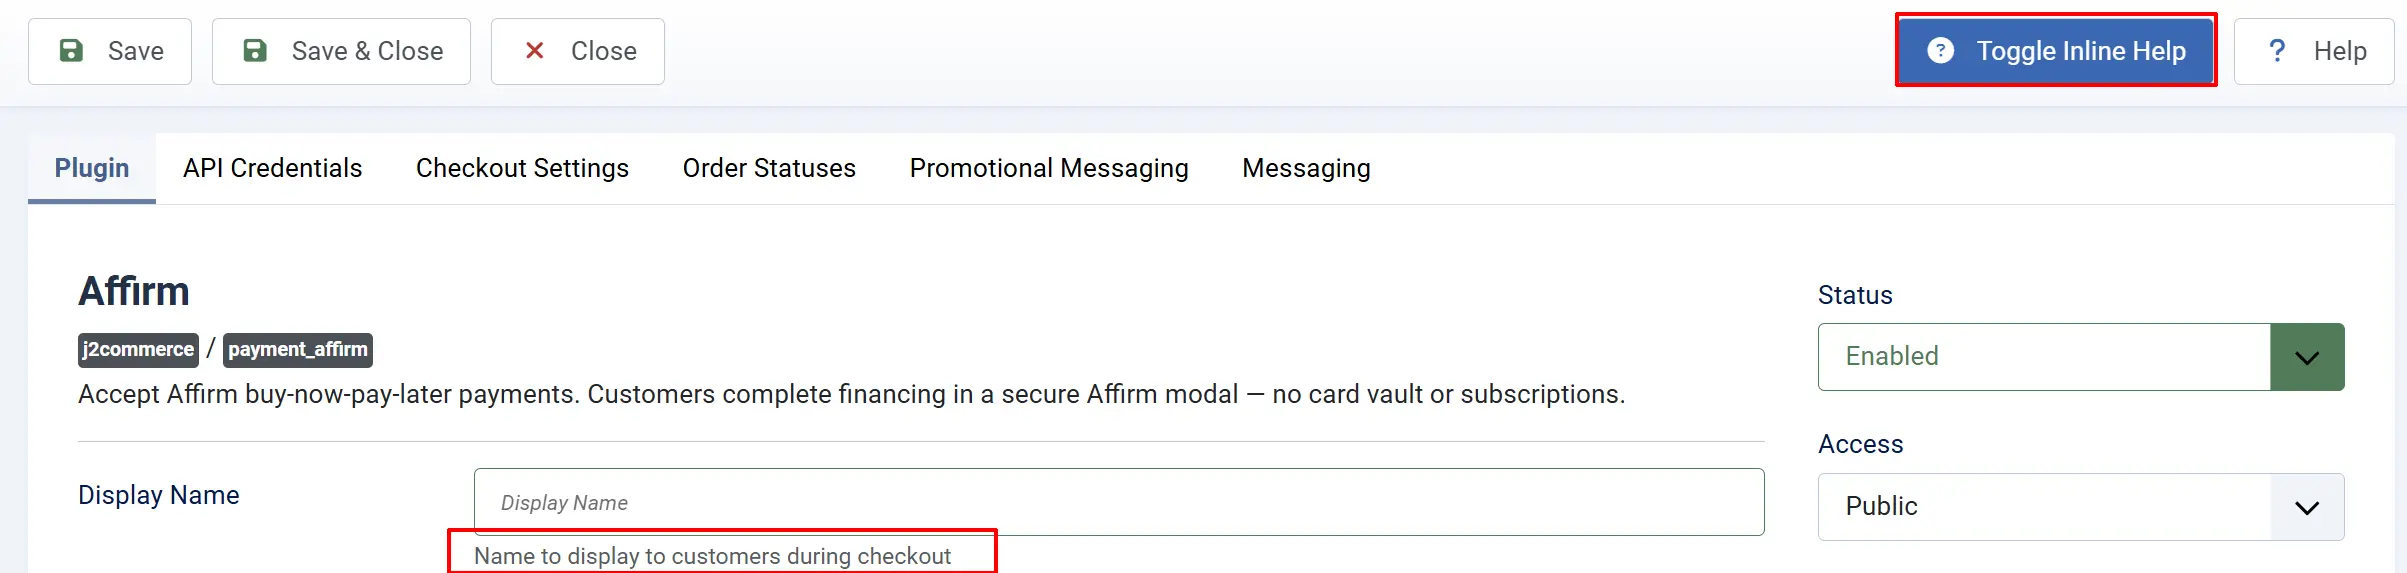
Display tab

Display Name: The payment method label shown to shoppers at checkout — e.g., "Pay Over Time with Affirm"
Display Image: Optional badge or logo shown alongside the payment option at checkout
Template Style: Choose the checkout template style — Bootstrap 5 or UIkit — to match your site's frontend framework
Match this to your active Joomla template: most templates use Bootstrap 5. Use UIkit if your template is UIkit-based (e.g., YOOtheme Pro).
Debug Logging: Log Affirm API requests and responses to the Joomla system log. Useful for troubleshooting — turn off in production.
API Credential tab
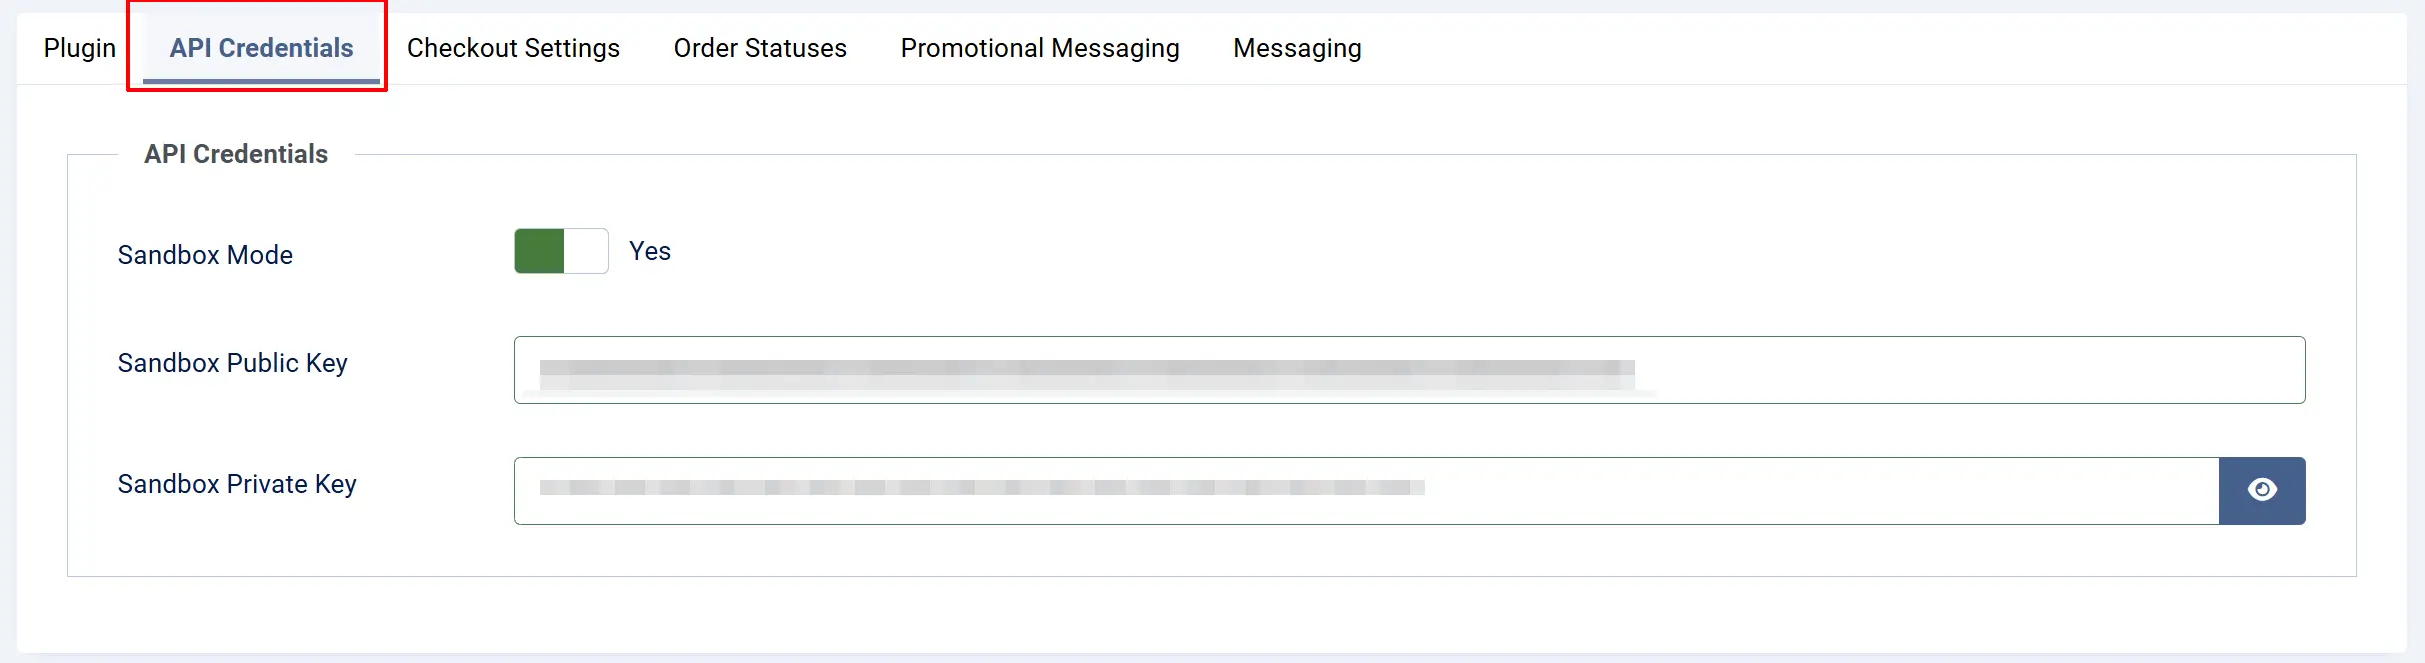
Sandbox Mode
Toggle Sandbox Mode to Yes while you are testing. In sandbox mode, no real loans are issued and you can use Affirm's test credentials to simulate the full checkout flow. Turn this off before going live.
A yellow warning banner appears on your J2Commerce dashboard whenever Sandbox Mode is on. If you see that banner on your live store, go to the Affirm plugin settings and turn Sandbox Mode off.
API Credentials
Two credential sets are available — fill in both so you can switch between sandbox and live without losing either set of keys. The plugin automatically uses whichever set matches the current Sandbox Mode setting.
Sandbox credentials (shown when Sandbox Mode is On):
Sandbox Public Key: Your Affirm sandbox public API key
Sandbox Private Key: Your Affirm sandbox private API key — keep this secret
Live credentials (shown when Sandbox Mode is Off):
Live Public Key: Your Affirm live public API key
Live Private Key: Your Affirm live private API key — keep this secret
Checkout Settings tab
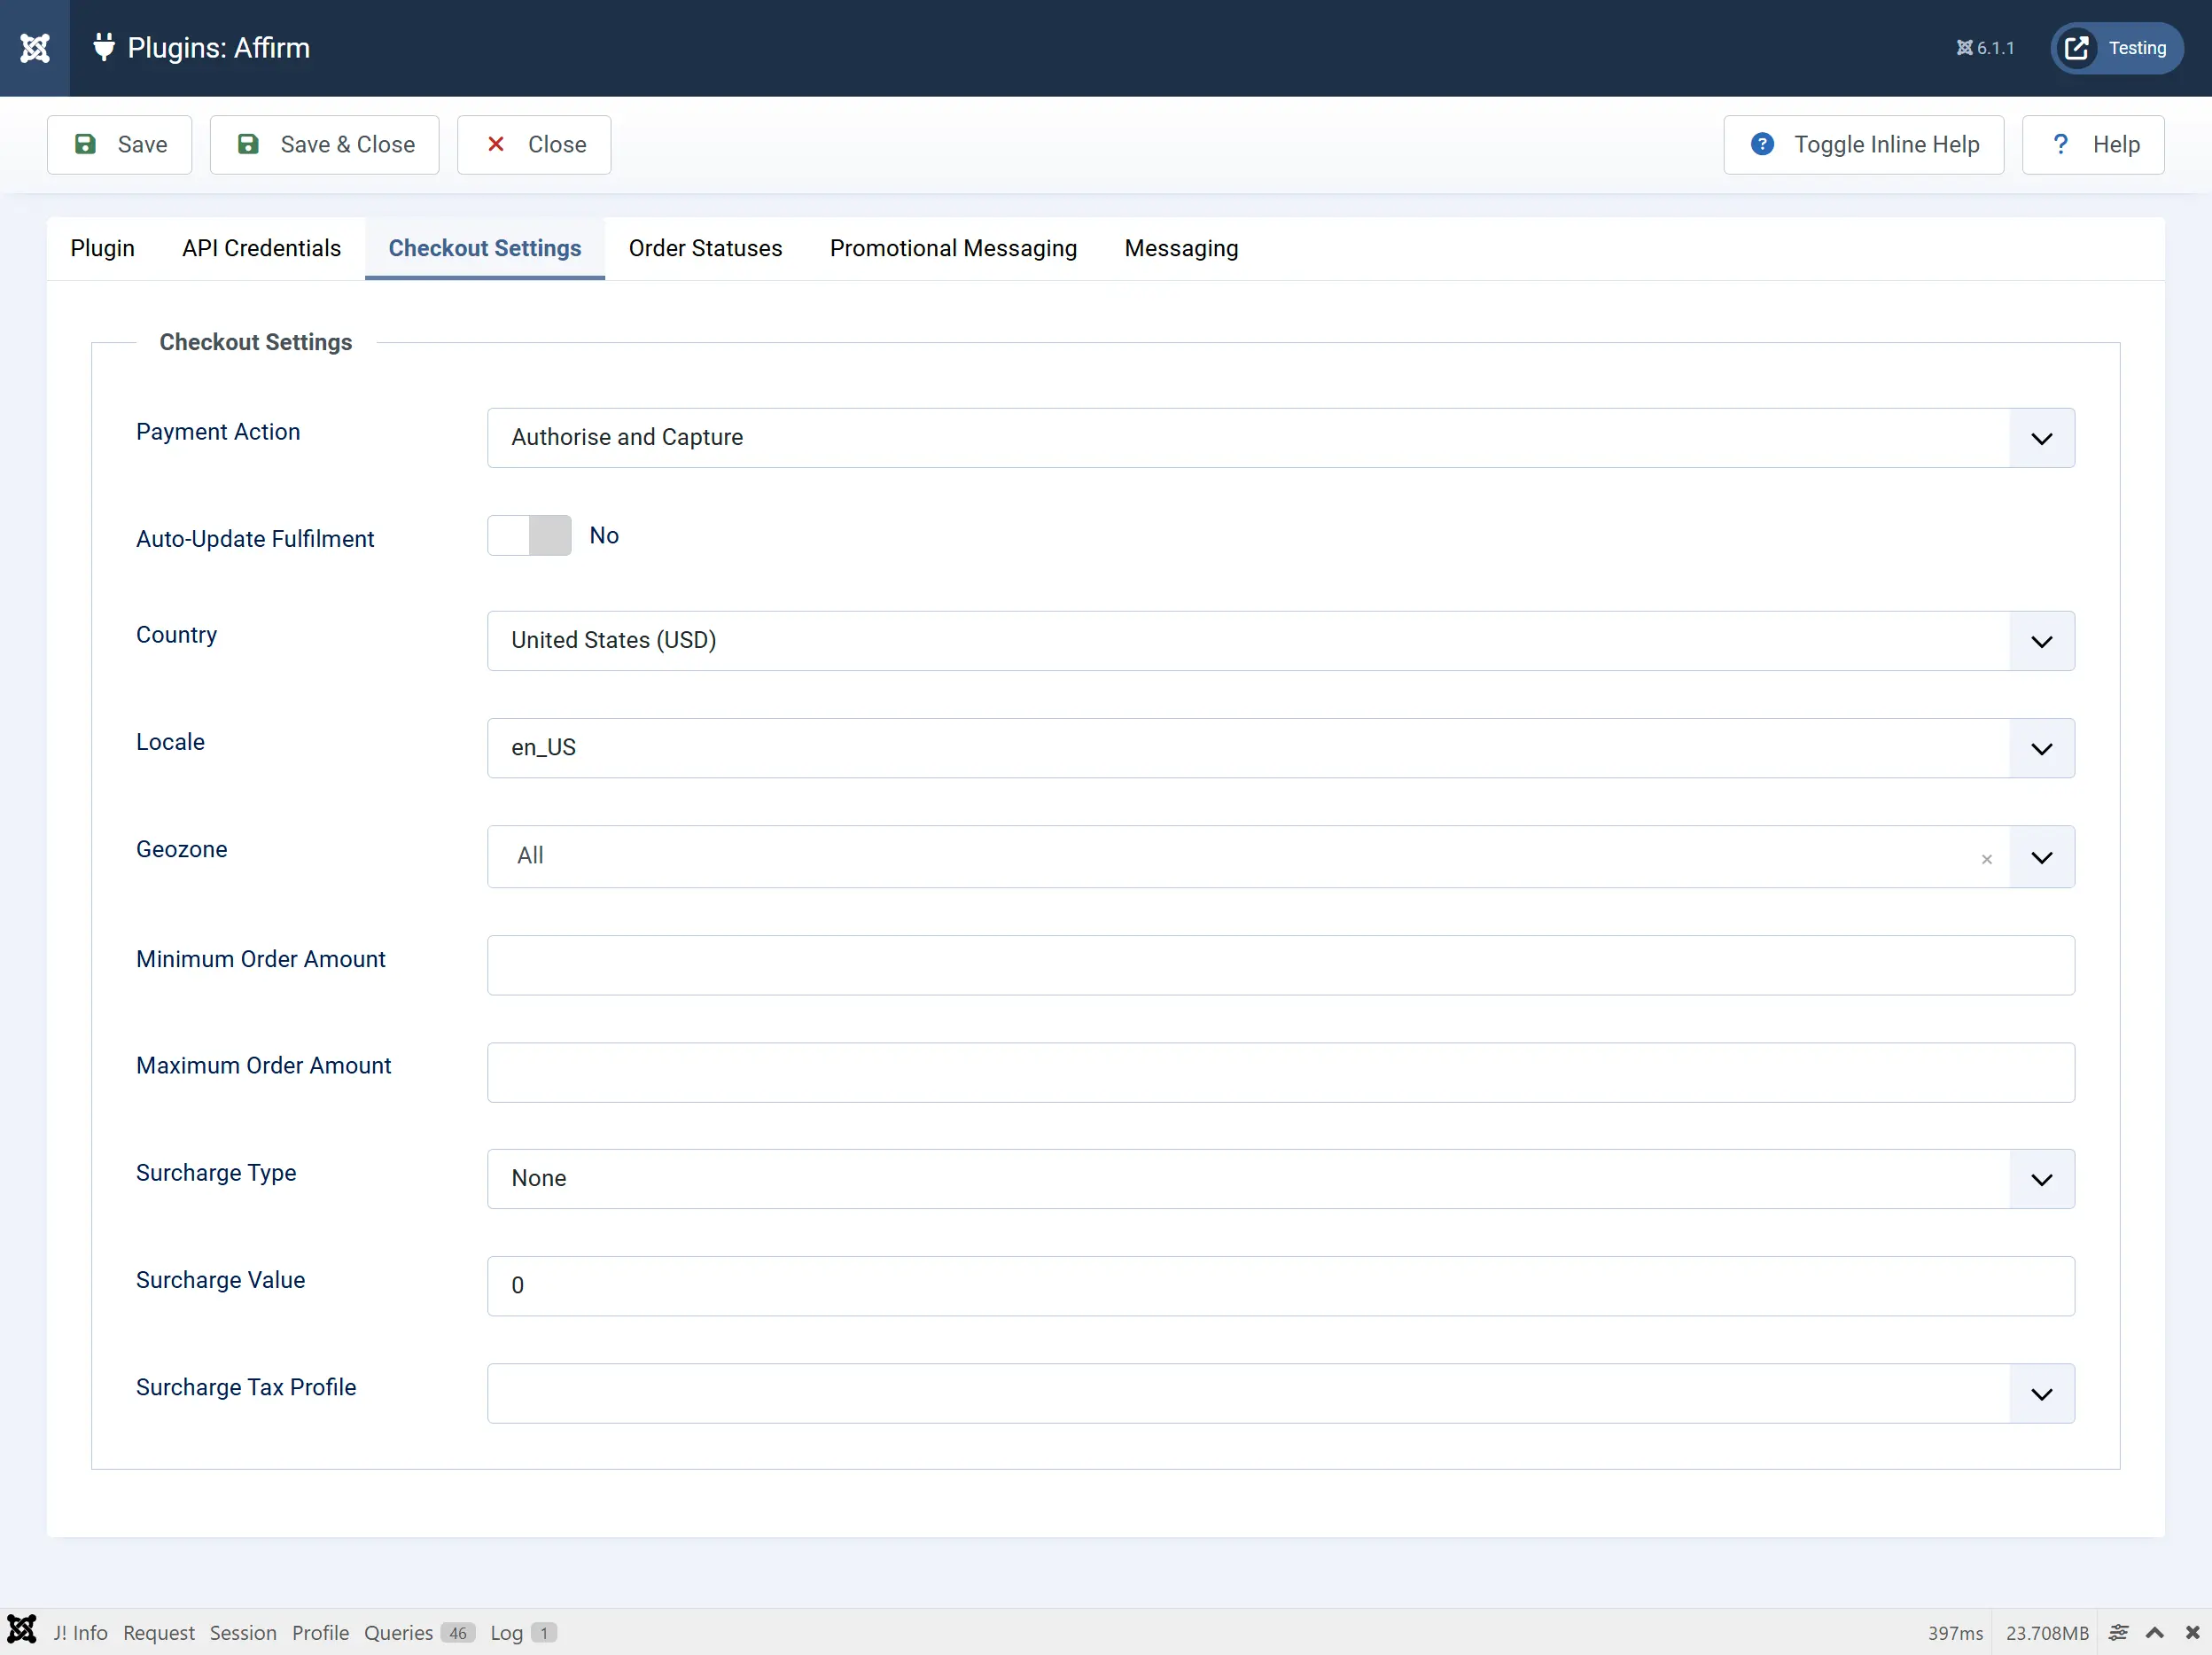
Payment Action:
-
Authorize and Capture: Charges the customer's Affirm loan immediately when the order is placed. Recommended for most stores.
-
Authorize Only: Places a hold on the financing but does not charge the customer until you manually capture from the order view. Useful when you ship later and want to confirm the item is in stock first.
Auto-Update Fulfillment: Automatically send the shipping carrier and tracking number to Affirm when a tracking number is saved on the order.
Country: Select the country that matches your Affirm merchant account — United States (USD), Canada (CAD), or United Kingdom (GBP)
Locale: Language displayed inside the Affirm checkout window
Available locale options: en_US, en_CA, fr_CA, en_GB. Make sure the locale matches the country setting.
Restrictions
Geozone: Limit Affirm to customers in a specific geozone. Leave blank to offer it to all locations.
Minimum Order Amount: Affirm is hidden when the cart subtotal is below this amount. Leave blank for no minimum.
Maximum Order Amount: Affirm is hidden when the cart subtotal exceeds this amount. Leave blank for no maximum.
Surcharge (Optional)
If you want to pass a financing fee on to customers who choose Affirm, complete these fields. Leave them set to None if you do not charge a surcharge.
Surcharge Type: None, Percentage (%), or Fixed Amount
Surcharge Value: The percentage or fixed dollar amount to add
Surcharge Tax Profile: Tax profile applied to the surcharge amount
Order Status tab
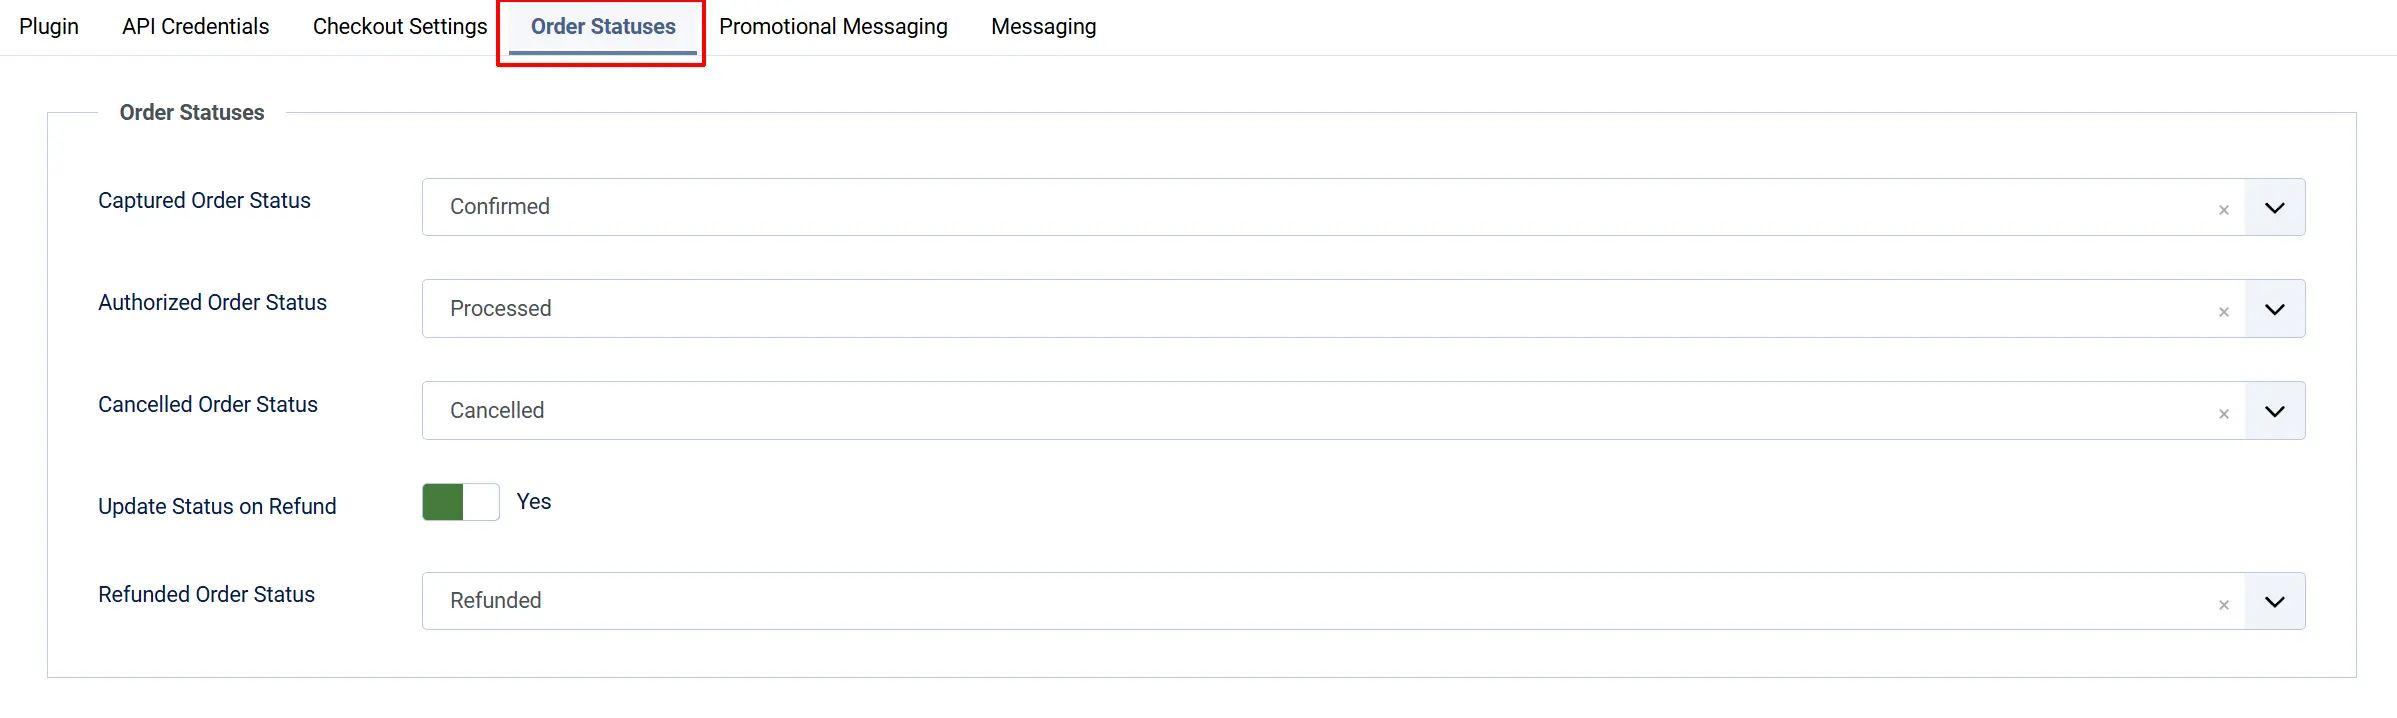
These settings control which order status J2Commerce applies at each step of the payment lifecycle.
Captured Order Status: Status applied when a payment is authorized and captured
Authorized Order Status: Status applied when a payment is authorized but not yet captured — used with Authorize Only
Cancelled Order Status: Status applied when an authorization is voided
Update Status on Refund: Automatically change the order status when a refund is issued
- Refunded Order Status: Status to apply when a refund is issued — shown when Update Status on Refund is Yes
If the status you want is not in a dropdown, create it first at J2Commerce -> Setup -> Order Statuses.

Promotional Message tab

Promotional Messaging (Optional): Affirm's "as low as $X/mo" widgets can appear on product detail pages, category listing pages, and at checkout — helping shoppers see financing options before they even add a product to the cart.
Show on Product Pages: Display the financing widget on individual product detail pages
Product Page Position: Where on the product page the widget appears —
-
After Product Title
-
Before Product Stock
-
Before/After Product Price
-
Before/After Add to Cart Button
Show on Category Pages: Display the widget on product listing and category pages
Show at Checkout: Display the widget next to the Affirm payment option in the checkout payment row
Minimum Price: Hide the widget when the product price is below this amount
Maximum Price: Hide the widget when the product price is above this amount
Promo ID: Optional Affirm data-promo-id for a specific financing program or messaging template. Leave blank for the default.
Widget Type: How the Affirm logo appears in the widget — Text or Symbol
Widget Color: Color scheme of the Affirm widget text and logo — Black or White
Show Learn More Link: Show a clickable "Learn more" link that opens the Affirm pre-qualification modal
Custom Message tab
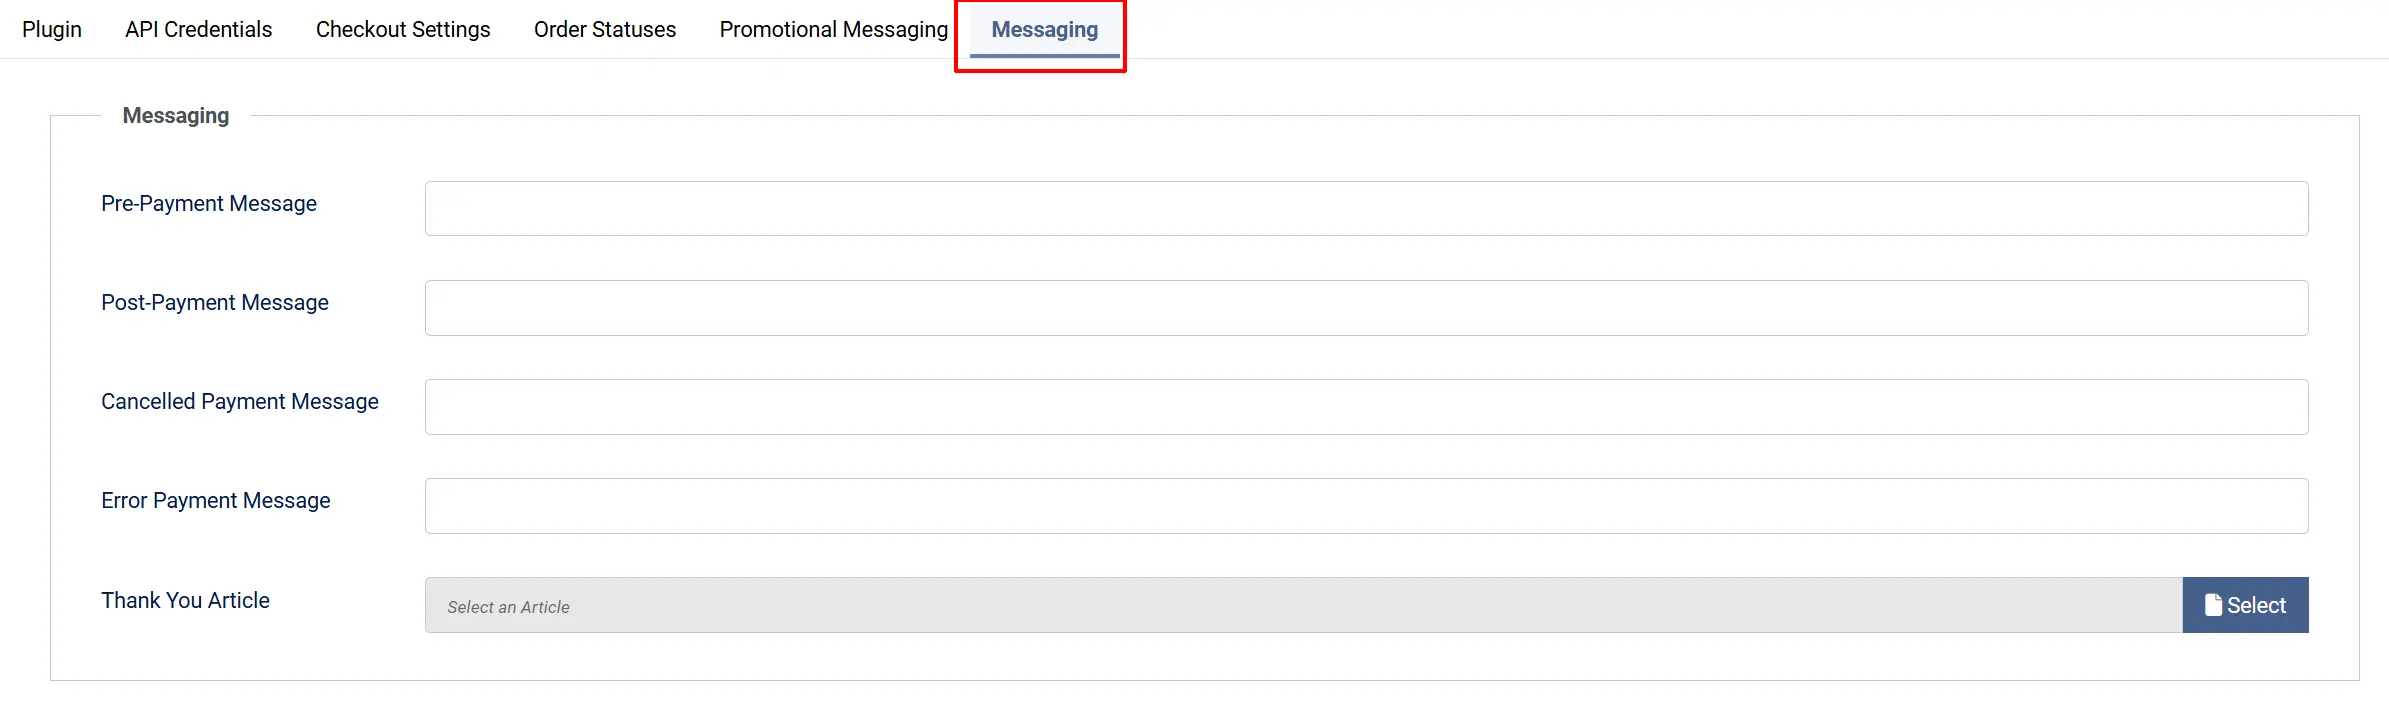
Custom Messages (Optional)
These optional text fields let you insert custom content at specific points in the checkout flow.
Pre-Payment Message: Shown above the Pay with Affirm button at checkout
Post-Payment Message: Shown after a successful payment is confirmed
Cancelled Payment Message: Shown when the shopper closes the Affirm window without completing financing
Error Payment Message: Shown when the payment cannot be completed
Thank-You Article: Select a Joomla article to display on the order confirmation page after a successful Affirm payment, in addition to the standard J2Commerce order confirmation.
How Checkout Works
When a shopper selects Affirm at checkout:
- The shopper picks Affirm as their payment method and clicks Place Order.
- A secure Affirm pop-up window opens on the same page — the shopper never leaves your site.
- Inside the Affirm window, the shopper reviews their monthly payment options and completes a short financing application.
- Affirm approves the application and closes the window.
- The plugin finalizes the order immediately on the shopper's return — no waiting for emails or webhooks.
- The shopper sees the order confirmation page with their order details.
Affirm handles the entire financing application on its own secure servers. Your store never sees card numbers or sensitive financial data. There are no stored cards and no subscriptions — each Affirm financing decision is a one-time loan tied to a single order.
Managing Orders
Once an Affirm payment is placed, the J2Commerce order view shows payment action buttons in the payment row. Each button appears only when the corresponding action is valid for the current loan state.
Capture an Authorized Payment
If you set Payment Action to Authorize Only, a Capture button appears on the order. Click Capture when you are ready to settle the loan — typically at the time you ship the order. Capturing charges the customer's Affirm account and starts the repayment schedule.
Void an Authorization
Before capturing, click Void to cancel the authorization entirely. This permanently cancels the Affirm loan and notifies the customer that no charge was made. Voiding cannot be undone and is only available before a capture has been processed.
Issue a Refund
After a payment is captured, click Refund in the order view. A dialog appears with two options:
- Full refund — returns the entire captured amount. This permanently closes the loan.
- Partial refund — enter a specific amount up to the maximum refundable balance.
The dialog shows the maximum refundable amount so you always know the upper limit.
Update Fulfillment
Click Update Fulfillment to send shipping details to Affirm after you have shipped the order. A dialog asks for:
Shipping Carrier: The carrier name — e.g., USPS, UPS, FedEx
Tracking Number: The shipment tracking number
These details appear on Affirm's settlement reports and help Affirm correlate payments with fulfilled shipments. This action does not change the loan amount or order status. It is available as long as the loan is active.
Sandbox Testing
With Sandbox Mode on and your sandbox API keys entered, go through the checkout with any product. In the Affirm test window:
- Enter any US mobile phone number (e.g.,
555-555-5555). - When prompted for the SMS verification code, enter
123456. - When prompted for the last 4 digits of your SSN, enter
5678. - Complete the rest of the application with any plausible test values.
- Affirm approves the test application and returns you to the store.
No real money moves in sandbox mode. After testing, verify the order status updated correctly in J2Commerce -> Sales -> Orders.
Going Live Checklist
Before switching to live transactions, confirm the following:
- Sandbox Mode is set to No
- Live Public Key and Live Private Key are entered
- Country matches the country your Affirm merchant account is registered in
- The store currency (USD, CAD, or GBP) matches the Country setting
- Payment Action is set to your preferred mode (Authorize and Capture for most stores)
- Debug Logging is set to No
- You completed a successful sandbox test order before switching to live
Troubleshooting
Affirm Does Not Appear at Checkout
Cause: Missing or incorrect API keys, the store currency or country is not supported, or the cart total is outside the configured minimum/maximum order amount limits.
Solution:
- Go to J2Commerce -> Setup -> Payment Methods -> Affirm.
- Confirm Sandbox Mode matches the keys you have entered — sandbox keys only work in sandbox mode.
- Verify the Sandbox Public Key and Sandbox Private Key (or live equivalents) are filled in.
- Confirm Country is set to United States, Canada, or United Kingdom and the store currency matches.
- Check Minimum Order Amount and Maximum Order Amount against the current cart total.
- If a Geozone restriction is set, confirm the customer's shipping address falls within it.
- Enable Debug Logging, attempt checkout, then review the Joomla system log for details.
Order Did Not Finalize After the Customer Returned from Affirm
Cause: The Affirm window was closed before the application was completed, or a network error prevented the finalization call from reaching your server.
Solution:
- Check the order in J2Commerce -> Sales -> Orders. If it is still Pending, the Affirm application may not have been approved.
- Enable Debug Logging and retry the checkout. Review the Joomla system log for the Affirm API response.
- Affirm finalizes synchronously on the customer's return — if your server experienced a timeout, ask the customer to try again.
"Affirm API credentials are not configured" Error
Cause: The Public Key or Private Key fields are empty for the active mode (sandbox or live).
Solution:
- Go to J2Commerce -> Setup -> Payment Methods -> Affirm.
- Check whether Sandbox Mode is on or off.
- Fill in the matching credential fields for the active mode.
- Click Save.
Sandbox Warning Banner Appears on the Live Store
Cause: Sandbox Mode is still enabled after going live.
Solution:
- Go to J2Commerce -> Setup -> Payment Methods -> Affirm.
- Set Sandbox Mode to No.
- Confirm the Live Public Key and Live Private Key are entered.
- Click Save.
Promotional Widget Does Not Appear on Product Pages
Cause: The product price is outside the configured Minimum Price / Maximum Price range, or the widget toggle for that page type is off.
Solution:
- Go to the Affirm plugin settings -> Promotional Messaging.
- Confirm Show on Product Pages is set to Yes.
- Check Minimum Price and Maximum Price against the product's actual price.
- Verify the Product Page Position is a location your template renders.
Support
- J2Commerce documentation: docs.j2commerce.com
- J2Commerce support: www.j2commerce.com/support
- Affirm merchant support: affirm.com