Tranzila Payment Gateway
Tranzila is an Israeli payment gateway that lets shoppers pay by credit or debit card directly on your checkout page. Unlike redirect-based gateways, the shopper never leaves your site — the card details are entered in a form on your checkout and sent securely to Tranzila's transaction handle. The result comes back instantly, and the order is confirmed or declined without any page redirect.
The plugin supports six currencies (ILS, USD, GBP, HKD, JPY, EUR) and an optional installment payment mode that splits the charge into equal monthly payments based on the order total.
The Tranzila plugin is a separate add-on, not included in the core J2Commerce package. Purchase and download it from the J2Commerce Extensions Store before following these steps.
Prerequisites
Before you configure the plugin, make sure you have the following ready from your Tranzila account:
- A supplier name (also called a terminal name) — this is the unique identifier Tranzila assigns to your merchant account.
- A TranzilaPW token password — a separate credential that authorizes server-to-server transactions on your terminal.
- If you want to test before going live, Tranzila also provides a test (sandbox) supplier name and a matching test token password.
Your Tranzila account representative can provide all of these credentials.
Purchase and download
This plugin is a separate add-on available from the J2Commerce Extensions Store. It is not included with the core J2Commerce 6 component.
- Go to the J2Commerce website and locate Tranzila.
- Add it to your cart and complete checkout.
- Go to My Downloads under your account profile and find the plugin.
- Click Available Versions -> View Files -> Download Now to download the ZIP file.
Install the plugin
In the Joomla Administrator, go to System -> Install -> Extensions.
Upload the plg_j2commerce_payment_tranzila.zip file.

Enable the Plugin
Once you have installed the App, you will need to enable it. There are two ways you can access the App.
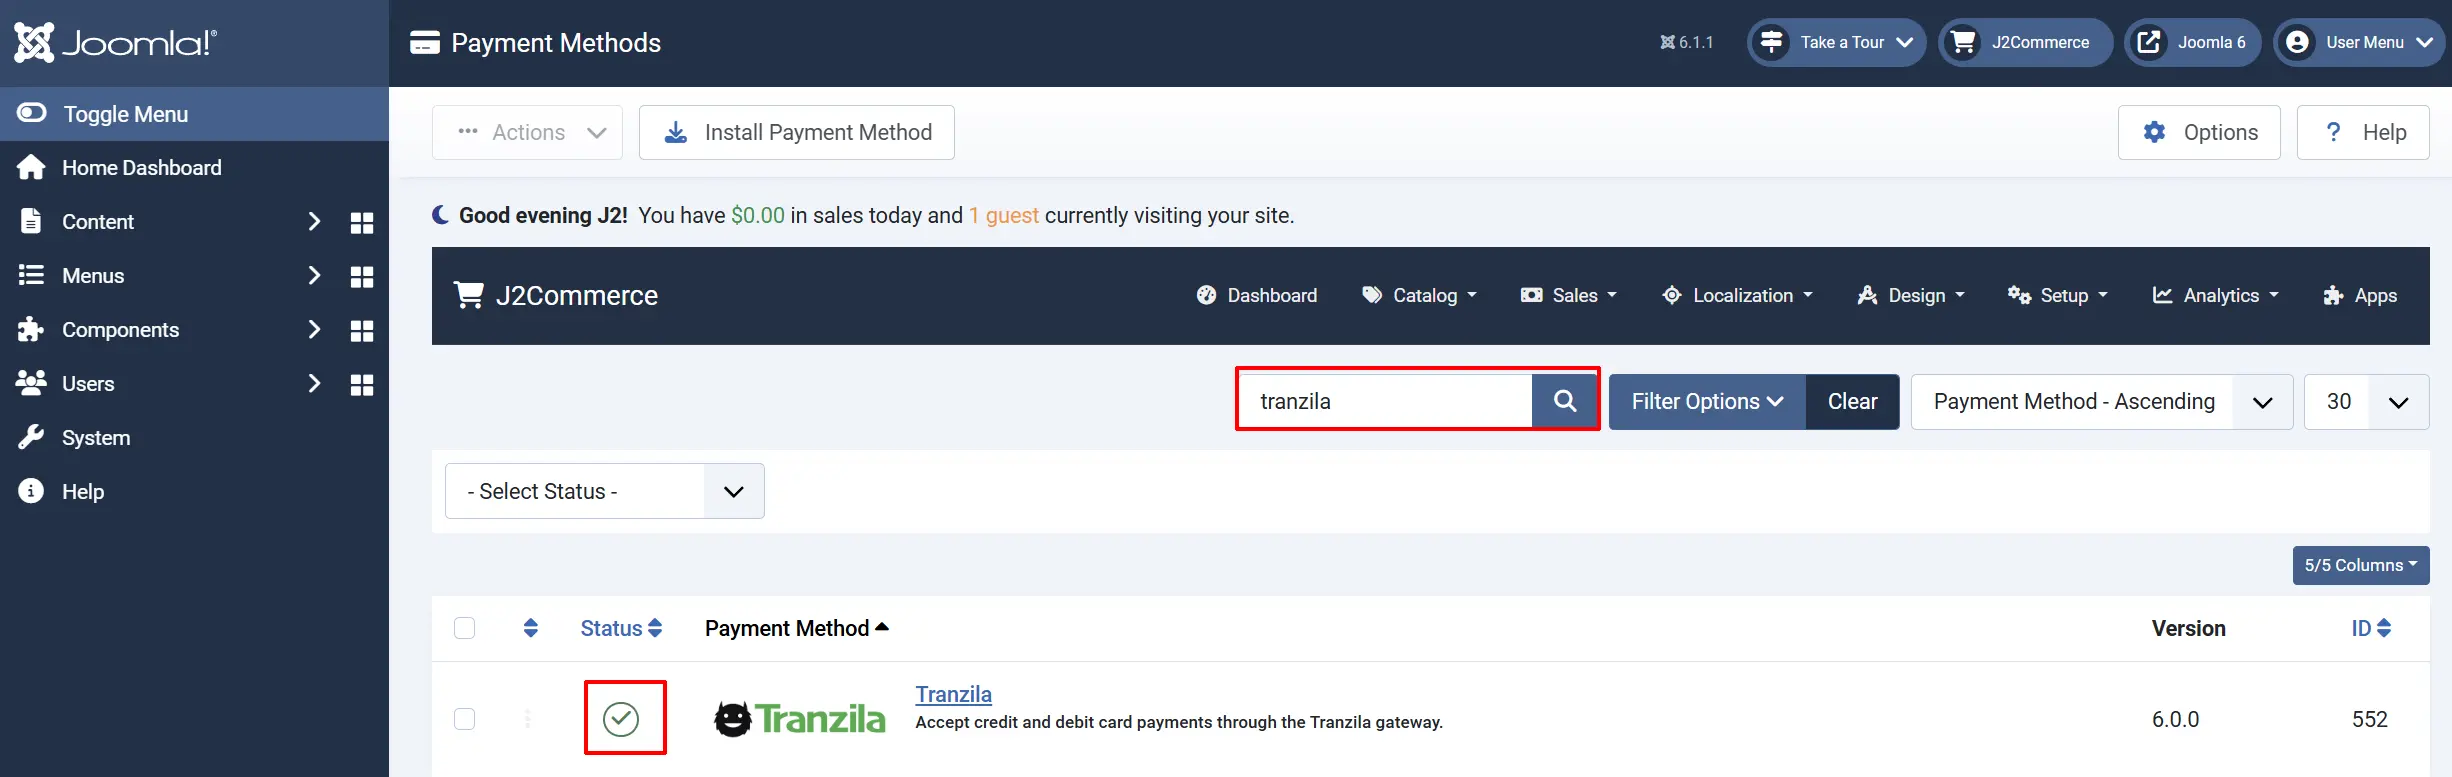
Option A: Go to the J2Commerce icon at the top right corner -> Setup -> Payment Methods
Option B: Go to Components on the left sidebar -> J2Commerce -> Dashboard -> Setup -> Payment Methods

To help you narrow down the list, you can do a search for Tranzila, click the X, and it will turn into a green checkmark. It is now enabled and ready for setup.
Configure the plugin
Click the Tranzila title next to the green checkmark to open the configuration screen.
Click the Toggle Inline Help button at the top of any plugin configuration page to show a short description beneath each field.

Display Settings
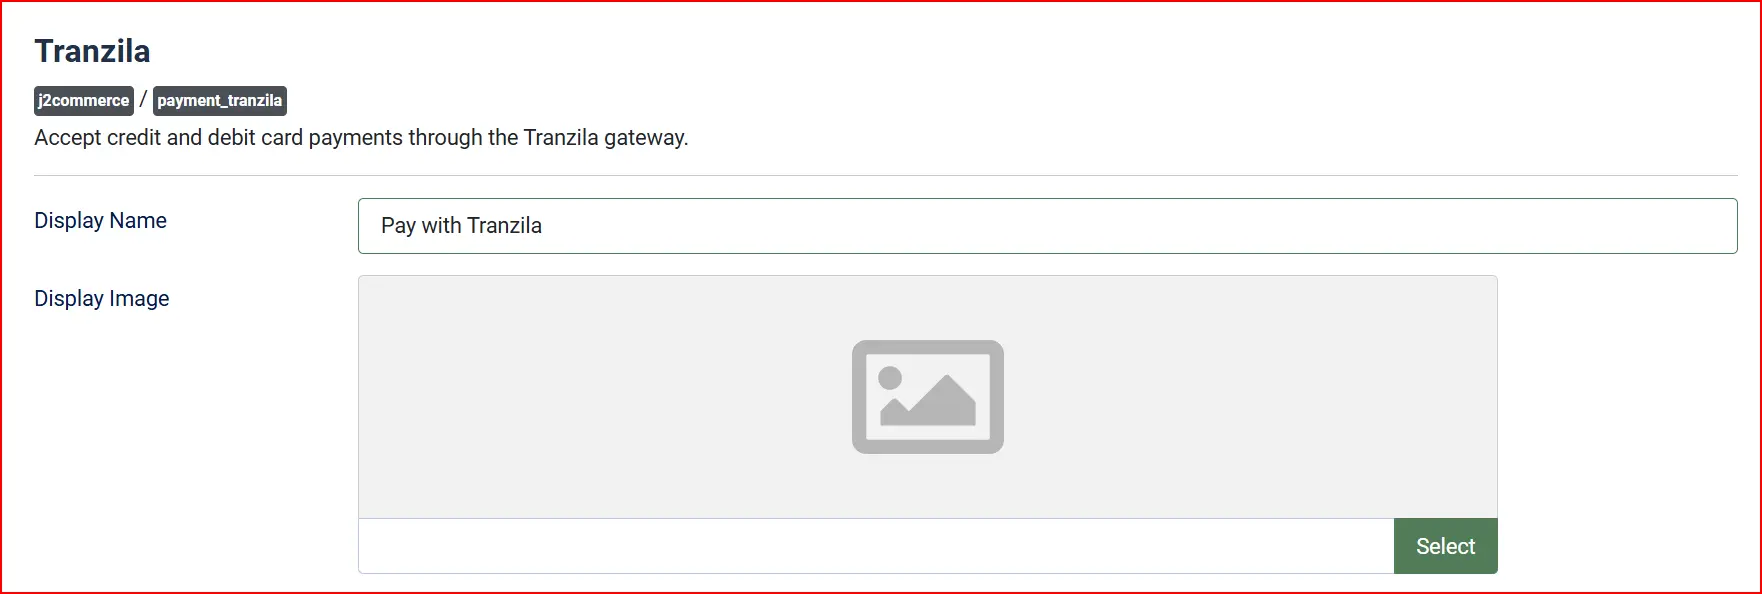
Display Name: The name shown to shoppers at checkout when they select this payment method.
Display Image: An optional logo image shown next to the payment name on the checkout page. Leave blank to show text only.
Credentials
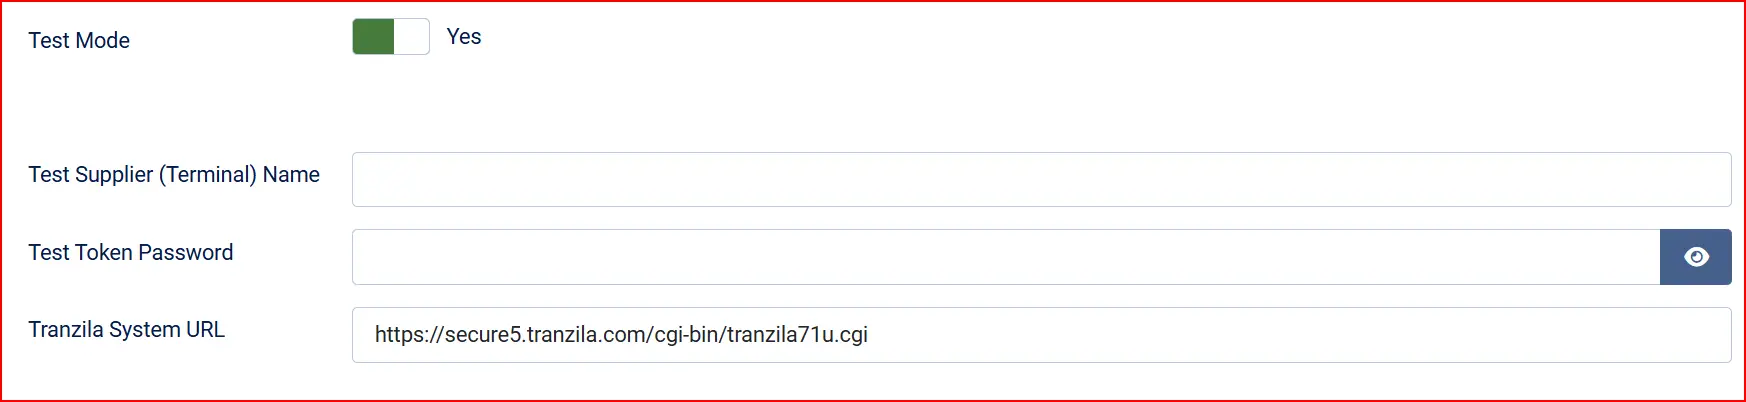
Test Mode: When enabled, the Test Supplier and Test Token Password fields are used. Switch this off before going live.
Test Supplier (Terminal) Name: The sandbox terminal name provided by Tranzila for testing. Visible only when Test Mode is on.
Test Token Password: The sandbox TranzilaPW password for testing. Visible only when Test Mode is on.
Supplier (Terminal) Name: Your live terminal name. Visible only when Test Mode is off.
Token Password: Your live TranzilaPW password. Visible only when Test Mode is off.
During setup, leave Test Mode enabled, enter your sandbox credentials, and place a test order to confirm the end-to-end flow. Once you are satisfied, switch Test Mode off and enter your live credentials.
Tranzila System URL: The Tranzila transaction handle endpoint. You should not need to change this unless Tranzila support instructs you to use a different handle.
The plugin enforces HTTPS on this URL. If you change it to a plain http:// address the plugin will refuse to send card data.
Payment Type and Installment Tiers

Tranzila supports two payment modes:
-
Full Payment: The entire order total is charged in one transaction. This is the default and recommended setting.
-
Installment Payment: The charge is split into monthly installments. The number of installments offered to the shopper depends on the order total and the tiers you define below.
When Installment Payment is selected, the Installment Tiers table appears. Each row maps a price range to a maximum number of installments:

Price From: The minimum order total (in your store currency) for this tier to apply.
Price To: The maximum order total for this tier.
Installments: The maximum number of installments offered when the order total falls within this range.
Example: To offer up to 3 installments on orders between 200 and 500 ILS, and up to 6 installments on orders above 500 ILS, create two rows:
| Price From | Price To | Installments |
|---|---|---|
| 200 | 500 | 3 |
| 500.01 | 9999 | 6 |
If the order total does not match any tier, the installment dropdown is not shown and the full amount is charged in a single payment.
Installments below 3 are treated as a full single payment by Tranzila. The installment dropdown only appears when the tier allows 3 or more.
Order Status

Payment Status: The J2Commerce order status set when payment is approved. For most stores, Confirmed is the right choice.
Template Style: Choose a visual sub-template for the payment form (Bootstrap 5 or UIkit). Leave blank to use the default for your active app.
Restrictions

Geozone Restriction: Limit this payment method to shoppers in a specific geozone. Leave blank to make it available everywhere.
Minimum Subtotal: Hide this payment method when the order subtotal is below this amount. Leave blank for no minimum.
Maximum Subtotal: Hide this payment method when the order subtotal exceeds this amount. Leave blank for no maximum.
Custom Messages
These fields let you add short HTML snippets or plain text that appears at specific points in the checkout flow. All fields are optional.
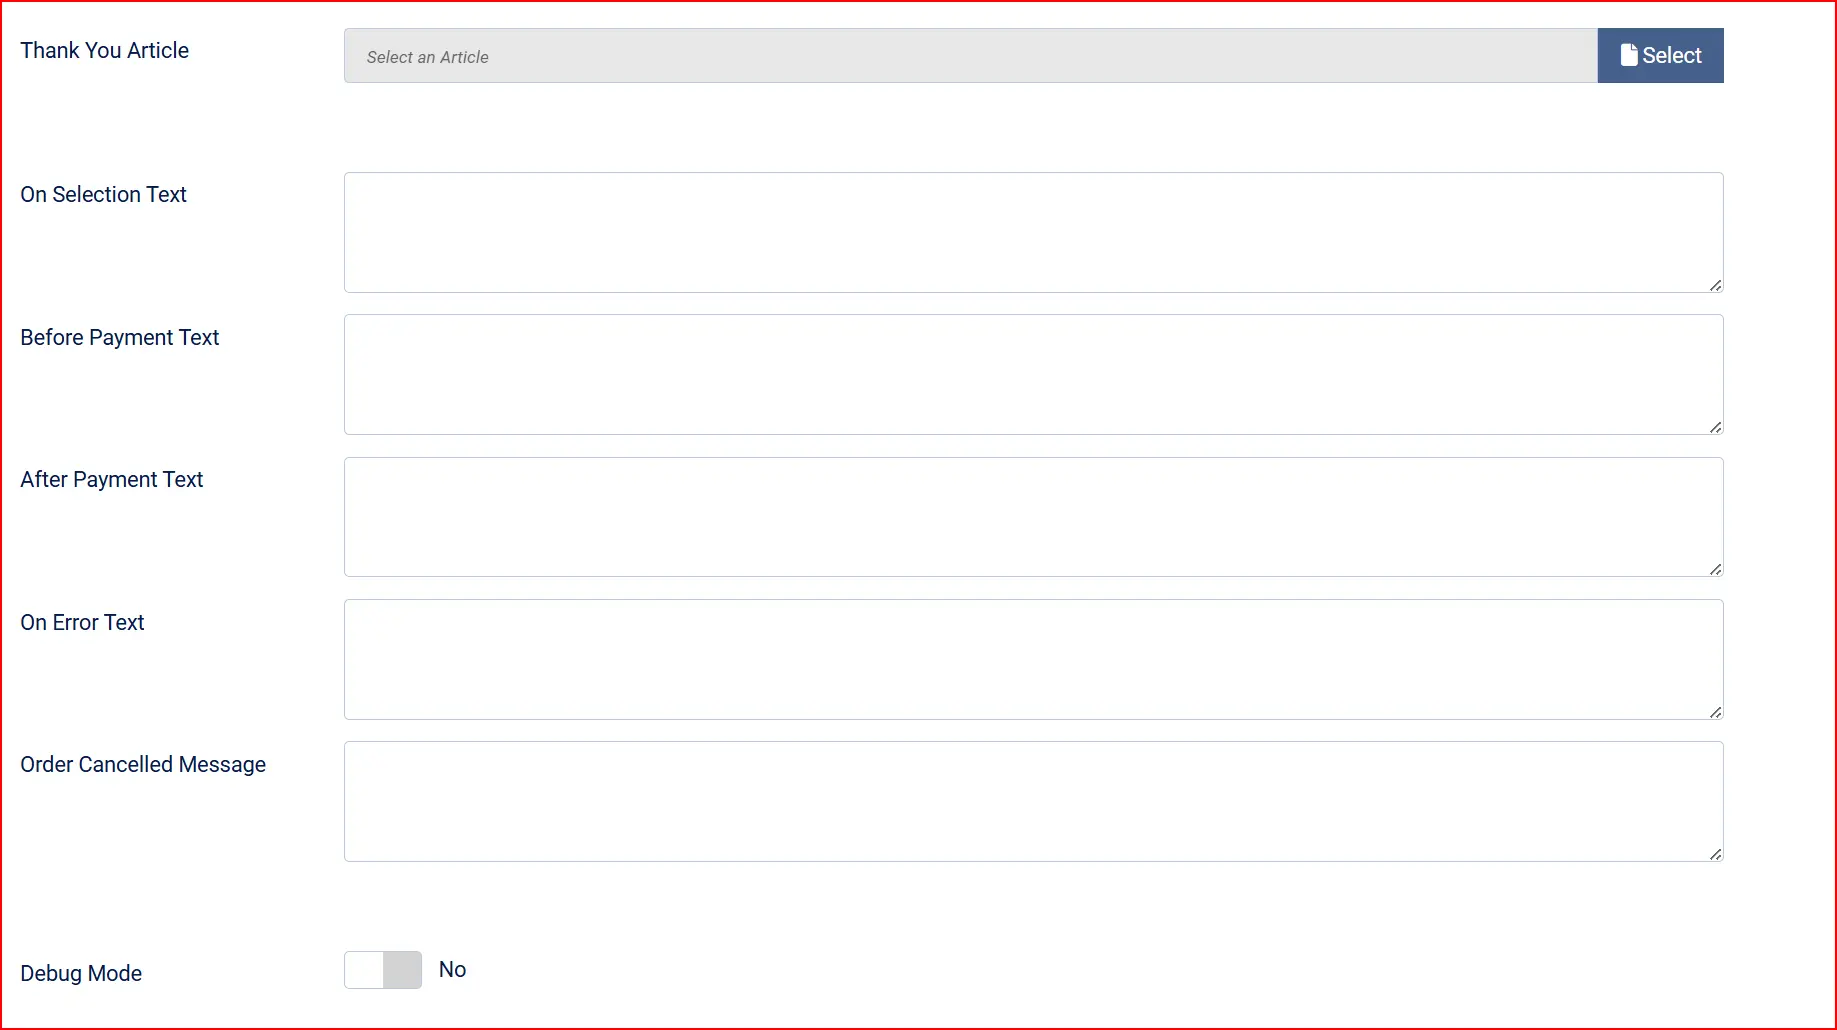
Thank-You Message Article: Select a Joomla article to display on the order confirmation page after a successful payment. Leave blank to use the default confirmation page.
On Selection Text: Shown immediately when the shopper picks this payment method.
On Before Payment Text: Shown above the card entry form.
On After Payment Text: Shown on the confirmation screen after a successful payment.
On Error Text: Shown when the card is declined or an error occurs. If left blank, the plugin shows its own error message.
On Cancel Text: Shown if the shopper cancels the payment.
Debug Mode: When enabled, the plugin writes requests and responses to the Joomla log directory. Card numbers and CVV values are redacted before logging. Disable in production.
How Checkout Looks to the Shopper
When a shopper reaches the payment step and selects Tranzila as their payment method, they see a card entry form directly on your checkout page:
- Card Number — a text field for the 16-digit card number.
- Expiry Month — a dropdown showing months 01 through 12.
- Expiry Year — a dropdown showing the current year plus the next 14 years.
- CVV — a short field for the 3- or 4-digit security code.
- Installments (only shown when Installment Payment is configured and the order total matches a tier) — a dropdown letting the shopper choose how many monthly payments to spread the charge across.
- A Place Order button.
When the shopper clicks Place Order, the form shows a spinner and "Processing… please wait" while the card details travel directly from your server to Tranzila. The result is instant: the order is confirmed or an error is shown on the same page.
Security Note
This plugin transmits raw card data through your web server to Tranzila's endpoint (a SAQ-D integration under PCI-DSS). This means your server temporarily handles the full card number and CVV before forwarding them over HTTPS to Tranzila. While the plugin never stores card data and always uses an HTTPS endpoint, operating under SAQ-D requires a more thorough annual self-assessment than a hosted-fields integration.
If reducing your PCI scope is a priority, ask your Tranzila account manager whether a Hosted Fields or iframe-based option is available for your terminal. A future version of this plugin may offer that option.
What's New vs. the J2Store Version
If you are upgrading from the J2Store 4 version of this plugin, here is what has changed in J2Commerce 6:
| Area | J2Store 4 | J2Commerce 6 |
|---|---|---|
| Framework | FOF 2 (non-namespaced) | Native Joomla 6 MVC with namespaces and DI container |
| JavaScript | jQuery-dependent | Vanilla ES6 — no jQuery dependency |
| Currency handling | Used raw order total, which undercharged in multi-currency stores | Uses CurrencyHelper::gatewayAmount() to convert correctly for any currency |
| Debug log | Basic logging, sometimes included raw card data | Card numbers and CVV are always redacted; TranzilaPW token is masked |
| Installment tiers | Stored as a serialized string in the database | Configured via a clean repeatable subform field in the plugin settings |
| Order finalization | Direct database update of order status | Uses OrderModel::updateOrderStatus() which triggers status-change events and queues the confirmation email |
| CSRF protection | Inconsistent across form submissions | CSRF token verified on every payment POST |
| Double-submit guard | None | Plugin checks the existing transaction_status before re-sending; a second submit on the same order is silently ignored |
Troubleshooting
"The Tranzila supplier name is not configured"
Cause: The Supplier (Terminal) Name field (or Test Supplier when in Test Mode) is blank.
Solution:
- Go to J2Commerce -> Setup -> Payment Methods and open the Tranzila settings.
- Check that Test Mode is set to the mode you are using.
- Enter the correct supplier name in the field that matches your mode.
- Click Save & Close and try again.
Payment declined — no error message from Tranzila
Cause: Tranzila returned a response code other than 000. Common reasons include incorrect card details, an expired card, insufficient funds, or the terminal not being enabled for the currency you are charging.
Solution:
- Enable Debug Mode in the plugin settings.
- Place a test order.
- Open the Joomla log file at
[joomla_root]/logs/plg_j2commerce_payment_tranzila.phpand look for theCharge responseline to see the exactResponsecode andConfirmationCodereturned by Tranzila. - Contact Tranzila support with the response code if you cannot identify the cause.
- Disable Debug Mode once you have finished investigating.
"Tranzila endpoint must use HTTPS"
Cause: The Tranzila System URL field has been changed to a plain http:// address.
Solution: Restore the URL to https://secure5.tranzila.com/cgi-bin/tranzila71u.cgi (or another HTTPS address supplied by Tranzila support).
The installment dropdown does not appear
Cause: Either Payment Type is set to Full Payment, or the order total does not fall within any of the configured Installment Tiers, or the matching tier has fewer than 3 installments.
Solution:
- Confirm Payment Type is set to Installment Payment.
- Check that your Installment Tiers rows cover the price range of the order you are testing.
- Ensure the Installments value in the matching tier is 3 or higher.
Where is the debug log?
When Debug Mode is on, the plugin writes to:
[joomla_root]/logs/plg_j2commerce_payment_tranzila.php
The log records each charge request (with the card number masked to the last 4 digits and CVV replaced with ***) and the raw response from Tranzila. Never share this file publicly or with untrusted parties — it contains order amounts and Tranzila response codes.