PayPal Payment
The PayPal plugin lets your customers pay using PayPal's Smart Payment Buttons — a modern, secure checkout experience that supports PayPal accounts, credit cards, and other payment methods PayPal offers in your customers' region.
The plugin uses PayPal's REST API v2, so no redirects are needed. Customers complete payment directly on your checkout page without leaving your site. Refunds, webhook notifications, and sandbox testing are all built in.
Prerequisites
- J2Commerce is installed and active on your Joomla site
- A PayPal Business account (see the setup steps below)
- REST API credentials (Client ID and Client Secret) from the PayPal Developer Dashboard
Step 1: Set Up a PayPal Business Account
If you already have a PayPal Business account and REST API credentials, skip ahead to Installation & Enabling.
Create a PayPal Business Account
- Go to paypal.com and click Sign Up.
- Choose Business Account and click Next.
- Enter your email address and create a password.
- Fill in your business details — business name, address, and phone number.
- Verify your email address when PayPal sends you a confirmation email.
- Complete the identity verification steps PayPal requires (this varies by country).
Get Your REST API Credentials
After your account is active:
- Go to developer.paypal.com and log in with your PayPal Business account.
- Click Apps & Credentials in the top navigation.
- Make sure you are on the Live tab (not Sandbox).
- Click Create App.
- Give the app a name — for example, "My Store".
- Click Create App to confirm.
- On the next page you will see your Client ID and Client Secret. Copy both and keep them somewhere safe.
Sandbox credentials (for testing): Click the Sandbox tab on the same Apps & Credentials page. Create a separate sandbox app or use the default one. Copy the Sandbox Client ID and Sandbox Client Secret separately.
Enable the Plugin
This plugin ships with J2Commerce 6 and is available immediately after installation. Because it requires your bank details before it can be used, it is not enabled automatically.
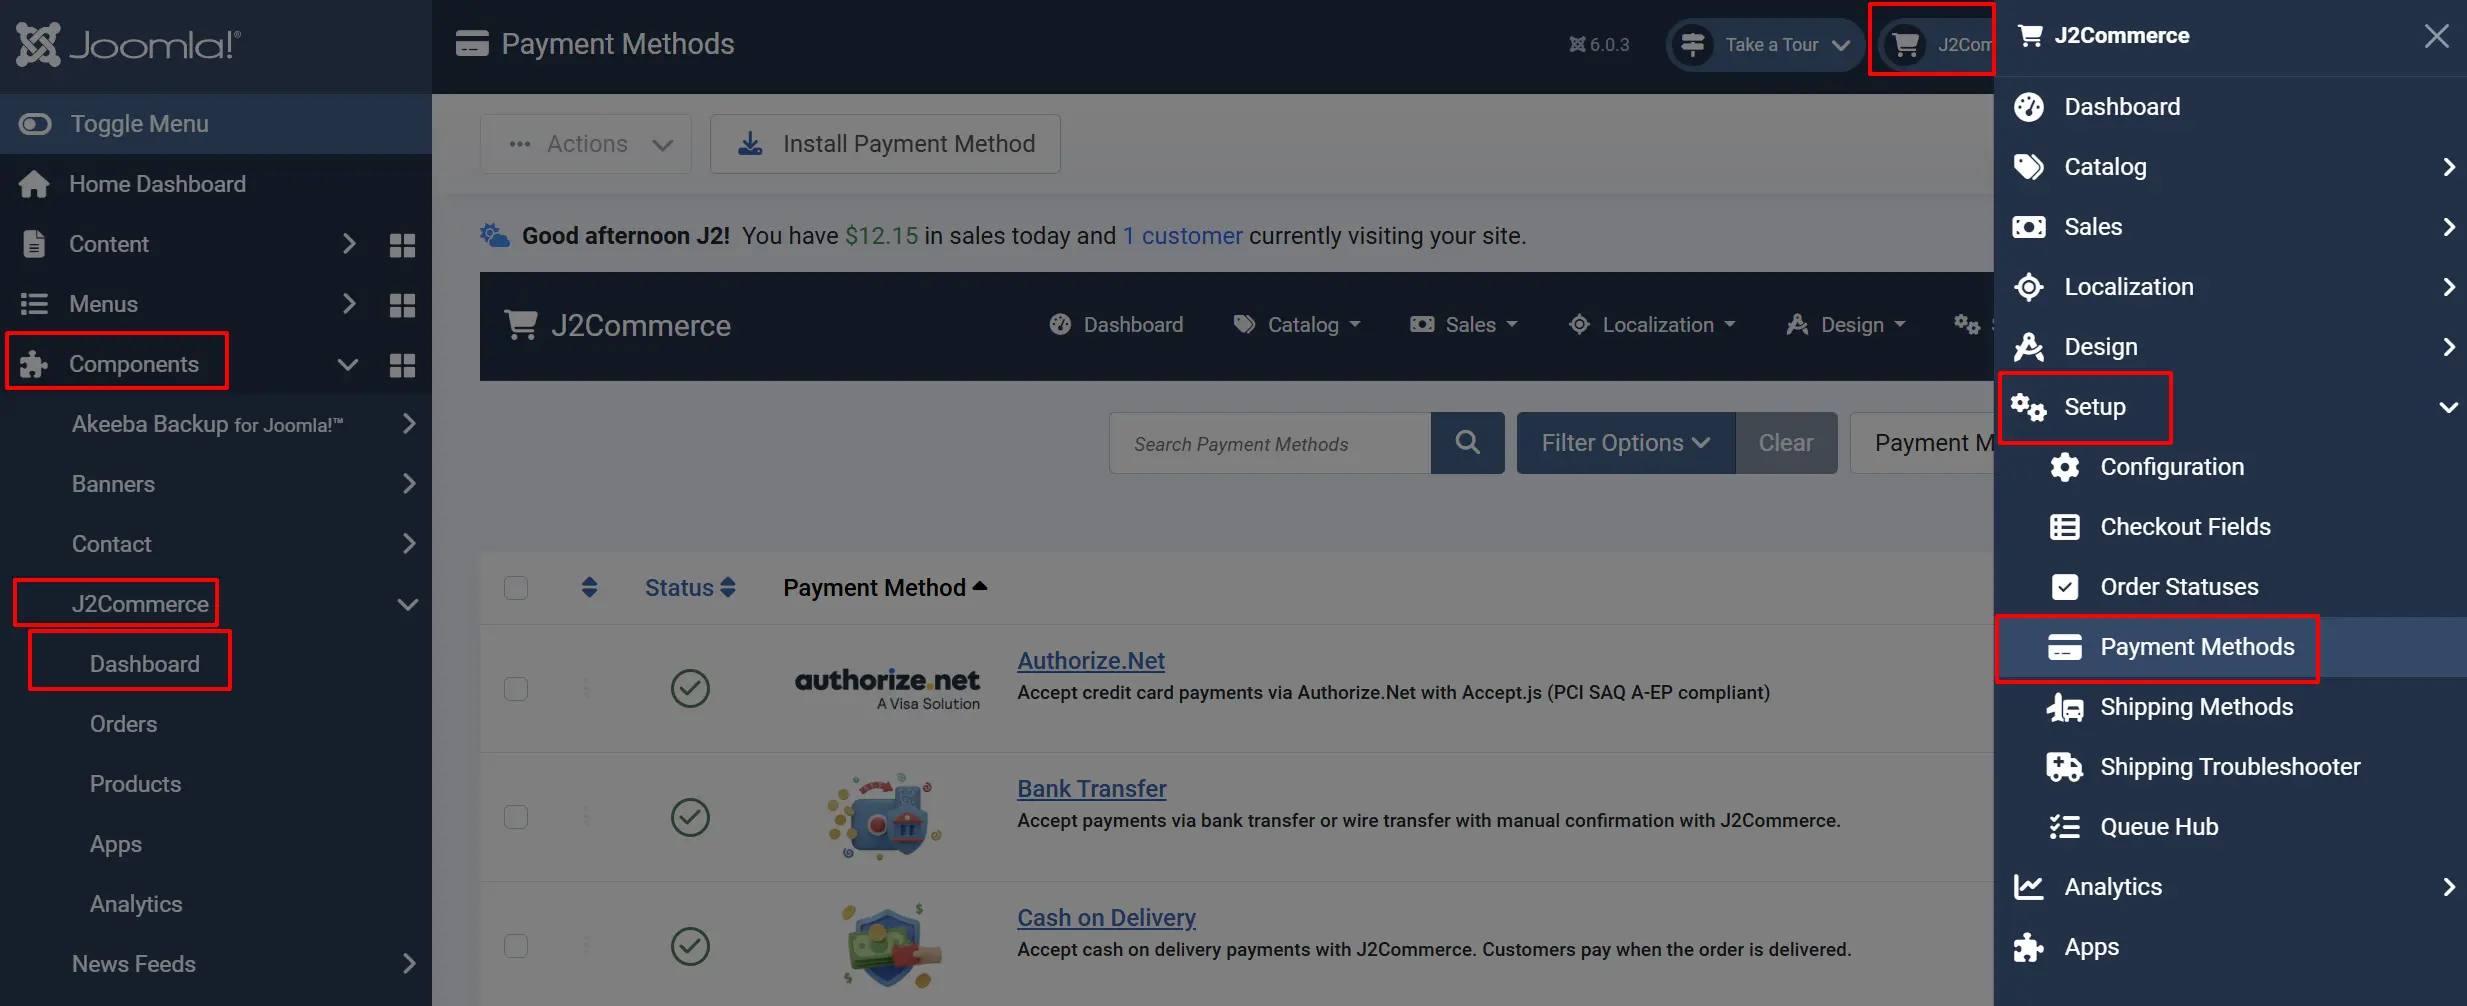
There are three ways you can access the plugin.
Option A: Go to the J2Commerce icon at the top right corner -> Setup -> Payment Methods
Option B: Go to Components on the left sidebar -> J2Commerce -> Dashboard -> Setup -> Payment Methods
Option C: Go to Settings on the left sidebar -> Manage -> Plugins
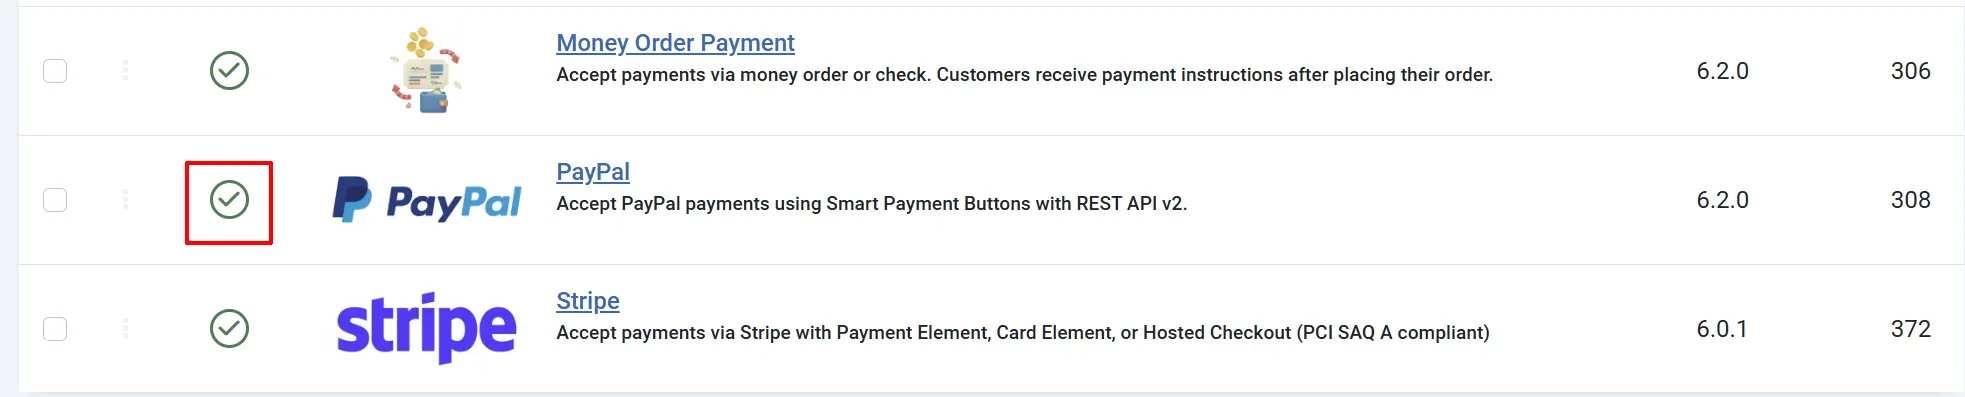
Look for PayPal, click the X, and it will turn into a green checkmark. It is now enabled and ready for setup.
Configuration
After enabling the plugin, click the Cash on Demand title to open the settings.
Tip: Click on the Toggle Inline Help button on any app/plugin you install and it will show a description below each section. See image below
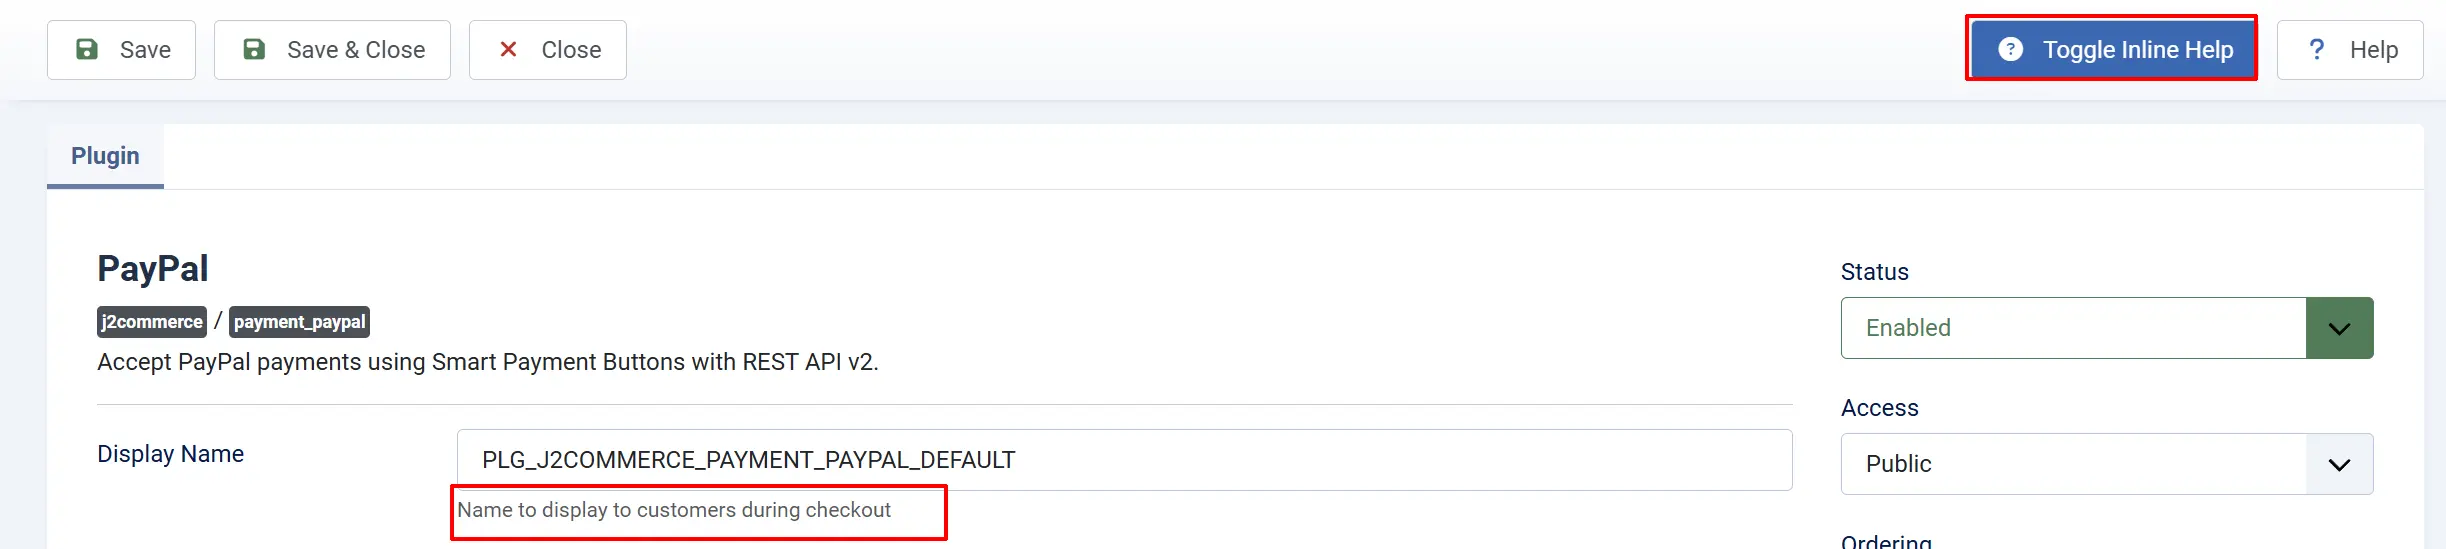
Display Settings
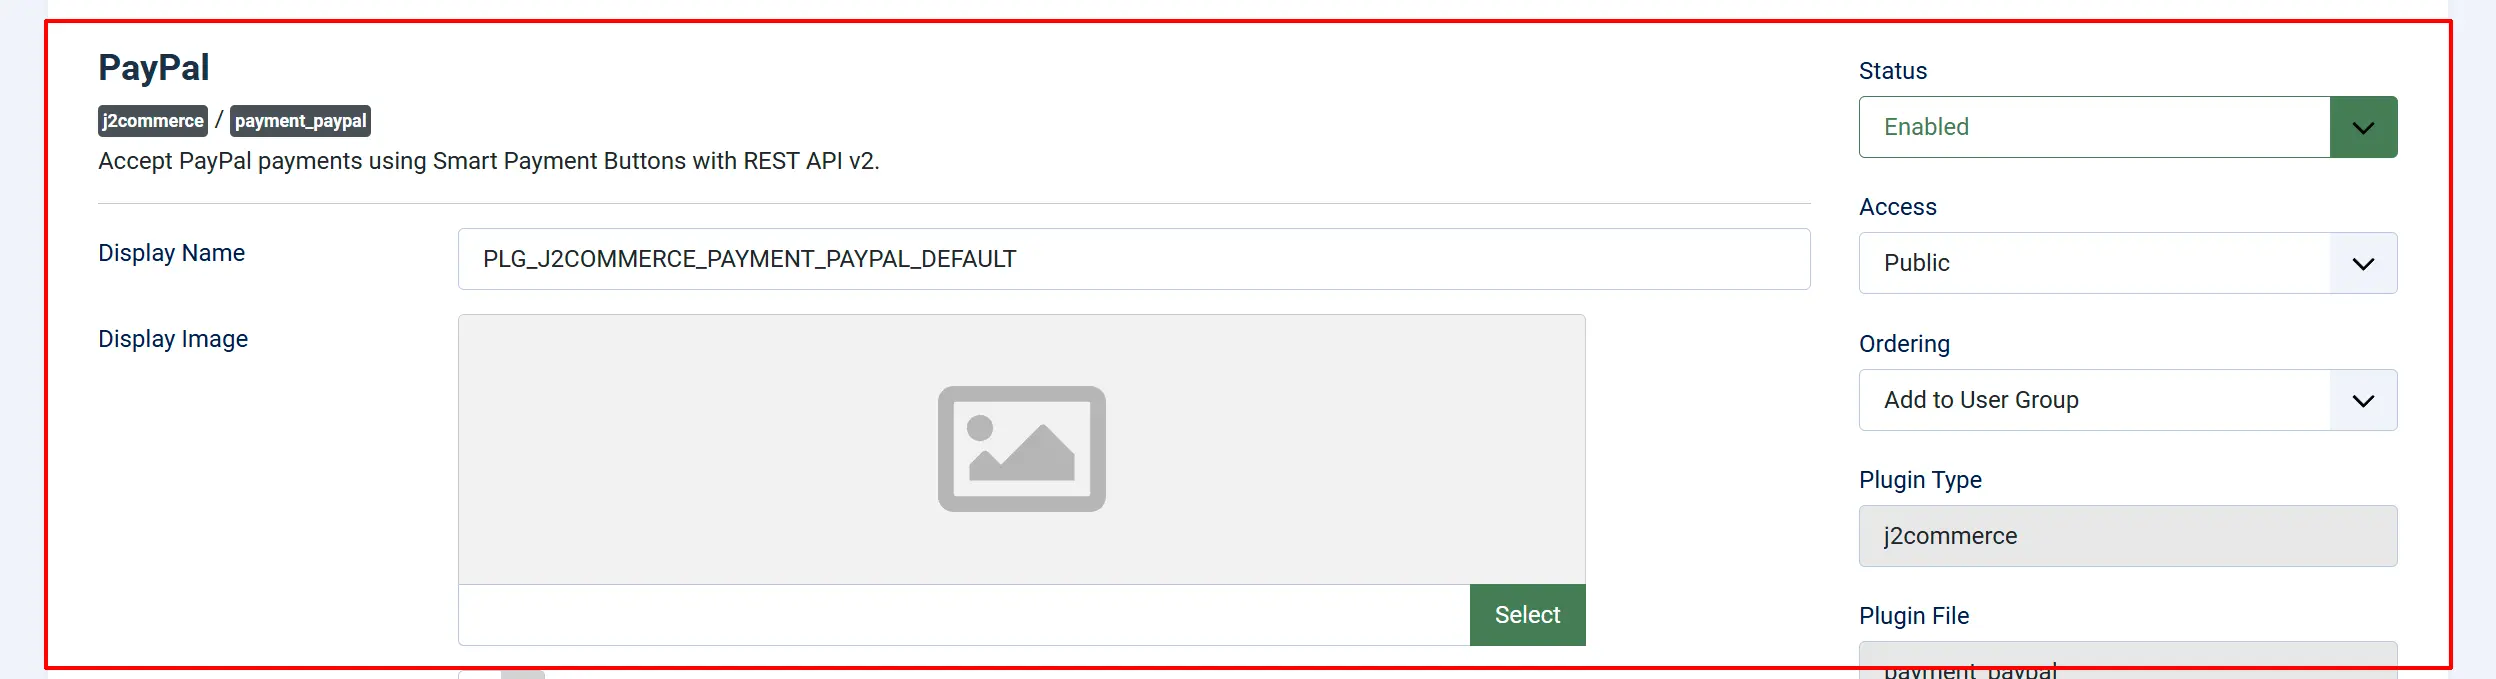
Display Name: The label shown to customers at checkout
Display Image: Optional logo or image shown next to the payment option at checkout
Sandbox Mode
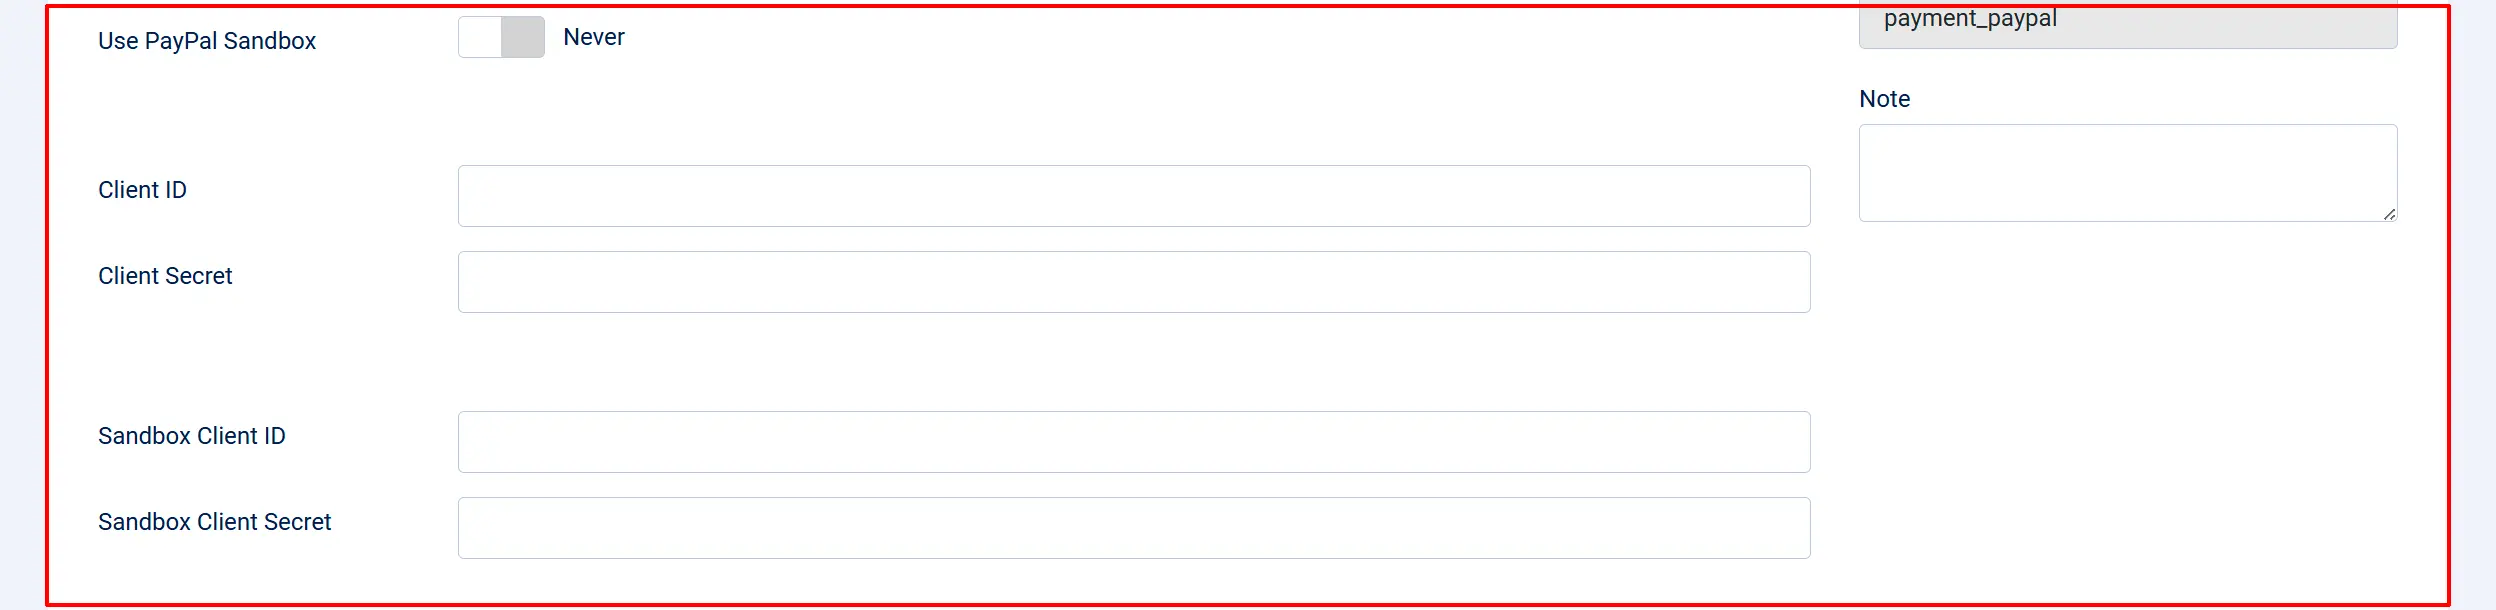
Use PayPal Sandbox: Switch this on to use PayPal's test environment. No real money is processed.
Turn sandbox mode on while you are setting up and testing. Turn it off before you go live.
When sandbox mode is active, a warning banner appears on the J2Commerce dashboard so you cannot accidentally forget.
Live API Credentials
These are used when Use PayPal Sandbox is set to No.
Client ID: Your live REST API Client ID from developer.paypal.com
Client Secret: Your live REST API Client Secret
Sandbox API Credentials
These are used when Use PayPal Sandbox is set to Yes.
Sandbox Client ID: Your sandbox REST API Client ID
Sandbox Client Secret: Your sandbox REST API Client Secret
Webhooks (Optional but Recommended)

Webhooks allow PayPal to notify your store automatically when payment events occur — for example, when a payment completes, is refunded, or is disputed. Without webhooks, order status updates only happen when the customer completes checkout on your page.
Webhook ID: The Webhook ID from your live PayPal app in the developer dashboard
Sandbox Webhook ID: The Webhook ID from your sandbox PayPal app
How to create a webhook in PayPal:
- In the PayPal Developer Dashboard, open your app.
- Scroll down to Webhooks and click Add Webhook.
- Enter your webhook URL. The URL format for J2Commerce is:
https://yoursite.com/index.php?option=com_j2commerce&task=checkout.processWebhook&payment_method=payment_paypal - Select the events you want to receive. Recommended events:
PAYMENT.CAPTURE.COMPLETED,PAYMENT.CAPTURE.DENIED,PAYMENT.CAPTURE.REFUNDED,PAYMENT.CAPTURE.REVERSED,CUSTOMER.DISPUTE.CREATED,CUSTOMER.DISPUTE.RESOLVED. - Click Save. Copy the Webhook ID shown and paste it into the plugin configuration.
Order Status
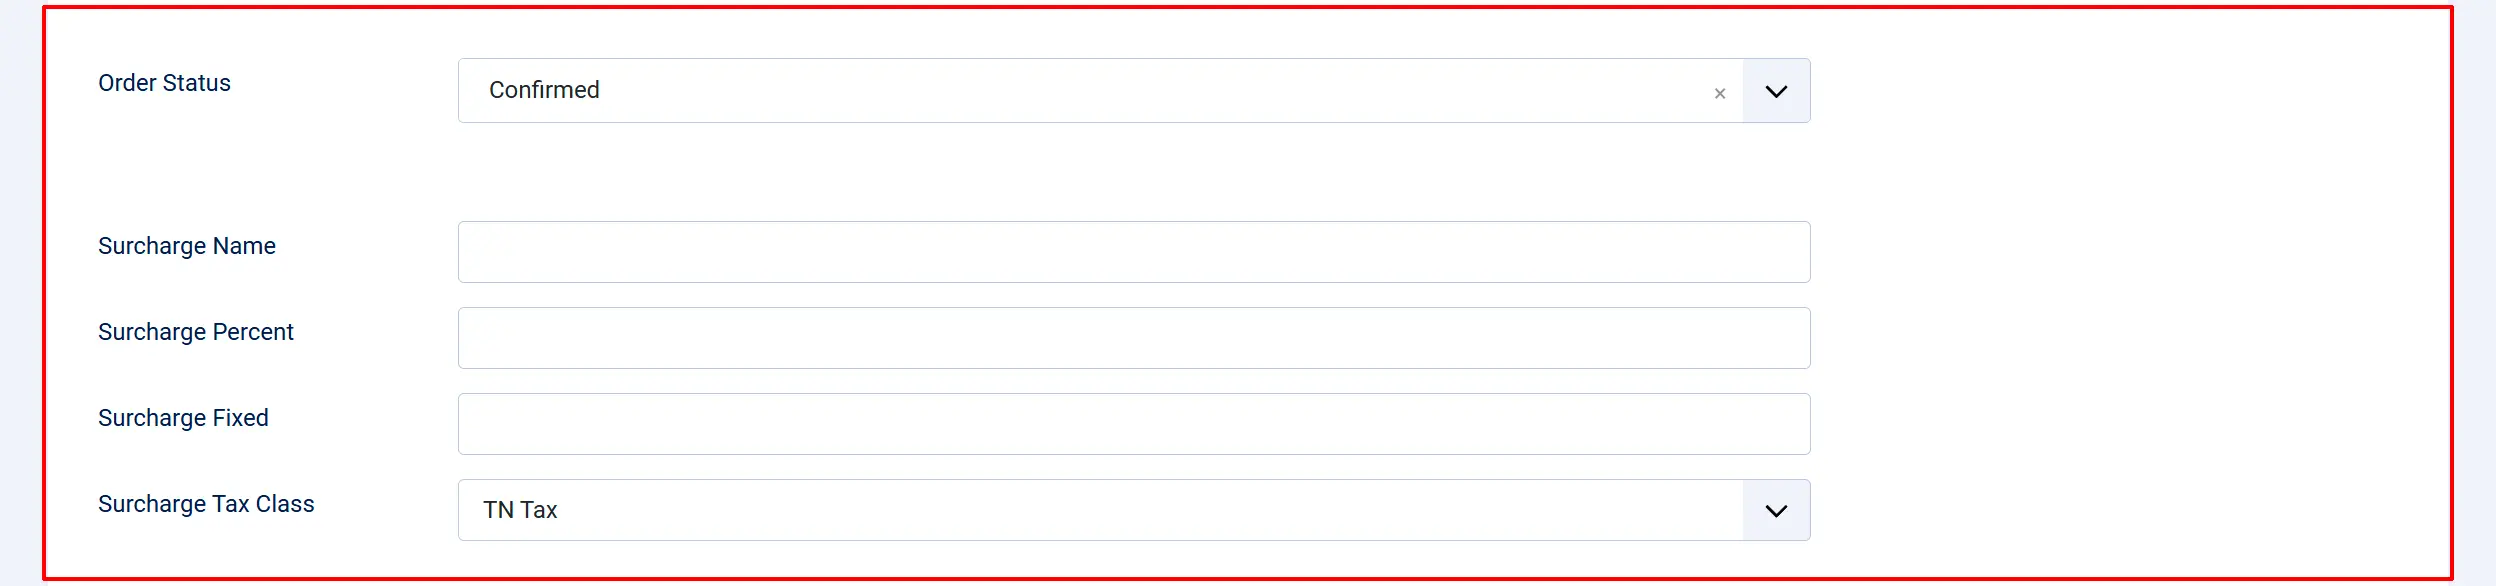
Order Status: The order status is applied after a successful payment capture
Choose the status that fits your workflow. Most stores use Confirmed or Processing for paid orders.
NOTE: If the status you want isn't listed in the dropdown menu, you can create a new one by going to J2Commerce -> Setup -> Order Statuses

Surcharge
Add an optional surcharge to orders paid via PayPal. This is useful if you want to pass on PayPal's processing fee to customers (check your local laws and PayPal's terms before doing this).
Surcharge Name: Label shown to customers for the surcharge (e.g., "PayPal Fee")
Surcharge Percent: Percentage of the order subtotal added as a surcharge
Surcharge Fixed: Fixed amount added as a surcharge
Surcharge Tax Class: Tax profile to apply to the surcharge amount
You can combine a percentage and a fixed amount — both will be added together.
Geo-Zone Restriction

Geo-Zone Restriction: Limit PayPal availability to customers in a specific geo-zone
Leave this empty to show PayPal to all customers regardless of location.
Order Amount Limits
Minimum Subtotal: Hide PayPal if the cart subtotal is below this amount. Leave empty for no minimum.
Maximum Subtotal: Hide PayPal if the cart subtotal exceeds this amount. Leave empty or set to -1 for no maximum.
Thank You Page
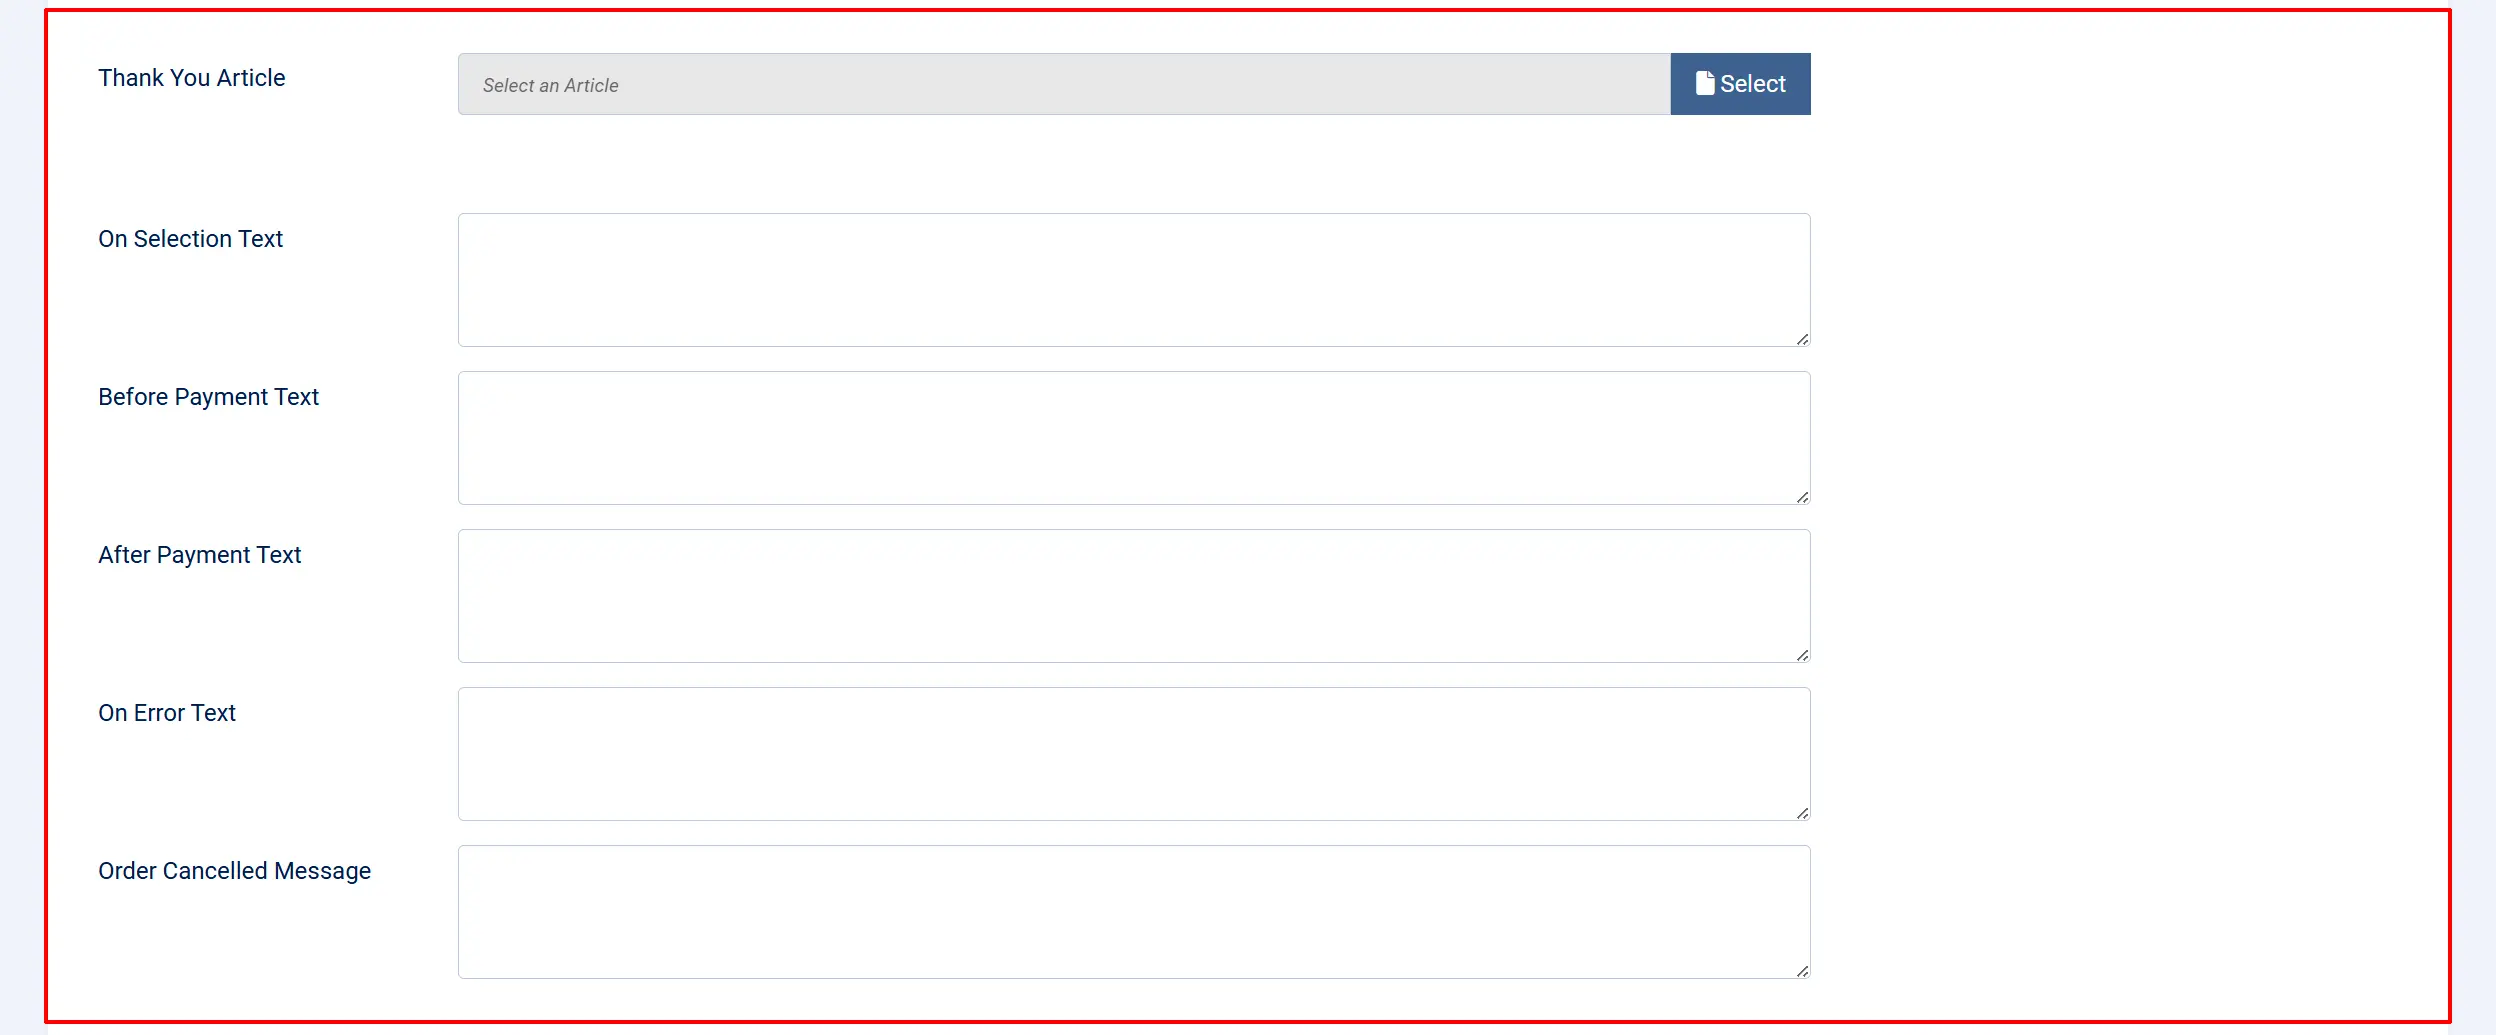
Thank You Article: Select a Joomla article to display after a successful payment. This is shown on the confirmation page in addition to the standard confirmation message.
Custom Messages
These text fields let you customize messages shown to customers at different points in the payment process.
On Selection: When the customer selects PayPal as their payment method
On Before Payment: On the payment page before the customer clicks Pay
On After Payment: On the confirmation page after a successful payment
On Error Payment: When a payment error occurs
On Cancel Payment: When the customer cancels payment and returns to the cart
Dashboard Icon

Show Dashboard Icon: Show a shortcut icon for PayPal on the J2Commerce dashboard
Dashboard Icon Label: Label for the dashboard icon (only visible when Show Dashboard Icon is Yes)
Subtemplate
Template Style: Select an alternative layout template for the PayPal payment form, if any are installed
Debug Mode
Debug Mode: Write detailed PayPal API activity to administrator/logs/payment_paypal.php and the browser console
Enable debug mode only while troubleshooting. Disable it in production — logs can grow large quickly.
Supported Currencies
PayPal does not support every currency. If your store uses a currency not in this list, PayPal will not be available at checkout.
Supported currencies: AUD, BRL, CAD, CNY, CZK, DKK, EUR, HKD, HUF, INR, ILS, JPY, MYR, MXN, TWD, NZD, NOK, PHP, PLN, GBP, RUB, SGD, SEK, CHF, THB, USD.
Checkout Experience
When a customer selects PayPal at checkout:
- The PayPal Smart Payment Buttons load on the page.
- The customer clicks their preferred option — PayPal, credit card, or any other method PayPal offers in their region.
- A PayPal login window (or card form) appears. The customer completes payment.
- The payment is captured immediately.
- The customer is returned to your confirmation page.
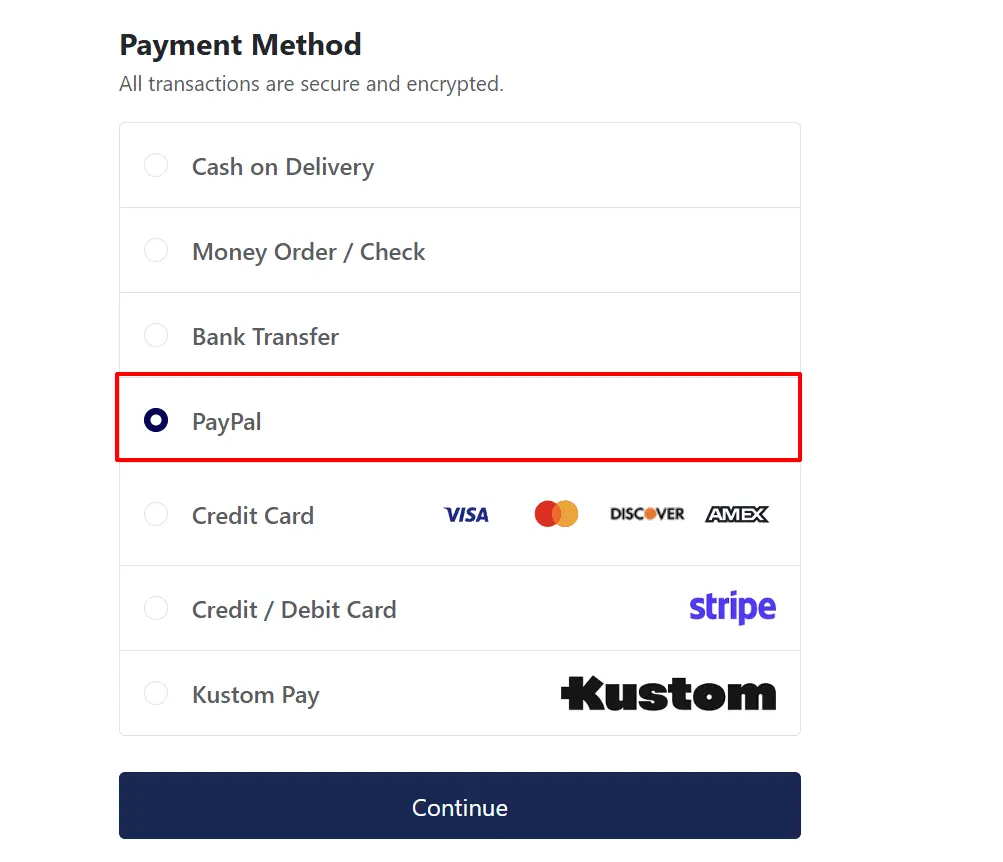
Payment happens without the customer leaving your site. The PayPal popup or inline experience handles authentication securely.
If the customer clicks Cancel in the PayPal window, they are returned to checkout and the cart remains intact. The cancellation message you configured is displayed.
Order Management
Once a customer pays, J2Commerce records the transaction details against the order:
- Order status is updated to the status you configured (default: Confirmed).
- Transaction ID — the PayPal capture ID — is stored with the order.
- Order history is updated with a "Payment received via PayPal" note.
Refunds
You can issue a refund directly from the order in the J2Commerce admin:
- Go to J2Commerce -> Sales -> Orders and open the order.
- Click the Refund button.
- Enter the amount to refund (leave blank to refund the full amount).
- Confirm the refund.
The refund is sent to PayPal via the API. The order status is updated and a note is added to the order history.
Webhook-Triggered Updates
If webhooks are configured, PayPal can update order statuses automatically for events that happen outside the normal checkout flow:
| PayPal Event | What happens in J2Commerce |
|---|---|
| Payment capture completed | Order status updated to the configured "Confirmed" state |
| Payment capture pending | Order status updated to Pending |
| Payment capture denied | Order status updated to Failed |
| Payment refunded | Order status updated to Refunded |
| Payment reversed (chargeback) | Order status updated to Failed, flagged for review in order history |
| Dispute created | Warning logged in the application log |
| Dispute resolved | Resolution logged in the application log |
Webhook events are deduplicated — if PayPal sends the same event twice, it is processed only once.
Going Live Checklist
Before accepting real payments, confirm the following:
- Use PayPal Sandbox is set to No
- Your live Client ID and Client Secret are entered
- The webhook URL is registered in your live PayPal app and the Webhook ID is saved
- You have placed a test order using a real PayPal account with a small amount and then refunded it
- Debug Mode is set to No
Troubleshooting
PayPal buttons do not appear at checkout
Cause: The Client ID is missing or incorrect, or the plugin is not enabled.
Solution:
- Go to J2Commerce -> Setup -> Payment Methods and confirm PayPal is enabled.
- Check that a Client ID (or Sandbox Client ID if in sandbox mode) is entered.
- Enable Debug Mode and check the browser console for error messages.
"PayPal plugin is not properly configured" message
Cause: The Client ID field is empty.
Solution: Open the PayPal plugin settings and enter your Client ID and Client Secret.
Payments go through in PayPal but the order stays Pending
Cause: Webhooks are not configured, so J2Commerce does not receive the payment confirmation from PayPal.
Solution:
- Set up a webhook in your PayPal app (see Webhooks above).
- Enter the Webhook ID in the plugin settings.
- Alternatively, the order status is also updated during the capture step — if the customer completed checkout successfully, check whether the order status was set at that time.
"Currency not supported" error
Cause: Your store's active currency is not in PayPal's supported currency list.
Solution: Switch your store to a supported currency or configure a separate currency for PayPal-eligible customers.
Refund fails with an error
Cause: The PayPal capture ID is missing from the order, or the transaction has already been refunded.
Solution:
- Open the order and check that a Transaction ID is recorded.
- If the Transaction ID is empty, the payment may not have been captured correctly. Check the debug log.
- Log in to your PayPal Business account and verify the transaction status there.
Dashboard shows "PayPal is in Sandbox mode" warning
Cause: Use PayPal Sandbox is set to Yes.
Solution: If you are ready to go live, open the PayPal plugin settings and switch Use PayPal Sandbox to No, then enter your live credentials.
Support
For help with the PayPal plugin:
- J2Commerce documentation: docs.j2commerce.com
- J2Commerce support: www.j2commerce.com
- PayPal Developer Dashboard: developer.paypal.com
- PayPal Business support: paypal.com/support