Authorize.Net Payment Plugin
The Authorize.Net plugin lets your store accept credit card payments — Visa, Mastercard, Discover, and American Express — processed through the Authorize.Net payment gateway. It uses Authorize.Net's Accept.js library so raw card numbers never reach your server, which reduces your PCI compliance burden significantly.
The plugin also supports saving cards for returning customers and processing subscription renewal payments automatically through Authorize.Net's Customer Information Manager (CIM).
Requirements
- with PHP 8.3.0 +
- Joomla! 6.x
- J2Commerce 6.x
Prerequisites
- J2Commerce 6 installed and active
- An Authorize.Net merchant account (live or sandbox)
- Four credentials from your Authorize.Net dashboard: API Login ID, Transaction Key, Public Client Key, and Signature Key
- Your server must have outbound HTTPS access (port 443) to
api.authorize.net
Purchase and Download
This plugin is a separate add-on available from the J2Commerce Extensions Store. It is not included with the core J2Commerce 6 component.
Step 1: Go to our J2Commerce website -> Payment Plugin
Step 2: Locate the Authorize.Net Plugin -> click View Details -> Add to cart -> Checkout.
Step 3: Go to your My Downloads under your profile button at the top right corner and search for the app. Click Available Versions -> View Files -> Download Now
Installing the Plugin
You can install this Authorize.net Payment plugin using the Joomla installer. The following steps help you with a successful installation.
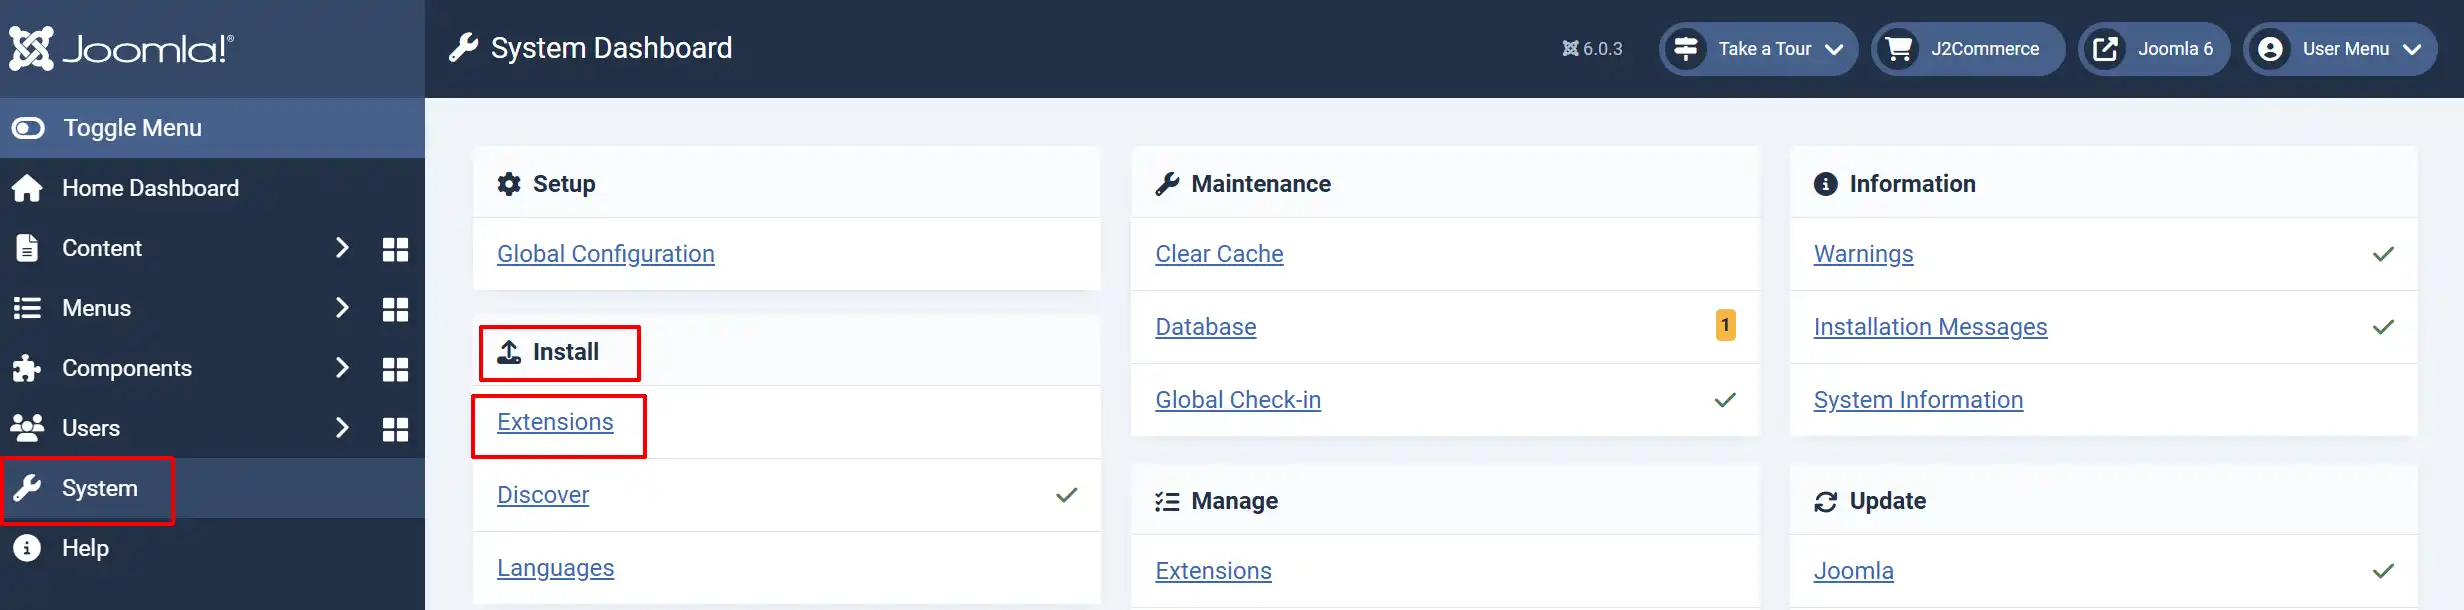
In the Joomla admin, go to System -> Install -> Extensions
Upload the plugin ZIP file or use the install from URL option.
Enable the Plugin
Once you have installed the extension, you will need to enable it. There are two ways you can access the extension.
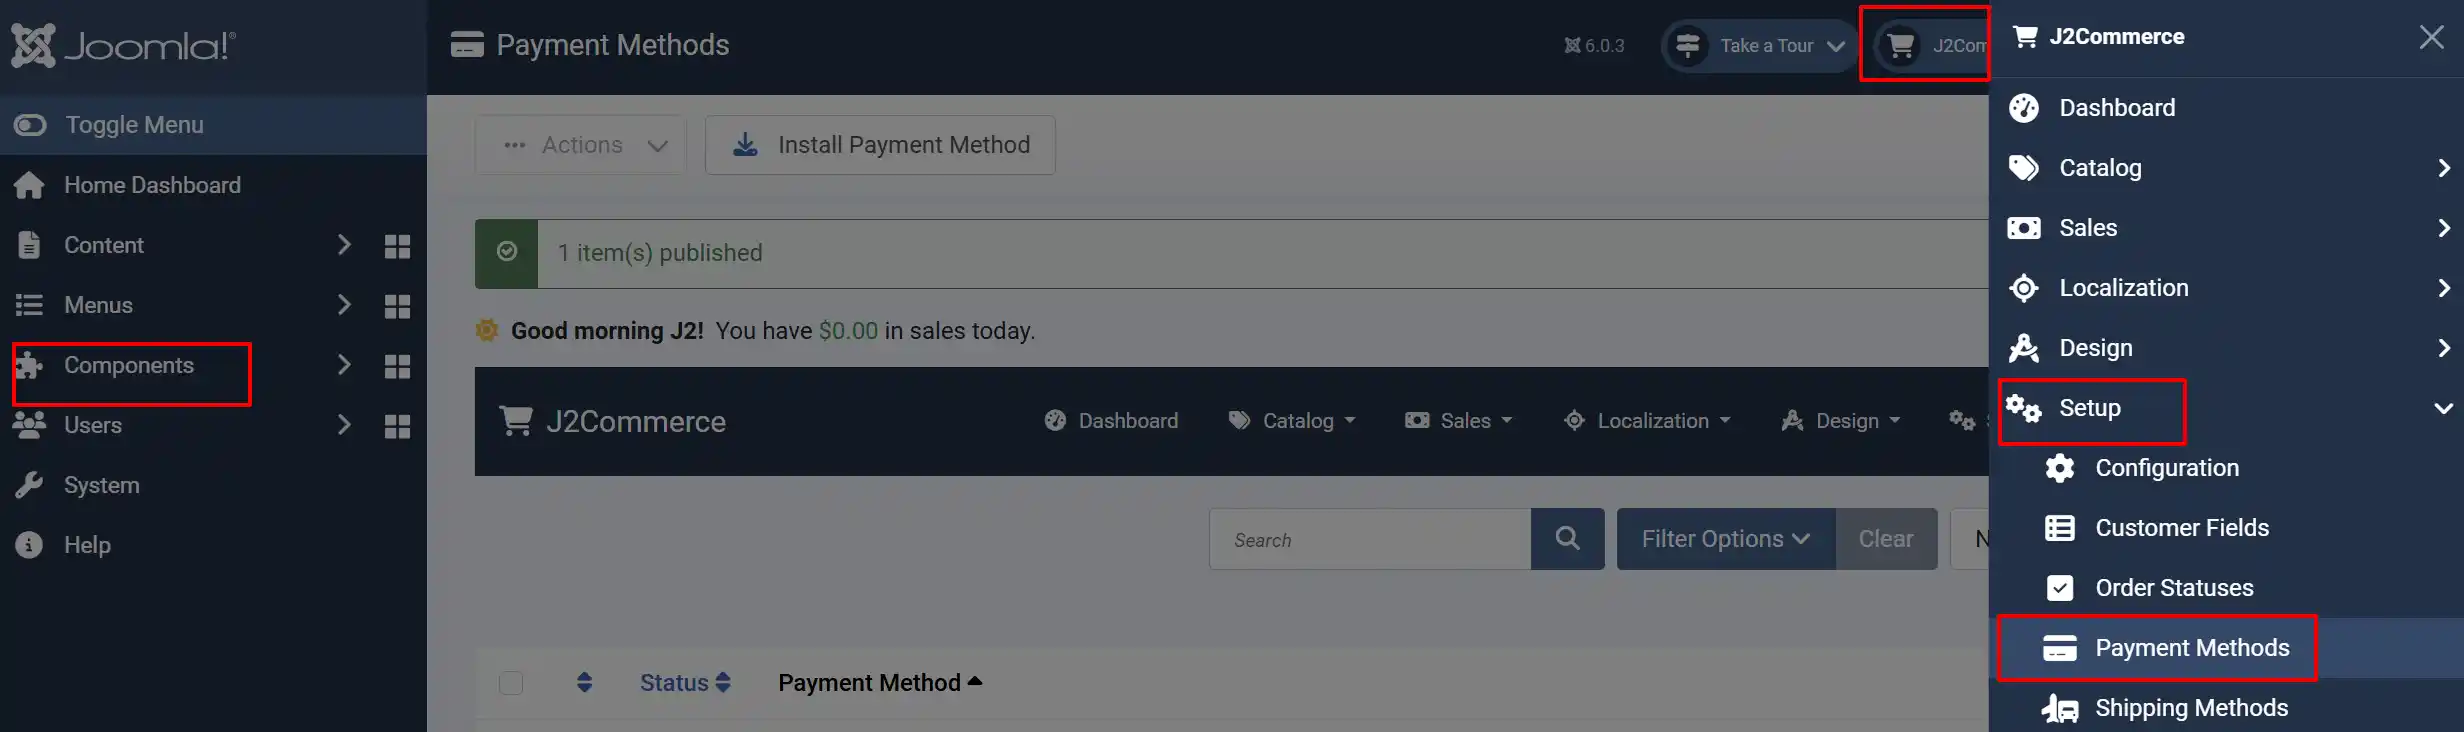
Option A: Go to the J2Commerce icon at the top right corner -> Setup -> Payment Methods
Option B: Go to Components on the left sidebar -> J2Commerce -> Dashboard -> Setup -> Payment Methods
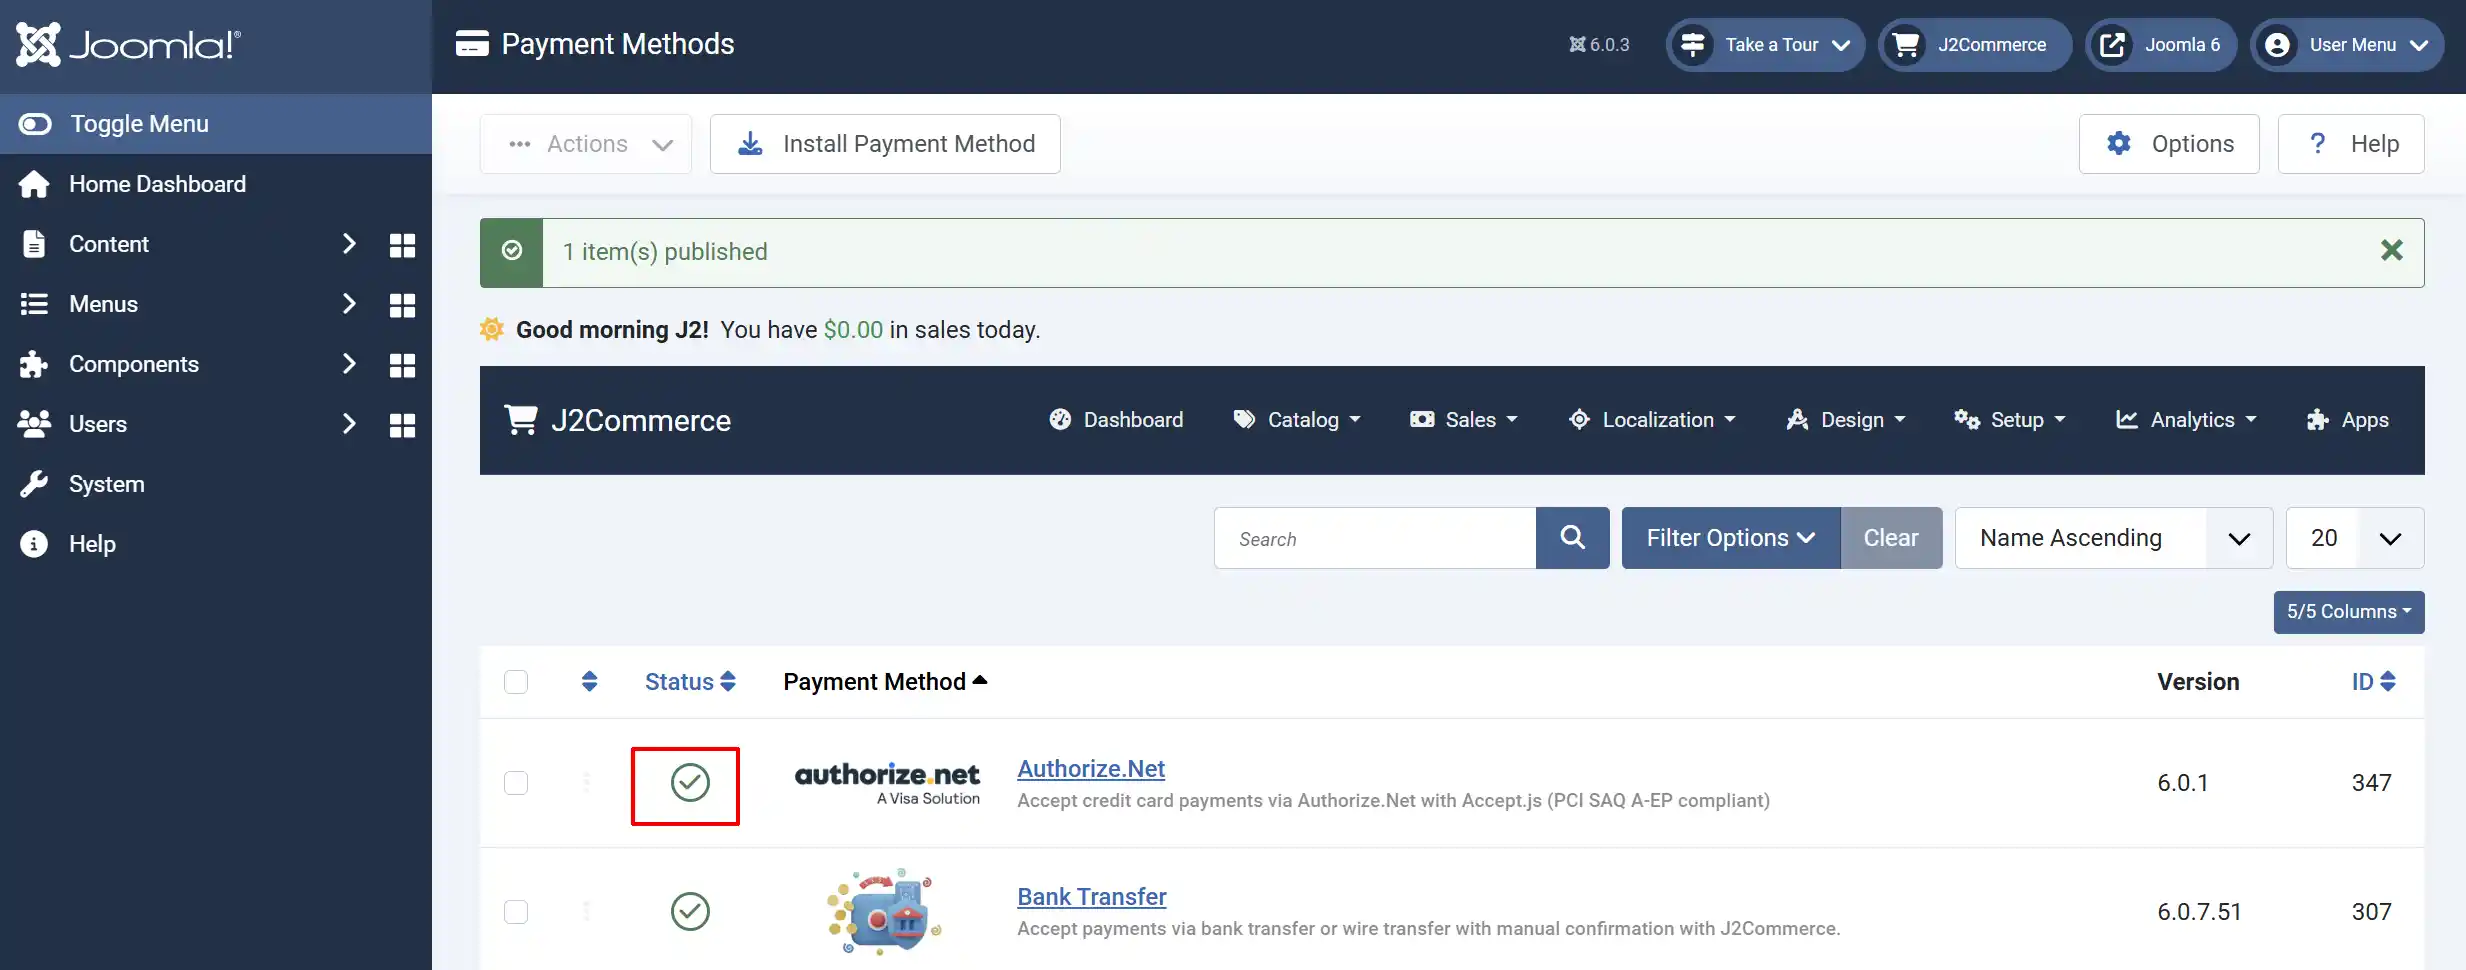
Look for Authorize.net, click the X, and it will turn into a green checkmark. It is now enabled and ready for setup.
Getting Your API Credentials
In order for you to configure the plugin, you need four values from your Authorize.Net account. All four are found in the Authorize.Net Merchant Interface.
We recommend that you open two tabs in your browser (open the app from J2Commerce and your account with Authorize.net so you can easily just copy/paste when you receive your credentials by following the steps below.
NOTE: If you want to try it out on a non-live site then you need to create an account on the developer site first to retrieve the Keys for Sandbox Mode. To create an account go to https://developer.authorize.net/hello_world/sandbox.html
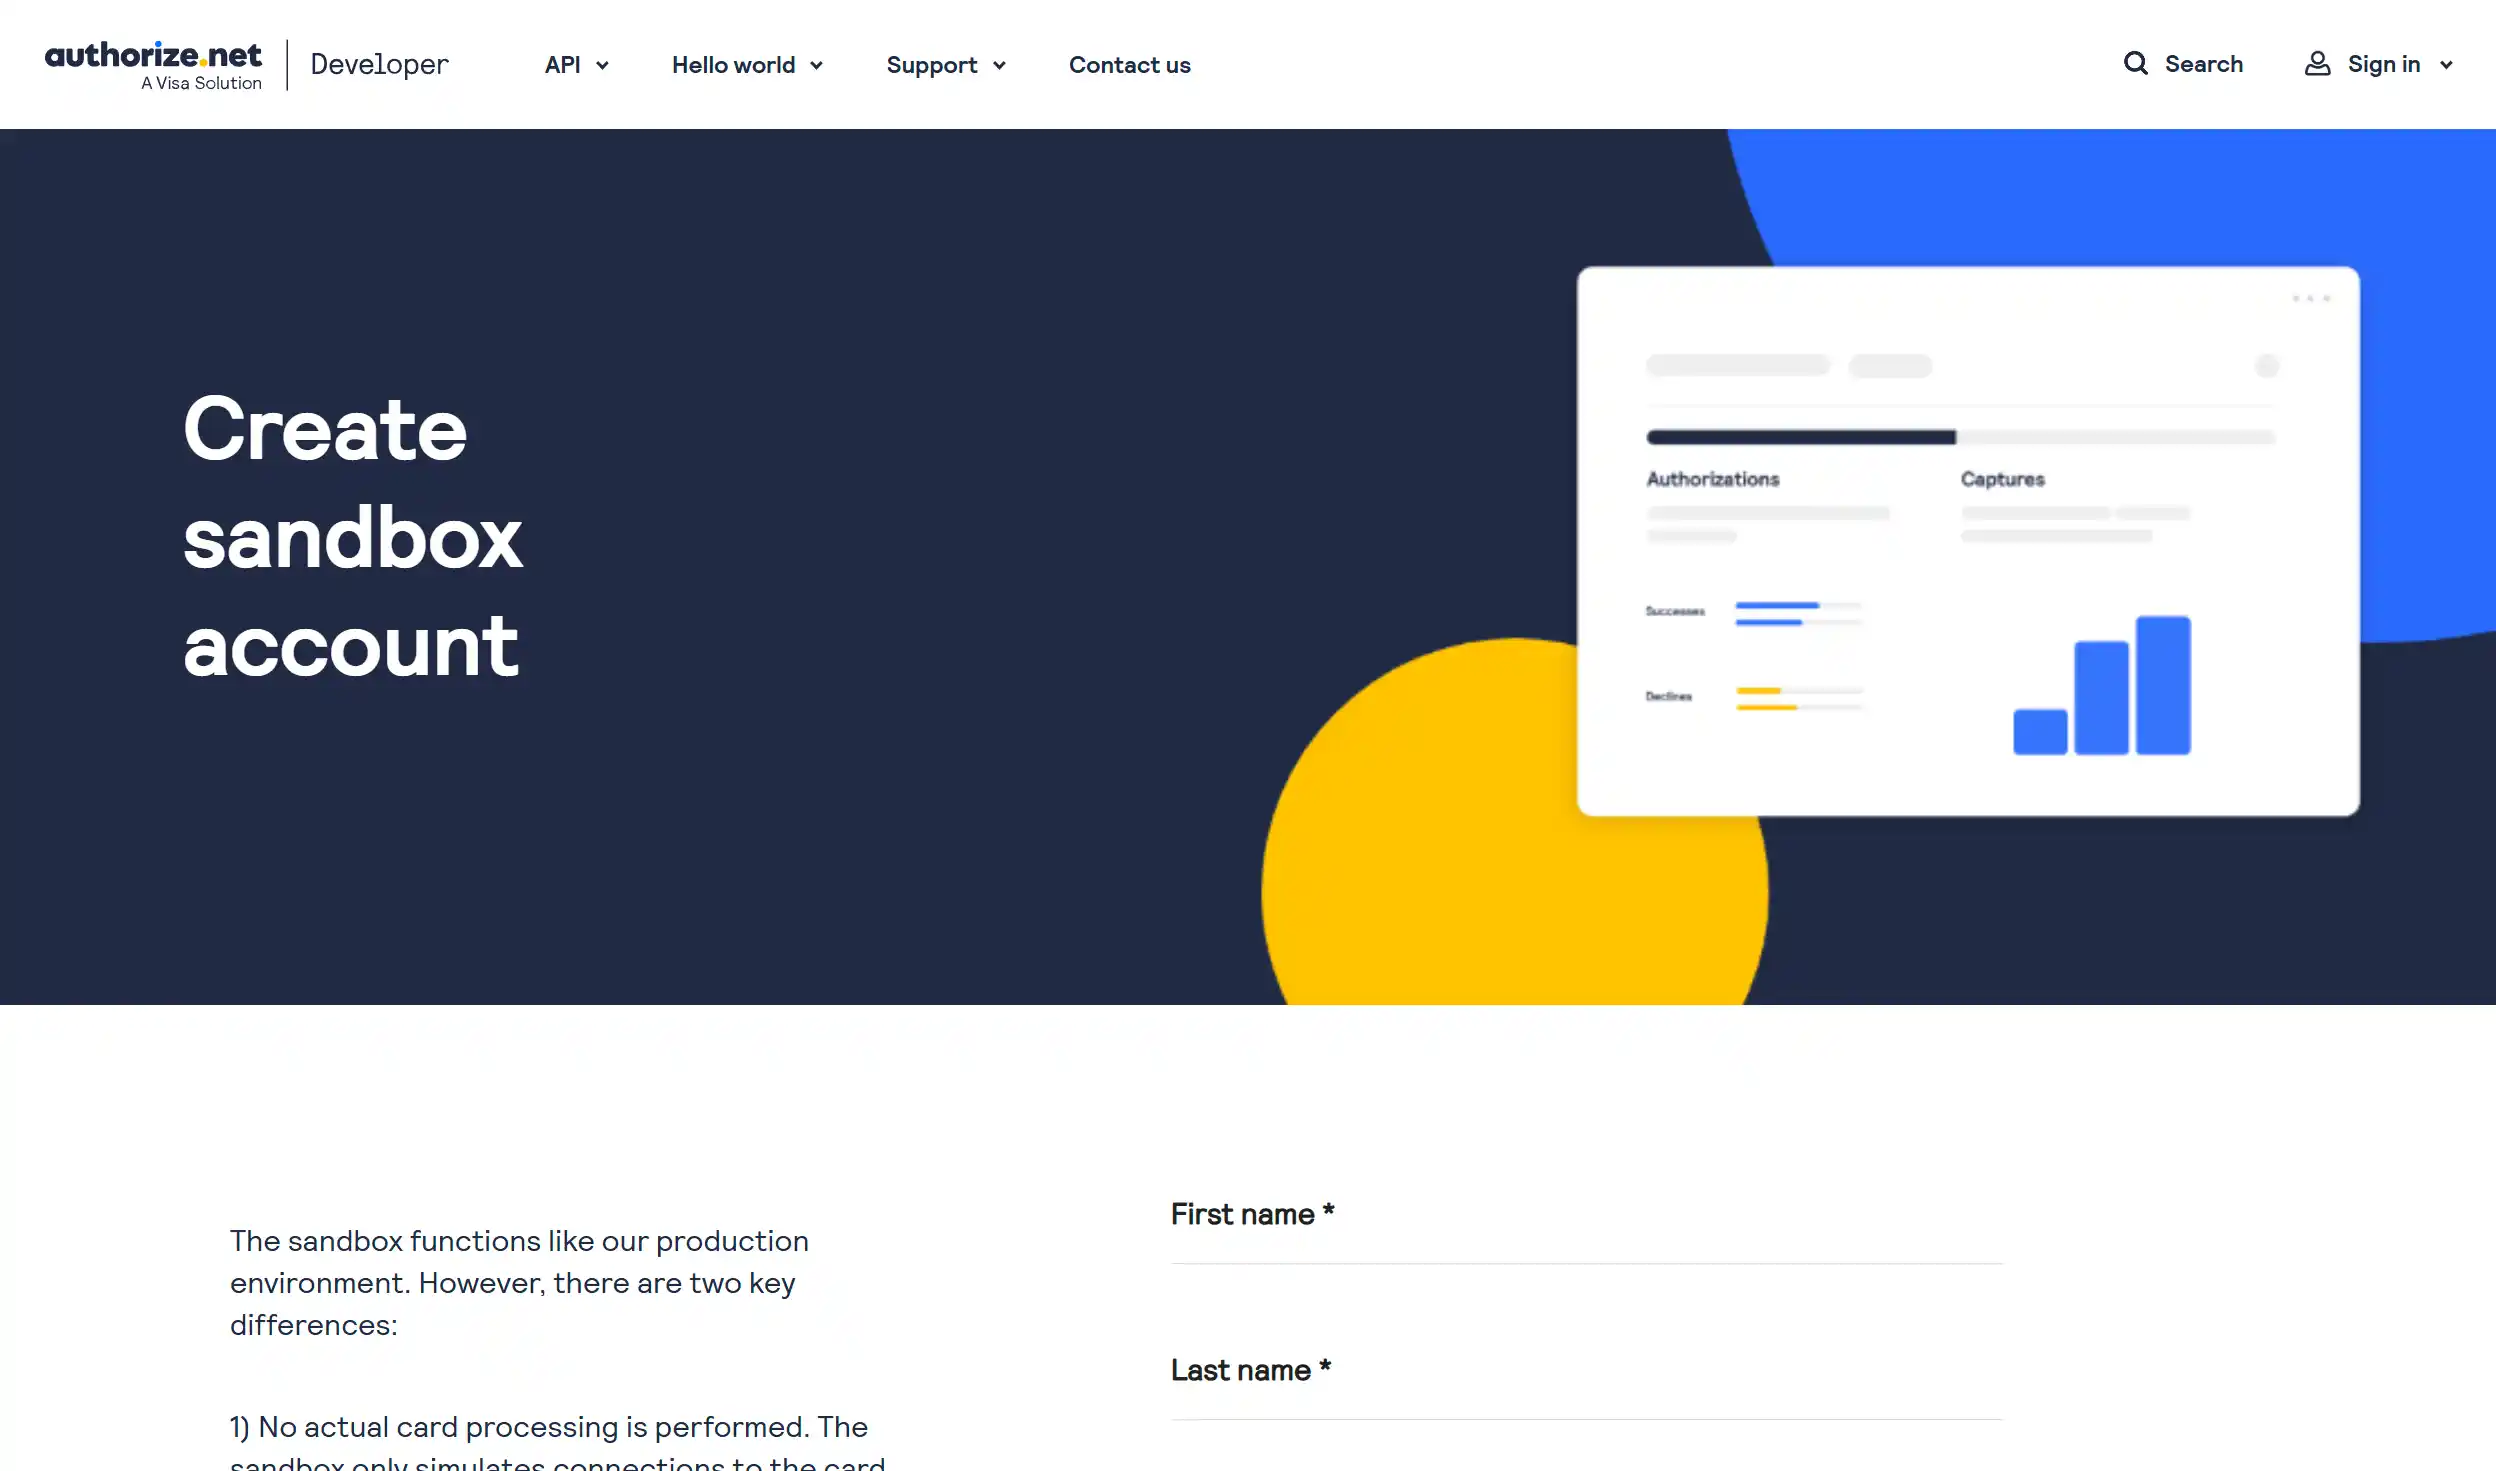
Once you have created an account, you can follow the steps below
Getting Your API Credentials
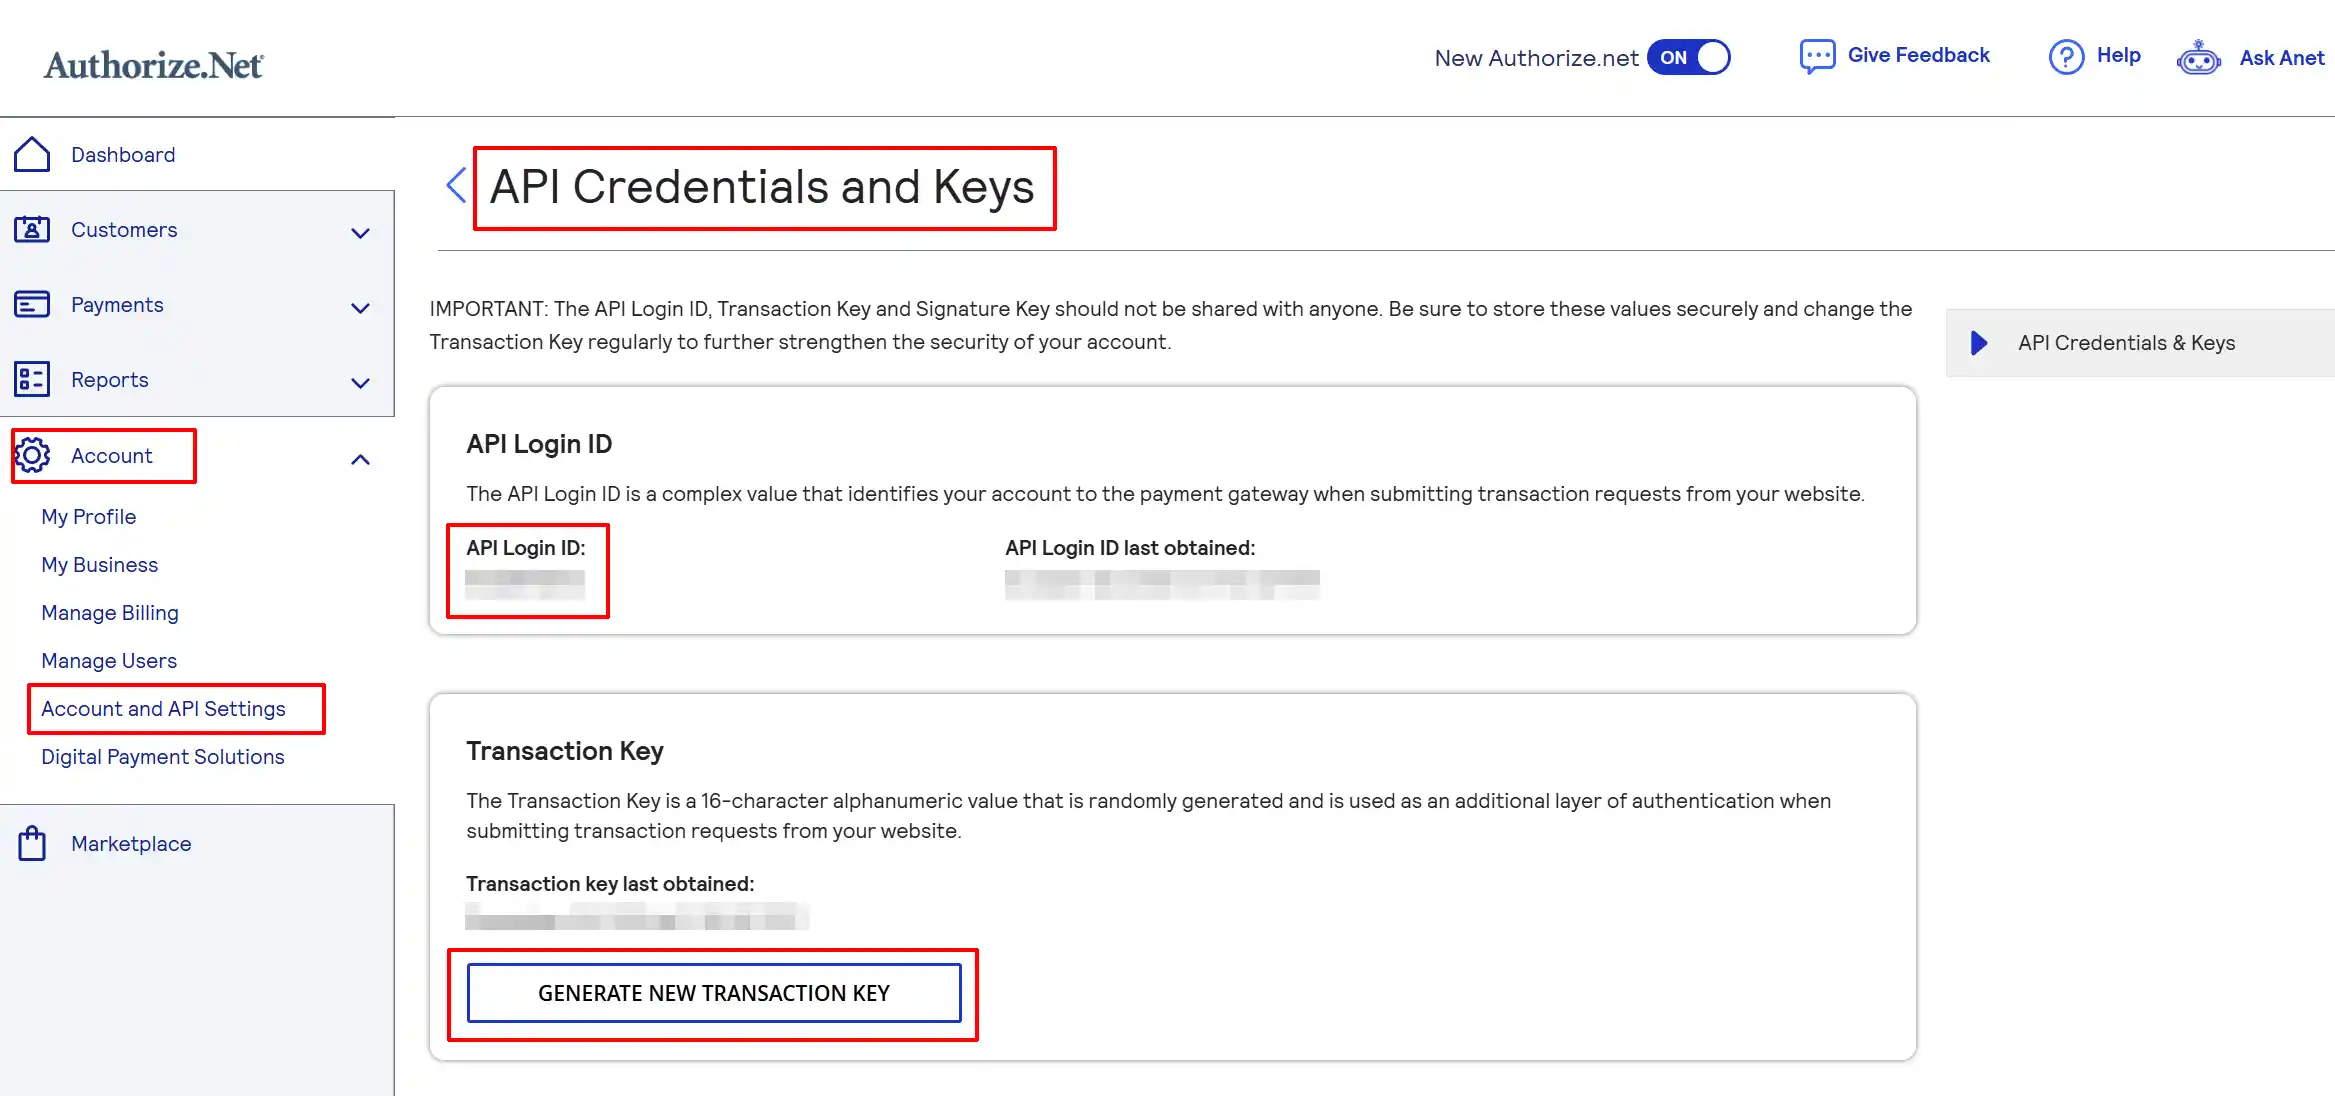
- Log in to your Authorize.Net Merchant Interface at https://account.authorize.net.
- Go to Account -> Account and API Settings -> API Credentials & Keys.
- Copy your API Login ID — this is shown on the page.
- To get or generate a Transaction Key, click Generate New Transaction Key, confirm your secret answer, and copy the key shown. Store it somewhere safe — it is only shown once.
Public Client Key
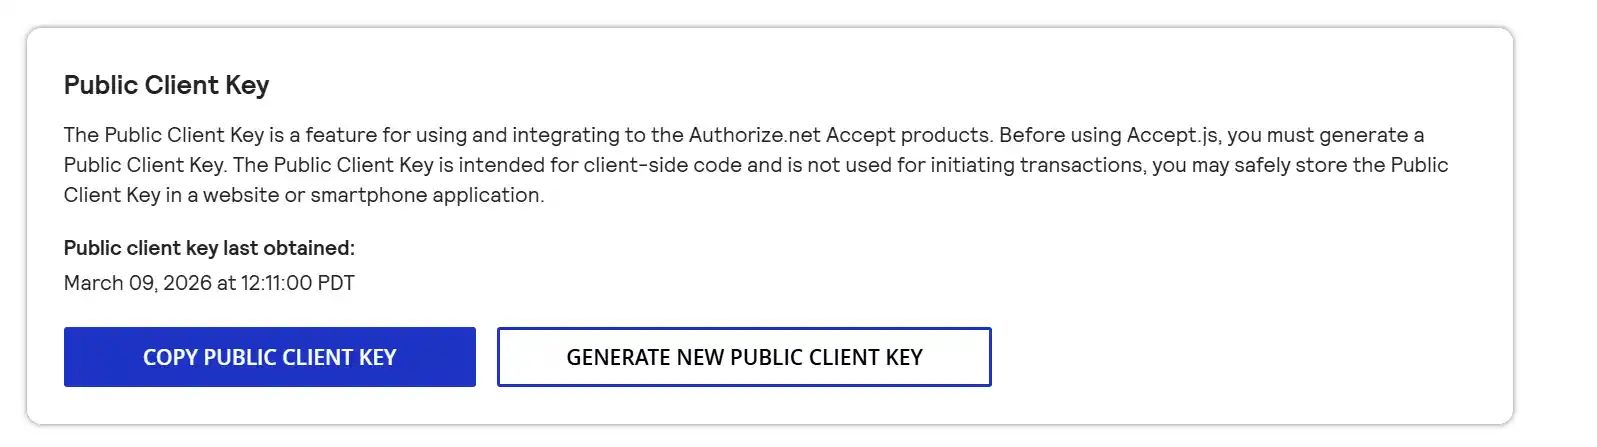
The Public Client Key is used by Accept.js to tokenize card data in the browser. It is safe to expose in the page source.
- Go to the same location listed above (Account -> Account and API Settings -> API Credentials & Keys)
- If no key exists yet, click Generate New Key to generate one.
- Copy the key shown.
Signature Key
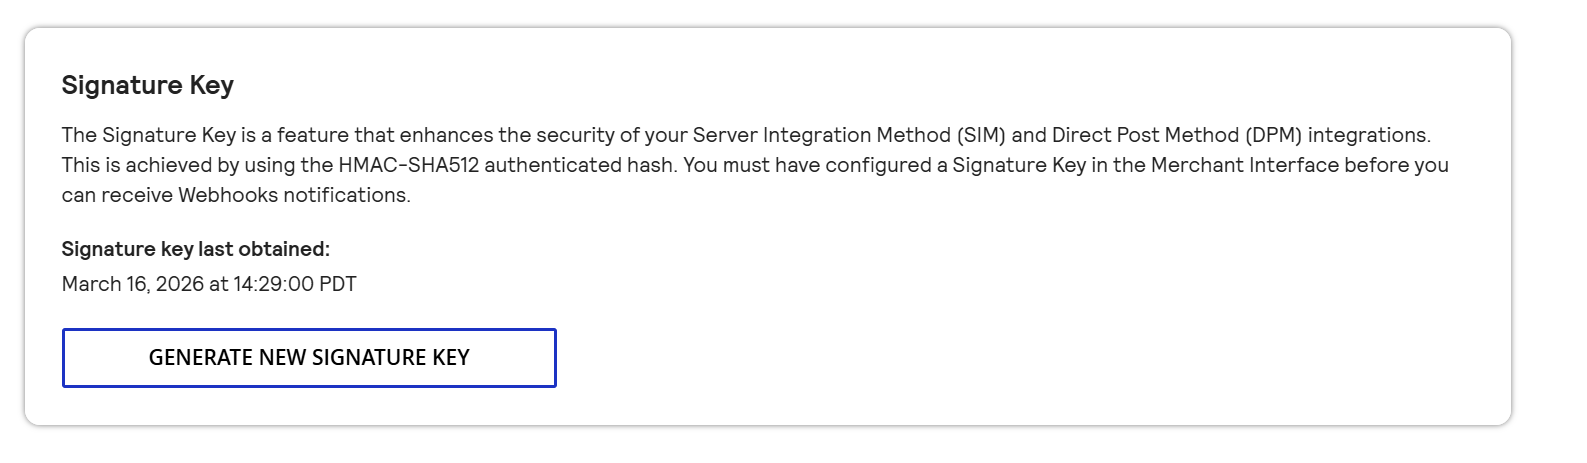
The Signature Key is used to verify that incoming webhook notifications actually come from Authorize.Net.
- Go to the same location listed above (Account -> Account and API Settings -> API Credentials & Keys)
- Under Signature Key, click Generate New Signature Key and copy the value shown.
Sandbox Mode: If you are using the Authorize.Net sandbox, log in at https://sandbox.authorize.net to obtain your sandbox credentials. Sandbox credentials are separate from live credentials and only work in sandbox mode.
Configure the Plugin
Open the plugin settings by going to J2Commerce -> Setup -> Payment Methods, then click the Authorize.Net title to start setting up the parameters.
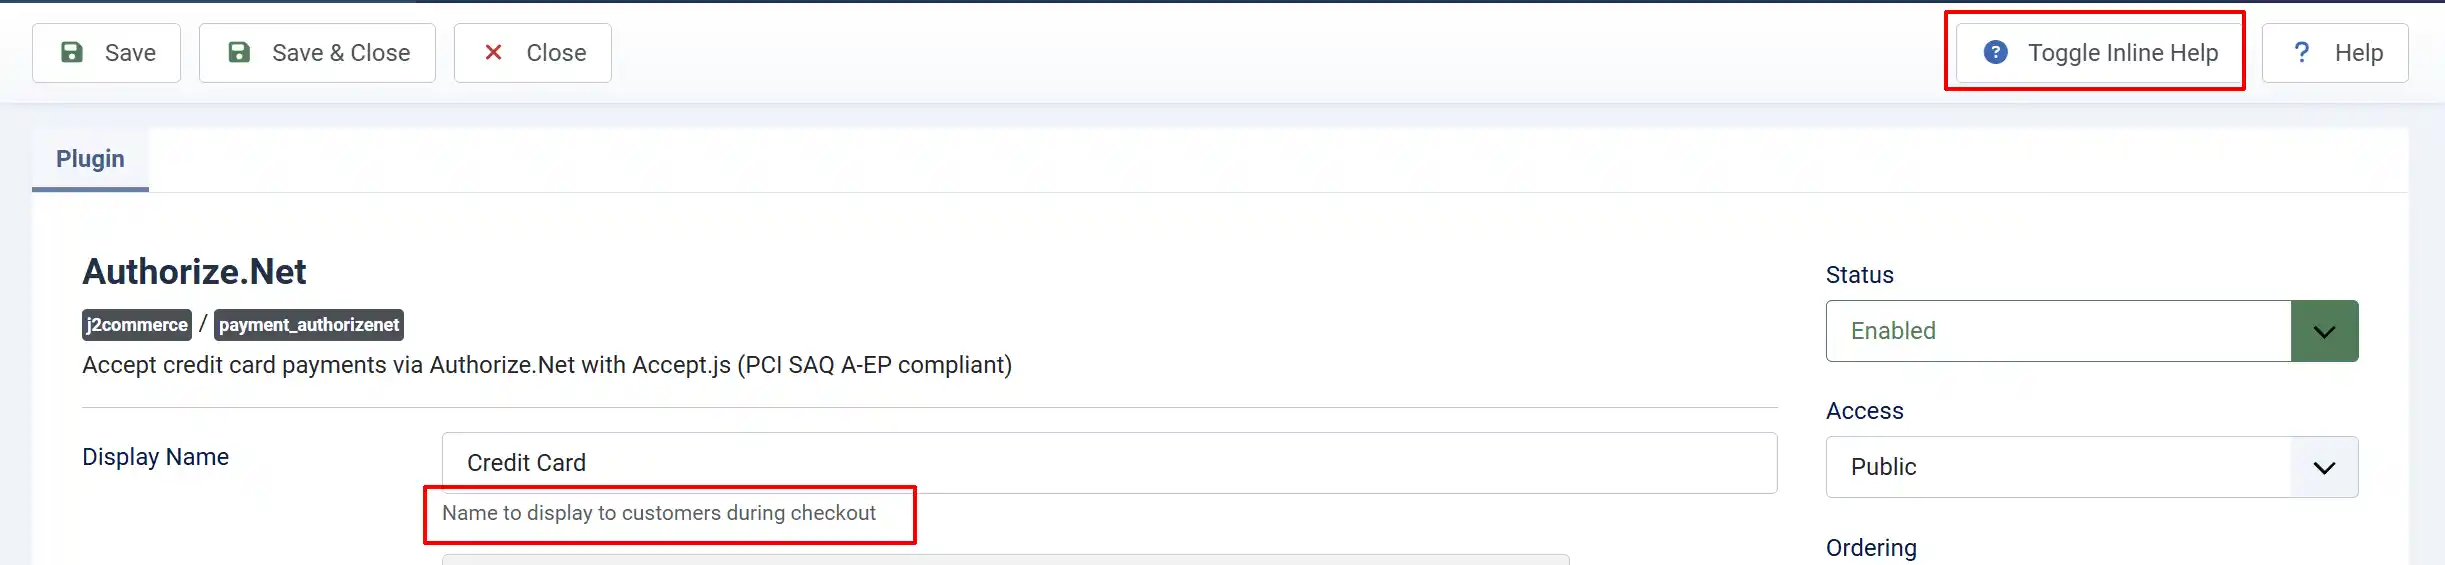
Tip: Click on the Toggle Inline Help button on any app/plugin you install and it will show a description below each section. See image below
Display Settings
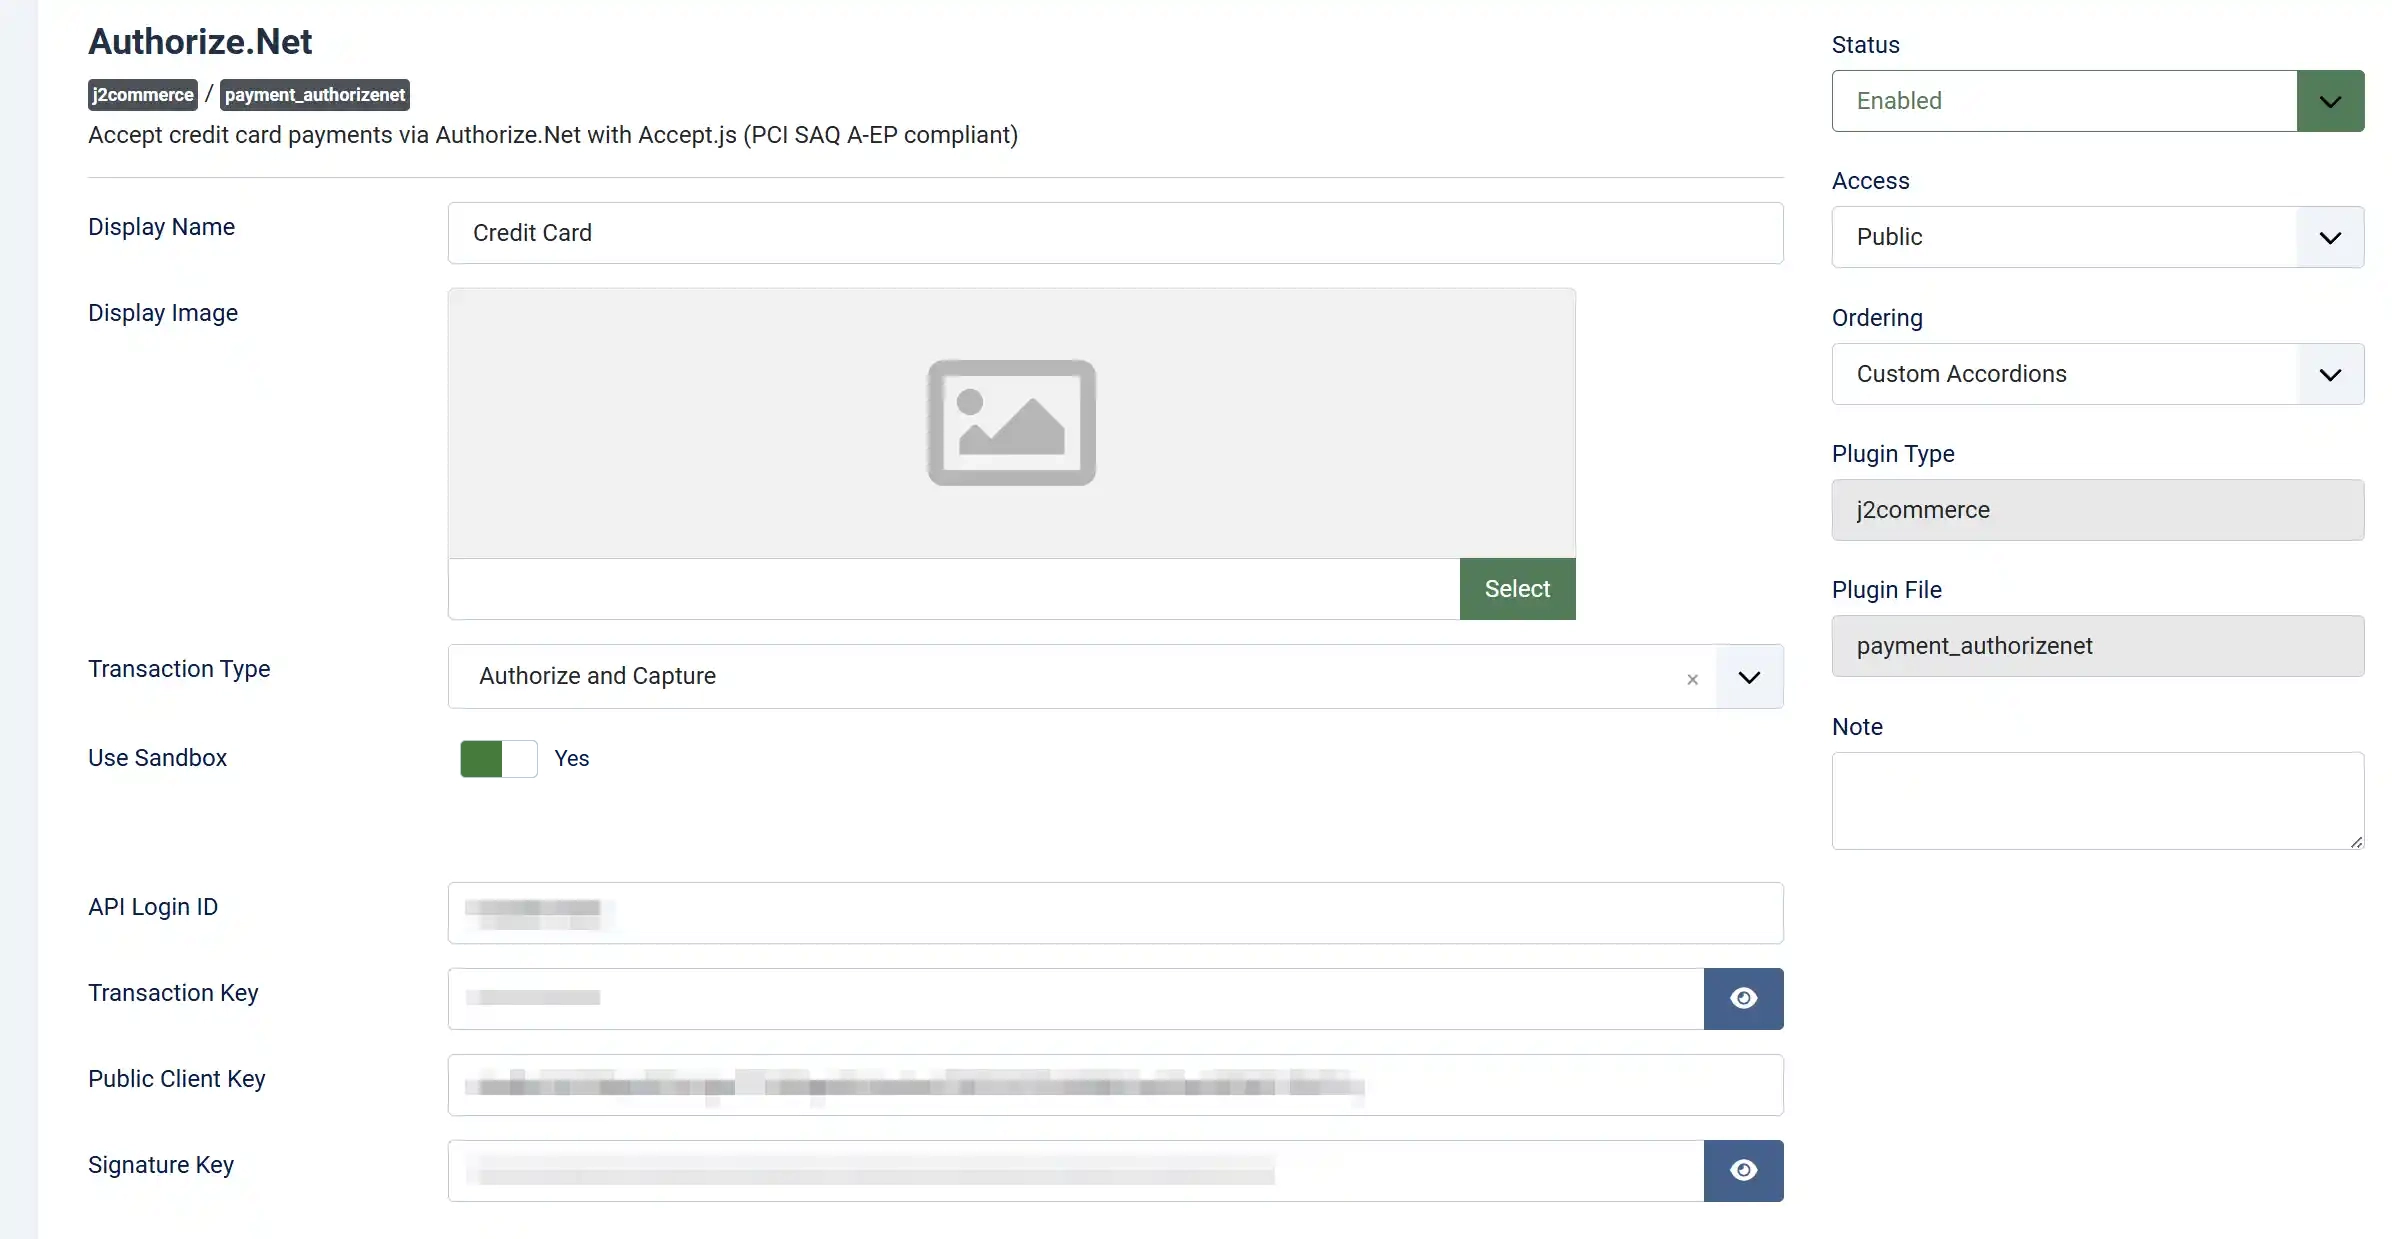
Display Name: The name customers see at checkout, e.g. "Credit Card" or "Pay by Card".
Display Image: An optional logo or card brand image shown next to the payment option at checkout.
Transaction Type: Controls how charges are applied.
-
Authorize and Capture — charges the card immediately when the order is placed.
-
Authorize Only — reserves the funds but does not charge; you must manually capture the payment later from within Authorize.Net.
Most stores should use Authorize and Capture. Use Authorize Only if you need to review orders before charging or if you ship physical goods and want to capture at the time of shipment.
Use Sandbox: Toggle between sandbox (test) mode and live mode. When enabled, sandbox credentials are used and no real payments are processed. You first have to create an account of the Developer site of Authorize.net in order to receive the Sandbox Credentials
Live Credentials
These fields are active when Use Sandbox is set to No.
API Login ID: Your live API Login ID from Authorize.Net.
Transaction Key: Your live Transaction Key.
Public Client Key: Your live Public Client Key — required for Accept.js tokenization.
Signature Key: Your live Signature Key — required for webhook verification.
Sandbox Credentials
These fields appear and become active only when Use Sandbox is set to Yes.
Sandbox API Login ID: Your sandbox API Login ID from https://sandbox.authorize.net.
Sandbox Transaction Key: Your sandbox Transaction Key.
Sandbox Public Client Key: Your sandbox Public Client Key.
Sandbox Signature Key: Your sandbox Signature Key.
Tip: Keep your sandbox credentials filled in even after going live. That way, you can quickly switch back to test mode without re-entering them.
Sandbox Test Card Numbers
Use these card numbers on the checkout form while in sandbox mode. Any future expiry date and any 3-digit CVV work.
| Card Type | Test Card Number |
|---|---|
| Visa | 4111111111111111 |
| Mastercard | 5424000000000015 |
| Discover | 6011000000000012 |
| American Express | 370000000000002 |
To test a declined card, use 4000300011112220.
Important: Switch Use Sandbox back to No and enter your live credentials before going live. The sandbox warning banner appears on the J2Commerce dashboard whenever sandbox mode is active, so it is easy to spot.
Transaction Type
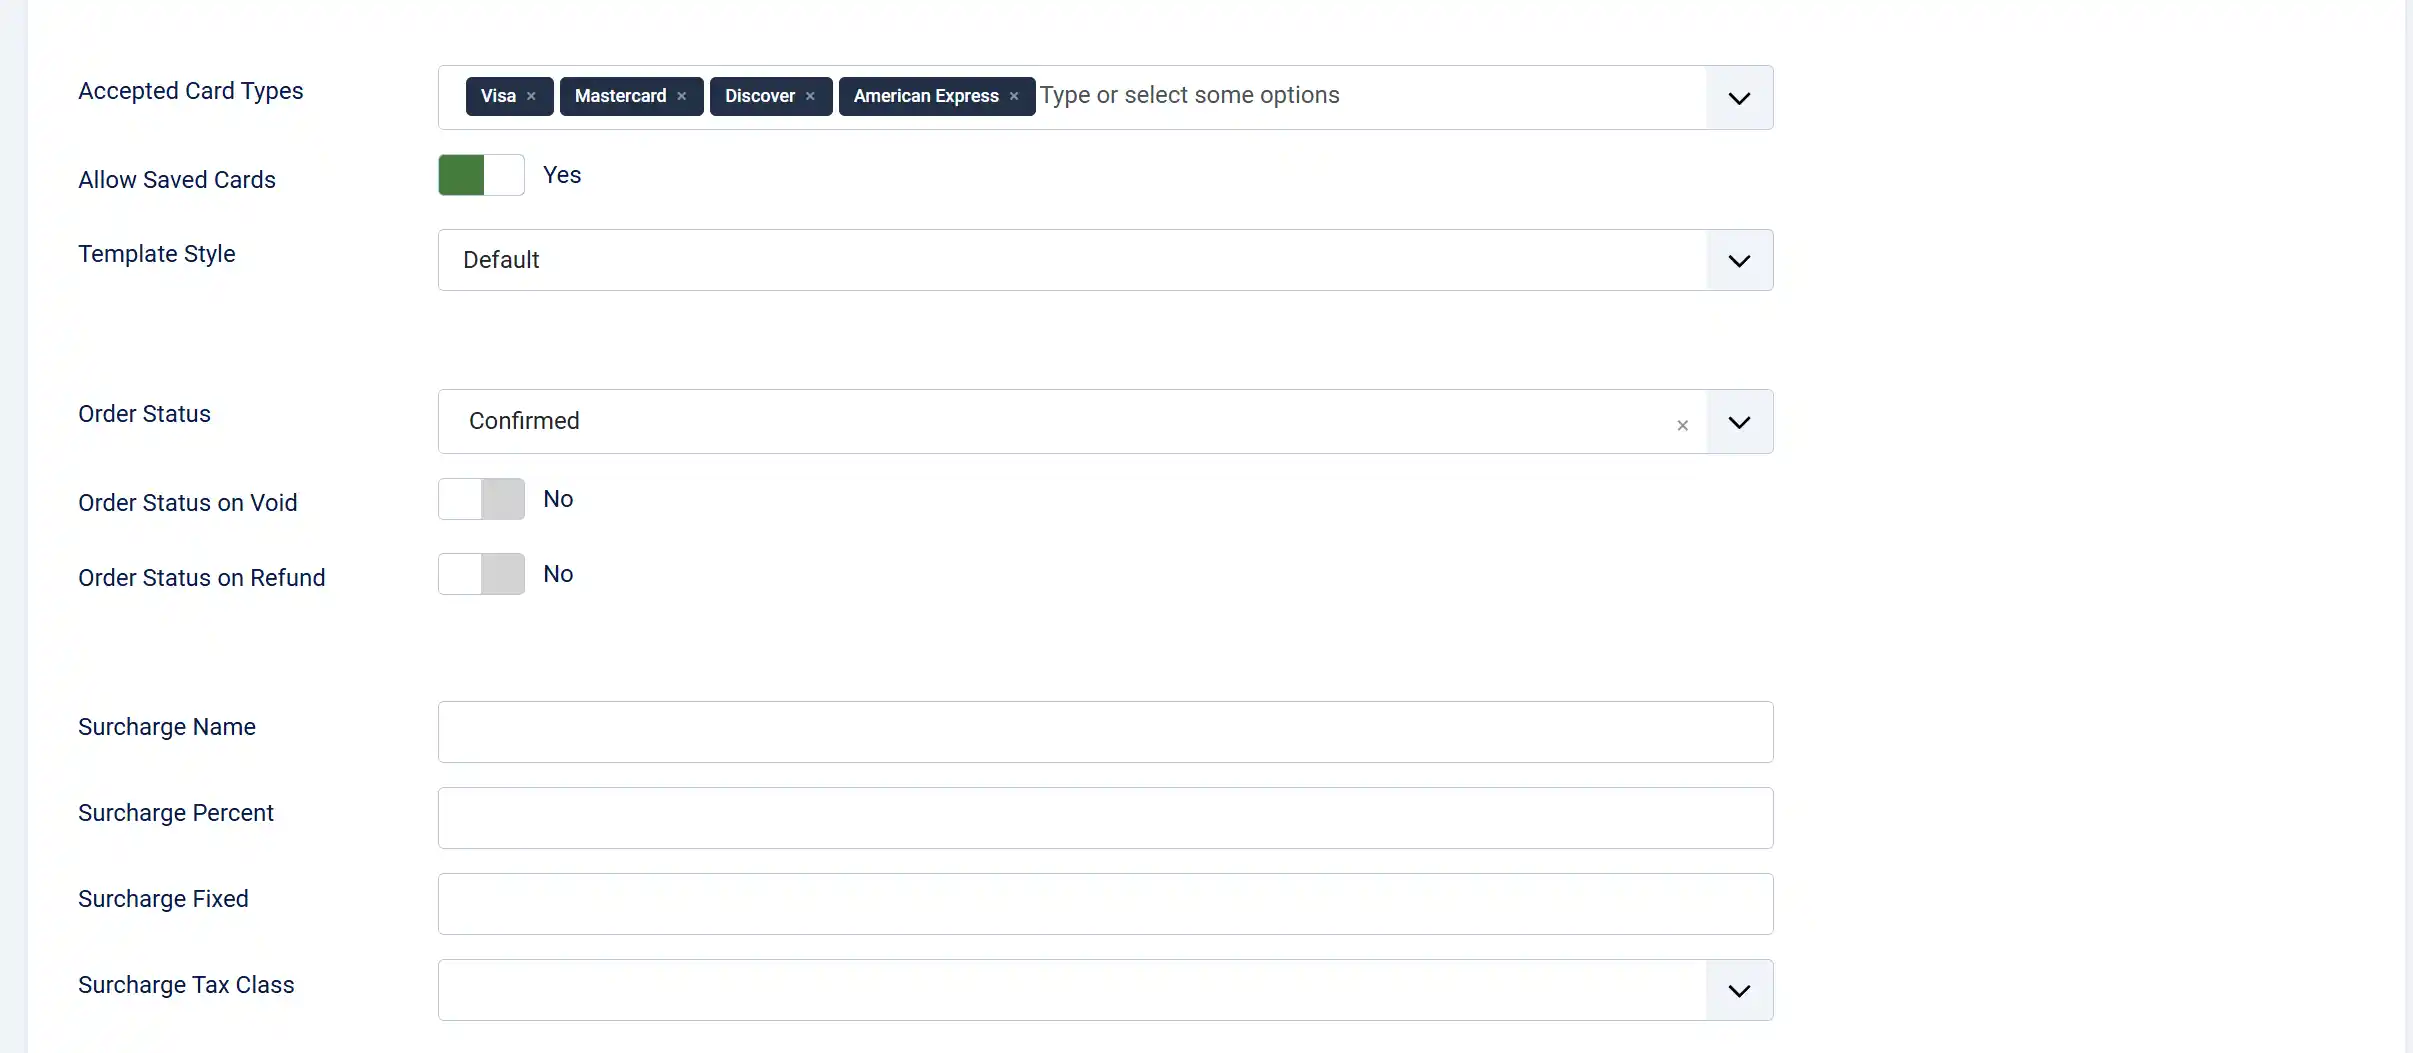
Accepted Card Types: Multi-select list of card brands to accept. Only selected brands will be shown in the card type display at checkout. Select all the ones you want to accept.
Available options: Visa, Mastercard, Discover, American Express.
Note that Authorize.Net processes any card your merchant account is configured to accept — this setting controls display only.

Allow Saved Cards: When enabled, logged-in customers can save their card for future purchases using Authorize.Net's Customer Information Manager (CIM). A "Payment Methods" tab also appears on the My Profile page.
See the Saved Cards / Customer Profiles section for more detail.

Template Style: Choose the frontend template layout for checkout forms and saved card displays. Options depend on your site's template framework.
Available subtemplates: Bootstrap 5 and UIkit. Leave blank to use the default layout. If your Joomla template is UIkit-based (e.g., YOOtheme Pro), select the UIkit subtemplate for consistent styling.
Order Statuses
Order Status: The J2Commerce order status to assign when payment is successfully processed.
Set this to whichever status makes sense for your workflow. A common choice is Confirmed (immediately after payment) or Processing (if you have a manual review step).
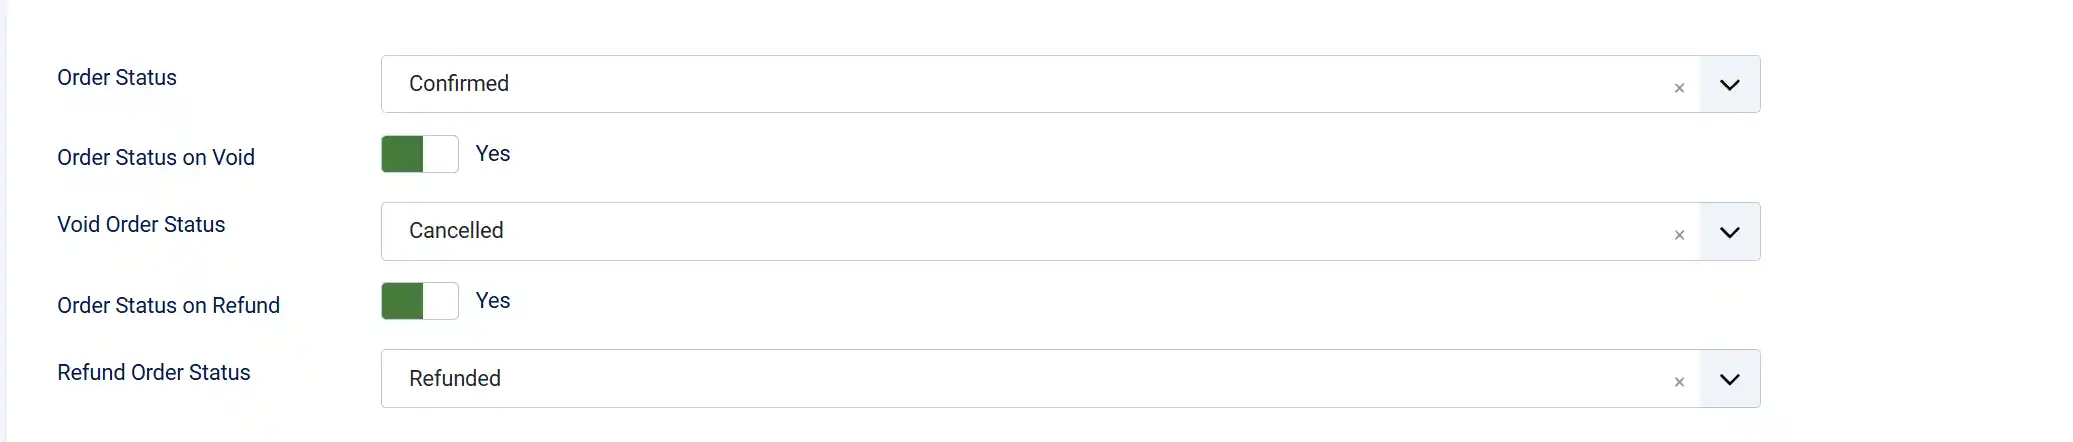
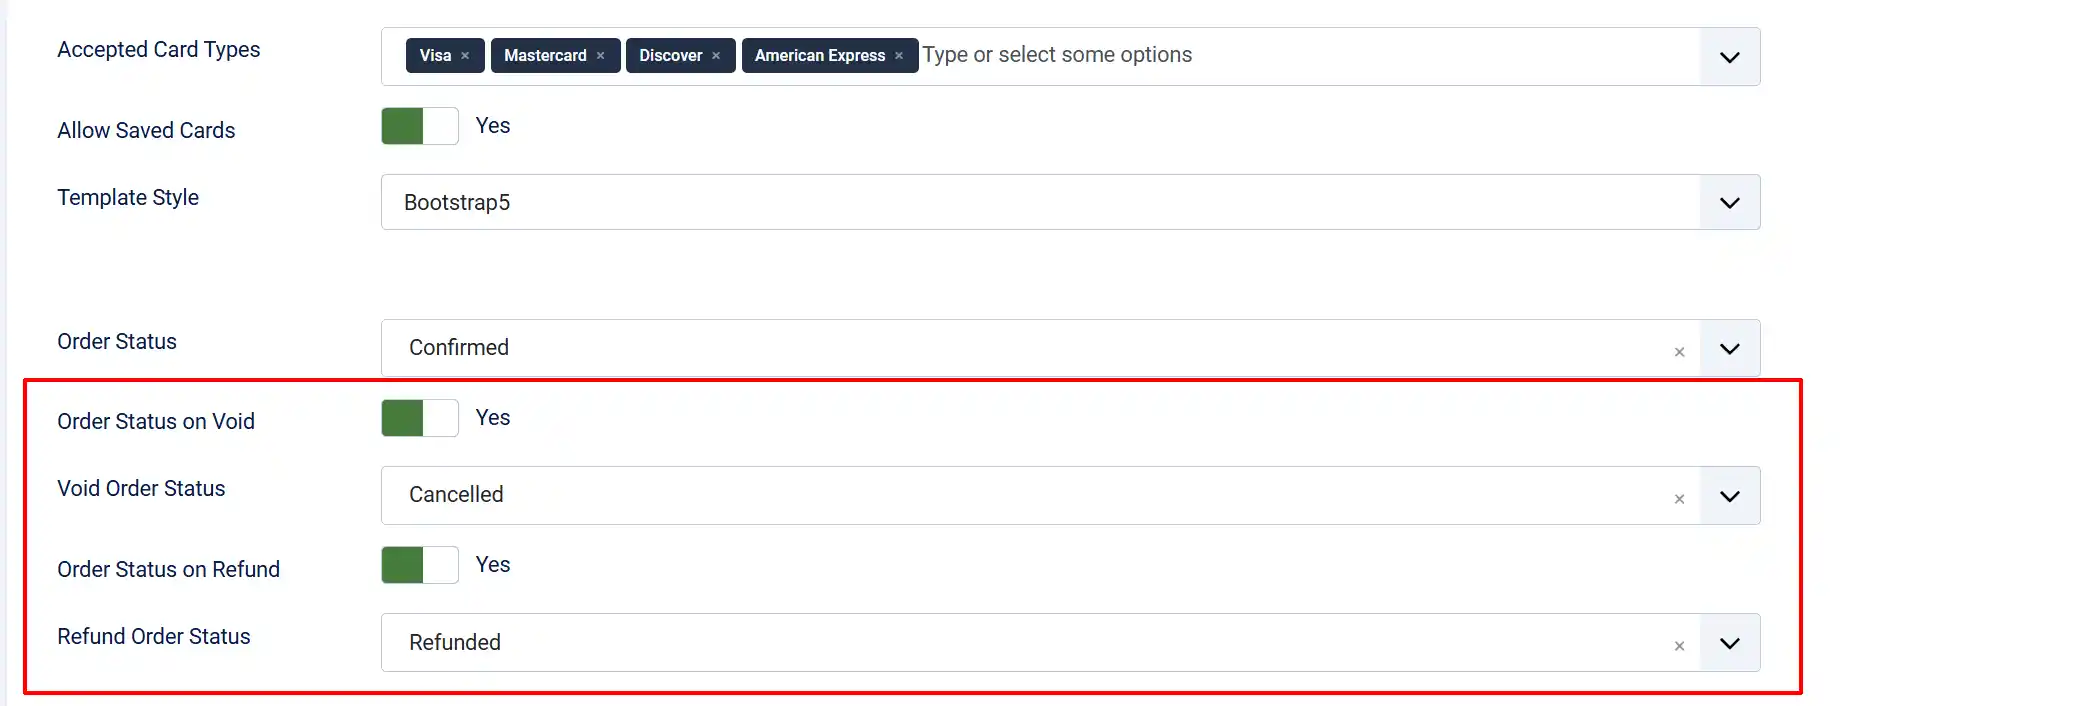
Order Status on Void:
-
When set to 'No', the order status is automatically changed when a transaction is voided.
-
When set to 'Yes', the order status is set when a void is processed. A common choice is Voided or Cancelled.
Order Status on Refund:
-
When set to 'No', the order status is automatically changed when a refund is processed.
-
When set to 'Yes', the order status to set when a refund is processed. A common choice is Refunded or Cancelled.
NOTE: If the order status you want isn't listed, you can create a new one by going to J2Commerce -> Setup -> Order Statuses

Tip: If you want refunded or voided orders to move to a specific status (e.g., "Cancelled" or "Refunded"), enable the relevant toggle and select the desired status. If left disabled, only the transaction record is updated — the order status stays unchanged.
Surcharge

You can add a payment surcharge to cover processing fees. Leave these blank if you do not want to charge customers extra for using this payment method.
Surcharge Name: Label shown to the customer on the order summary, e.g. "Credit Card Fee"
Surcharge Percent: Percentage of the order total to add as a surcharge, e.g. 2.5 for 2.5%.
Surcharge Fixed: Fixed amount to add, e.g. 0.30 for 30 cents. Both percent and fixed can be combined.
Surcharge Tax Class: If the surcharge itself should be taxed, select the applicable tax profile here.
Restrictions

Geozone Restriction: Limit this payment method to customers within a specific geozone. Leave blank to allow all countries.
Minimum Subtotal: Hide this payment method if the order subtotal is below this amount.
Maximum Subtotal: Hide this payment method if the order subtotal exceeds this amount.
Messages and Thank You Page
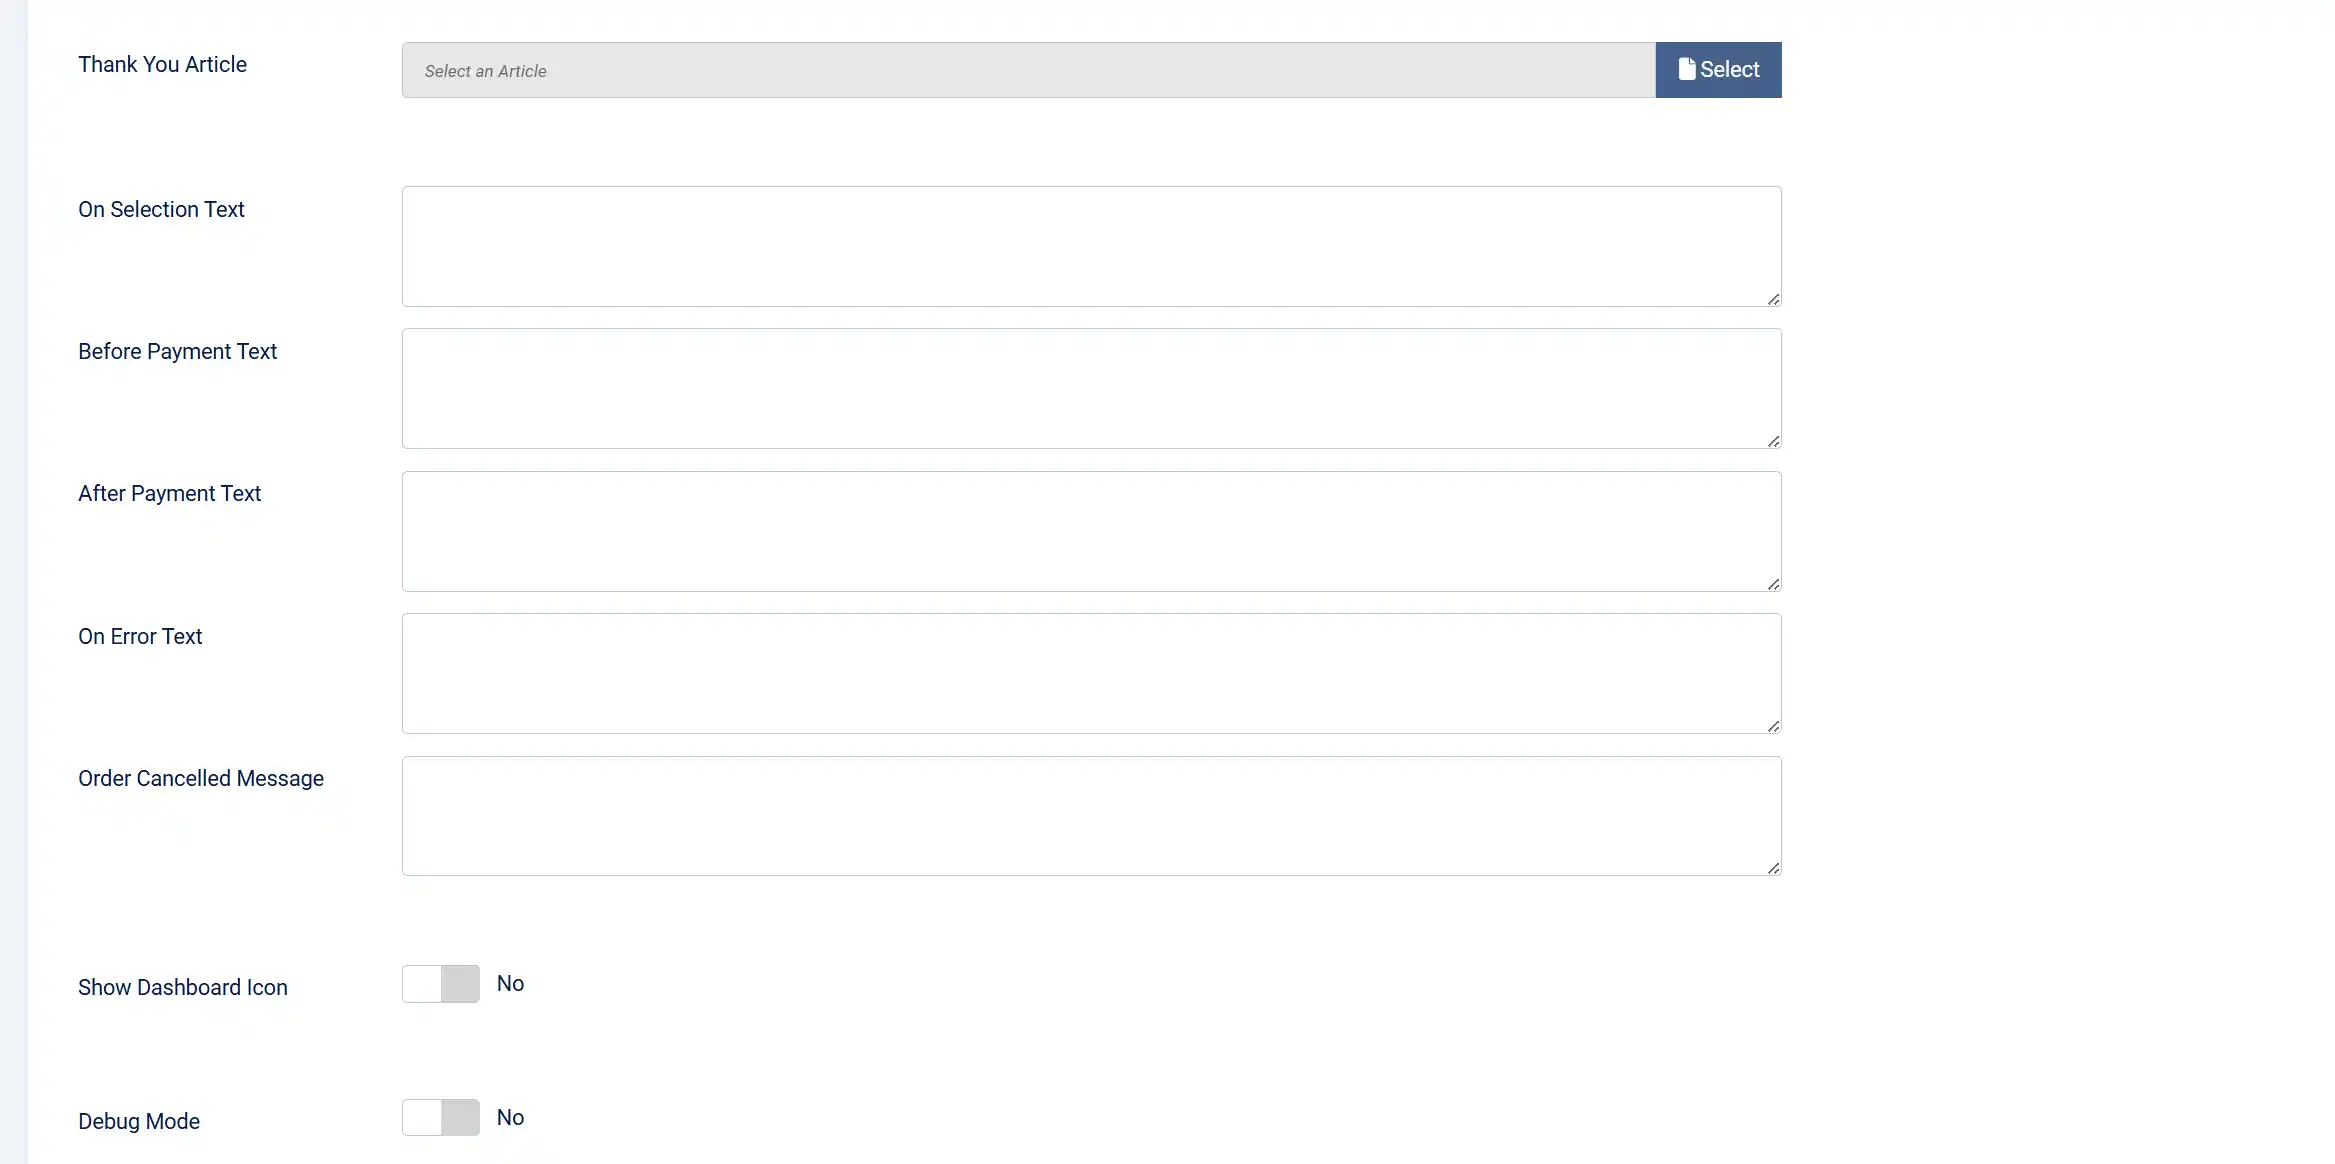
Thank You Article: A Joomla article to display after successful payment. If left blank, the standard J2Commerce confirmation page is used.
On Selection: Text shown when the customer selects this payment method at checkout. Use for instructions or notes.
Before Payment: Text shown on the payment form just before the card fields.
After Payment: Text shown on the confirmation screen after a successful payment.
On Error: Text shown when a payment error occurs.
On Cancel: Text shown if the customer cancels or abandons checkout.
Dashboard Icon

Show Dashboard Icon: Display a quick-access icon for this plugin on the J2Commerce admin dashboard.
Dashboard Icon Label: Custom label for the dashboard icon. Defaults to "Authorize.Net" if left blank.
Debug Mode: Write detailed API request/response logs to administrator/logs/payment_authorizenet.php. Sensitive data (transaction keys, card numbers) is automatically redacted. Disable this in production once everything is working.
Saved Cards / Customer Profiles
When Allow Saved Cards is enabled, logged-in customers can save payment methods to their accounts during checkout. Saved cards are stored in Authorize.Net's Customer Information Manager (CIM), not on your server — only a reference ID is stored in the J2Commerce database.
How It Works for Customers
Saving a card during checkout:
- At the payment step, the customer fills in their card details.
- A checkbox appears: Save this card for future purchases.
- If checked, the card is tokenized via Accept.js and stored as a payment profile in CIM after the transaction completes.
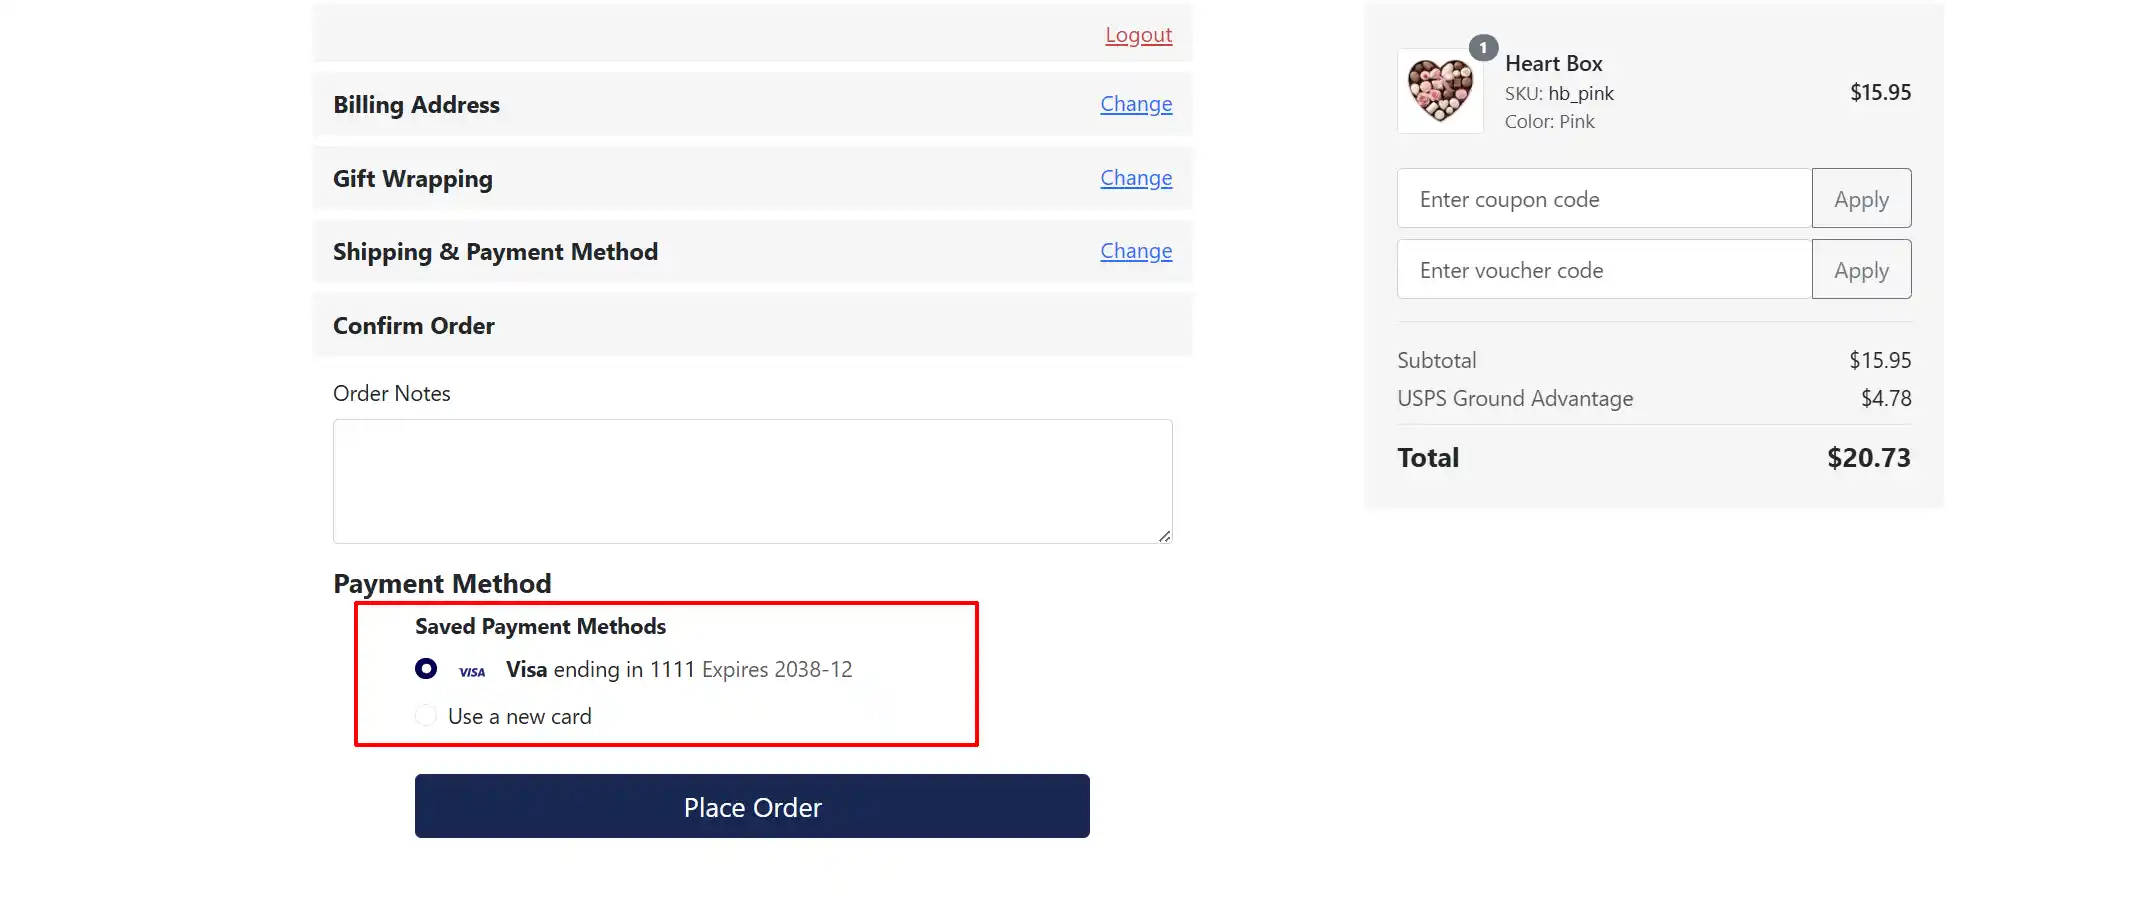
Using a saved card:
- On their next order, the customer sees their saved cards listed above the new card form, each with the card brand icon (Visa, Mastercard, etc.), last 4 digits, and expiry date.
- They select a saved card (shown as, for example, "Visa ending in 4242, Expires 12/27") or choose Use a new card.
- If a saved card is selected, no card entry is needed — the payment is processed using the stored CIM profile.
Managing Cards in My Profile
When Allow Saved Cards is enabled, a Payment Methods tab appears on the customer's My Profile page (My Account -> My Profile).

From this tab, customers can:
- View all saved cards (card type, last 4 digits, expiry date)
- Add a new card using the Add New Card button
- Remove a card using the trash icon — cards in use by active subscriptions cannot be removed
- Switch all active subscriptions to a different saved card using the rotate icon
NOTE: Saved cards are environment-specific. Cards saved in sandbox mode are not visible in live mode, and vice versa.
Checkout Flow
Here is what a customer experiences at checkout when Authorize.Net is the selected payment method:
-
The customer reaches the Payment step of checkout.
-
If they have saved cards (and Allow Saved Cards is on), their saved cards appear as radio button options above the card entry form.
-
Accept.js loads from Authorize.Net's servers in the background.
-
The customer either selects a saved card or enters card details:
- Card number
- Expiration month and year
- CVV / Security Code
-
When they click Place Order, the plugin intercepts the form submission.
-
Accept.js sends the card data directly to Authorize.Net's servers (bypassing your server entirely) and receives a one-time-use nonce token in return.
-
The plugin then sends only this nonce — along with the order details — to your server to complete the payment.
-
Your server calls the Authorize.Net API, charges the card, and updates the order status.
-
The customer is redirected to the confirmation page.
A spinner with "Processing your payment..." is shown during steps 6-8 to prevent double submission.
Subscription Support
If your store sells subscription products, the Authorize.Net plugin handles recurring billing automatically.
When a customer completes their first subscription order and saves their card, the plugin stores the CIM customer profile ID and payment profile ID against the subscription record. When a renewal comes due, J2Commerce calls the plugin's renewal handler, which charges the stored CIM profile — no customer interaction required.
Updating a subscription's payment card:
Customers can switch the card used for their subscriptions from their My Profile page:
- Go to My Account -> My Profile -> Payment Methods.
- Click the rotate icon next to the card to use for subscriptions.
- Confirm the prompt — all active subscriptions are immediately updated to use that card.
Cards being used by active subscriptions display a badge showing how many subscriptions they are attached to. These cards cannot be deleted until the subscriptions they serve are cancelled or switched to a different card.
Refunds and Voids
You can trigger refunds or voids directly from the J2Commerce order detail page in the admin — no need to log in to the Authorize.Net dashboard for routine reversals.
You need to make sure you have set the Void and/or Refund toggles to 'Yes' on the Authorize.net app configuration page for them to appear.
If the Order Status name that you want isn't showing up, then you need to add a new order status. Go to J2Commerce -> Setup -> Order Status -> New
NOTE: Any changes made to the app won't affect the previous orders. Only new orders will show the new options.
Void a Transaction
If a transaction has not yet settled (typically same-day, before the charge hits the Credit Card), a Void button appears on the order detail page. Clicking it cancels the authorization immediately, releasing the hold on the customer's card without any fees.
- Go to J2Commerce -> Orders and open the order.
- Click the Void button (shown with a ban icon).
- The plugin sends a void request to Authorize.Net and updates the order history.
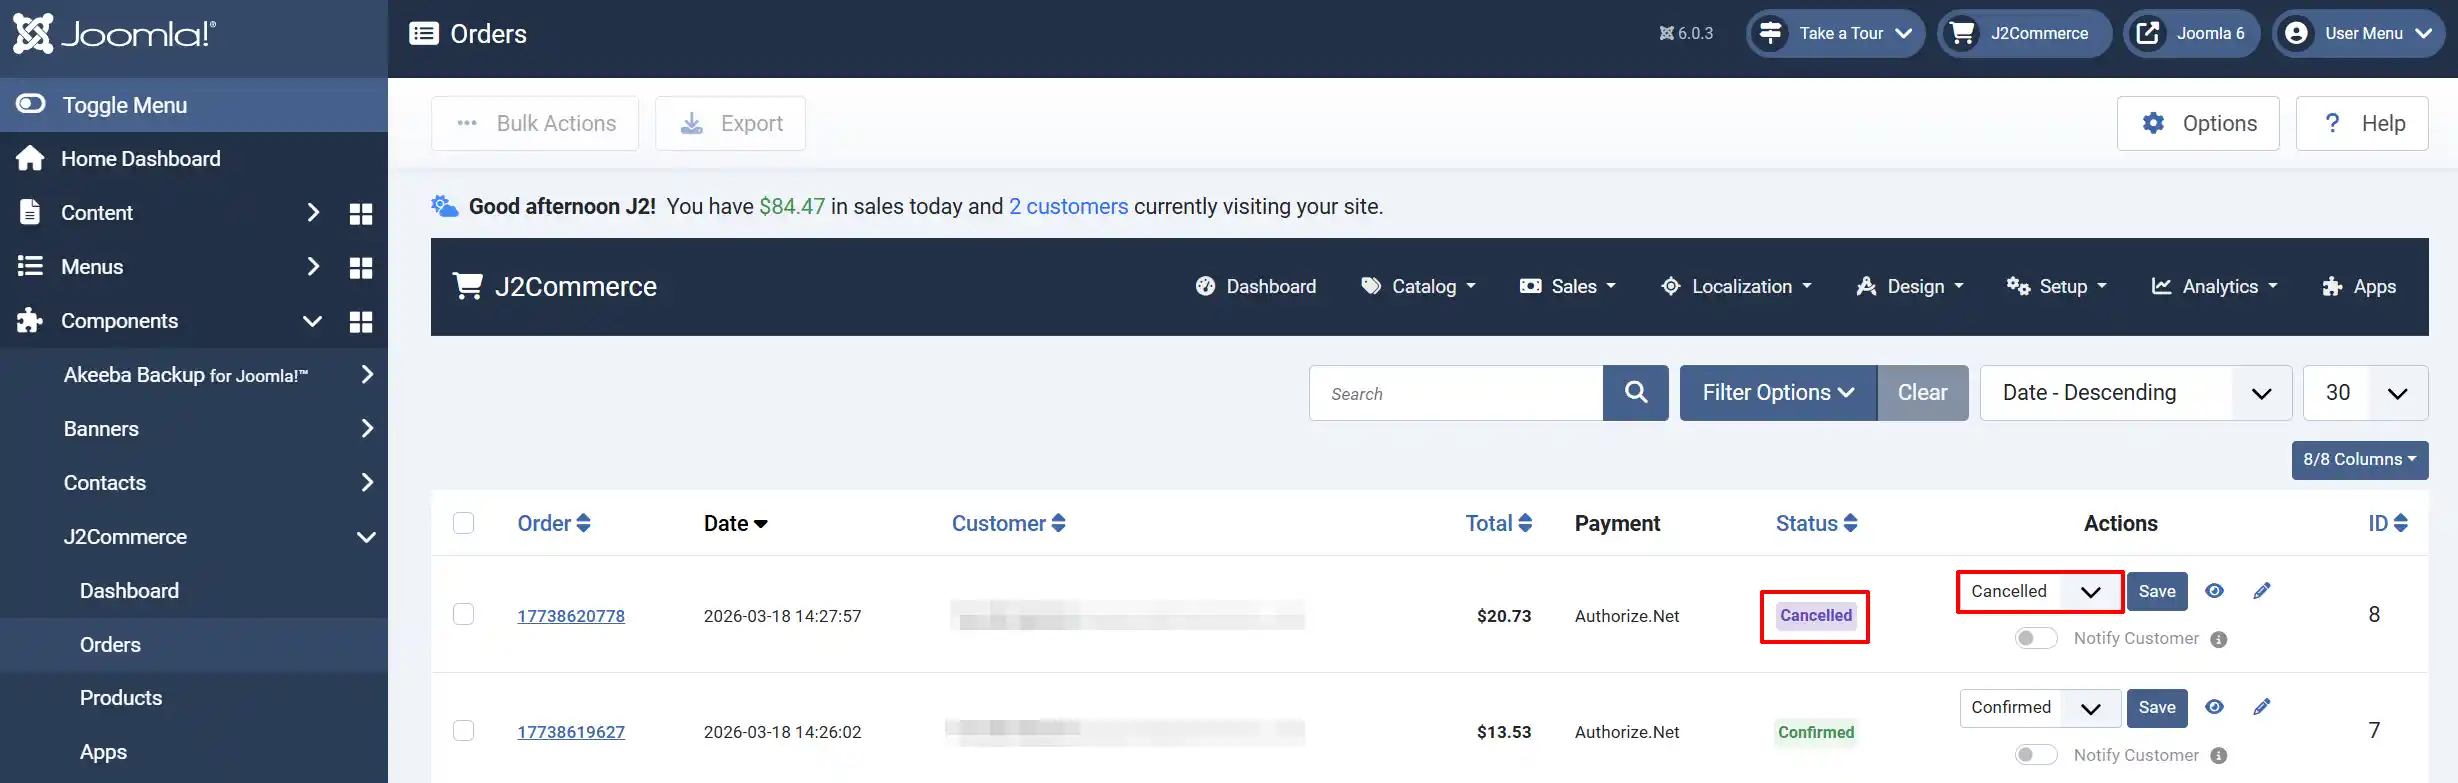
NOTE: The screenshow below shows what it looks like if Void is set to 'Yes' and Refund is set to 'No'

After you void the order, the status is automatically updated. Since we set the order status as 'Cancelled', the order will now show as 'Cancelled' on the backend.
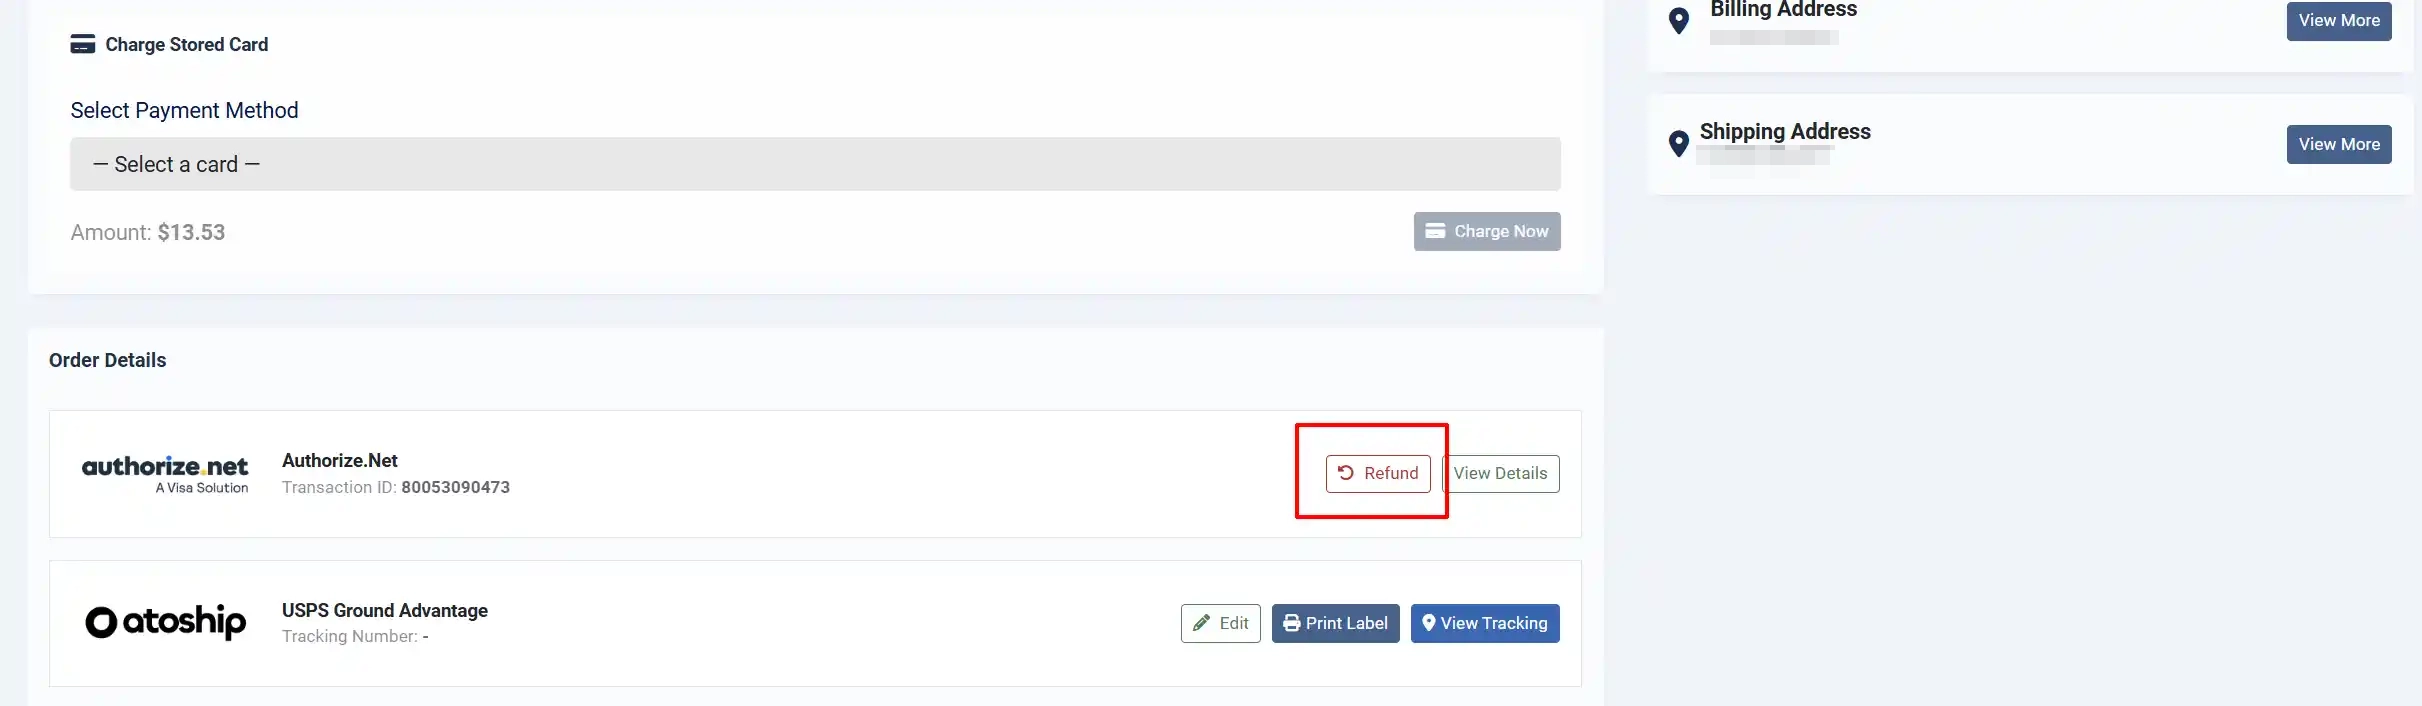
Refund a Transaction
Once a transaction has settled, a Refund button appears instead of Void. Clicking it opens a refund modal where you can choose between a full or partial refund. The refund usually takes 3–5 business days to appear on the customer's credit card.
-
Go to J2Commerce -> Orders and open the order.
-
Click the Refund button (shown with a rotate icon).
-
A modal dialogue appears with two options:
- Full refund — refunds the entire transaction amount (shown in the label, e.g., "Full refund — 149.99").
- Partial refund — enter a custom amount. The maximum refundable amount is displayed below the input field.
-
Click Process Refund to submit the refund to Authorize.Net.
-
The order history is updated with the refund details, including the amount refunded.

Tip: The partial refund amount field validates against the maximum refundable total. You cannot refund more than the original charge minus any previous refunds.
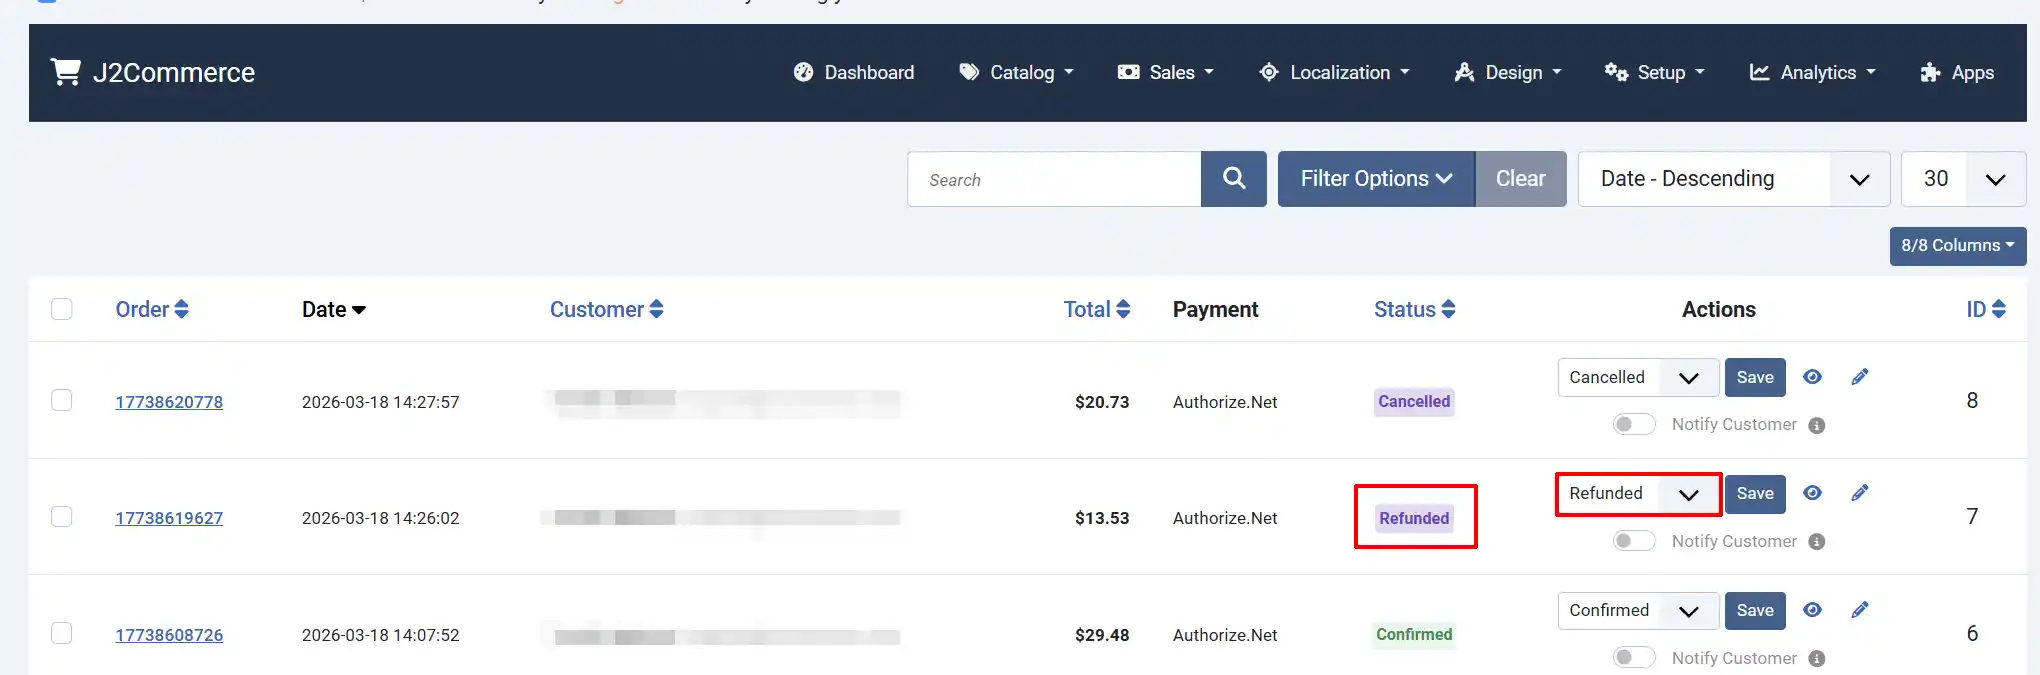
After you refund the order, the status is automatically updated. Since we set the order status as 'Refunded', the order will now show as 'Refunded' on the backend.
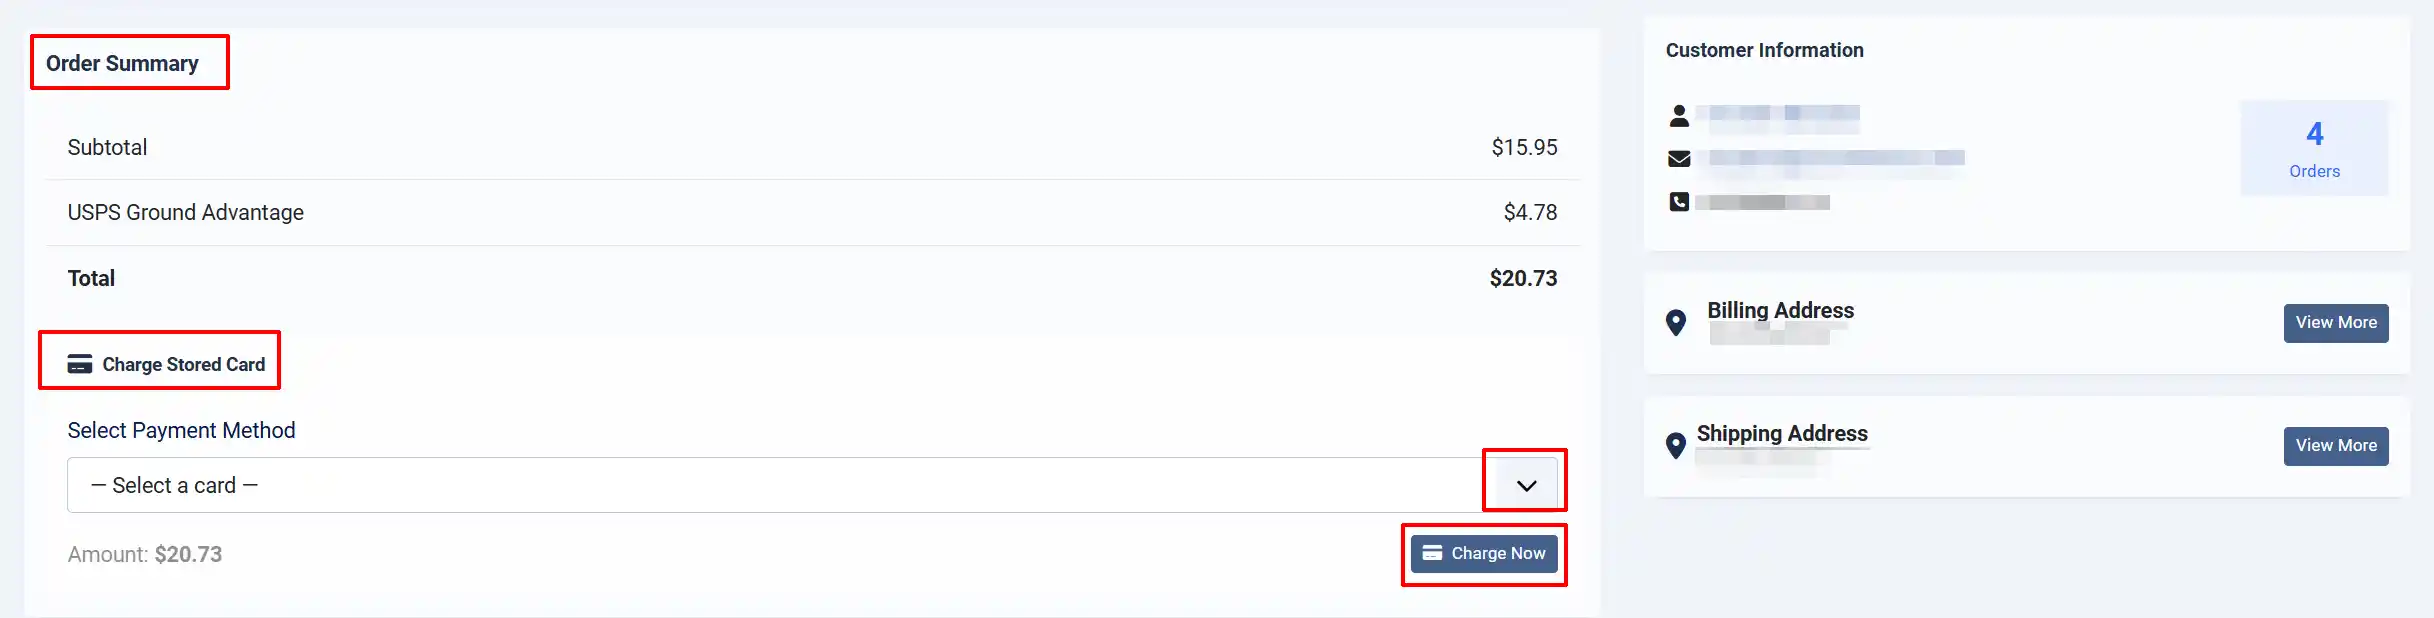
Admin Charge Stored Card
When a customer has saved cards via CIM, administrators can charge a stored card directly from the order detail page. This is useful for processing additional charges, collecting outstanding balances, or retrying failed payments.
-
Go to J2Commerce -> Orders and open the order.
-
Below the order details, a Charge Stored Card panel appears if the customer has saved payment methods.
-
Select a card from the dropdown (shown as card type, last 4 digits, and expiry).
-
The charge amount is shown automatically (the order total).
-
Click Charge Now to process the payment.
-
A success or error message appears inline within the panel.
Webhooks
Webhooks allow Authorize.Net to notify your store in real time when events occur — such as a payment completing, a refund being issued, or a fraud review being triggered. Configuring webhooks is optional but recommended for stores that use Authorize Only transactions or want fraud event handling.
Webhook URL
Your webhook endpoint is:
https://your-site.com/index.php?option=com_j2commerce&view=checkout&task=checkout.processWebhook&plugin=payment_authorizenet
Replace https://your-site.com with your actual site URL.
Setting Up Webhooks in Authorize.Net
-
Log in to your Authorize.Net Merchant Interface.

-
Go to Account -> Settings -> Transaction Format Settings -> Transaction Response Settings -> Webhooks.
-
Click Add Endpoint.
-
Enter your webhook URL and select the events you want to receive.
-
Click Save.
Supported Events
The plugin handles the following Authorize.Net webhook event types:
| Event | What the Plugin Does |
|---|---|
net.authorize.payment.authcapture.created | Marks the order transaction as Completed |
net.authorize.payment.capture.created | Marks the order transaction as Completed |
net.authorize.payment.refund.created | Marks the order transaction as Refunded |
net.authorize.payment.void.created | Marks the order transaction as Voided |
net.authorize.payment.fraud.held | Marks the order transaction as "Fraud Review" |
net.authorize.payment.fraud.declined | Marks the order transaction as Declined |
net.authorize.customer.deleted | Removes the stored CIM profile from J2Commerce |
All incoming webhooks are verified using HMAC-SHA512 with your Signature Key before any action is taken. Webhooks with an invalid or missing signature are rejected with a 401 response.
Important: The Signature Key must be configured in the plugin settings for webhook verification to work. Without it, all webhook requests are rejected.
Sandbox Testing
The sandbox environment lets you test your entire checkout flow without processing real payments.
Setting Up a Sandbox Account
- Visit https://developer.authorize.net/hello_world/sandbox and create a free sandbox account.
- Log in to https://sandbox.authorize.net and generate your sandbox API credentials (see the Getting Your API Credentials section above).
- In the plugin settings, set Use Sandbox to Yes and enter your sandbox credentials.
- Save the plugin settings.
Security and PCI Compliance
How Accept.js Reduces Your PCI Scope
Without Accept.js, card data would travel through your server — making your entire hosting environment in-scope for PCI DSS assessment (SAQ D or SAQ C).
With Accept.js:
- The customer's browser sends card details directly to Authorize.Net's servers
- Authorize.Net returns a one-time-use nonce (opaque token)
- Your server only ever handles the nonce — never the card number or CVV
- This qualifies your integration for PCI SAQ A-EP, a significantly lighter assessment
The plugin is designed to reinforce this protection: after Accept.js returns the nonce, the JavaScript immediately clears the card number and CVV fields from the DOM before the form data is submitted.
What Touches Your Server
| Data | Touches Your Server? |
|---|---|
| Card number | No — sent directly to Authorize.Net via Accept.js |
| CVV / security code | No — sent directly to Authorize.Net via Accept.js |
| One-time nonce token | Yes — used to complete the transaction |
| Billing name and address | Yes — sent with the transaction request |
| Last 4 digits (for display) | Yes — returned by Authorize.Net and stored for saved card display |
Debug Logs and Sensitive Data
When debug mode is enabled, all API requests and responses are written to administrator/logs/payment_authorizenet.php. The plugin automatically redacts the following from log output:
- Transaction Key
- Card numbers
- CVV codes
- Accept.js nonce values (shown as
***NONCE***)
Always disable debug mode in production. If you need to investigate an issue, enable it temporarily, reproduce the problem, then turn it off again.
Troubleshooting
Accept.js does not load and the payment form stays broken
Cause: Accept.js is loaded from Authorize.Net's CDN. If your server's Content Security Policy (CSP) blocks third-party scripts, or if there is a network issue, the library will not load.
Solution:
- Open your browser's developer console and look for errors referencing
js.authorize.netorjstest.authorize.net. - If you see a CSP error, add
https://js.authorize.netandhttps://jstest.authorize.netto your site'sscript-srcpolicy. - If you see a network error, verify that your customers' browsers can reach the Authorize.Net domain (firewalls or network filters on a corporate network may block it).
Credentials error or "API credentials are not configured" warning on the dashboard
Cause: The plugin requires all three primary credentials (API Login ID, Transaction Key, and Public Client Key) to process payments. If any are missing, the dashboard shows a warning and checkout will fail.
Solution:
- Go to J2Commerce -> Payments -> Payment Methods -> Authorize.Net.
- Verify that the API Login ID, Transaction Key, and Public Client Key fields are all filled in.
- If Use Sandbox is enabled, check the sandbox credential fields — they are separate from the live fields.
- Save the settings.
Sandbox mode is on in production
Cause: Someone left Use Sandbox set to Yes after testing.
Solution: The J2Commerce dashboard displays a prominent warning banner: "Authorize.Net is in Sandbox mode — no real payments will be processed." If you see this banner, go to the plugin settings and set Use Sandbox to No, then verify your live credentials are correct.
Refund fails with an error
Cause: Authorize.Net refunds can fail for several reasons — the most common is that the original transaction amount was already partially refunded, or the transaction has not yet settled (in which case a void should be used instead).
Solution:
- Enable Debug Mode temporarily and attempt the refund again.
- Check
administrator/logs/payment_authorizenet.phpfor the specific error code returned by Authorize.Net. - If the error is
E00027(transaction not found) or similar, the transaction may be too old or was processed in a different environment (sandbox vs. live). - For unsettled transactions, the plugin automatically tries a void first — if the void fails, check the transaction status directly in your Authorize.Net Merchant Interface.
Webhook signature validation fails (401 response)
Cause: The Signature Key in the plugin settings does not match the one configured in your Authorize.Net account, or the key has been regenerated in Authorize.Net without updating the plugin.
Solution:
- Log in to your Authorize.Net Merchant Interface.
- Go to Account -> Settings -> Security Settings -> API Credentials & Keys.
- Copy the current Signature Key.
- Paste it into the Signature Key field in the plugin settings and save.
Saved cards do not appear for a customer
Cause: Saved cards are tied to the environment (sandbox vs. production). If the environment was changed after the customer saved their card, the cards stored under the previous environment will not appear.
Solution: Cards cannot be migrated between environments. If you are switching from sandbox to live, customers will need to save their cards again during their first live purchase.\