Amazon Pay
The Amazon Pay plugin lets your customers pay using their existing Amazon account — no card number entry required. Customers click the Amazon Pay button, log in to Amazon, confirm their payment method, and return to your store to complete the order. Because Amazon holds the customer's stored address and payment details, checkout is fast and familiar.
The plugin supports two checkout modes (Express Checkout and Payment Only), manual and automatic capture, subscription renewals, saved payment agreements, and full admin-level refund and cancel actions.
Requirements
- PHP 8.3.0 or later
- Joomla 6.x
- J2Commerce 6.x
- An Amazon Pay merchant account (available in the US, Europe/UK, and Japan)
Set Up an Amazon Pay Account
If you already have an Amazon Pay merchant account and API credentials, skip ahead to Installing the Plugin.
Register as an Amazon Pay Merchant
- Go to pay.amazon.com and click Sign up.
- Log in with your Amazon Seller account or create a new one.
- Follow the registration steps for your country and business type.
- Once approved, you will have access to Seller Central and Integration Central.
Get Your API Credentials
Amazon Pay uses four credentials: a Merchant ID, a Store ID (Client ID), a Public Key ID, and a Private Key.
- Log in to Seller Central and navigate to Amazon Pay -> Integration -> Integration Central.
- Under API Keys, click Create new key.
- Choose Sandbox or Production depending on your environment.
- Download the private key
.pemfile immediately — Amazon only lets you download it once. - Copy the Public Key ID displayed on screen (sandbox keys start with
SANDBOX-). - Your Merchant ID appears under Account Settings in Seller Central.
- Your Store ID (Client ID) appears in Integration Central under the application you registered — format:
amzn1.application-oa2-client.xxxxx.
Create sandbox credentials first and complete end-to-end testing before generating production keys. Sandbox keys are clearly prefixed with SANDBOX- so they cannot be accidentally used in live mode.
Purchase and Download
This plugin is a separate add-on available from the J2Commerce Extensions Store. It is not included with the core J2Commerce 6 component.
Step 1: Go to the J2Commerce website -> Payment Plugins
Step 2: Locate Amazon Pay -> click View Details -> Add to Cart -> Checkout
Step 3: Go to your My Downloads under your profile button at the top right corner and search for the plugin. Click Available Versions -> View Files -> Download Now
Installing the Plugin
You can install this Amazon Pay plugin using the Joomla installer. The following steps help you with a successful installation.
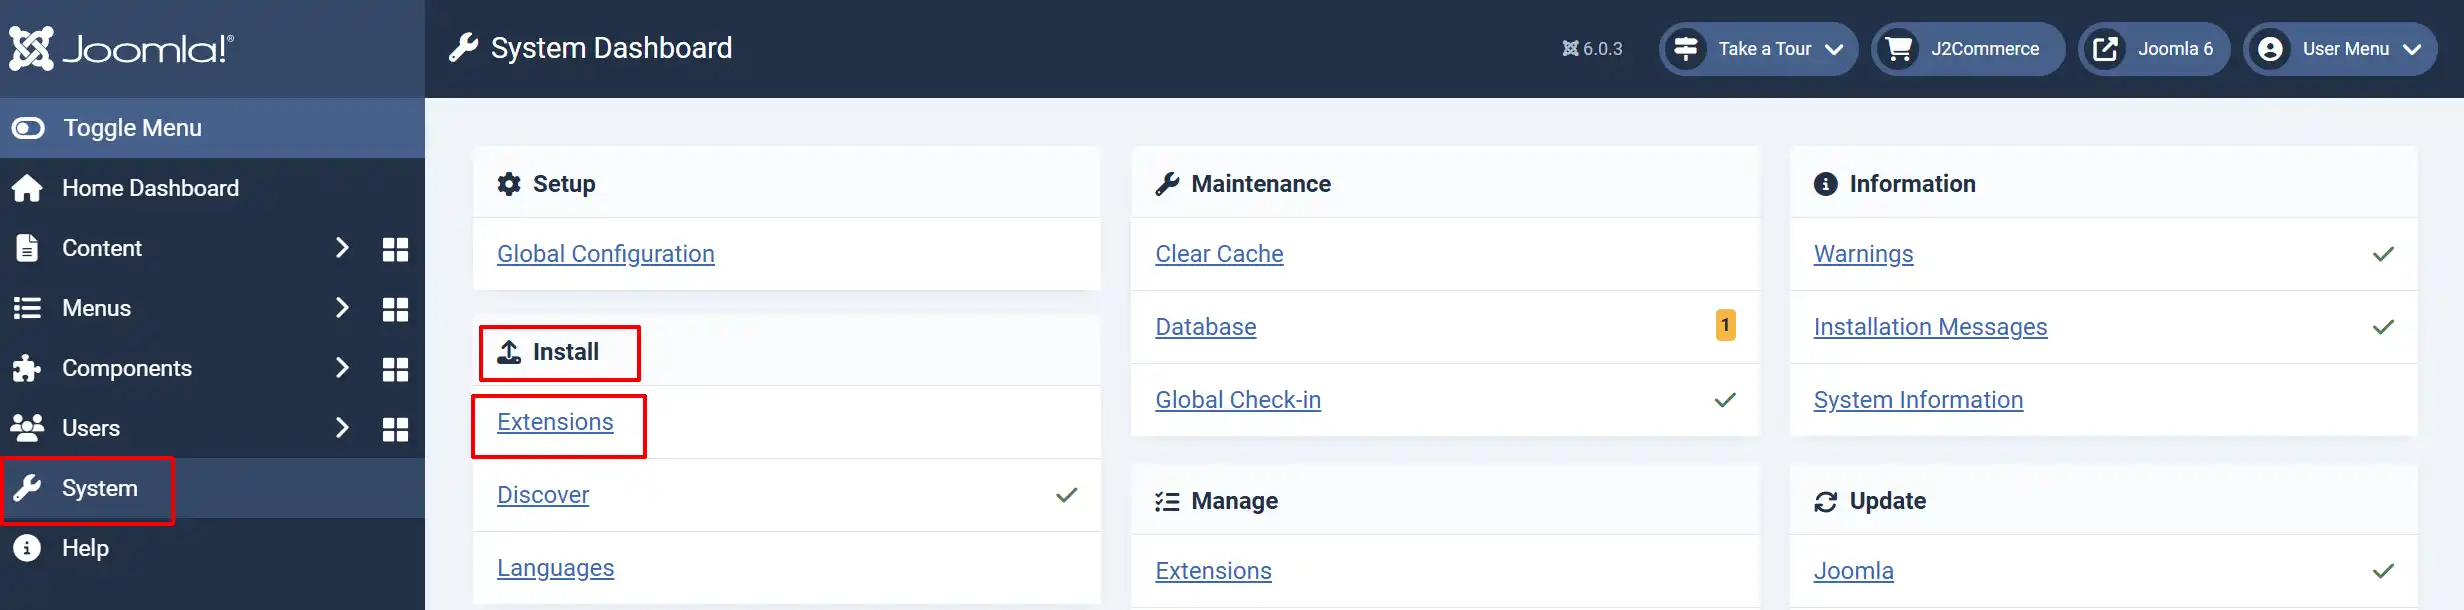
In the Joomla admin, go to System -> Install -> Extensions
Upload the payment_amazonpay.zip file or use the Install from URL option.
Enable the Plugin
Once you have installed the extension, you will need to enable it. There are two ways you can access the extension.
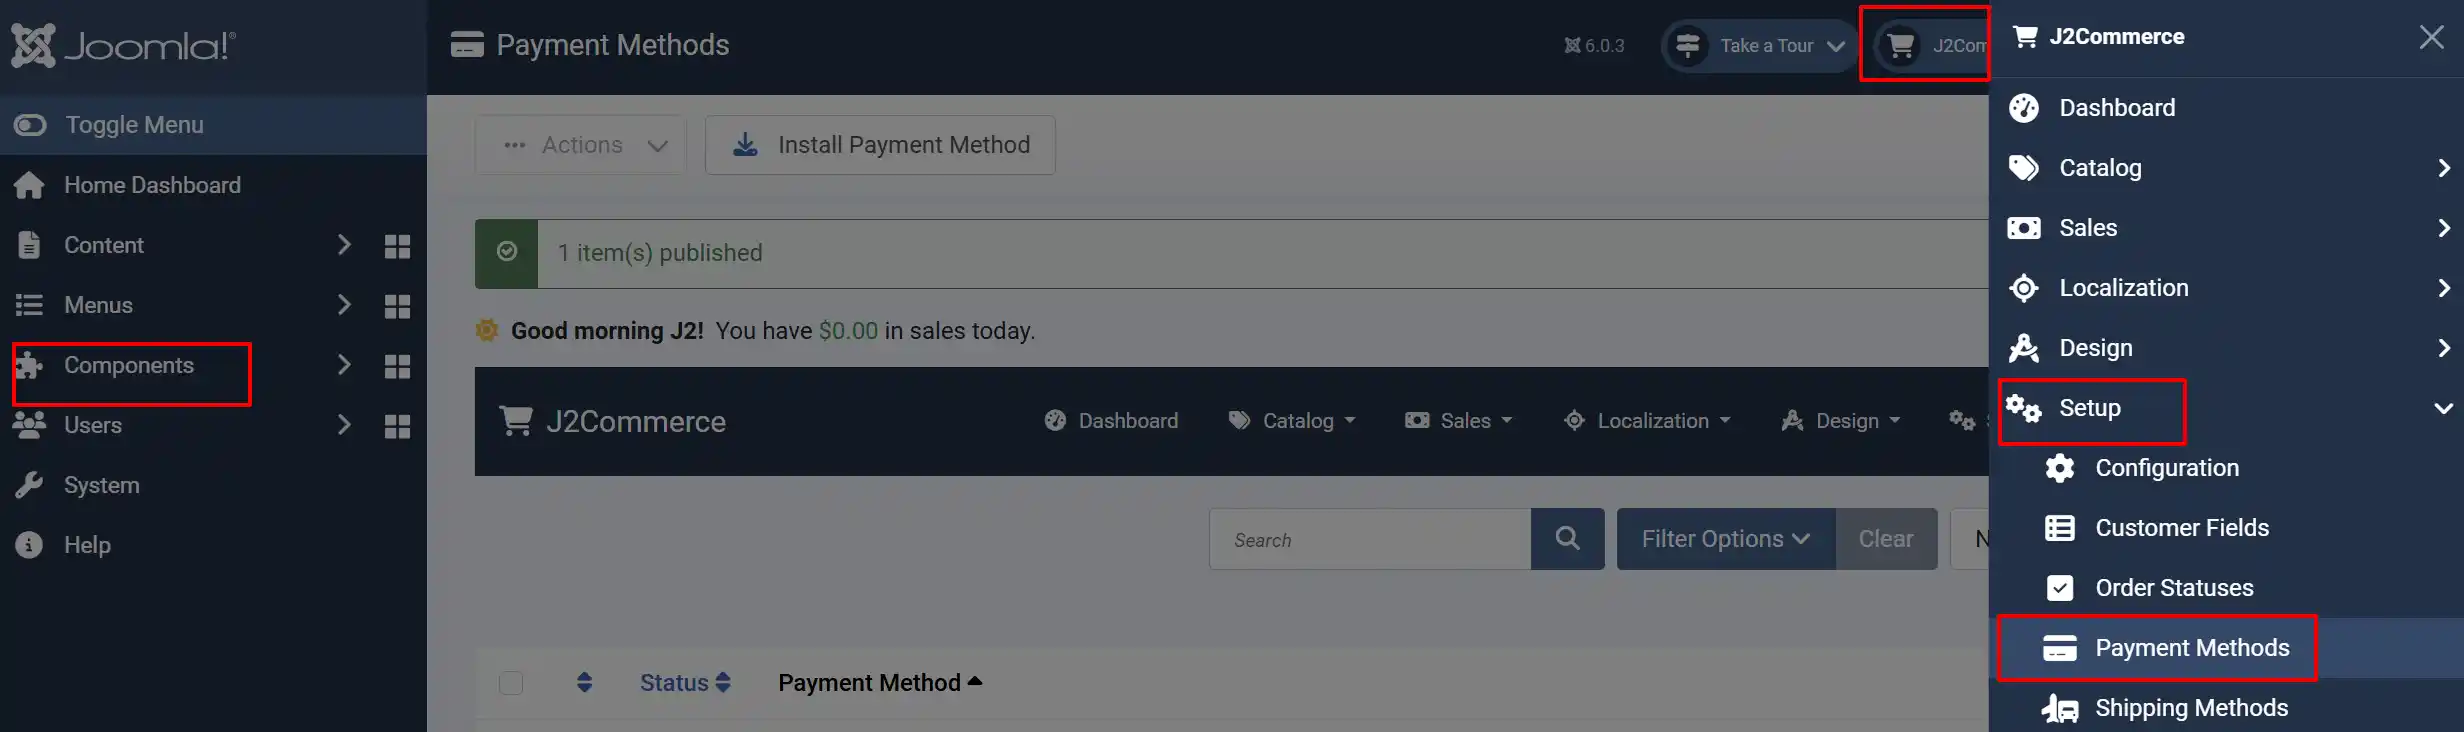
Option A: Go to the J2Commerce icon at the top right corner -> Setup -> Payment Methods
Option B: Go to Components on the left sidebar -> J2Commerce -> Dashboard -> Setup -> Payment Methods
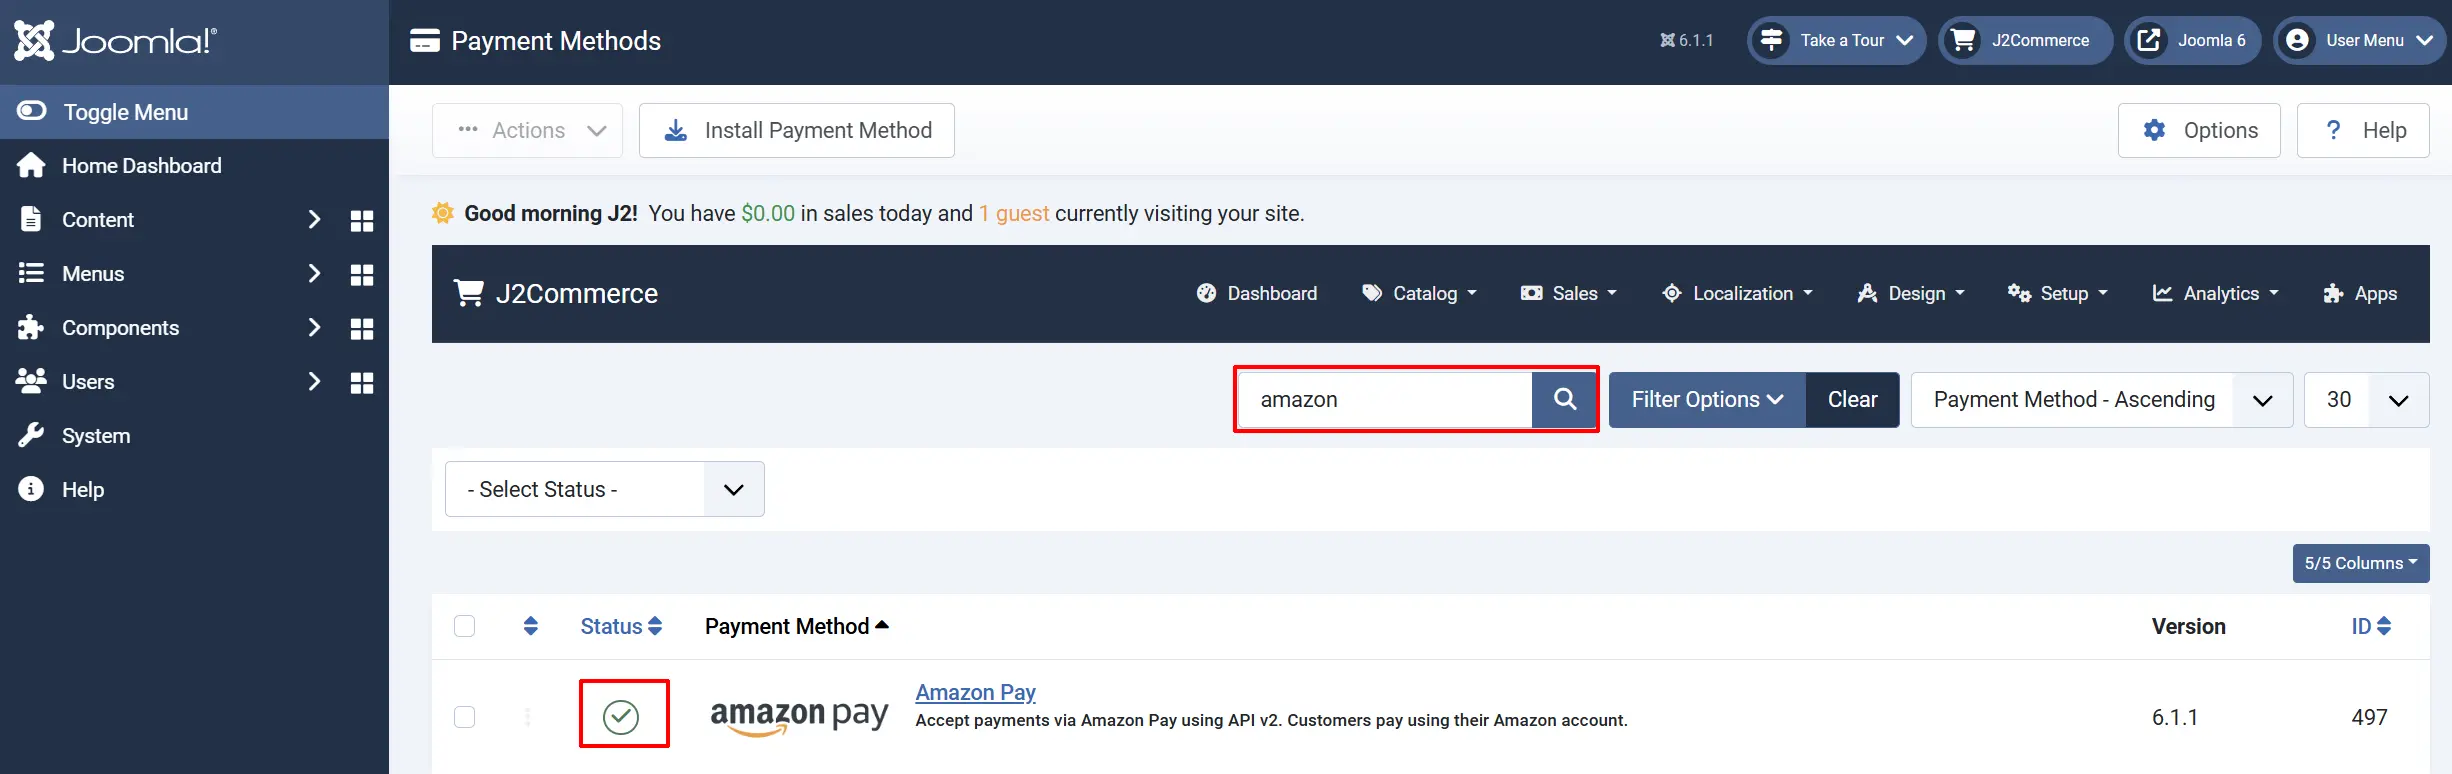
Look for Amazon Pay, click the X, and it will turn into a green checkmark. It is now enabled and ready for setup.
Configuring the Plugin
Click the Amazon Pay title to open the settings. The settings are organized across six tabs.
Helpful tip: Click the Toggle Inline Help button in the toolbar to show a short description below each field while you configure the plugin.

Basic Settings tab
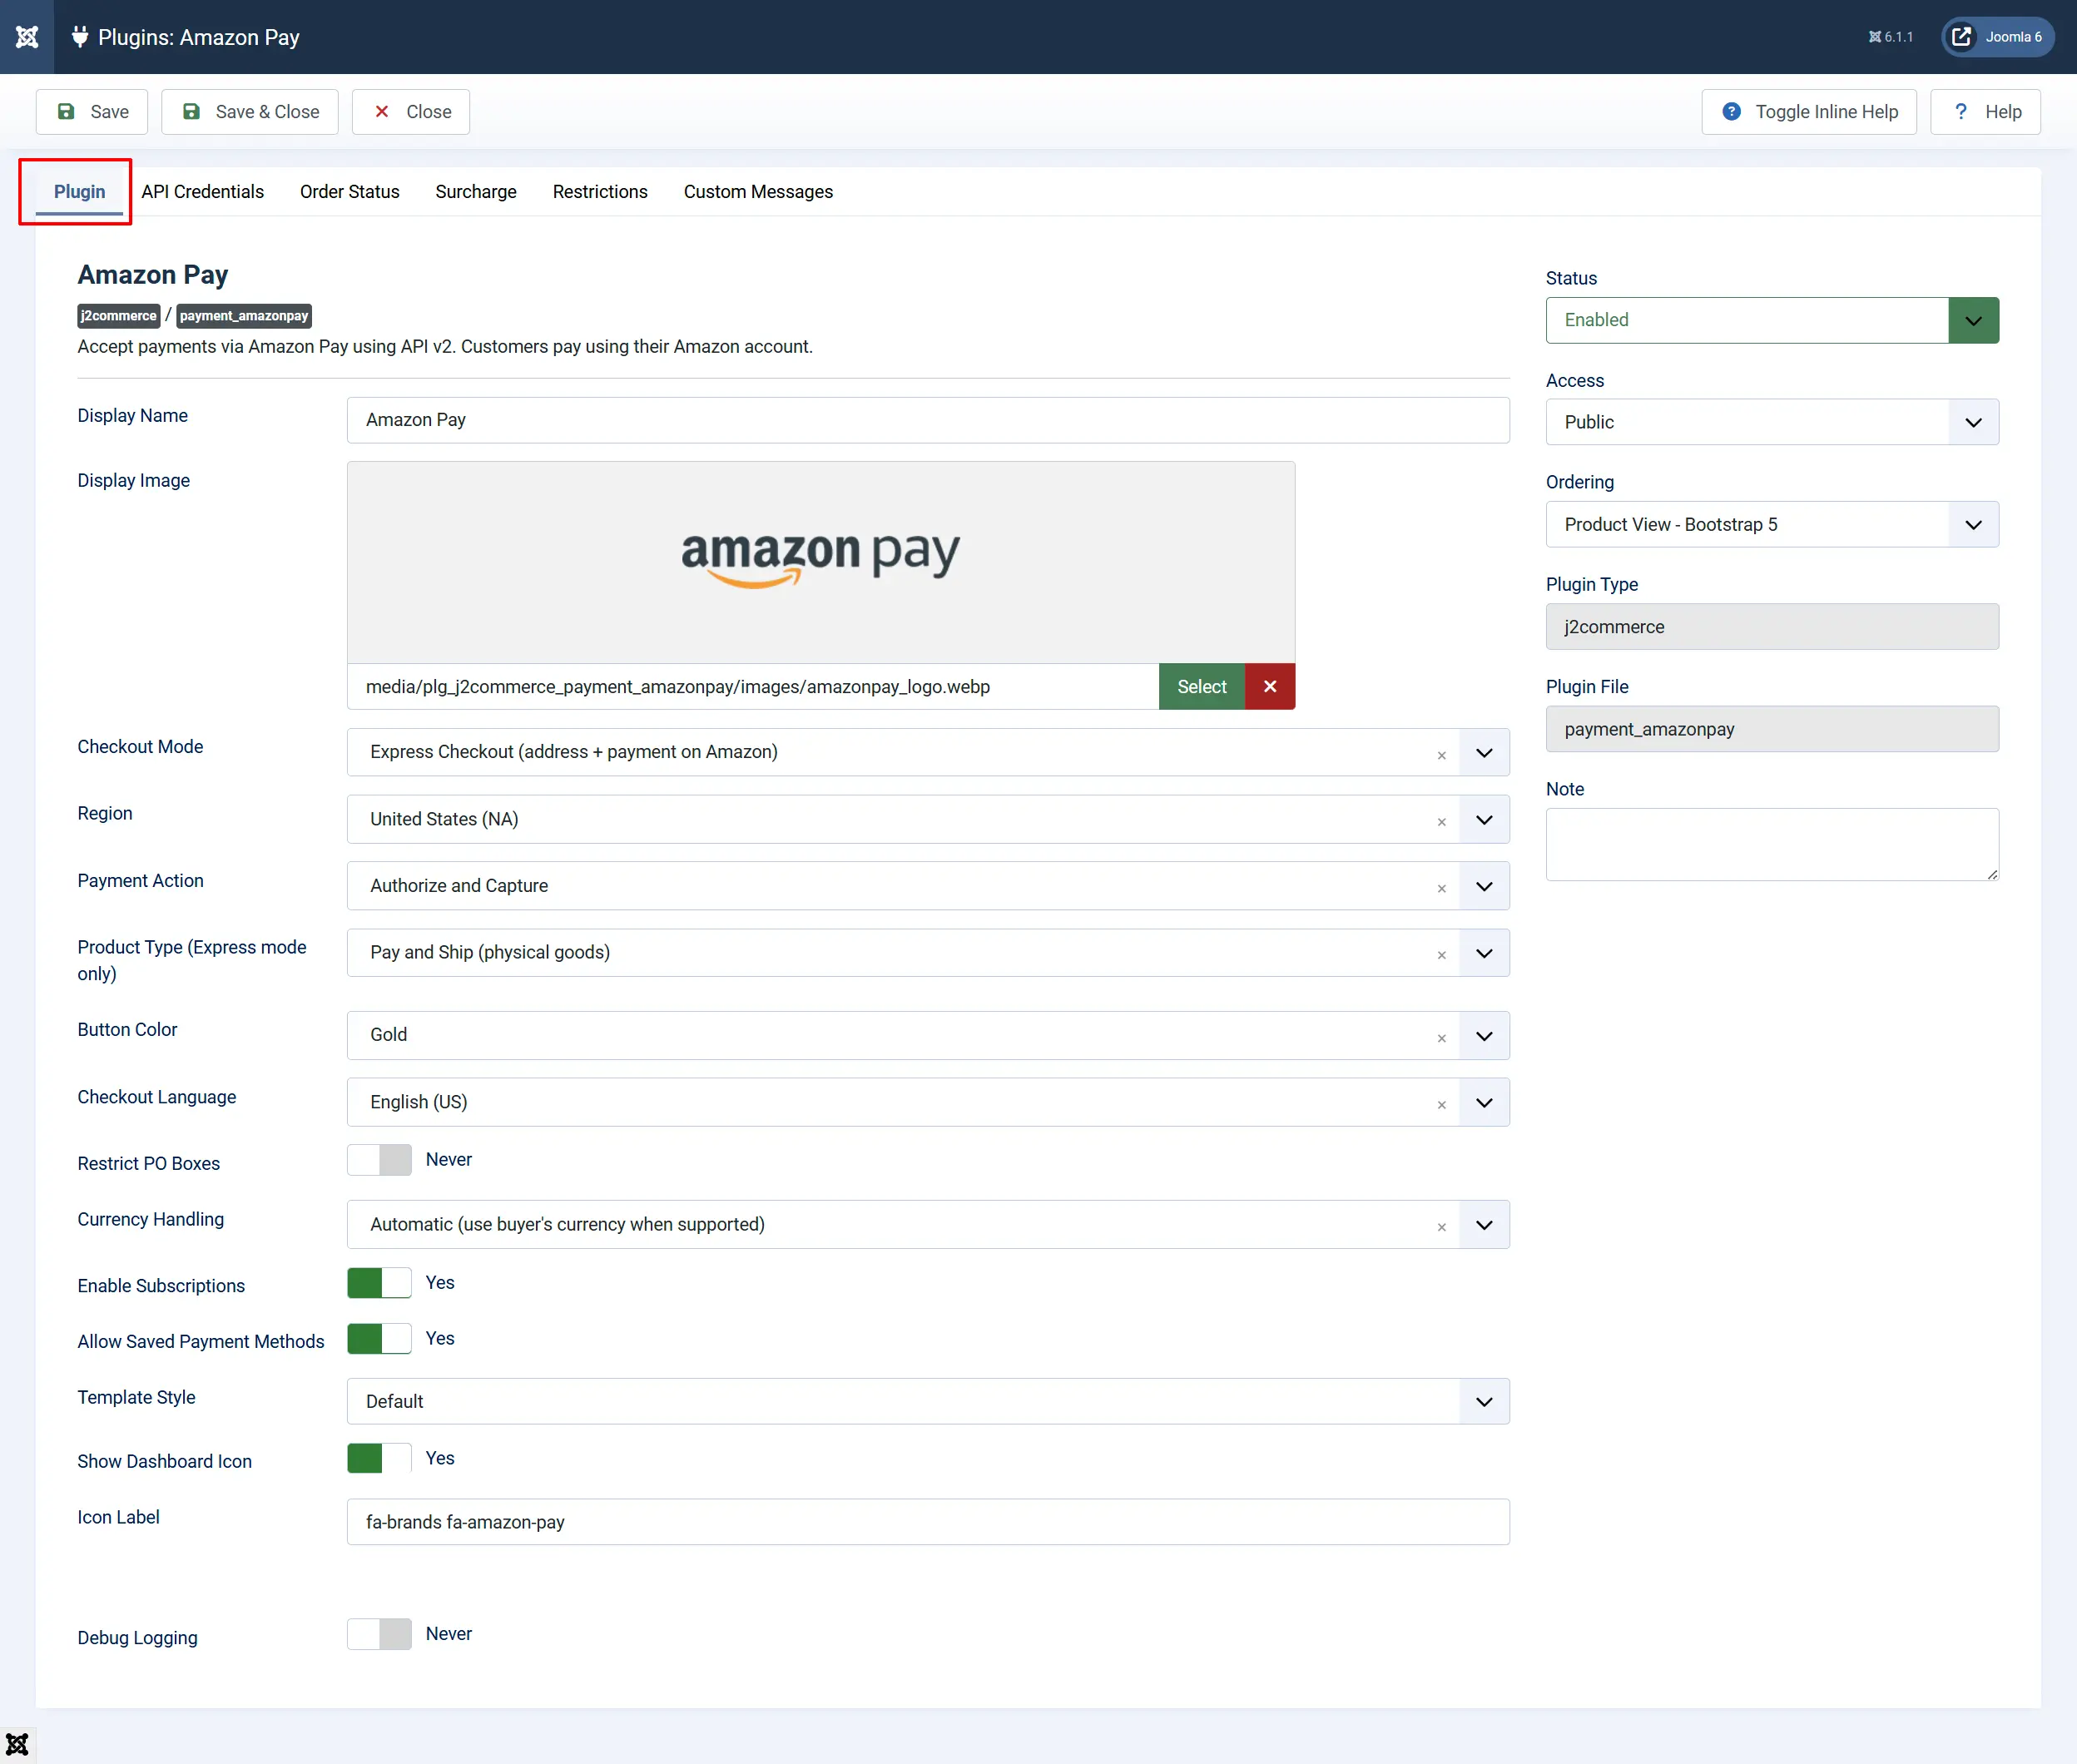
Display Name: The label shown to customers at checkout
Display Image: Optional logo shown next to the payment option at checkout
Checkout Mode: How the checkout flow works — see options below
-
Express Checkout (address + payment on Amazon): The customer is redirected to an Amazon-hosted page where they select both their shipping address and payment method from their Amazon account. After confirming, they return to your store. This mode allows Amazon to collect the shipping address directly.
-
Payment Only (payment on Amazon, address from checkout): The customer enters their address on your checkout page as normal. When they reach the payment step, clicking the Amazon Pay button redirects them to Amazon to select their payment method only. This is similar to a hosted redirect gateway like WorldPay.
Region: Your Amazon Pay registration region
Payment Action: Whether to charge immediately or authorize first
-
Authorize and Capture: Funds are captured from the buyer's account immediately when the order is placed. Choose this for most stores.
-
Authorize Only: A hold is placed on the buyer's account but no money is taken. You must manually capture from the order admin page. Use this if you want to verify stock or weight before charging.
Product Type: Express mode only — whether Amazon collects a shipping address
-
Pay and Ship: Amazon collects the buyer's delivery address. Use this for physical goods.
-
Pay Only: Amazon only collects the payment method. Use this for digital goods or downloads where no shipping address is needed.
Button Color: Color of the Amazon Pay button displayed at checkout
Checkout Language: Language shown on the Amazon-hosted checkout page
Restrict PO Boxes: Express mode only — prevents PO Box shipping addresses
Currency Handling: Whether to charge in the buyer's selected currency or always use your ledger currency
Enable Subscriptions: Allow subscription products to be purchased with Amazon Pay
Allow Saved Payment Methods: Let logged-in customers keep their Amazon Pay agreement for renewals and admin charges
Template Style: Frontend layout for checkout forms
Show Dashboard Icon: Add an Amazon Pay icon tile to the J2Commerce dashboard
Debug Logging: Write API activity to administrator/logs/payment_amazonpay.php
API Credentials
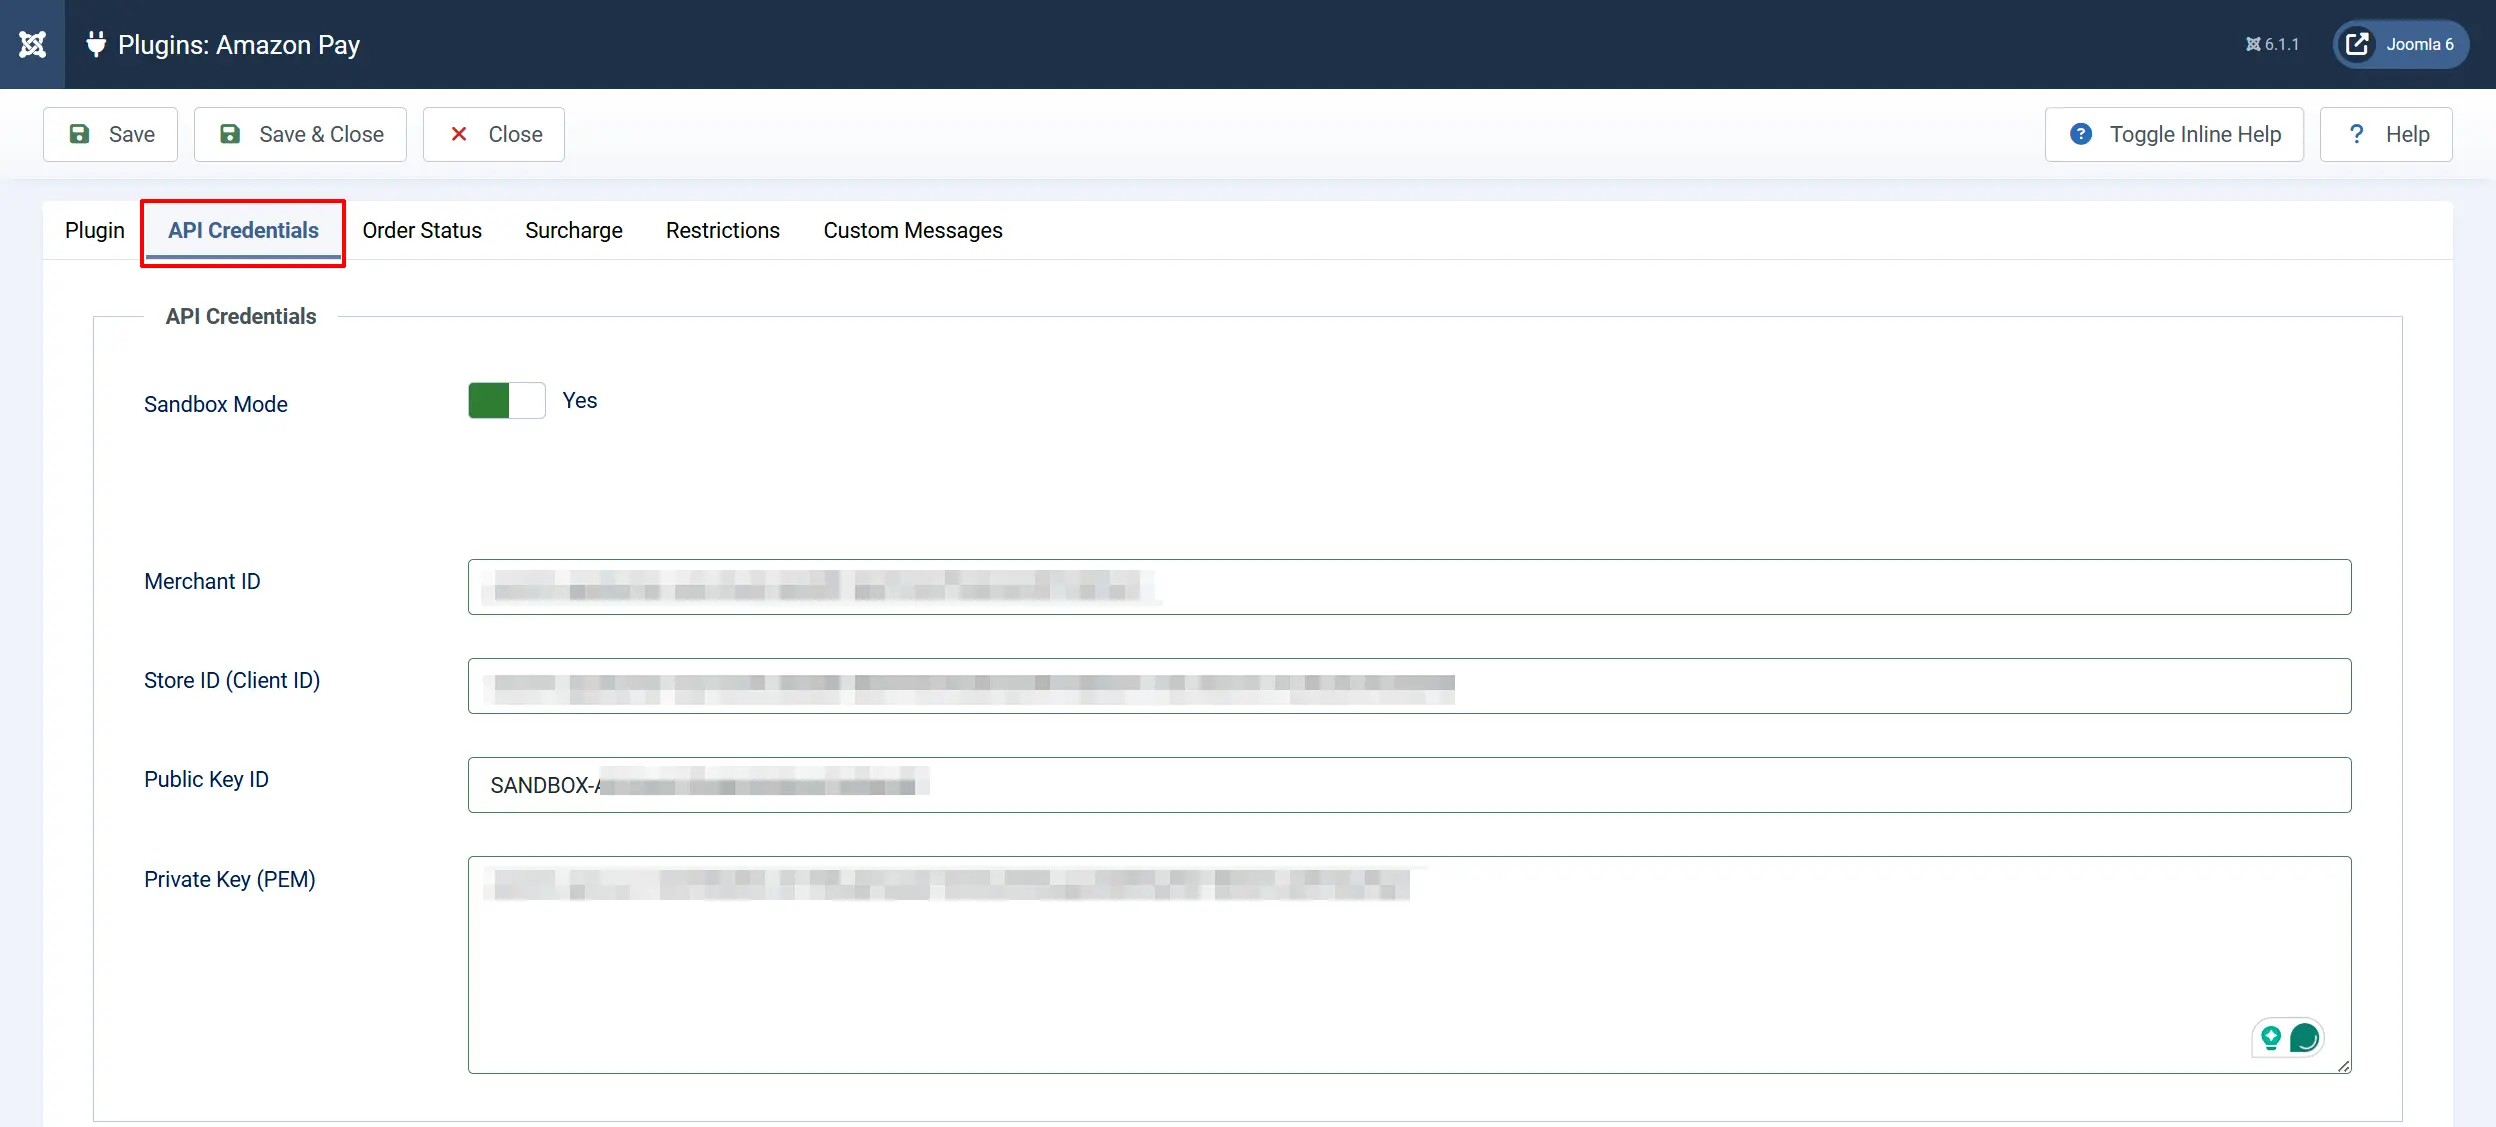
Sandbox Mode: Toggle on to use Amazon Pay's test environment. No real charges occur. Toggle off when you are ready to accept real payments.
When Sandbox is on, the fields below accept sandbox credentials. When off, they accept live credentials.
Merchant ID: Your Amazon Pay Merchant ID from Seller Central
Store ID (Client ID): Format: amzn1.application-oa2-client.xxxxx — from Integration Central
Public Key ID: Your API public key ID. Sandbox keys start with SANDBOX-
Private Key (PEM): Paste the full contents of your .pem private key file
The private key is a multi-line text block that begins with -----BEGIN RSA PRIVATE KEY-----. Paste the entire block including the header and footer lines into the Private Key field.
Order Status
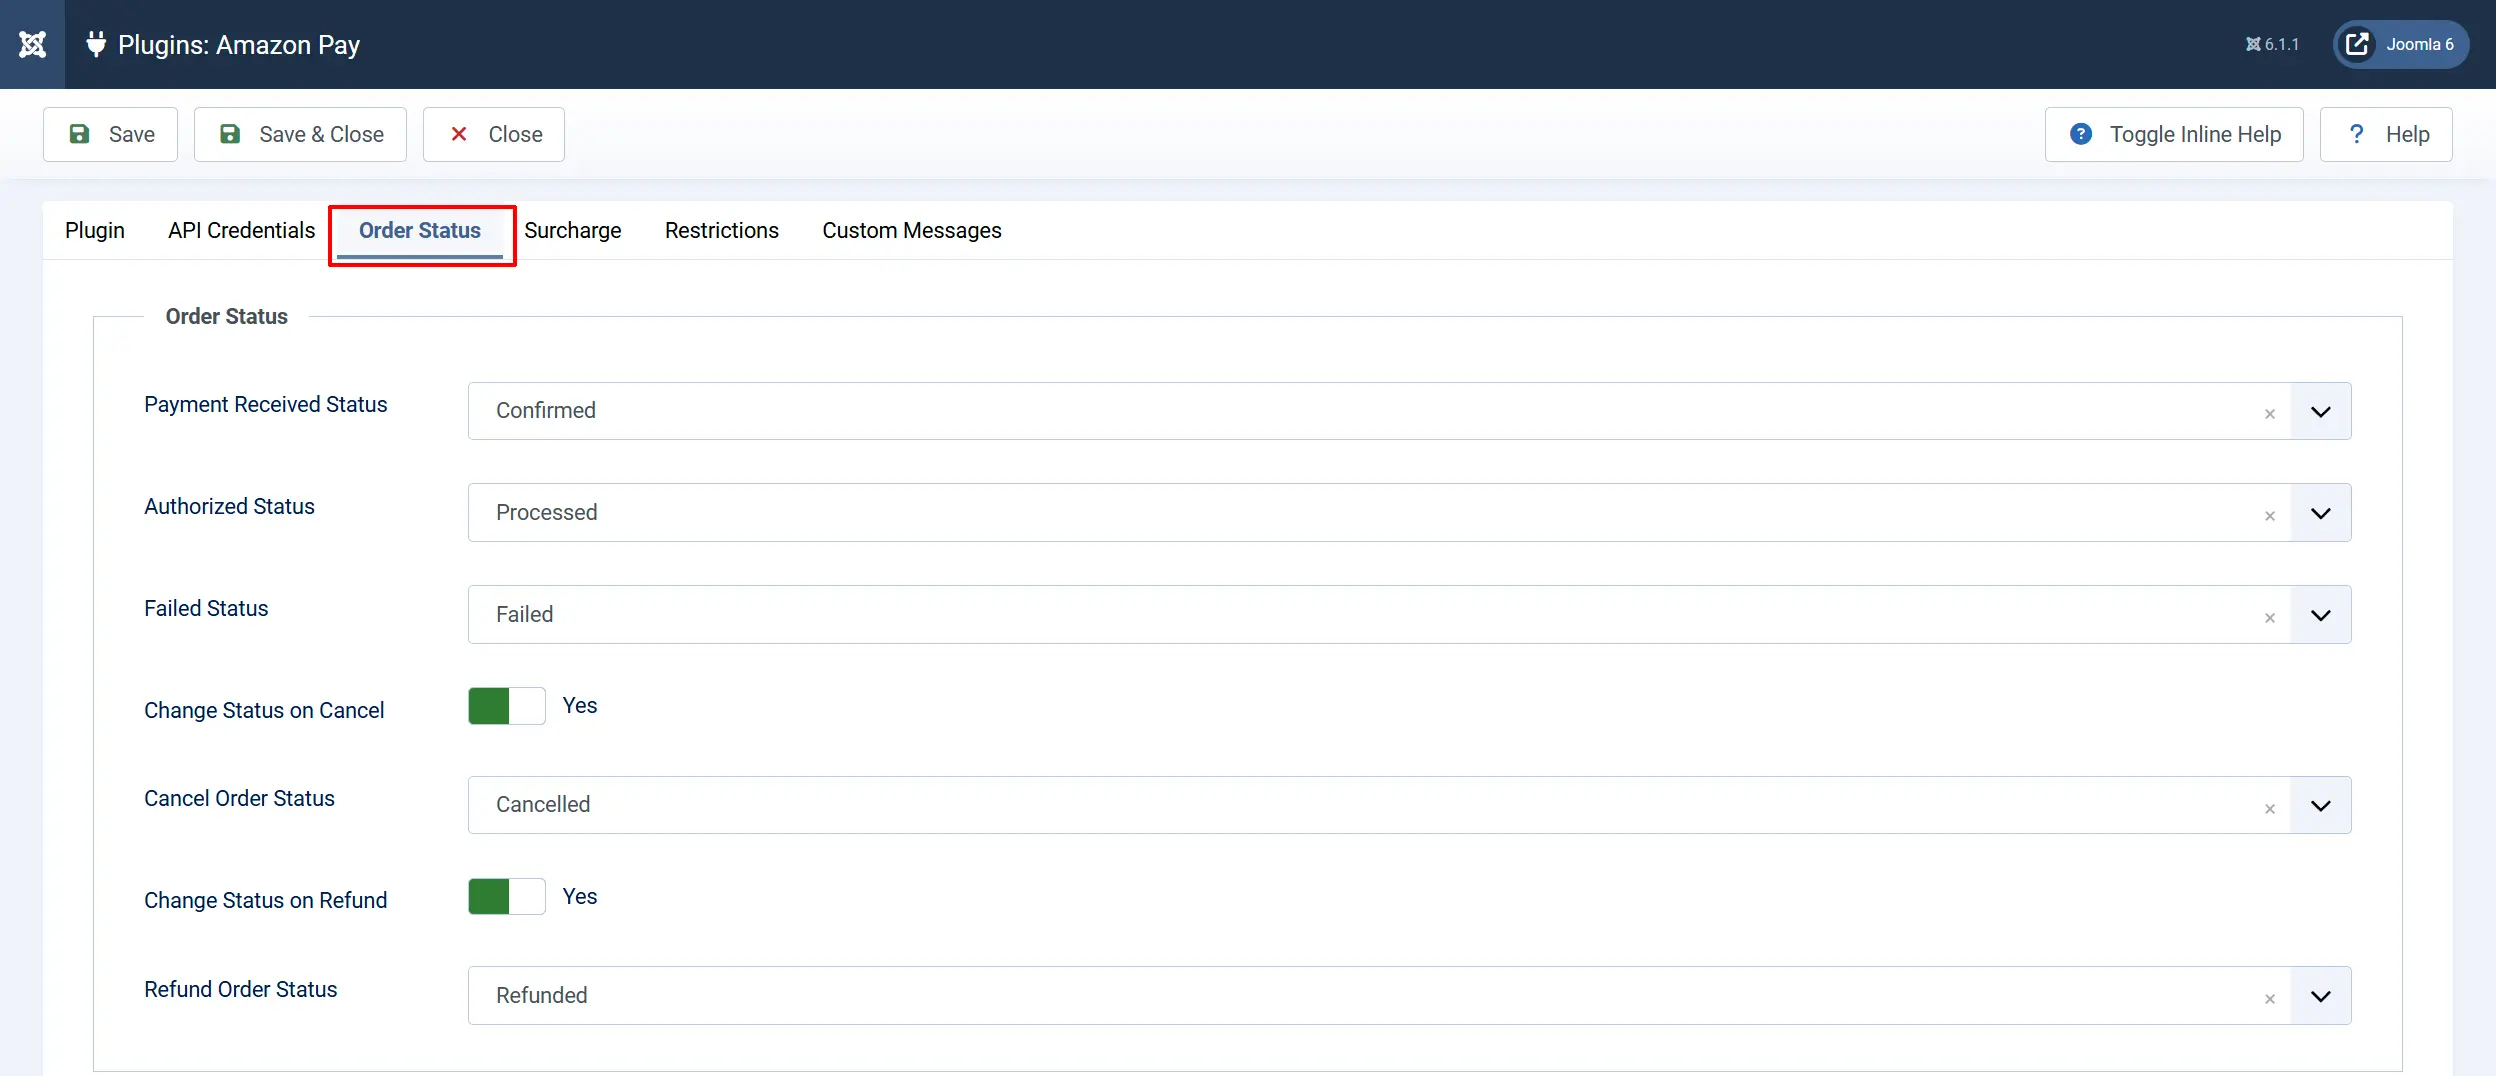
Configure which order status J2Commerce sets at each stage of a payment.
Payment Received Status: Status set after a successful payment capture
Authorized Status: Status set when payment is authorized but not yet captured
Failed Status: Status set when payment fails
Change Status on Cancel: Automatically update status when a charge is canceled
Cancel Order Status: Status to apply after a charge cancellation (shown when above is Yes)
Change Status on Refund: Automatically update status when a refund is processed
Refund Order Status: Status to apply after a refund (shown when above is Yes)
If the status you need does not appear in any dropdown, create it first by going to J2Commerce -> Setup -> Order Statuses.

Surcharge
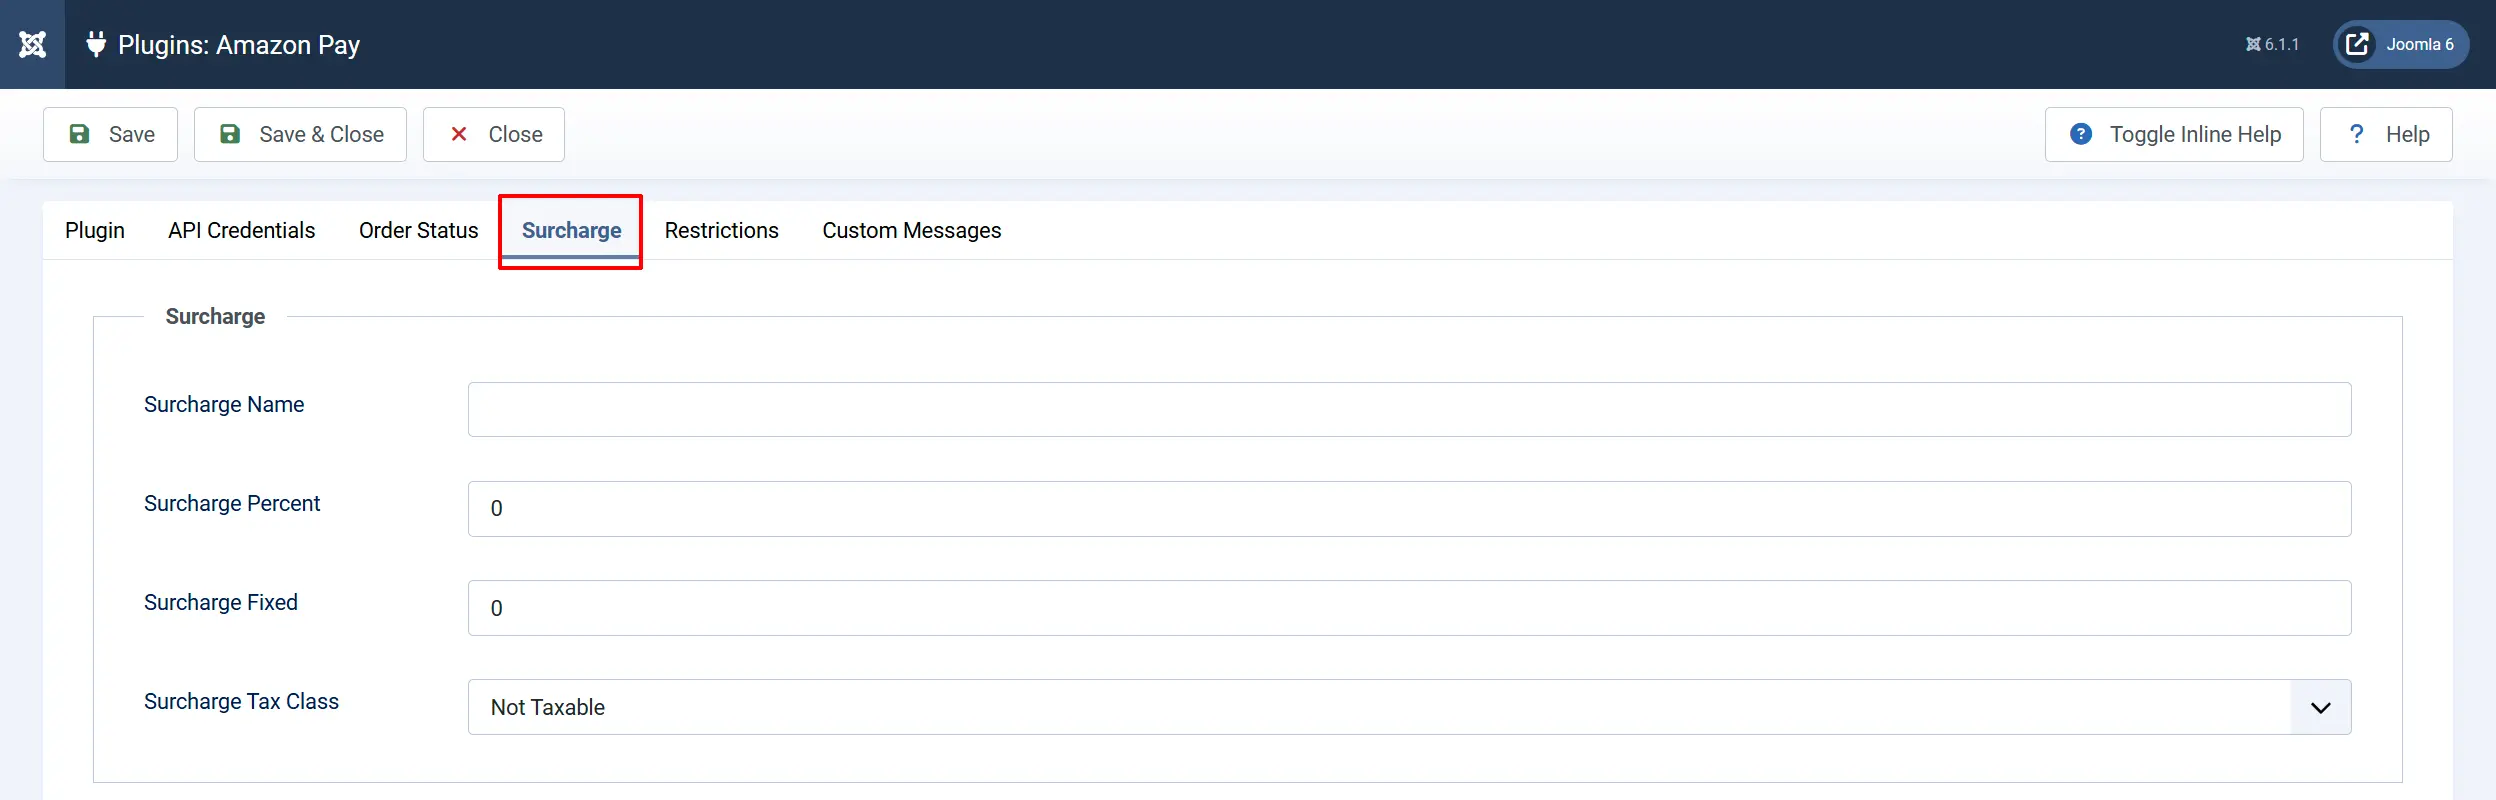
Add an optional surcharge to orders paid with Amazon Pay. You can combine a percentage and a fixed amount — both are added together.
Surcharge Name: Label shown to customers (e.g., "Processing Fee")
Surcharge Percent: Percentage of the order subtotal to add
Surcharge Fixed: Fixed amount to add in your store currency
Surcharge Tax Class: Tax profile to apply to the surcharge
Restrictions
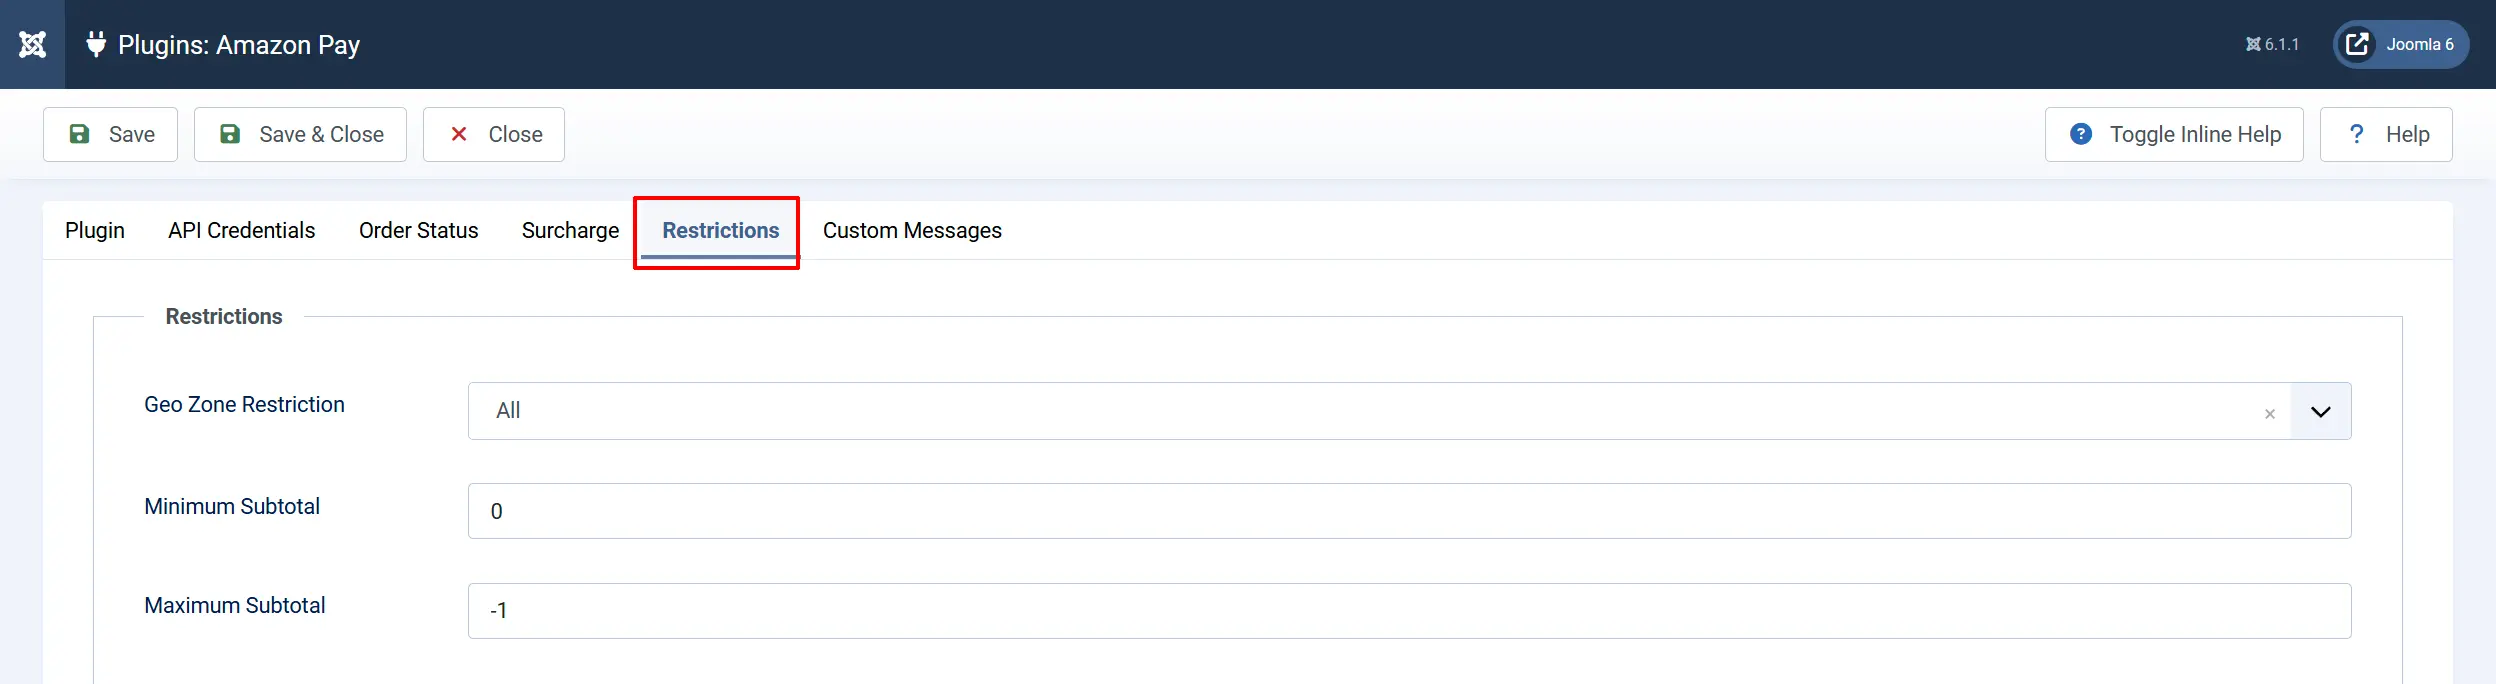
Control which customers see Amazon Pay at checkout.
Geo-Zone Restriction: Only show Amazon Pay to customers in a specific geo-zone. Leave empty for all customers
Minimum Subtotal: Hide Amazon Pay if the cart subtotal is below this amount. Leave at 0 for no minimum
Maximum Subtotal: Hide Amazon Pay if the cart subtotal exceeds this amount. Set to -1 for no maximum
Custom Messages
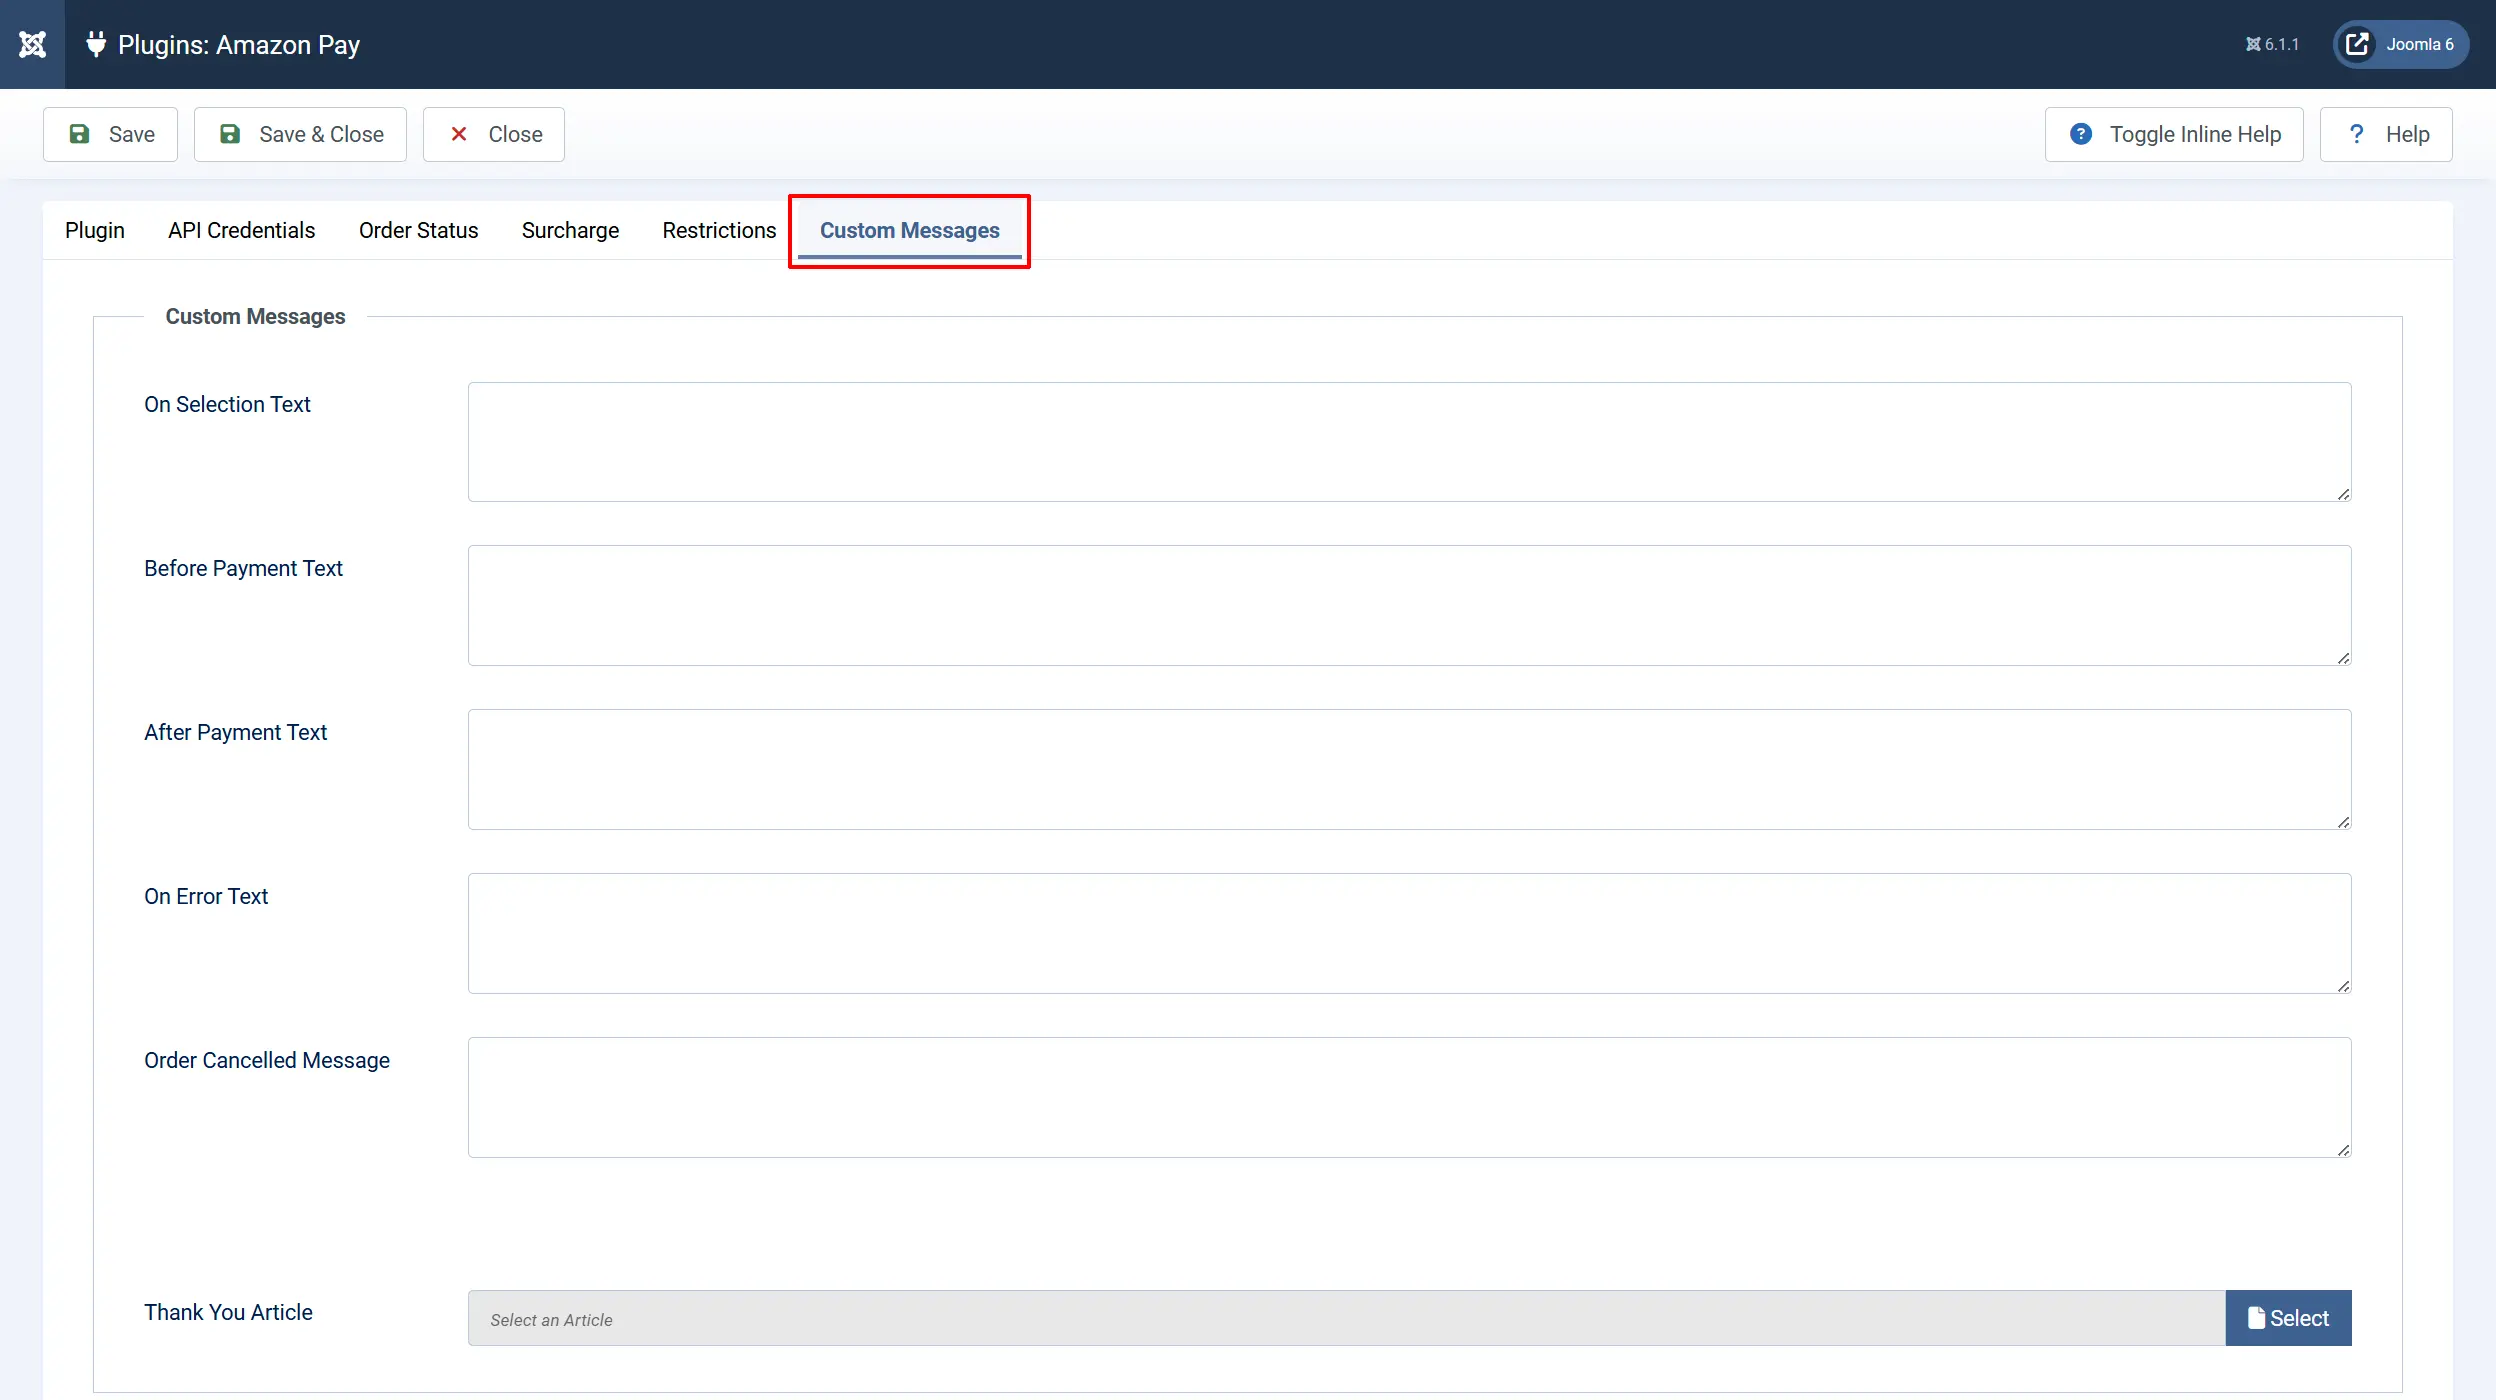
These optional text fields let you customize messages shown to customers at different points in the payment process.
On Selection: When the customer selects Amazon Pay as their payment method
On Before Payment: On the payment page before the customer clicks the Amazon Pay button
On After Payment: On the confirmation page after a successful payment
On Error Payment: When a payment error occurs
On Cancel Payment: When the customer cancels payment and returns to the cart
Thank You Article: A Joomla article to display on the confirmation page after payment
Checkout Experience
Express Checkout Flow
When a customer selects Amazon Pay in Express Checkout mode:
- They click the Amazon Pay button on your checkout page.
- They are redirected to Amazon to log in and confirm their address and payment method.
- After confirming, Amazon redirects them back to your store review page.
- The customer clicks Place Order to complete the purchase.
- Payment is processed and the confirmation page is shown.
Payment Only Flow
When a customer selects Amazon Pay in Payment Only mode:
- The customer fills in their delivery address on your standard checkout page.
- At the payment step, they click the Amazon Pay button.
- They are redirected to Amazon to choose their payment method from their account.
- Amazon redirects them back to your store and the order is completed.
Order Management
After a customer pays, J2Commerce records the Amazon Pay transaction details on the order.
Capture an Authorized Payment
If you set Payment Action to Authorize Only, payments are held but not captured. To collect the funds:
- Go to J2Commerce -> Sales -> Orders and open the order.
- Look for the Payment section on the order page.
- Click Capture to collect the authorized amount.
- The order status updates to the status you configured.
Cancel an Authorized Charge
If payment has been authorized but not yet captured:
- Go to J2Commerce -> Sales -> Orders and open the order.
- In the Payment section, click Cancel Charge.
- Confirm the action. The authorization is released and no funds are collected.
Issue a Refund
You can refund a captured payment directly from the order admin page:
- Go to J2Commerce -> Sales -> Orders and open the order.
- In the Payment section, click Refund.
- Leave the amount blank for a full refund, or enter a specific amount for a partial refund.
- Confirm the refund. The funds are returned to the customer's Amazon account.
Charge a Saved Payment Method
If the customer has a saved Amazon Pay agreement and Allow Saved Payment Methods is enabled, you can charge their agreement from the order admin page:
- Go to J2Commerce -> Sales -> Orders and open the order.
- In the order summary, find the Charge Saved Amazon Pay section.
- Select the saved agreement from the dropdown.
- Enter the amount to charge (defaults to the outstanding balance).
- Click Charge Now.
This is useful for phone orders, manual renewals, or collecting additional charges.
Subscriptions
When Enable Subscriptions is set to Yes, customers can use Amazon Pay for subscription products (requires the app_subscriptionproduct add-on).
At checkout, Amazon Pay creates a recurring Charge Permission that authorizes your store to collect future renewal charges. Each renewal is automatically charged by the J2Commerce scheduler without requiring the customer to log in again.
When a subscription is canceled, J2Commerce closes the recurring Charge Permission in Amazon Pay.
Saved Payment Methods
When Allow Saved Payment Methods is enabled, customers who complete a subscription checkout or agree to save their payment method have their Amazon Pay Charge Permission stored securely in your store database (in the #__j2commerce_paymentprofiles table). The actual payment credentials remain with Amazon — only an agreement token is stored.
Customers can view and manage saved methods in My Account -> Payment Methods on the frontend.
Notifications (IPN)
Amazon Pay sends Instant Payment Notifications (IPN) to your store via Amazon's SNS (Simple Notification Service). These notify J2Commerce of events such as charge captures, declines, cancellations, and refunds.
The IPN endpoint URL is: https://[your-site.com]/index.php?option=com_ajax&plugin=payment_amazonpay&group=j2commerce&task=ipn&format=raw
Register this URL in Amazon Pay Integration Central under your application's IPN settings. When an IPN arrives, J2Commerce verifies the X.509 certificate and updates the order status automatically.
Going Live Checklist
Before accepting real payments:
- Sandbox is set to No
- Your live Merchant ID, Store ID, Public Key ID, and Private Key are entered
- Your live private key
.pemfile is pasted in full - You have placed a test order end-to-end in sandbox mode and received a Confirmed status
- Your IPN endpoint URL is registered in Amazon Pay Integration Central
- Debug Logging is set to No
- Your Amazon Pay account has completed identity verification and is approved for production
Troubleshooting
Amazon Pay button does not appear at checkout
Cause: The plugin is not enabled, credentials are missing, or the Region is set incorrectly.
Solution:
- Go to J2Commerce -> Setup -> Payment Methods and confirm Amazon Pay shows a green checkmark.
- Open the plugin settings and check that all four credential fields are filled in (Merchant ID, Store ID, Public Key ID, Private Key).
- Verify the Region matches your Amazon Pay registration (US, EU, or JP). Mismatched regions cause the button to fail silently.
- Enable Debug Logging and check
administrator/logs/payment_amazonpay.phpfor error messages.
Dashboard shows a warning about Amazon Pay credentials
Cause: One or more credential fields are empty for the current mode (sandbox or live).
Solution: Open the plugin settings and ensure all four fields in the API Credentials tab are filled in for the active mode.
Order stays Pending after the customer returns from Amazon
Cause: The checkout session was not completed correctly, or a network error interrupted the return redirect.
Solution:
- Enable Debug Logging and reproduce the issue.
- Check
administrator/logs/payment_amazonpay.phpfor the checkout session response. - Verify that your site URL in J2Commerce configuration matches the URL Amazon redirects back to. Mismatches cause session verification to fail.
Refund fails with an error
Cause: The charge has already been fully refunded, the charge ID is missing, or the Amazon Pay account does not have sufficient funds for the refund.
Solution:
- Open the order and confirm a Transaction ID is recorded.
- Check
administrator/logs/payment_amazonpay.phpfor the API error code. - Verify the refund amount does not exceed the captured amount minus any previous refunds.
Saved payment method not appearing for admin charge
Cause: Allow Saved Payment Methods is disabled, or the customer did not complete a checkout that created a saved agreement.
Solution:
- Verify Allow Saved Payment Methods is set to Yes in the plugin settings.
- Saved agreements are created during subscription checkouts or when a customer pays with Amazon Pay and an agreement is stored. Regular one-time orders do not automatically save the agreement unless a subscription is in the cart.
"Amazon Pay is running in SANDBOX mode" warning appears on the dashboard
Cause: Sandbox Mode is set to Yes.
Solution: If you are ready to go live, open the plugin settings, switch Sandbox to No, and enter your production credentials.
Support
- J2Commerce documentation: docs.j2commerce.com
- J2Commerce support: www.j2commerce.com
- Amazon Pay documentation: developer.amazon.com/docs/amazon-pay
- Amazon Pay Integration Central: sellercentral.amazon.com