VoguePay
VoguePay is a Nigerian payment gateway (voguepay.com) widely used across West Africa. It lets your customers pay using cards and local payment methods on VoguePay's own hosted checkout page. Your customers are redirected to VoguePay to complete the payment, then returned to your store for order confirmation.
The plugin handles the full payment loop: it builds the redirect form, sends the customer to VoguePay, and verifies the payment result server-side before updating the order status.
Prerequisites
- J2Commerce installed and configured on Joomla 6
- An active VoguePay merchant account at voguepay.com
- Your VoguePay Merchant ID (found in your VoguePay dashboard, top-right corner)
Purchase and download
This plugin is a separate add-on available from the J2Commerce Extensions Store. It is not included with the core J2Commerce 6 component.
- Go to the J2Commerce website and locate VoguePay.
- Add it to your cart and complete checkout.
- Go to My Downloads under your account profile and find the plugin.
- Click Available Versions -> View Files -> Download Now to download the ZIP file.
Install the plugin
In the Joomla Administrator, go to System -> Install -> Extensions.
Upload the plg_j2commerce_payment_voguepay.zip file.

Enable the Plugin
Once you have installed the App, you will need to enable it. There are two ways you can access the App.
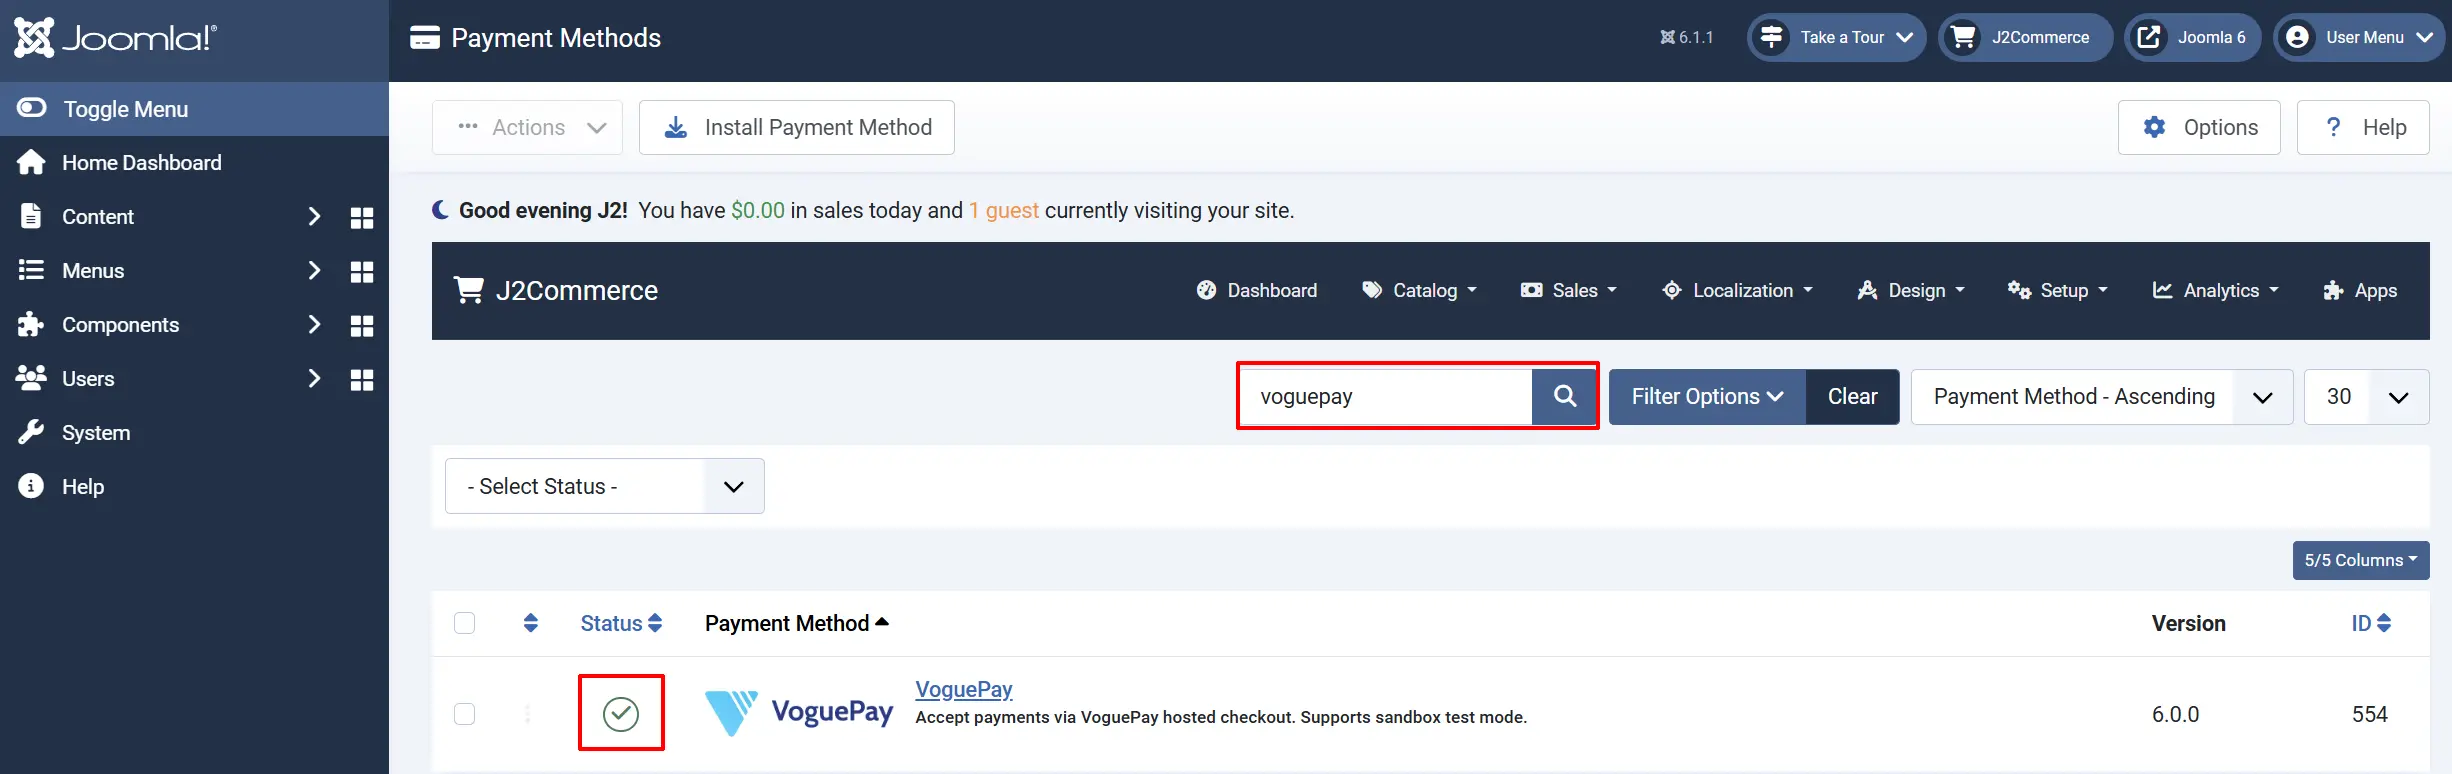
Option A: Go to the J2Commerce icon at the top right corner -> Setup -> Payment Methods
Option B: Go to Components on the left sidebar -> J2Commerce -> Dashboard -> Setup -> Payment Methods

To help you narrow down the list, you can do a search for VoguePay, click the X, and it will turn into a green checkmark. It is now enabled and ready for setup.
Configure the plugin
Click the VoguePay title next to the green checkmark to open the configuration screen.
Click the Toggle Inline Help button at the top of any plugin configuration page to show a short description beneath each field.

Gateway Settings tab

This tab holds your VoguePay credentials and developer options.
Sandbox / Test Mode: Switches to VoguePay demo mode. Payments are simulated and nothing is charged. The merchant ID is automatically replaced with demo.
-
Sandbox (Test) Mode: When Sandbox / Test Mode is set to Yes, VoguePay uses a shared demo account. You can place test orders and watch the full payment flow without spending real money. The plugin automatically uses
demoas the merchant ID, so you do not need to enter anything in the Merchant ID field. -
To go live, set Sandbox / Test Mode to No and enter your real Merchant ID.
VoguePay Merchant ID: Your VoguePay merchant ID from the top-right of your VoguePay dashboard. Leave blank when using Sandbox mode — the demo ID is applied automatically.
Debug Mode: Logs all gateway requests and responses to the Joomla system log. Useful for diagnosing issues.
Finding Your Merchant ID
- Log in to your VoguePay account at voguepay.com.
- Look at the top-right area of the dashboard — your Merchant ID is displayed there.
- Copy it and paste it into the VoguePay Merchant ID field in J2Commerce.
Display Settings tab
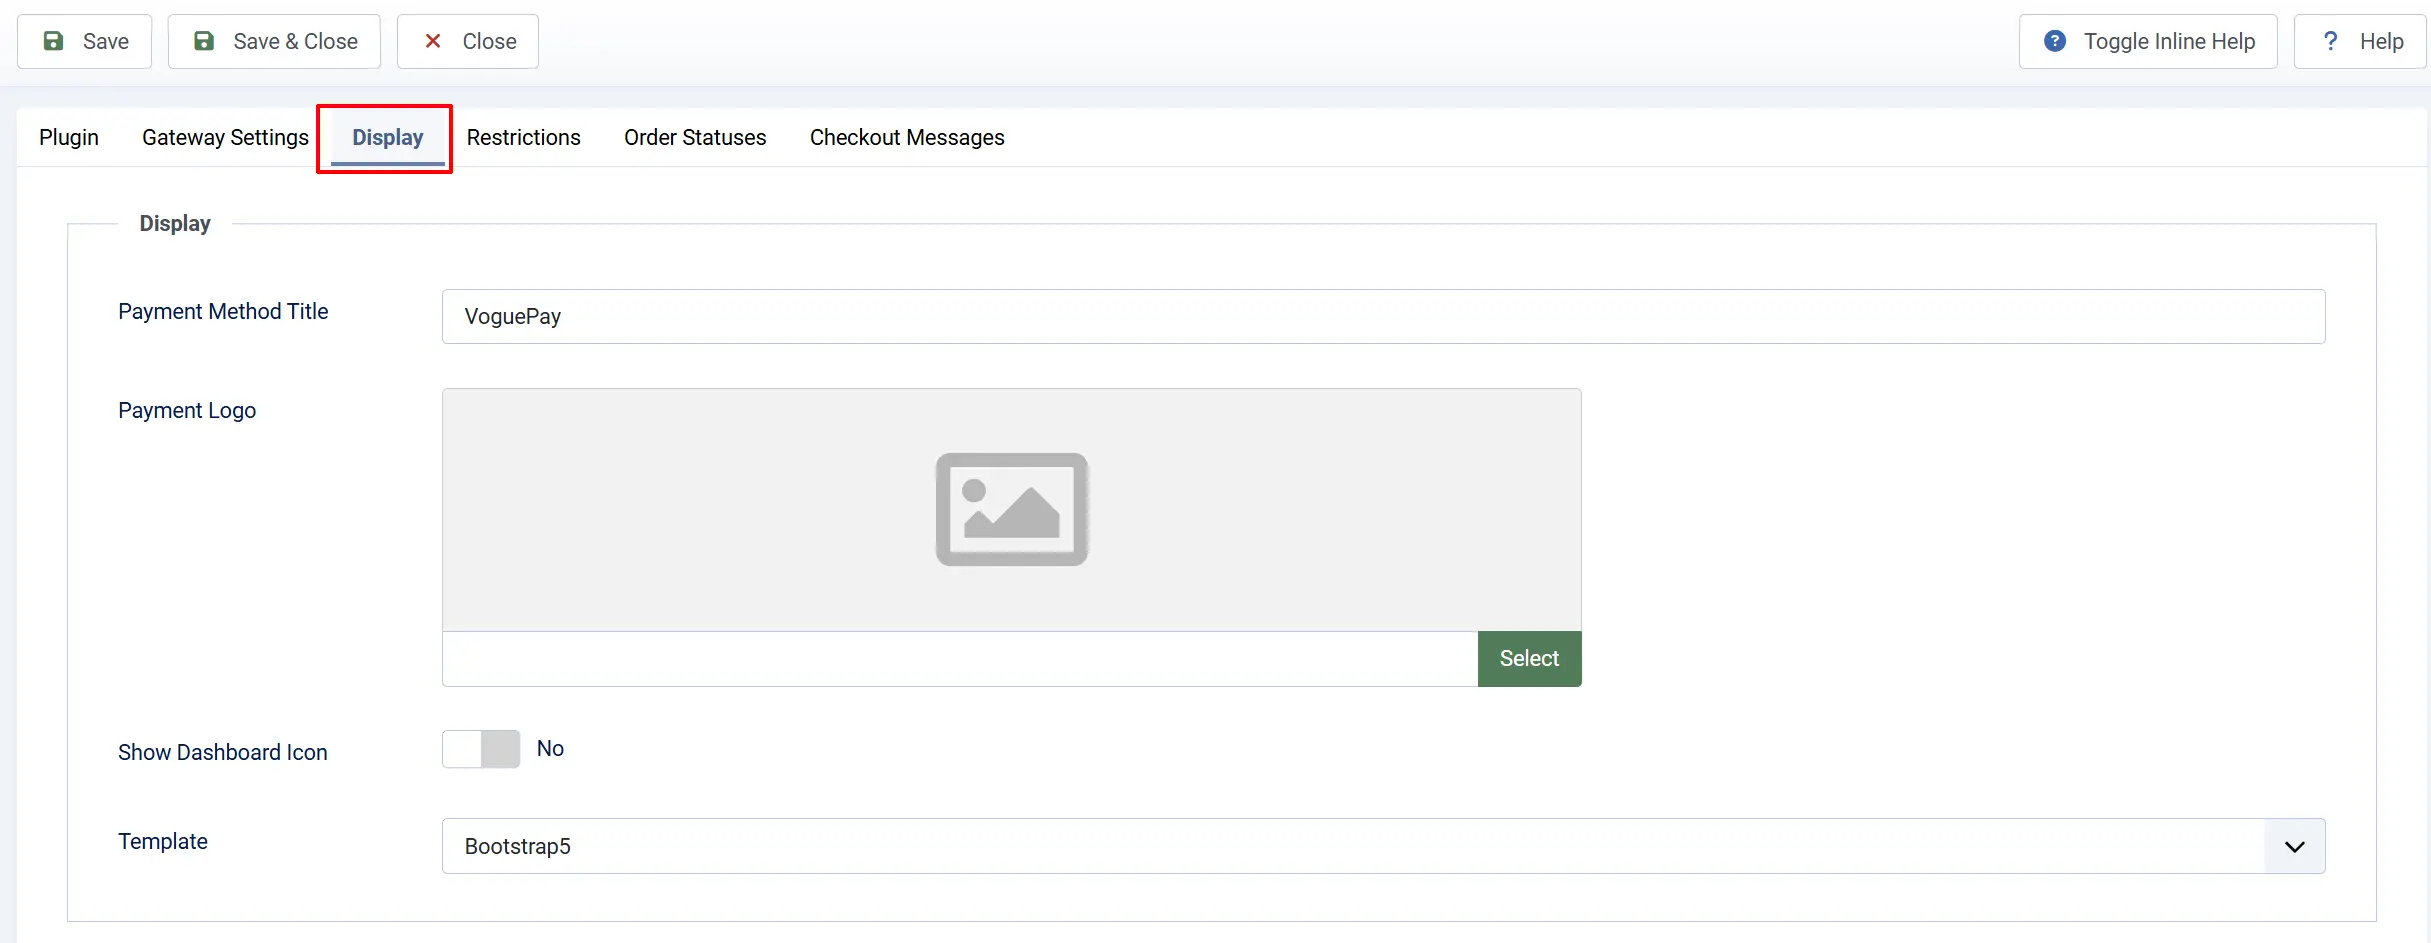
Control how VoguePay appears to customers during checkout.
Payment Method Title: The name customers see at checkout when selecting this payment method.
Payment Logo: An optional image (logo) shown alongside the payment method title at checkout.
Show Dashboard Icon: Adds a quick-access icon to the J2Commerce admin dashboard for this plugin's settings page.
Template: Selects the checkout template style. Use bootstrap5 for most Joomla templates, or uikit for UIkit-based templates.
Restrictions
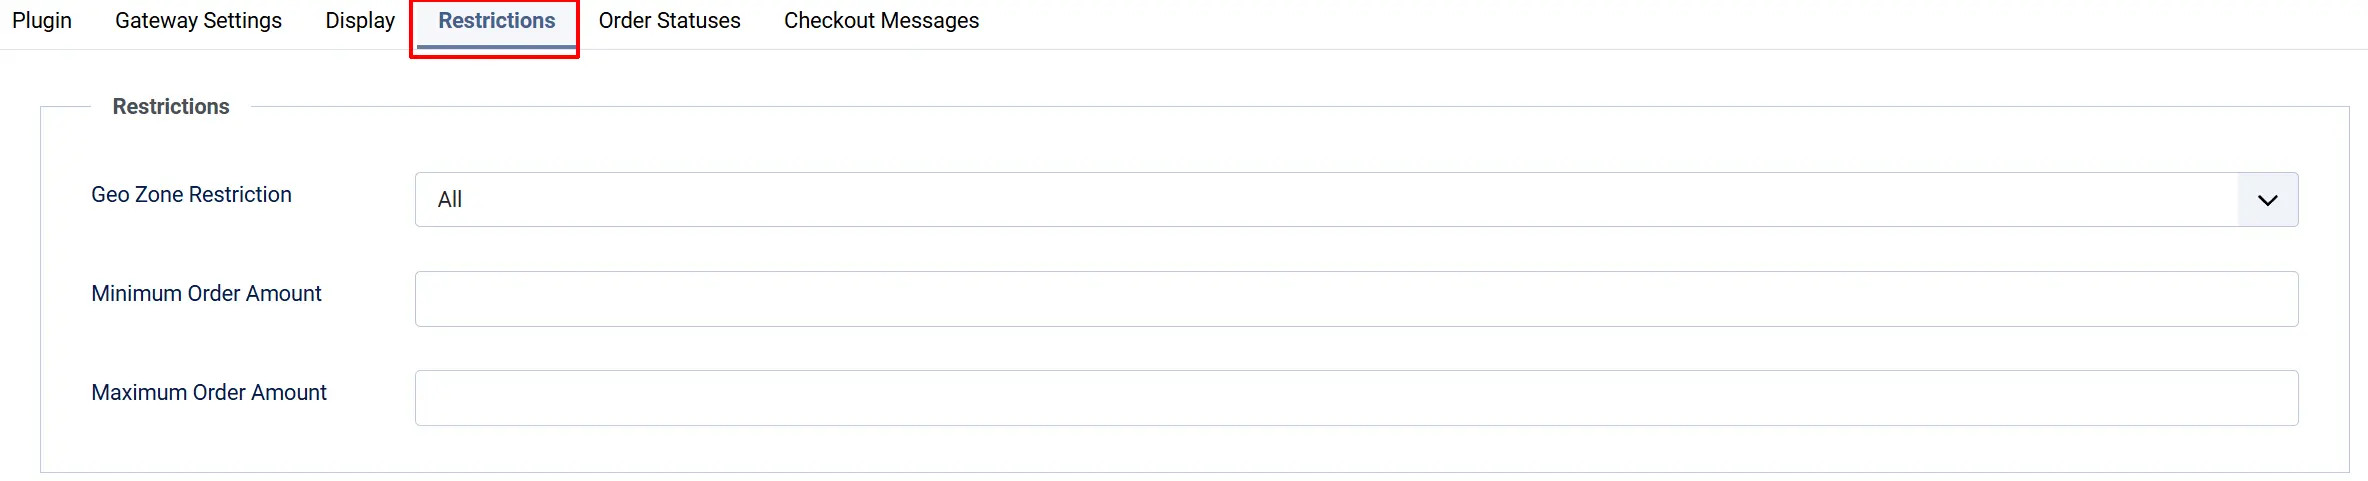
Use these settings to limit who can see the VoguePay option at checkout.
Geo Zone Restriction: Restricts VoguePay to customers in a specific geo zone (for example, Nigeria only). Select All Geo Zones to show it everywhere.
Minimum Order Amount: VoguePay will not appear for orders below this value. Leave blank or enter 0 to disable.
Maximum Order Amount: VoguePay will not appear for orders above this value. Leave blank or enter 0 to disable.
Tip: If you only serve Nigerian customers with VoguePay, create a geo zone for Nigeria under J2Commerce -> Localisation -> Geo Zones and select it here.
Order Statuses
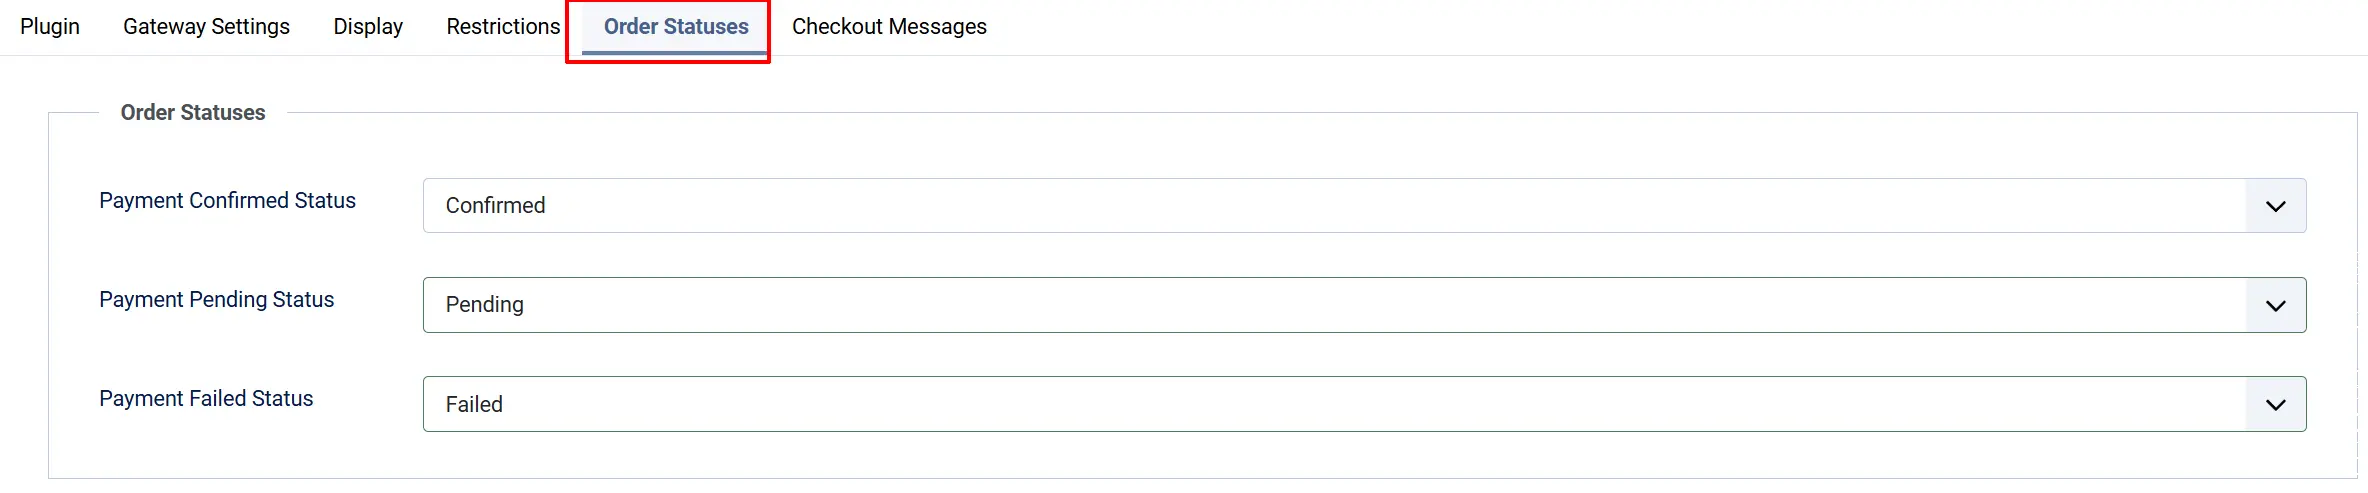
These settings map VoguePay payment results to your J2Commerce order statuses. Set each one to a matching status in your store.
Payment Confirmed Status: VoguePay reports the payment as Approved.
Payment Pending Status: VoguePay reports the payment as Pending (awaiting funds).
Payment Failed Status: Payment is cancelled or fails.
If the order status you want is not listed, create it first under J2Commerce -> Setup -> Order Statuses.

Checkout Messages
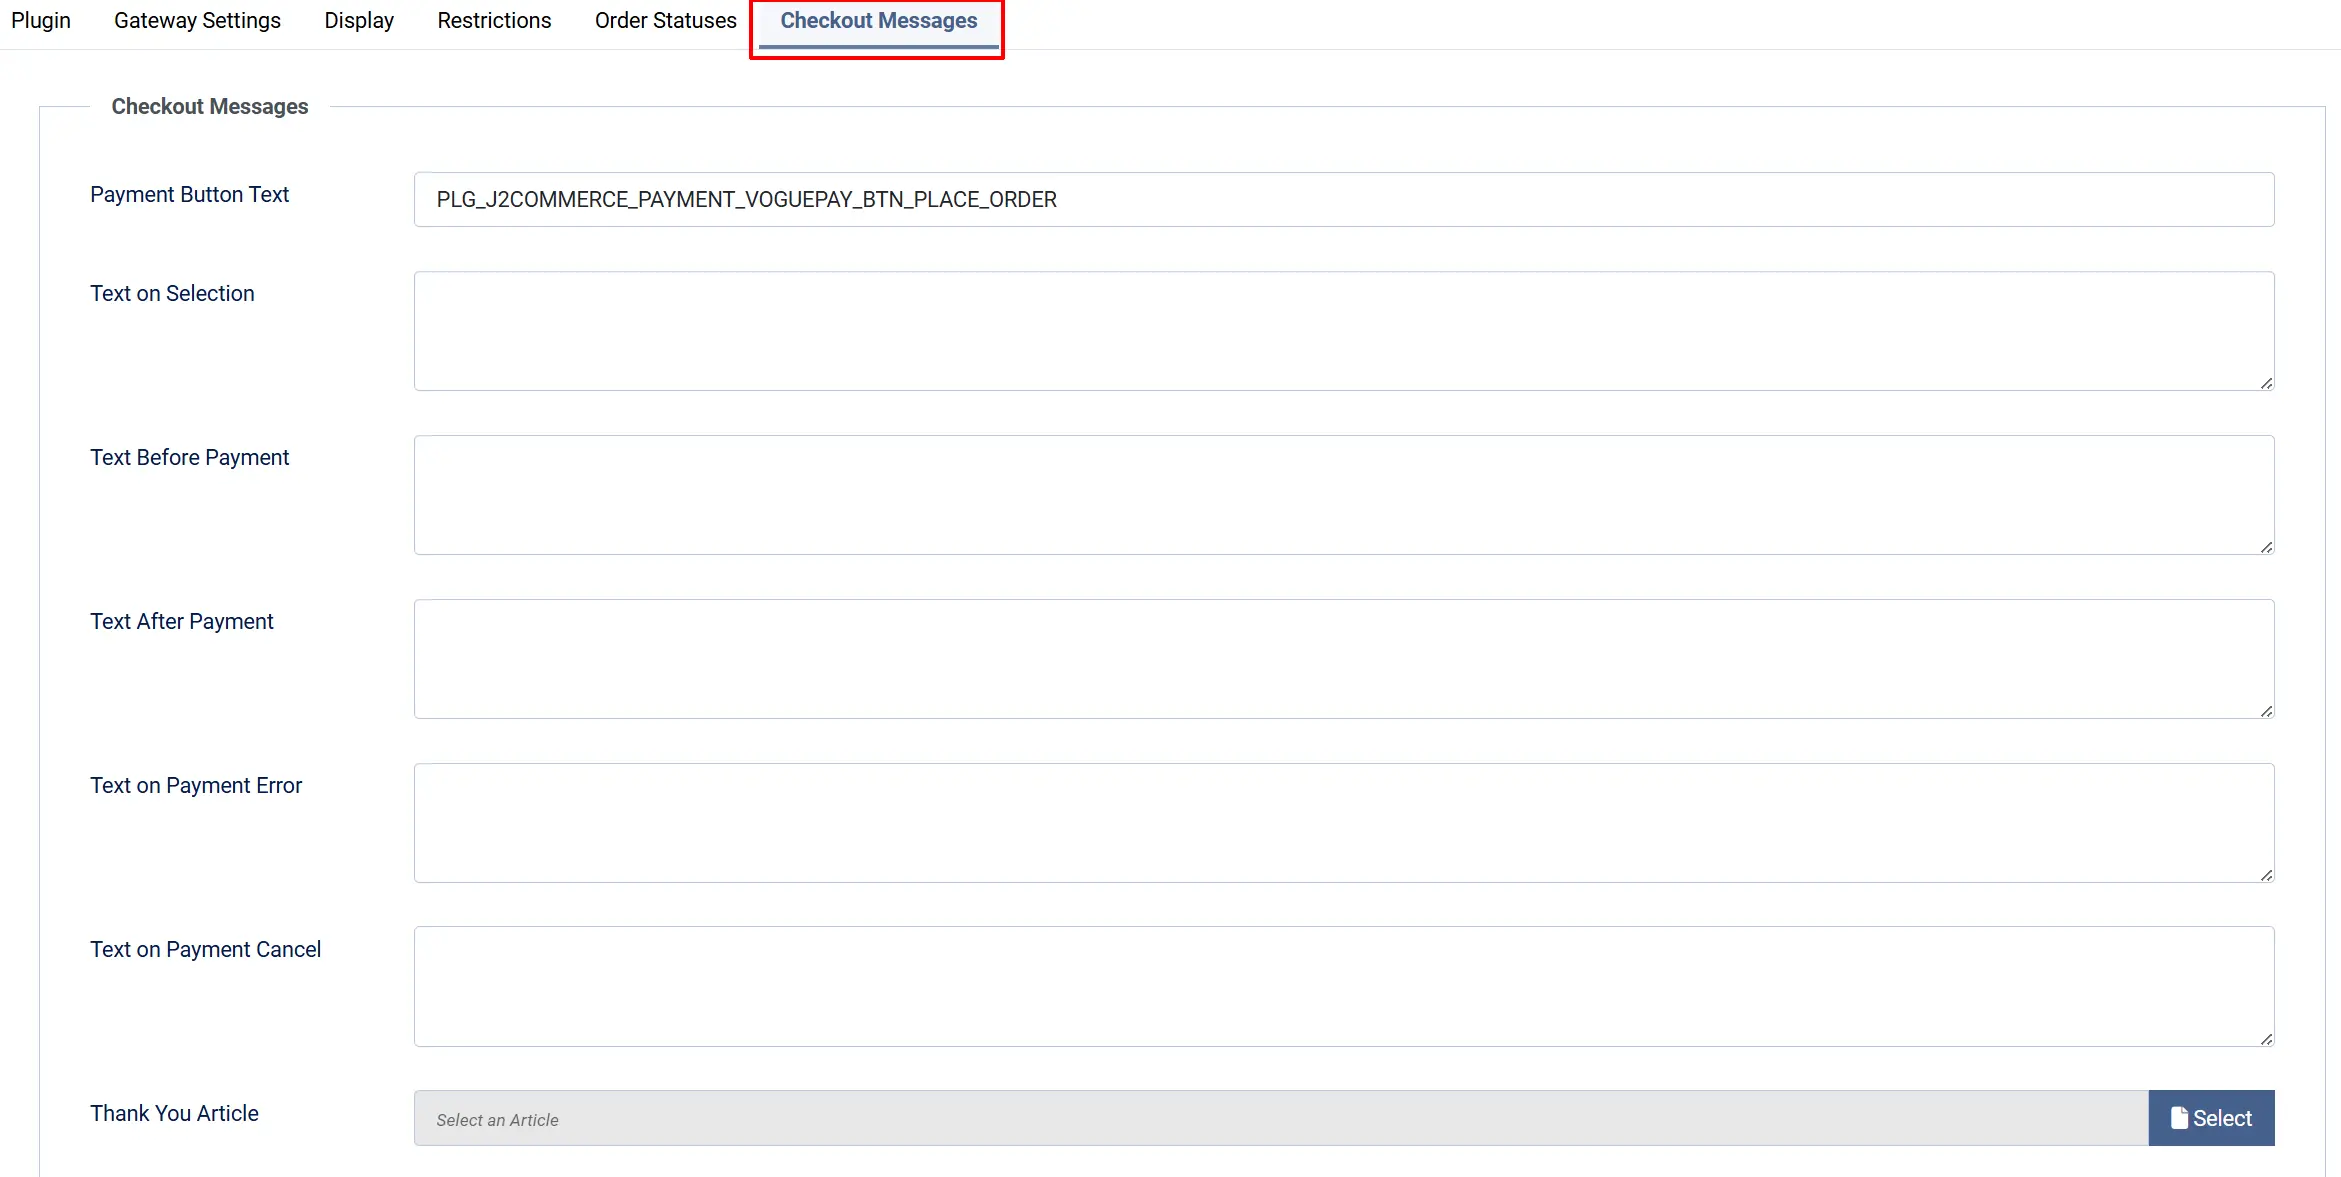
Payment Button Text: Text displayed on the submit button. Defaults to 'Place Order'.
These optional text fields let you guide customers through the VoguePay payment experience.
Text on Selection: Displayed when the customer selects VoguePay as their payment method on the checkout page.
"You will be redirected to VoguePay to complete your payment securely."
Text Before Payment: Displayed above the payment button, just before the customer clicks to go to VoguePay.
"Click the button below to pay securely via VoguePay."
Text After Payment: Displayed when the customer returns after a successful payment (before the server confirms).
"Thank you! Your order is being confirmed. Please wait a moment."
Text on Payment Error: Displayed when a payment error occurs.
"We could not process your payment. Please try again or contact us."
Text on Payment Cancel: Displayed when the customer cancels at the VoguePay gateway.
"Your payment was cancelled. You can try again or choose a different method."
Payment Button Text: Label on the submit button that sends the customer to VoguePay.
"Pay with VoguePay" or leave as default "Place Order"
Thank You Article: An optional Joomla article displayed on the order confirmation page after payment. A thank-you message or order summary article
How the Payment Flow Works
Understanding the checkout flow helps you configure messages and troubleshoot problems.
- The customer selects VoguePay at checkout and clicks the payment button.
- J2Commerce saves the order and builds a redirect form with the order total and your Merchant ID.
- The customer's browser automatically submits to
https://voguepay.com/pay— they are now on VoguePay's hosted payment page. - The customer completes payment on VoguePay using their preferred payment method.
- VoguePay sends a server-to-server notification to J2Commerce with the transaction ID.
- J2Commerce calls VoguePay's verification API to confirm the transaction and checks that the merchant ID and amount match your configuration.
- If everything checks out, J2Commerce updates the order status to your Payment Confirmed Status and the customer sees the confirmation page.
Important: J2Commerce verifies every payment result directly with VoguePay's API. The plugin never trusts the URL parameters that come back from the redirect — it always contacts VoguePay independently to confirm the payment before marking an order as paid.
What's Different in J2Commerce 6
If you previously used VoguePay with J2Store v4, here is what changed in J2Commerce 6:
- Native Joomla 6 architecture. The plugin no longer uses the old FOF 2 framework. It follows Joomla 6's dependency injection and event dispatcher pattern, making it more stable and compatible with future Joomla updates.
- Multi-currency charge conversion. When a customer pays in a currency different from your store's base currency, J2Commerce now converts the order total to the correct gateway charge amount before sending it to VoguePay. This prevents undercharging in multi-currency stores.
- Hardened server-side verification. The plugin now confirms both the merchant ID and the exact amount returned by VoguePay's API before accepting a payment. An order can only move forward — it can never be downgraded from confirmed back to pending or failed by a late or forged notification.
- No jQuery required. The minimal JavaScript used by the plugin (form auto-submit) is written in vanilla JavaScript (ES6+). There is no jQuery dependency.
- Joomla Log integration. Debug logging uses the standard Joomla log system instead of writing to custom files in the cache folder. Enable Debug Mode and check Joomla's system log under System -> Logs.
Tips
- Always test in Sandbox / Test Mode before taking real payments. Go through the full checkout flow, cancel a payment, and check that your order statuses update correctly.
- Keep Debug Mode turned off in production. It records gateway request and response data to the Joomla log — useful for troubleshooting, but unnecessary overhead in normal operation.
- If you restrict VoguePay to a specific geo zone, test with a customer address inside and outside that zone to confirm the restriction works as expected.
- The Text After Payment message appears before the server has confirmed the payment. It lets you show a friendly holding message like "processing your payment..." while J2Commerce contacts VoguePay in the background.
Troubleshooting
VoguePay does not appear at checkout
Cause: The plugin is not enabled, the Merchant ID is blank (and Sandbox mode is off), or a geo zone or order amount restriction is hiding it.
Solution:
- Go to J2Commerce -> Setup -> Payment Methods and confirm VoguePay is enabled.
- Open the plugin settings and check the Gateway Settings tab. If Sandbox / Test Mode is No, make sure VoguePay Merchant ID contains your merchant ID.
- Check the J2Commerce admin dashboard — if a red alert about missing credentials appears, the merchant ID is empty.
- Review your Restrictions settings. If a geo zone is selected, make sure the customer's billing address is in that zone. Check the minimum and maximum order amounts.
Orders stay on "Pending Payment" after the customer pays
Cause: VoguePay's server-to-server notification could not reach your site, or the payment verification call failed.
Solution:
- Enable Debug Mode in the plugin settings.
- Place a test order in sandbox mode.
- Go to System -> Logs in Joomla and look for entries in the
payment_voguepaycategory. - Check for errors like "Could not verify the transaction with VoguePay" — this means VoguePay's verification API returned an unexpected response, which may indicate a network issue between your server and VoguePay.
- Make sure your server can make outbound HTTPS requests to
voguepay.com.
"Payment validation failed: merchant ID mismatch" error
Cause: The merchant ID returned by VoguePay's verification API does not match the VoguePay Merchant ID in your plugin settings.
Solution: Double-check the Merchant ID in your VoguePay dashboard (top-right of the dashboard) and make sure it matches exactly what is entered in the Gateway Settings tab. The value is case-sensitive.
"Payment validation failed: the amount paid does not match the order total" error
Cause: The amount VoguePay reports for the transaction differs from the expected order total by more than 0.01.
Solution: This usually indicates a currency conversion mismatch. Check that your J2Commerce currency settings are correct and that the currency code in your orders matches what VoguePay expects. Enable Debug Mode to log the exact amount values being compared.