Global Payments
The Global Payments plugin connects your J2Commerce store to the Global Payments GP API — a Unified Commerce Platform used by businesses worldwide to accept credit and debit card payments.
Checkout is powered by GP.js Hosted Fields, which loads secure card entry iframes directly on your checkout page. Customers enter their card number, expiry, and CVV without ever leaving your site, and card data is handled entirely by Global Payments. This keeps your store at the simplest level of PCI security compliance (SAQ-A).
If you prefer, you can also switch to Hosted Payment Pages (HPP) mode, which redirects customers to a Global Payments-hosted page to complete payment.
The plugin also supports:
- Authorize + Capture — funds settle immediately when the customer pays
- Authorize Only — reserve funds at checkout and settle manually from the order admin when you are ready to ship
- Saved cards — returning customers can reuse a saved card at checkout with one click
- Subscription renewals — saved cards are charged automatically when you use the J2Commerce Subscriptions add-on
- Settle, cancel, and refund actions directly from the J2Commerce order screen
- Multiple card brands — Visa, Mastercard, American Express, Discover, Maestro, JCB, Diners Club, UnionPay, Carte Bancaire
Requirements
- Joomla 6.x
- J2Commerce 6.x
- PHP 8.3 or later
- A Global Payments merchant account (sandbox or live)
- Your store must be accessible over HTTPS
Get Your Global Payments Credentials
Before configuring the plugin, log in to the Global Payments Developer Portal and retrieve your credentials.
You need two values for each environment:
| Credential | Where to find it |
|---|---|
| App ID | Under your application in the GP Developer Portal |
| App Key | Under your application in the GP Developer Portal (treat this like a password) |
Global Payments provides separate credentials for sandbox (test) and live environments. Keep both sets ready — you will enter them in the plugin settings.
Start in sandbox mode while you test checkout flows. Switch to live credentials only when you are ready to accept real payments.
Purchase and Download
Step 1: Go to the J2Commerce website -> Payment Gateways
Step 2: Locate Global Payment -> click View Details -> Add to Cart -> Checkout
Step 3: Go to My Downloads under your profile button at the top right corner and search for PayTrace. Click Available Versions -> View Files -> Download Now
Install the Plugin
In the Joomla Administrator, go to System -> Install -> Extensions.
Upload the payment_globalpayment.zip file or use the Install from URL option.

Enable the Plugin
Once you have installed the App, you will need to enable it. There are two ways you can access the App.
Option A: Go to the J2Commerce icon at the top right corner -> Setup -> Payment Methods
Option B: Go to Components on the left sidebar -> J2Commerce -> Dashboard -> Setup -> Payment Methods

To help you narrow down the list, you can do a search for Global Payment, click the X, and it will turn into a green checkmark. It is now enabled and ready for setup.
Configure the Plugin
Basic Settings
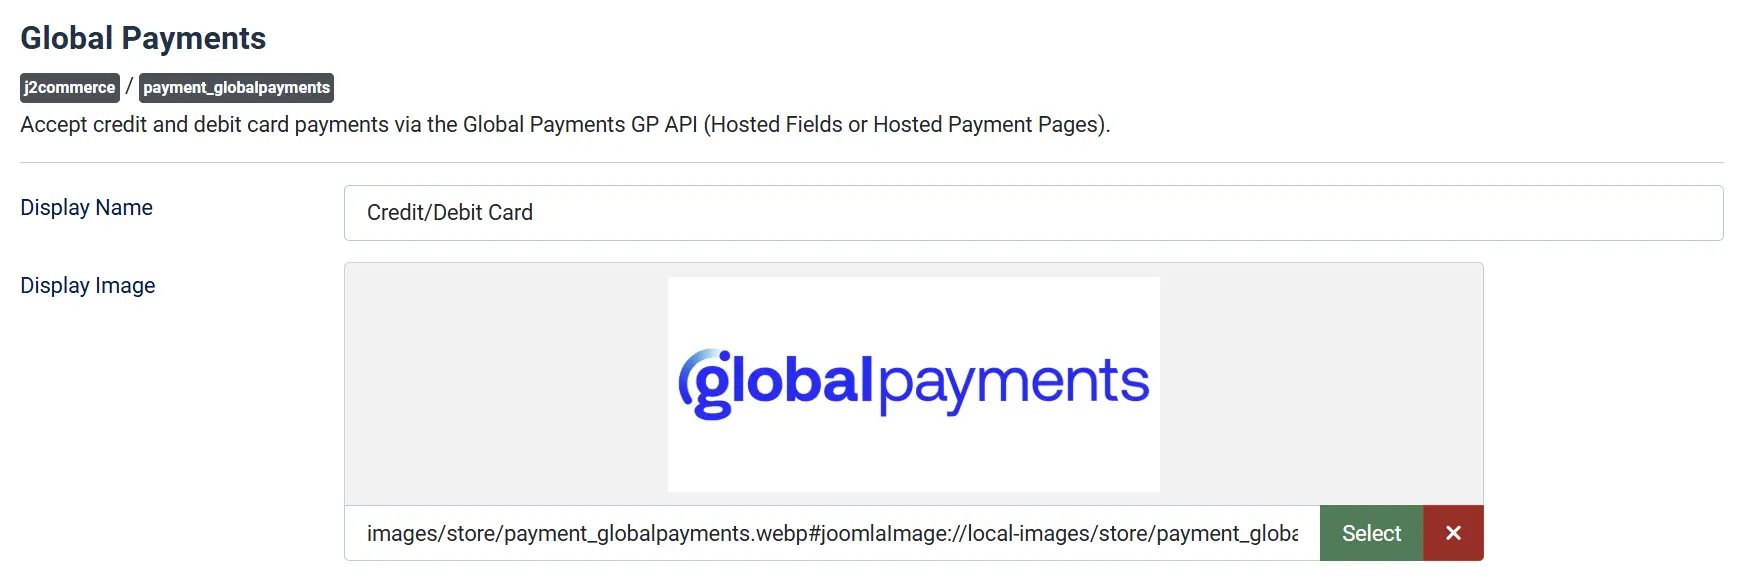
Display Name: The label your customers see at checkout when selecting Global Payments. The default is Credit/Debit Card. You can change this to anything that makes sense for your store, such as "Pay by Card" or "Secure Card Payment".
Display Image: Upload a custom logo or payment badge to appear alongside the payment method name at checkout. Leave empty to show no image.

Integration Mode: Choose how customers enter their card details:
-
Hosted Fields (GP.js, recommended): Secure card iframes appear directly on your checkout page. Customers never leave your site. Supports saved cards.
-
Hosted Payment Pages (HPP): Customers are redirected to a Global Payments-hosted payment page to complete their purchase.
Hosted Fields is recommended for the smoothest checkout experience. Use HPP if your hosting environment has restrictions that prevent iframes from loading.
Transaction Type: Controls what happens to funds at the moment of checkout:
-
Authorize + Capture (recommended): Funds are reserved and collected immediately when the customer pays.
-
Authorize Only: Funds are reserved but not collected. You settle (capture) manually from the order admin when you are ready to ship.
Credentials
Sandbox / Test Mode: Toggle Sandbox / Test Mode to Yes to send all transactions to the Global Payments sandbox environment. No real money moves in sandbox mode.
When sandbox mode is enabled, the plugin uses your Sandbox App ID and Sandbox App Key credentials. When it is disabled, it uses your live App ID and App Key.
The J2Commerce dashboard shows a warning banner while sandbox mode is active so you cannot accidentally leave test mode on after going live.
Live credentials (visible when Sandbox is set to No):
-
App ID: Your live Global Payments App ID from the Developer Portal
-
App Key: Your live Global Payments App Key
-
Statement Narrative: Text shown on the customer's card statement. Default:
Order Payment
Sandbox credentials (visible when Sandbox is set to Yes):
-
Sandbox App ID: Your sandbox App ID
-
Sandbox App Key: Your sandbox App Key
-
Sandbox Statement Narrative: Statement text used during testing
Account Names (Sub-accounts)

Global Payments routes different operations through named sub-accounts on your merchant account. In most cases the defaults work without any changes.
Account Name — Transactions: If your GP account uses a different sub-account name for card charges
- Account Name — HPP: Only visible in HPP mode. Change if your HPP sub-account differs
Account Name — Tokenization: Only visible in Hosted Fields mode. Change if your tokenization sub-account name differs
Contact your Global Payments account manager if you are unsure which sub-account names to use.
Card Settings (Hosted Fields mode only)

Allow Saved Cards: Set to Yes to let logged-in customers save their card at checkout for faster future purchases. Saved cards are stored as secure tokens in the Global Payments vault — no raw card data is kept on your server.
Saved cards are also required for subscription renewals. If your store uses the J2Commerce Subscriptions add-on, keep this enabled.
Accepted Card Types: Select the card brand icons to display above the payment form at checkout. This is a visual indicator for customers — it does not restrict which cards Global Payments will actually process.
Available card types:
- Visa
- Mastercard
- American Express
- Discover
- Maestro
- JCB
- Diners Club
- UnionPay
- Carte Bancaire
Template Layout: Choose between Bootstrap 5 and UIkit checkout form layouts to match your Joomla template. Select the option that matches your site's CSS framework.
Order Statuses
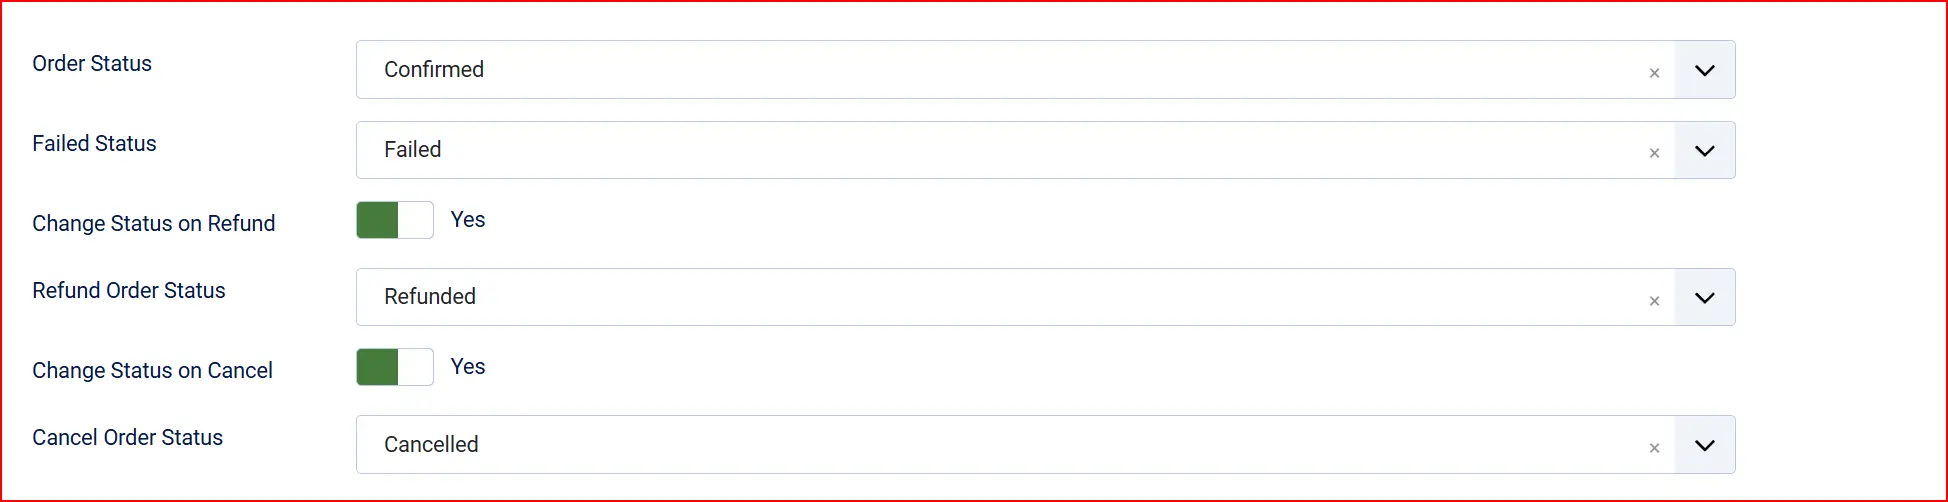
Control which order status J2Commerce sets at each stage of the payment lifecycle:
Order Status: Status set when payment is successfully captured
Failed Status: Status set when a payment is declined or fails
Authorized Status: Status set when payment is authorized but not yet settled (Authorize Only mode only)
Status on Refund: Set Change Status on Refund to Yes if you want J2Commerce to automatically update the order status when you process a refund. Then choose the target status from Refund Order Status.
Status on Cancel: Set Change Status on Cancel to Yes if you want J2Commerce to update the order status when a payment authorization is cancelled. Then choose the target status from Cancel Order Status.
NOTE: If the status you want isn't listed in the dropdown menu, you can create a new one by going to J2Commerce -> Setup -> Order Statuses

Surcharge (Optional)

Add a payment surcharge to orders placed with this method. Leave all three fields empty if you do not charge a surcharge.
Surcharge Name: Label shown to the customer, for example Card Processing Fee
Surcharge Percent: Percentage of the order total to add as a fee (for example 1.5 for 1.5%)
Surcharge Fixed: Fixed amount to add, for example 0.50
Surcharge Tax Class: Tax profile to apply to the surcharge amount
Availability Restrictions (Optional)

Limit when Global Payments appears as a payment option at checkout:
Geozone Restriction: Show this payment method only to customers in a specific geozone
Minimum Subtotal: Hide this method if the order subtotal is below this amount
Maximum Subtotal: Hide this method if the order subtotal is above this amount
Leave these fields empty to show Global Payments to all customers regardless of location or order size.
Custom HTML Messages (Optional)

Thank You Article: Select a Joomla article to display on the payment confirmation page after a successful purchase. Leave empty to show the default J2Commerce confirmation message.
Checkout Messages: Inject custom HTML at specific points in the checkout and payment flow:
On Selection: When the customer selects Global Payments as their payment method
On Before Payment: Above the payment form at checkout
On After Payment: On the confirmation page after a successful payment
On Error: When a payment fails or is declined
On Cancel: When the customer cancels the payment
Dashboard Icon (Optional) and Debug

Set Show Dashboard Icon to Yes to add a shortcut icon to the J2Commerce admin dashboard. Use Dashboard Icon Label to customize the icon text.
Debug Mode: Set Debug Mode to Yes to log all Global Payments API requests and responses to the Joomla log. This is useful when troubleshooting a configuration issue.
Disable debug mode on live stores. Logs may contain sensitive transaction details.
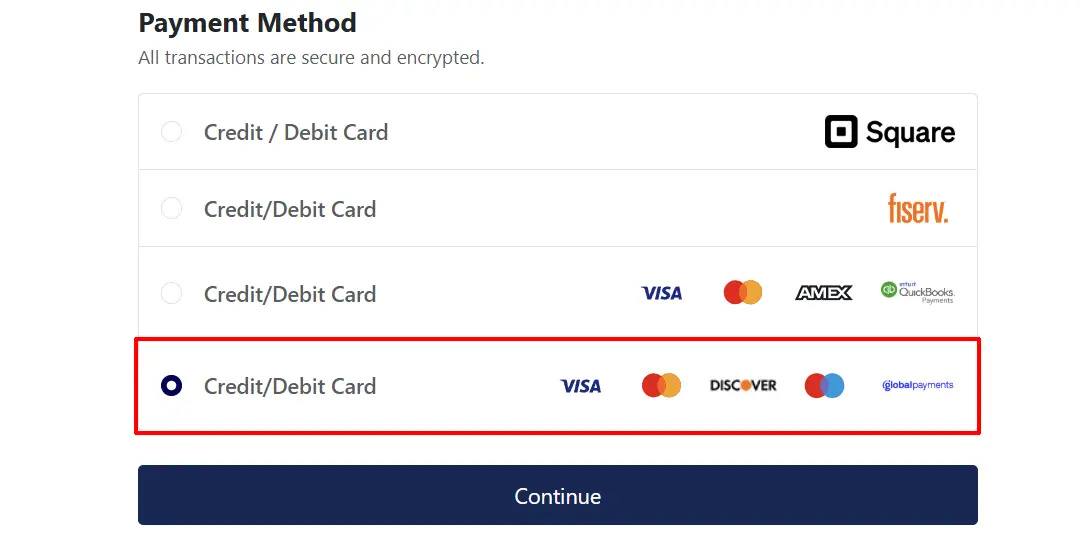
Frontend View
Going Live
When you are ready to accept real payments:
- Go to J2Commerce -> Setup -> Payment Methods and click Global Payments.
- Set Sandbox / Test Mode to No.
- Enter your App ID and App Key from the Global Payments live environment.
- Click Save.
- Place a test order on your store with a real card to confirm everything works.
Managing Orders
Settle (Capture) a Payment
If you configured Transaction Type as Authorize Only, a Settle (Capture) button appears on the order screen for authorized orders.
- Go to J2Commerce -> Orders and open the order.
- Find the Settle (Capture) button in the payment panel.
- Click the button and confirm when prompted.
The funds are collected from the customer's card immediately. The order status updates based on your Payment Status setting.
Cancel an Authorization
If a payment has been authorized but not yet settled, you can cancel the authorization to release the reserved funds without charging the customer.
- Open the order in J2Commerce -> Sales -> Orders.
- Click the Cancel Payment button in the payment panel and confirm when prompted.
Once a payment has been settled, you cannot cancel it — use Refund instead.
Issue a Refund
You can refund a settled payment in full or partially from the order screen.
- Open the order in J2Commerce -> Sales -> Orders.
- Click the Issue Refund button in the payment panel.
- Choose Full refund or Partial refund.
- For a partial refund, enter the amount to refund (up to the maximum refundable amount).
- Click Process Refund to confirm.
The refund is sent to the customer's original payment method. If you enabled Change Status on Refund, the order status updates automatically.
Saved Cards
When Allow Saved Cards is enabled, logged-in customers can tick a "Save this card for future purchases" checkbox at checkout. The card is stored as a secure PMT token in the Global Payments vault.
On subsequent visits, saved cards appear as radio button options above the new-card form. Customers can select a saved card and complete checkout without re-entering their card details.
Saved cards can be deleted by the customer from their account area, or by a store administrator from the order screen in the summary panel.
Subscription Support
When the J2Commerce Subscriptions add-on is installed, the Global Payments plugin automatically supports subscription product purchases and renewals. Subscriptions require Allow Saved Cards to be enabled, because recurring charges are made against the card token stored at the initial purchase.
Tips
- Start in sandbox mode — use the Global Payments test card numbers provided in the Developer Portal to verify your checkout flows before going live.
- Use Authorize Only for physical goods — authorize at checkout and settle only after you confirm stock and ship the order, to avoid refunds on out-of-stock items.
- Keep Statement Narrative short — most card issuers display only the first 22 characters. Use a recognizable name so customers recognize the charge.
- Enable the dashboard icon if you regularly need to adjust plugin settings — the shortcut saves time navigating menus.
Troubleshooting
The Payment Form Does Not Appear at Checkout
Cause: Missing credentials or the plugin is disabled.
Solution:
- Go to J2Commerce -> Setup -> Payment Methods and confirm Global Payments is enabled (green checkmark).
- Open the plugin settings and verify that App ID and App Key are filled in for the active mode (sandbox or live).
- If the dashboard shows a "credentials not configured" warning, enter the missing credentials and save.
Card Is Declined
Cause: The card details were incorrect, the card issuer declined the transaction, or you are using a sandbox card number in live mode.
Solution:
- Ask the customer to double-check their card number, expiry date, and CVV.
- Confirm that Sandbox / Test Mode matches the credentials entered. Sandbox credentials will not work in live mode and vice versa.
- If the problem persists, ask the customer to contact their bank or use a different card.
Settle Button Is Not Visible
Cause: The order was placed using Authorize + Capture mode, so the payment was already settled at checkout. The Settle button only appears for orders placed in Authorize Only mode.
Solution:
- Open the plugin settings and check the Transaction Type field.
- If you need manual settlement, change Transaction Type to Authorize Only and save. Future orders will show the Settle button.
Refund Button Is Not Visible
Cause: The transaction has not been settled yet, the order was not paid through Global Payments, or the maximum refundable amount is zero.
Solution:
- Confirm the order's payment method is Global Payments (check the order's payment details).
- If the payment is still in authorized status, use Cancel Payment instead.
- If a refund was already processed, the maximum refundable amount will be zero and the button will not appear.
Sandbox Warning Appears on the Dashboard
Cause: Sandbox / Test Mode is still set to Yes.
Solution:
- Open the plugin settings.
- Set Sandbox / Test Mode to No.
- Enter your live App ID and App Key.
- Click Save.
Saved Cards Are Not Appearing at Checkout
Cause: The customer is not logged in, or Allow Saved Cards is set to No.
Solution:
- Confirm the customer is logged in to their Joomla account.
- Open the plugin settings and set Allow Saved Cards to Yes (Hosted Fields mode only).
- Confirm Integration Mode is set to Hosted Fields — saved cards are not supported in HPP mode.