Paybox Payment
The Paybox plugin connects your J2Commerce store to Paybox (Verifone Paybox System), a trusted hosted payment gateway widely used by French and European merchants. When a customer checks out, they are redirected to the Paybox-hosted payment page to enter their card details securely. Once Paybox confirms the payment with a signed server-to-server callback, J2Commerce updates the order automatically.
Because card entry happens entirely on Paybox's servers, your store never handles raw card data. This makes PCI compliance significantly simpler — your store falls into the lightest scope (SAQ A), so you avoid the burden of more intensive security audits.
Key features:
- Redirect to Paybox-hosted payment page — card details never touch your server
- Server-to-server RSA-signed callback (PBX_REPONDRE_A) — the authoritative payment confirmation
- HMAC-SHA512 request signing — every outbound payment request is cryptographically verified by Paybox
- Multi-currency support with automatic conversion to the correct ISO 4217 numeric currency code
- Sandbox mode with the Paybox pre-production gateway for safe testing
- Configurable order statuses for confirmed, pending, and failed payments
- Bootstrap 5 and UIkit template options
- Geozone and subtotal restrictions
- Debug logging (credentials are never written to the log)
Requirements
- PHP 8.3.0 or later with the
opensslextension enabled - Joomla 6.x
- J2Commerce 6.x
- A Paybox merchant account with live or pre-production credentials
- Your store must be accessible over HTTPS on a publicly reachable domain for payment confirmation to work
Get Your Paybox Credentials
Before you can configure the plugin you need five values from your Paybox merchant account.
Contact your Paybox account manager or log in to the Paybox back office to retrieve:
| Credential | What it is |
|---|---|
| Site Number (PBX_SITE) | Your unique site number assigned by Paybox |
| Rank Number (PBX_RANG) | Your payment rank number, usually a two-digit value |
| Identifier (PBX_IDENTIFIANT) | Your merchant identifier |
| HMAC Secret Key | A hexadecimal string used to sign outbound payment requests — find it in the Paybox back office under security settings |
| Paybox RSA Public Key | A PEM-format public key used to verify the signed server callback — available from Paybox technical documentation |
Keep this information to hand while you configure the plugin. The HMAC secret key and RSA public key must match exactly what Paybox has on file for your account. Do not share either value.
Purchase and download
This plugin is a separate add-on available from the J2Commerce Extensions Store. It is not included with the core J2Commerce 6 component.
- Go to the J2Commerce website and locate Paybox.
- Add it to your cart and complete checkout.
- Go to My Downloads under your account profile and find the plugin.
- Click Available Versions -> View Files -> Download Now to download the ZIP file.
Install the plugin
In the Joomla Administrator, go to System -> Install -> Extensions.
Upload the plg_j2commerce_payment_paybox.zip file.

Enable the Plugin
Once you have installed the App, you will need to enable it. There are two ways you can access the App.
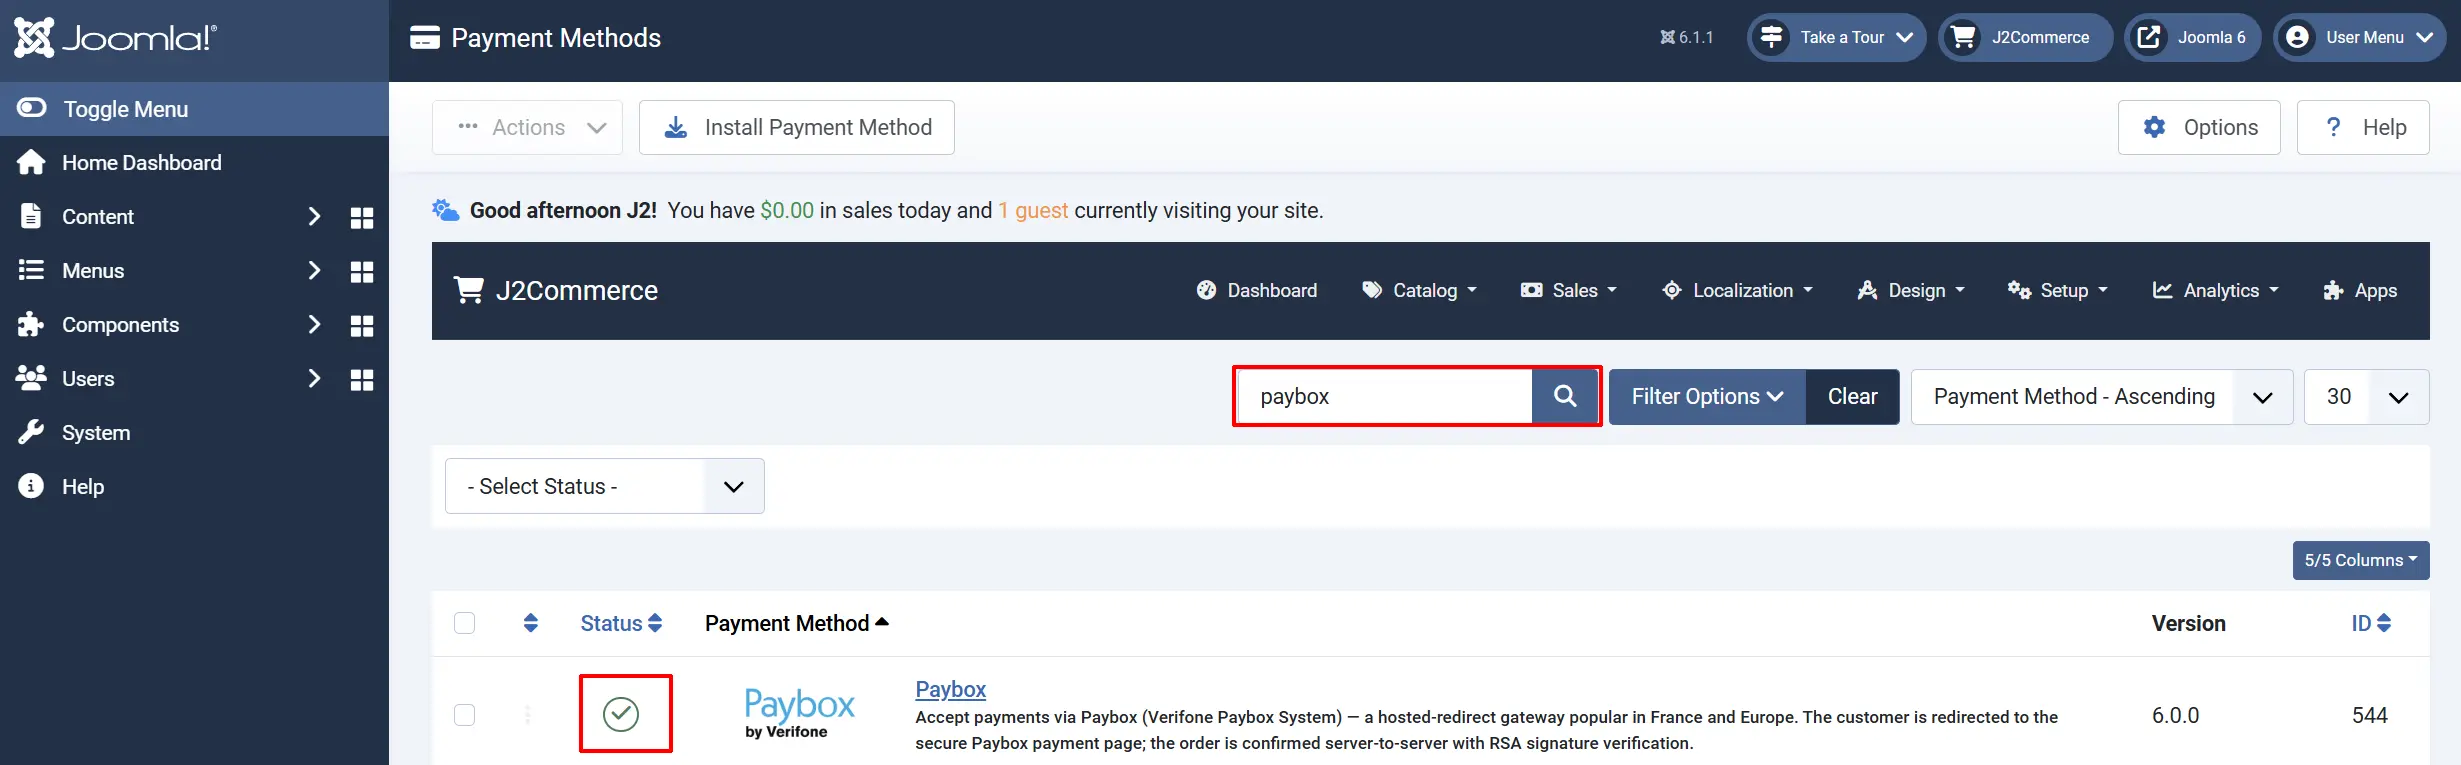
Option A: Go to the J2Commerce icon at the top right corner -> Setup -> Payment Methods
Option B: Go to Components on the left sidebar -> J2Commerce -> Dashboard -> Setup -> Payment Methods

To help you narrow down the list, you can do a search for Paybox, click the X, and it will turn into a green checkmark. It is now enabled and ready for setup.
Configure the plugin
Click the Paybox title next to the green checkmark to open the configuration screen.
Click the Toggle Inline Help button at the top of any plugin configuration page to show a short description beneath each field.

Display Settings tab
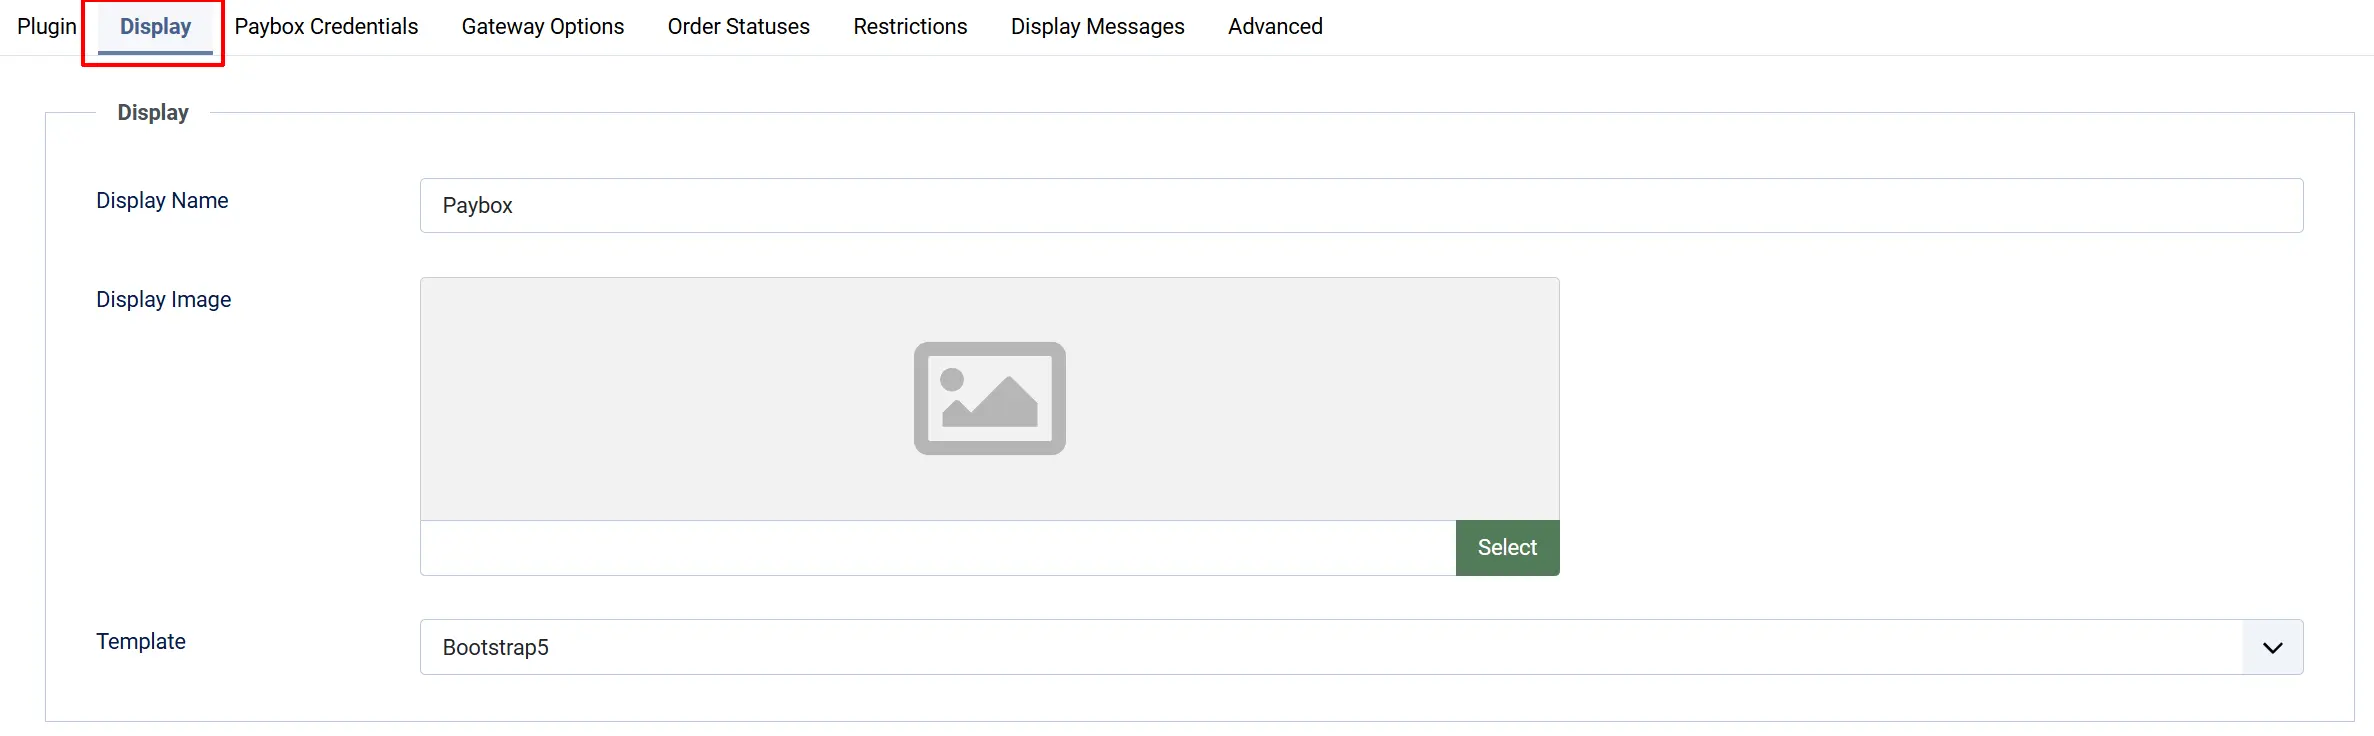
Display Name: The payment method name shown to customers at checkout. Defaults to Paybox. You can change this to something like "Pay by Credit Card (Paybox)" if you prefer.
Display Image: An optional logo shown beside the payment method name at checkout. Click Select to choose or upload an image from the Media Manager.
Template: Choose the checkout layout template. Select Bootstrap 5 for standard Joomla templates or UIkit for UIkit-based templates such as YOOtheme Pro.
Paybox Credentials tab
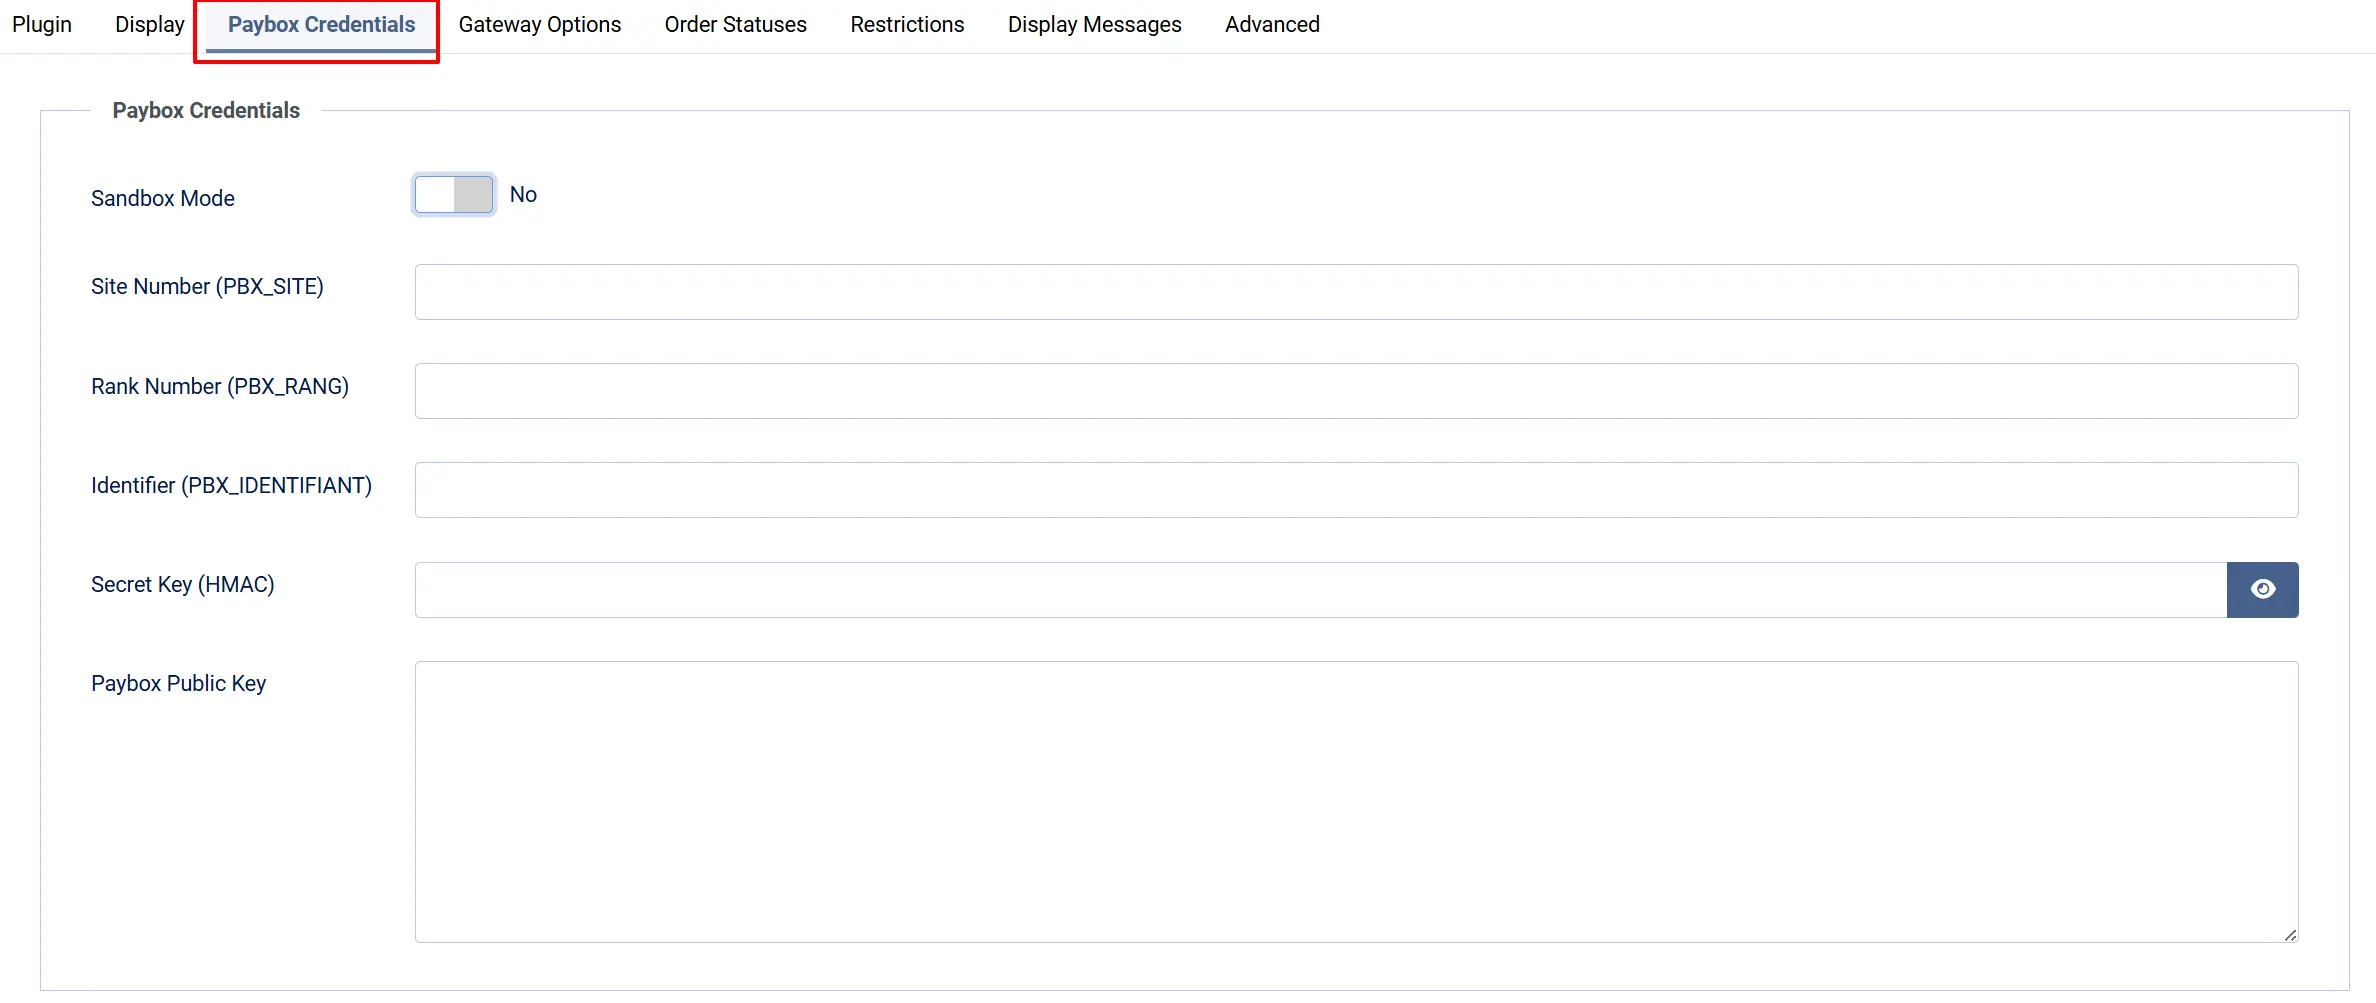
Sandbox Mode: When set to Yes, all transactions go to the Paybox pre-production gateway (preprod-tpeweb.paybox.com) — no real money is processed. Set to No when you are ready to accept real payments.
Site Number (PBX_SITE): Enter the site number (PBX_SITE) provided by Paybox.
Rank Number (PBX_RANG): Enter the rank number (PBX_RANG) provided by Paybox.
Identifier (PBX_IDENTIFIANT): Enter the merchant identifier provided by Paybox.
Secret Key (HMAC): Paste the hexadecimal HMAC secret key from your Paybox back office. This key is used to sign every outbound payment request with HMAC-SHA512. Never share or log this value.
Paybox Public Key: Paste the Paybox RSA public key in PEM format (the block beginning with -----BEGIN PUBLIC KEY-----). The plugin uses this key to verify the RSA signature on every server-to-server payment confirmation callback. Without a valid key here, the plugin cannot confirm payments.
Gateway Options tab
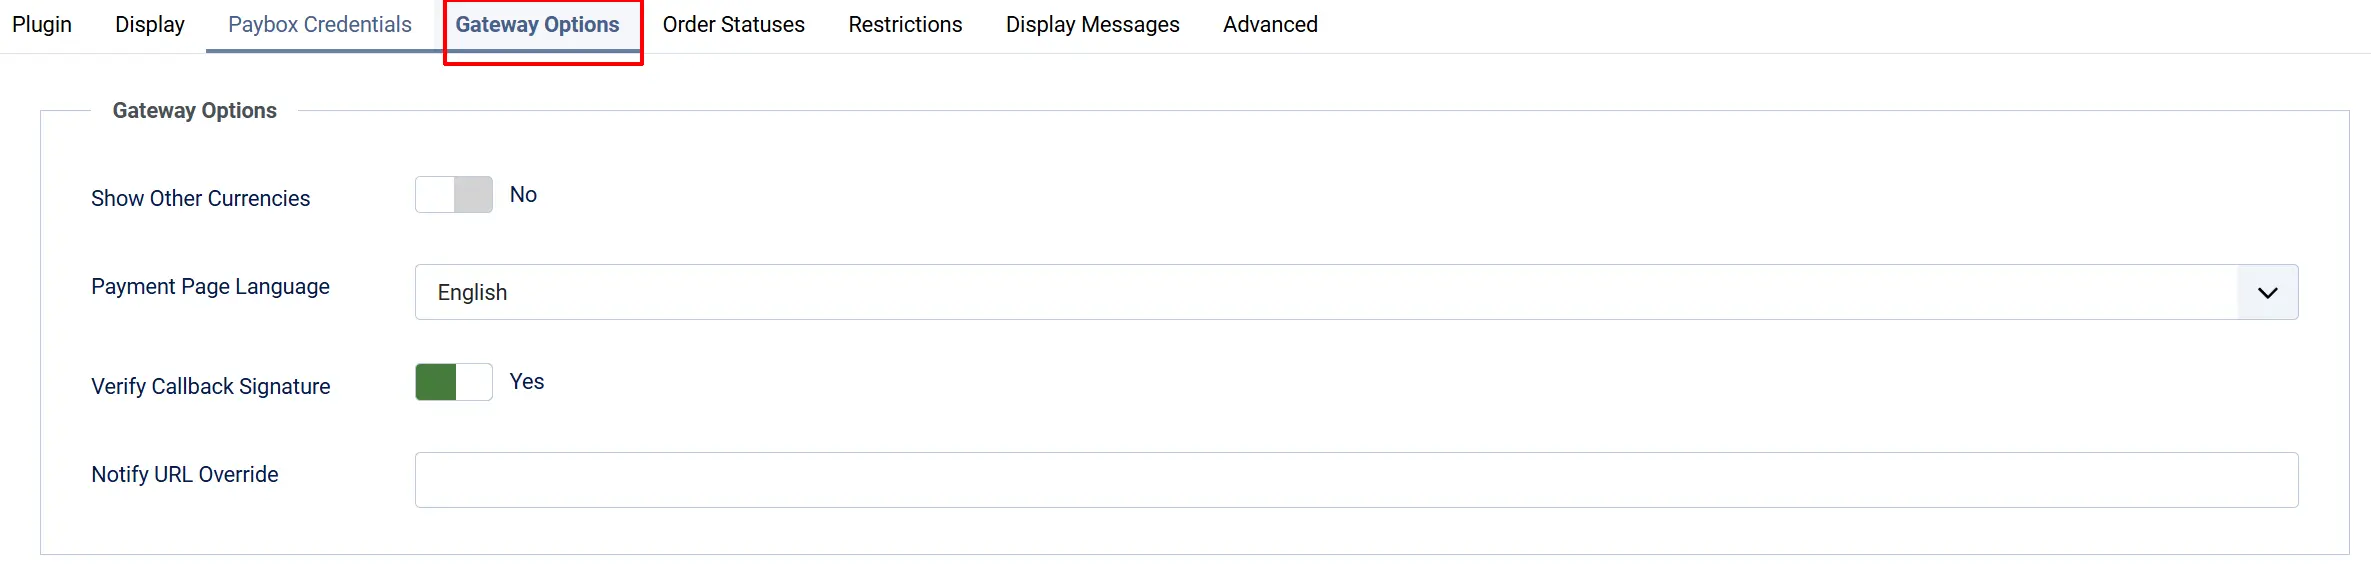
Show Other Currencies: When set to Yes, the Paybox payment page displays currency information for other currencies alongside the order total. This is informational only and does not change the charged amount.
Payment Page Language: Choose the language for the Paybox hosted payment page. Options include English, French, Spanish, Italian, German, Dutch, Swedish, and Portuguese. This affects the text and labels on the Paybox page your customer sees.
Verify Callback Signature: Keep this set to Yes on a live store. When enabled, the plugin verifies the RSA signature on every payment confirmation callback using the Paybox public key before accepting the result. Disabling this is only useful during debugging and must not be left off in production.
Notify URL Override: Leave this blank on a normally hosted store. Set it only when your store is behind a reverse proxy, a load balancer, or a tunnel during local development, and the auto-detected URL is not publicly reachable by Paybox. Enter the full public HTTPS URL that Paybox should use for the payment confirmation callback. See the section on testing locally for guidance.
Order Status tab
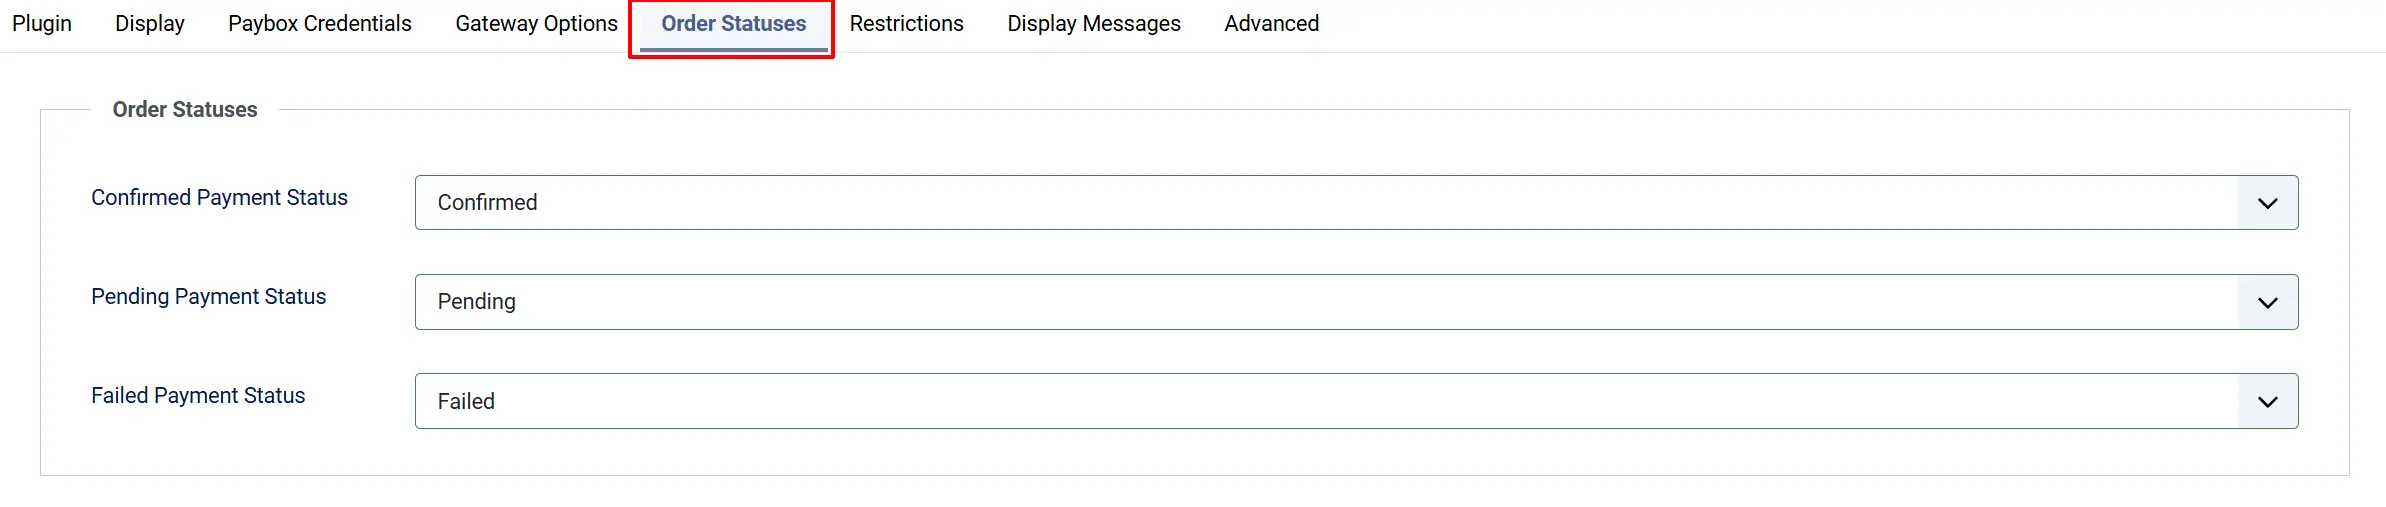
Confirmed Payment Status: Applied when Paybox confirms a successful payment (Erreur=00000)
Pending Payment Status: Applied immediately when the customer is redirected to Paybox, while waiting for the confirmation callback
Failed Payment Status: Applied when Paybox reports a failed or cancelled payment
If the order status you want is not listed, create it first under J2Commerce -> Setup -> Order Statuses.

Restrictions
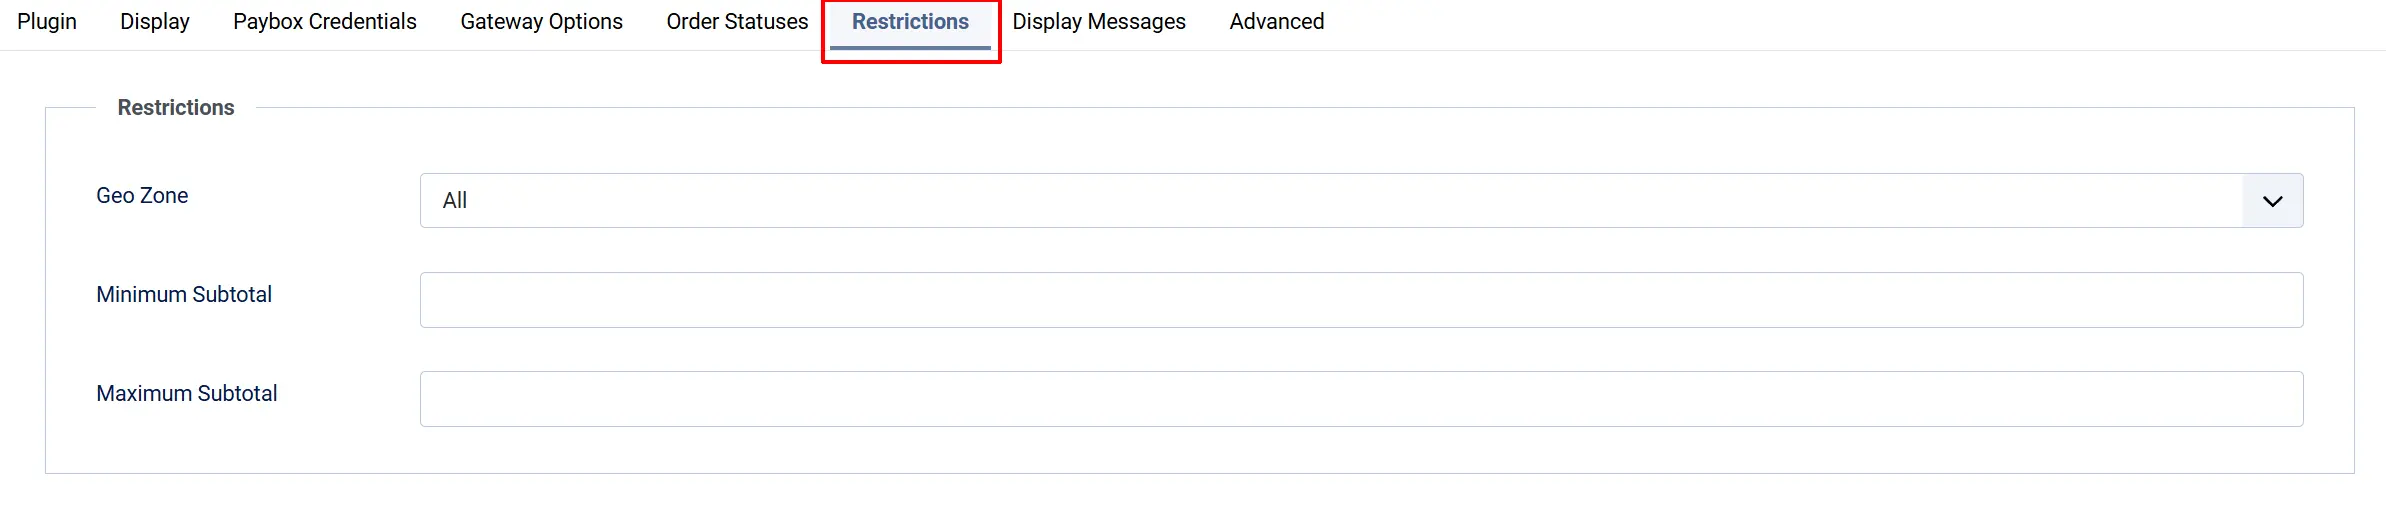
Geo Zone: Limit this payment method to customers whose billing address falls within a specific geographic zone. Leave empty to allow customers from any location.
Minimum Subtotal: Hide Paybox at checkout when the order subtotal is below this amount. Leave empty for no minimum.
Maximum Subtotal: Hide Paybox at checkout when the order subtotal is above this amount. Leave empty for no maximum.
Display Messages

Text Before Payment: Optional text displayed to the customer on the order summary page, just before they are redirected to Paybox. Use this to set expectations, for example: "You will now be redirected to Paybox to complete your payment securely."
Text After Payment: Optional text displayed to the customer after they return from Paybox. This replaces the default pending message on the order confirmation page.
Advanced

Debug Logging: When enabled, the plugin writes request details and callback data to the Joomla log (category plg_j2commerce_payment_paybox). The HMAC secret key and RSA public key are never written to the log. Disable this on a live store once everything is working correctly.
How Checkout Works for Customers
Here is what a customer experiences when they select Paybox at checkout:
- The customer adds items to the cart and proceeds to checkout.
- On the payment step, they select Paybox (shown with the display name and optional logo you configured).
- A short message is displayed (the Text Before Payment you configured, or the default message).
- The customer clicks Pay Now via Paybox and is redirected to the Paybox-hosted payment page.
- On the Paybox page, the customer enters their card details. The page language matches the Payment Page Language you selected.
- Paybox processes the payment and sends a signed confirmation directly to your store in the background (server-to-server, not through the customer's browser).
- J2Commerce receives the callback, verifies the RSA signature, checks the amount, and updates the order status to your Confirmed Payment Status.
- The customer is returned to your store's confirmation page and sees the order confirmation.
The customer will see a "Your payment is being processed" message if they arrive at the confirmation page before the callback has been received and processed. Once the callback arrives and is verified, the order status updates automatically.
The server-to-server callback is the authoritative payment confirmation. The customer's browser return to your store is for display purposes only and does not confirm the payment. This means the order is always finalized by the callback, not by what happens in the browser after the customer returns.
Sandbox Testing
Always test in sandbox mode before accepting real payments.
- Set Sandbox Mode to Yes in the plugin settings.
- Enter your Paybox pre-production credentials (Site, Rank, Identifier, HMAC Key, and Public Key — Paybox supplies separate test credentials for pre-production).
- Place a test order on your store and complete checkout. You will be redirected to
preprod-tpeweb.paybox.com. - Complete a test payment using the Paybox test card numbers supplied in your pre-production documentation.
- Check that the order appears in J2Commerce -> Sales -> Orders with your configured Confirmed Payment Status.
When you are ready to go live:
- Set Sandbox Mode to No.
- Replace the pre-production credentials with your live Site Number, Rank Number, Identifier, HMAC Key, and Public Key.
- Save the settings and clear the Joomla cache.
- Place a low-value test order on the live gateway to confirm everything is working.
Testing on Localhost with ngrok
Paybox's payment confirmation callback must reach your store over a publicly accessible HTTPS URL. If your store is running on localhost, Paybox cannot deliver the callback and orders will remain in Pending status.
Use ngrok to expose your local store over a public HTTPS tunnel:
- Install ngrok and start a tunnel:
ngrok http 443. - Copy the public HTTPS URL that ngrok shows (for example
https://abc123.ngrok.io). - In the Paybox plugin settings, paste this URL into Notify URL Override.
- Save the settings and run a test checkout.
Remember to update Notify URL Override each time you restart ngrok, as the public URL changes with each session.
What Is New Compared to the J2Store Version
If you are upgrading from the J2Store version of the Paybox plugin, here is what has changed in J2Commerce 6:
- Native Joomla 6 MVC architecture — no more FOF 2 framework or jQuery dependencies. The plugin uses proper Joomla 6 dependency injection, namespaced classes, and vanilla JavaScript.
- RSA-verified server callback is authoritative — the IPN callback is now clearly separated from the browser return URL. The callback finalizes the order; the browser return is UX only. This prevents any possibility of double-processing.
- Multi-currency aware amount conversion — the plugin uses
CurrencyHelper::gatewayAmount()to convert the order total to the correct display currency before multiplying by 100 for the integer cent amount. The ISO 4217 numeric currency code is mapped automatically from the order currency code (EUR=978, USD=840, GBP=826, CHF=756, CAD=124, AUD=036, and others). - Configurable order statuses — confirmed, pending, and failed statuses are now dropdown fields. In the J2Store version these were hardcoded.
- Bootstrap 5 and UIkit templates — the checkout form now has two layout options to match your frontend template.
- Secrets are never logged — the HMAC secret key and the RSA public key are explicitly excluded from all log output.
- Atomic callback claim — if Paybox sends a duplicate callback for an already-confirmed order, the plugin acknowledges it silently without reprocessing.
Troubleshooting
Orders stay in Pending status after the customer pays
Cause: Paybox could not deliver the payment confirmation callback to your store. This usually happens when the callback URL is not publicly reachable.
Solution:
- Check that your store is accessible over HTTPS at a public domain.
- If your store is on localhost or behind a proxy, set the Notify URL Override field to a publicly reachable URL. See Testing on Localhost with ngrok.
- Enable Debug Logging in the plugin settings and place a test order. Review the Joomla log (System -> Logs) for entries from
plg_j2commerce_payment_payboxto see whether the callback was received. - Confirm there is no firewall or security rule blocking incoming POST requests to the
com_ajaxendpoint on your server.
"Paybox signature validation failed" error
Cause: The RSA public key stored in the plugin does not match the one Paybox used to sign the callback, or the key was pasted incorrectly (missing header/footer lines or extra whitespace).
Solution:
- Return to the plugin settings and re-check the value in the Paybox Public Key field.
- The key should begin with
-----BEGIN PUBLIC KEY-----and end with-----END PUBLIC KEY-----. Ensure the full block is present, including both lines. - Obtain a fresh copy of the key from the official Paybox developer documentation and paste it into the field again.
- Save the settings and retry a test transaction.
Callback rejected with "Invalid signature"
Cause: The RSA signature verification failed. This can also mean the signed data string does not match — for example, if a caching layer or WAF is modifying the incoming request before it reaches J2Commerce.
Solution:
- Enable Debug Logging and check the Joomla log for the raw values received in the callback.
- If a WAF or caching plugin is active, add an exception for the callback URL (
index.php?option=com_ajax&group=j2commerce&plugin=payment_paybox&format=raw&task=ipn). - As a temporary test only, set Verify Callback Signature to No, confirm the order finalizes, then re-enable it. If disabling signature verification resolves the issue, the public key or the incoming data is being altered somewhere.
Payment request rejected by Paybox ("Erreur" at the gateway)
Cause: One or more of the credential fields (Site Number, Rank Number, or Identifier) is incorrect, or the HMAC secret key does not match your Paybox account.
Solution:
- Log in to the Paybox back office and verify the Site Number, Rank Number, and Identifier.
- Retrieve the HMAC secret key again from the back office. The key is a hexadecimal string — copy it exactly, with no spaces or line breaks.
- Confirm that the Sandbox Mode setting matches your credentials. Pre-production credentials will not work on the live gateway and vice versa.
- Save the settings and try a test transaction.
Paybox option does not appear at checkout
Cause: The plugin is disabled, a geozone restriction is preventing the method from showing, or the order subtotal is outside the configured minimum or maximum limits.
Solution:
- Go to J2Commerce -> Setup -> Payment Methods and confirm Paybox has a green enabled indicator.
- If a Geo Zone is set, check that the customer's billing address falls within that zone.
- Check the Minimum Subtotal and Maximum Subtotal values and compare them with the current order total.
- Confirm that the Site Number, Rank Number, and Identifier fields are not empty — the plugin will not display at checkout if these required credential fields are blank.
Order total amount looks wrong on the Paybox page
Cause: Your store has a currency other than EUR active, and the currency conversion is not what you expect.
Solution:
The plugin converts the order total to the gateway amount using J2Commerce's CurrencyHelper::gatewayAmount() (which respects the currency_value exchange rate stored on the order), then multiplies by 100 to obtain integer cents for Paybox. If the amount looks incorrect, check the exchange rates configured in J2Commerce -> Setup -> Configuration -> Currencies.
This plugin does not support refunds, saved cards, or subscription billing. Paybox is a redirect-only payment method — the customer pays on the Paybox page and returns to your store. For any post-payment actions such as refunds, use the Paybox merchant back office directly.