Money Order / Check Payment
The Money Order payment plugin lets you accept payments by money order, personal check, cashier's check, or bank draft. When a customer selects this payment method at checkout, they see your payment instructions (payee name, mailing address, etc.) and their order is placed immediately with a pending status. You then fulfill the order once you receive the physical payment.
This is an offline payment method — no online payment processing occurs. It is ideal for B2B stores, government procurement, or customers who prefer to pay by mail.
Requirements
- PHP 8.3.0+
- Joomla! 6.x
- J2Commerce 6.x
Purchase and Download
This plugin is a separate add-on available from the J2Commerce Extensions Store. It is not included with the core J2Commerce 6 component.
Step 1: Go to our J2Commerce website -> Payment Plugin
Step 2: Locate the Money Order Payment Plugin -> click View Details -> Add to cart -> Checkout.
Step 3: Go to your My Downloads under your profile button at the top right corner and search for the app. Click Available Versions -> View Files -> Download Now
Installing the Plugin
You can install this Money Order Payment plugin using the Joomla installer. The following steps help you with a successful installation.
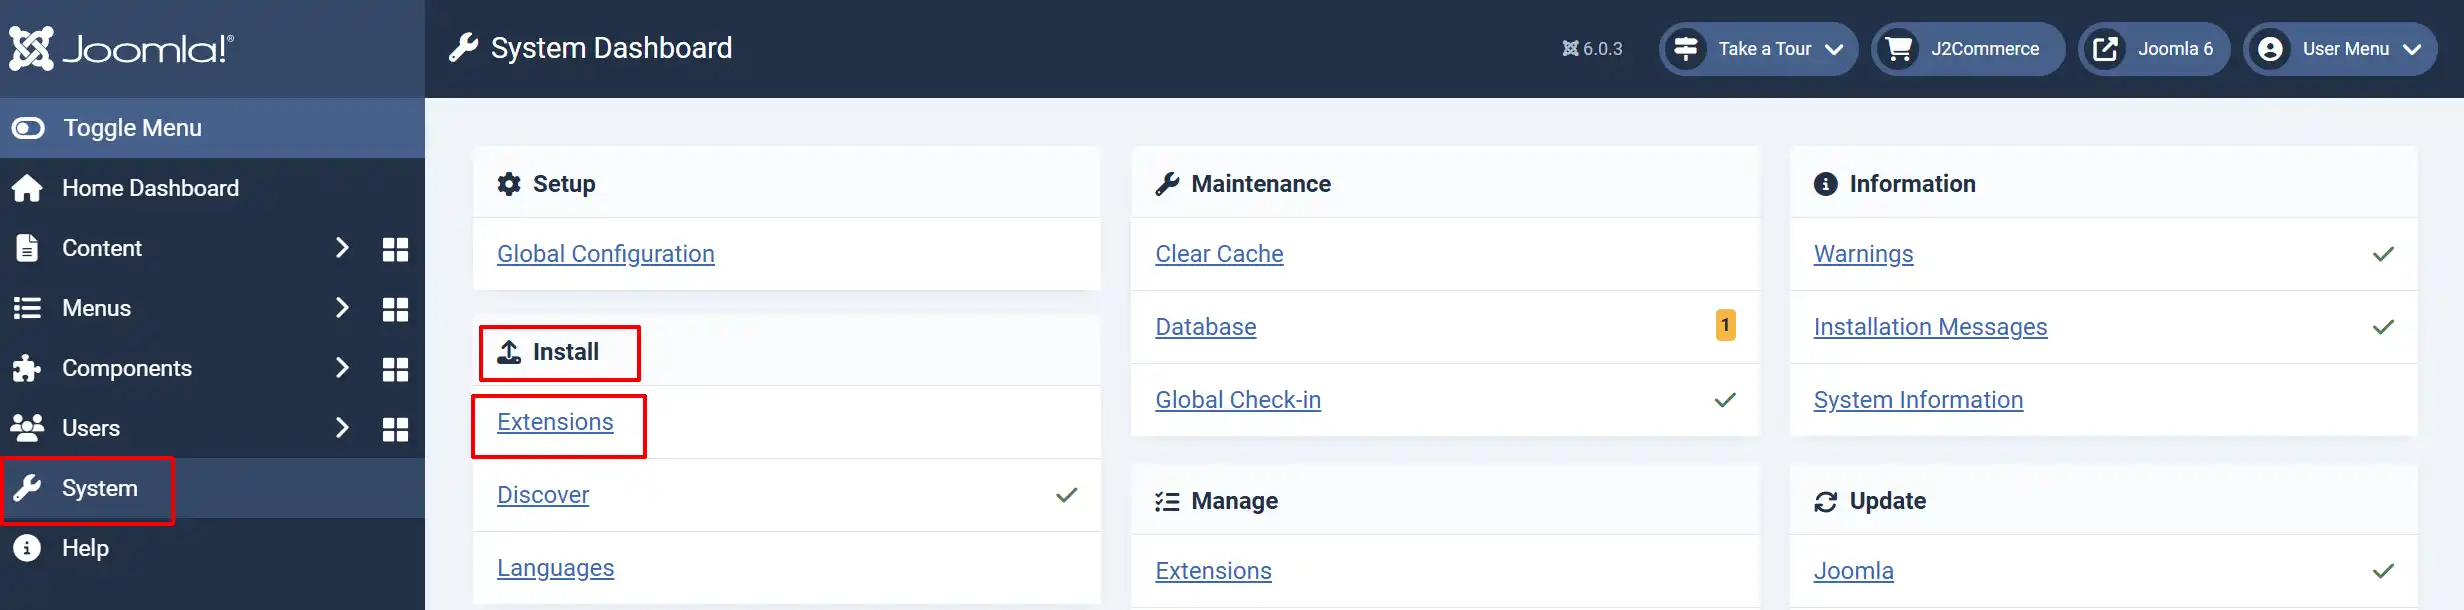
In the Joomla admin, go to System -> Install -> Extensions
Upload the Money Order Payment ZIP file or use the install from URL option.
Enable the Plugin
Once you have installed the extension, you will need to enable it. There are two ways you can access the extension.
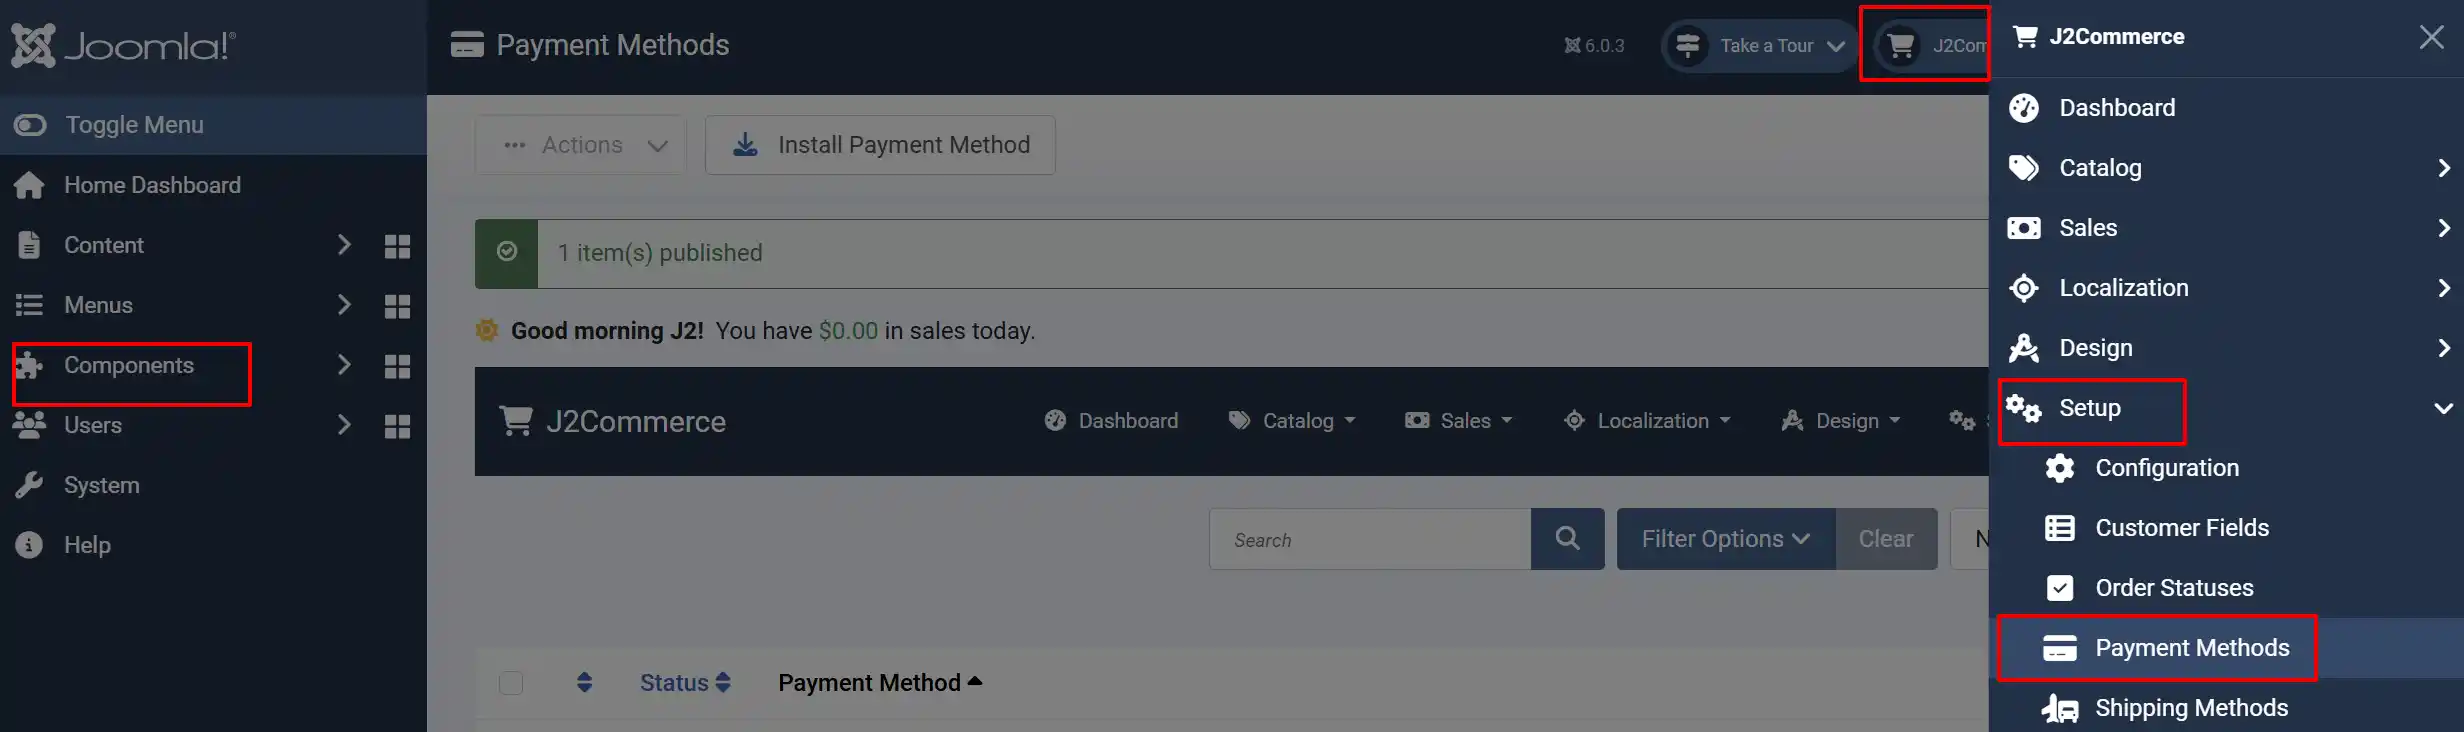
Option A: Go to the J2Commerce icon at the top right corner -> Setup -> Payment Methods
Option B: Go to Components on the left sidebar -> J2Commerce -> Dashboard -> Setup -> Payment Methods
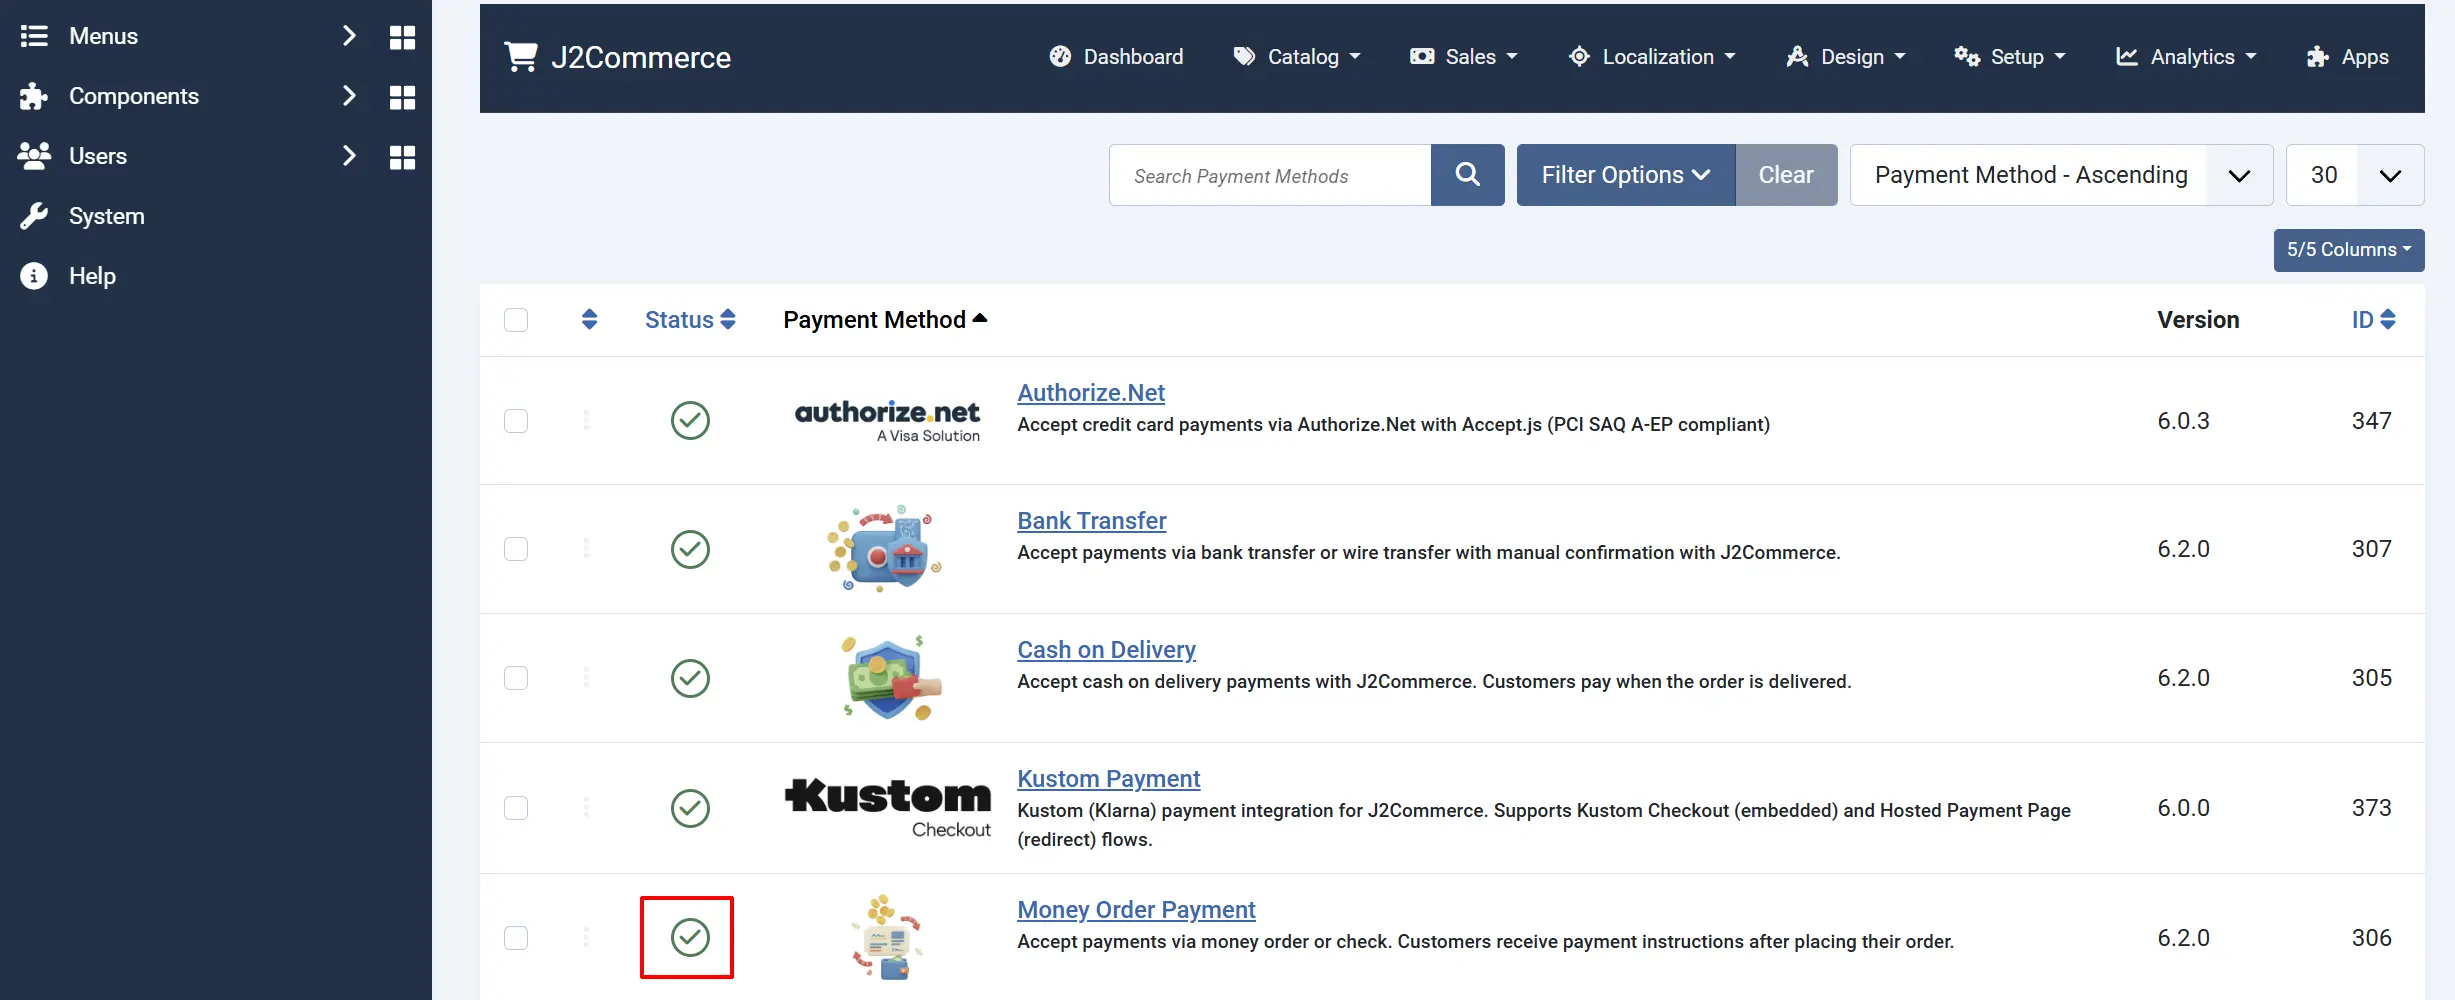
Look for Money Order Payment, click the X, and it will turn into a green checkmark. It is now enabled and ready for setup.
Configuring the Plugin
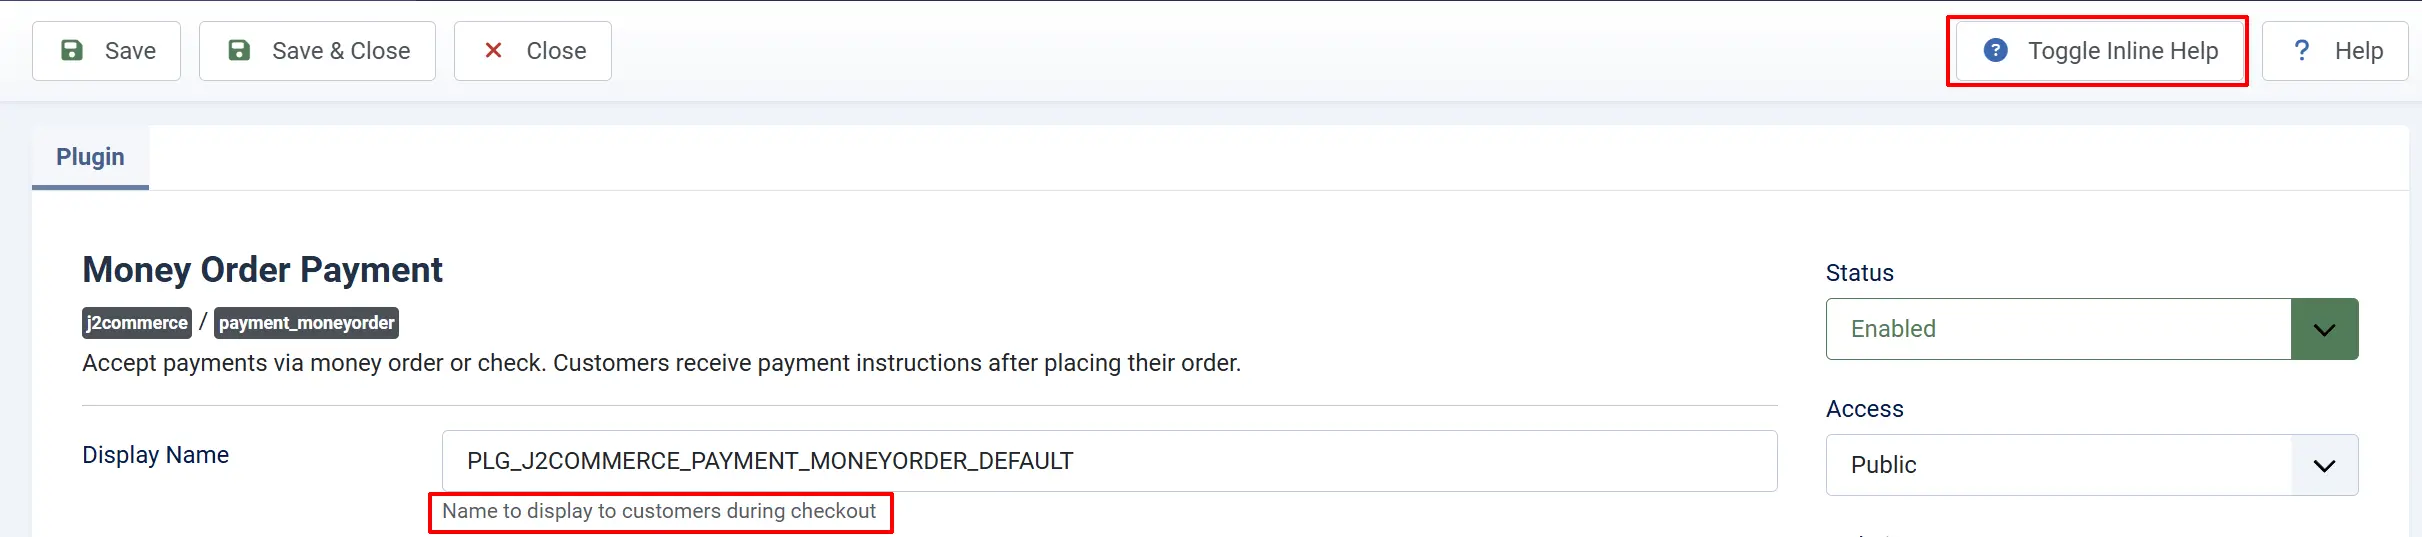
After enabling the plugin, click the Money Order Payment title to open the settings.
Tip: Click on the Toggle Inline Help button on any app/plugin you install and it will show a description below each section. See image below
Display Settings
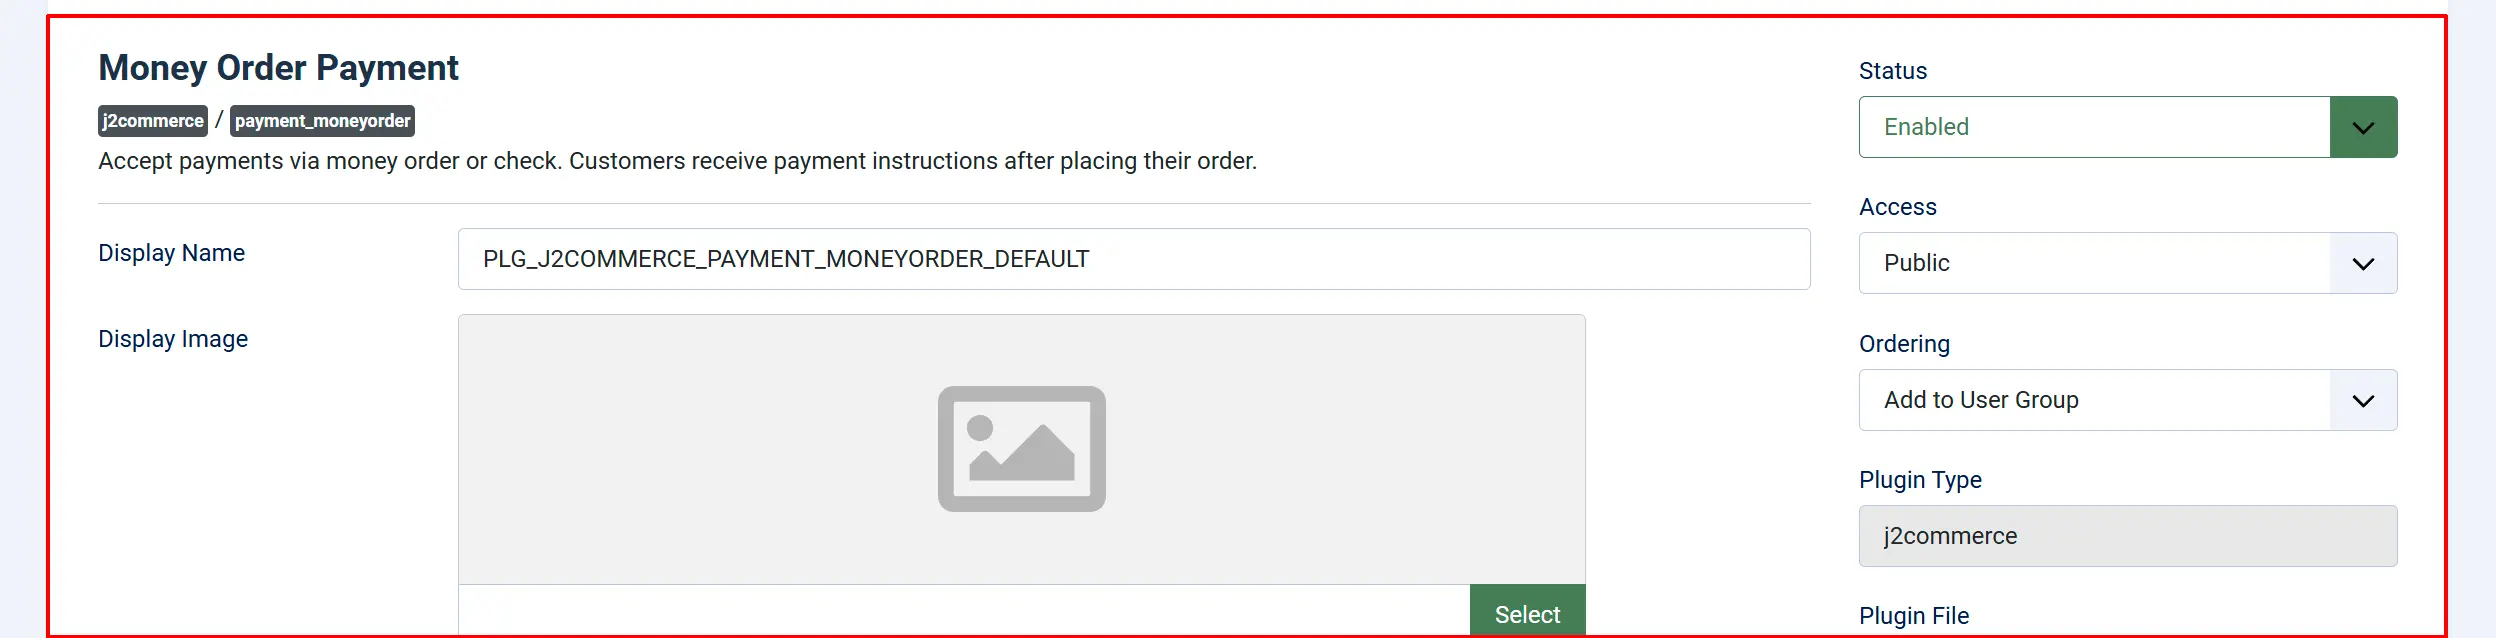
Display Name: The name shown to customers at checkout (e.g., "Money Order / Check", "Pay by Check").
Display Image: An optional image shown next to the payment method name at checkout. Use a check or money order icon.
Payment Instructions
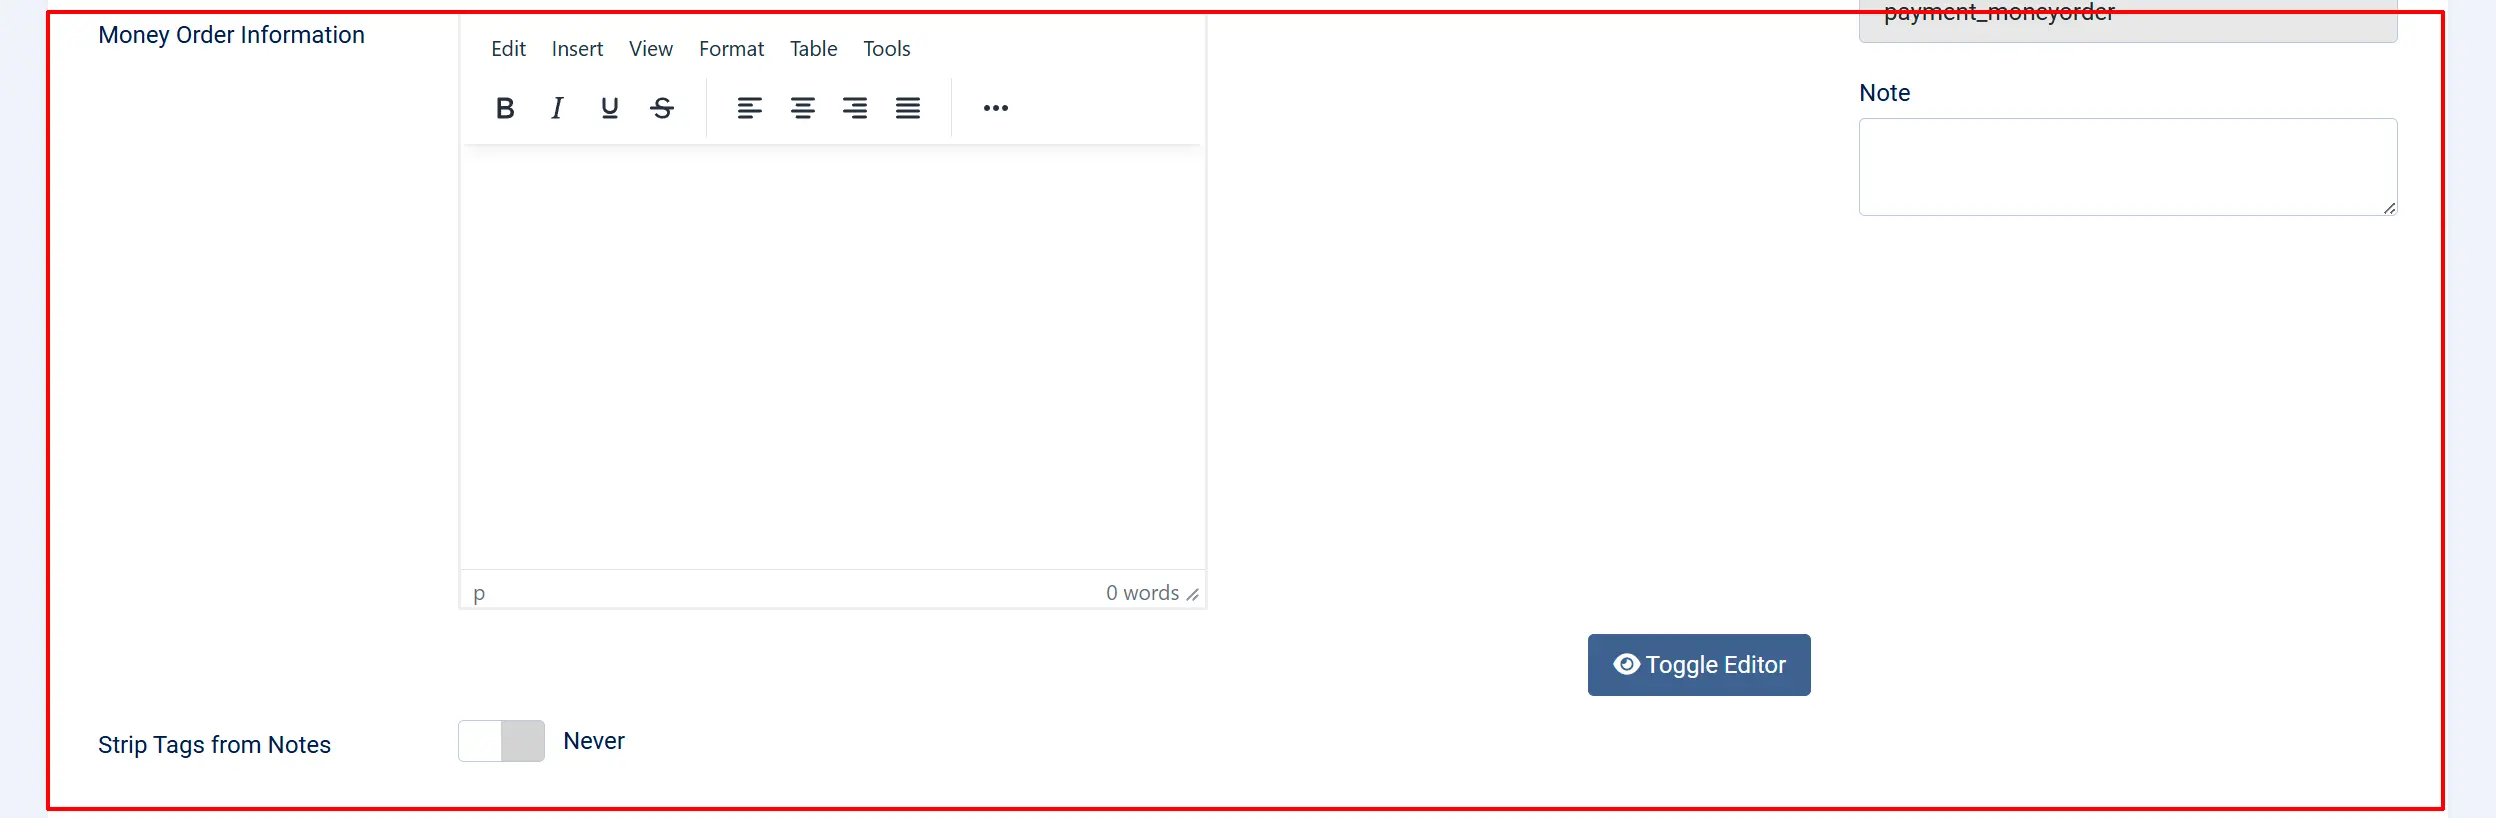
Money Order Information: A rich-text editor where you enter the instructions customers see after selecting this payment method. Include the payee name, mailing address, and any reference number requirements.
This is the most important field. Write clear, complete instructions so customers know exactly how to send payment. For example:
Please make your money order or check payable to:
ACME Store, LLC 123 Commerce Street Suite 400 New York, NY 10001
Include your order number on the memo line. Orders are shipped within 2 business days of payment receipt.
Enable Strip Tags: When set to Yes, HTML tags are removed from the payment instructions before display. Leave as No if you want formatted text with bold, links, etc.
Order Status
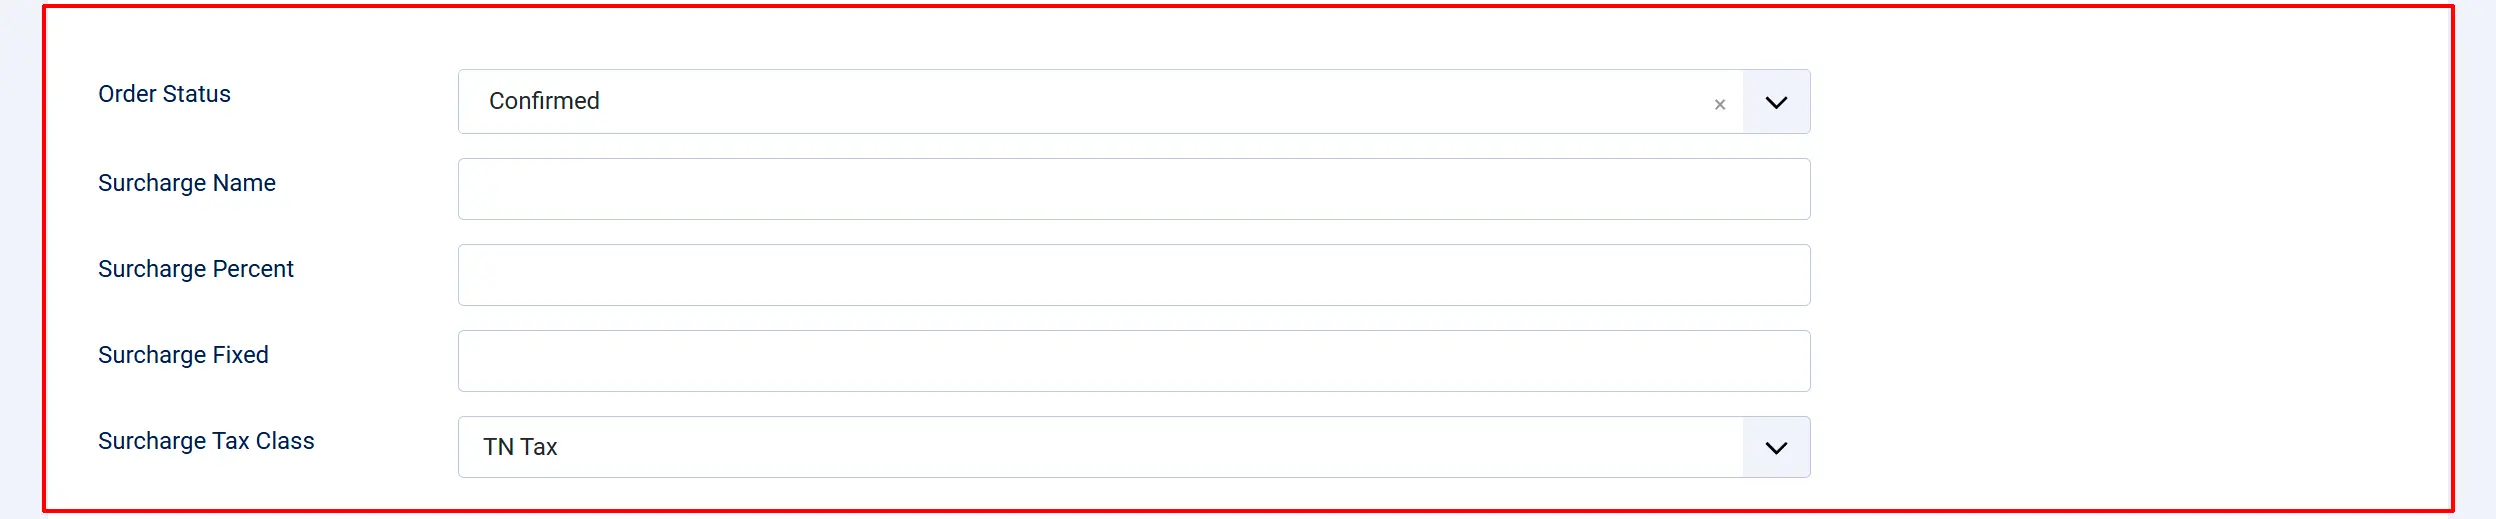
Order Status: The status assigned to orders placed using this payment method. Since payment is not received immediately, use a pending-type status (e.g., "Pending").
NOTE: If the status you want isn't listed in the dropdown menu, you can create a new one by going to J2Commerce -> Setup -> Order Statuses

Surcharge Settings
Add an optional fee for customers who pay by money order or check.
Surcharge Name: Label shown to the customer for the surcharge (e.g., "Processing Fee").
Surcharge Percent: A percentage-based surcharge applied to the order total (e.g., 2 for 2%).
Surcharge Fixed: A fixed dollar amount added to the order (e.g., 5.00).
Surcharge Tax Class: If the surcharge should be taxed, select the appropriate tax profile.
You can use both a percentage and a fixed amount together. Leave all surcharge fields empty to charge no extra fees.
Geozone Restriction

Geozone: Limit this payment method to customers in a specific geozone. For example, restrict money order payments to domestic customers only. Leave empty to allow all locations.
Thank You Message
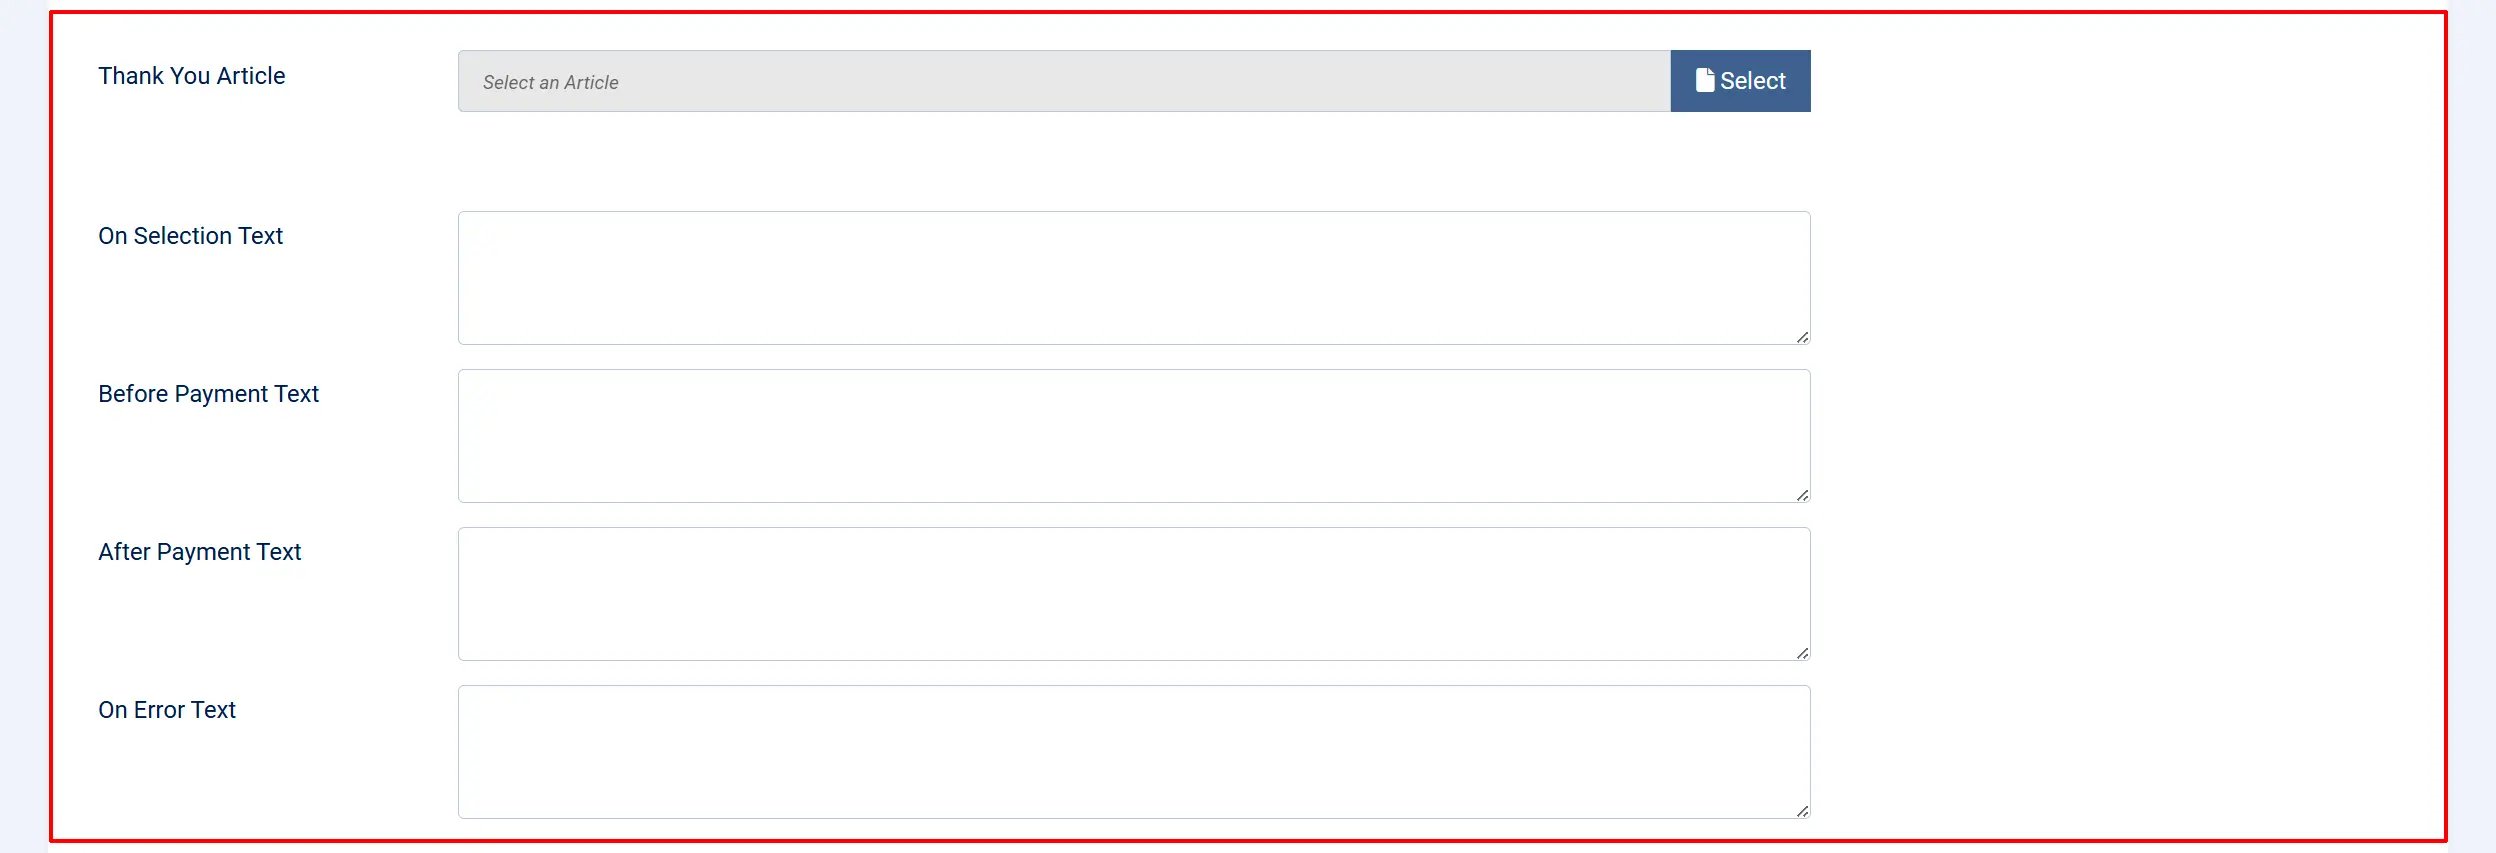
Thank You Article: Select a Joomla article to display as the order confirmation page. If left empty, the default J2Commerce confirmation page is used.
Custom Messages
Display custom text at different stages of the checkout process.
On Selection: Text shown when the customer first selects this payment method in the payment step.
On Before Payment: Text shown on the payment confirmation page, before the customer clicks the place order button.
On After Payment: Text shown on the thank-you page after the order is placed successfully.
On Error: Text shown if an error occurs during order processing.
Button and Template

Button Text: The label on the place order button (e.g., "Place Order", "Submit Order").
Template Style: Use a custom template override for the payment form. Leave empty to use the default template.
Click Save & Close to apply your settings.
How It Works
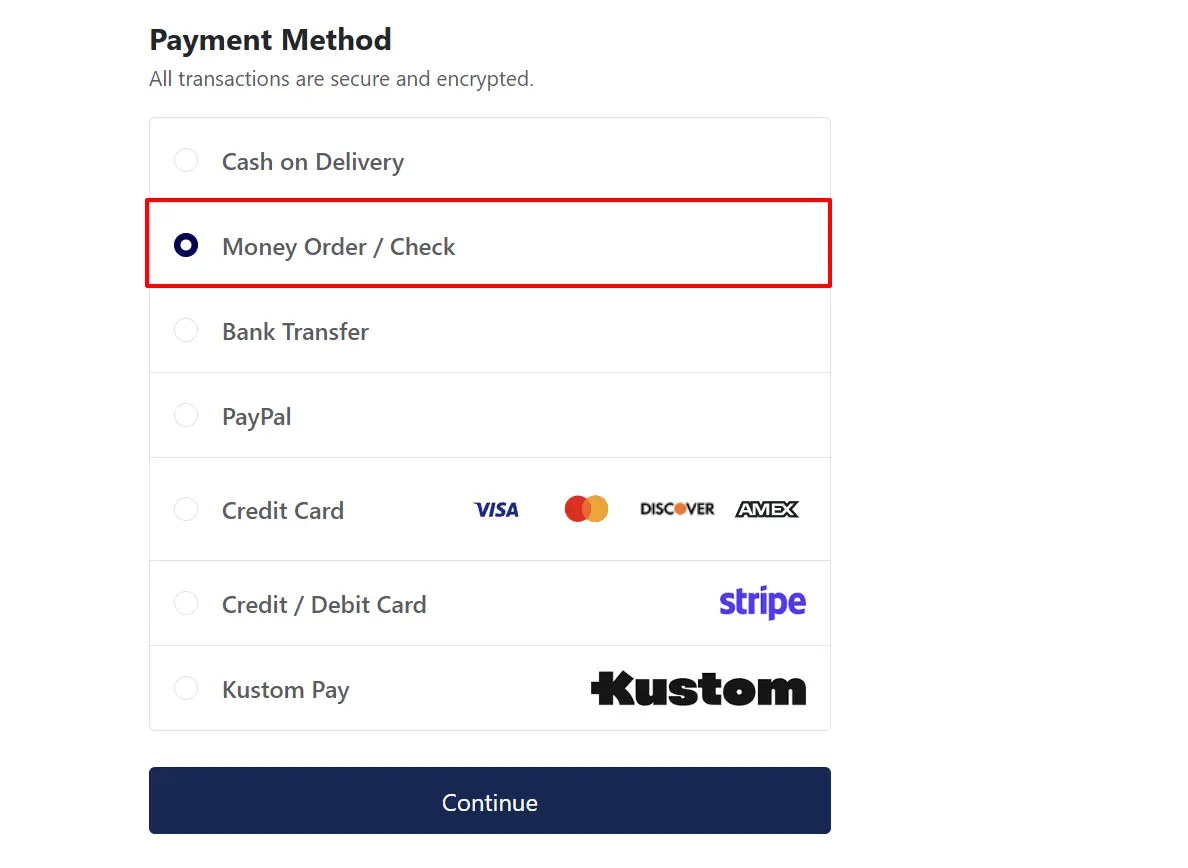
- The customer adds items to their cart and proceeds to checkout.
- At the payment step, they see Money Order / Check (or your custom display name) as a payment option.
- After selecting it, your Payment Instructions are displayed in an info box.
- The customer clicks Place Order.
- The order is created with the status you configured (e.g., "Pending").
- The customer sees the confirmation page with your On After Payment message.
- The customer mails the money order or check to your address.
- When you receive the payment, manually update the order status to "Confirmed" (or "Complete") in J2Commerce -> Sales -> Orders.
Tips
- Write clear payment instructions. Include the exact payee name, full mailing address, and tell customers to write their order number on the memo line. The clearer your instructions, the fewer support questions you will receive.
- Use a pending order status. Do not set the order status to "Confirmed" or "Complete" — those statuses imply payment was received. Use "Pending" until the check clears.
- Set a geozone restriction. Money orders are typically domestic. Restrict this method to your home country's geozone to avoid international customers selecting it.
- Consider a processing timeframe note. In your payment instructions or On After Payment message, tell customers how long to expect before their order ships (e.g., "Orders ship within 3 business days after payment clears").
- Add a surcharge if needed. If handling money orders costs you extra (bank fees, processing time), add a small fixed surcharge to cover the cost.
Troubleshooting
Payment method does not appear at checkout
Cause: The plugin is disabled, or the customer's address does not match the configured geozone.
Solution:
- Go to J2Commerce -> Setup -> Payment Methods and verify Money Order Payment is enabled.
- If a Geozone restriction is set, confirm the customer's billing address matches a country/zone in that geozone.
- Clear your site cache: Home Dashboard -> System -> Clear Cache.
Payment instructions are not showing
Cause: The Money Order Information field is empty.
Solution:
- Open the plugin settings.
- Enter your payment instructions in the Money Order Information editor field.
- Click Save & Close.
HTML formatting is stripped from instructions
Cause: The Enable Strip Tags option is set to Yes.
Solution:
- Open the plugin settings.
- Set Enable Strip Tags to No.
- Click Save & Close.
The order is marked as complete before receiving payment
Cause: The Order Status is set to a completed status instead of a pending status.
Solution:
- Open the plugin settings.
- Change the Order Status to Pending (or another status that indicates payment has not been received).
- Click Save & Close.
- When you receive the physical payment, manually update the order status in J2Commerce -> Sales -> Orders.