Worldline Payment
Worldline is one of Europe's largest payment service providers, processing transactions in over 100 countries. It supports credit and debit cards, e-wallets, bank transfers, and many local payment methods — making it a strong choice for merchants selling internationally, particularly across Europe, Asia-Pacific, and Latin America. When a customer checks out, they are redirected to Worldline's secure hosted payment page (called MyCheckout), enter their details there, and then return to your store when done. Your store never handles raw card numbers, which keeps you at the lowest level of payment security compliance.
Requirements
- PHP 8.3.0 or higher
- Joomla! 6.x
- J2Commerce 6.x
- An active Worldline Connect merchant account
Purchase and Download
This plugin is a separate add-on available from the J2Commerce website. It is not included with the core J2Commerce component.
Step 1: Go to www.j2commerce.com and find the Worldline Payment plugin.
Step 2: Click View Details, add it to your cart, and complete checkout.
Step 3: Go to My Downloads under your profile at the top right. Click Available Versions -> View Files -> Download Now.
Before You Start
You need a Worldline Connect merchant account. Contact Worldline or a local acquirer to open one, then log into the Worldline Client Portal. You will need four pieces of information:
| Credential | Where to find it | What it is |
|---|---|---|
| Merchant ID | Client Portal home screen | A numeric identifier for your merchant account (for example, 9000000765) |
| API Key ID | Client Portal -> Configuration -> API Keys | A short identifier that tells Worldline which key you are using to sign requests |
| API Secret | Client Portal -> Configuration -> API Keys (shown once at creation) | A long secret used to sign every request your server sends to Worldline — never share this publicly |
| Webhook Secret | Client Portal -> Configuration -> Webhooks | A key Worldline uses to sign the payment notifications it sends back to your store, so you can verify they are genuine |
Worldline provides a separate sandbox environment for testing. The sandbox has its own set of credentials — find them in the Client Portal under the sandbox account.
When you create a new API Key in the Worldline Client Portal, the secret is shown only once. Copy it immediately and store it somewhere safe before closing the dialog.
Purchase and Download
Step 1: Go to the J2Commerce website -> Payment Gateways
Step 2: Locate Worldline Payment -> click View Details -> Add to Cart -> Checkout
Step 3: Go to My Downloads under your profile button at the top right corner and search for PayTrace. Click Available Versions -> View Files -> Download Now
Install the Plugin
In the Joomla Administrator, go to System -> Install -> Extensions.
Upload the payment_worldline.zip package ZIP file or use the Install from URL option.

Enable the Plugin
Once you have installed the App, you will need to enable it. There are two ways you can access the App.
Option A: Go to the J2Commerce icon at the top right corner -> Setup -> Payment Methods
Option B: Go to Components on the left sidebar -> J2Commerce -> Dashboard -> Setup -> Payment Methods

To help you narrow down the list, you can do a search for Worldline Payment, click the X, and it will turn into a green checkmark. It is now enabled and ready for setup.
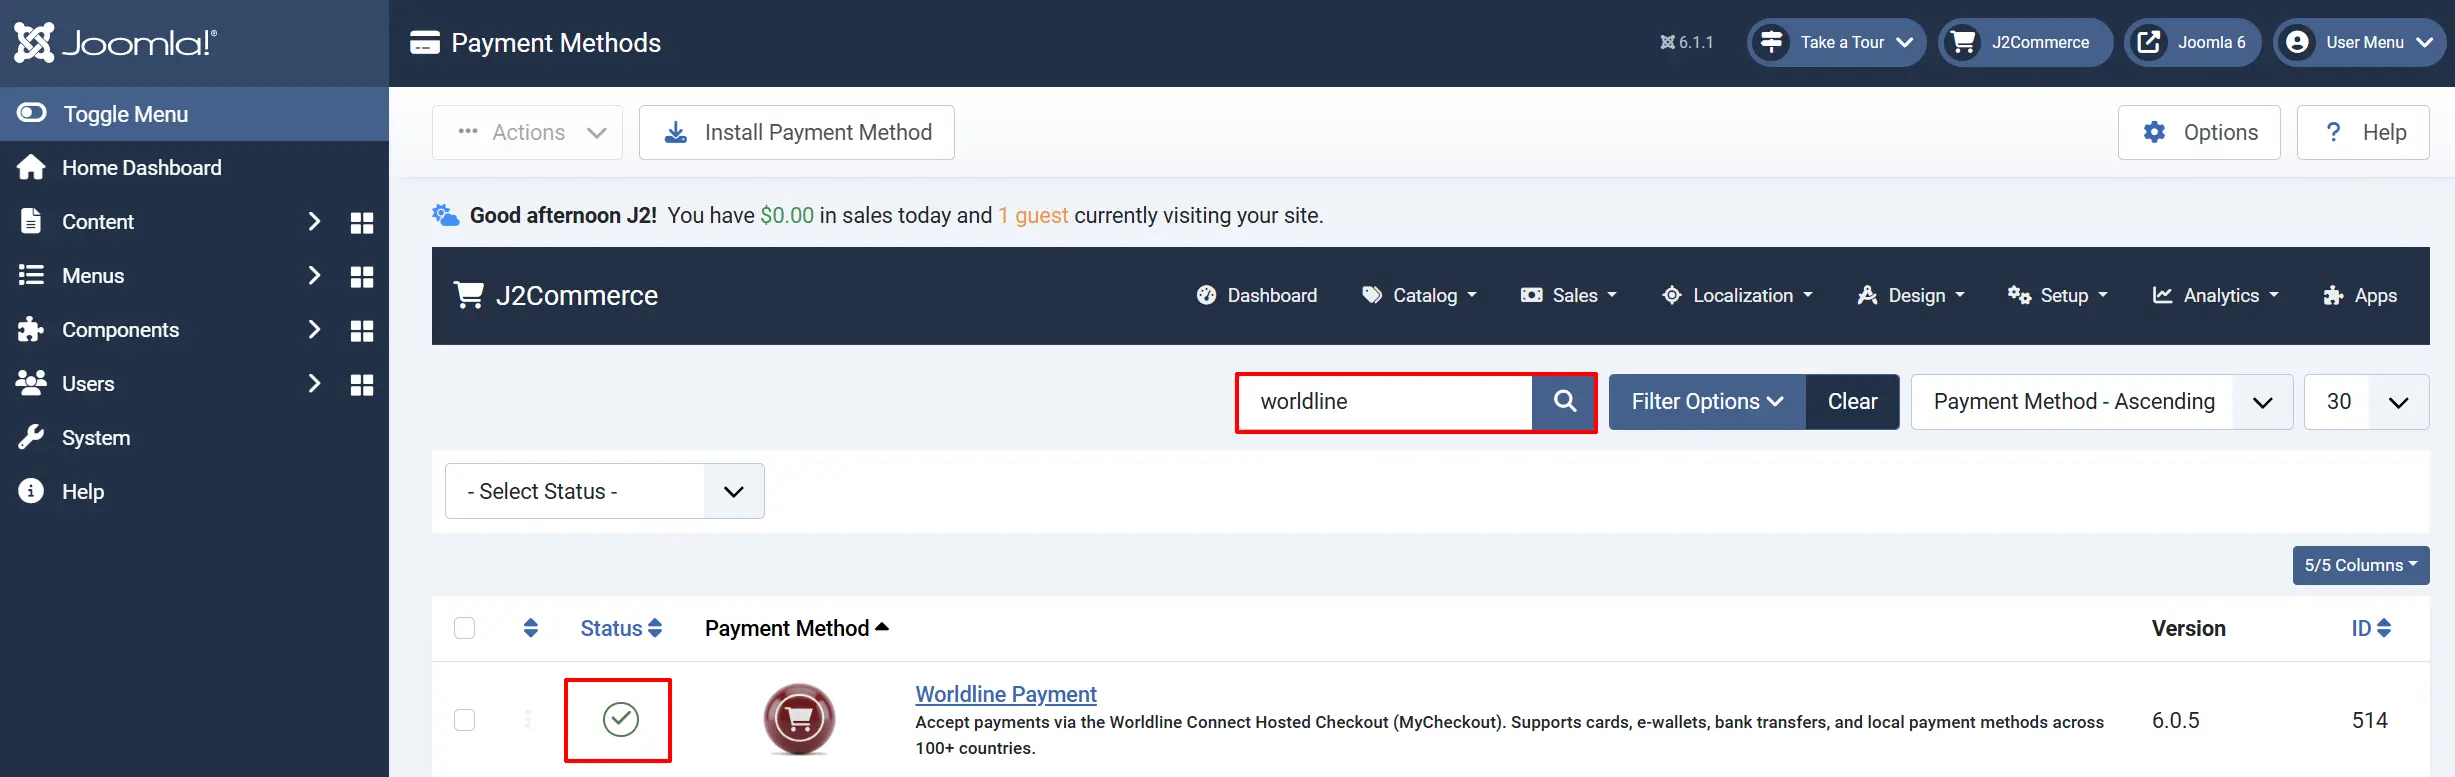
Configure the Plugin
Click the Worldline Payment title next to the green checkmark to open the configuration screen.
Click the Toggle Inline Help button at the top of any plugin configuration page to show a short description beneath each field.

Basic Settings tab
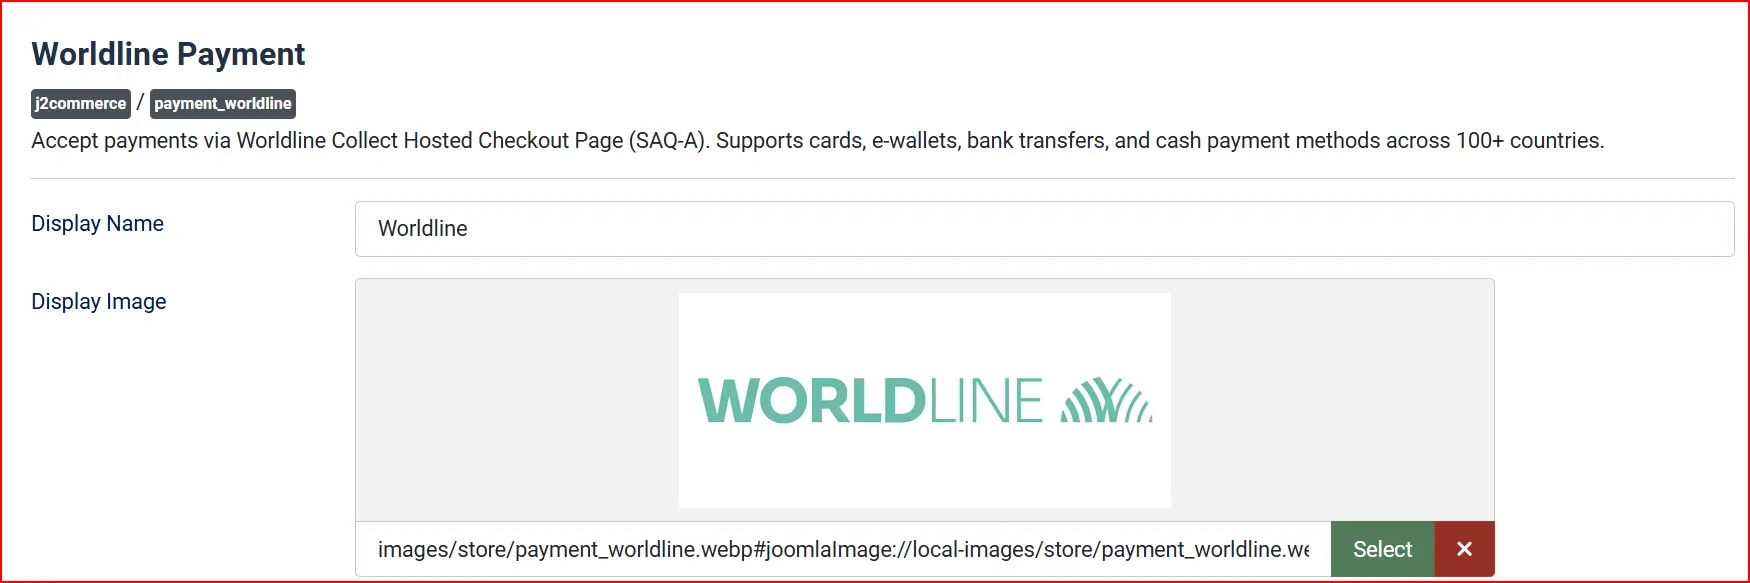
Display Name: The payment option name shown to customers at checkout (for example, "Pay by Card" or "Worldline")
Display Image: Upload a logo or card icons to show next to the payment option
Credentials
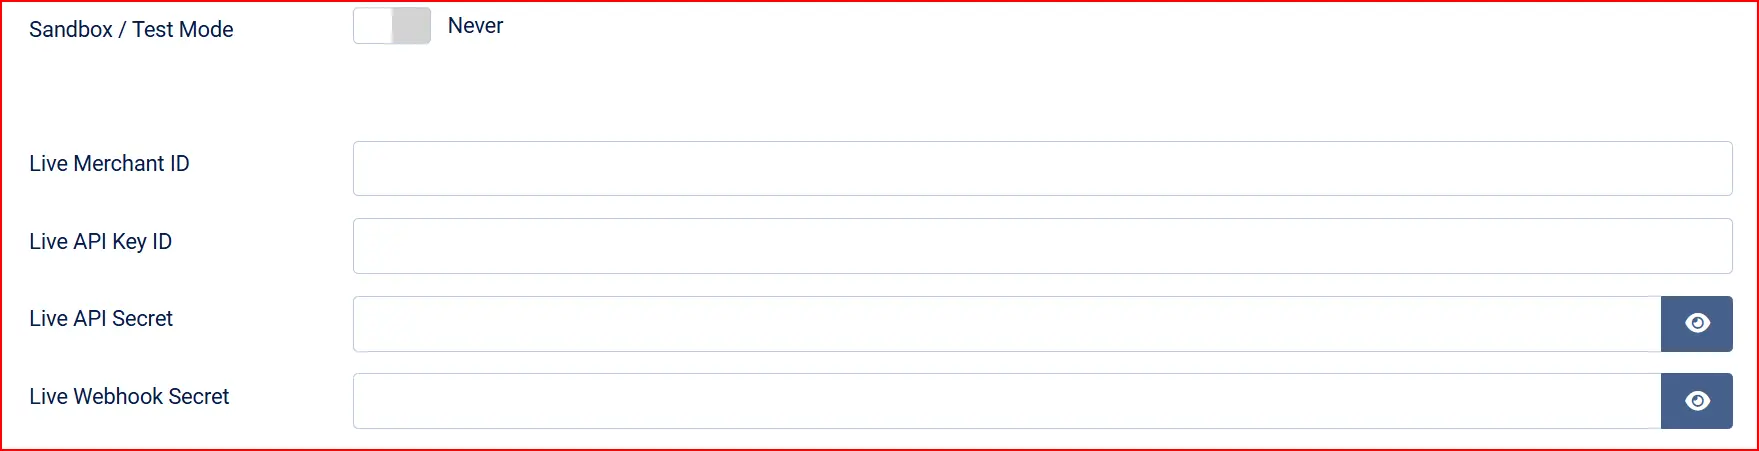
Enable Sandbox / Test Mode to send all transactions to Worldline's test environment instead of processing real payments. Fill in your sandbox credentials when this is on. Set it to No and fill in your live credentials when you are ready to go live.
A warning banner appears on the J2Commerce dashboard whenever Sandbox Mode is active, reminding you that no real payments are being processed.
The credentials section changes depending on whether Sandbox Mode is on or off. Both sets of fields are shown separately so you can switch between environments without losing your settings.
When Sandbox Mode is off (live):
| Field | Description |
|---|---|
| Live Merchant ID | Your numeric live merchant ID from the Worldline Client Portal |
| Live API Key ID | Your live API Key ID — the short identifier shown in the portal |
| Live API Secret | Your live API secret — the long signing key shown once at creation |
| Live Webhook Secret | Your live webhook secret from the portal's Webhooks section |
When Sandbox Mode is on (test):
The same four fields appear, prefixed with "Sandbox", and accept your test-environment credentials.
Never share your API Secret or Webhook Secret publicly. These keys must stay on your server only and should never be pasted into any code that runs in the customer's browser.
Integration Mode

-
Hosted Checkout (redirect): The customer is redirected to Worldline's secure MyCheckout hosted page to enter their payment details. This is the default and the lowest-compliance option (your store never sees card data).
- Hosted Checkout Variant: This field only appears when Integration Mode is set to Hosted Checkout. A variant is a branded version of the Worldline-hosted payment page — you can create and configure variants in the Worldline Client Portal to match your store's colors and logo. Enter the variant ID number here. Leave the default value (
100) if you have not set up a custom variant.
- Hosted Checkout Variant: This field only appears when Integration Mode is set to Hosted Checkout. A variant is a branded version of the Worldline-hosted payment page — you can create and configure variants in the Worldline Client Portal to match your store's colors and logo. Enter the variant ID number here. Leave the default value (
-
On-site Card Form (Client SDK): A card form appears directly on your checkout page. Card data is encrypted in the customer's browser by the Worldline Client SDK before being sent to Worldline — your server never receives raw card numbers. This option keeps the customer on your site throughout checkout.
Most stores should use Hosted Checkout. The on-site card form requires an additional Worldline account configuration step (Sessions must be enabled) and provides a more seamless experience at the cost of a slightly higher compliance scope.
Payment Capture

-
Auto Capture (recommended): Charges the customer immediately when the payment is authorized. This is the right choice for most stores.
-
Authorize Only: Reserves the funds on the customer's card but does not charge them yet. You then capture the payment manually from the admin order page when you are ready to ship.
Allow Saved Payment Methods
When enabled, logged-in customers can save their payment method during checkout for use on future orders. On their next purchase, their saved card appears as an option so they do not need to enter their details again. Saved payment methods are also used for automatic subscription renewal payments.
Set this to No if you prefer customers to always enter fresh payment details each time.
Enable Subscriptions
Set this to Yes if your store sells subscription products and you use the J2Commerce Subscription Product app. This allows Worldline to process automatic renewal payments using the customer's saved payment method.
Template Layout (Subtemplate)
Template Style: Choose the visual style for the card form at checkout: Match this setting to the template framework your site uses.
-
(blank): Default layout
-
bootstrap5: Bootstrap 5-based J2Commerce templates
-
uikit: UIkit-based J2Commerce templates
Order Statuses
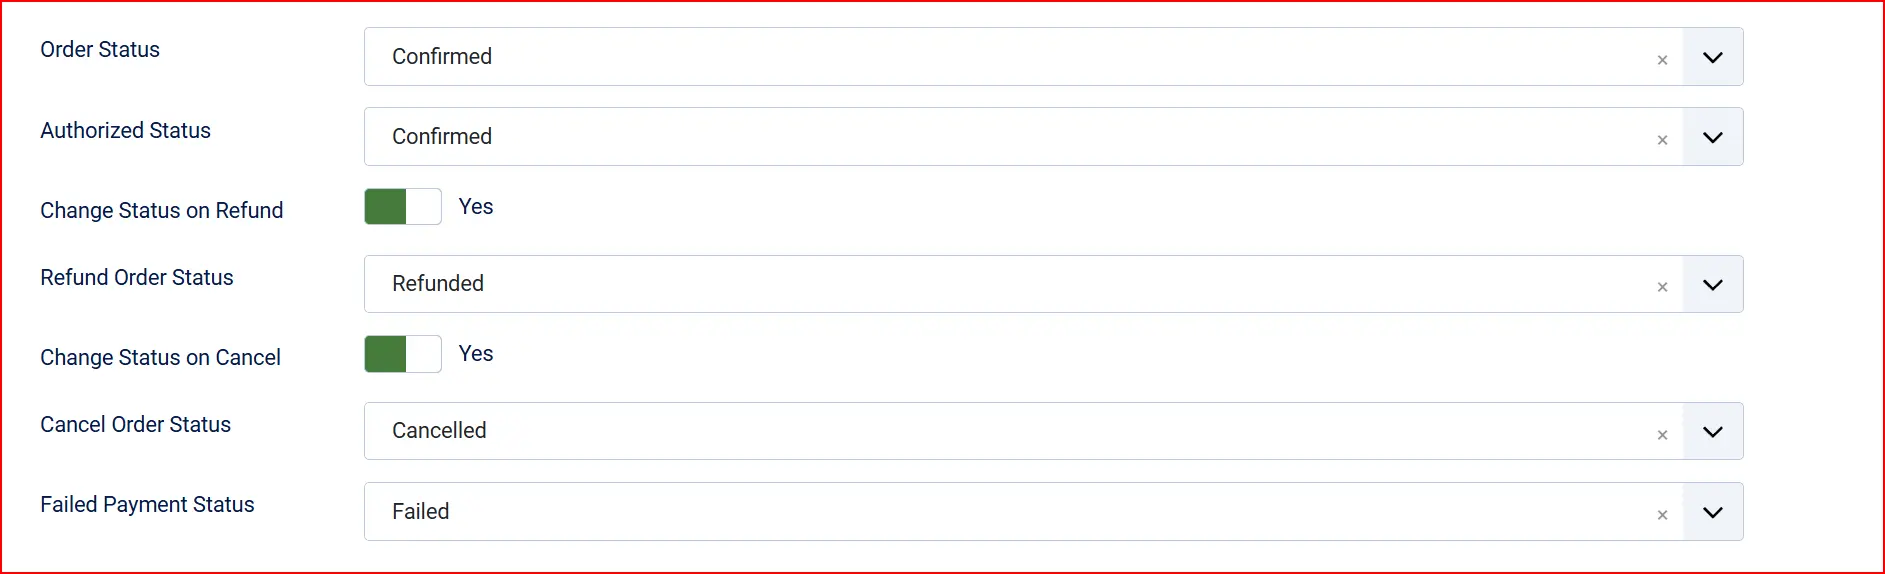
Order Status: The order status applied when a payment is confirmed and captured
Authorized Status: The order status applied when a payment is authorized but not yet captured (only visible in Authorize Only mode)
Change Status on Refund: When enabled, processing a refund automatically moves the order to a status you choose
- Refund Order Status: The order status to set after a successful refund (only visible when the option above is enabled)
Change Status on Cancel: When enabled, cancelling a payment authorization automatically moves the order to a status you choose
- Cancel Order Status: The order status to set after a successful cancellation (only visible when the option above is enabled)
Failed Payment Status: The order status applied when a payment fails or is rejected
If the status you want is not listed in a dropdown, create a new one first by going to J2Commerce -> Setup -> Order Statuses.

Surcharge / Payment Fee

If Worldline charges you a processing fee and you want to pass part or all of it on to customers, fill in these fields:
Surcharge Label: The label shown to customers on the order total (for example, "Card processing fee")
Surcharge Percent: A percentage of the order total added as a fee (for example, 2 for 2%)
Surcharge Fixed Amount: A flat fee added to every order (for example, 0.50 for $0.50)
Surcharge Tax Class: Select a tax profile if the fee itself should be taxed
Leave all fields blank if you do not want to add a surcharge.
Availability Restrictions

Allowed Geo Zone: Only show this payment method to customers whose billing address falls inside a specific geozone. Leave blank to show it to everyone.
Minimum Subtotal: Hide this payment method if the order subtotal is below this amount. Leave blank for no minimum.
Maximum Subtotal: Hide this payment method if the order subtotal is above this amount. Leave blank for no maximum.
If you set a Maximum Subtotal, leave the field blank rather than entering 0. Entering 0 is interpreted as a zero-dollar ceiling and hides the payment method from all orders.
Custom Messages
These optional text fields let you add HTML messages at specific moments during checkout:
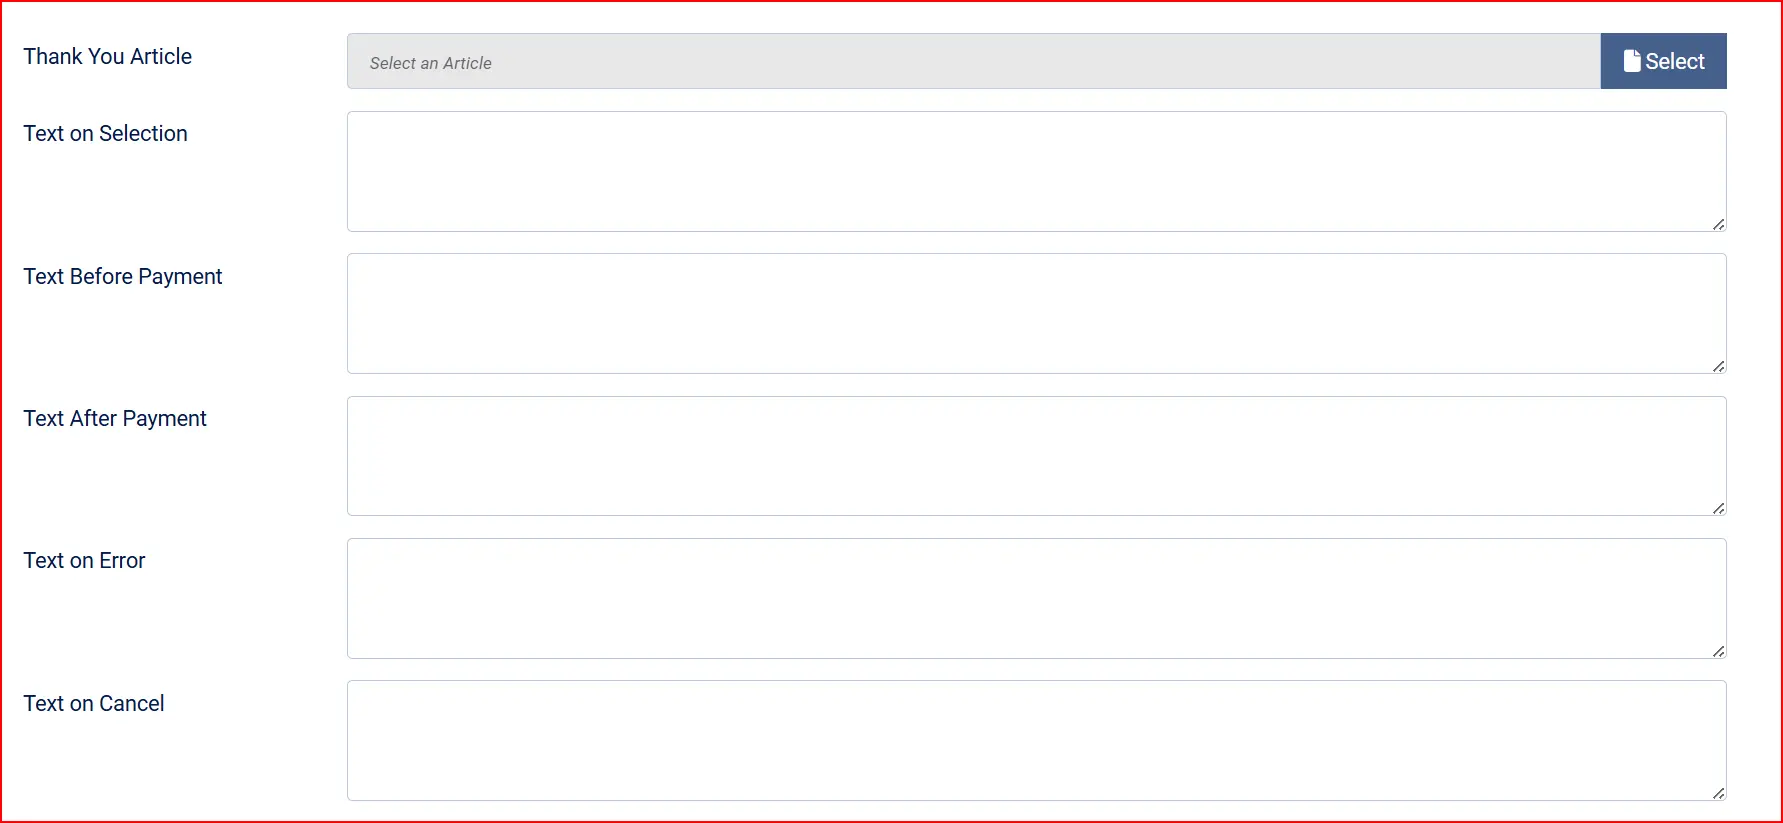
Post-Payment Article: Use the Post-Payment Article field to select a Joomla article that appears on the confirmation page after a successful payment. This is a good place for order instructions, shipping timelines, or a personal thank-you message.
Text on Selection: When the customer selects Worldline as their payment method
Text Before Payment: Above the Place Order button, inside the payment form area
Text After Payment: On the order confirmation page after a successful payment
Text on Error: When a payment attempt fails
Text on Cancel: When the customer cancels the payment
Dashboard Icon

Show Dashboard Icon: When set to Yes, a quick-access icon appears on the J2Commerce dashboard
Icon Label: The label displayed under the dashboard icon (only visible when Show Dashboard Icon is Yes)
Debug Mode
Enable Debug Mode to write all API requests and responses to a log file (logs/payment_worldline.php). This is helpful when diagnosing configuration issues. Always disable Debug Mode on a live store once everything is working, since log files can contain sensitive order information.
What the Customer Sees
When a customer reaches checkout and selects the Worldline payment option, the experience depends on the Integration Mode you have chosen.

Hosted Checkout Mode (default)
- The checkout page shows a Place Order button with a brief notice that the customer will be redirected to a secure Worldline payment page.
- If the customer has previously saved a payment method, it is passed to the Worldline-hosted page automatically so they can use it without re-entering all their details.
- Clicking Place Order redirects the customer to the Worldline MyCheckout page where they enter their card details in a PCI-compliant environment hosted by Worldline.
- After completing payment, Worldline returns the customer to your store and lands them on the order confirmation page.
- If Allow Saved Payment Methods is enabled, the customer's card is saved for future purchases after a successful transaction.
On-site Card Form Mode
- A card form appears directly on the checkout page — the customer enters their card details without leaving your store.
- The Worldline Client SDK encrypts the card data in the browser before it is sent anywhere. Your server never sees the raw card number.
- If the card requires a 3D Secure challenge (an extra verification step from the customer's bank), the customer is briefly redirected to their bank's verification page and then returned automatically.
- After the payment is confirmed, the customer sees the order confirmation page.
In both modes, your store never receives or stores raw card numbers. Worldline handles all card security on their end, which keeps your store at the lowest applicable level of PCI compliance.
Managing Payments from the Order Screen
Once a customer has paid, additional actions are available from J2Commerce -> Sales -> Orders — open the relevant order.
Capture an Authorized Payment
If you chose Authorize Only as the capture mode, the customer's card was reserved but not charged. Open the order in the admin and use the Capture Payment button to collect the funds. You can only capture an authorized payment once, and the capture amount matches the amount Worldline originally authorized.
Cancel an Authorization
If a payment has been authorized but not yet captured, you can use the Cancel Payment button to release the reservation back to the customer. This is the right action when you cannot fulfill the order and want to avoid charging the customer.
Cancellation is only available on authorized (uncaptured) payments. Once a payment has been captured, use Refund instead.
Refund a Payment
From the order screen you can issue a full refund (the entire order amount) or a partial refund (a specific amount you enter). The money is returned to the customer's original payment method. J2Commerce records the refund in the order history automatically.
Tips
- Start in Sandbox Mode — Configure your test credentials first, process a few dummy payments to confirm everything works, then switch to live credentials.
- Save the API Secret the moment you create it — The Worldline Client Portal shows it only once. If you miss it, you will need to regenerate the key.
- Use Hosted Checkout for simplicity — The redirect mode requires no extra Worldline configuration and gives you the lowest PCI compliance scope. Use the on-site form only if keeping customers on your site throughout checkout is a hard requirement.
- Enable saved payment methods for subscription stores — If you sell subscription products, saved methods allow automatic renewal payments without asking the customer to re-enter their details each cycle.
- Leave subtotal limits blank if you have no restrictions — Entering
0in the Maximum Subtotal field hides the payment method from all orders.
Troubleshooting
Payments Fail Immediately After Setup
Cause: Credentials are missing, entered incorrectly, or are from the wrong environment (live credentials entered while Sandbox Mode is on, or vice versa).
Solution:
- Go to J2Commerce -> Setup -> Payment Methods -> open Worldline Payment.
- Confirm the Sandbox / Test Mode setting matches the credentials you have entered.
- Check that all four credential fields (Merchant ID, API Key ID, API Secret, Webhook Secret) are filled in with no leading or trailing spaces.
- Enable Debug Mode, attempt a test payment, then open the log file at
logs/payment_worldline.phprelative to your Joomla root to read the exact API error message.
The Worldline Option Does Not Appear at Checkout
Cause: The plugin is disabled, the order subtotal is outside the configured limits, or the customer's billing address is outside the configured geozone.
Solution:
- Go to J2Commerce -> Setup -> Payment Methods and confirm the Worldline row shows a green enabled status.
- Check Minimum Subtotal and Maximum Subtotal — if set, verify the current cart total falls within the range. Remember that a value of
0in Maximum Subtotal hides the method for all orders. - Check Allowed Geo Zone — if set, verify the customer's billing country is inside that geozone.
Customer Is Redirected to Worldline But Payment Does Not Confirm Back
Cause: Worldline sends a server-to-server webhook notification to tell J2Commerce the payment succeeded. If your server is not publicly reachable (for example, a local development environment), the notification cannot arrive. The RETURNMAC verification on the return URL is a backup check, but the webhook is the authoritative signal.
Solution: Test on a publicly accessible server, or use a tunnelling tool to expose your local environment to the internet. Make sure the site URL configured in Joomla matches what the customer's browser sees — mismatched URLs cause return redirects to fail.
"Worldline API credentials are not configured" Error at Checkout
Cause: One or more of the required credential fields (Merchant ID, API Key ID, API Secret) is empty for the active mode.
Solution: Open the plugin settings. If Sandbox Mode is on, check the four Sandbox credential fields. If Sandbox Mode is off, check the four Live credential fields. All three authentication fields must be filled in — the Webhook Secret is not required to process payments but is strongly recommended.
Saved Payment Methods Do Not Appear
Cause: The customer is not logged in, or Allow Saved Payment Methods is disabled in the plugin settings.
Solution:
- Confirm the customer is logged into their account. Saved methods are not available to guest customers.
- Open the plugin settings and check that Allow Saved Payment Methods is set to Yes.
A Refund or Capture Fails
Cause: Each admin action is only valid in a specific payment state. Capture works only on authorized (not yet charged) payments. Refund works only on captured (charged) payments. Cancellation works only on authorized payments.
Solution: Check the order history to see the current payment state, then use the matching action: Capture Payment for an authorized hold, Cancel Payment to release an uncaptured authorization, and Issue Refund for a completed charge.
The Hosted Checkout Page Shows a Generic Error or Fails to Load
Cause: The Hosted Checkout Variant ID you entered does not exist in the Worldline Client Portal, or the sandbox account does not have MyCheckout provisioned.
Solution:
- Log into the Worldline Client Portal and verify the variant ID exists under the Hosted Checkout or MyCheckout configuration section.
- If testing on a Worldline sandbox account that was not specifically provisioned for MyCheckout, contact Worldline support to have it enabled on your sandbox merchant.
- Leave the Hosted Checkout Variant field at the default value (
100) to use Worldline's standard hosted page without custom branding.