Product Reviews
Allowing customers to write product reviews is essential for building trust and driving sales. Reviews provide real, unbiased feedback that helps potential buyers feel confident in their purchasing decisions, especially when they see others sharing positive experiences. This social proof reduces uncertainty, increases credibility, and makes your brand feel more transparent and authentic. Additionally, reviews often answer common questions, highlight real-world benefits, and improve engagement, all of which can lead to higher conversion rates and repeat customers.
Requirements
- PHP 8.1.0 +
- Joomla! 4.x/ Joomla! 5.x +
- J2Commerce / J2Store 4.x +
Purchase the App:
Step 1: Go to our J2Commerce website > Extensions > Apps
Step 2: Locate the Product Reviews App > click View Details > Add to cart > Checkout.
Step 3: Go to your My Downloads under your profile button at the top right corner and search for the app. Click Available Versions > View Files > Download Now
Install the App:
Use the Joomla! installer to install the app. Go to System > Install > Extensions > install the app
-e0515ef561b368cb4d5a053cacb4c525.webp)
Enable the App
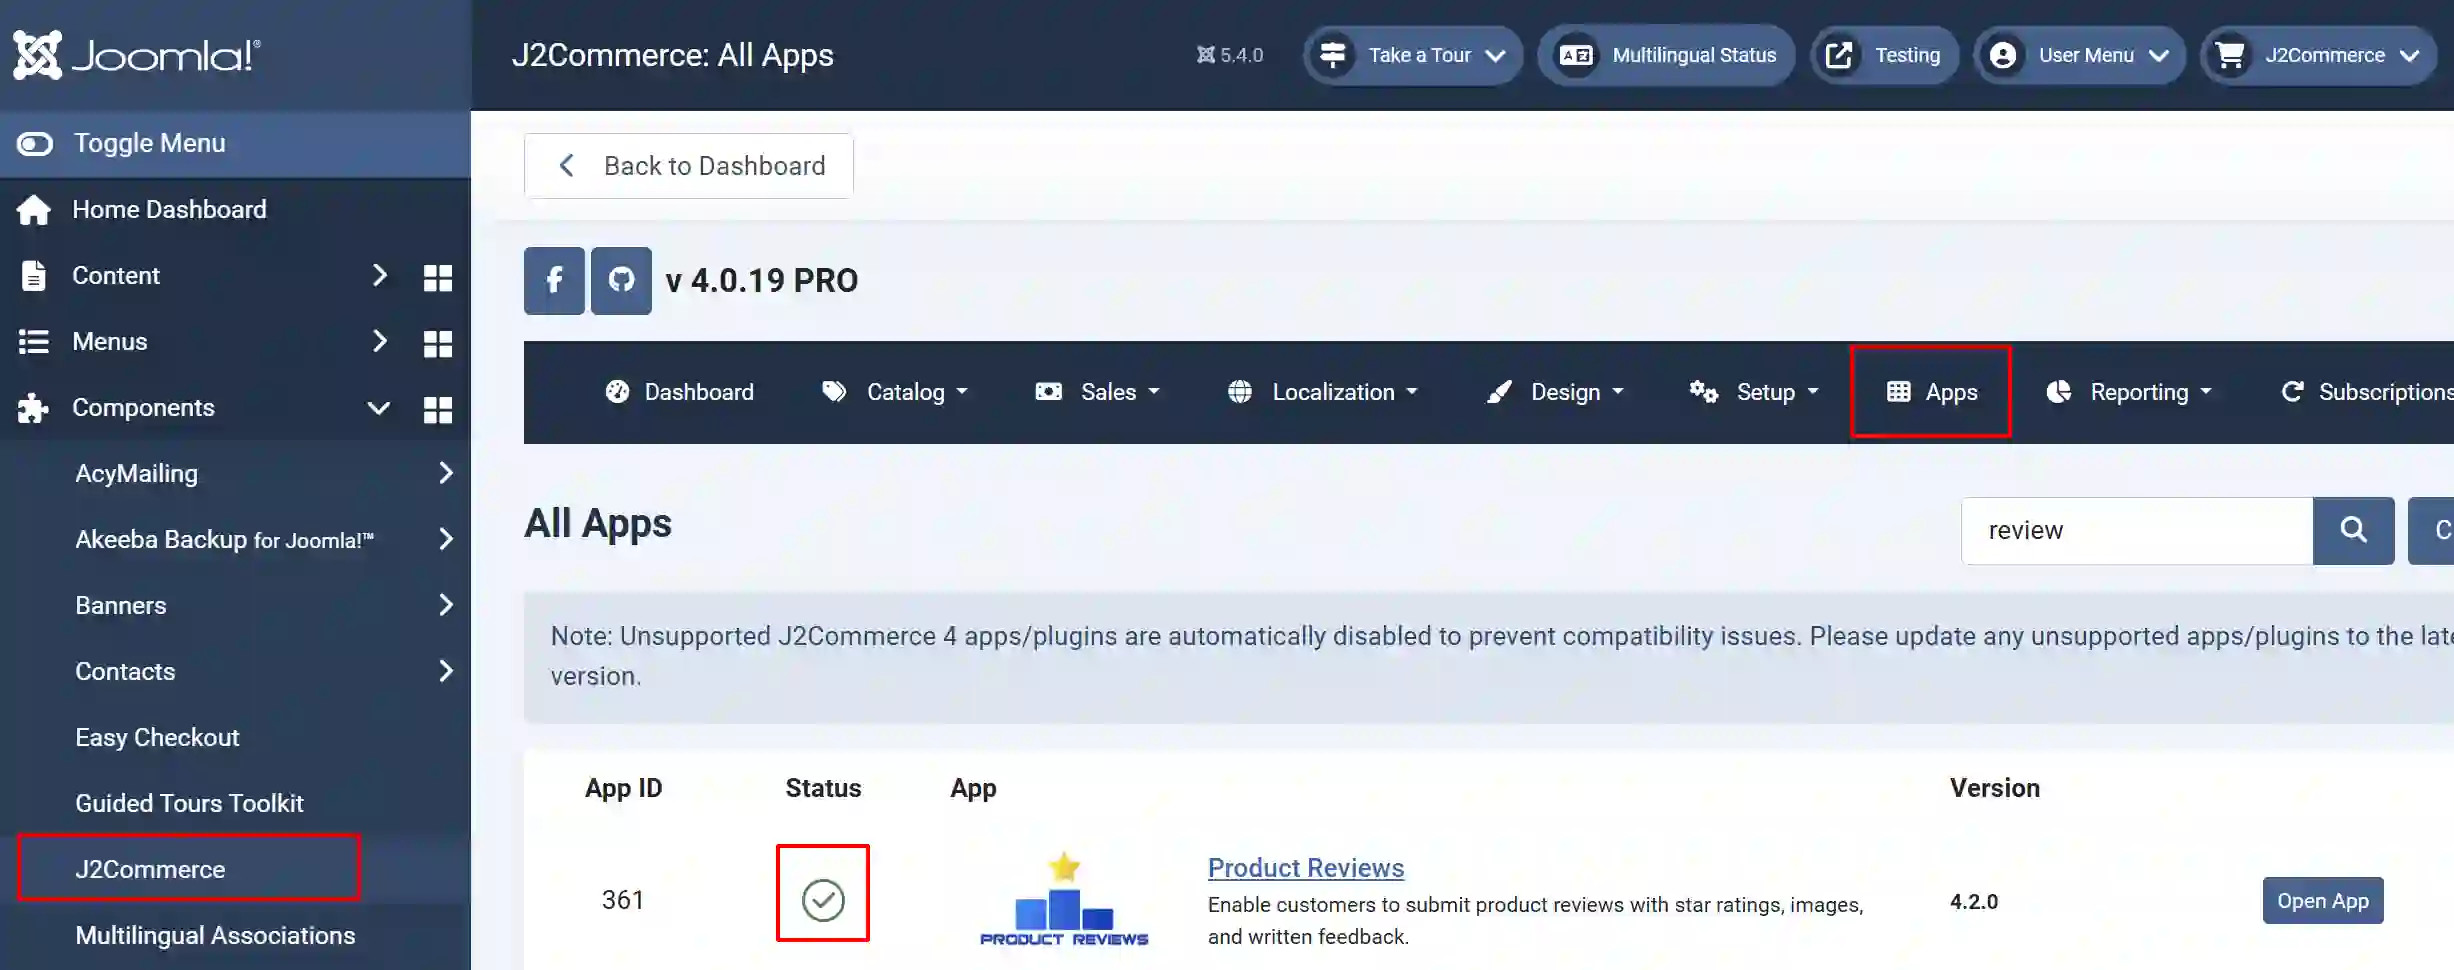
Go to J2Commerce > Apps > search for Product Reviews to narrow down your search.
Click on the 'X' under Status to enable it.
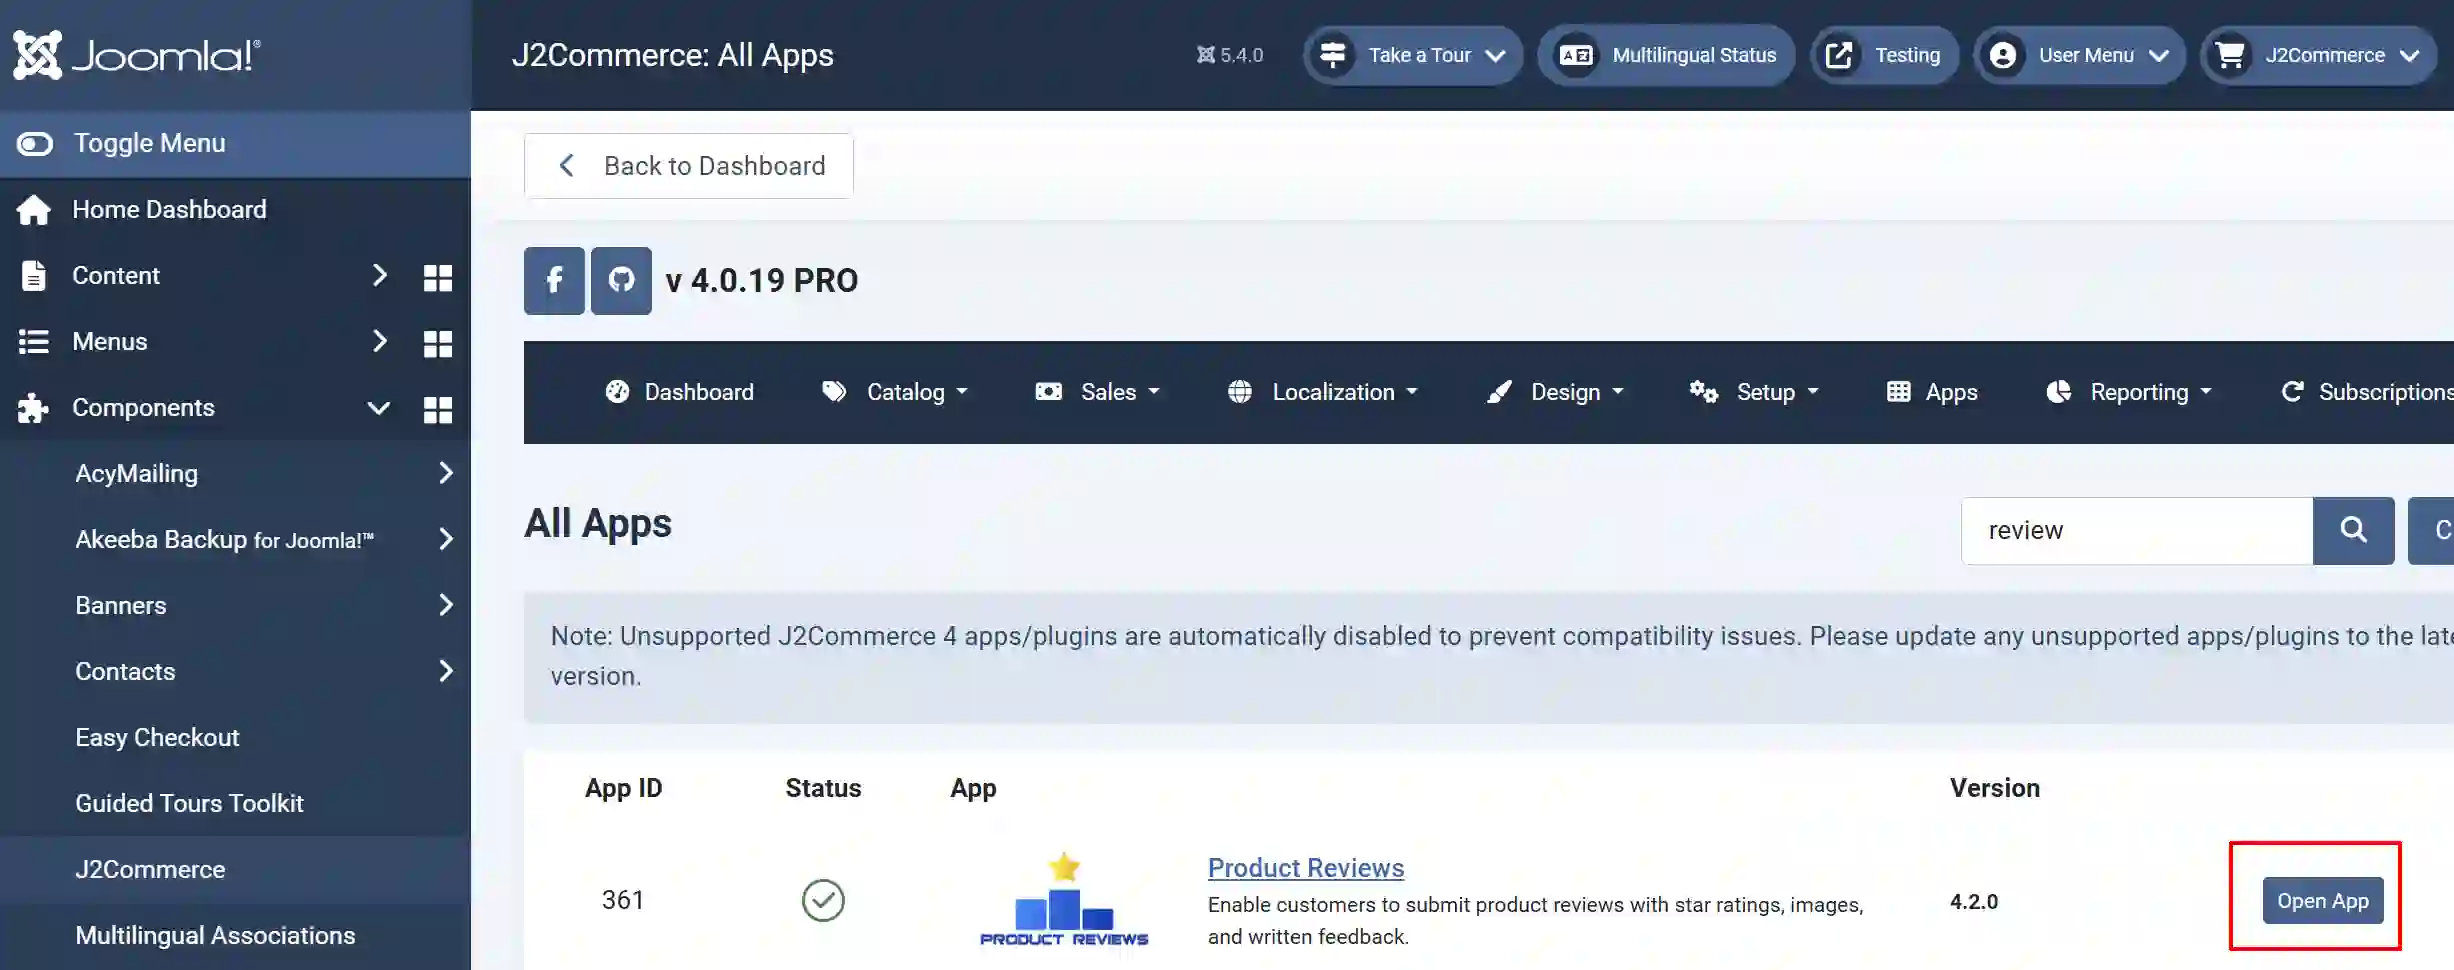
Click on "Open App" or the Title to start setting up the app.
Setting up the App
Basic Settings tab

Enable Reviews: Enable or disable the product reviews functionality globally.
Auto-Approve Reviews: Automatically approve new reviews without moderation.
Login Requirement: Specify whether users must be logged in to submit reviews.
Prevent Duplicate Reviews: Select Yes to prevent users from submitting multiple reviews for the same product. This is important to select Yes so one person can't leave a ton of bad reviews on one product
Enable Quick Icon: Select 'Yes' to display the quick icon in the Joomla administrator dashboard.
Display Settings tab
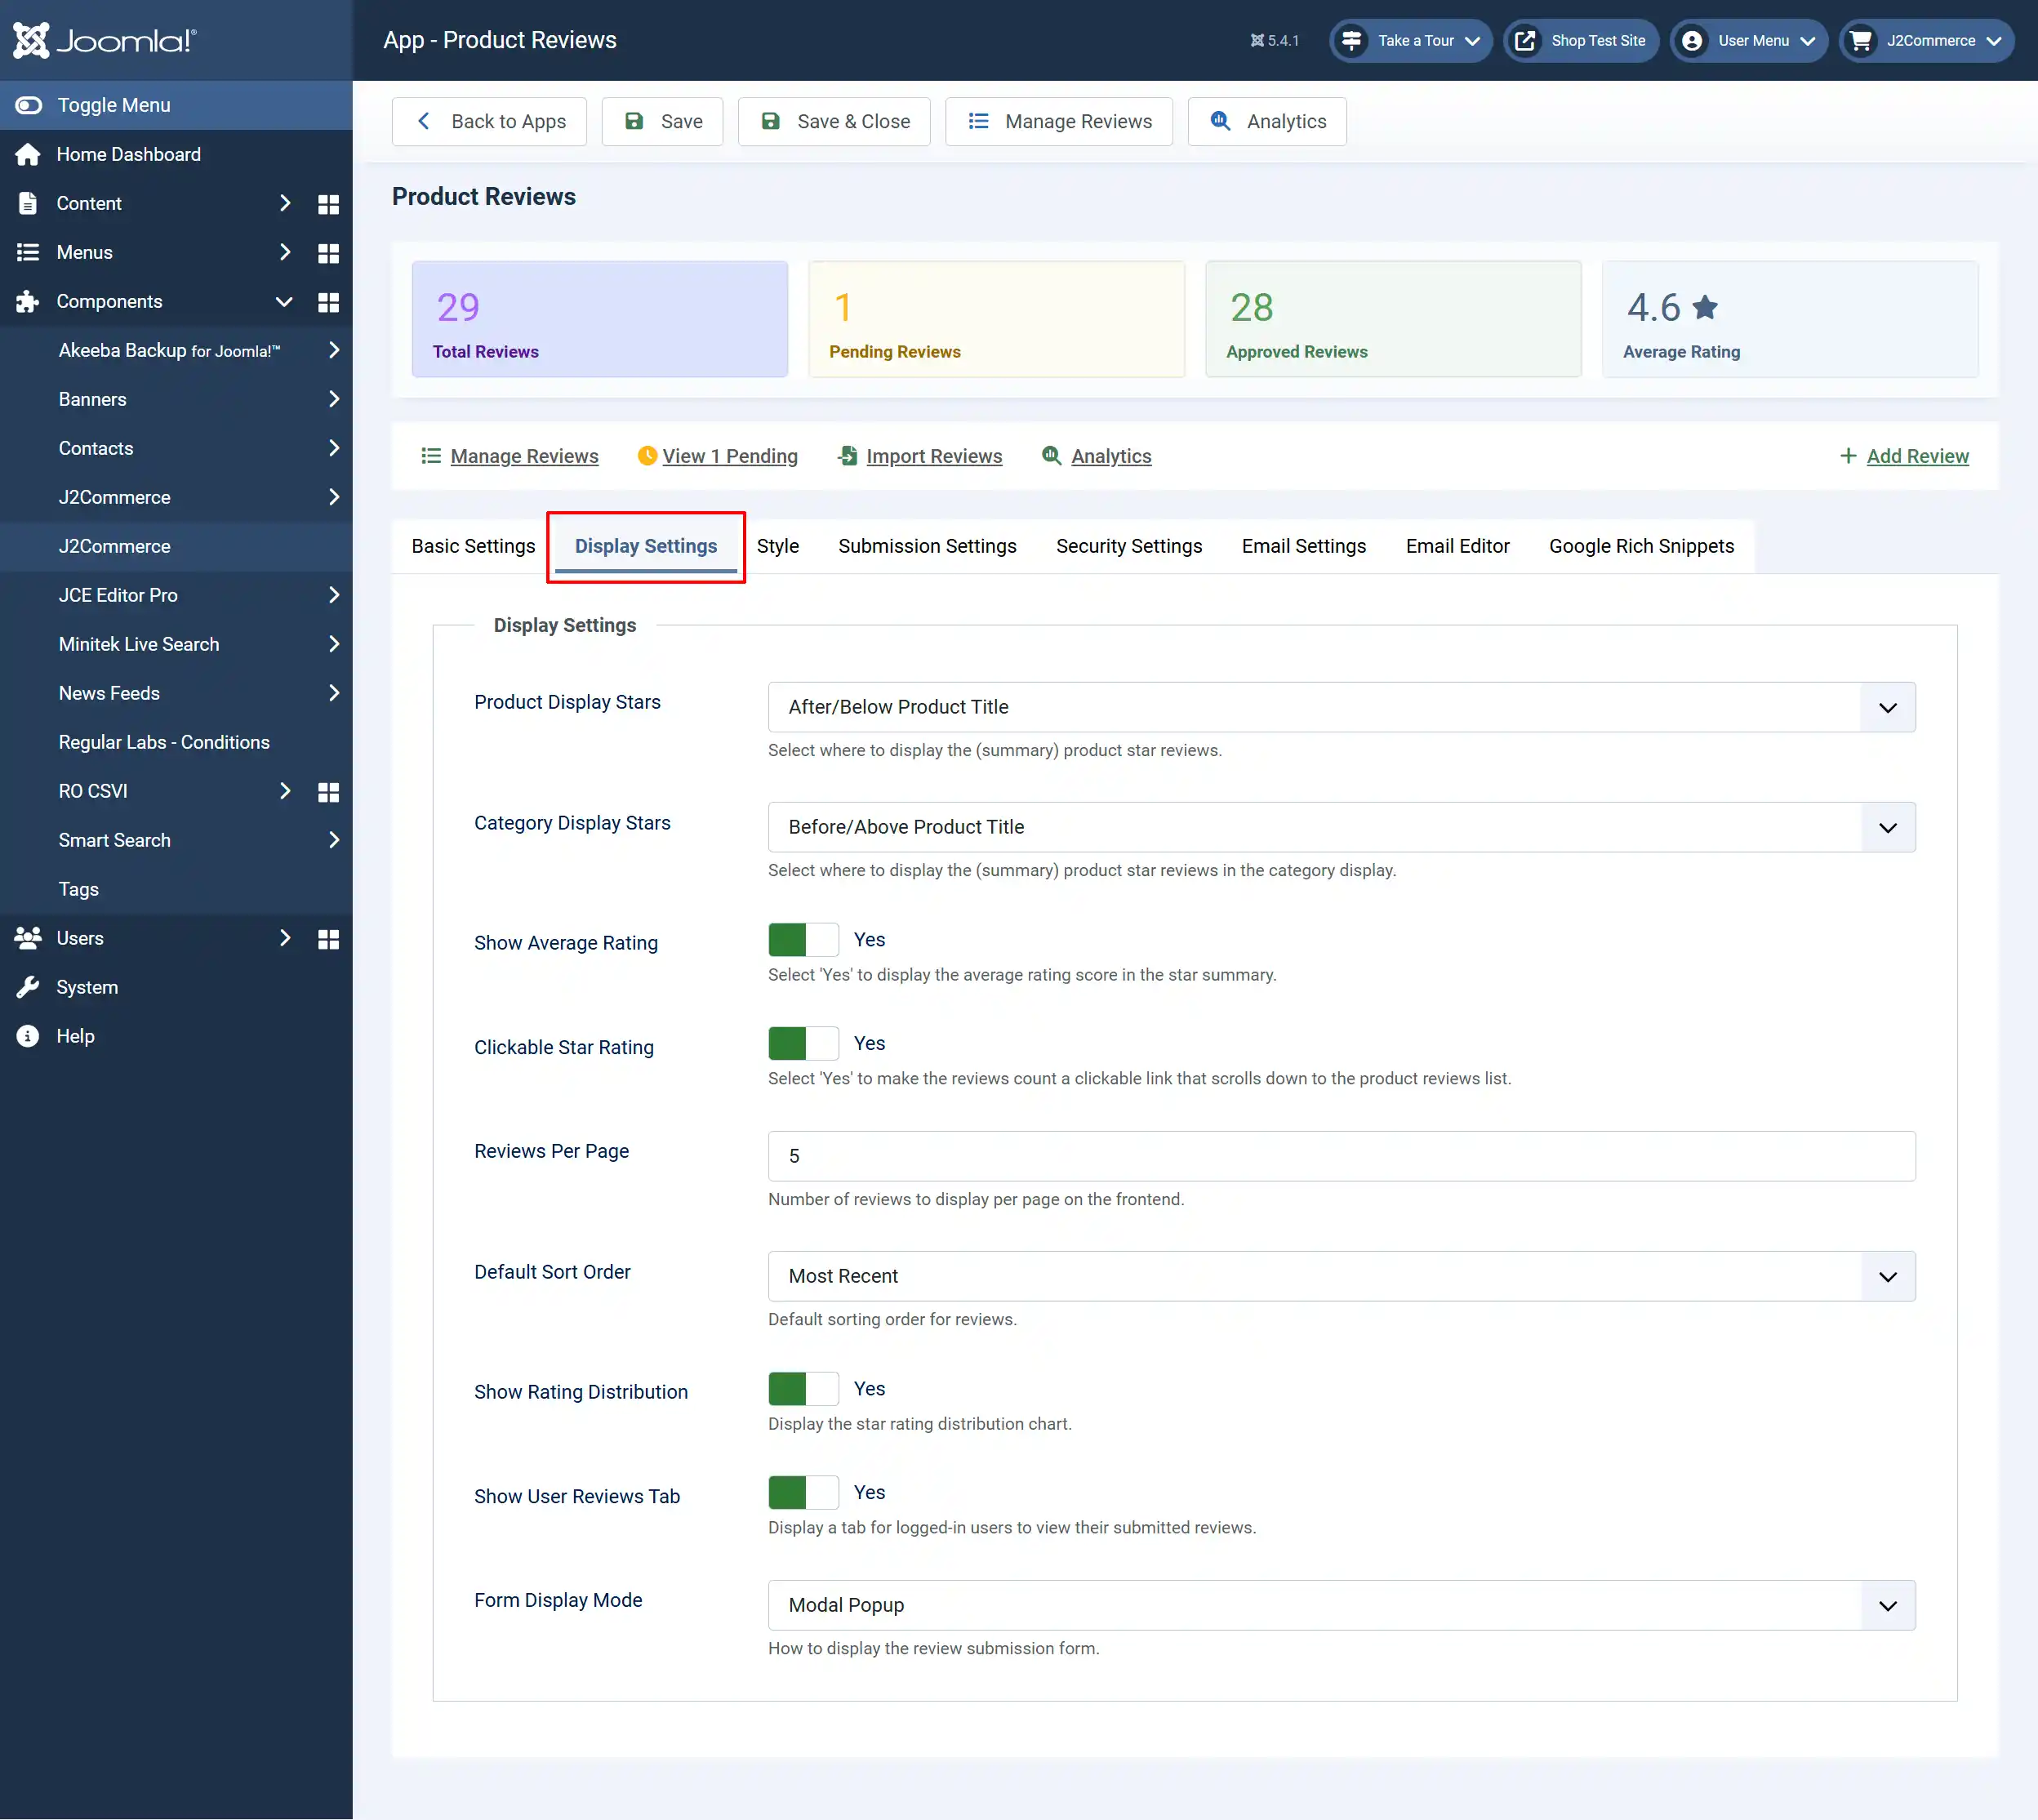
Product Display Stars: Select where to display the (summary) product star reviews. In the drop-down menu, you have many options to choose from. The screenshot below shows what it looks like on the frontend if you choose After / Below Product Title

Category Display Stars: Select where to display the (summary) product star reviews in the category display. In the drop-down menu, you have many options to choose from. The screenshot below shows what it looks like on the frontend if you choose Before / Above Product Title

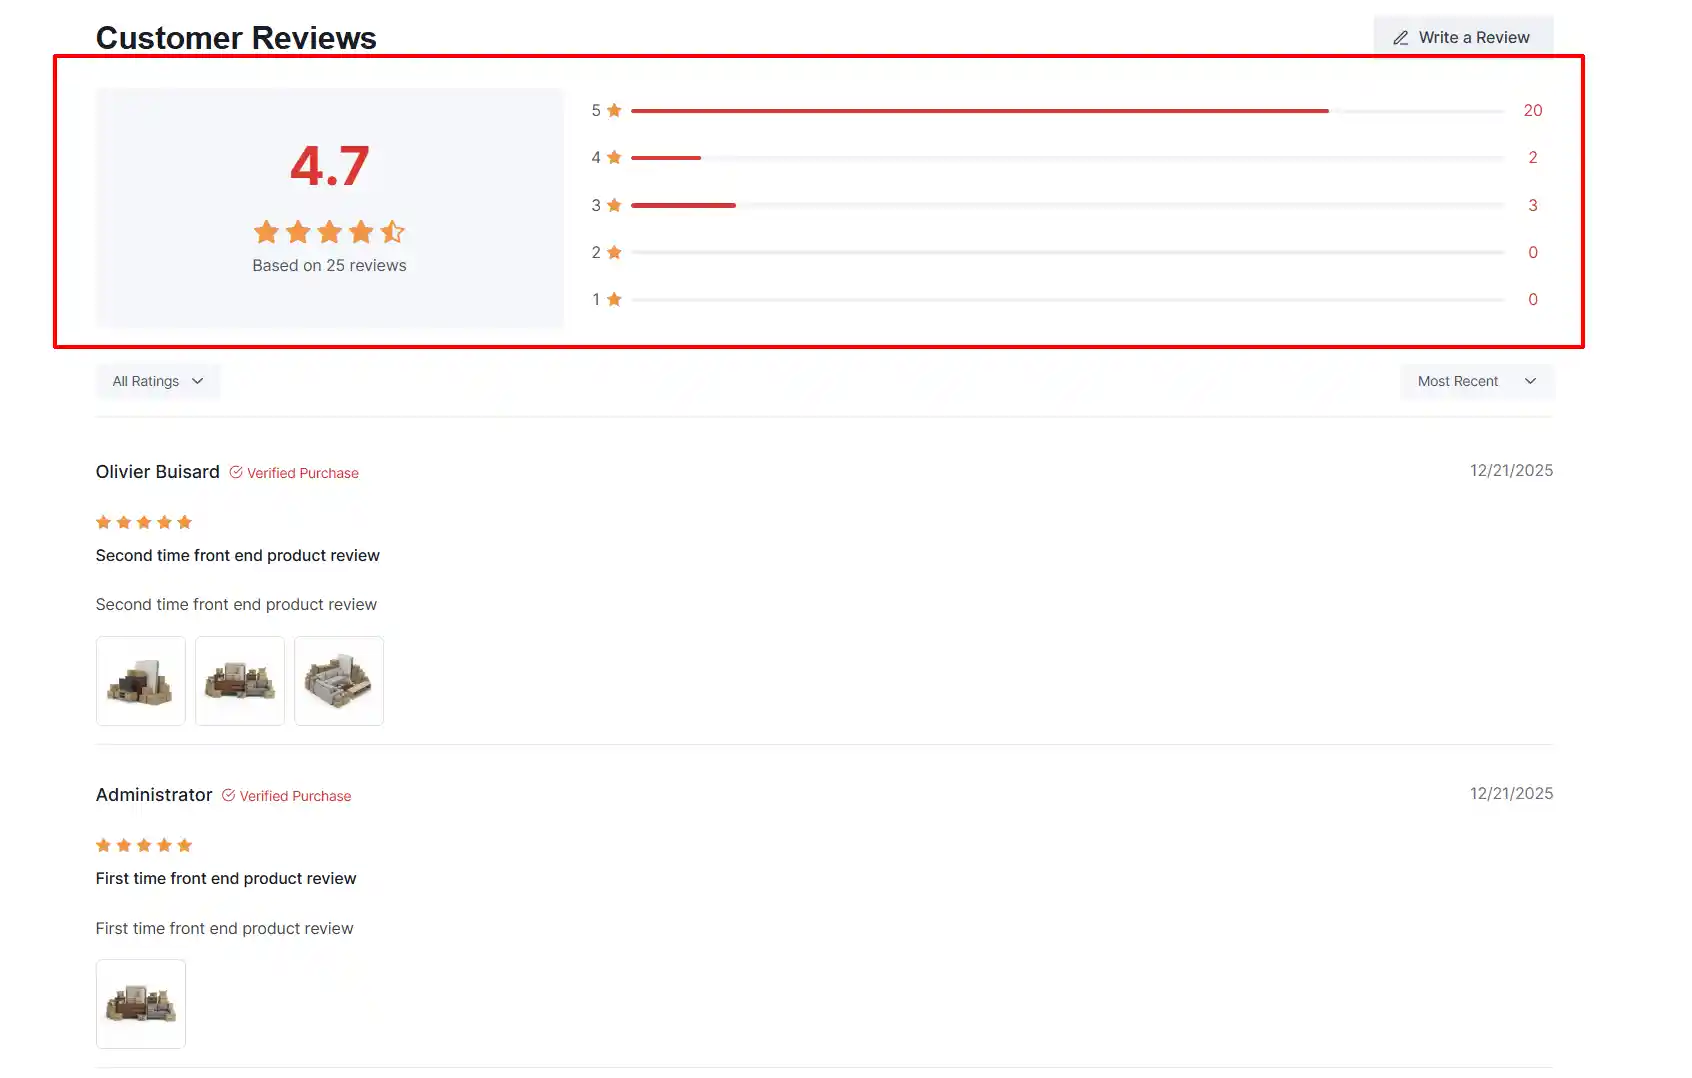
Show Average Rating: Select 'Yes' to display the average rating score in the star summary.

Clickable Star Rating: Select 'Yes' to make the reviews count a clickable link that scrolls down to the product reviews list.

Reviews Per Page: Number of reviews to display per page on the frontend. How many reviews do you want to display on each product page?
Default Sort Order: Default sorting order for reviews. You can choose to have your ratings organized by Most Recent, Highest Rating, or Lowest Rating
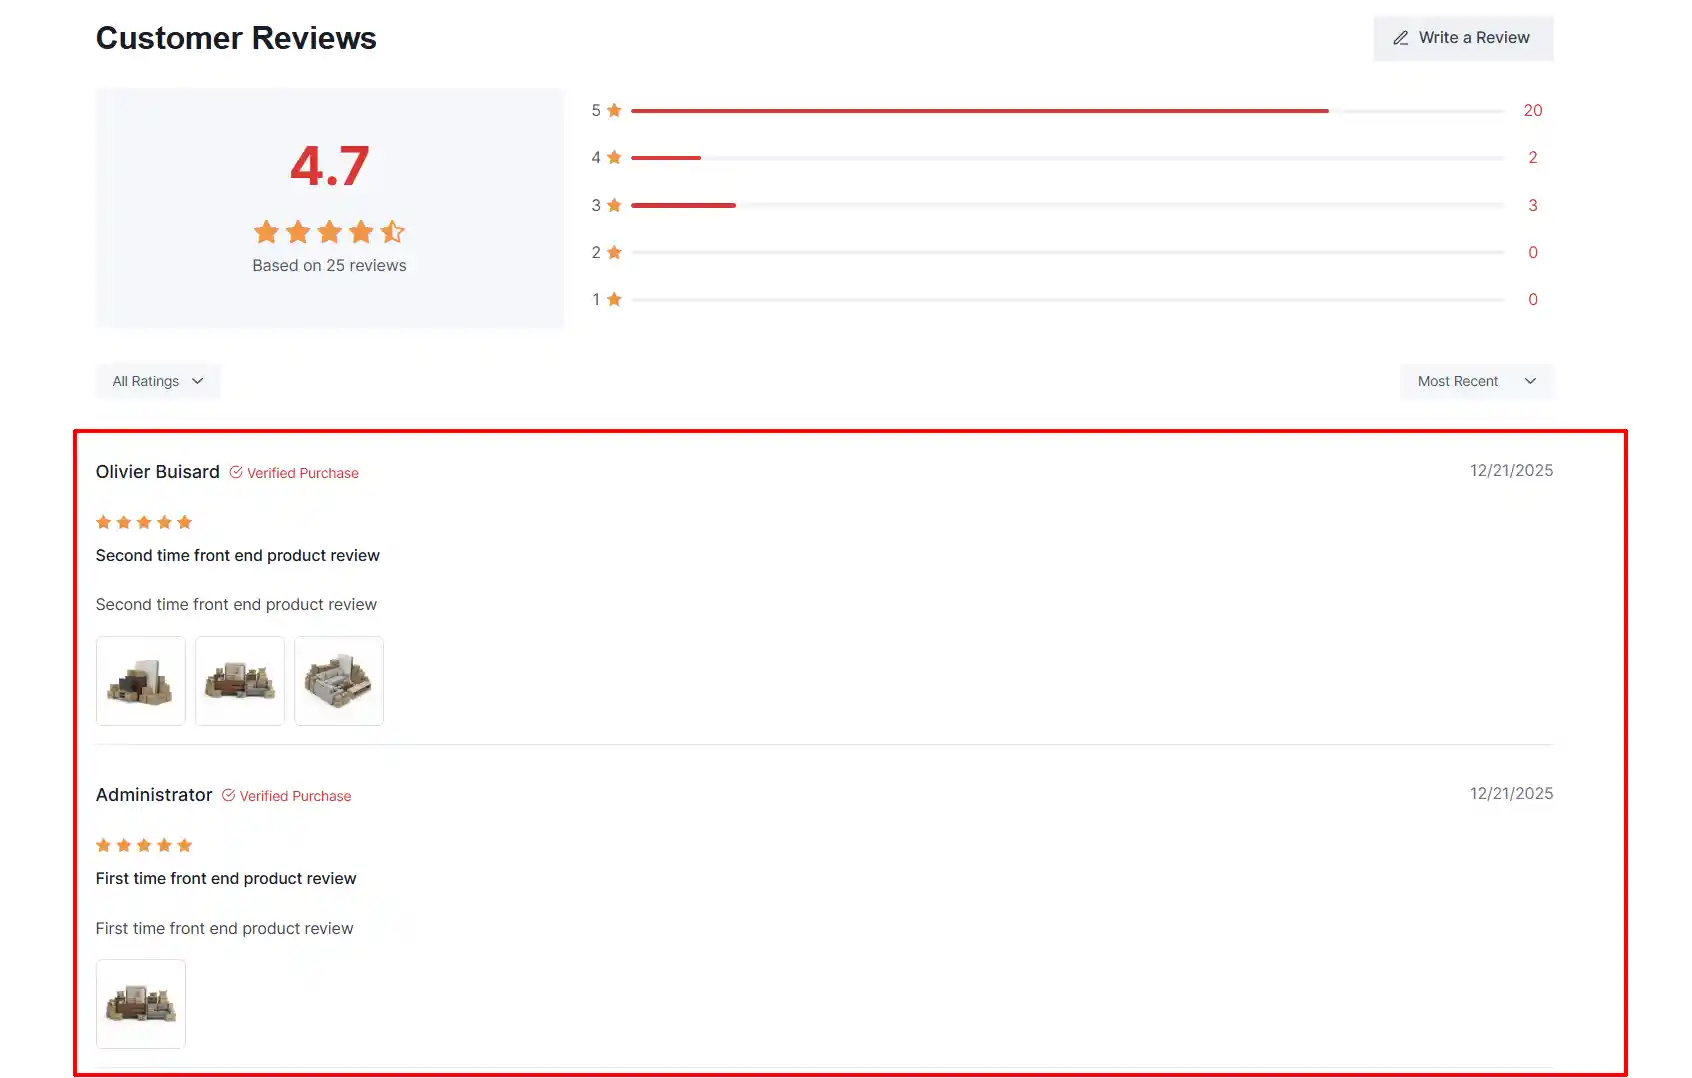
Show Rating Distribution: Select Yes to display the star rating distribution chart.
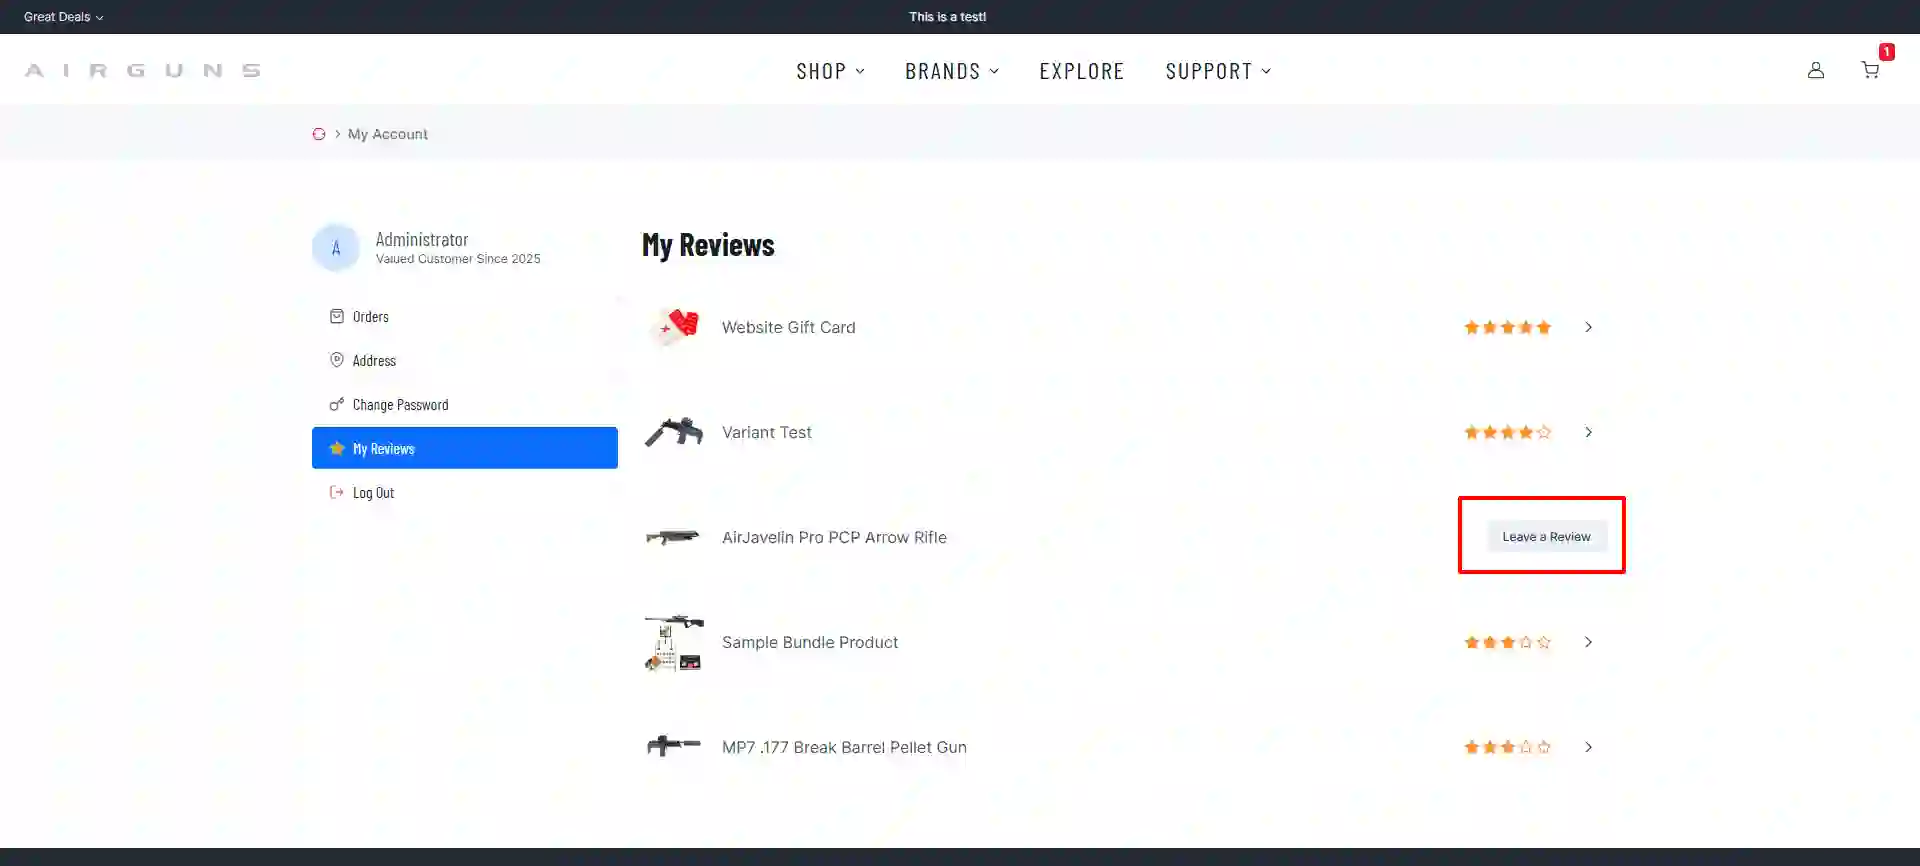
Show User Reviews Tab: Select Yes to display a tab for logged-in users to view their submitted reviews.
They will find this section in their Account Settings on the frontend of the site once logged in.
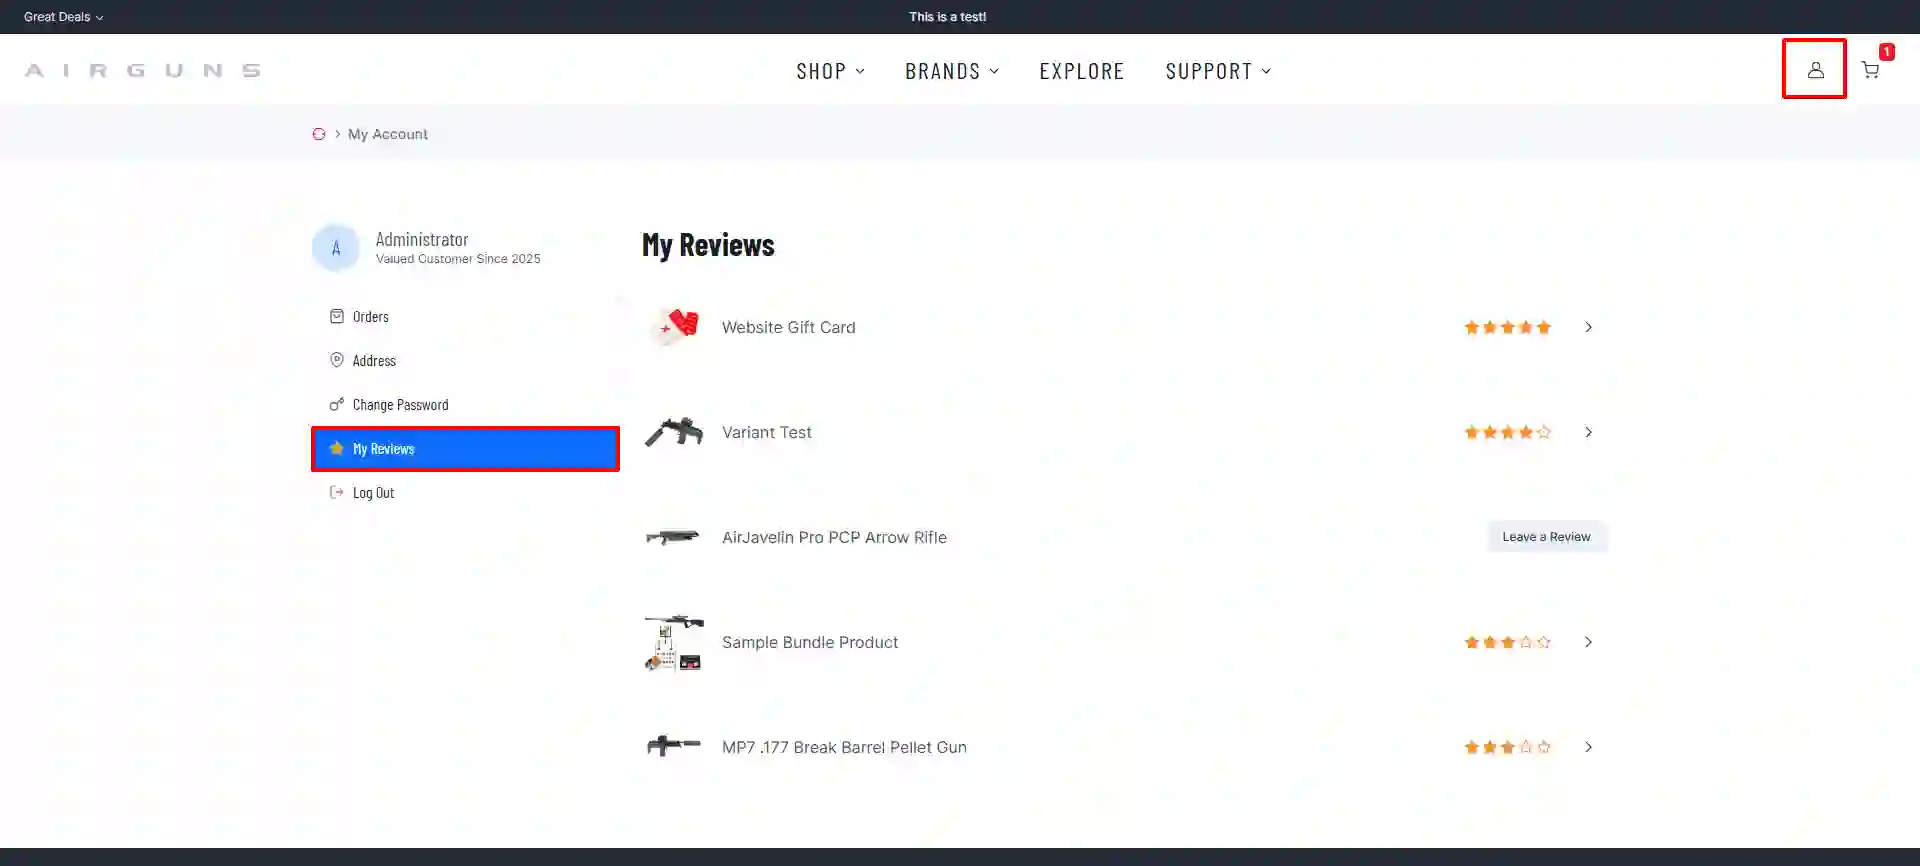
The customer can easily see all of the products they have purchased and any that haven't received a review.
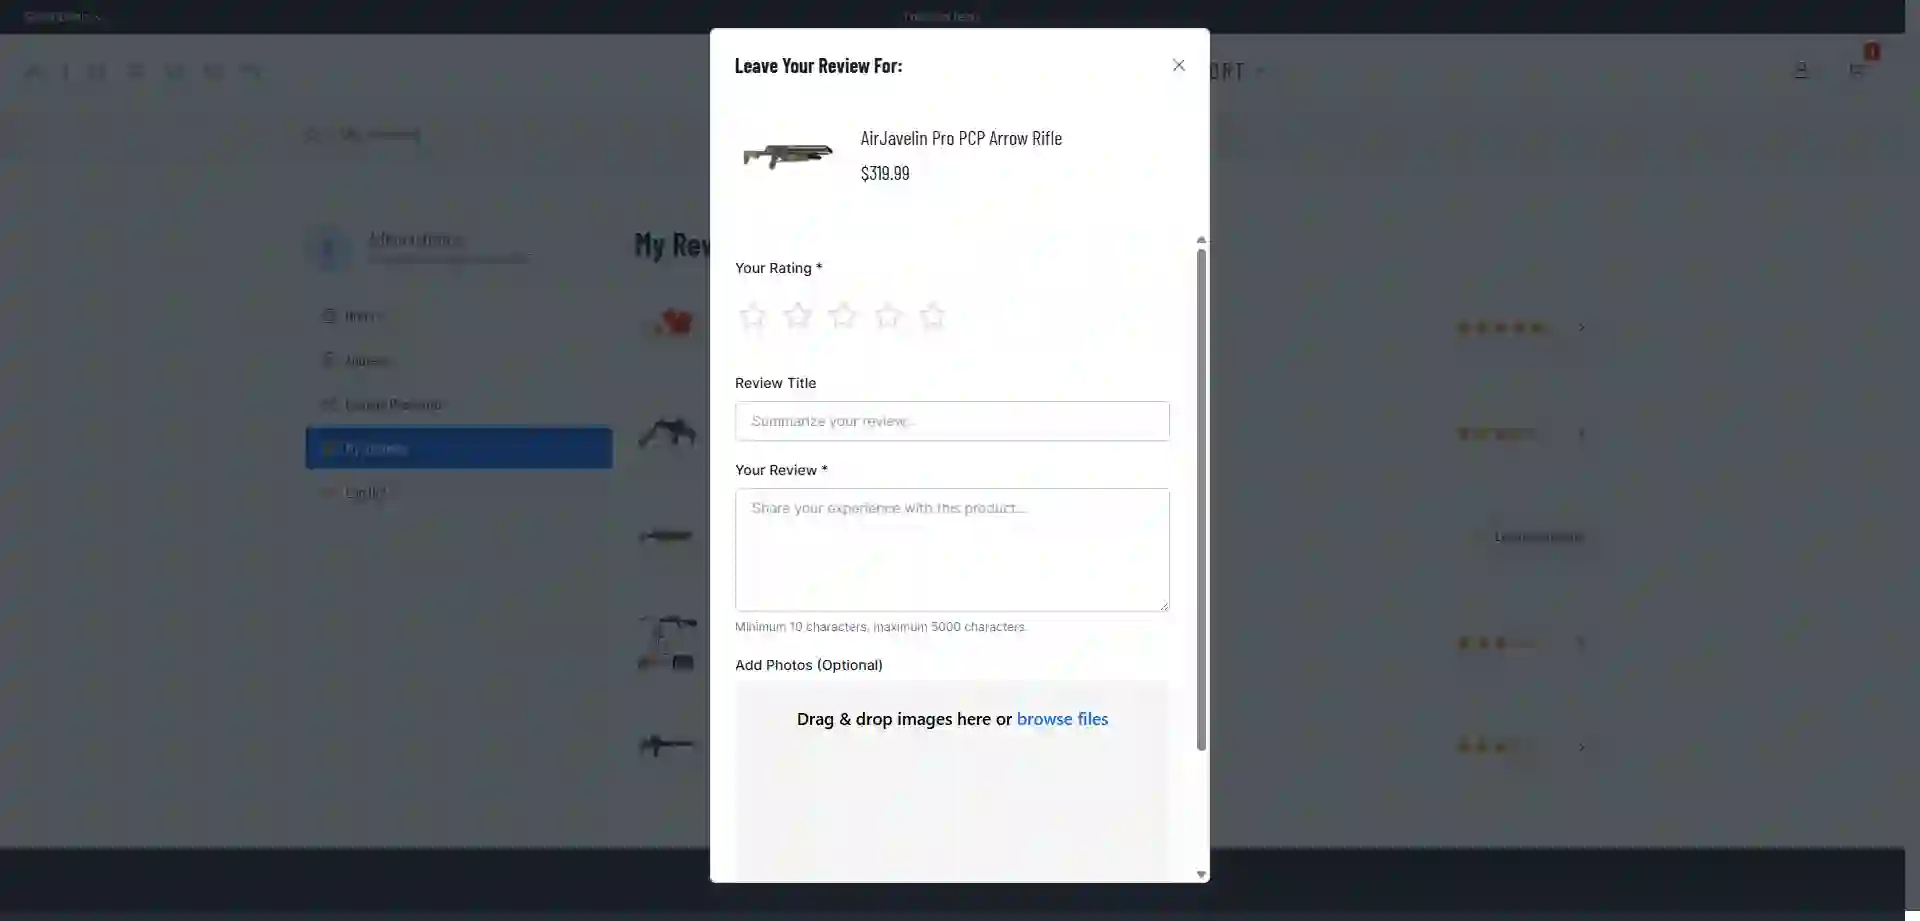
Form Display Mode: How to display the review submission form. Inline or a pop-up Modal window. The screenshot below shows the pop-up Modal example.
Style Tab
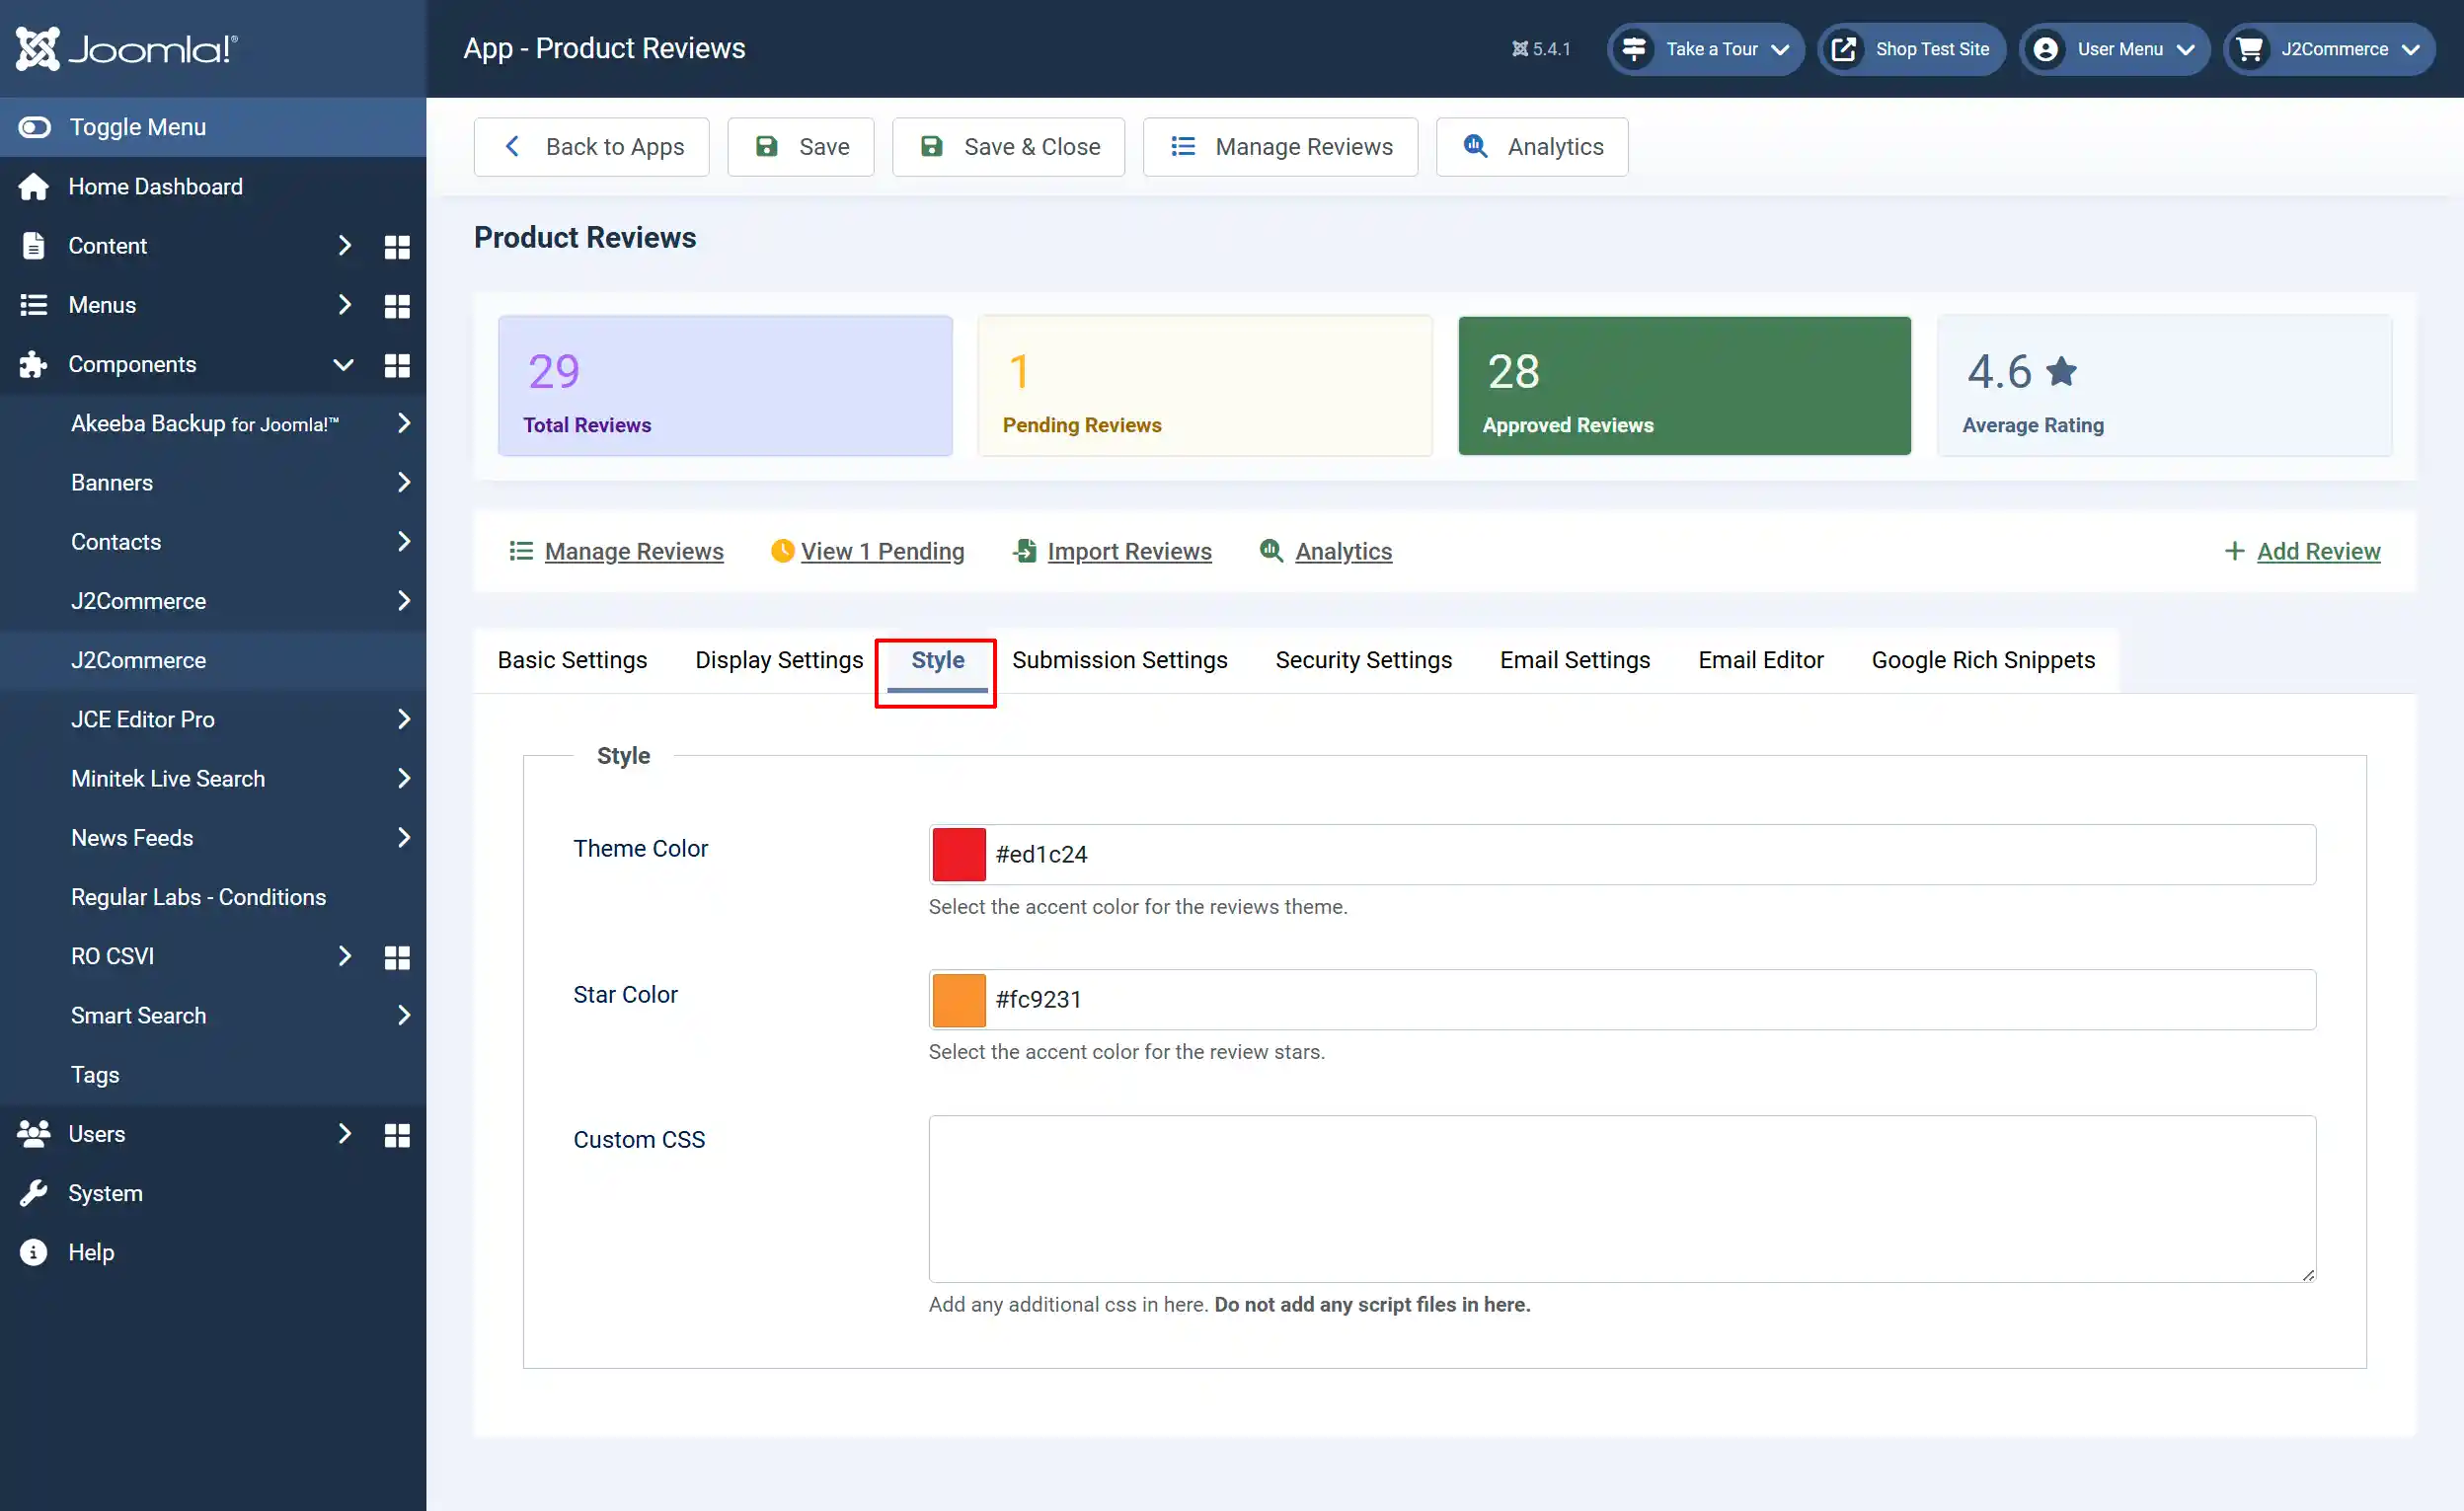
Theme Color: Select the accent color for the reviews theme.
Star Color: Select the accent color for the review stars.
Custom CSS: Add any additional css in here. Do not add any script files in here.
Note: The screenshot below shows an example of how the two colors are displayed on the frontend

Submission Settings tab
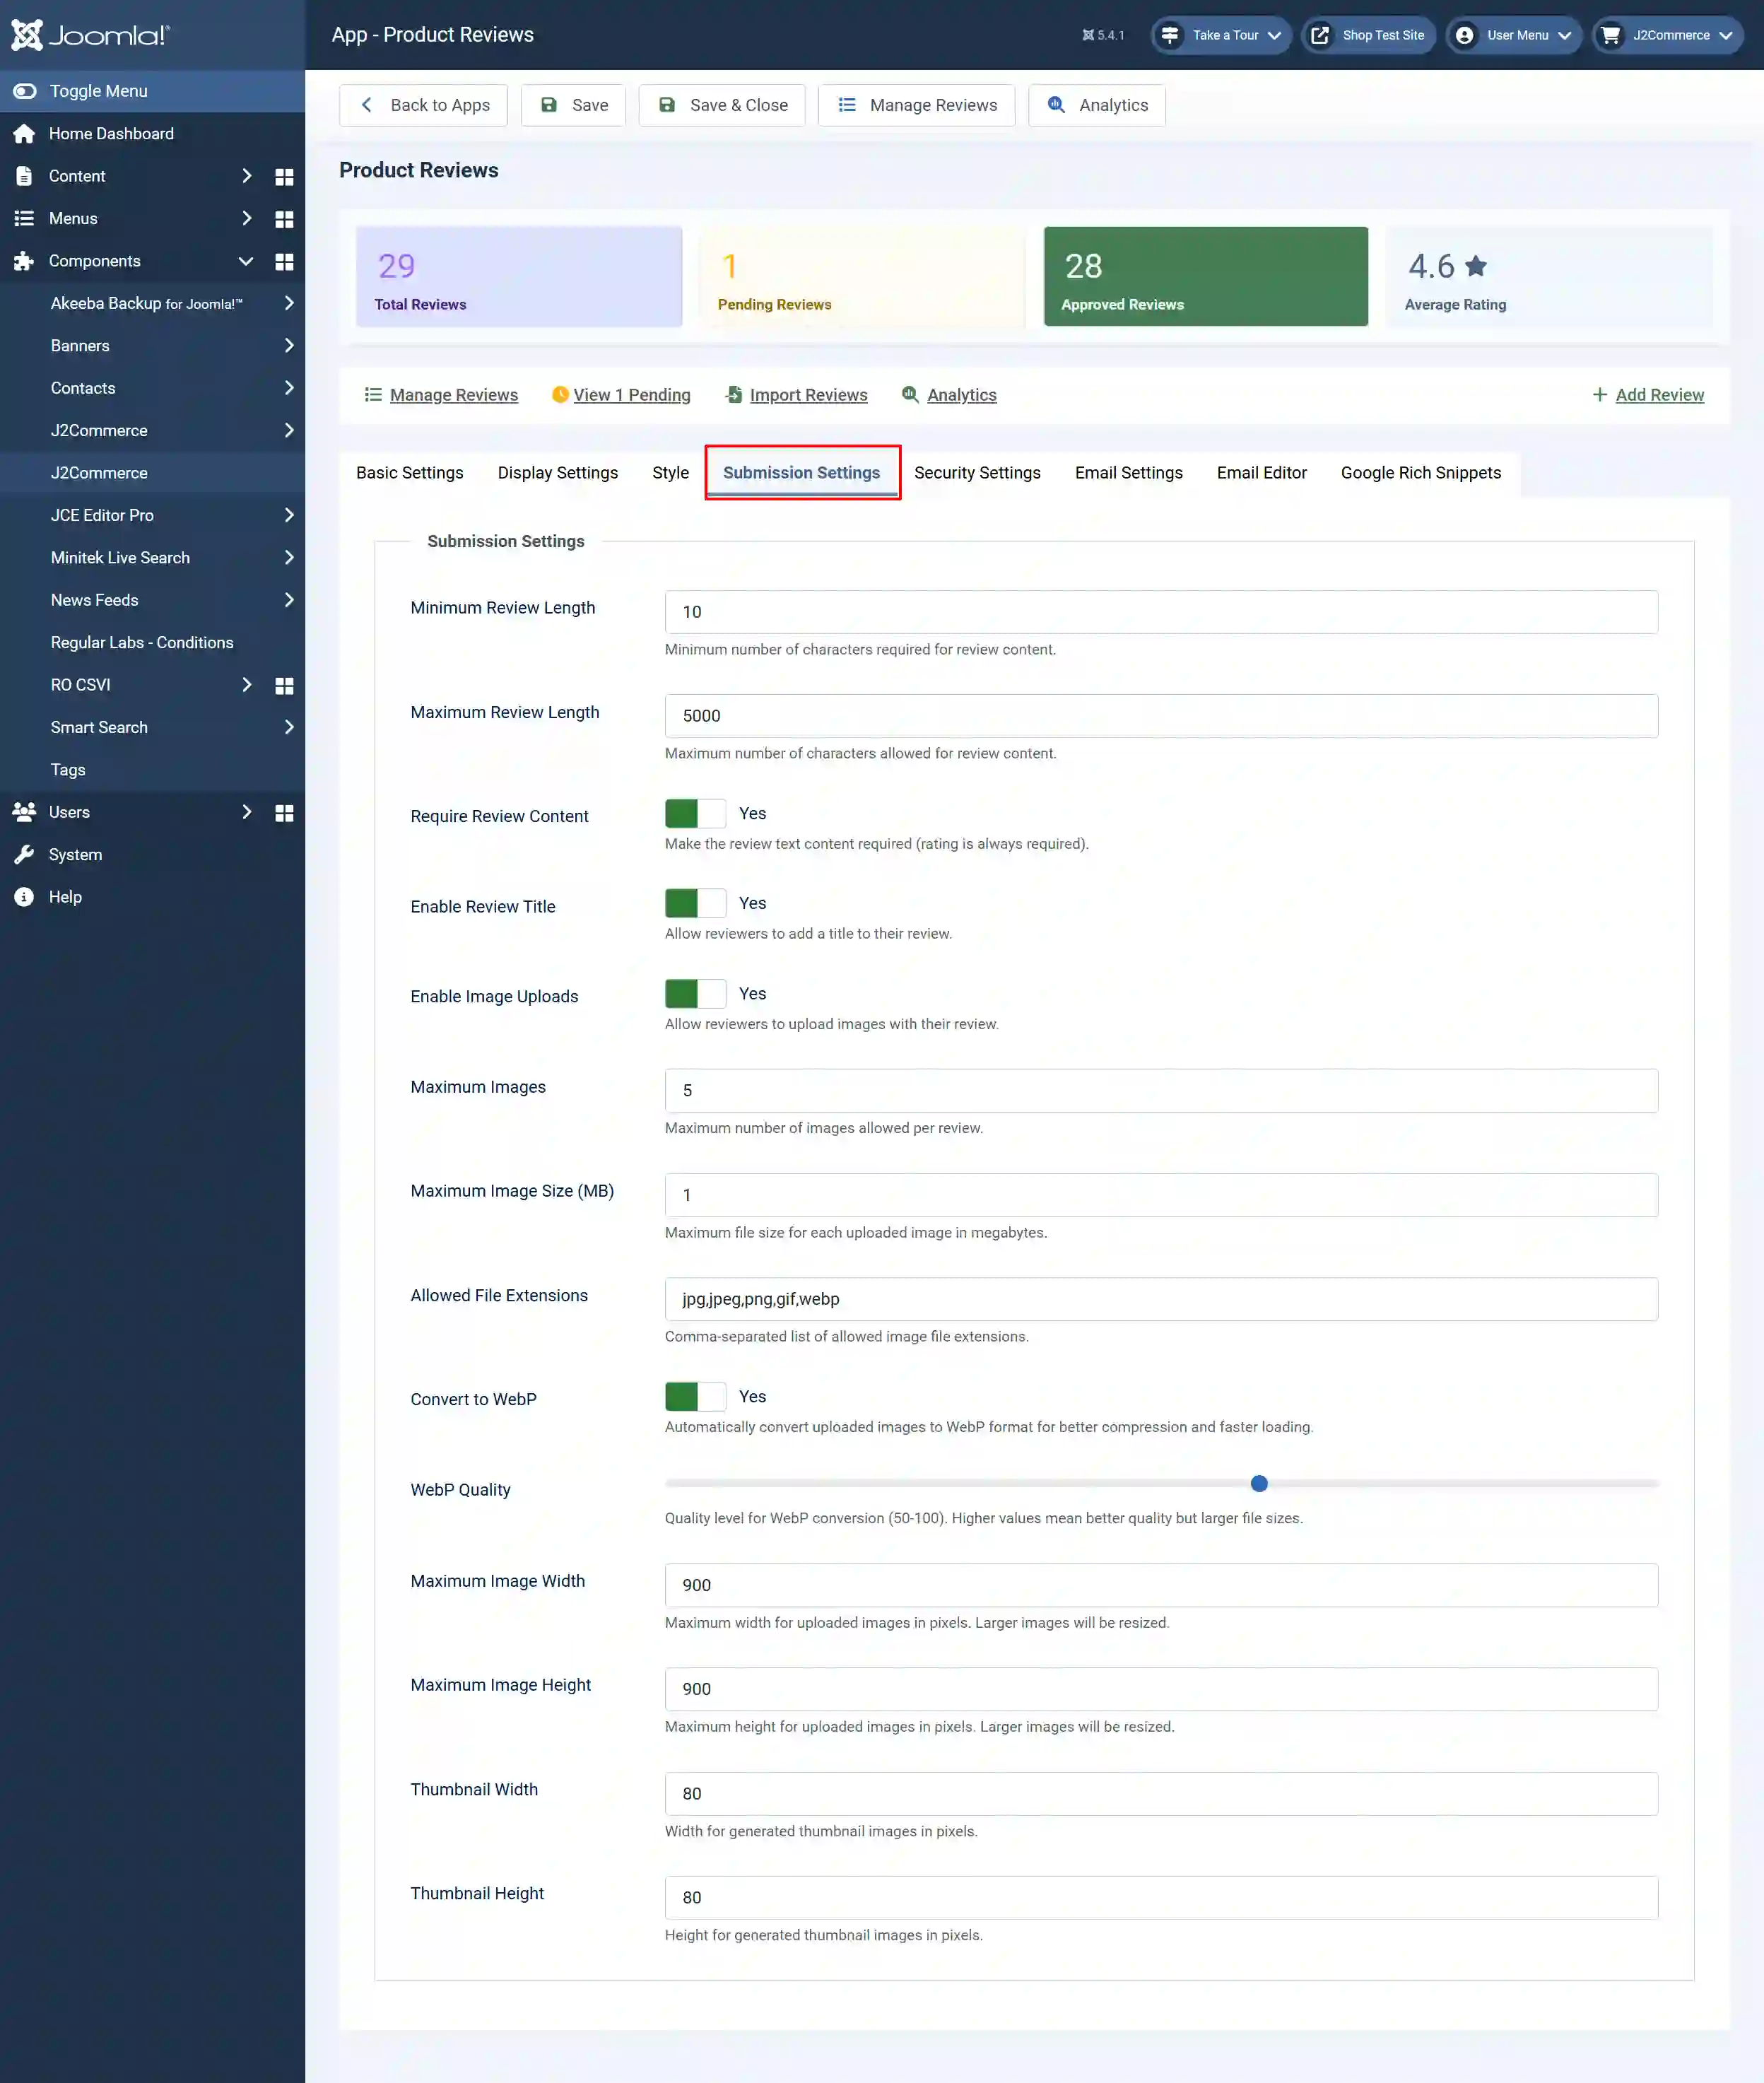
Minimum Review Length: Set the minimum number of characters required for review content.
Maximum Review Length: Set the maximum number of characters allowed for review content.
Require Review Content: Make the review text content required (star rating is always required).
Enable Review Title: Select Yes to allow reviewers to add a title to their review.
Enable Image Uploads: Select Yes to allow reviewers to upload images with their review.
Maximum Images: Set the maximum number of images allowed per review. They can select multiple images at the same time.
Maximum Image Size (MB): Set the maximum file size for each uploaded image in megabytes.
Allowed File Extensions: Comma-separated list of allowed image file extensions. ie: jpg, jpeg, png, gif, webp
Convert to WebP: Select Yes to have the images automatically convert uploaded images to WebP format for better compression and faster loading.
WebP Quality: Move the slider to the left/right to determine the quality level for WebP conversion (50-100). Higher values mean better quality but larger file sizes.
Maximum Image Width: Set the maximum width for uploaded images in pixels. Larger images will be resized.
Maximum Image Height: Set the maximum height for uploaded images in pixels. Larger images will be resized.
Thumbnail Width: Set the width for generated thumbnail images in pixels.
Thumbnail Height: Set the height for generated thumbnail images in pixels.
Security Settings tab
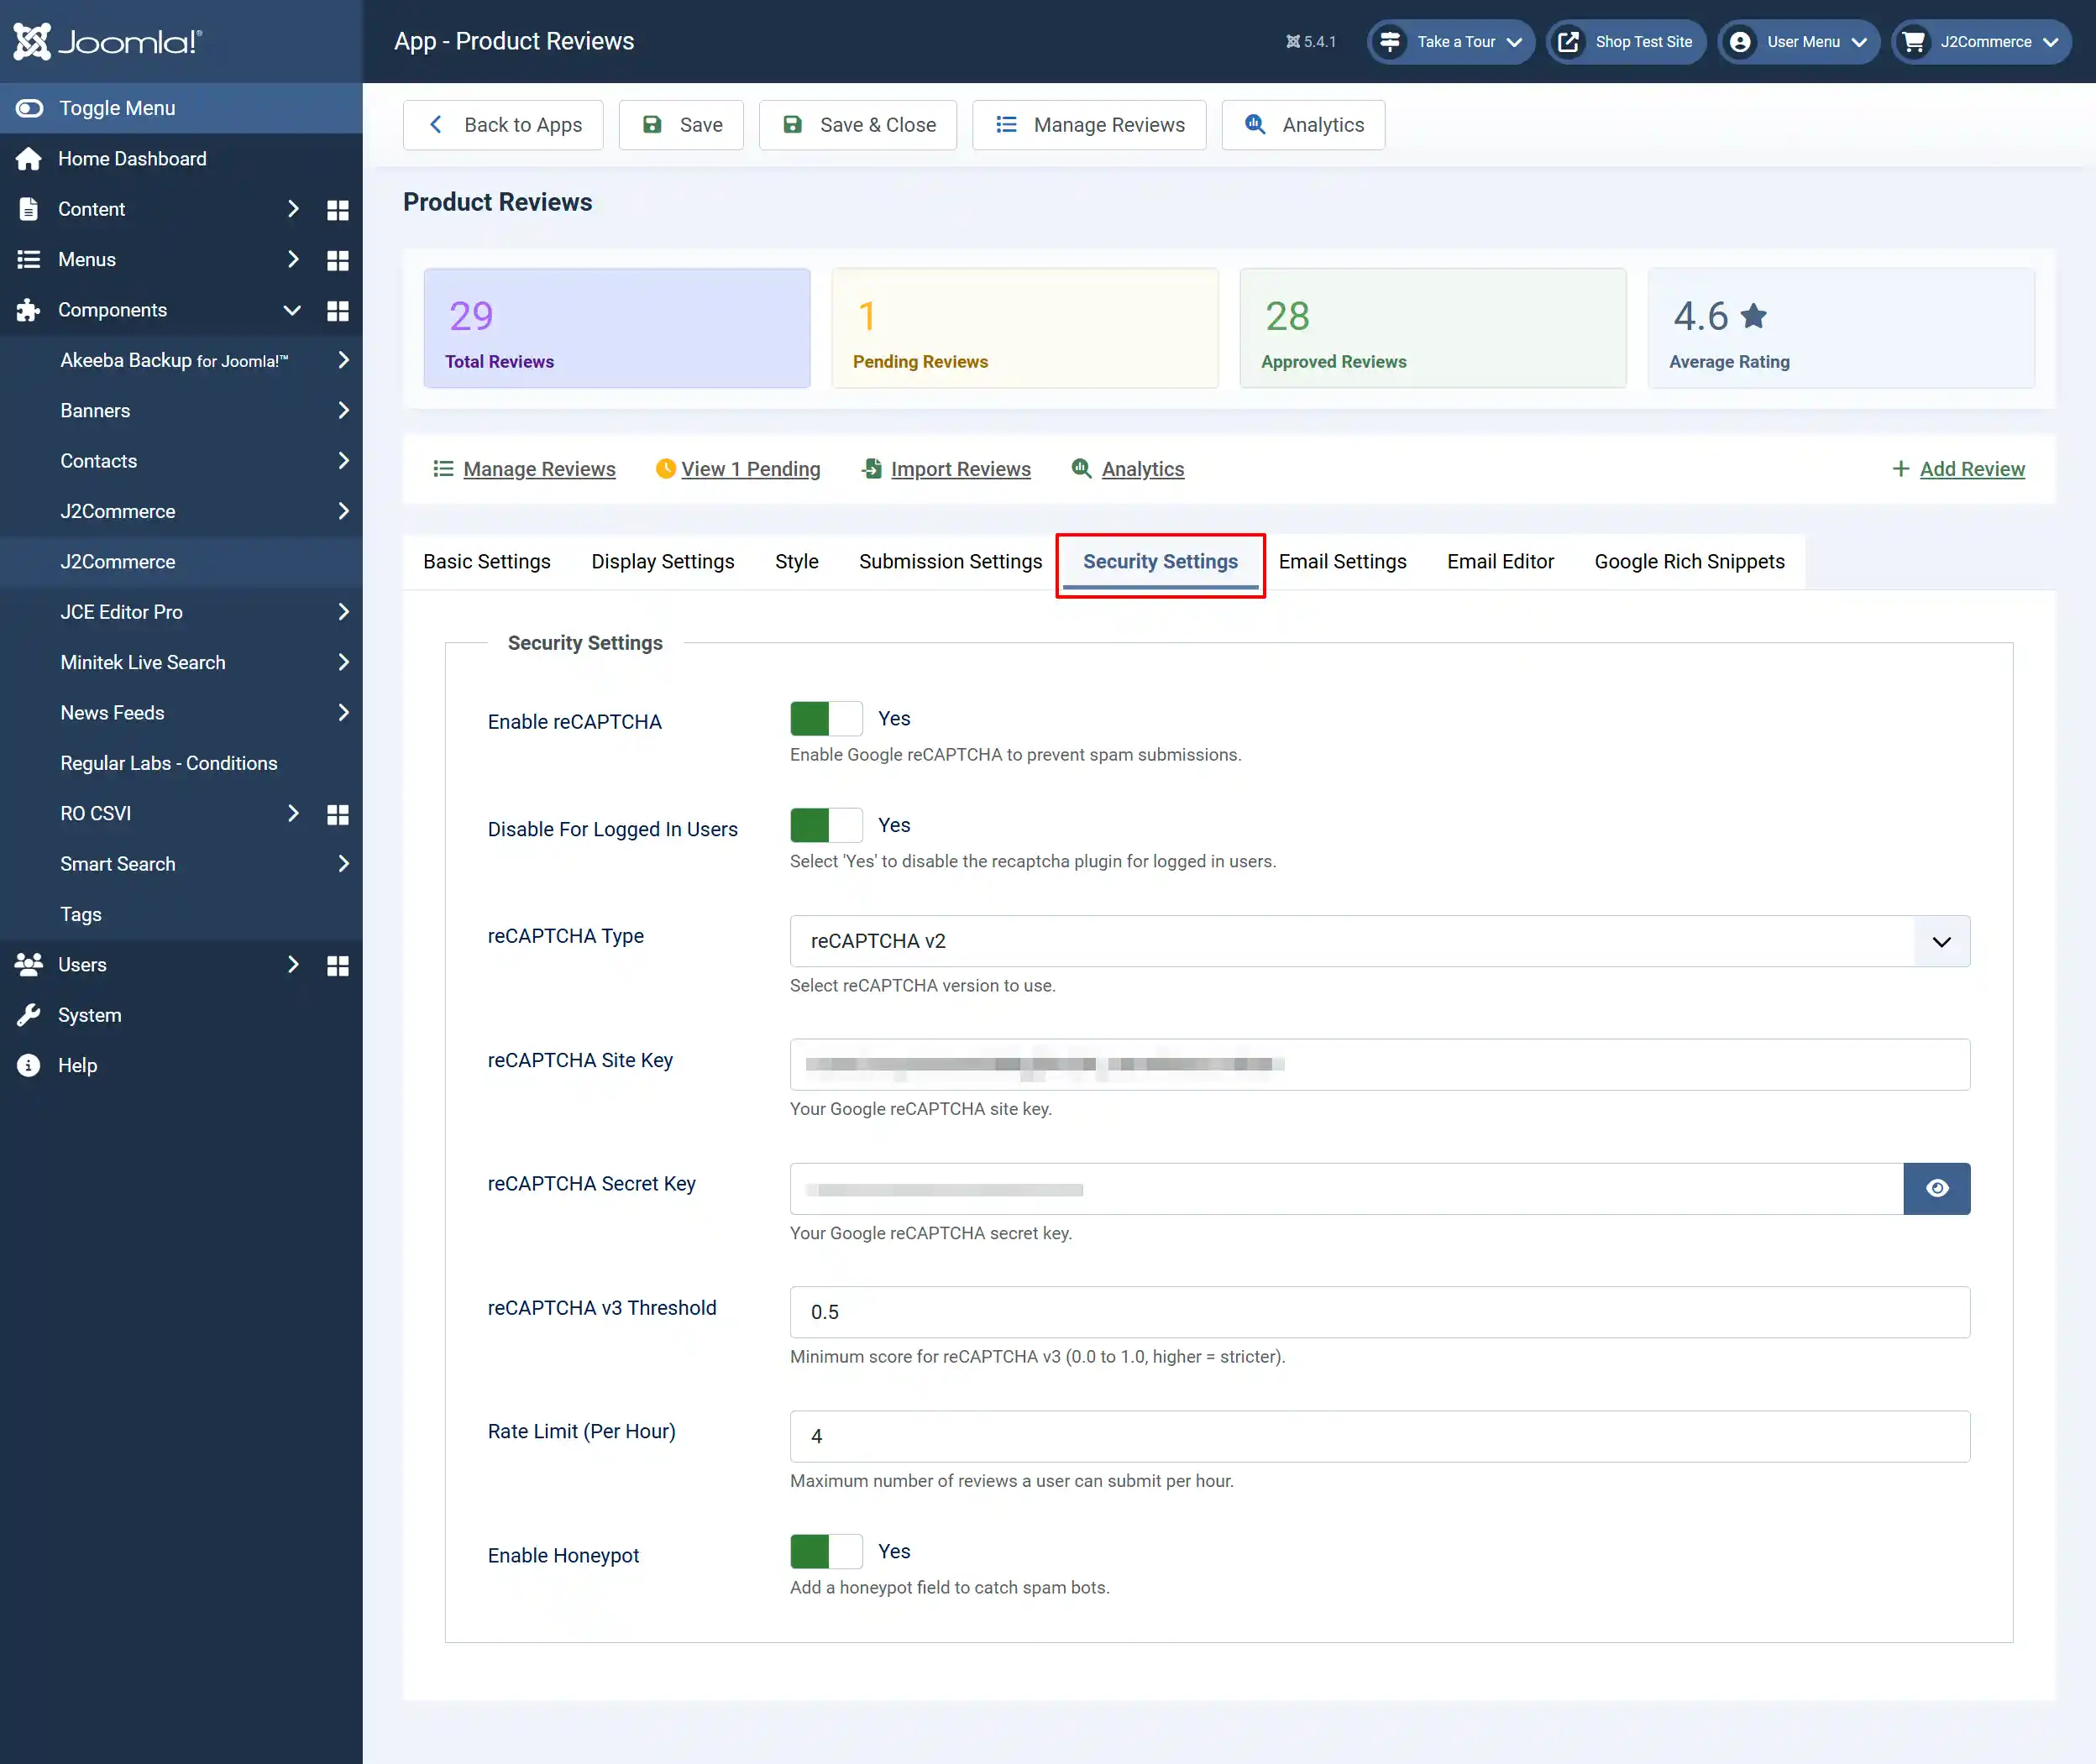
Enable reCAPTCHA: Select Yes to enable Google reCAPTCHA to prevent spam submissions.
Disable For Logged In Users: Select 'Yes' to disable the recaptcha plugin for logged in users.
reCAPTCHA Type: Select reCAPTCHA version to use.
reCAPTCHA Site Key: Your Google reCAPTCHA site key. Go to Cloud.Google.com to sign up for one.
reCAPTCHA Secret Key: Your Google reCAPTCHA secret key.
reCAPTCHA v3 Threshold: Minimum score for reCAPTCHA v3 (0.0 to 1.0, higher = stricter).
Rate Limit (Per Hour): Maximum number of reviews a user can submit per hour.
Enable Honeypot: Add a honeypot field to catch spam bots.
Email Settings tab
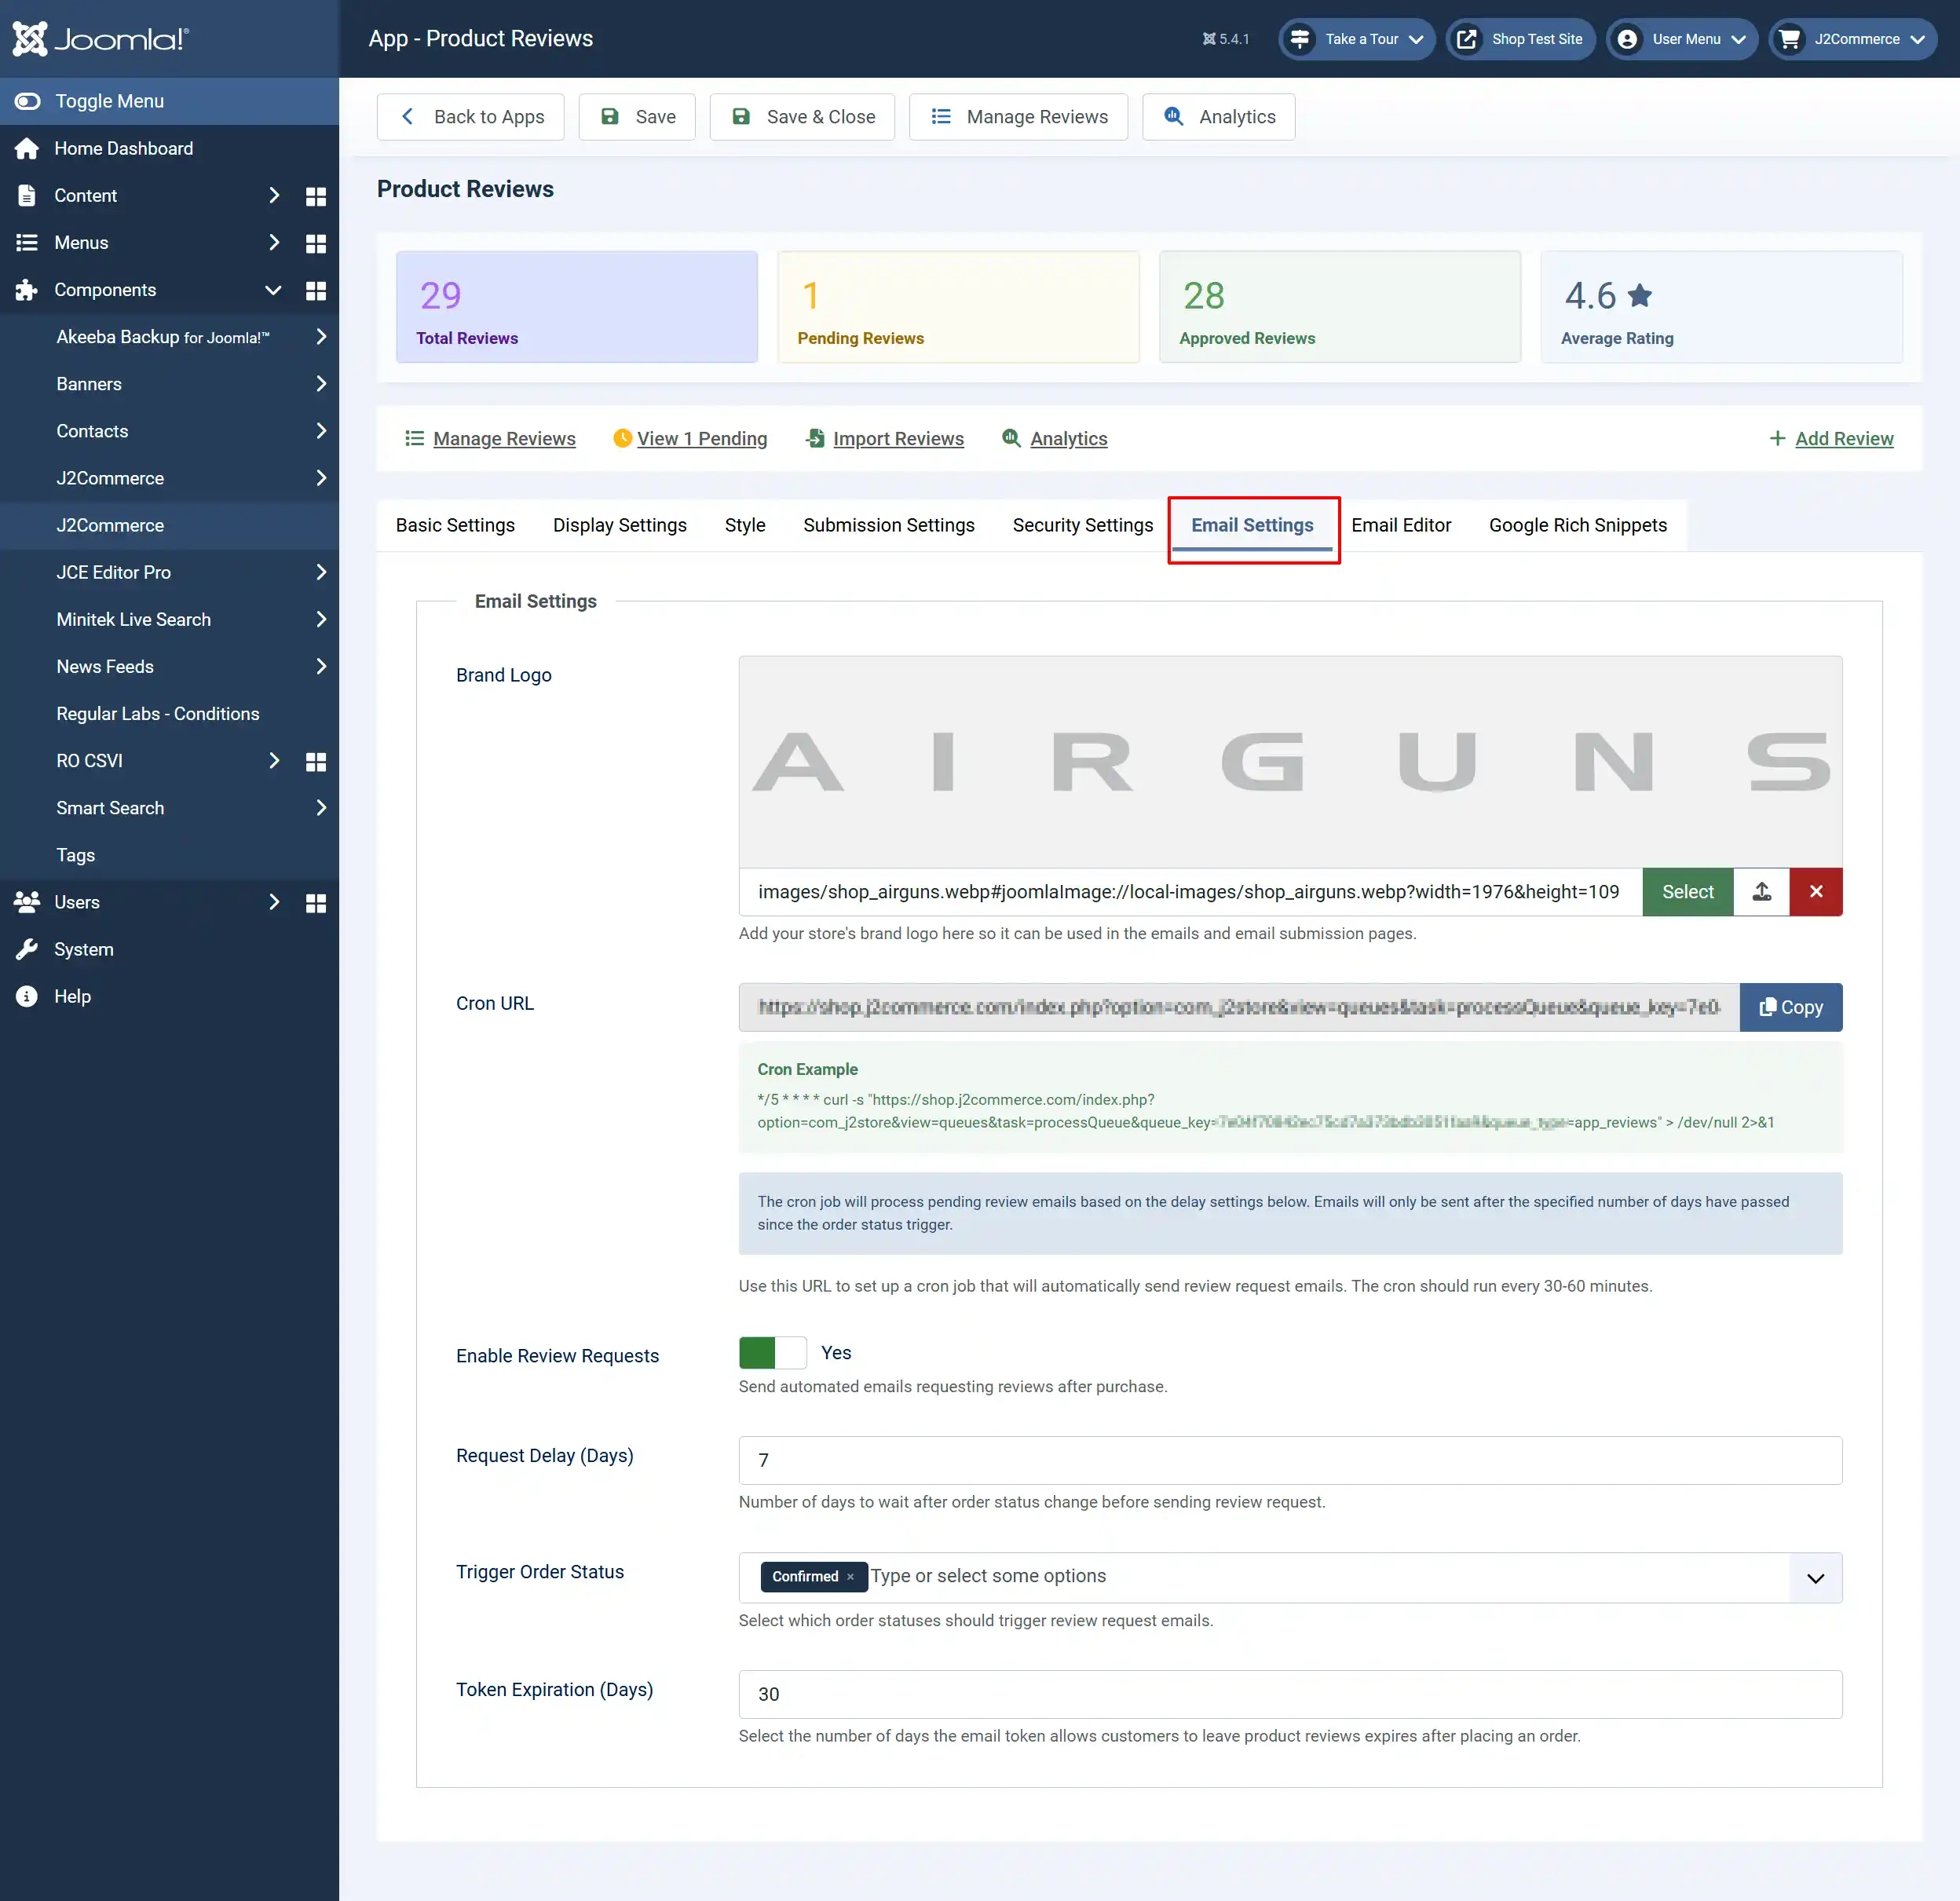
Brand Logo: Add your store's brand logo here so it can be used in the emails and email submission pages. A suggested image size is width=1976 & height=109
Cron URL: Use this URL to set up a cron job that will automatically send review request emails. The cron should run every 30-60 minutes.
How to set a cron job on your server
Visit the Cron Documentation to learn how to set up a cron job on your server.
Enable Review Requests: Select Yes to send automated emails requesting reviews after purchase.
Request Delay (Days): Number of days to wait after order status change before sending review request.
Trigger Order Status: Select which order statuses should trigger review request emails. A recommended order status would be Shipped.
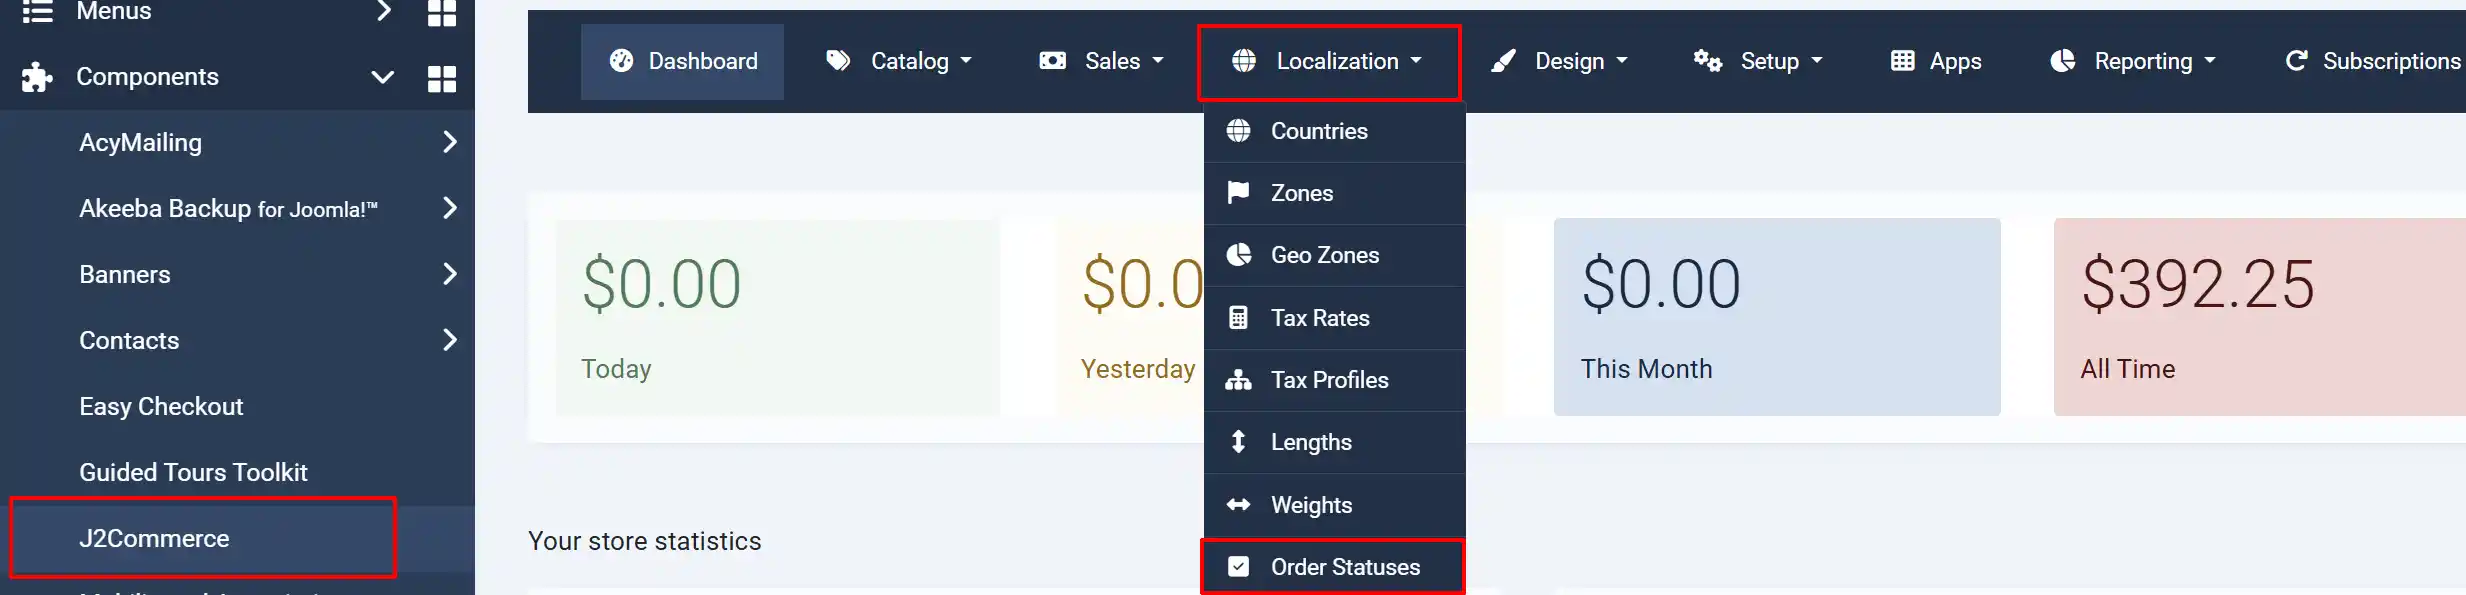
*Note: How to add a new Order Status to the drop-down menu: Open a new tab and go to your J2Commerce > Localization > Order Statuses > New. Once you have created a new status, go back to your app and hit save to refresh it, and it will appear in the drop-down menu. See image below.
Token Expiration (Days): Select the number of days the email token allows customers to leave product reviews, which will expire after placing an order.
Email Editor tab
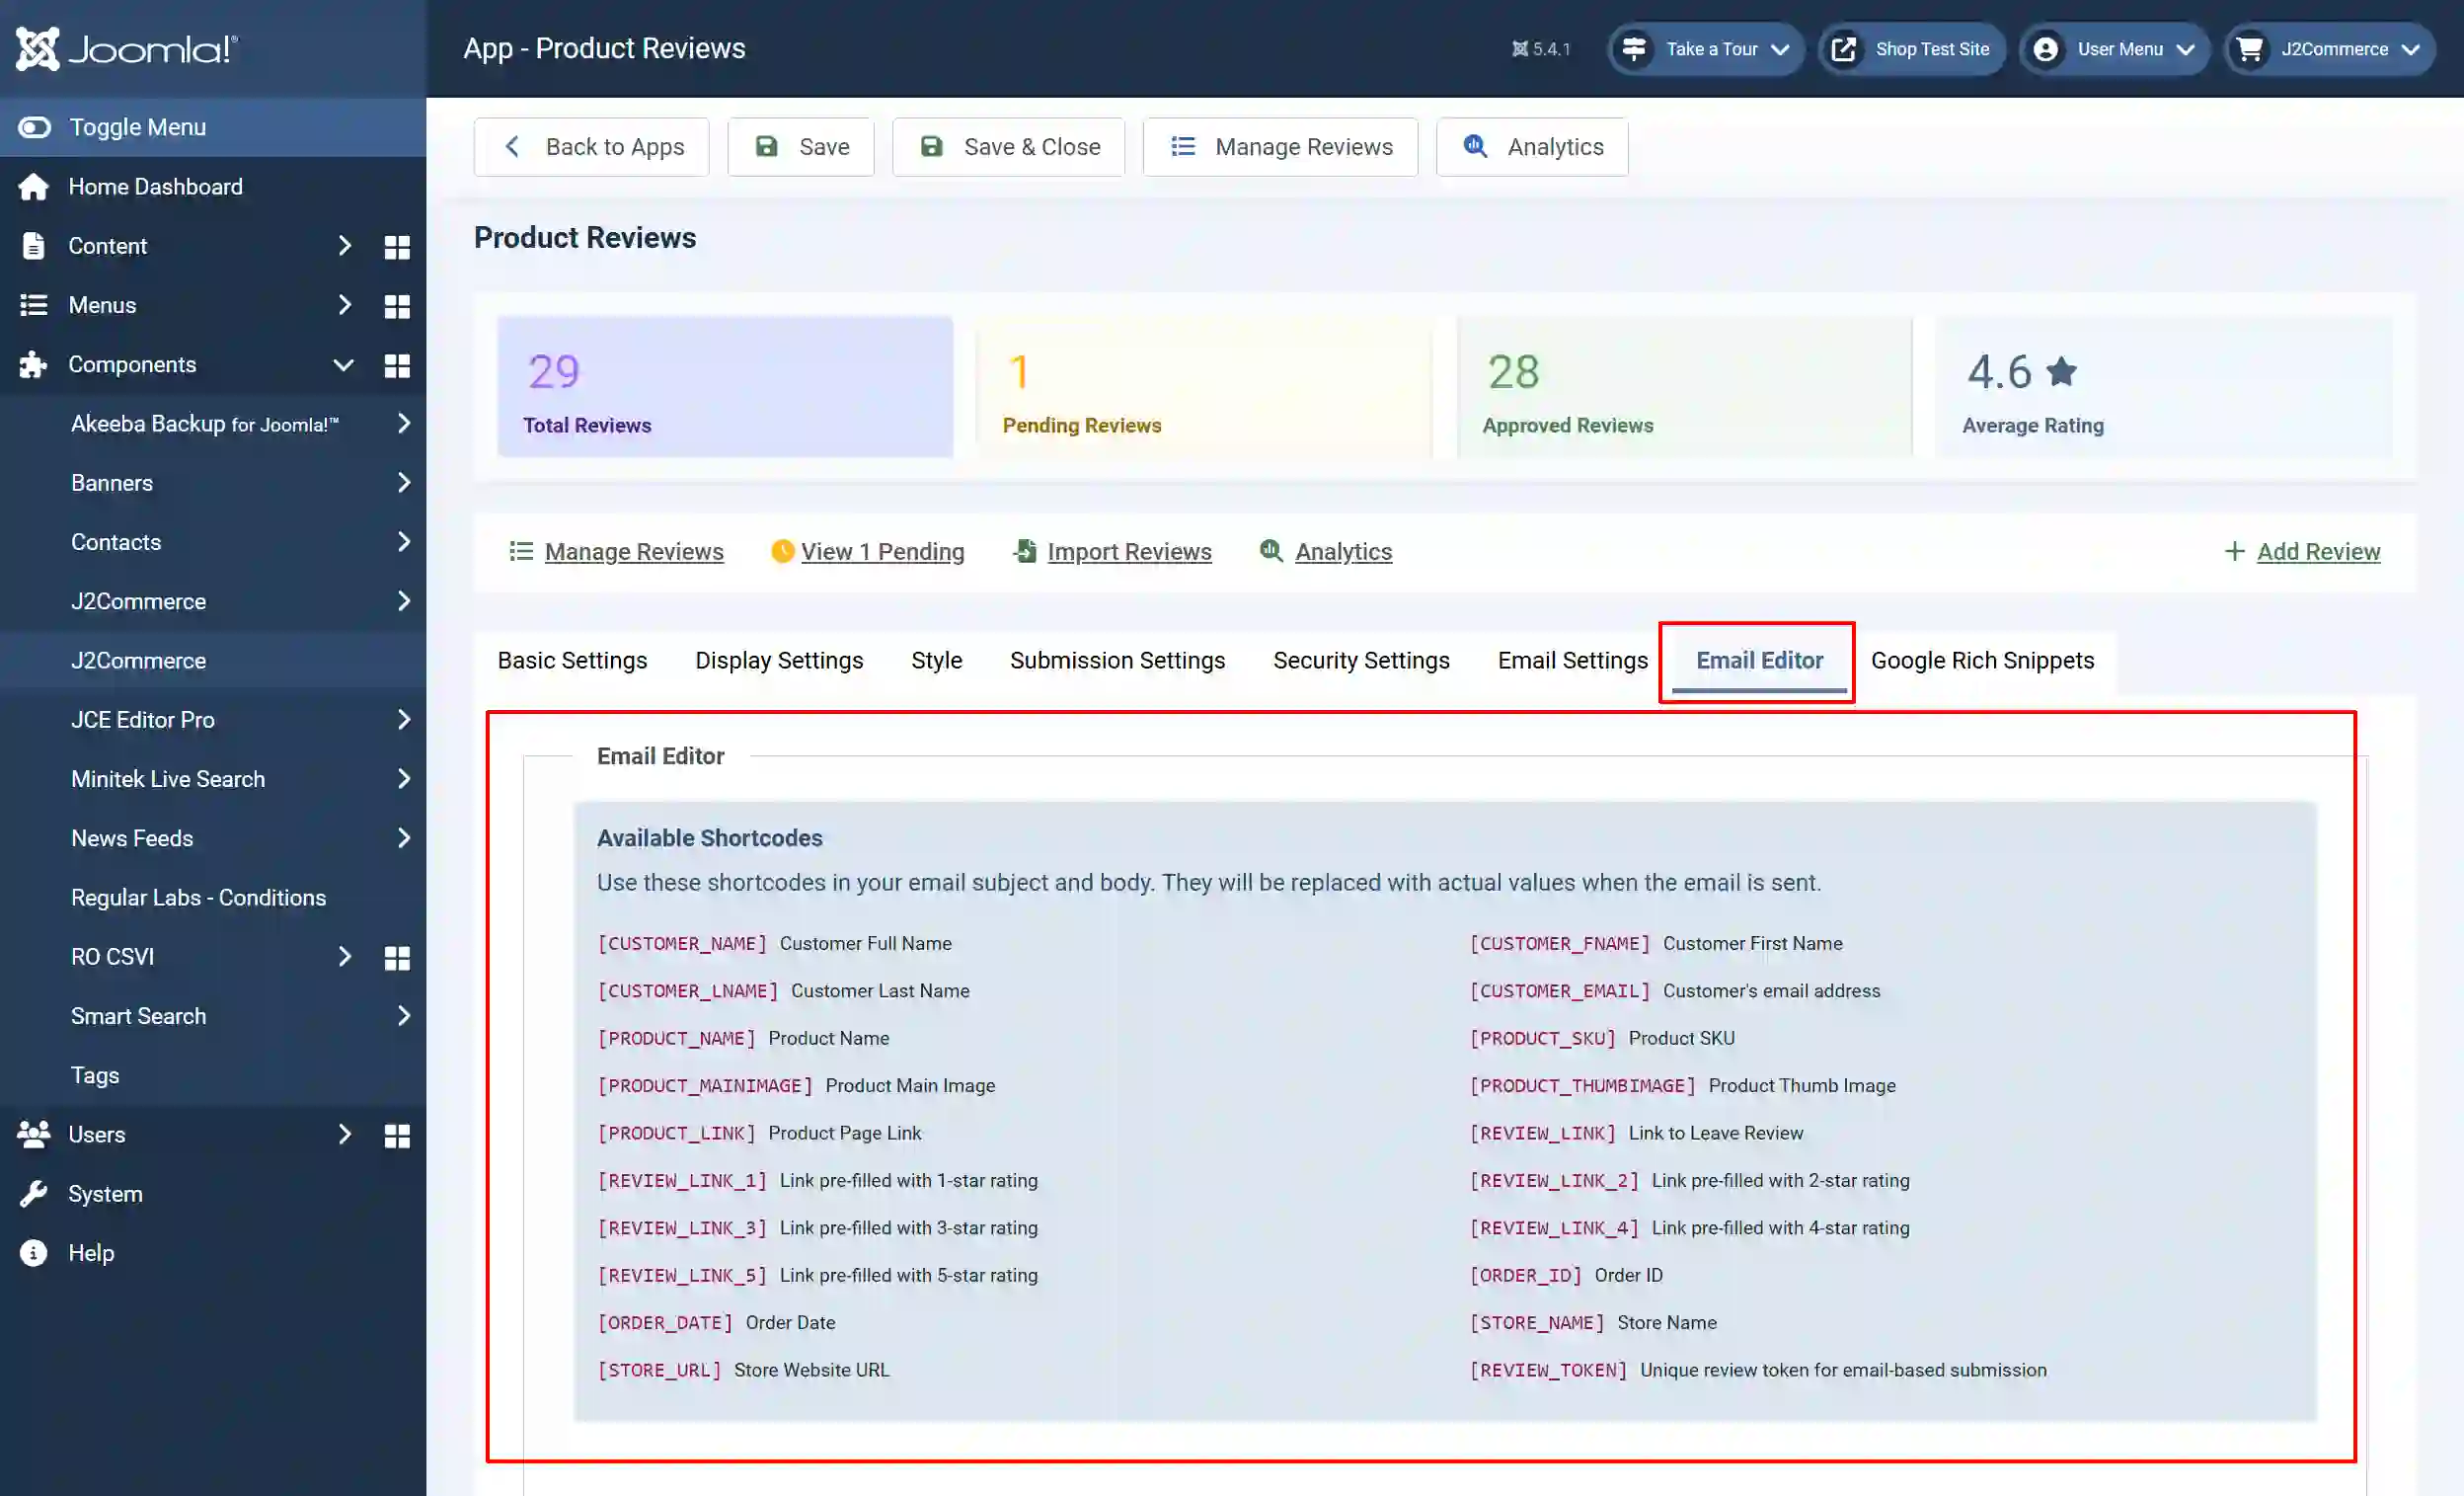
Available Shortcodes: Use these shortcodes in your email subject and body. They will be replaced with actual values when the email is sent.
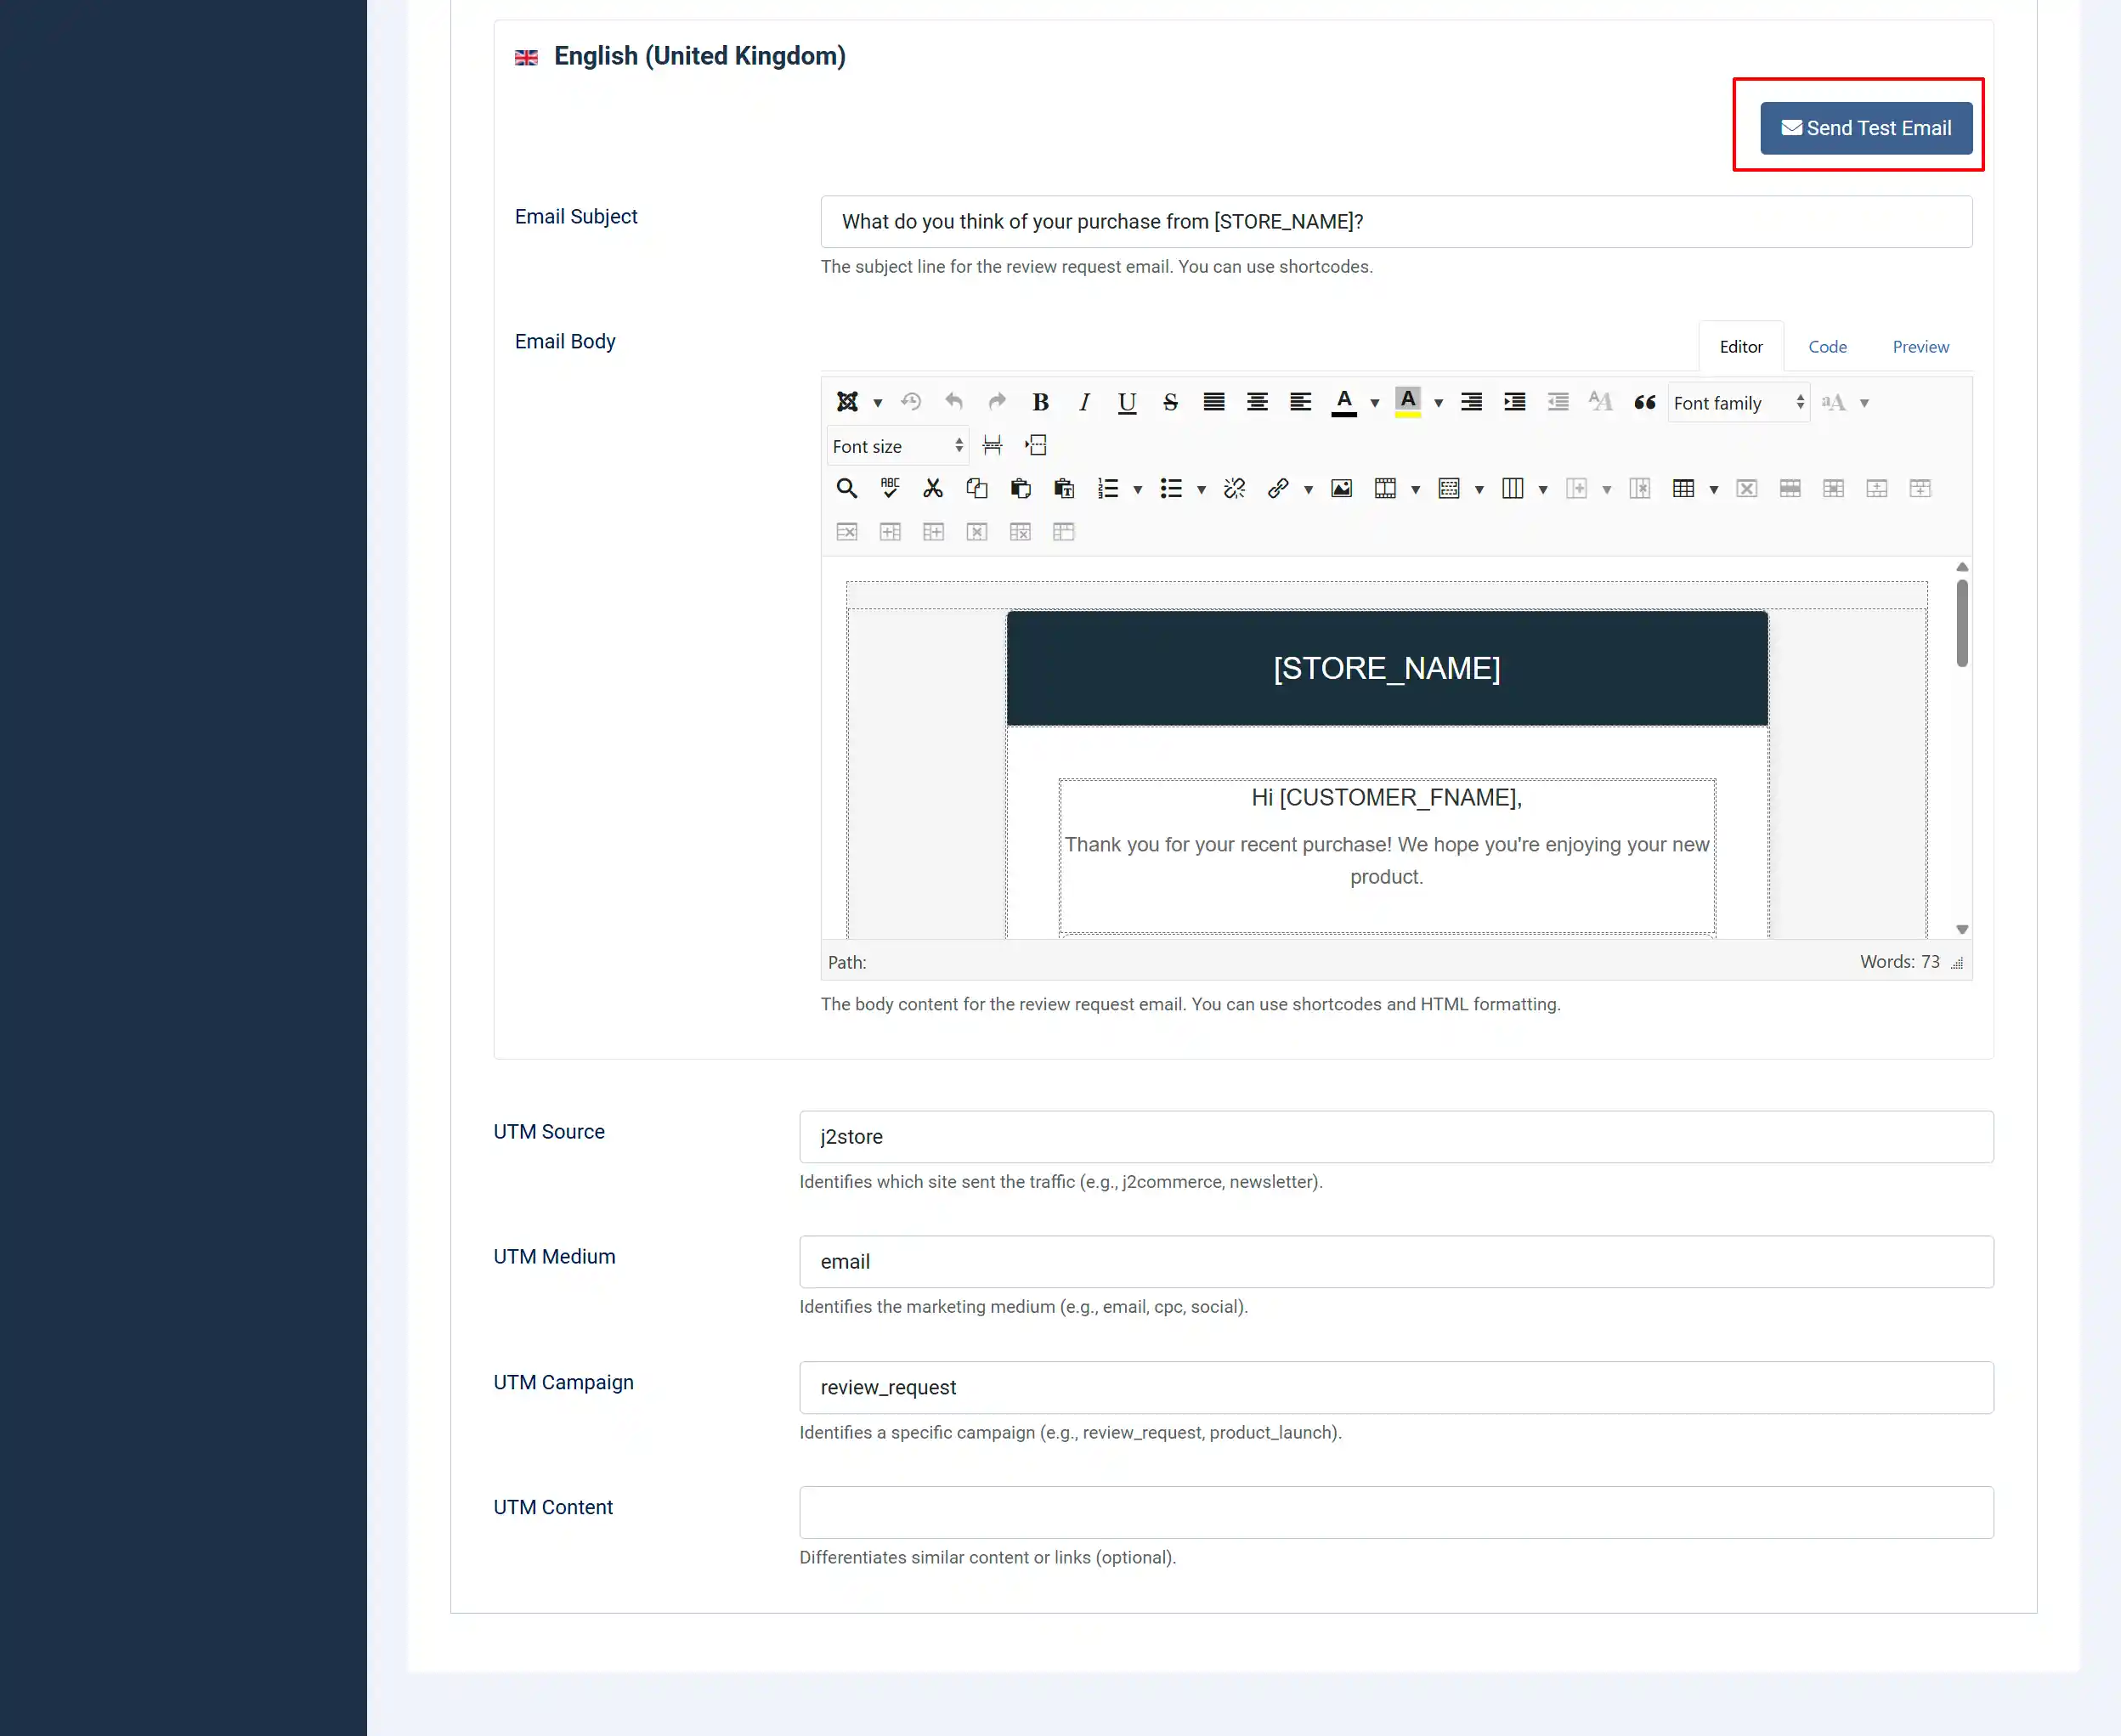
Email Subject: The subject line for the review request email. You can use shortcodes.
Email Body: The body content for the review request email. You can use shortcodes and HTML formatting.
UTM Source: Identifies which site sent the traffic (e.g., j2commerce, newsletter).
UTM Medium: Identifies the marketing medium (e.g., email, cpc, social).
UTM Campaign: Identifies a specific campaign (e.g., review_request, product_launch).
UTM Content: Differentiates similar content or links (optional).
Google Rich Snippets tab
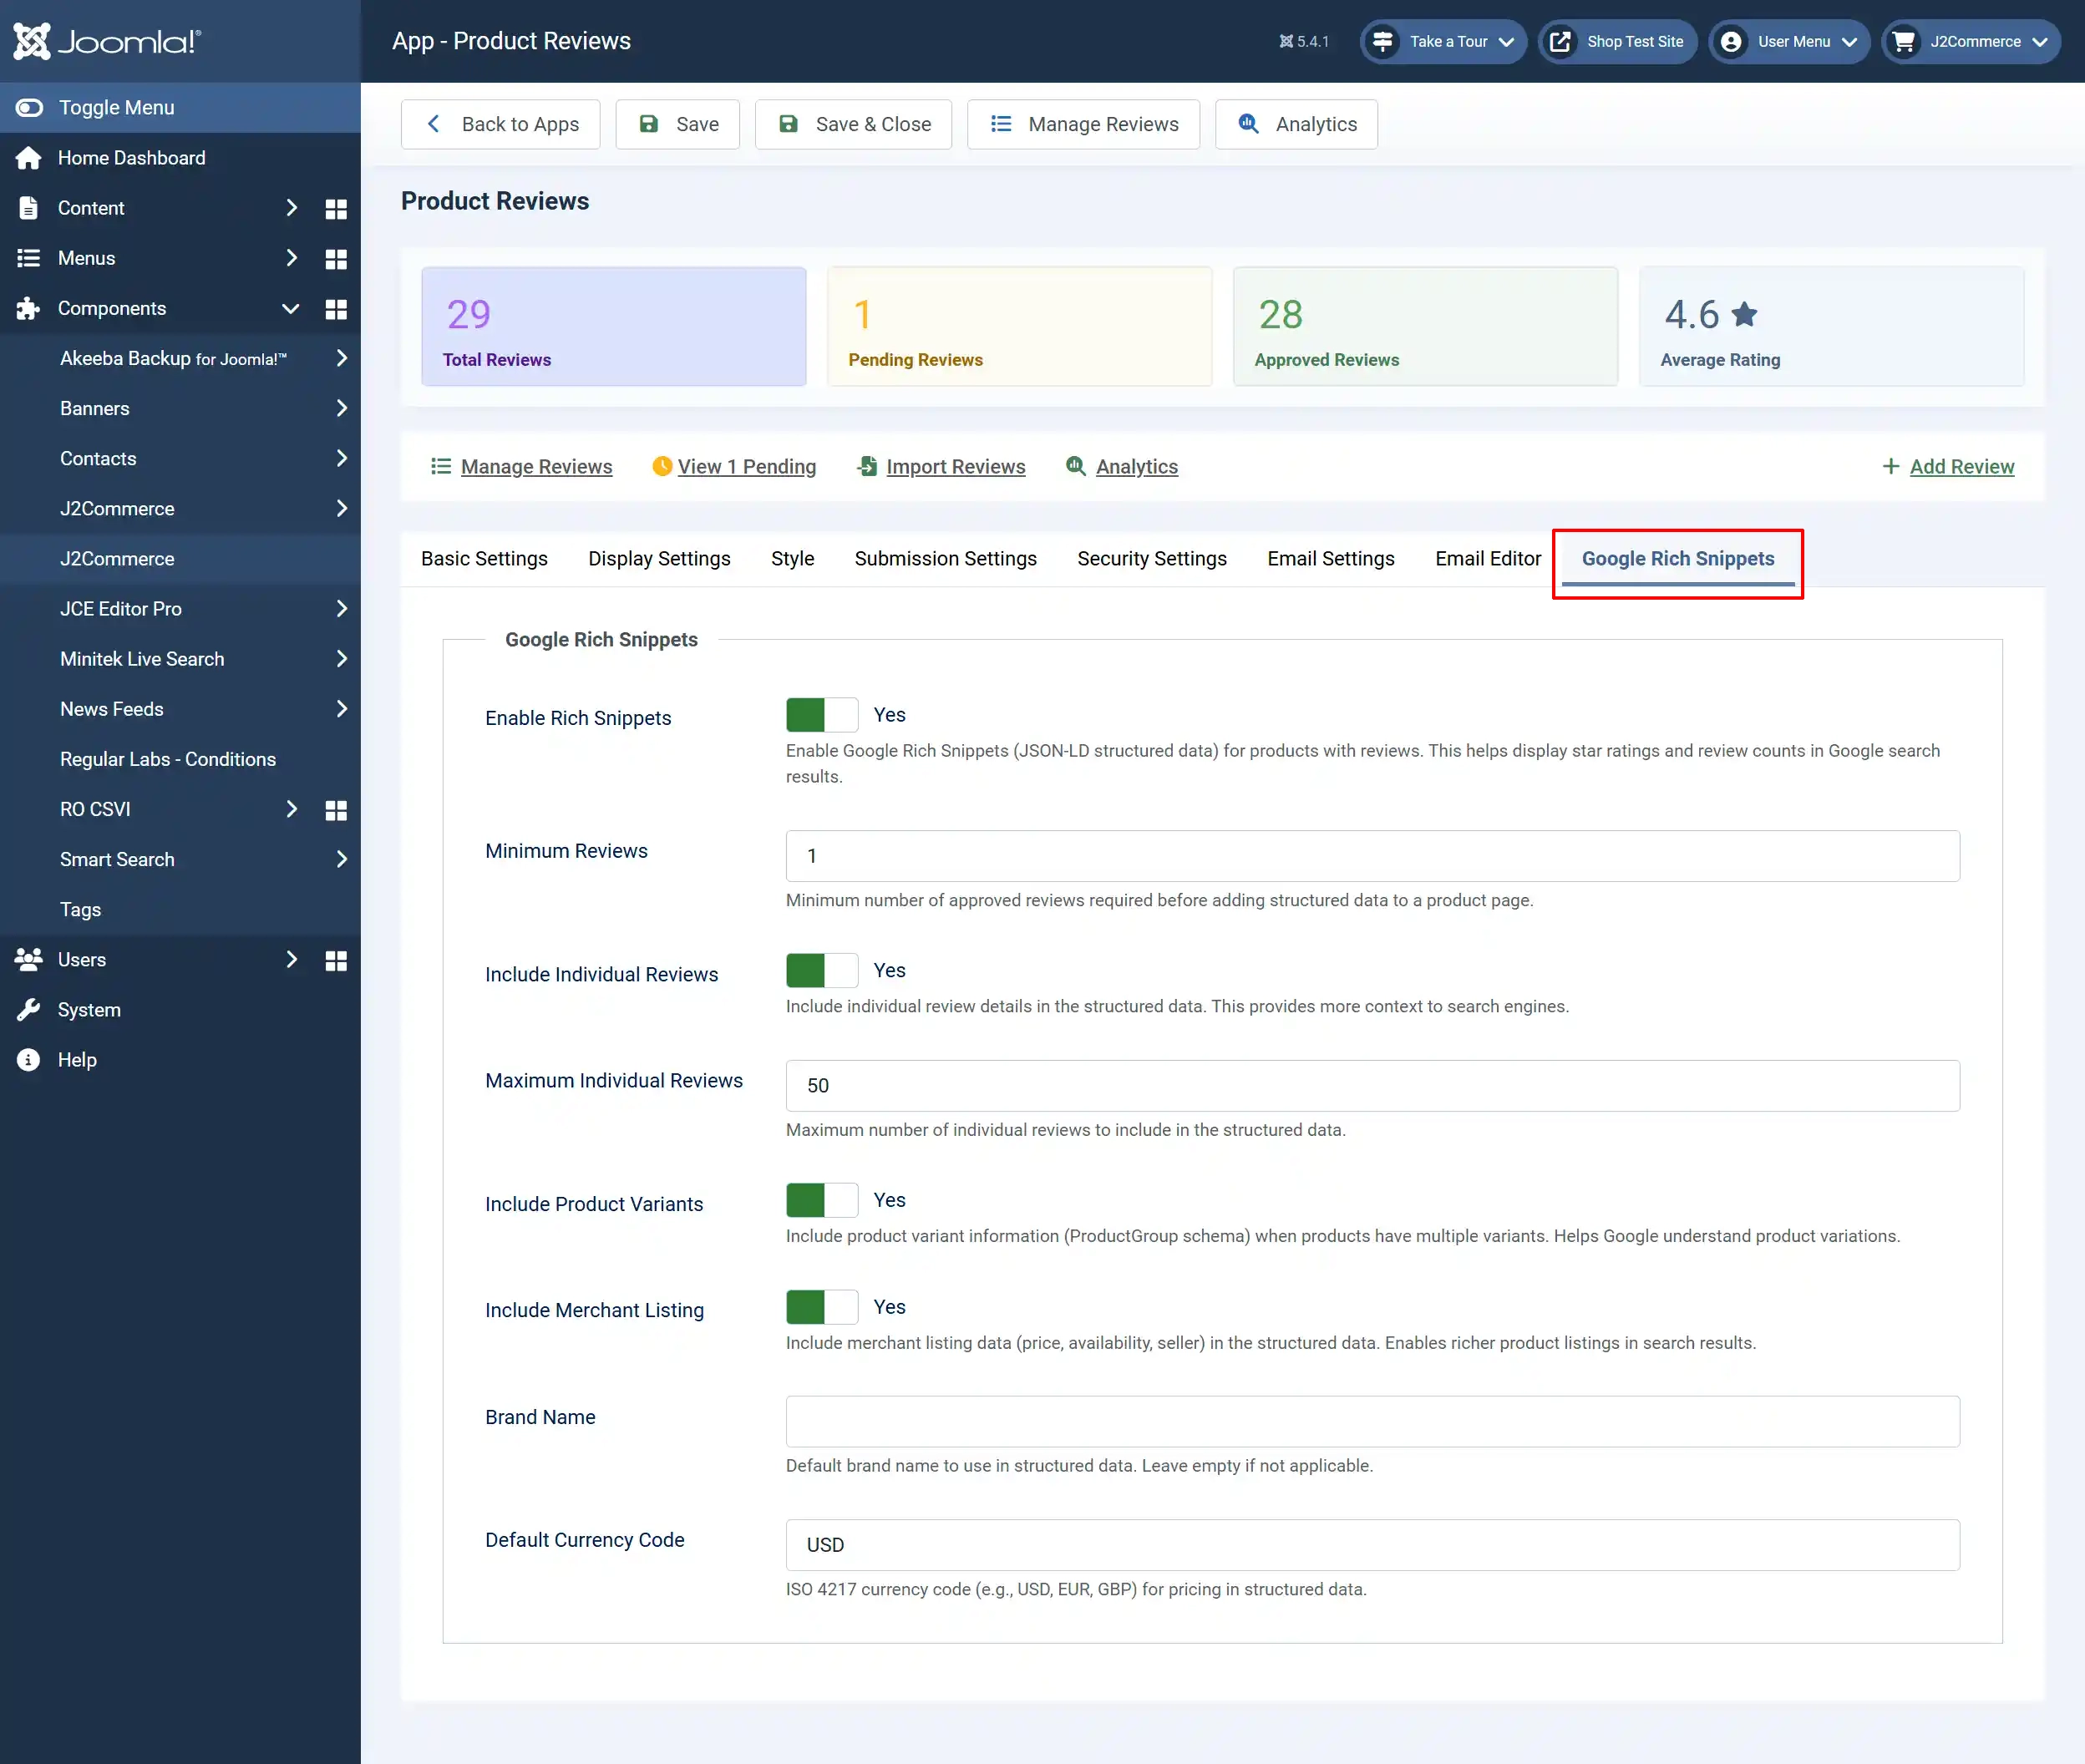
Enable Rich Snippets: Select Yes to enable Google Rich Snippets (JSON-LD structured data) for products with reviews. This helps display star ratings and review counts in Google search results.
Minimum Reviews: Minimum number of approved reviews required before adding structured data to a product page.
Include Individual Reviews: Include individual review details in the structured data. This provides more context to search engines.
Maximum Individual Reviews: Maximum number of individual reviews to include in the structured data.
Include Product Variants: Include product variant information (ProductGroup schema) when products have multiple variants. Helps Google understand product variations.
Include Merchant Listing: Include merchant listing data (price, availability, seller) in the structured data. Enables richer product listings in search results.
Brand Name: Default brand name to use in structured data. Leave empty if not applicable.
Default Currency Code: ISO 4217 currency code (e.g., USD, EUR, GBP) for pricing in structured data.
Manage Reviews tab
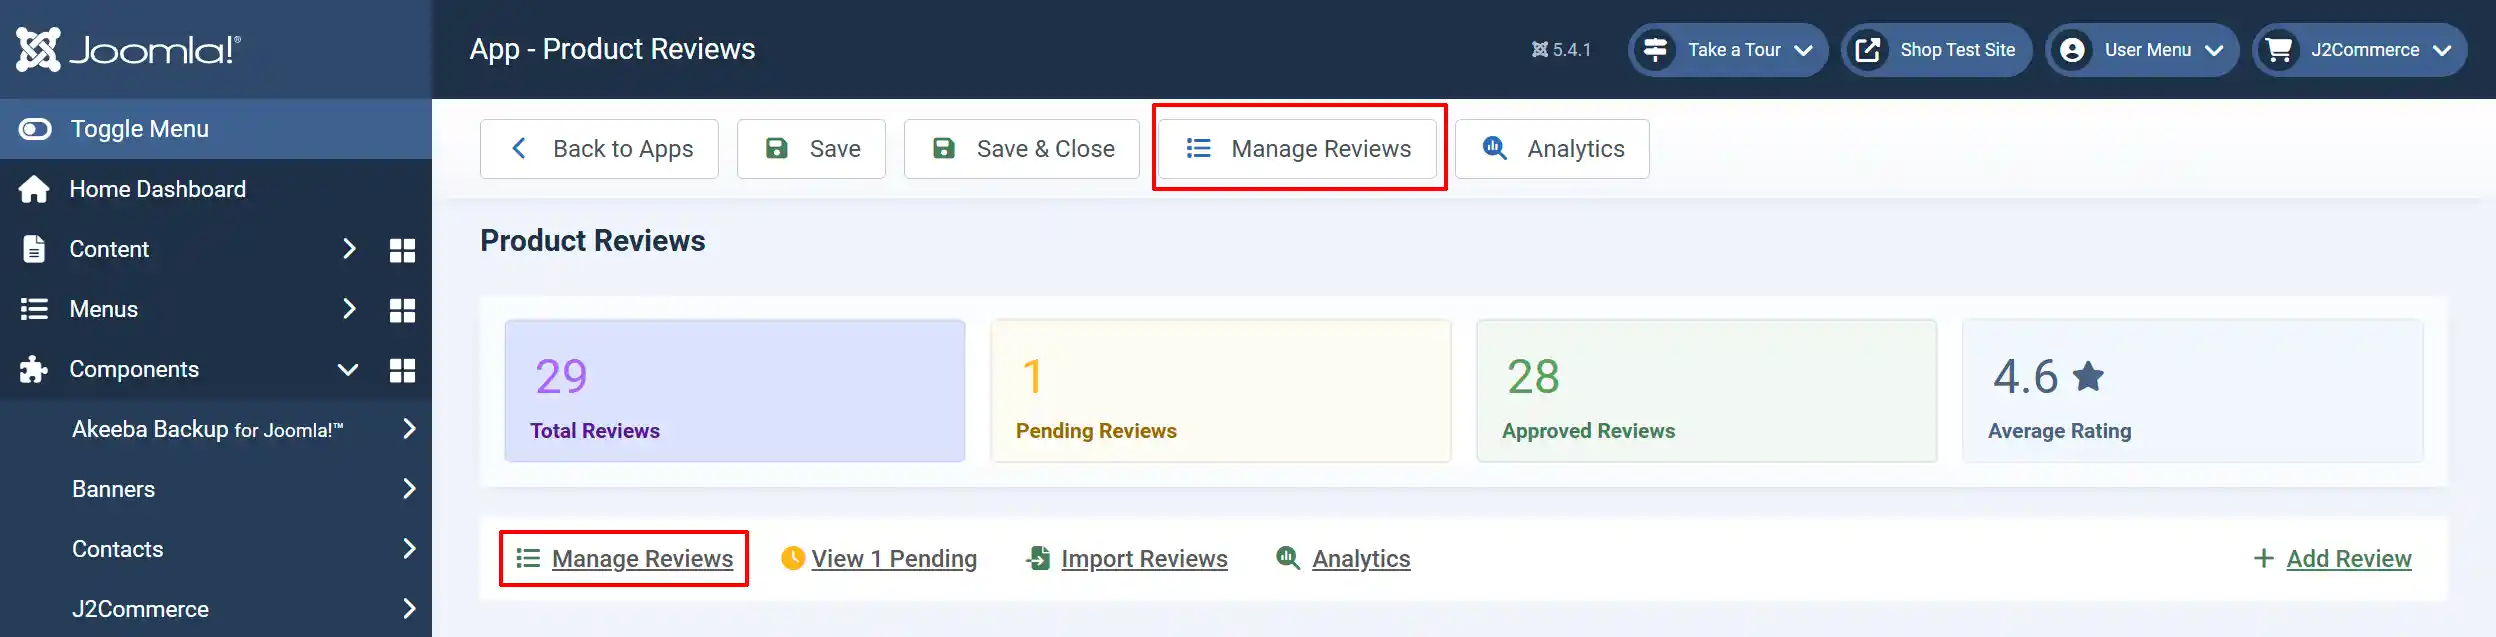
This section allows you to view and edit all of the reviews on one page.
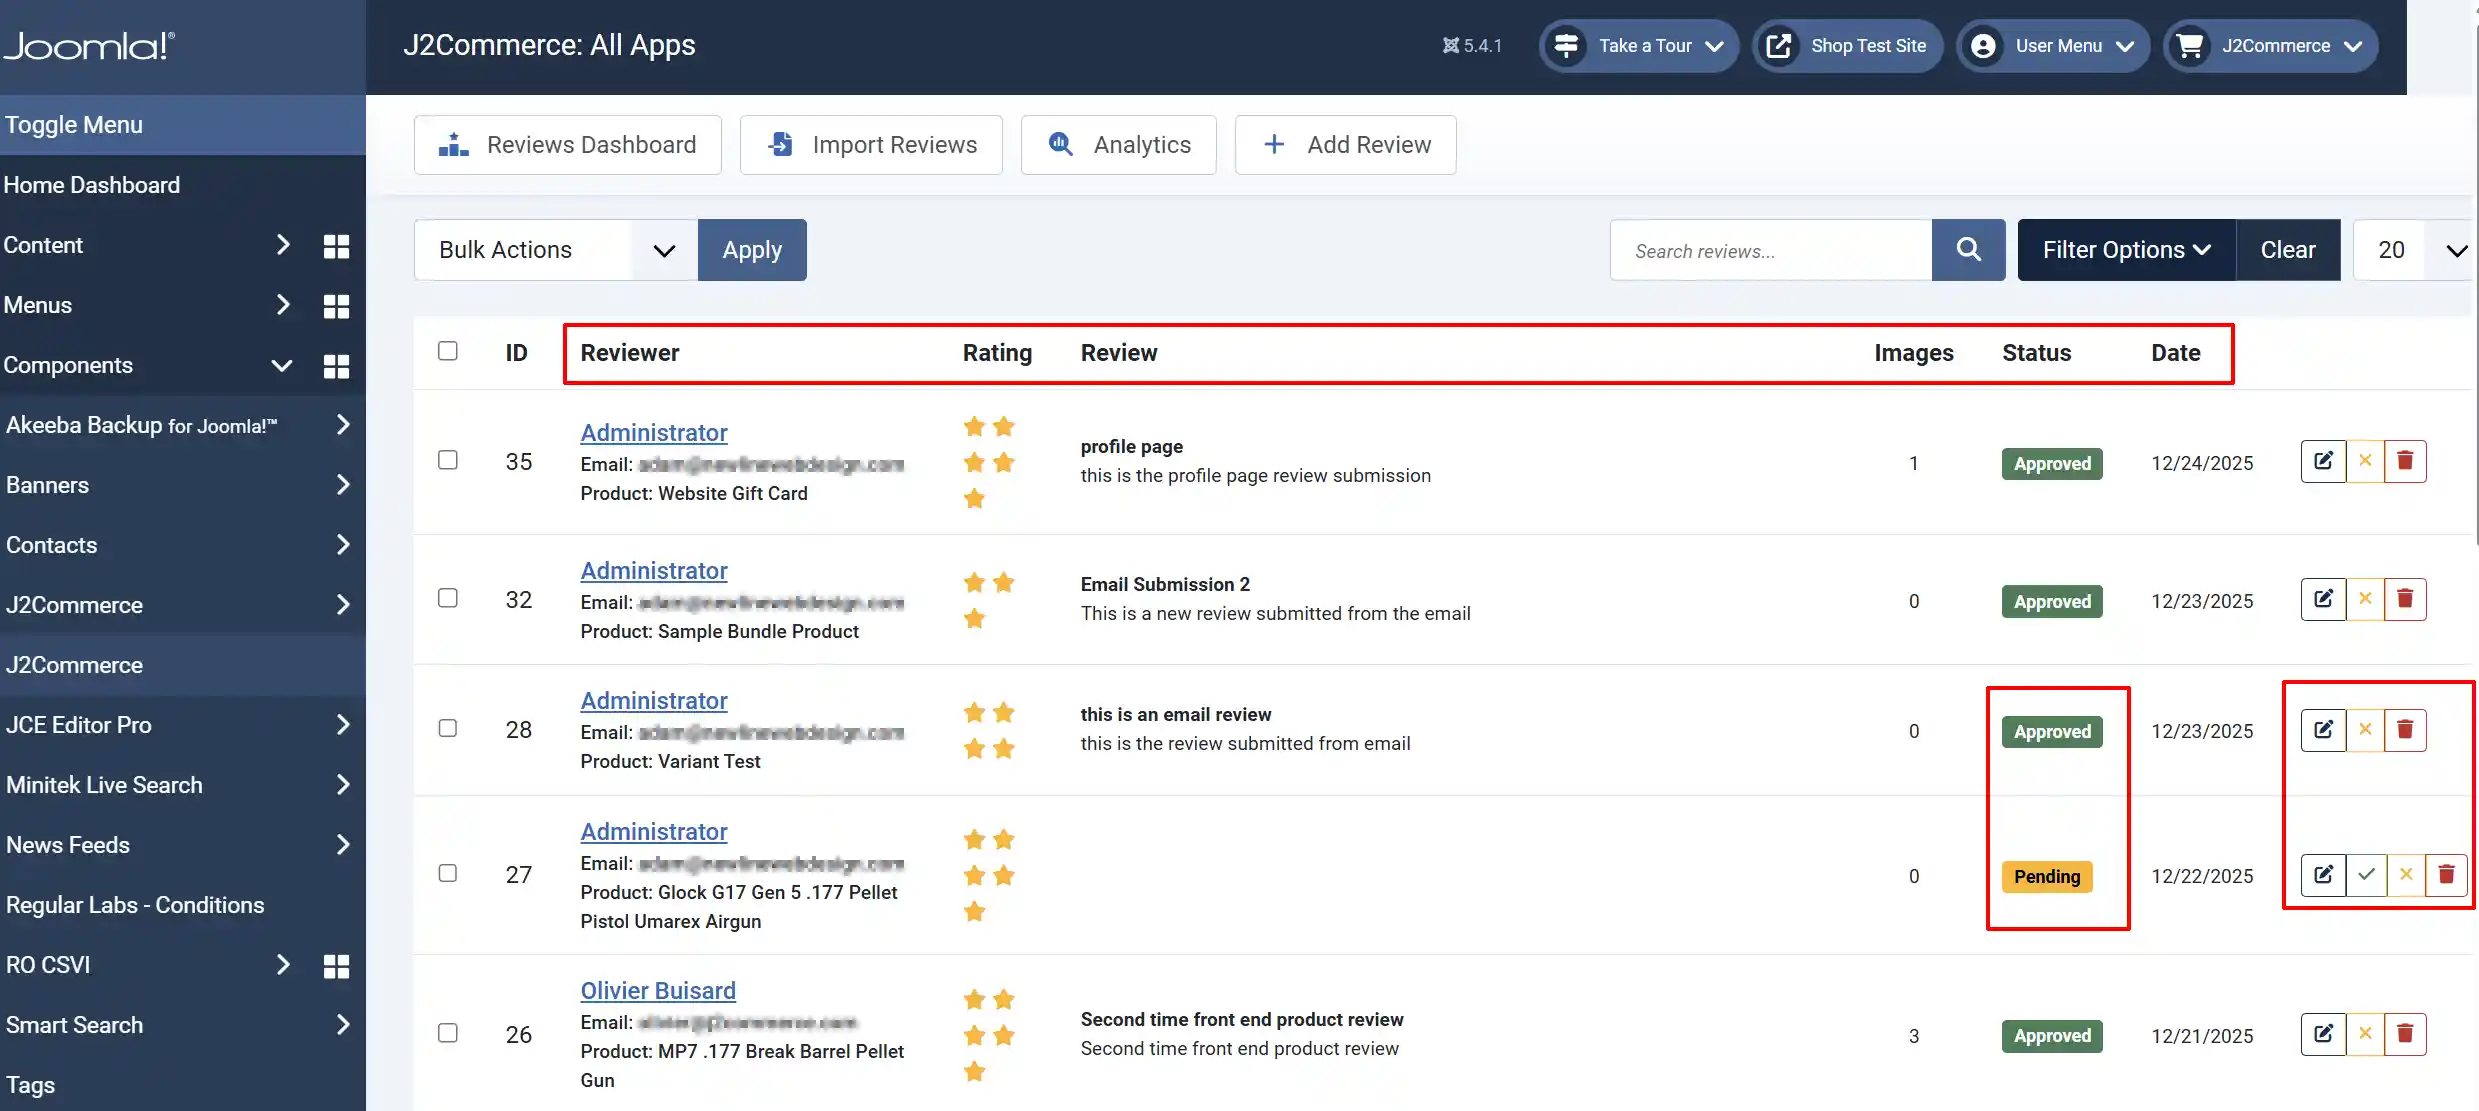
Reviewer: View the name, email and product name
Rating: How many stars they gave
Review: The review they wrote
Images: If they attached any images with their review and how many were uploaded
Status: The Status of the review.
Date: The date the review was submitted
Last Tab: Here you can Edit, Reject, or Delete the review. If the review status is Pending, the Approve option will appear
View Pending tab
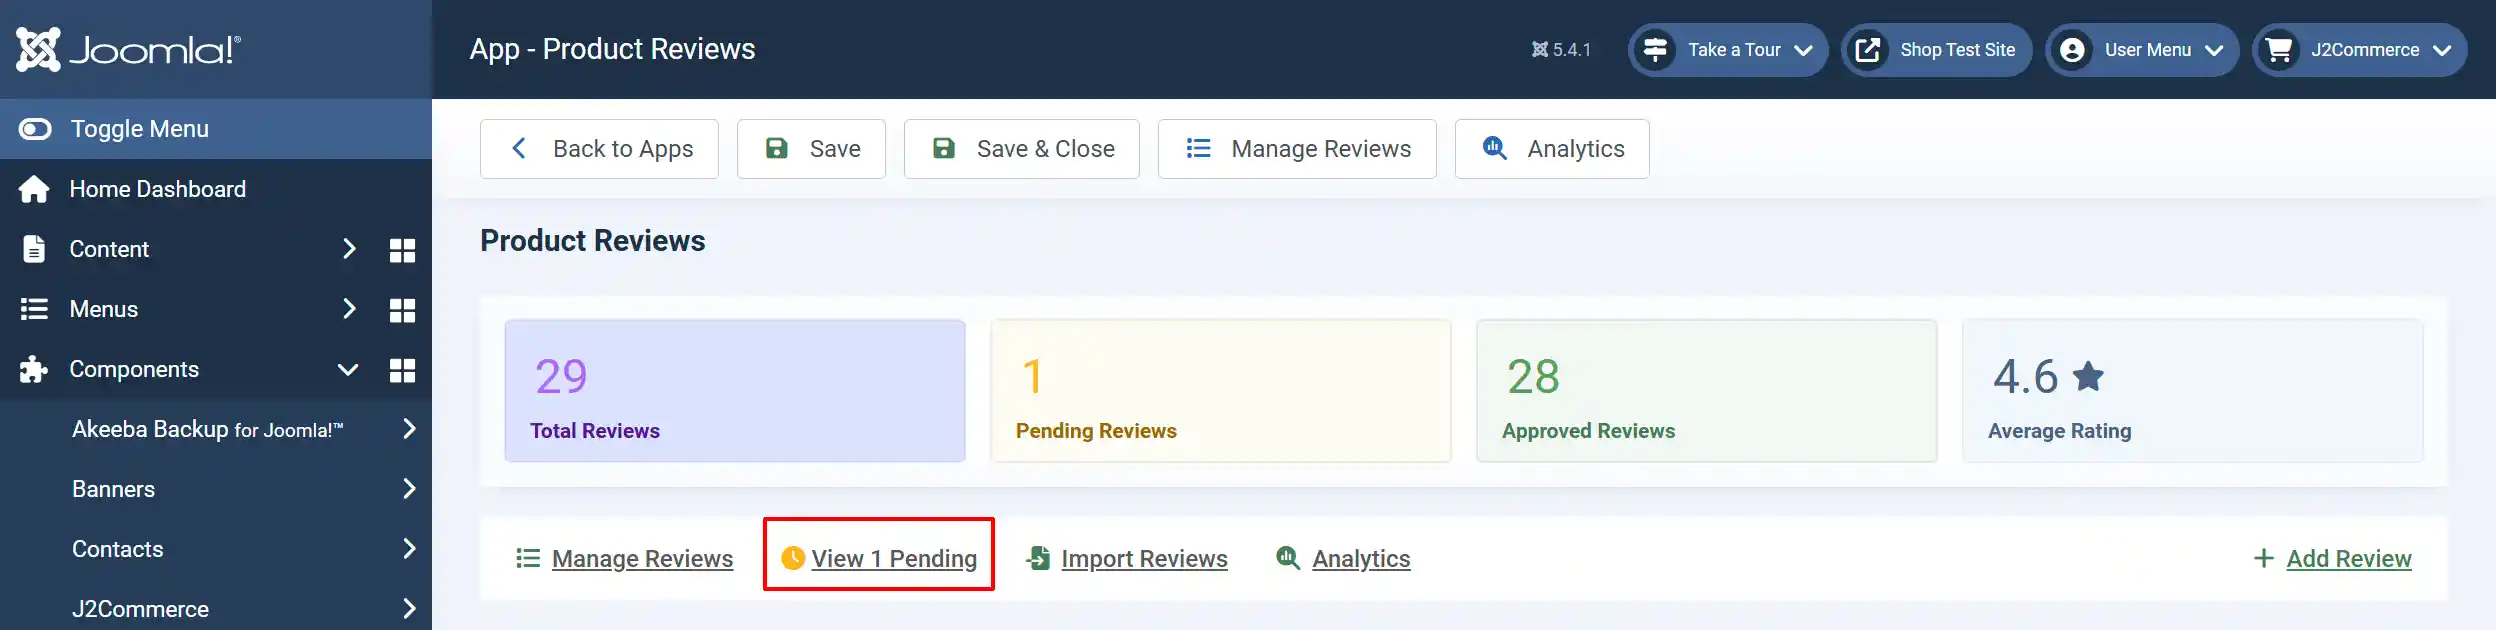
You can Edit, Reject, or Delete the review. If the review status is Pending, the Approve option will appear

Import Reviews tab

This is very helpful if you have reviews from another site that you want to bring them all over at one time
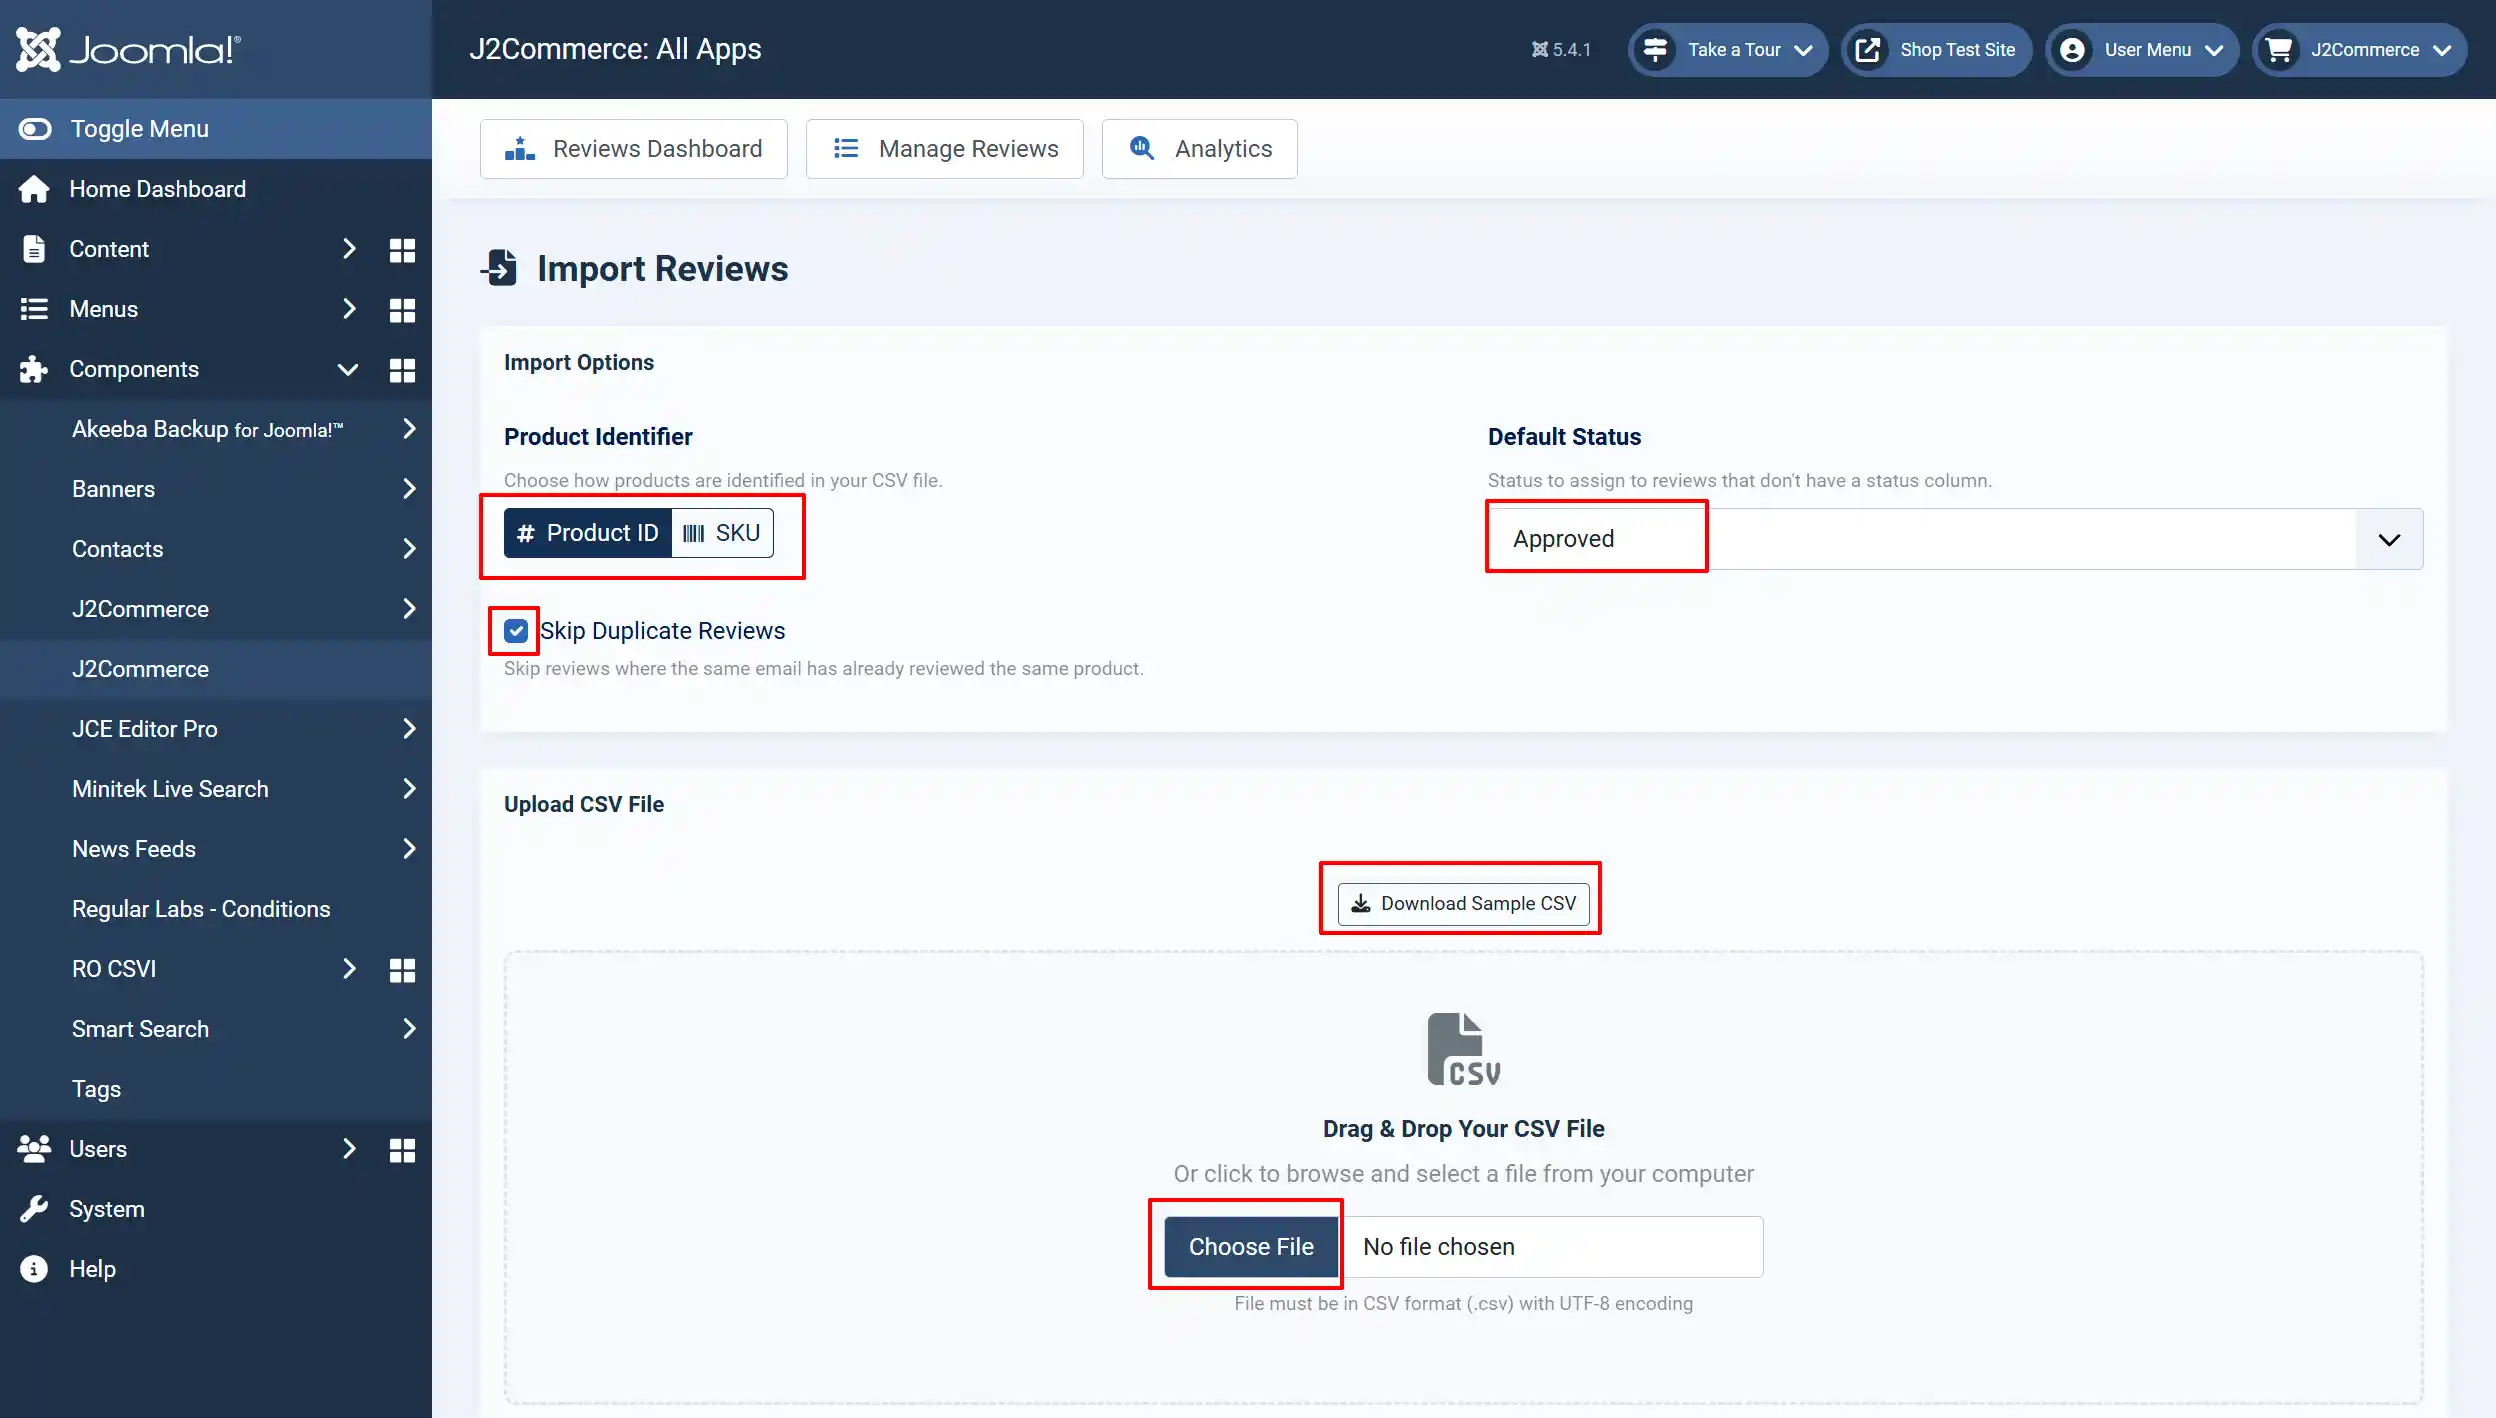
Product Identifier: Choose how products are identified in your CSV file. By the Product ID or the SKU number.
Skip Duplicate Reviews: Select it if you want the upload to skip all duplicate reviews
Default Status: Status to assign to reviews that don't have a status column. Either Pending or Approved.
Upload CSV File: Drag & Drop Your CSV File
Start Import: Once your file has been uploaded, select Start Import to begin
CSV Format Reference
Your CSV file must include the following columns. The first row should be the header row with column names. This will help to have a successful upload.
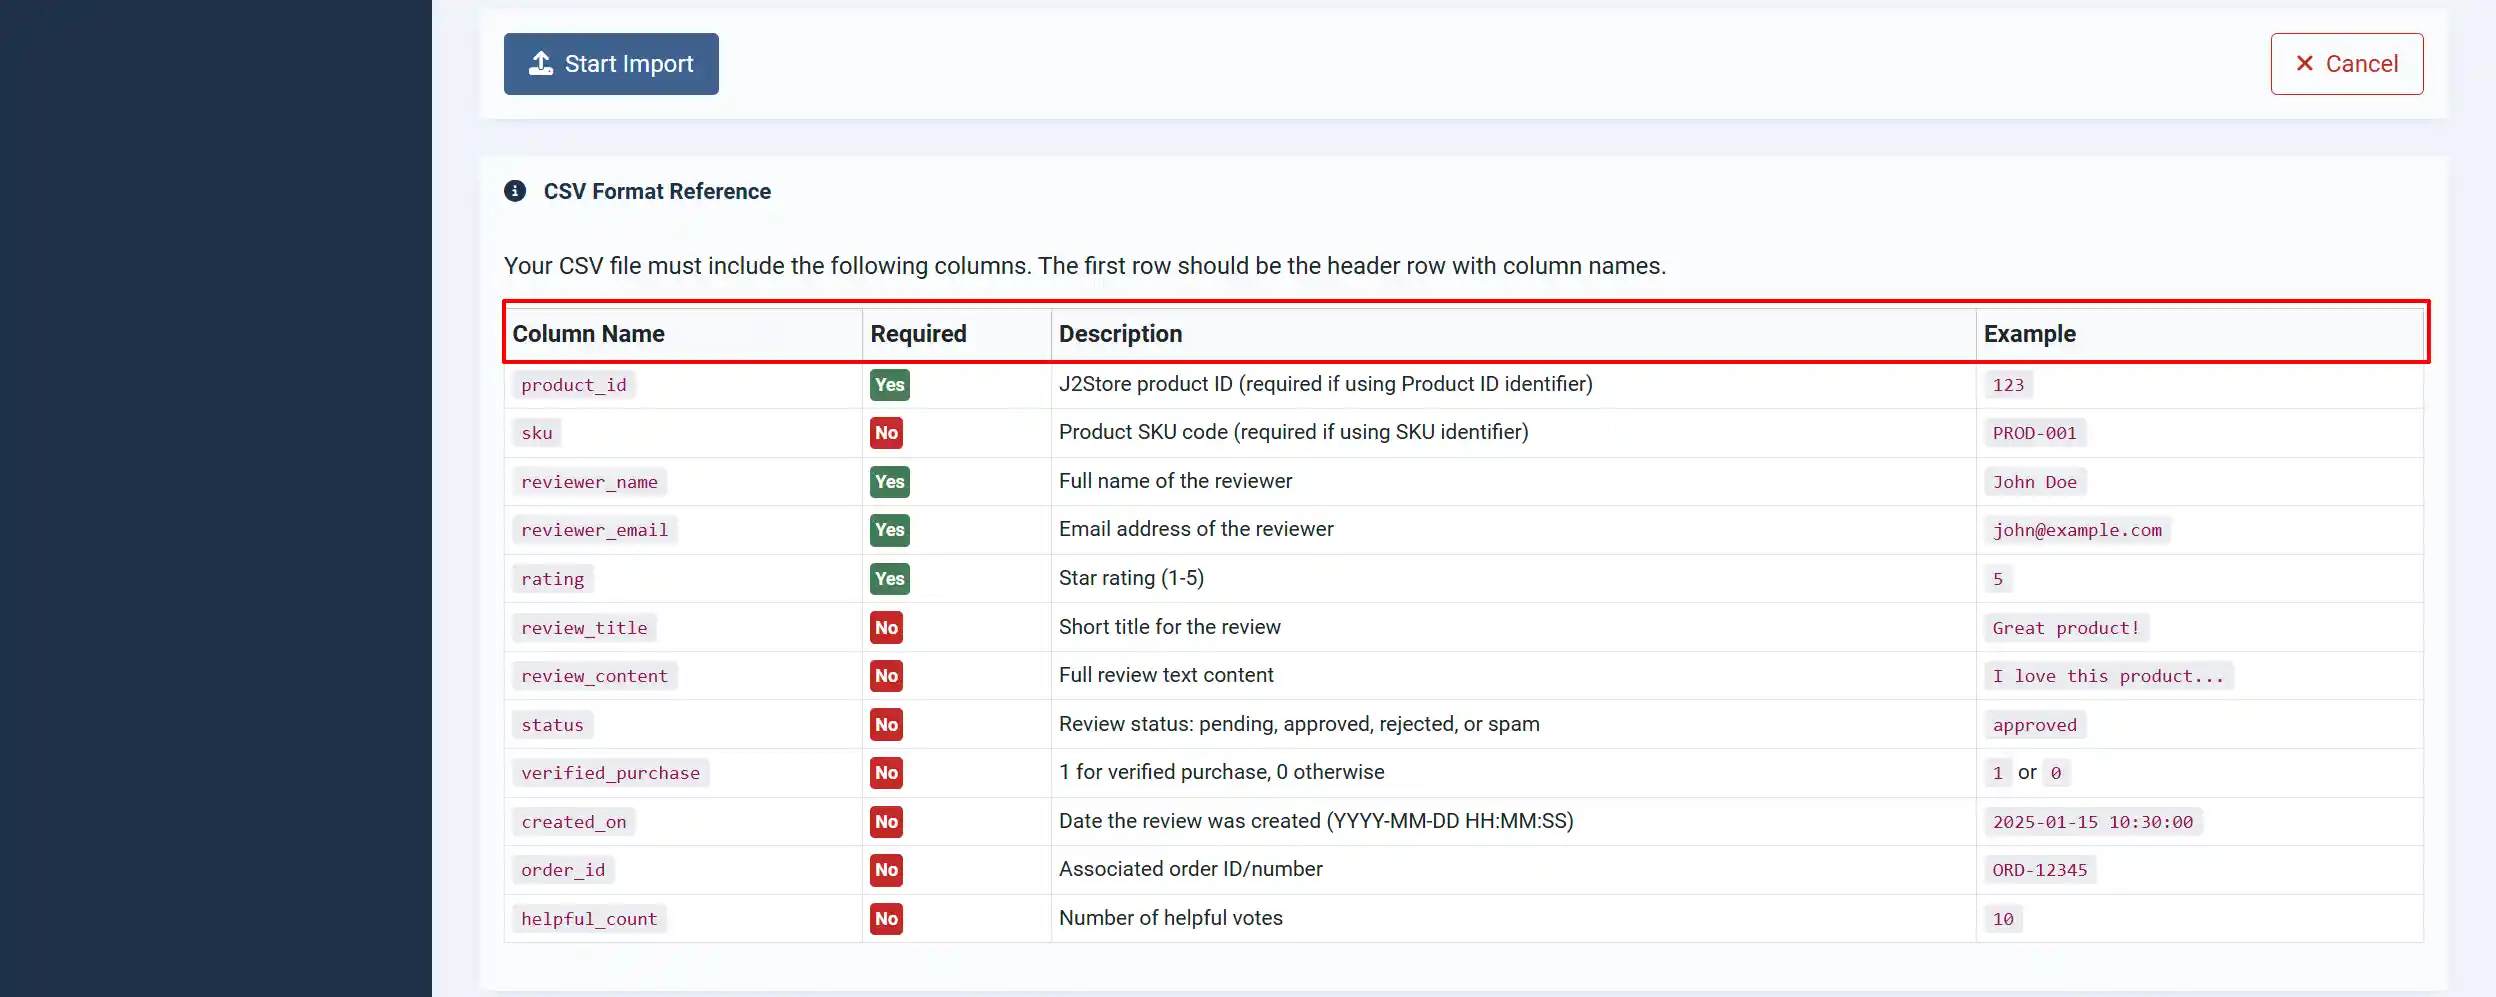
Column Name: List of column names and how they should appear in your file
Required: This shows you which columns are required or not.
Description: Description of the column names
Example: An example of how it should appear on the frontend and/or backend
Analytics tab
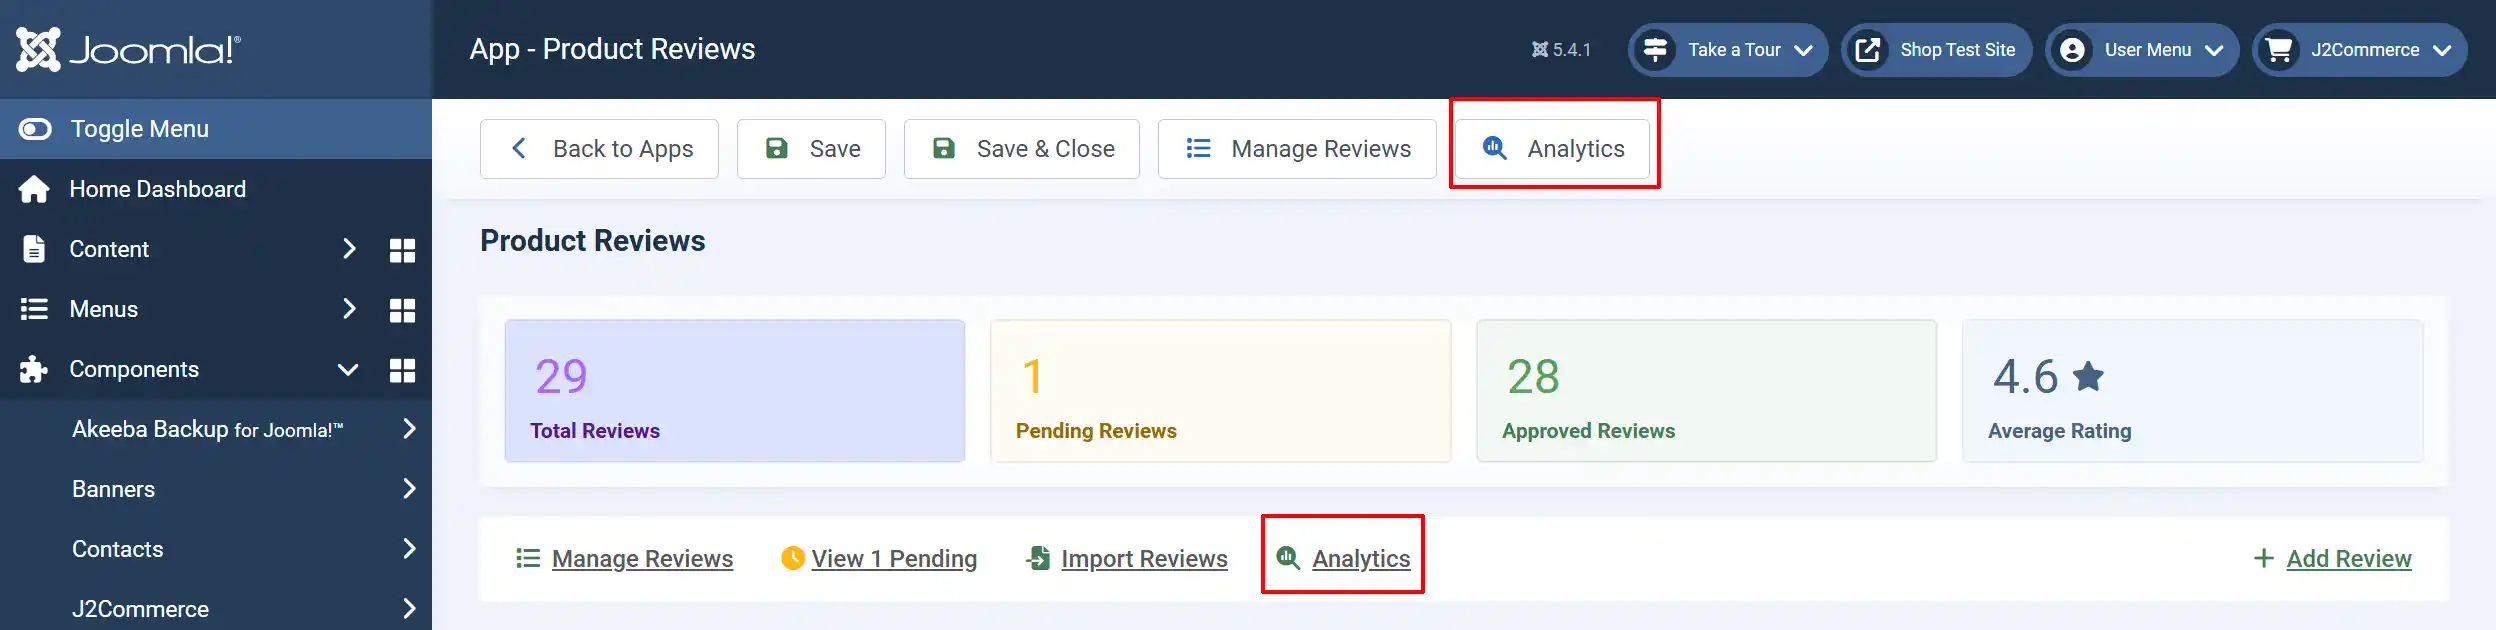
Reviews Analytics
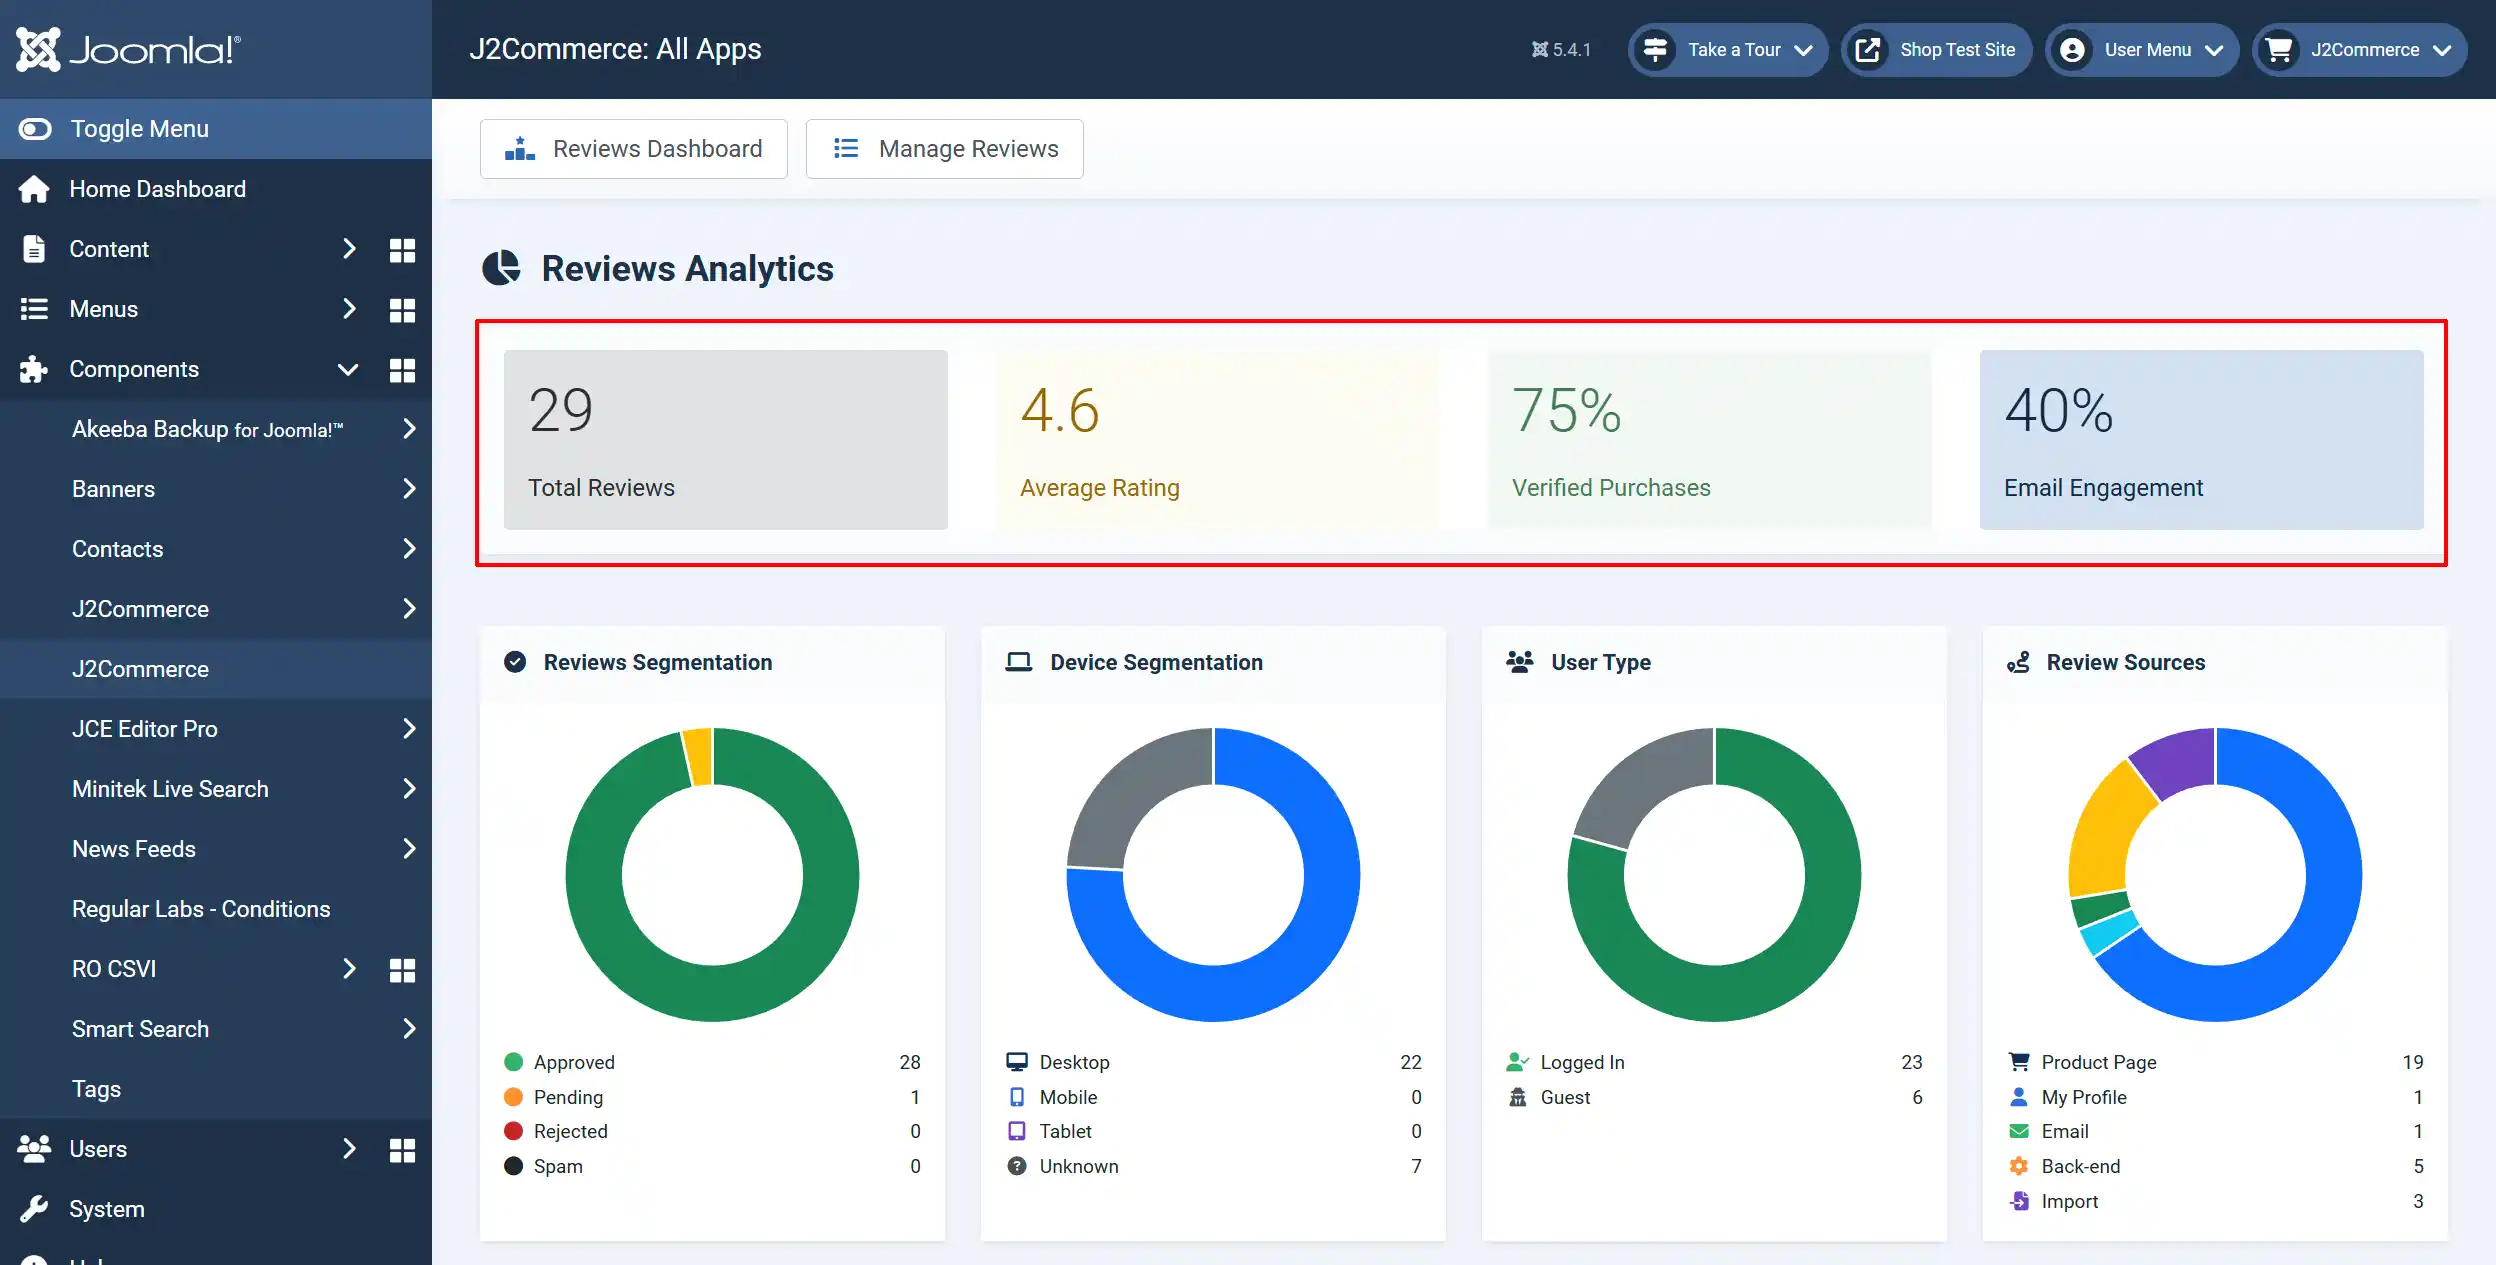
All of your review stats are laid out clearly. Total reviews, Average Rating, Verified Purchases, Email Engagement.
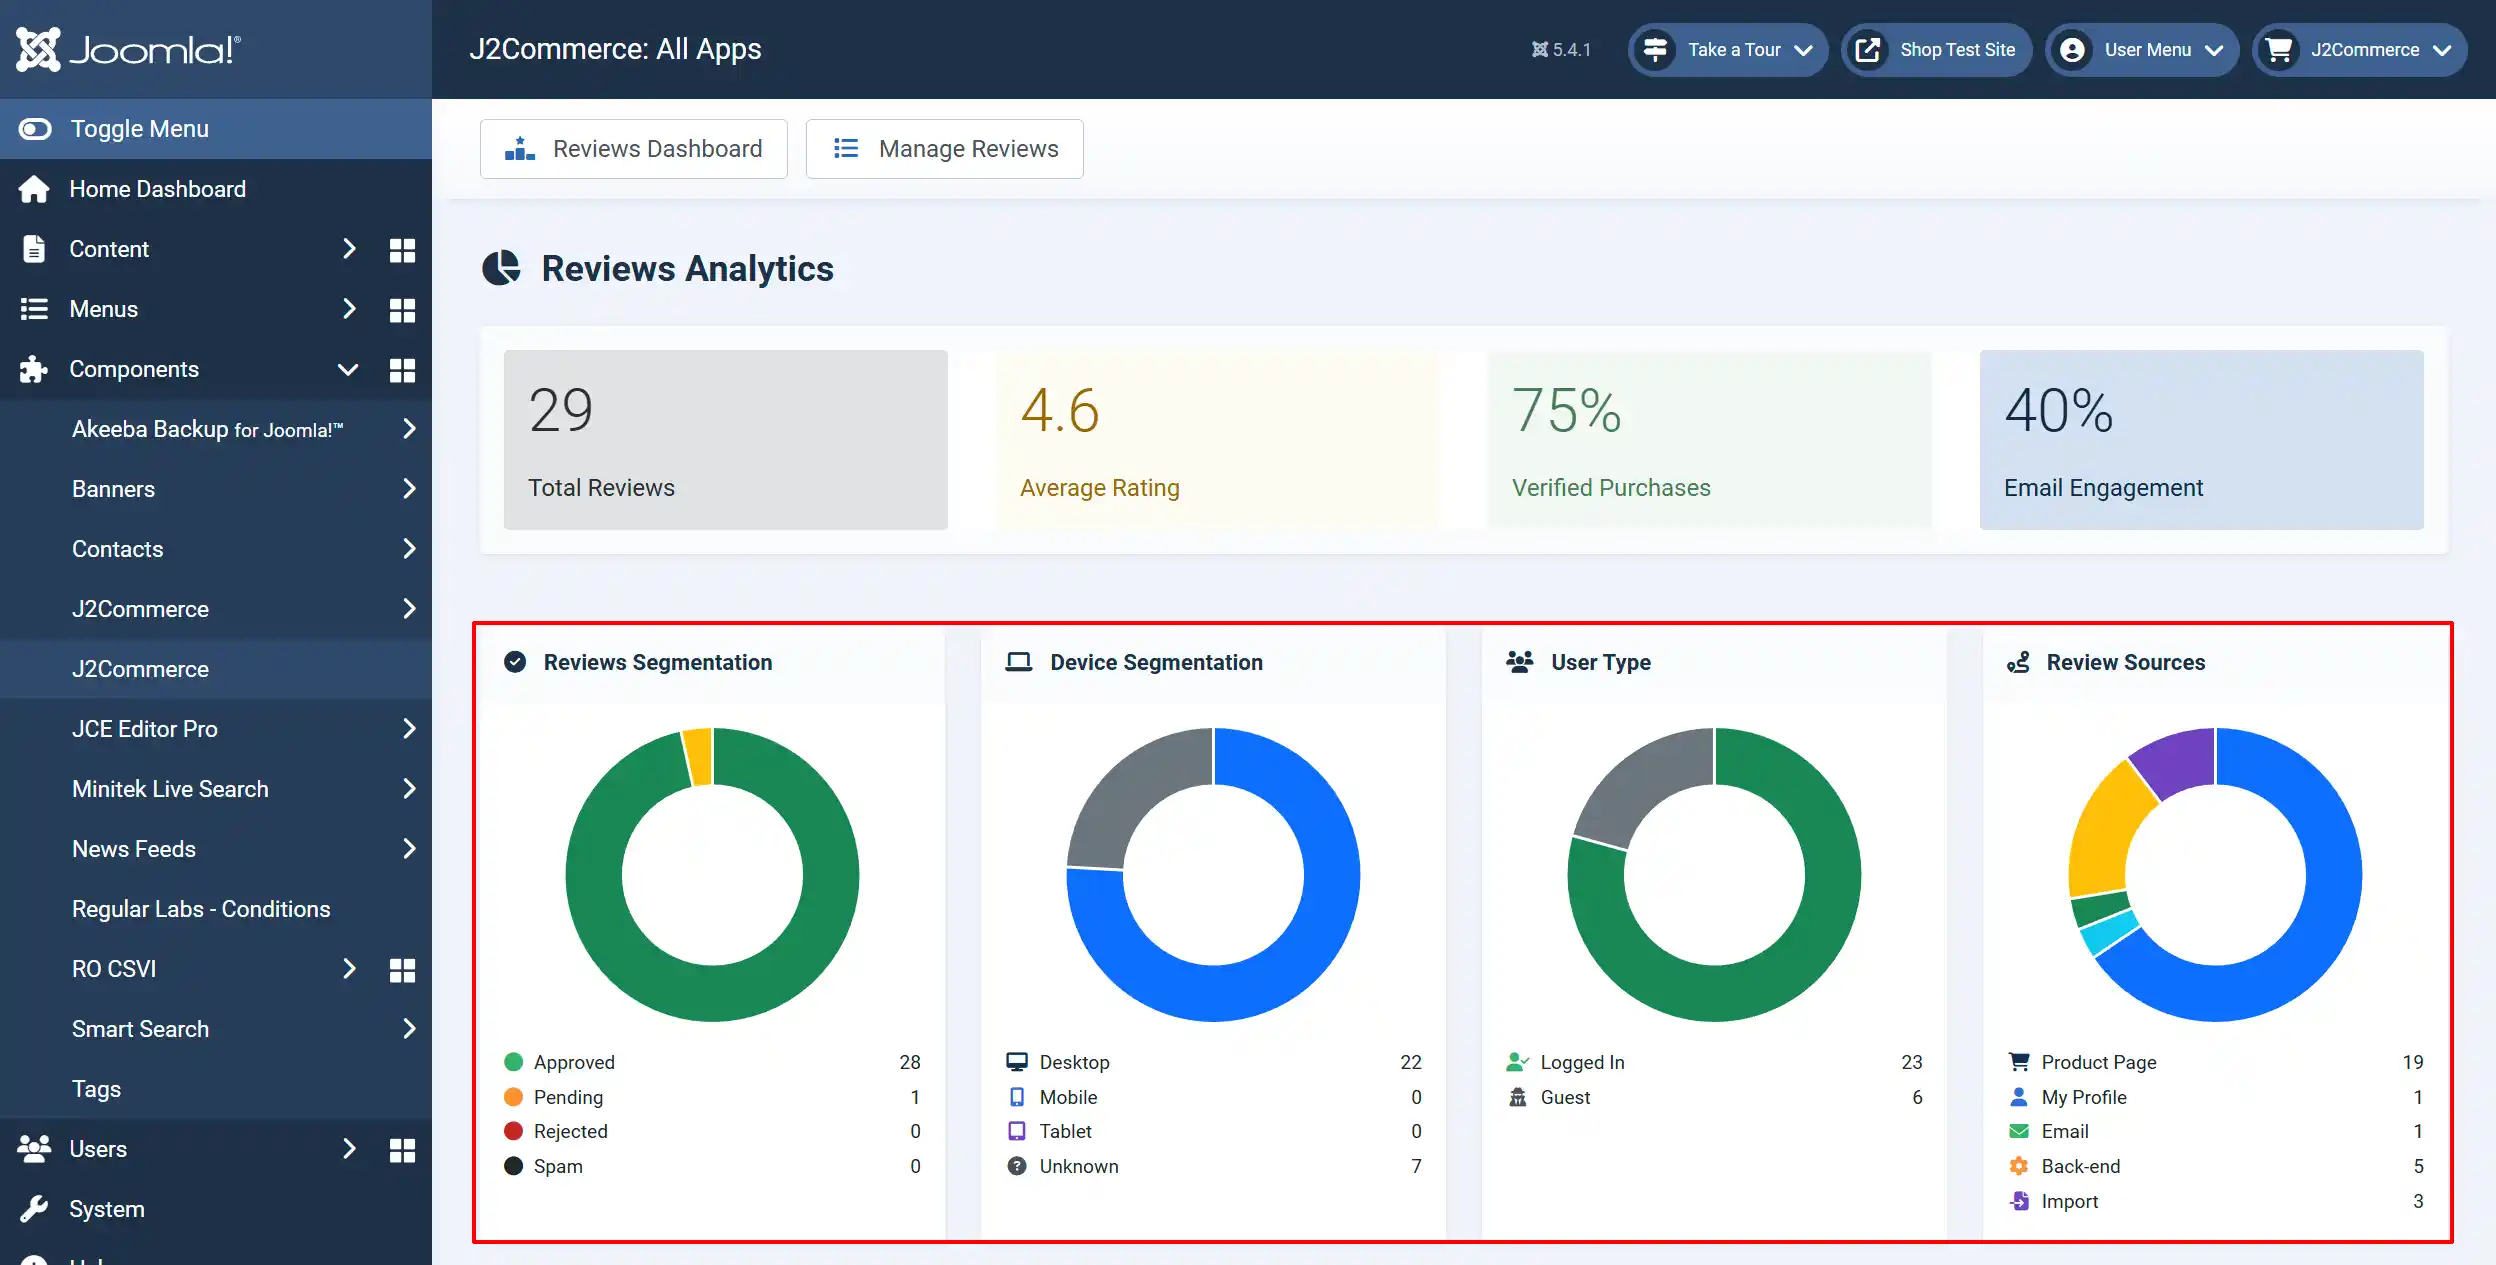
Reviews Segmentation: The number of reviews for each status. ie: Approved, Pending, Rejected, or Spam.
Device Segmentation: The number of reviews that were submitted from each device type. ie: Desktop, Mobile, Tablet, Unknown
User Type: The number of reviews that were submitted by either a customer logged in or a one-time guest.
Review Sources: The number of reviews that were submitted per source. ie: From the product page, from their profile page, from their email, from the back-end, imported list.

Star Distribution: The graph showing the star percentages
Email Metrics: The engagement rates from the emails that have been sent
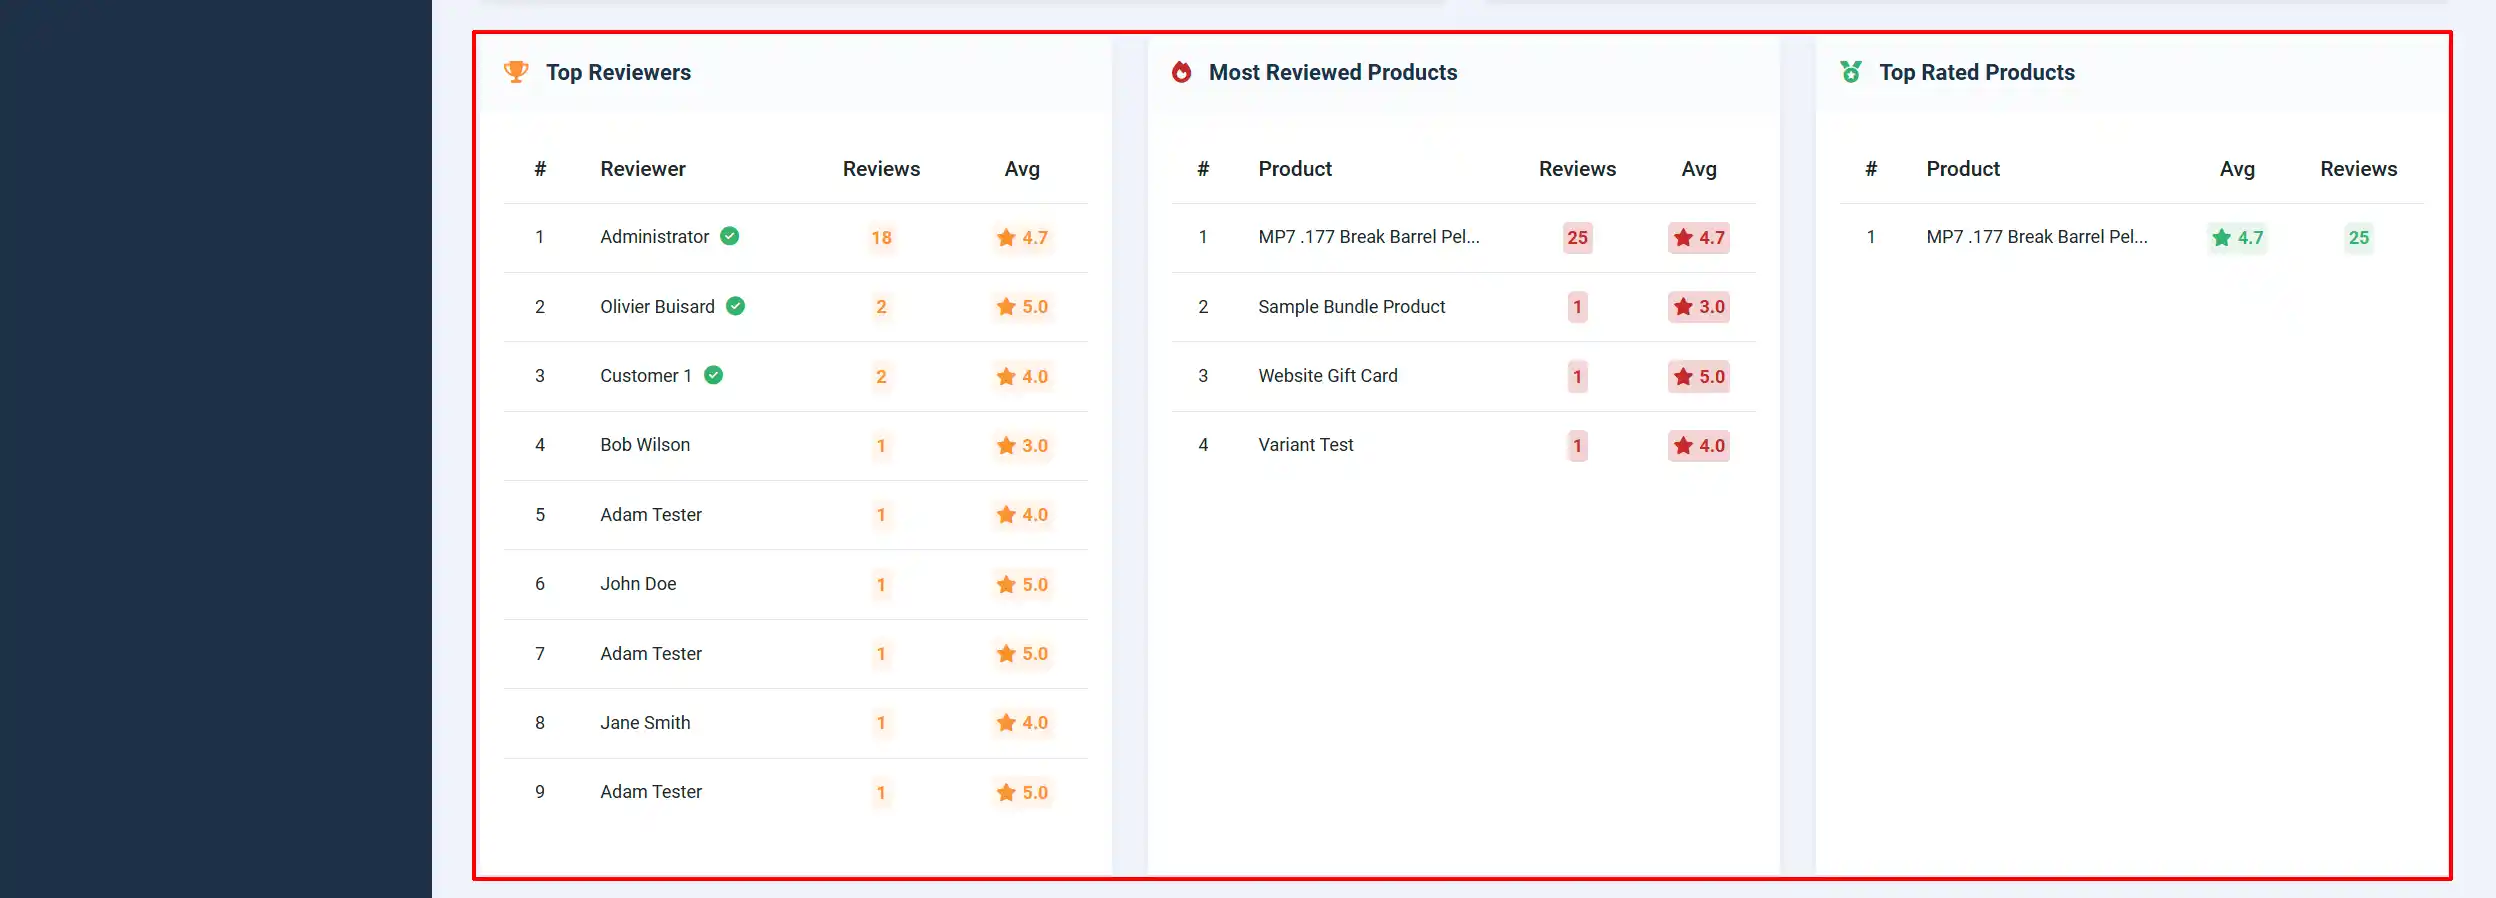
Top Reviewers: A list of the top reviewers and how many reviews they have written, as well as their average star rating
Most Reviewed Products: A list of products has the most amount of reviews. This is helpful if you want to feature a product based on its reviews.
Top Rated Products: A list of products that have the highest ratings.