Hotjar by Contentsquare
Requirements
- with PHP 8.1.0 +
- Joomla! 4.x/ Joomla! 5.x +
- J2Commerce / J2Store 4.x +
As of Nov 2025, Hotjar has not been entirely replaced by Contentsquare; instead, Contentsquare acquired Hotjar in September 2021 and has been migrating Hotjar customers to its platform.
-
Gradual Integration: Contentsquare has been progressively integrating its platforms. New customers began using the new Contentsquare platform in late 2024.
-
Full Merger: As of July 1, 2025, Hotjar officially merged into the Contentsquare Group.
-
Customer Migration: A full migration of all existing Hotjar customers to the Contentsquare platform is underway and scheduled to be completed in 2025.
Creating an account or log into Hotjar by Contentsquare
New or Existing Accounts: If you are a new customer, then create an account or log in to the (new) Contentsquare site. If you have a (Legacy) Hotjar account, then click on the sign-in button at the top of the page, and it will redirect you to the appropriate link.
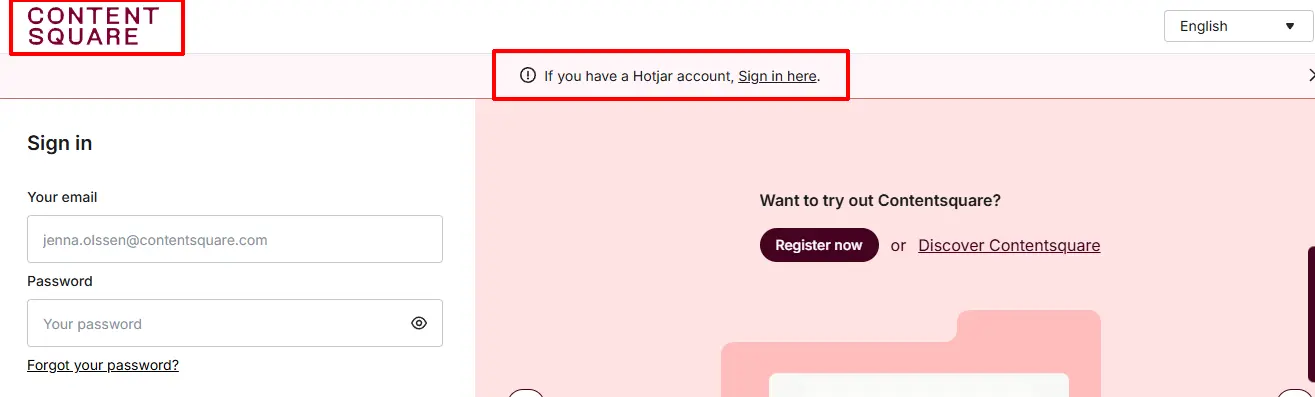
The information and screenshots may look a little different depending on which website you are on. ie, (Legacy) Hotjar or (New) Contentsquare. The screenshots in this document are for the Legacy Hotjar accounts.
Create/Add a new Site
If you have already added the website to your Hotjar account, you can skip this section and jump straight to the Purchase Hotjar System section below.
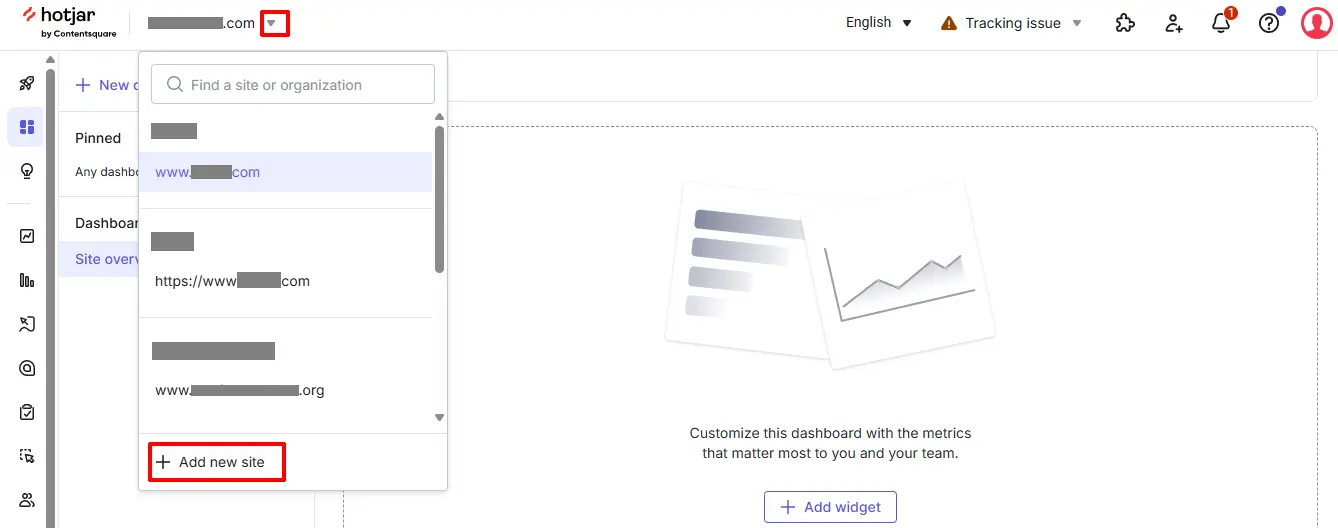
From your dashboard, click the dropdown arrow “Add new site” or “Find a Site or Organization”.
Setting up the new site

Organization: Select an account you have already created or select Add New to attach a new site.
Site Name: Enter the website name
Site URL: Enter the full URL for the website
Industry/Sector: Select the type of industry that explains the type of website it is.
Add Site: Click to move on to the next step
Purchase the System
Step 1: Go to J2Commerce > Extensions > Integrations
Step 2: Locate Hotjar by Contentsquare > View Details > Add to cart > Checkout.
Step 3: Go to your My Downloads under your profile button at the top right corner and search for the app. Click Available Versions > View Files > Download Now
Install the System
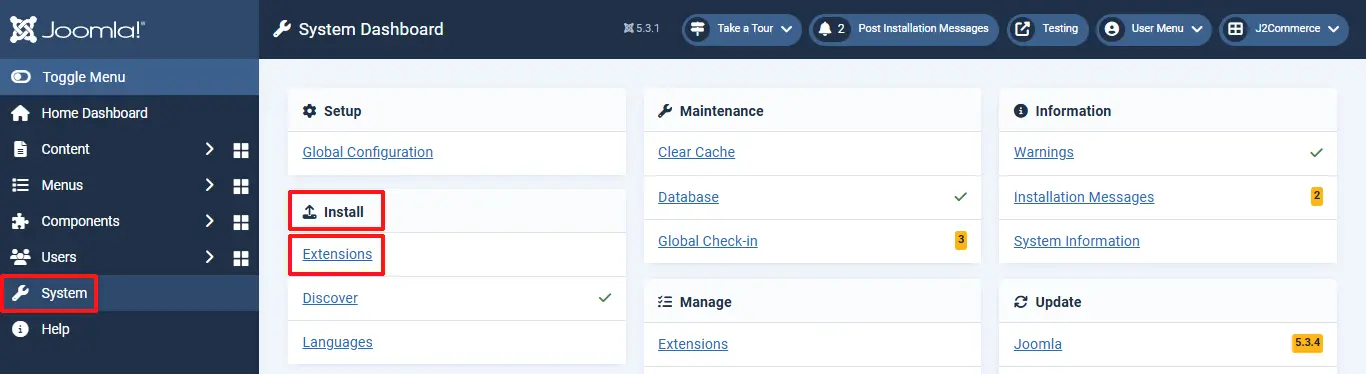
In the Joomla admin, go to System > Install > Extensions > Install the System
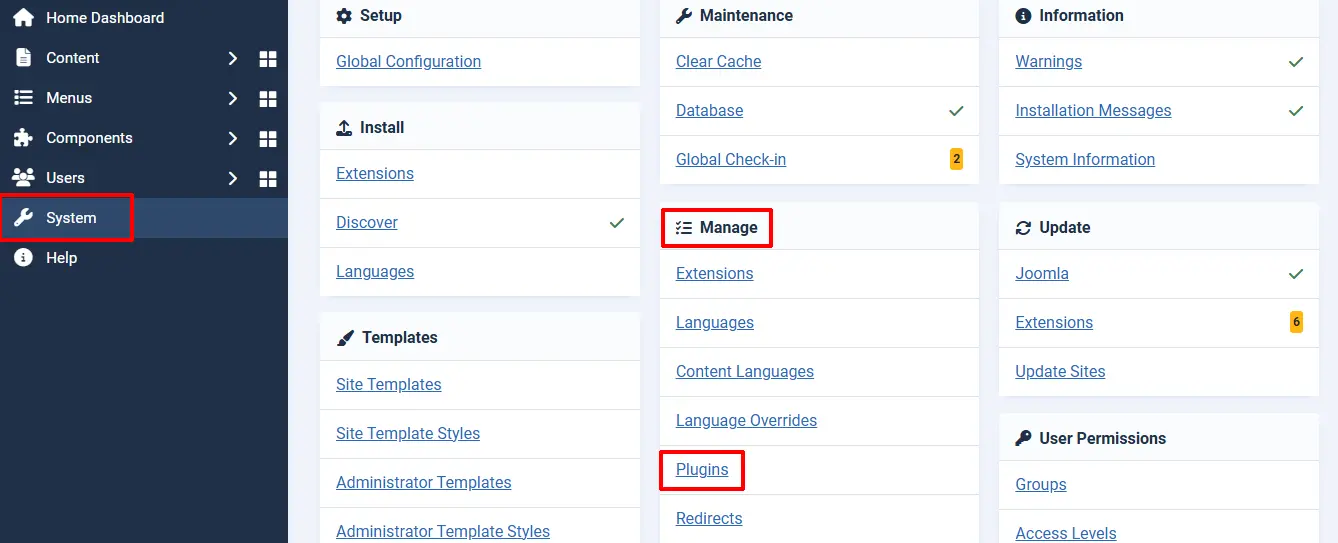
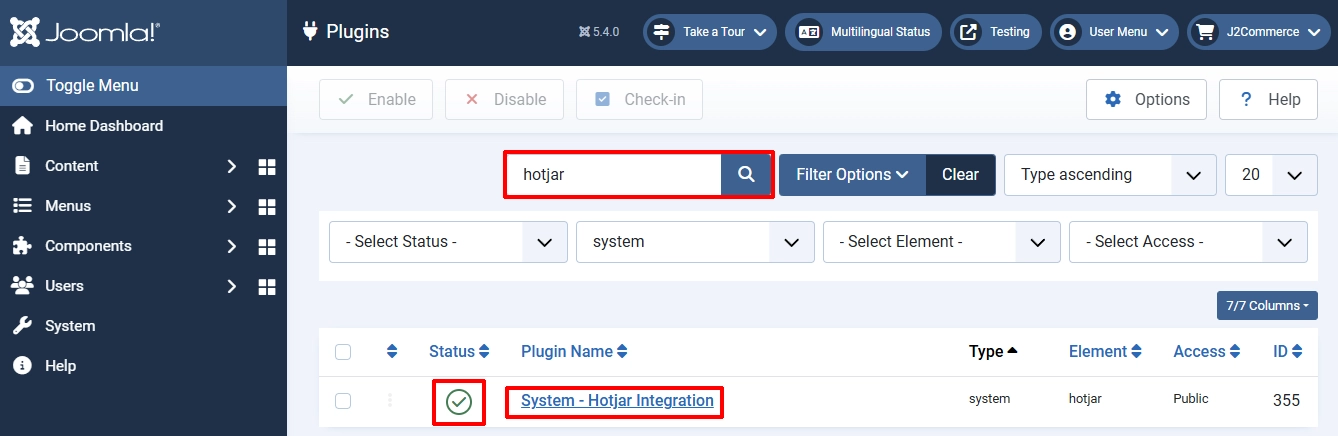
In the Joomla admin, go to System > Manage > Plugins
Enable the System
Search for Hotjar by Contentsquare and click on the 'X' under Status to enable it.
Once it's enabled, click on the title System-Hotjar Integration
Setting up the Parameters
Note: You will need to know which Hotjar account you have your sites under. If you are unsure which version you have, you can look at the tab on the top of your search bar to see the icon and web name. The original Legacy Hotjar has the orange logo. The J2Commerce plugin will work for either one.

Settings for the Original HotJar Site
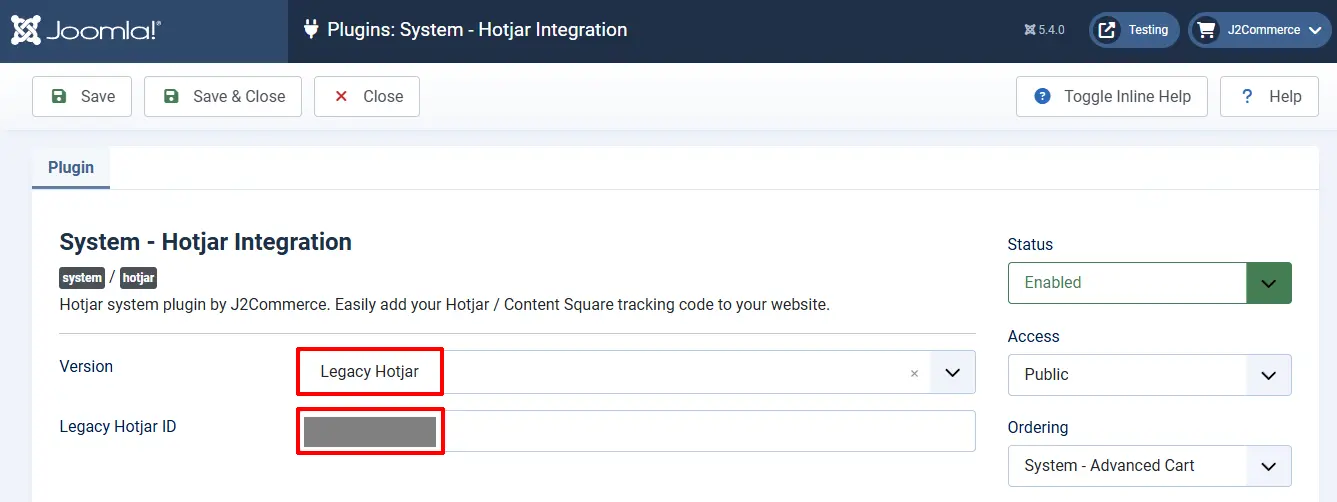
Version: Click the dropdown menu and select which version you have an account with. This first section will talk about the original Hotjar accounts, aka Legacy Hotjar.
Legacy Hotjar ID: Enter the Site ID that was assigned to your new website when you added it to your Hotjar account. Each site will have its own ID #.

Finding the ID Code for Legacy Hotjar
Step 1: Log in to the Legacy Hotjar website
Step 2: Click on your profile account at the top right corner
Step 3: Click on Organization Settings
See the screenshot below
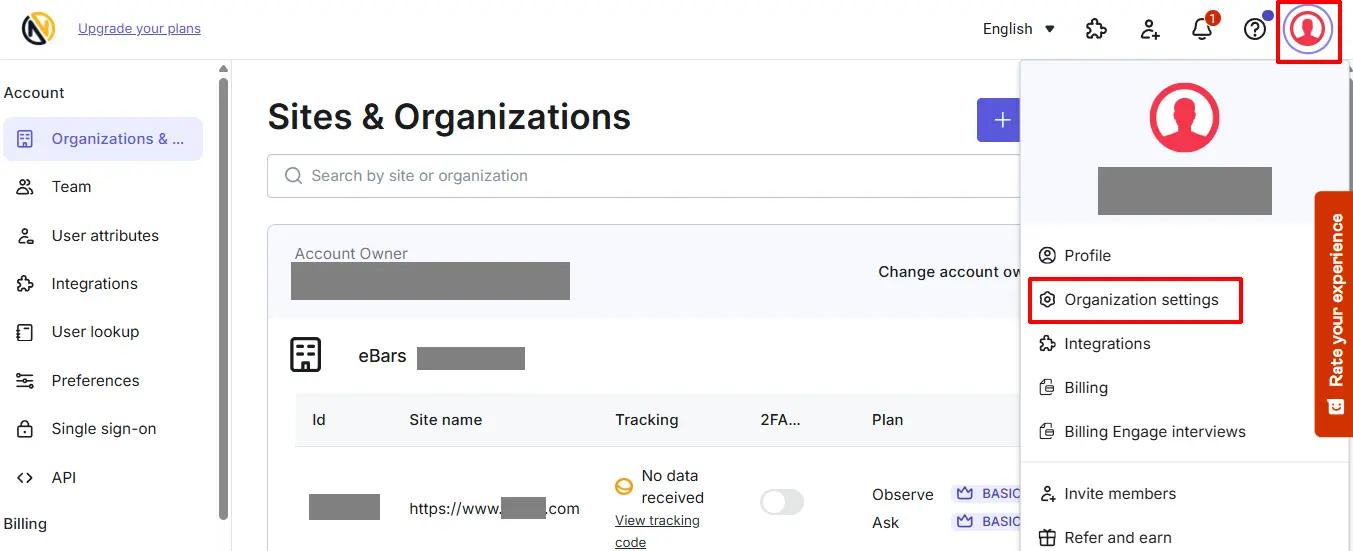
Note: If you try to copy/paste the Site ID from the Organization Settings page, it will automatically open up the Tracking Code window. You can find the Site ID in the upper right corner and copy it from there. See the screenshot below.
![]()
Note: The J2Commerce plugin will automatically install the Tracking Code for you. Once you have entered your ID, you're finished.
Settings for the New Hotjar by Contentsquare
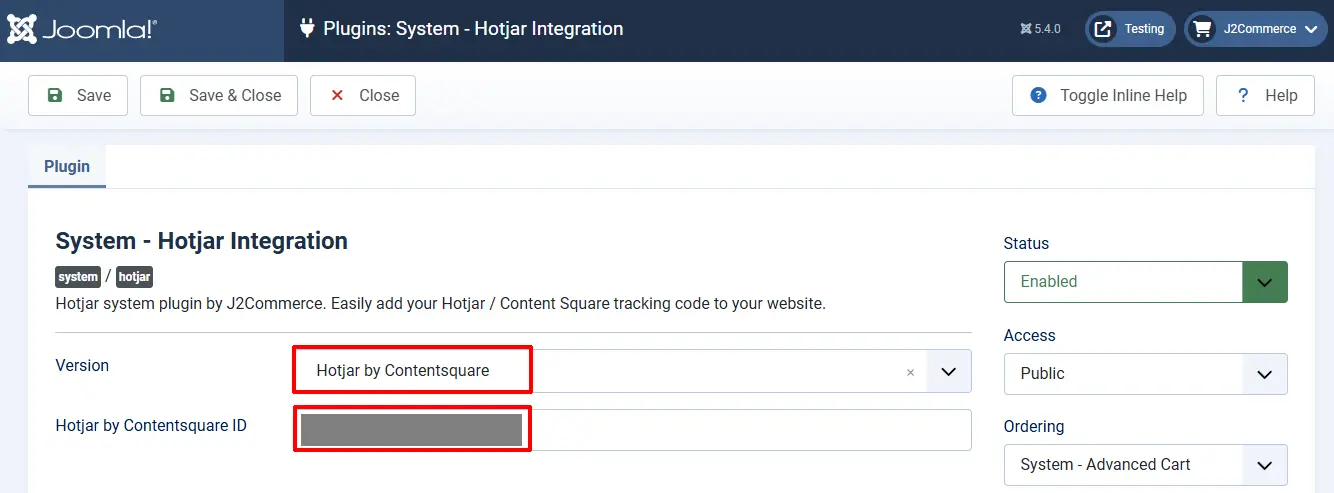
Version: Click the dropdown menu and select which version you have an account with. This section talks about the new Hotjar by Contentquare website.
Hotjar by Contentsquare ID: Enter the Site ID that was assigned to your new website when you added it to your Hotjar by Contentsquare account. Each site will have its own ID #.
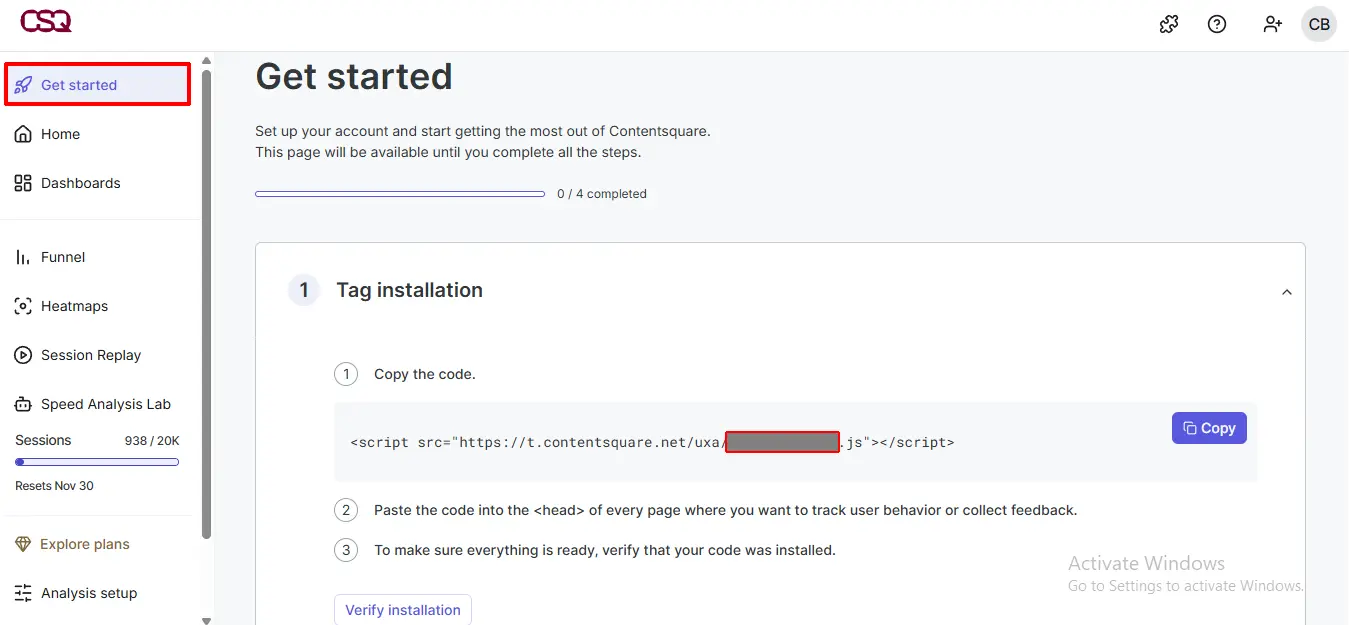
Finding the ID for the Hotjar by Contentsquare
Step 1: Log in to the Contentsquare site
Step 2: Go to Getting Started in the upper left corner
Step 3: Inside Tag Installation, look for the ID code that is between the / and .js
Step 4: Copy that Site ID code and enter it in your Hotjar account in Joomla!
Note: The J2Commerce plugin will automatically install the Tracking Code for you. Once you have entered your ID, you're finished.