Request Quote / Email Cart
Previously known as Email Basket
This plugin allows your customers to email items in the cart to the store owner and to themselves.
The plugin nicely integrates into the default cart page of J2Commerce. You can ask the customers to provide their name, address, or any other information while emailing the cart.
Requirements
- PHP 8.1.0 +
- Joomla! 4.x/ Joomla! 5.x +
- J2Commerce / J2Store 4.x +
Installation of Acymailing Connector:
Step 1: Go to our J2Commerce website > Extensions > Apps
Step 2: Locate the Request Quote / Email Cart App > click View Details > Add to cart > Checkout.
Step 3: Go to your My Downloads under your profile button at the top right corner and search for the app. Click Available Versions > View Files > Download Now
Installation:
You can install the Request Quote / Email Cart using the Joomla installer. The following steps help you with a successful installation.
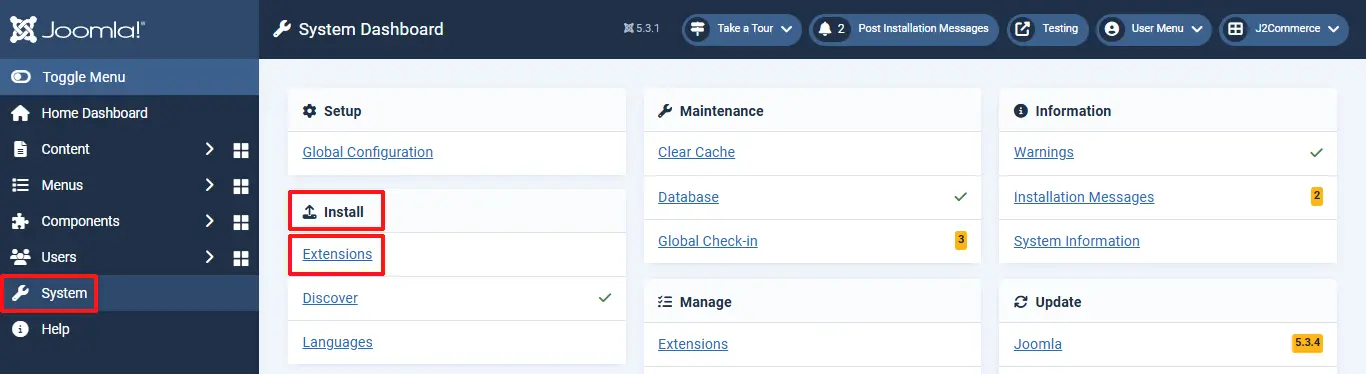
Step 1: Use the Joomla! installer to install the app. Go to System > Install > Extensions > Install the app
Enable the App
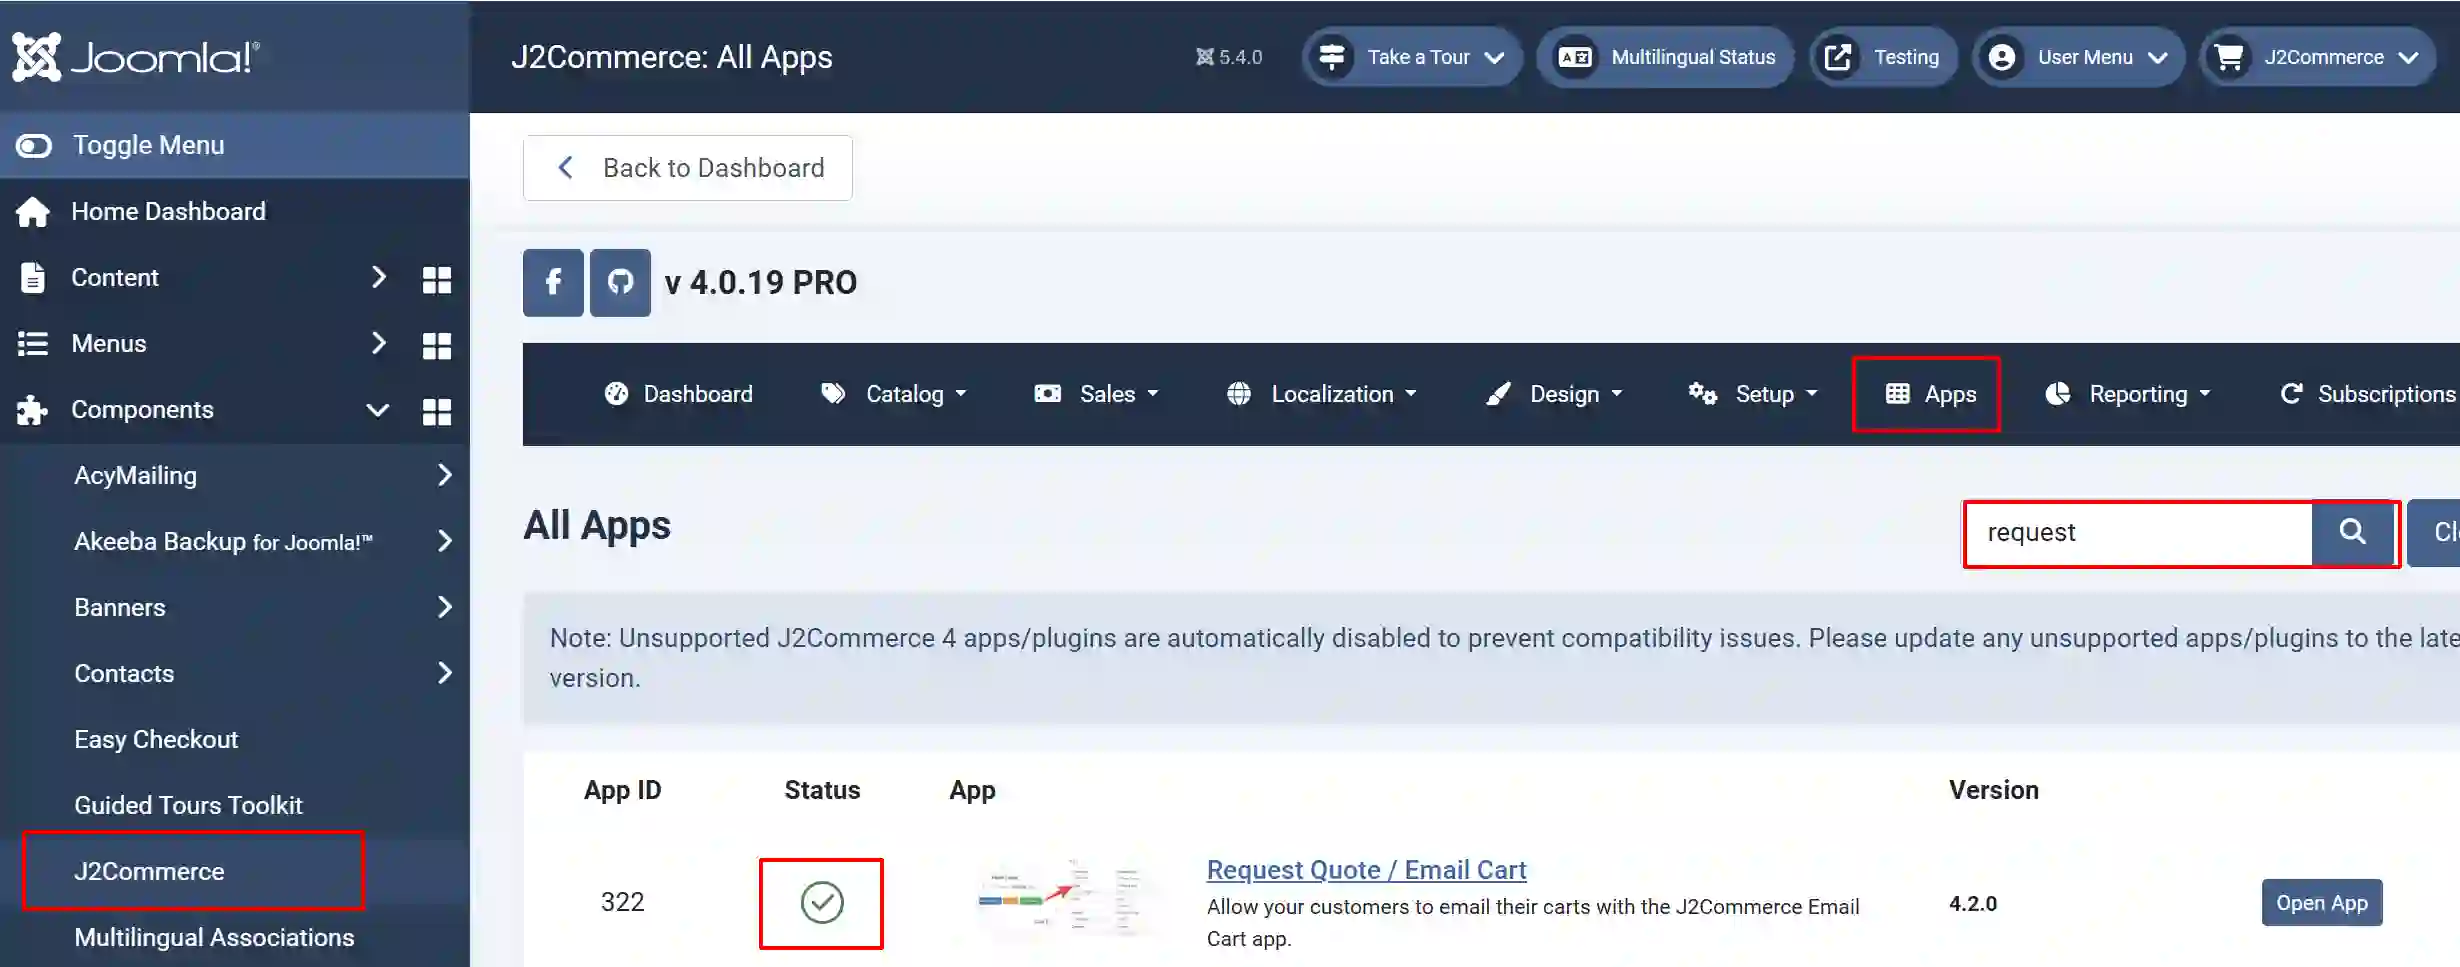
Go to J2Commerce > Apps > search for Request Quote to narrow down your search.
Click on the 'X' under Status to enable it.
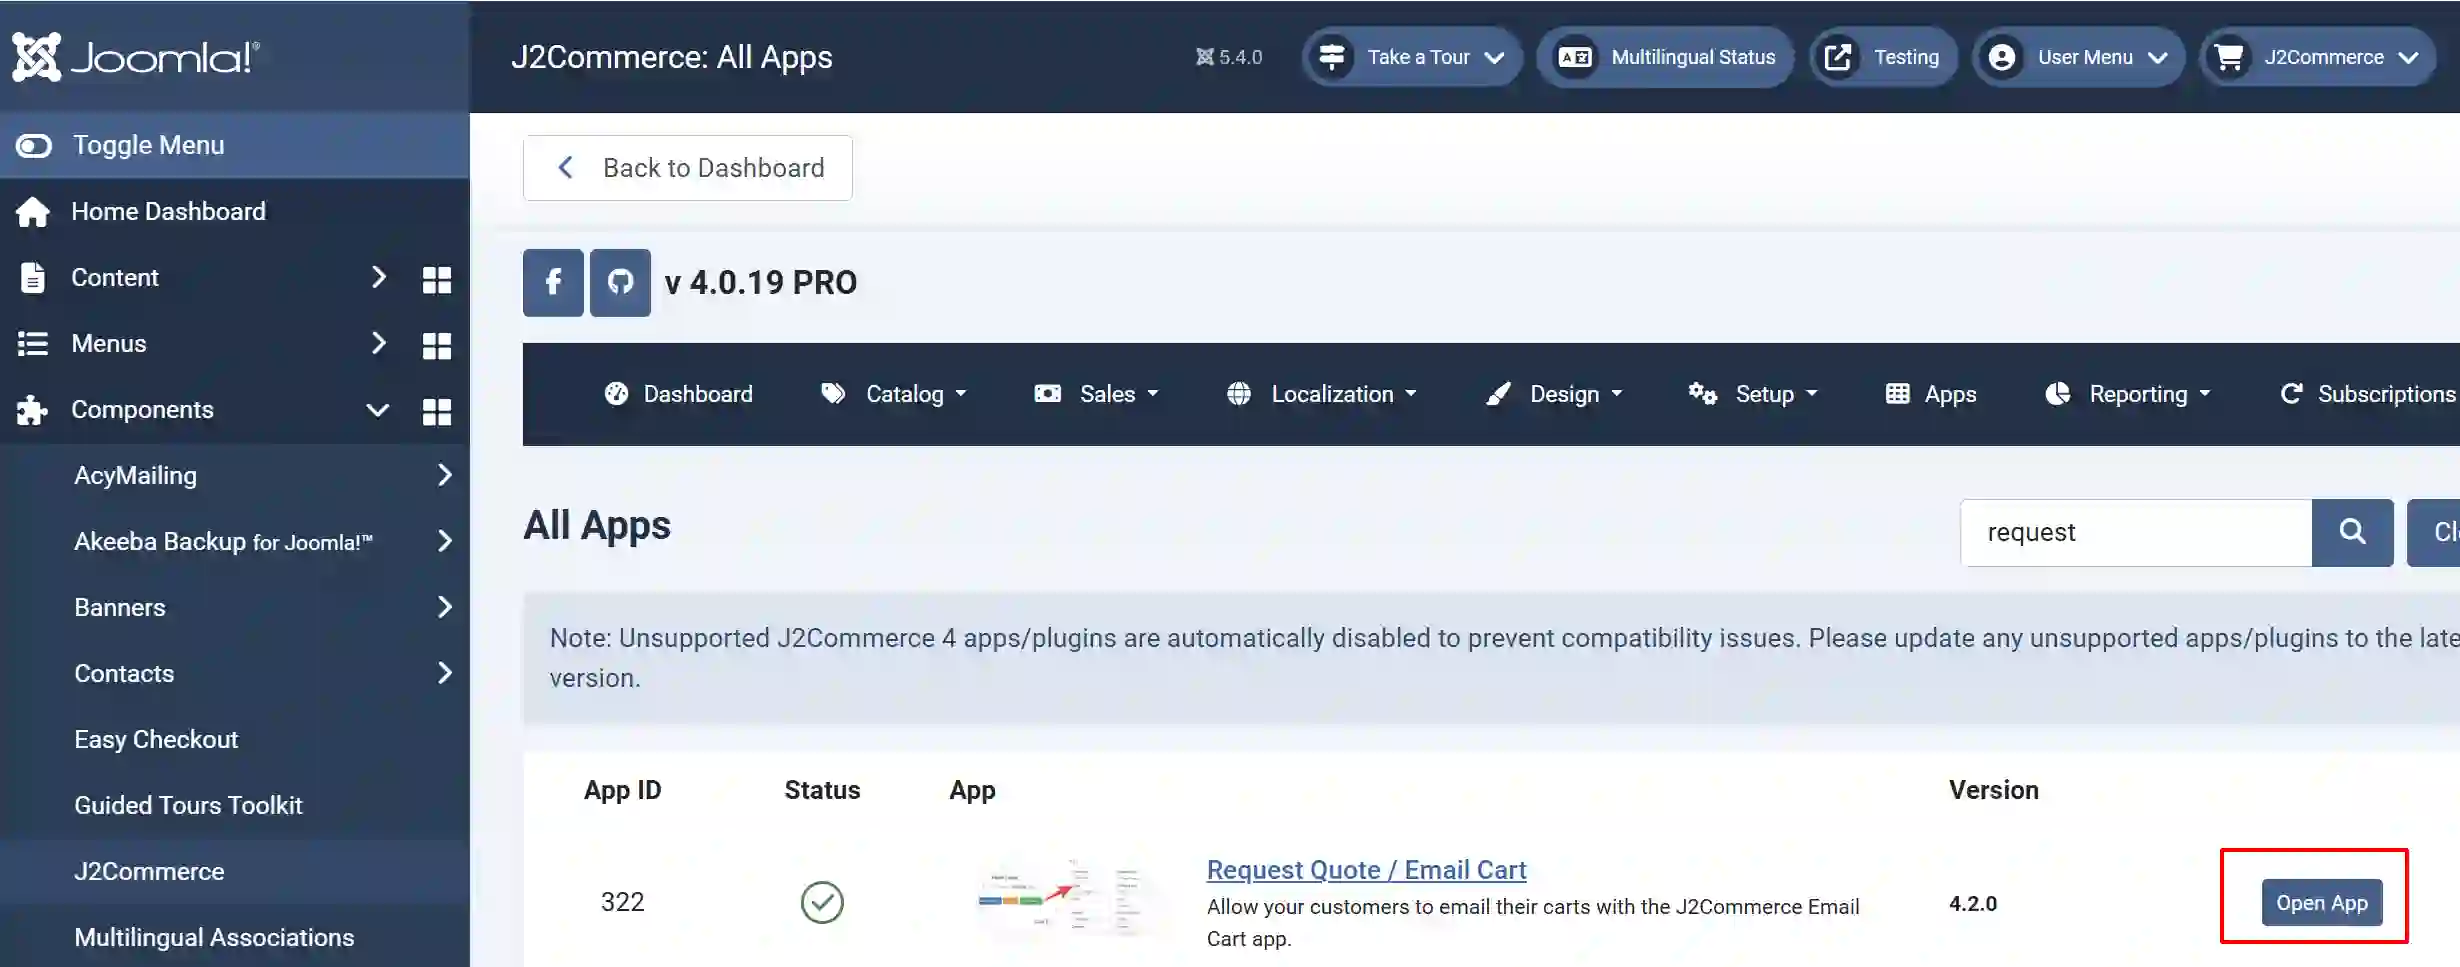
Click the Title or Open App to start setting up the configurations.
Setting up the App
Basic tab
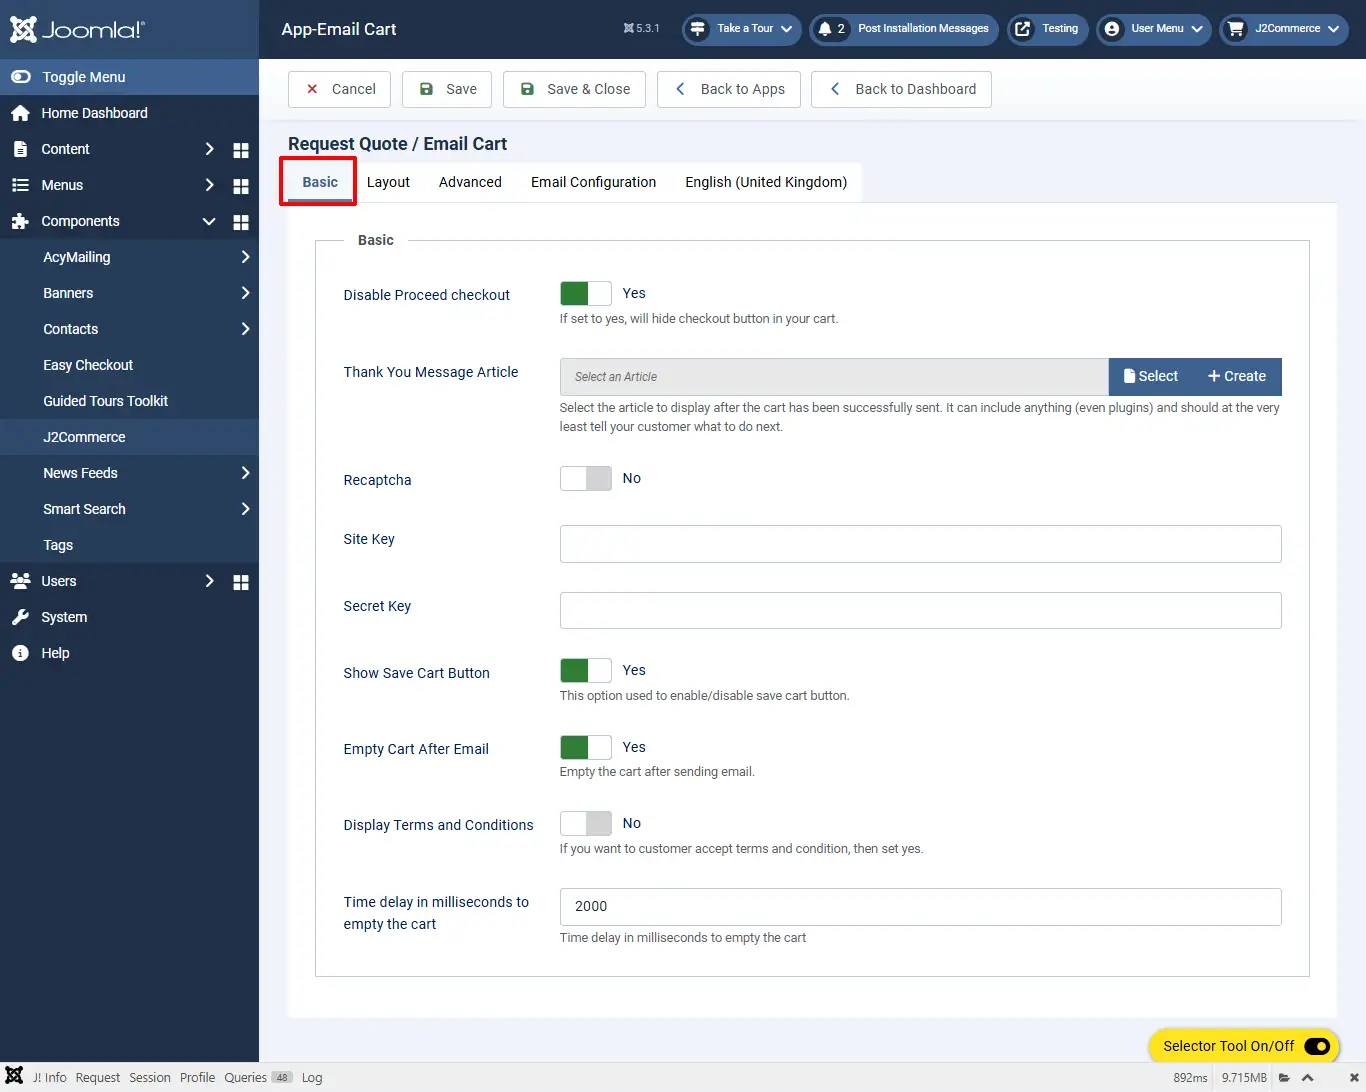
Disable Proceed checkout: If set to yes, it will hide the checkout button in your cart.
Thank You Message Article: Select the article to display after the cart has been successfully sent. It can include anything (even plugins) and should, at the very least, tell your customer what to do next.
reCAPTCHA: Select Yes to enable Google reCAPTCHA to prevent spam submissions.
reCAPTCHA Site Key: Your Google reCAPTCHA site key. Go to Cloud.Google.com to sign up for one.
reCAPTCHA Secret Key: Your Google reCAPTCHA secret key.
Show Save Cart Button: This option is used to enable/disable the save cart button.
Empty Cart After Email: Empty the cart after sending the email.
Display Terms and Conditions: Select Yes if you want the customer to agree to the terms and conditions.
Time delay in milliseconds to empty the cart: Time delay in milliseconds to empty the cart.
Layout tab
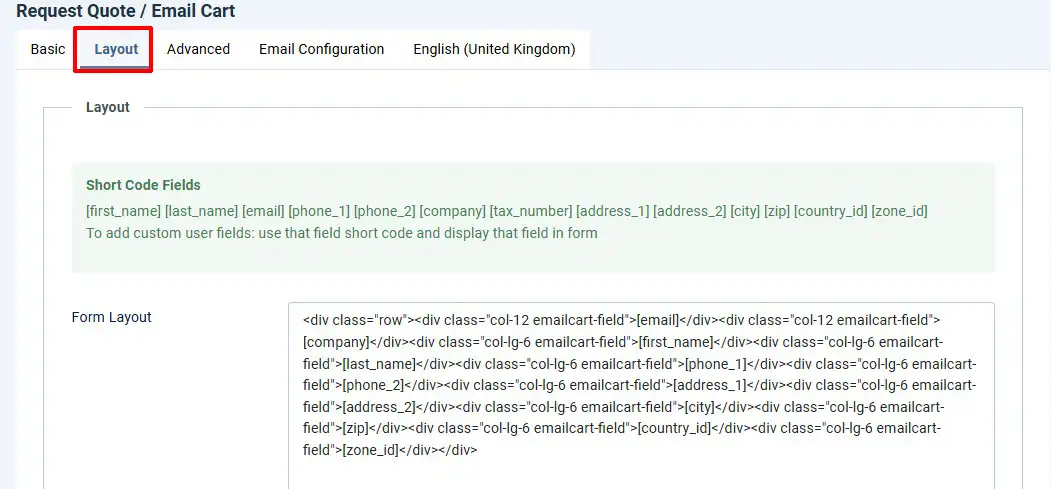
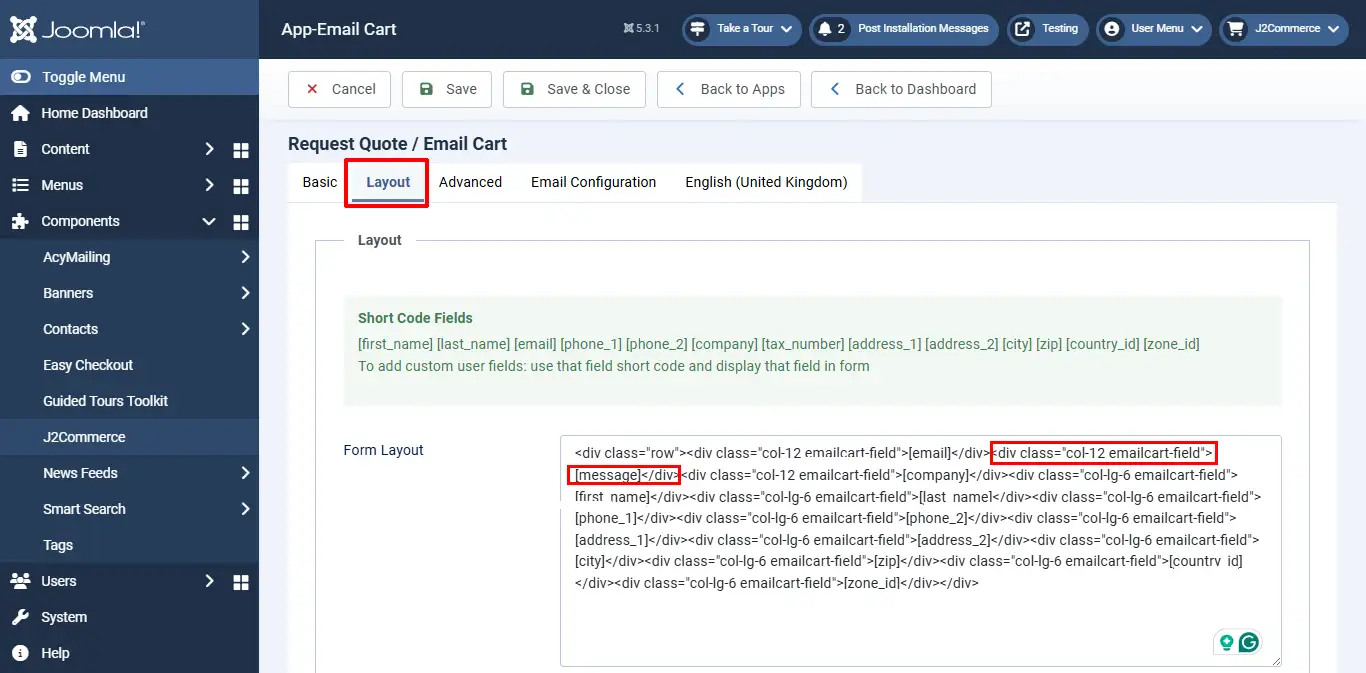
If you would like to add/remove the fields in the Email form without affecting the checkout form fields, it is possible in this section.
In the Form Layout, you can create a custom form by adding the field shortcode given at the top of the layout tab page and displaying that field in the form.
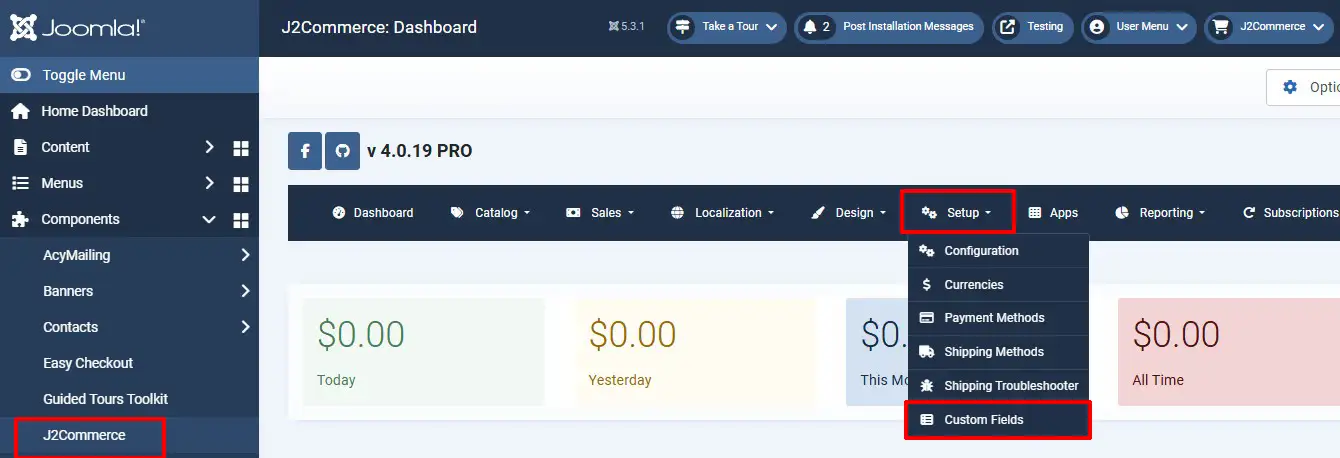
To add any new fields, go to J2Commerce > Setup > Custom fields. Click 'New' to create a new field. See the images and instructions below.
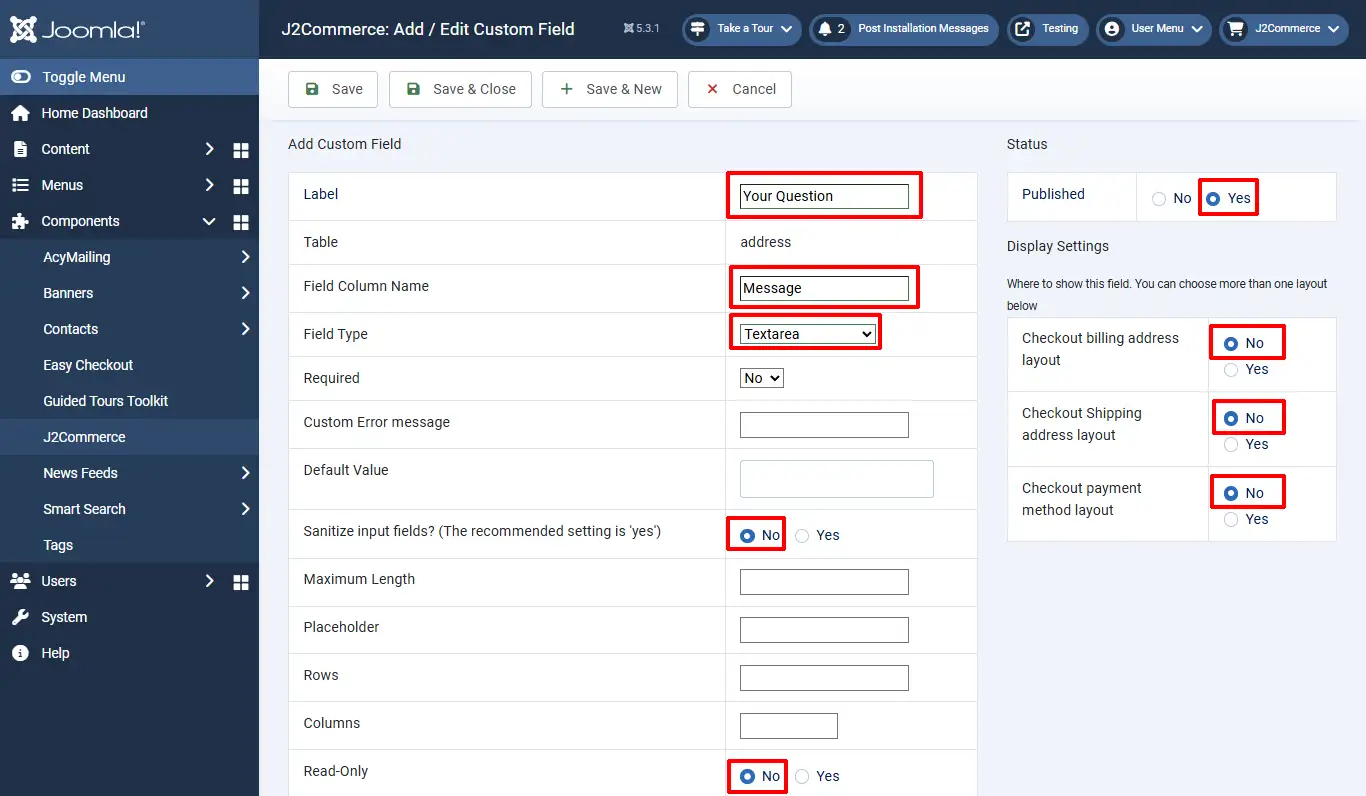
Enter the label name, field name, choose field type, and set the status to Published.
If you don’t want to display this new field in checkout and want to display it only in the Email form, then in the custom field display settings, set NO to all layouts (Checkout billing address layout, Checkout shipping address layout, Checkout payment method layout).
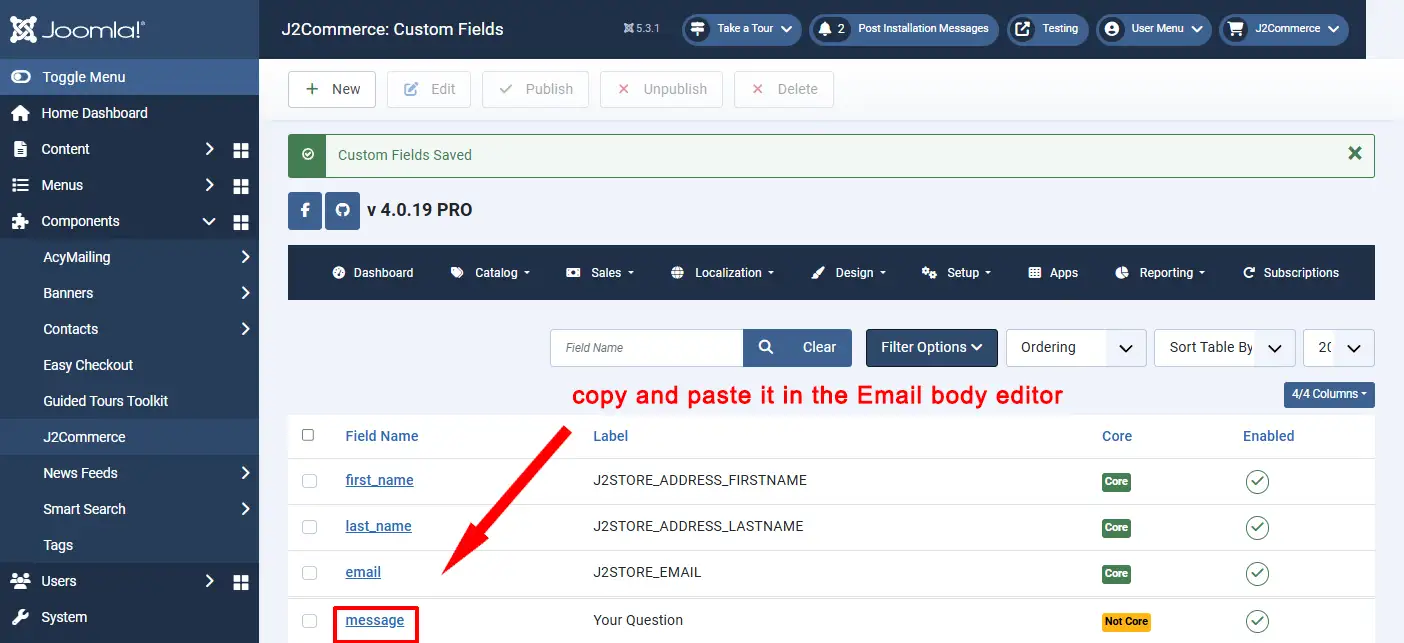
Now, in the form layout, add the shortcodes of the fields you want to display in the email form. To add a custom field shortcode, copy the field name in J2Commerce > Setup > Custom fields section and paste it in the form. The field name should be enclosed in square braces. For example, [message].
Form Layout: Add the code for the message into the message form in the Layout tab of the Request Quote / Email Cart App
Choose Basket modal type: Select whether you want a Bootstrap model or a custom model.
Envelope Icon: If you wish to display an icon in the Email Cart button, enter it in here (ie: fa-solid fa-envelope).
Cart Icon: If you wish to display an icon in the Save Cart button, enter it in here (ie: fa-solid fa-basket).
Advanced tab
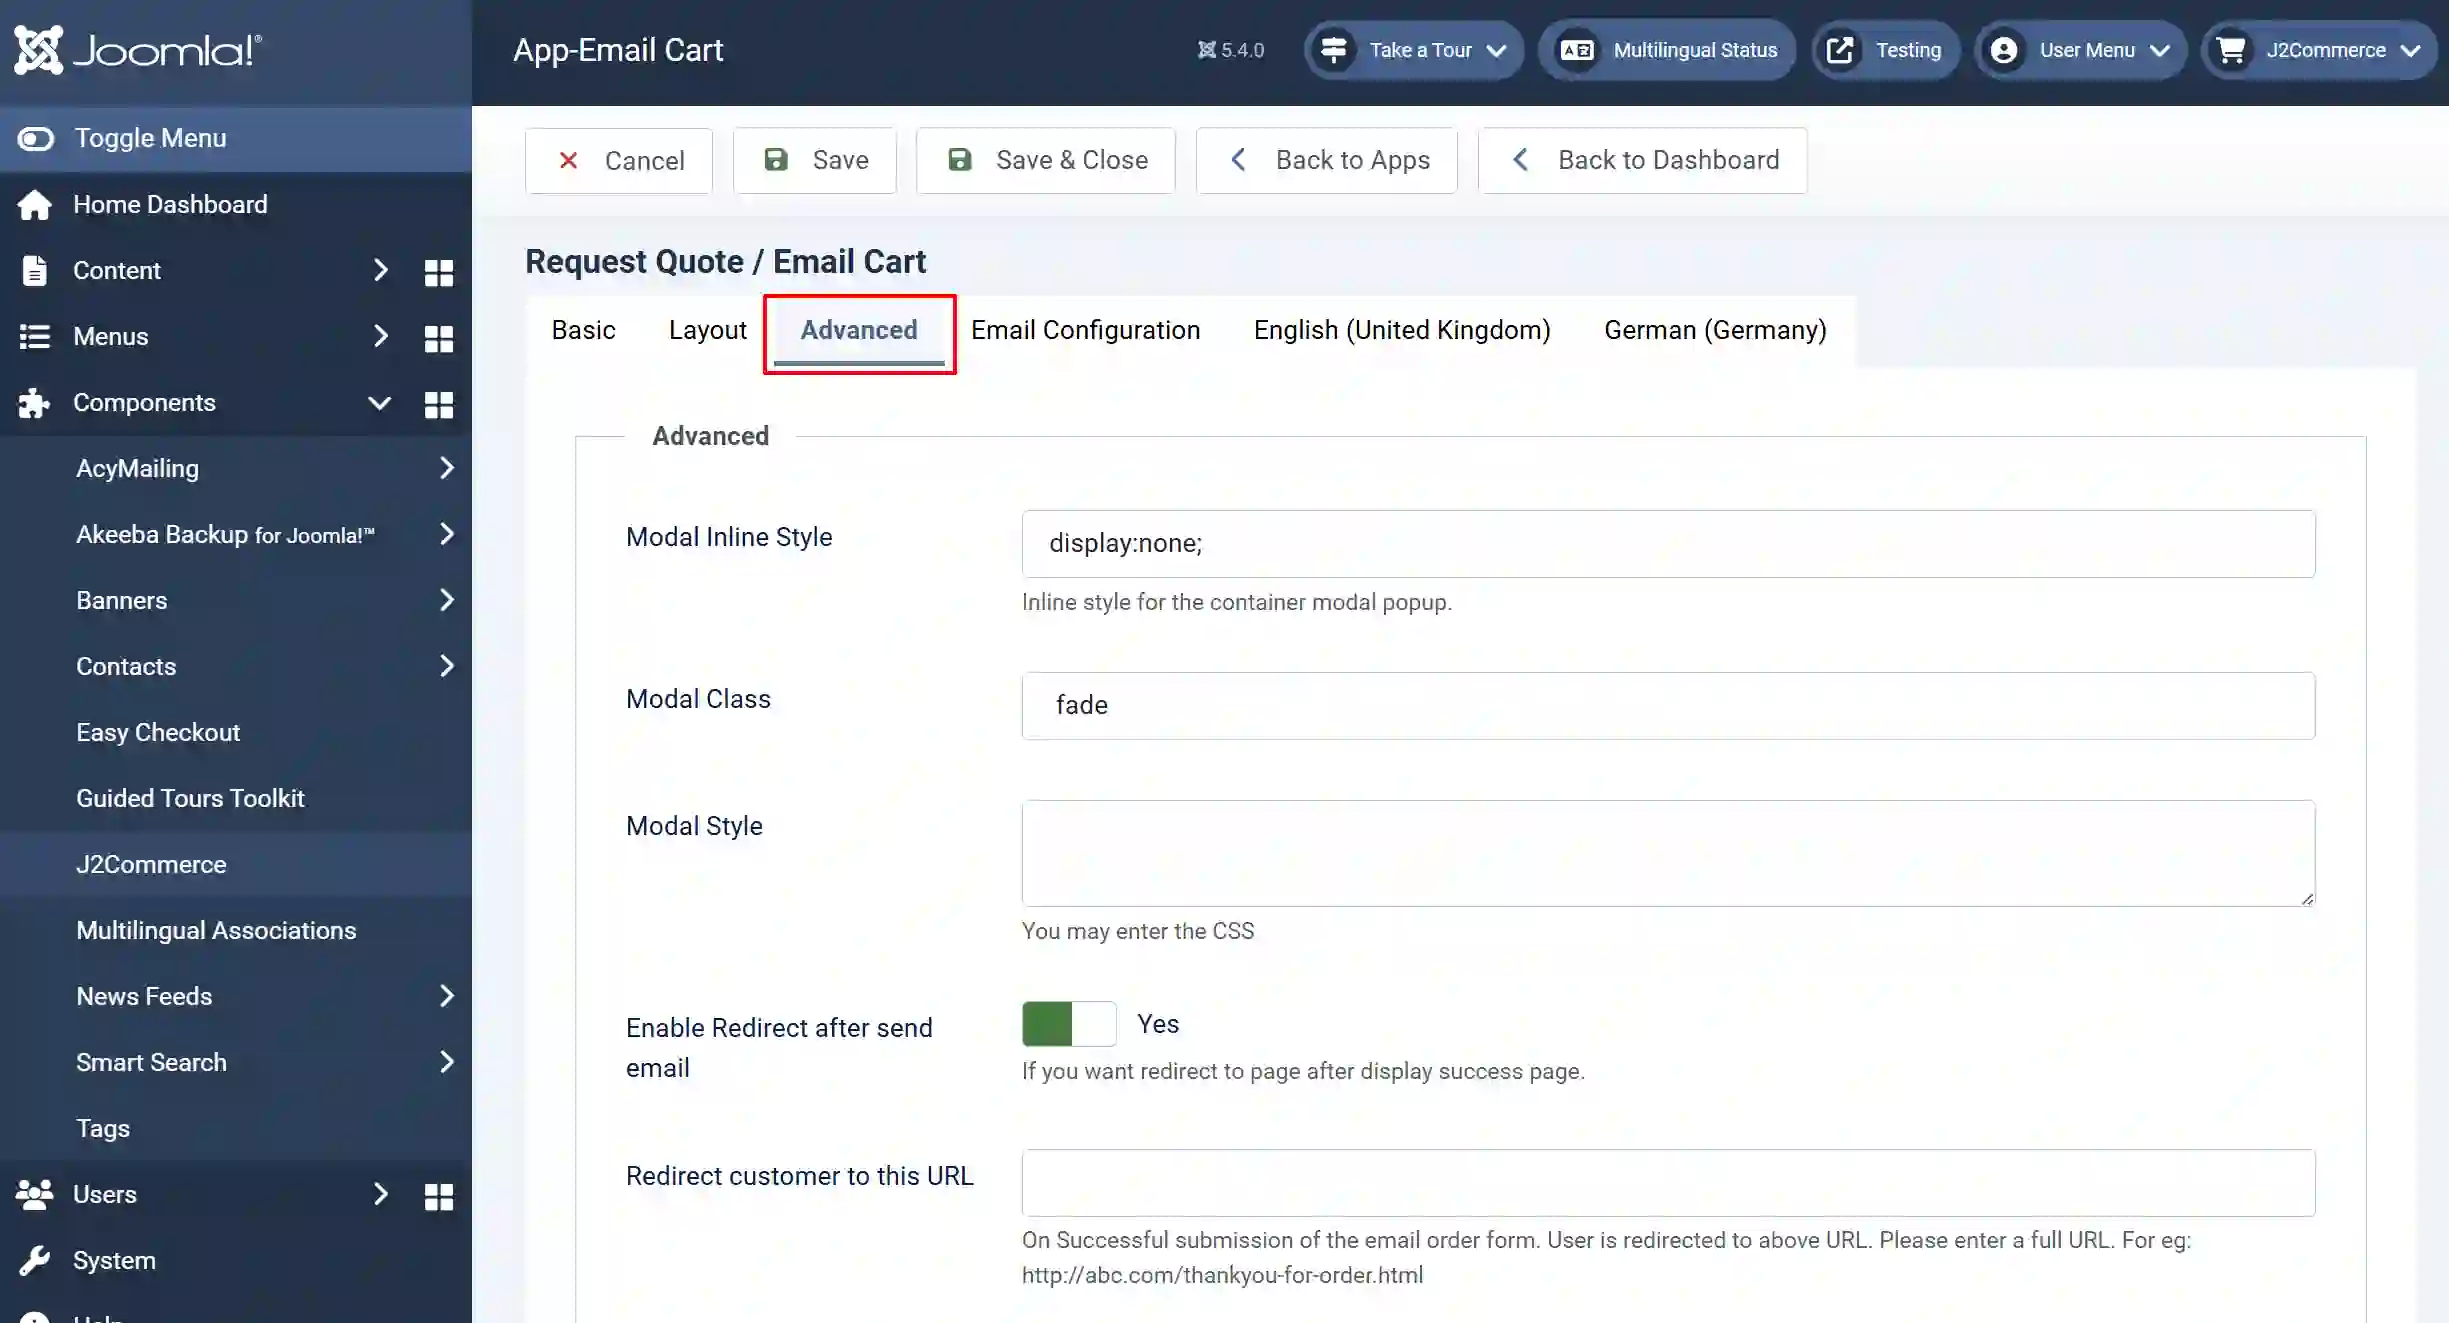
Modal Inline Style: Inline style for the container modal popup. You can add the additional inline style to the box container in the given text box.
Modal class: You can add additional class names to the modal box container in the given text box.
Modal Style: You can add the custom CSS in the given text area.
Enable Redirect after send email: Set this option to Yes if you wish to redirect the users to a page after the order has been placed.
Redirect the customer to this URL: On Successful submission of the email order form. User is redirected to the above URL. Please enter a full URL. For eg: http://abc.com/thankyou-for-order.html
Email Configuration
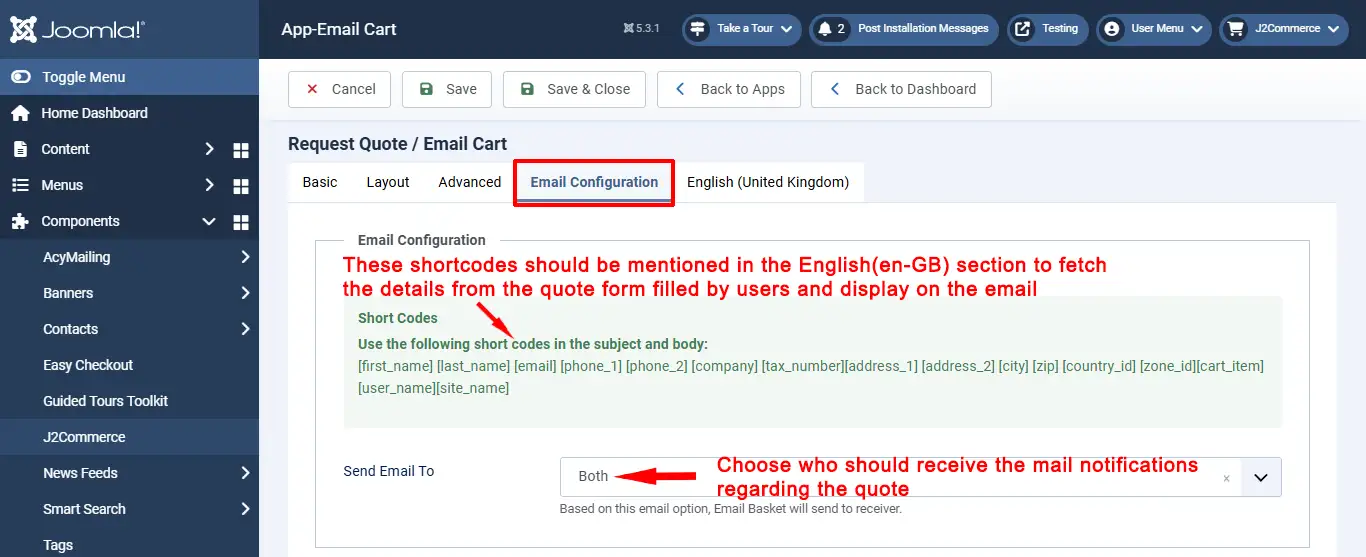
Short Codes: Use the following short codes in the subject and body: Use these shortcodes in the English (en-GB) section to fetch the details from the quote form filled out by the users and display on the email.
Send email to: Choose the user to whom you wish to send the email to.
Language Email tab
In this section, the email template could be set up. The shortcodes found in the previous tab could be used here. The order in which they are specified here would determine their order in the email notifications.
If the site is multi-lingual, the languages available would be displayed here and the email templates could be set up for each one of them accordingly.
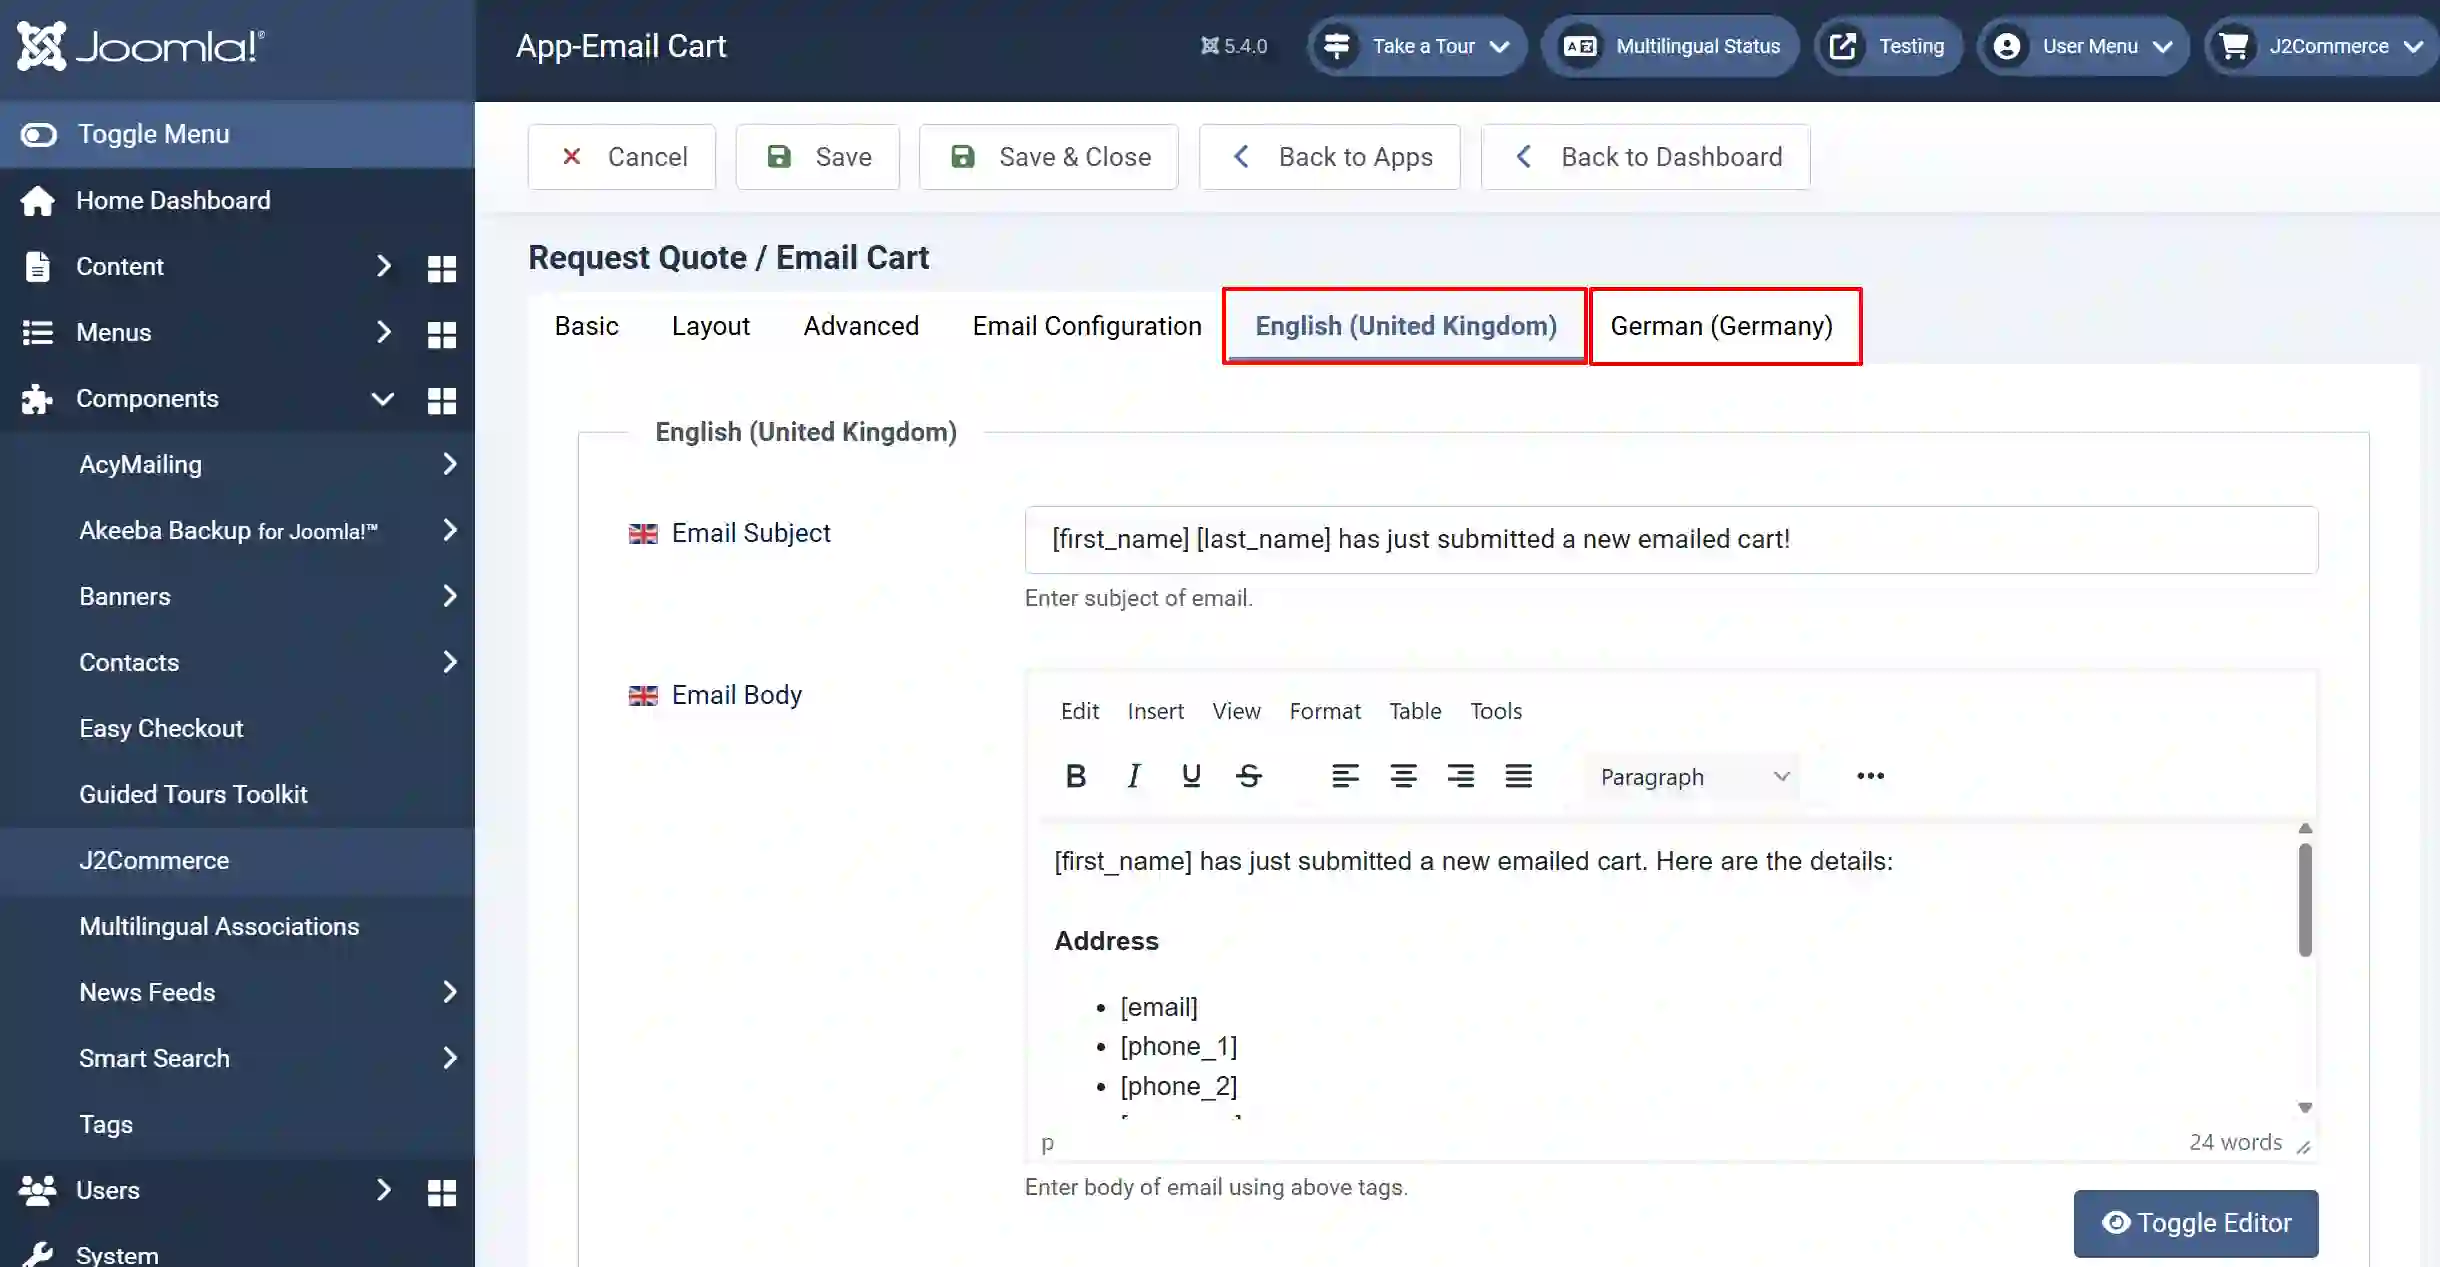
On a multi-lingual site: The available languages are listed in separate tabs next to the Email Configuration tab (instead of the English tab shown above)
Email Subject: Enter the shortcodes and the subject of the email here. ie: [first_name] [last_name] has just submitted a new emailed cart!
Email Body: In the Email body section, you can use the shortcodes (which are controlled by the email config tab) to display the dynamic information such as customer’s name, email, country, cart items, etc..[first_name][last\_name][email][phone\_1][phone_2][company][tax_number][address\_1][address_2][city][zip][country\_id][zone_id][cart\_item][user_name][site\_name]
To display the custom field information (entered by the user when filling the form) in an email that the customer and admin receive, it is possible by adding the shortcode of the respective custom field in the Email body editor. For example, if you are having a text area as a custom field in your email form, then copy the field name (you can get it in the custom field section J2Commerce > Setup > Custom fields) and paste it in the Email body editor. The instructions for adding new Custom Fields are mentioned previously in this doc.