Digifactu
Digifactu/Digifact is an electronic invoicing platform that lets businesses issue, manage, and store legally compliant electronic invoices. In markets such as Mexico, Guatemala, Panama, El Salvador, or the Dominican Republic, these systems help companies generate digital invoices that meet each country’s tax authority requirements, integrate with ERPs, automate workflows, and securely store records.
Each Country has its own type of tax verification rules. This documentation is for Spain. Spain's Invoicing Landscape is called (Veri*factu)
Setting up your Digifactu Account
Create Your Account
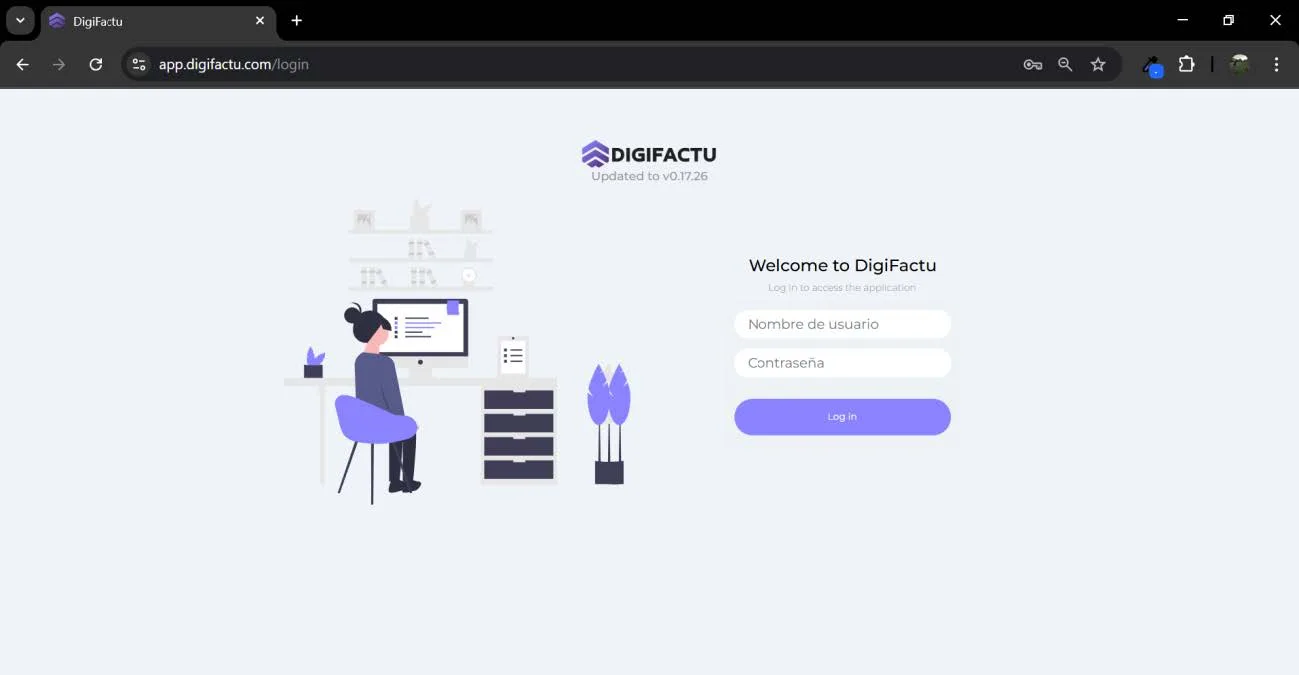
If you don't already have a DigiFactu account, go to https://app.digifactu.com
-
Register with your email address.
-
Verify your email and create secure login credentials.
Enter Business Information
-
Add your legal business name, tax ID (VAT/NIF/RFC depending on country), address, and contact details.
-
Select your country so the system applies the correct tax and invoicing rules.
Setting up your Subscriptions
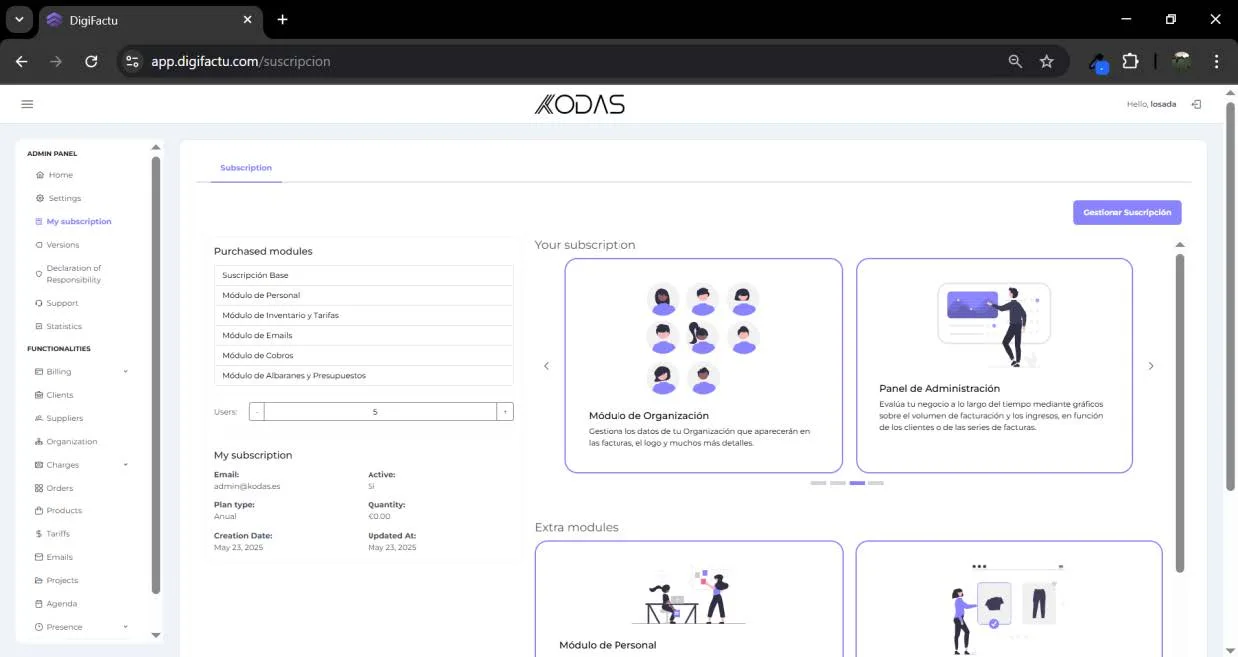
As this is a modular application, the user can subscribe only to the add-ons they need. In this section, the user will always see the modules or sections included in their Plan and can subscribe to additional ones if desired.
Connecting Digifactu to J2Commerce
Requirements
- PHP 8.1.0 +
- Joomla! 4.x/ Joomla! 5.x +
- J2Commerce / J2Store 4.x +
Purchase the App:
Step 1: Go to our J2Commerce website > Extensions > Apps
Step 2: Locate the DigiFactu App > click View Details > Add to cart > Checkout.
Step 3: Go to your My Downloads under your profile button at the top right corner and search for the app. Click Available Versions > View Files > Download Now
Note: In the documentation below, we will be using DigiFactu for Spain as the example.
Install the App:
Use the Joomla! installer to install the app. Go to System > Install > Extensions > install the app
-e0515ef561b368cb4d5a053cacb4c525.webp)
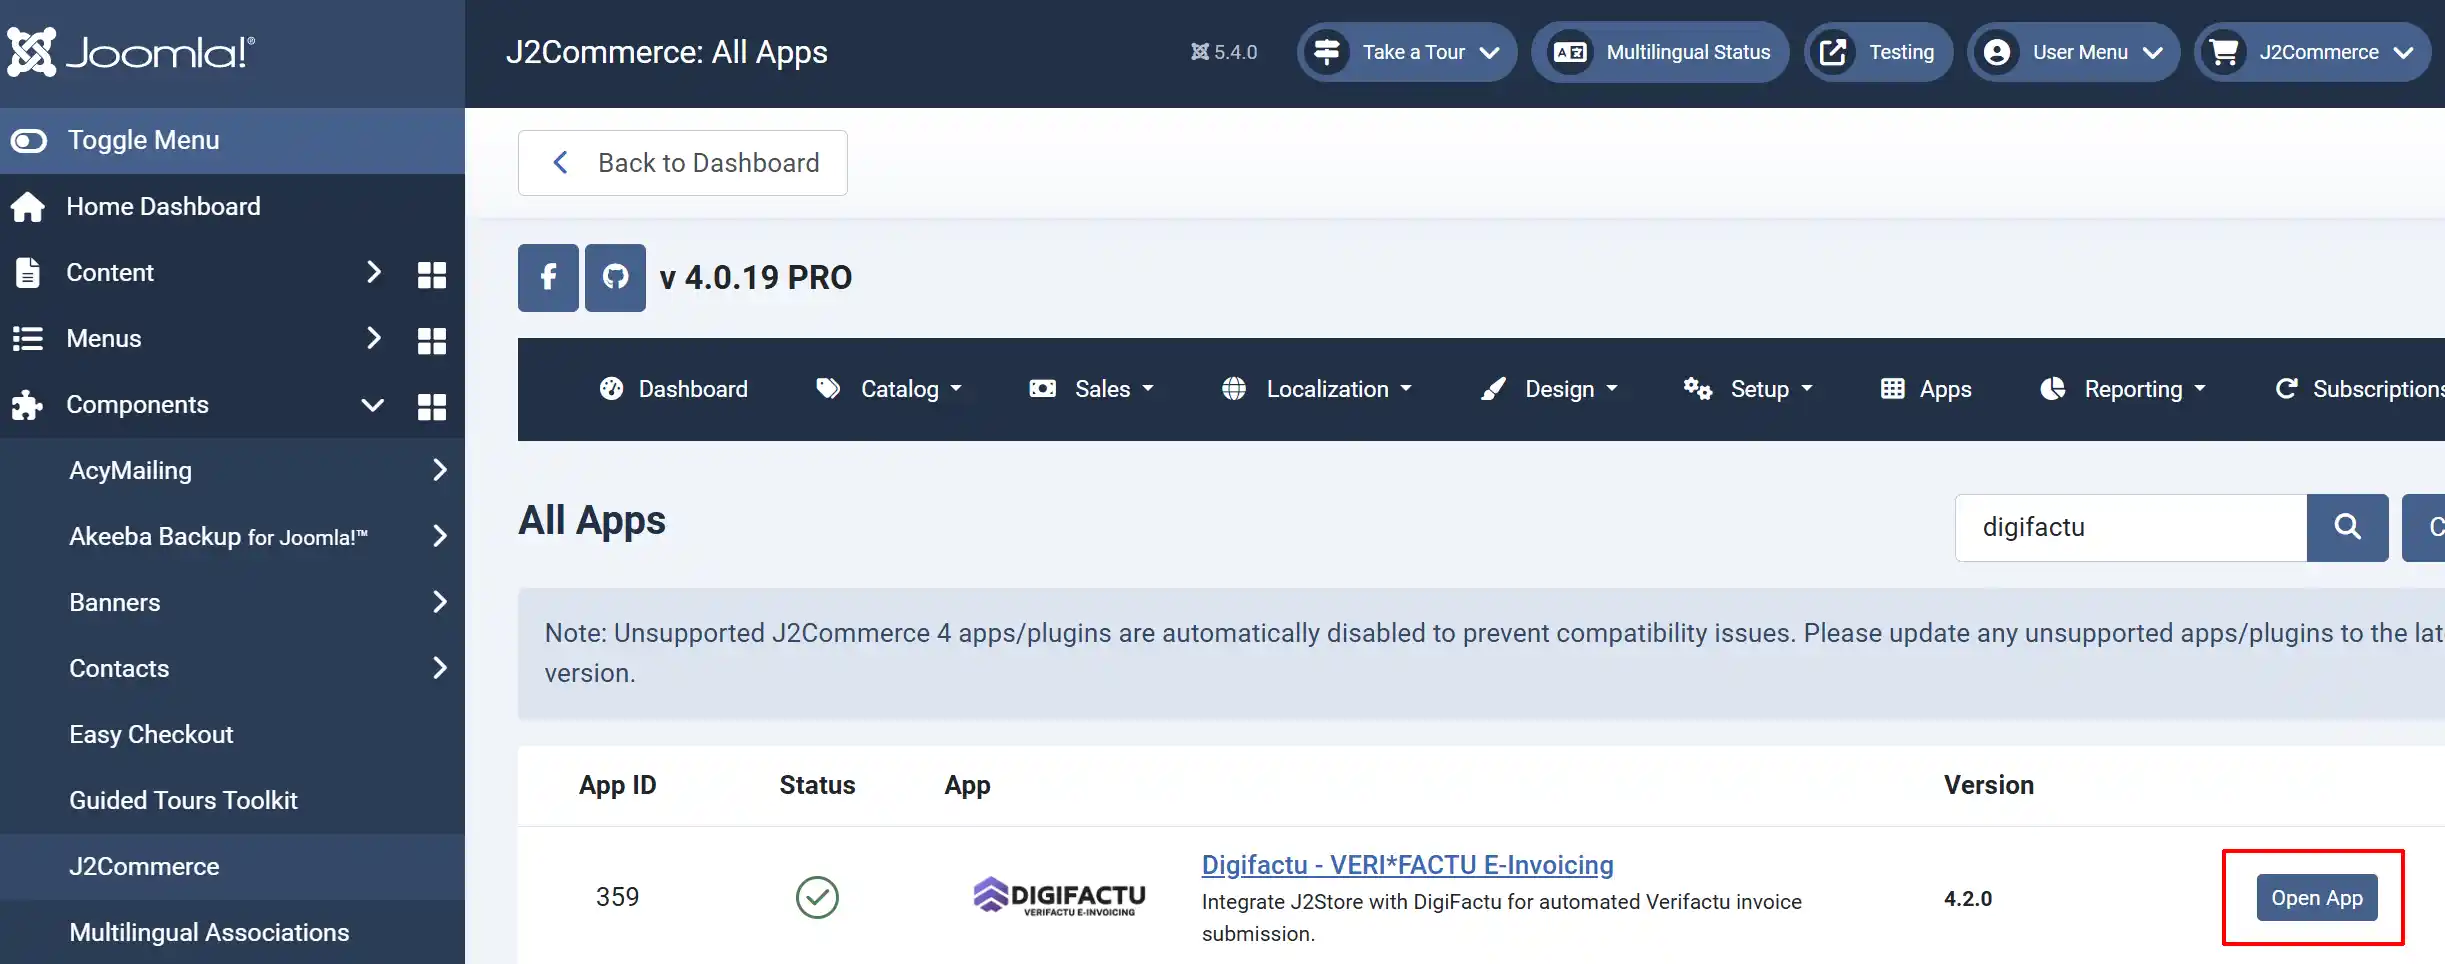
Enable the App
Go to J2Commerce > Apps > search for DigiFactu to narrow down your search.
Click on the 'X' under Status to enable it.
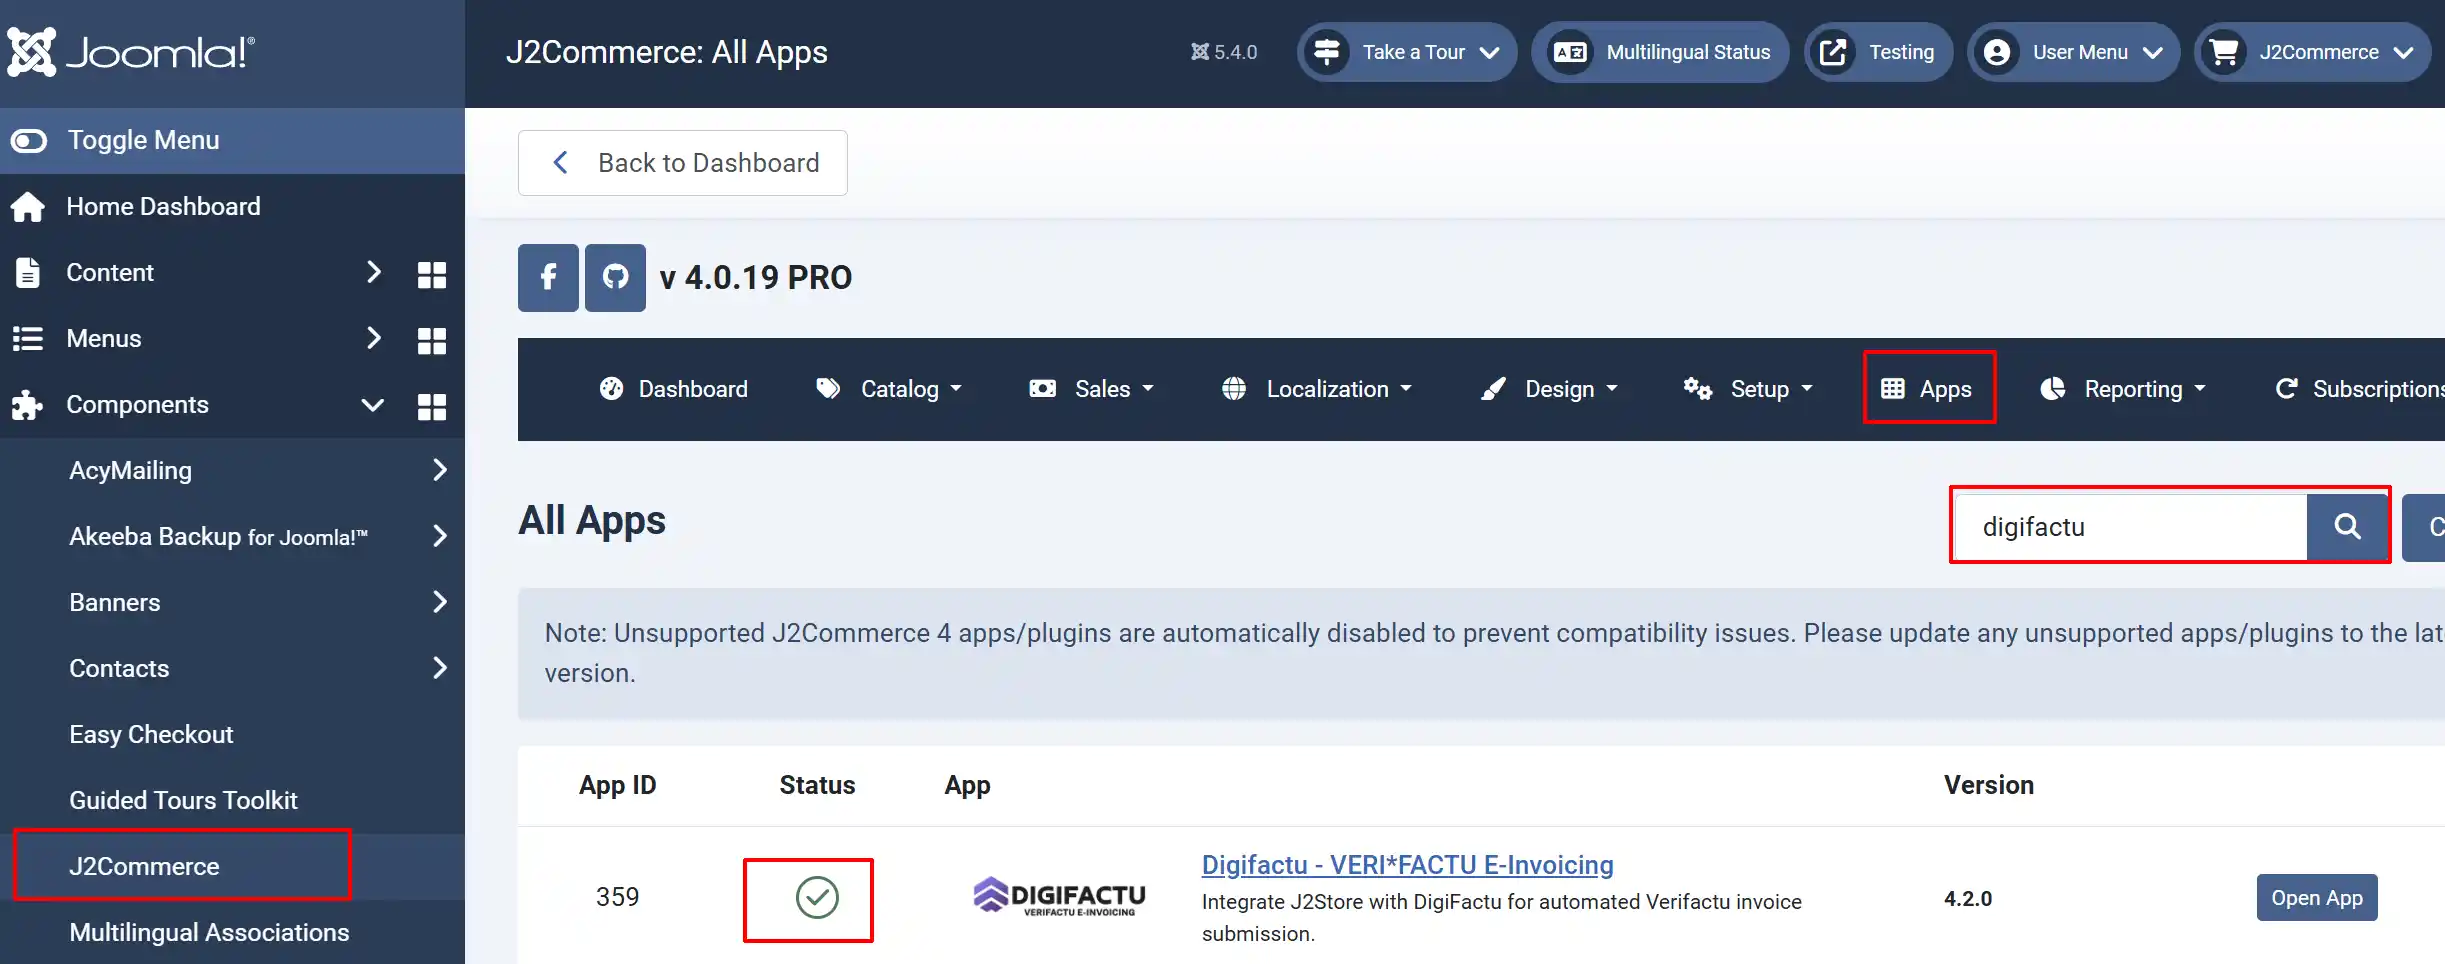
Step 7: Click the title or Open App to start setting up the configurations.
Configure the App Settings
Basic tab
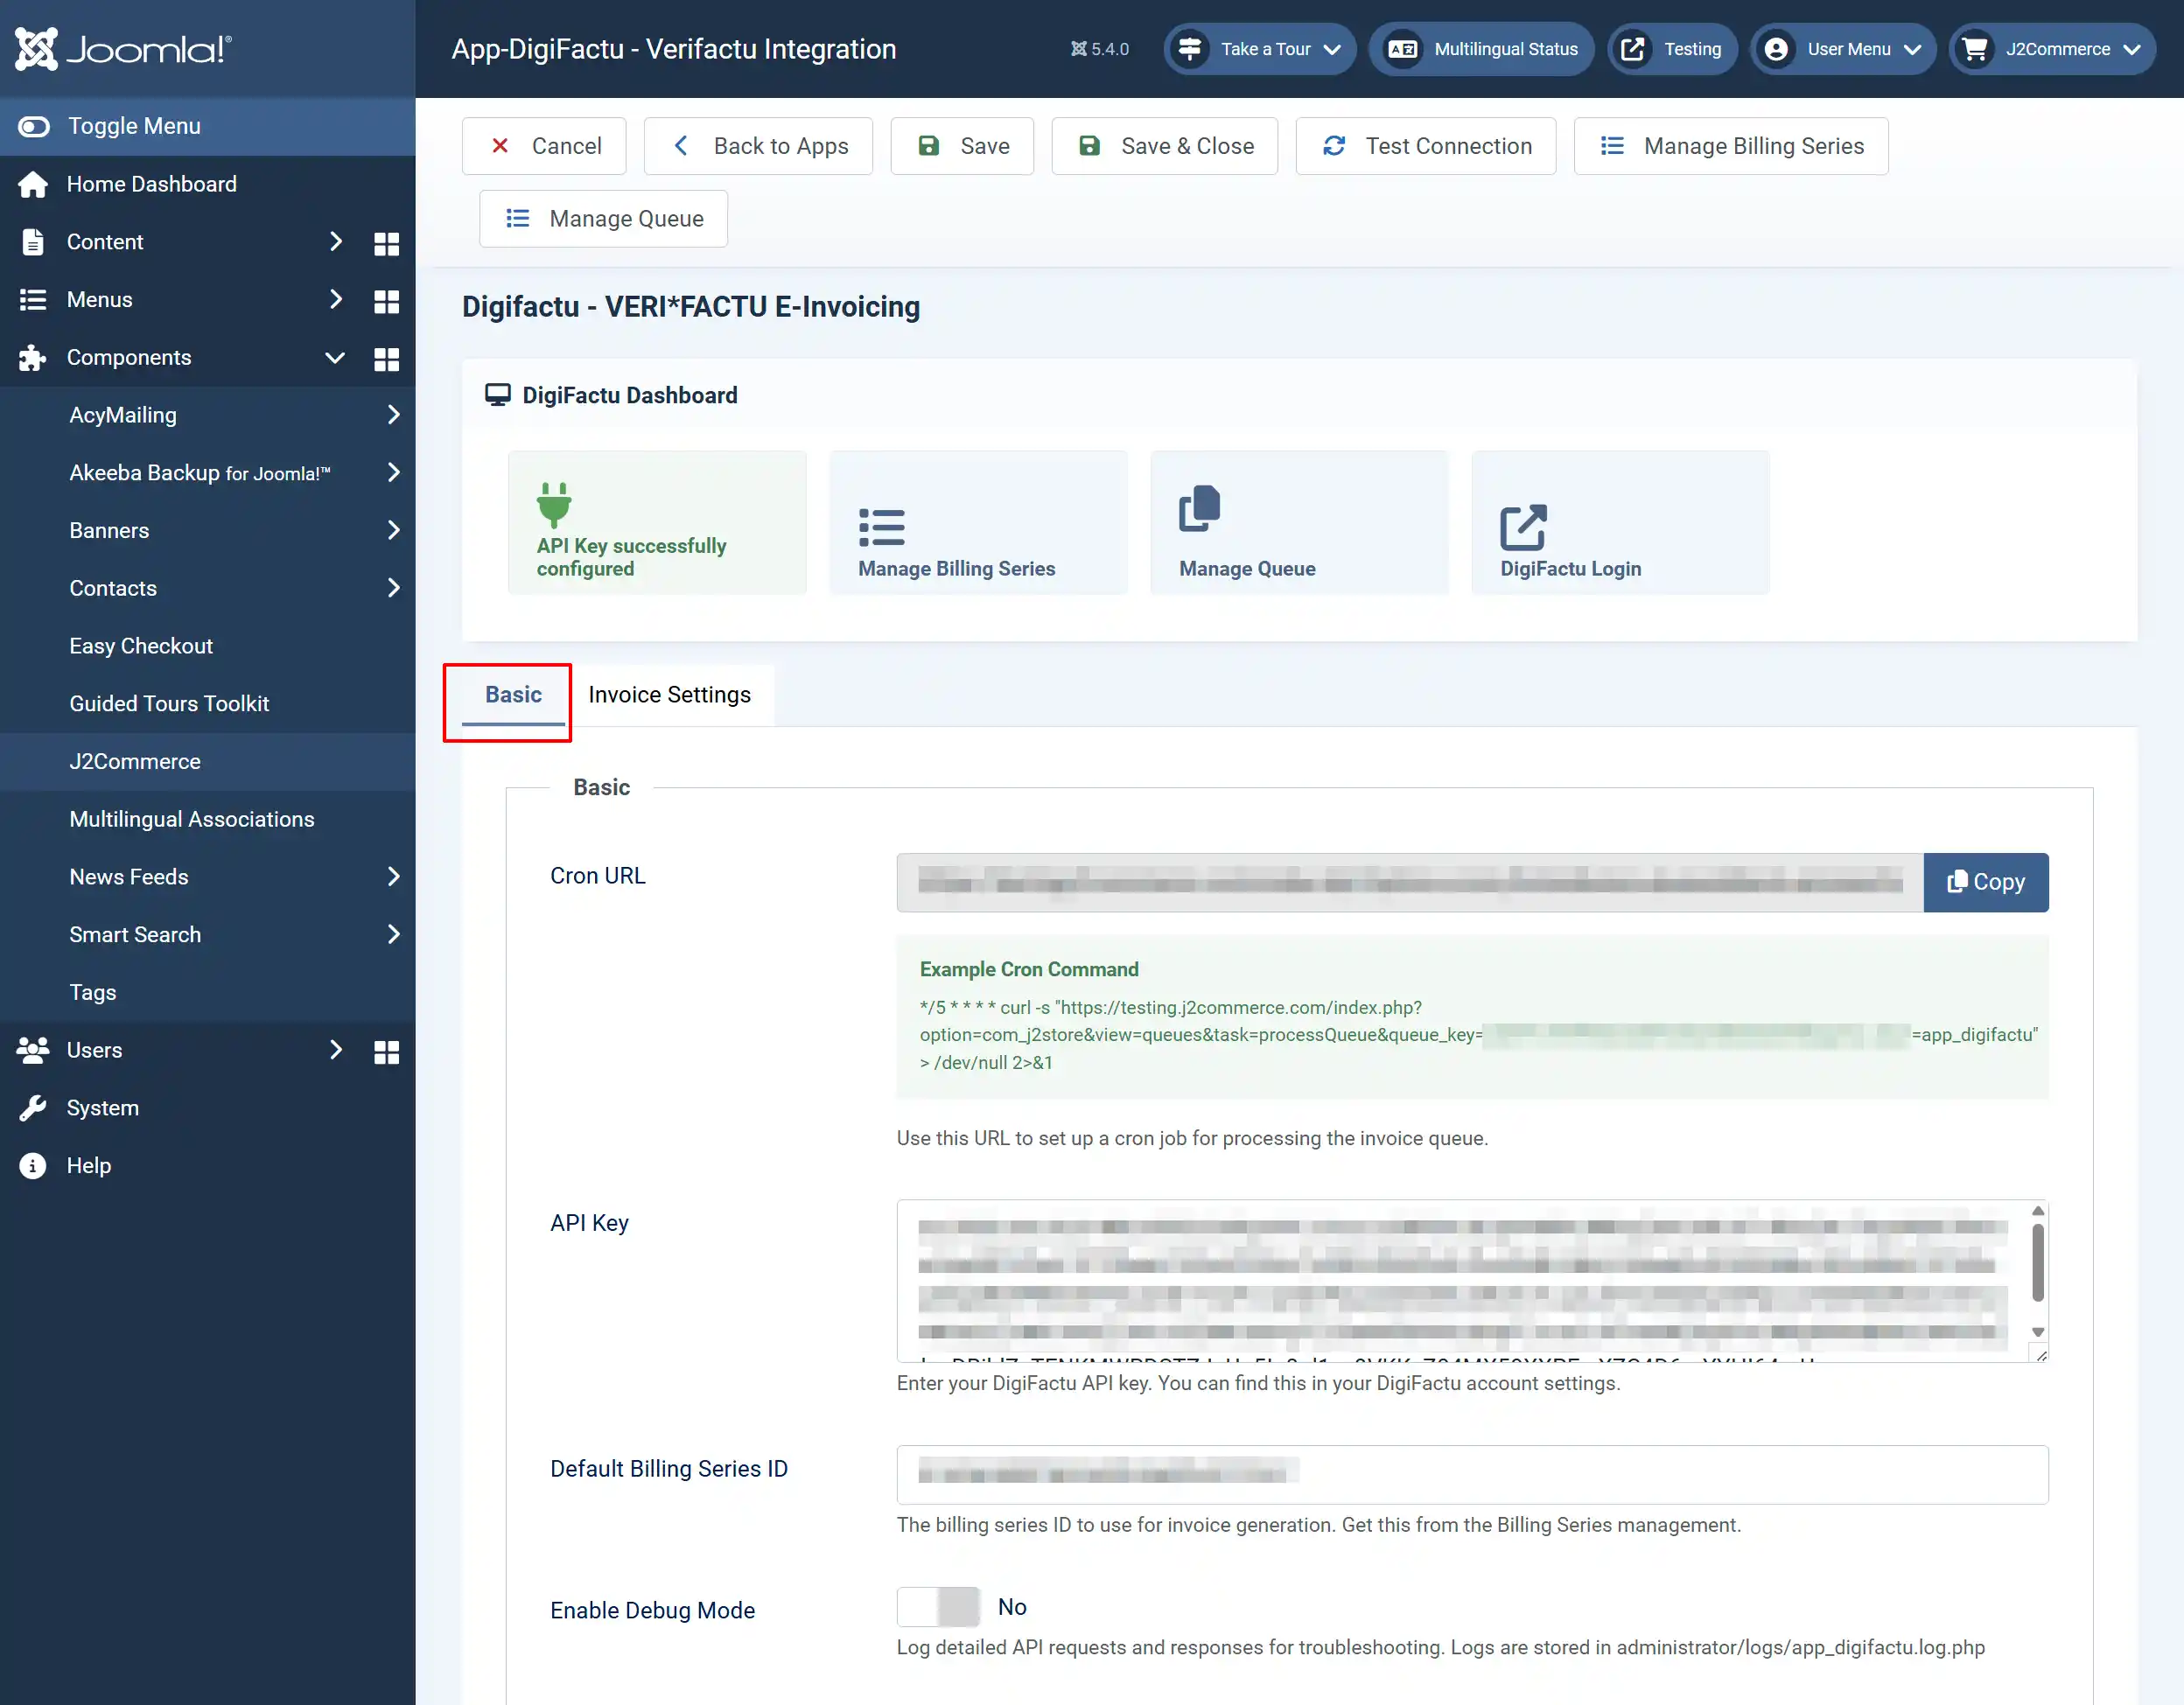
Cron URL: Use this URL to set up a cron job for processing the invoice queue. Copy/paste this URL in a new tab and hit enter to push an invoice through manually.
***To set up your cron job on your server, go to the bottom of this documentation for instructions
API Key: Enter your DigiFactu API key. You can find this in your DigiFactu account settings
Default Billing Series ID: The billing series ID to use for invoice generation. Get this from the Billing Series management.
Enable Debug Mode: Log detailed API requests and responses for troubleshooting. Logs are stored in administrator/logs/app_digifactu.log.php
Advanced tab

Sync Order Status: Select which order statuses should trigger invoice synchronization to DigiFactu.
Submitted Order Status: Orders that are successfully submitted into the Digifactu system will have their order status changed to the selected order status.
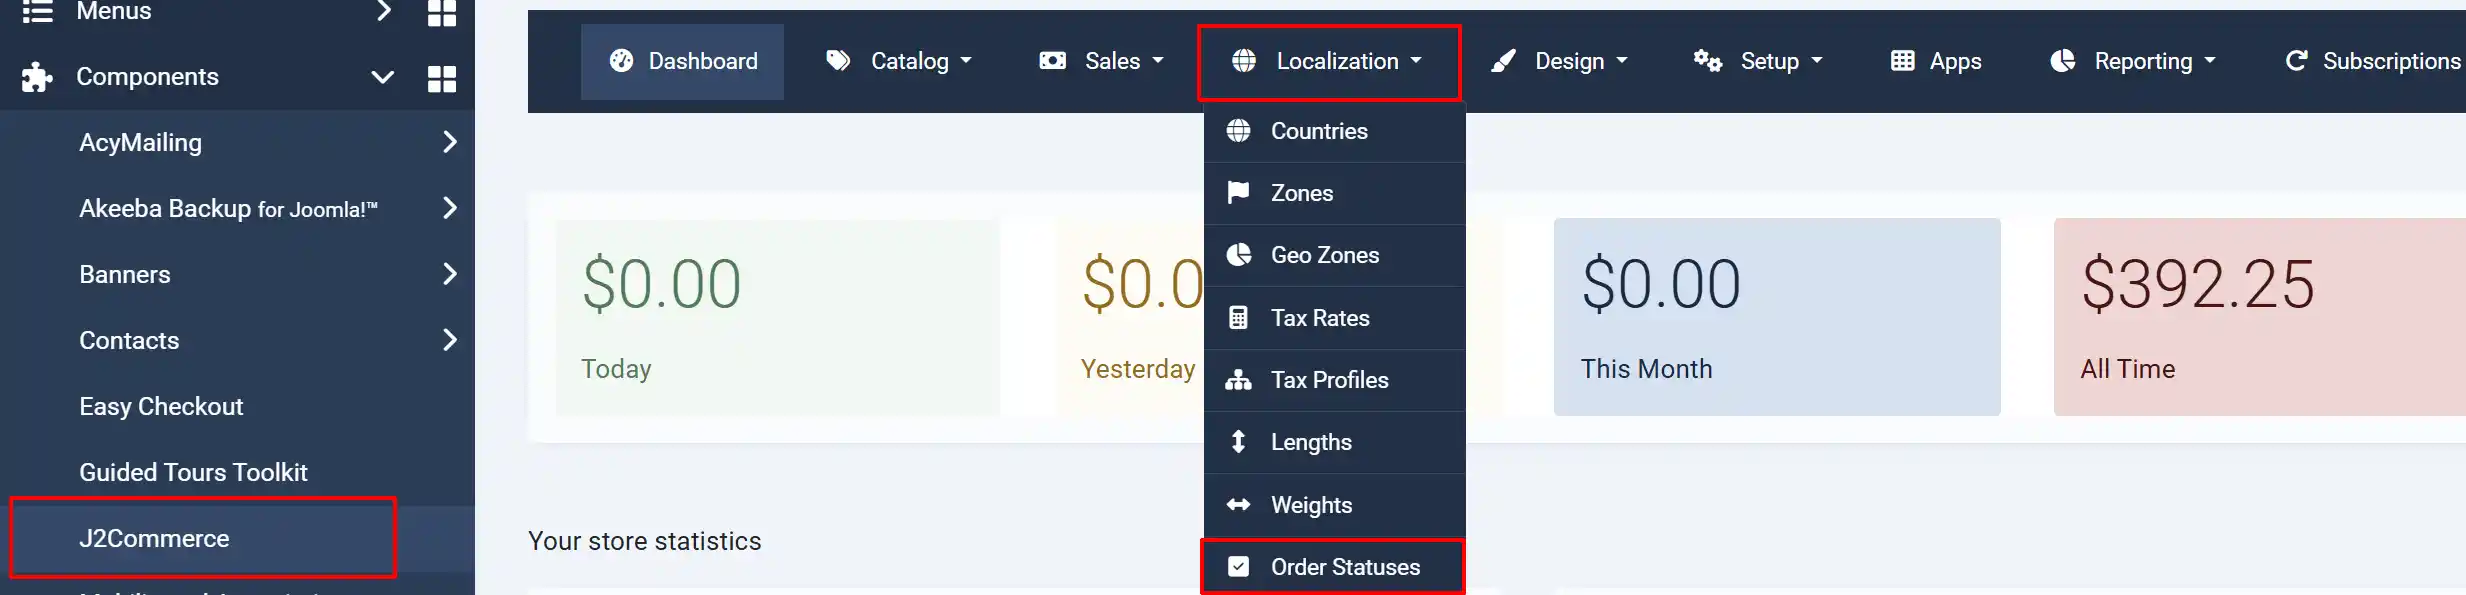
**Note: How to add a new Order Status to the drop-down menu: Open a new tab and go to your J2Commerce > Localization > Order Statuses > New. Once you have created a new status, go back to your app and hit save to refresh it, and it will appear in the drop-down menu. See image below.
Sync Zero Total Orders: Should orders with zero total be synchronized to DigiFactu?
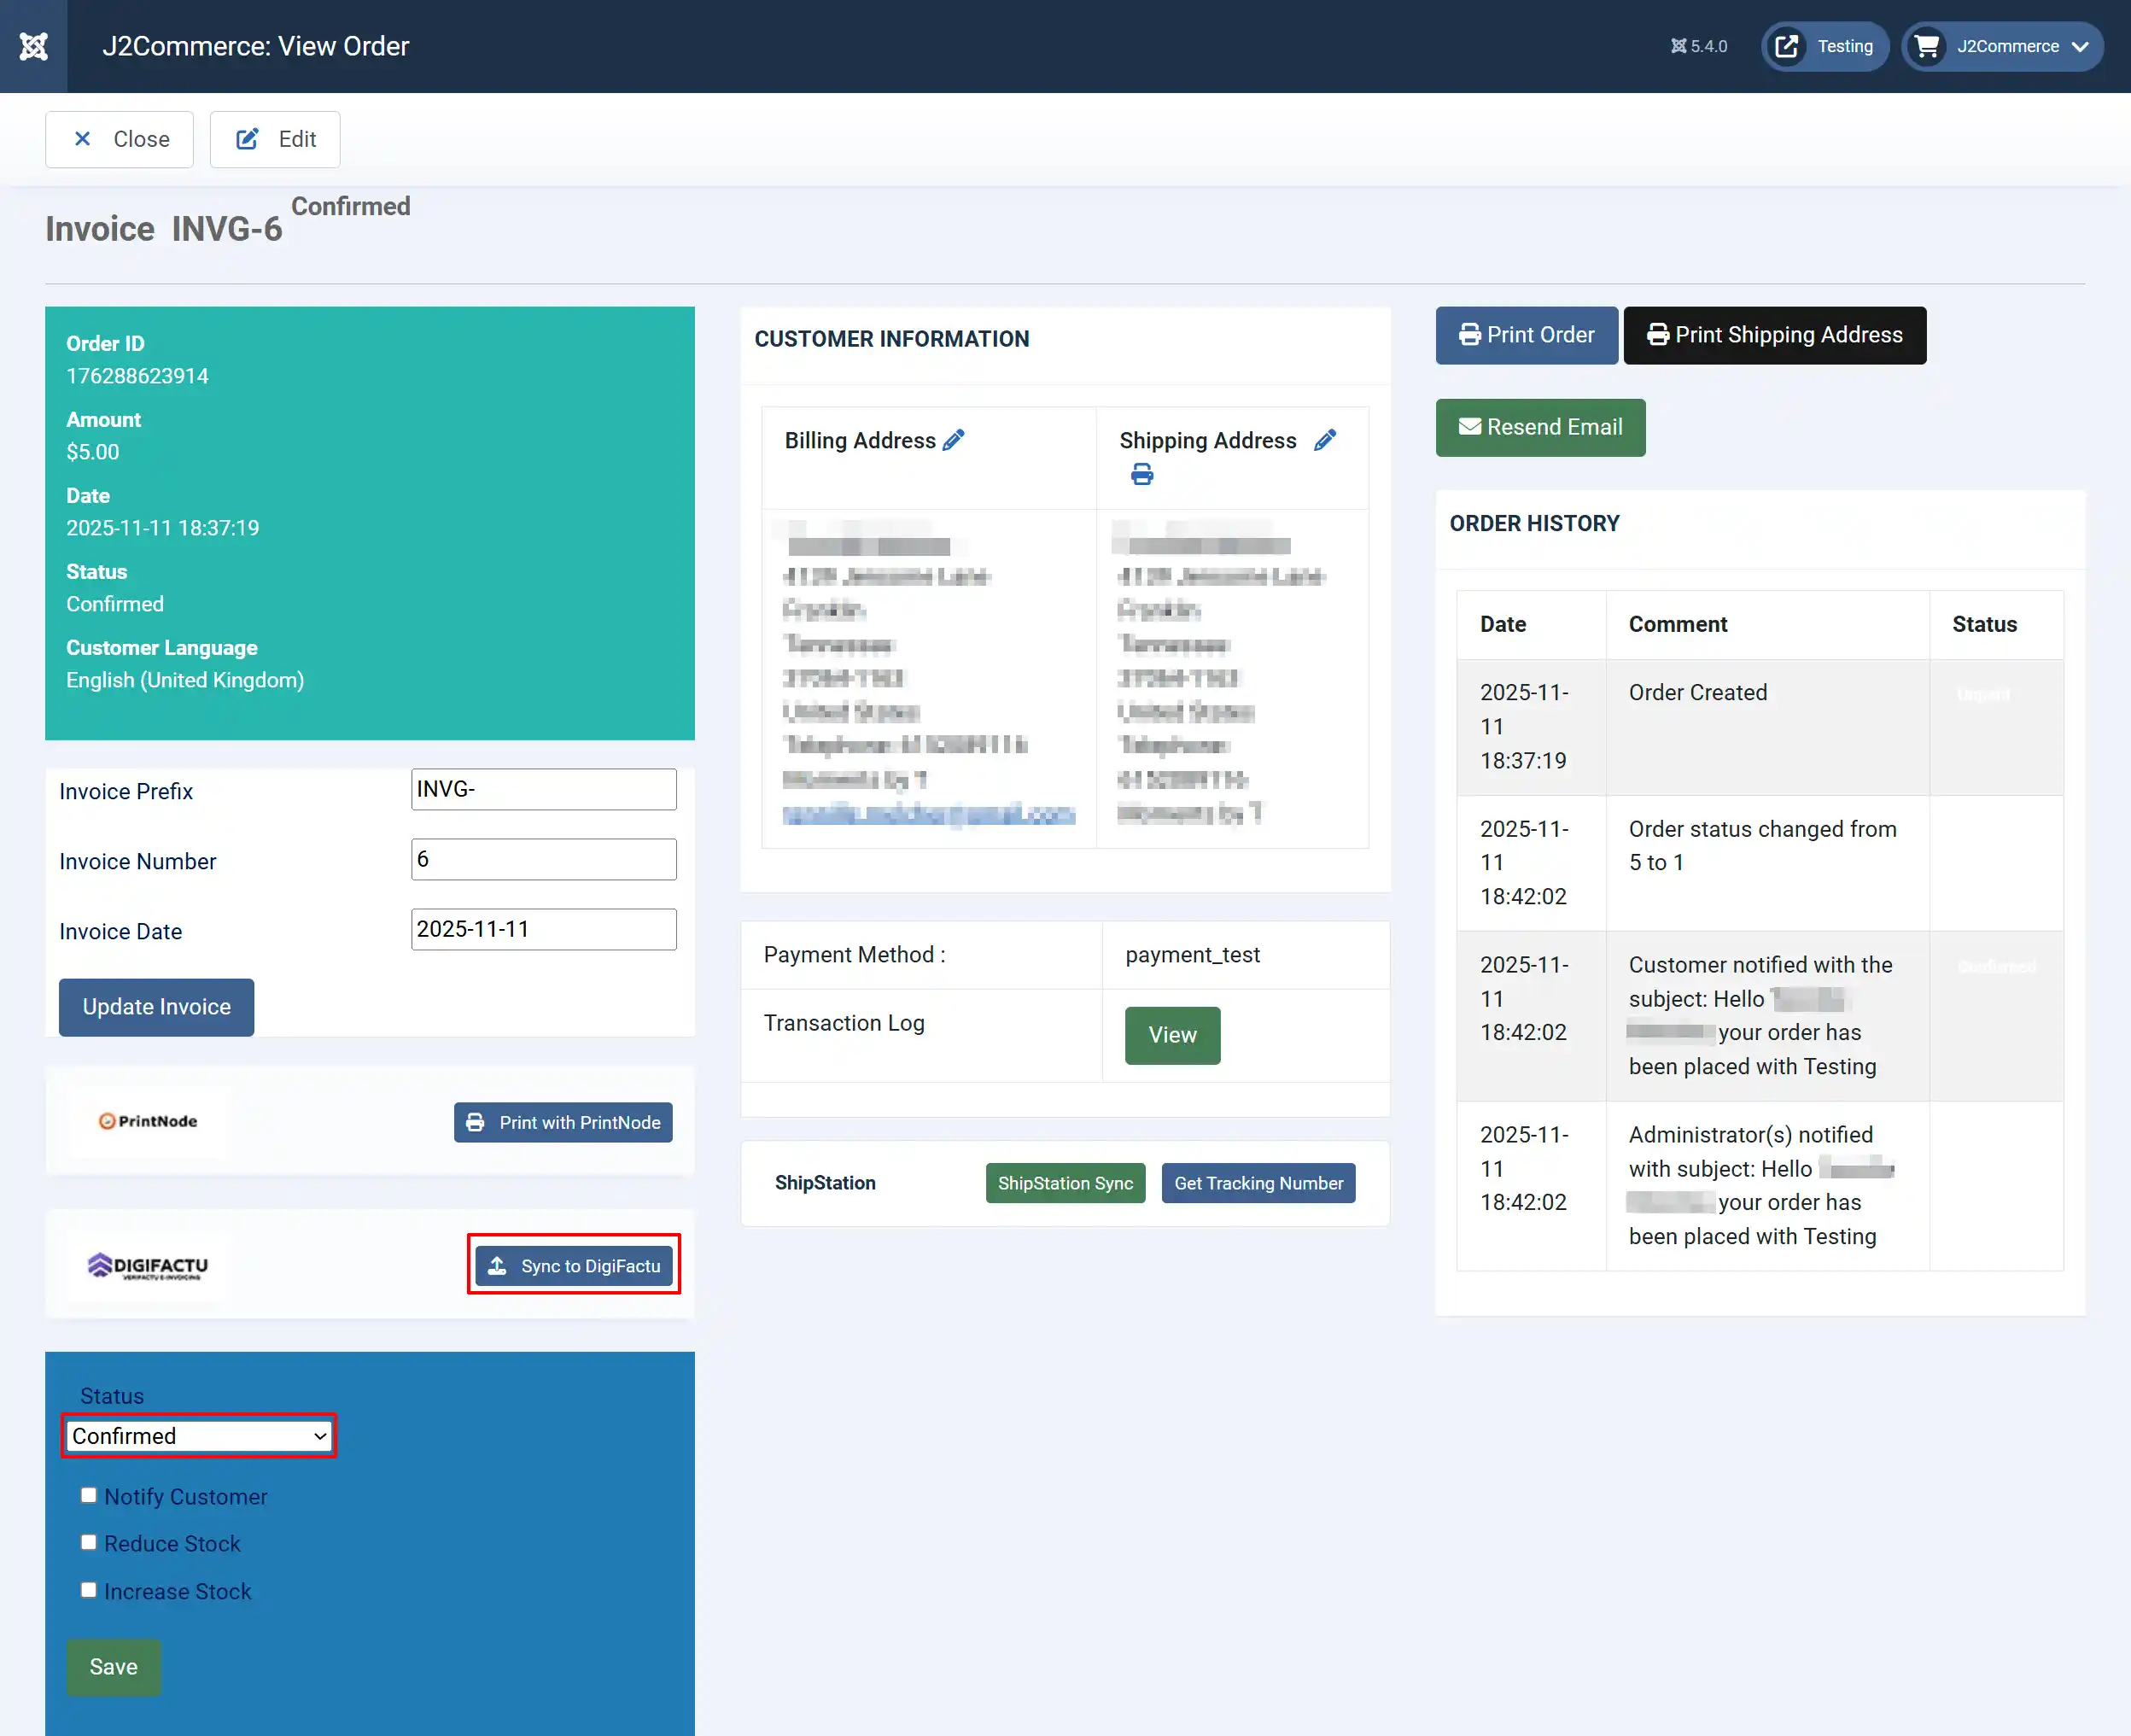
Enable Manual Sync Button: Show a manual sync button on individual order pages in the admin view. This is shown on the orders with matching order status to the Sync Order Status field.
The image below shows what the manual sync button looks like in the order status page if the button has been enabled to Yes. Once the order has been pushed through to DigiFactu, the order status will automatically change from Confirmed to Submitted (or whatever status you assigned it)
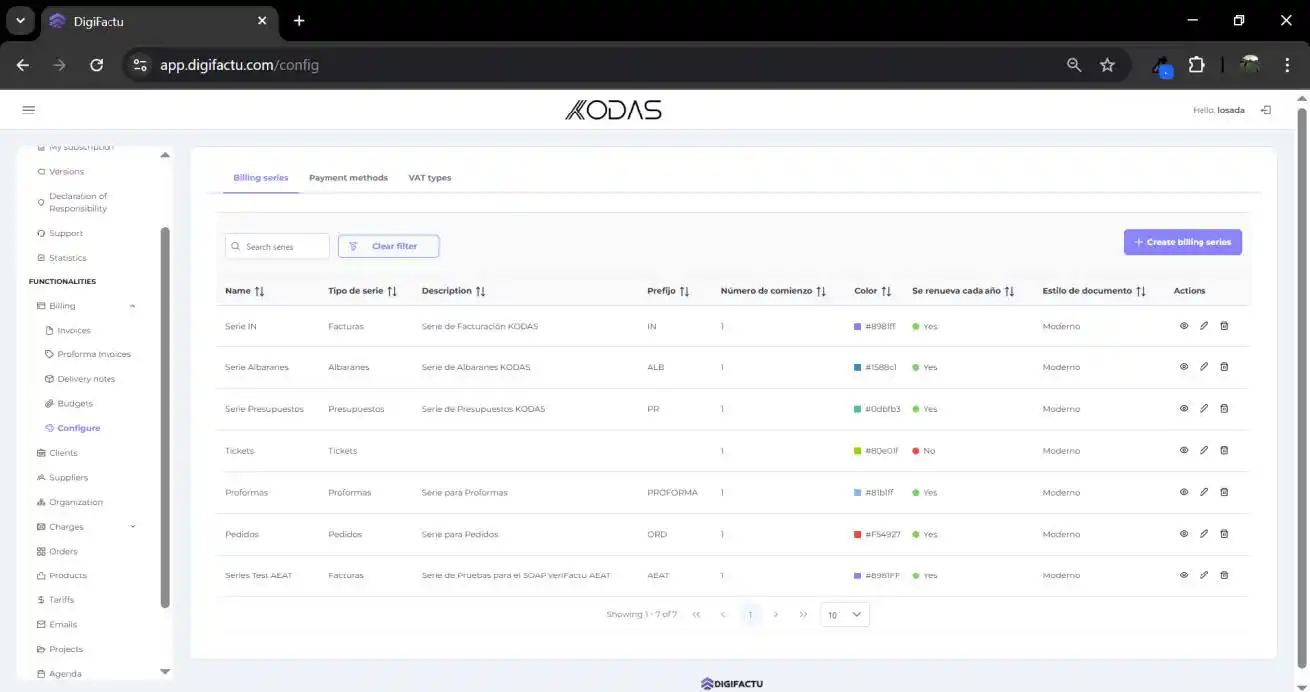
Manage Billing Series tab

A billing series is a structured sequence of invoice numbers that share the same prefix/format and sequencing rules. For example, you might create separate billing series for different product lines or regions, like:
-
INV-2025-US-001, INV-2025-US-002… -
SERV-2025-EU-001, SERV-2025-EU-002…
This helps with organization, legal tracking, and consistent numbering of invoices and bills. The configuration of different invoicing series, payment methods, and VAT types is managed in this section. Here, for example, the colors of each series can be adjusted, which will be reflected in the various generated documents, not only invoices but also Delivery Notes, etc.
Manage Queue tab

Here you will find the list of invoices that are waiting to be processed by the system. You can either wait for DigiFactu to push them through, or you can do it manually in the individual order by clicking the sync button
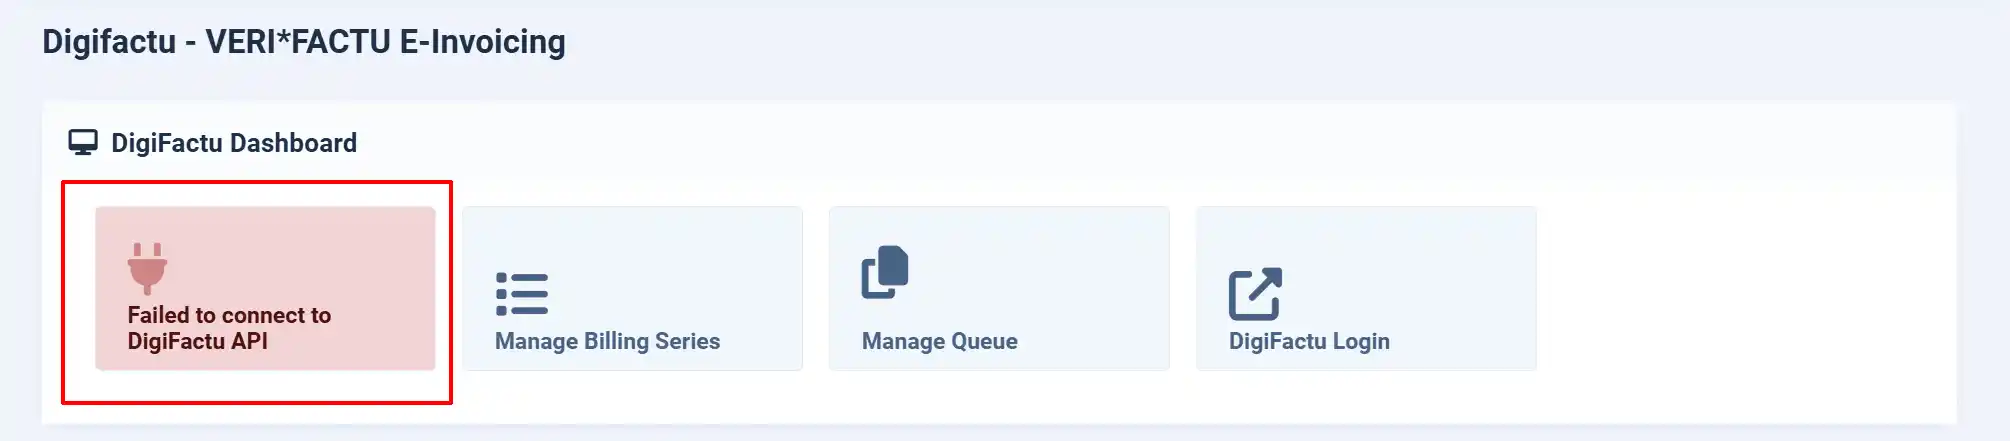
API Key Troubleshooting
The following screenshots shows if your API Credentials were entered correctly or not.
Successful API Key

Unsuccessful API Key
How to set a cron job on your server
Visit the Cron Documentation to learn how to set up a cron job on your server.