Google Tag Manager
Google Tag Manager gives developers a flexible way to add, update, and control tracking and marketing scripts without editing the website’s code each time. It reduces development workload, prevents script clutter, and enables advanced tracking of user behavior for analytics and advertising. By centralizing version control, improving site stability, and allowing faster deployment of new tracking tools, GTM helps keep websites efficient, secure, and ready for future growth.
Purchase the App
Step 1: Go to our J2Commerce website > Extensions > Apps
Step 2: Locate the Google Tag Manager App > click View Details > Add to cart > Checkout.
Step 3: Go to your My Downloads under your profile button at the top right corner and search for the app. Click Available Versions > View Files > Download Now
Install the App
Go to System > Install > Extensions > Install the app
-e0515ef561b368cb4d5a053cacb4c525.webp)
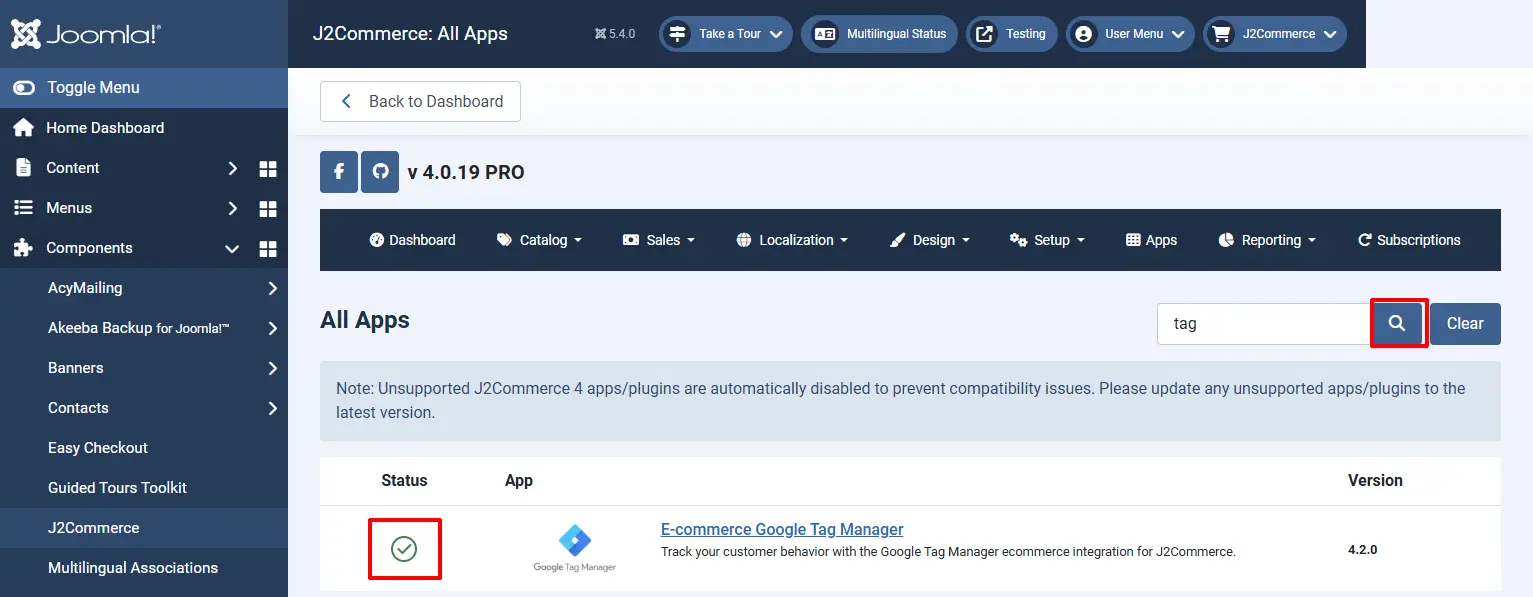
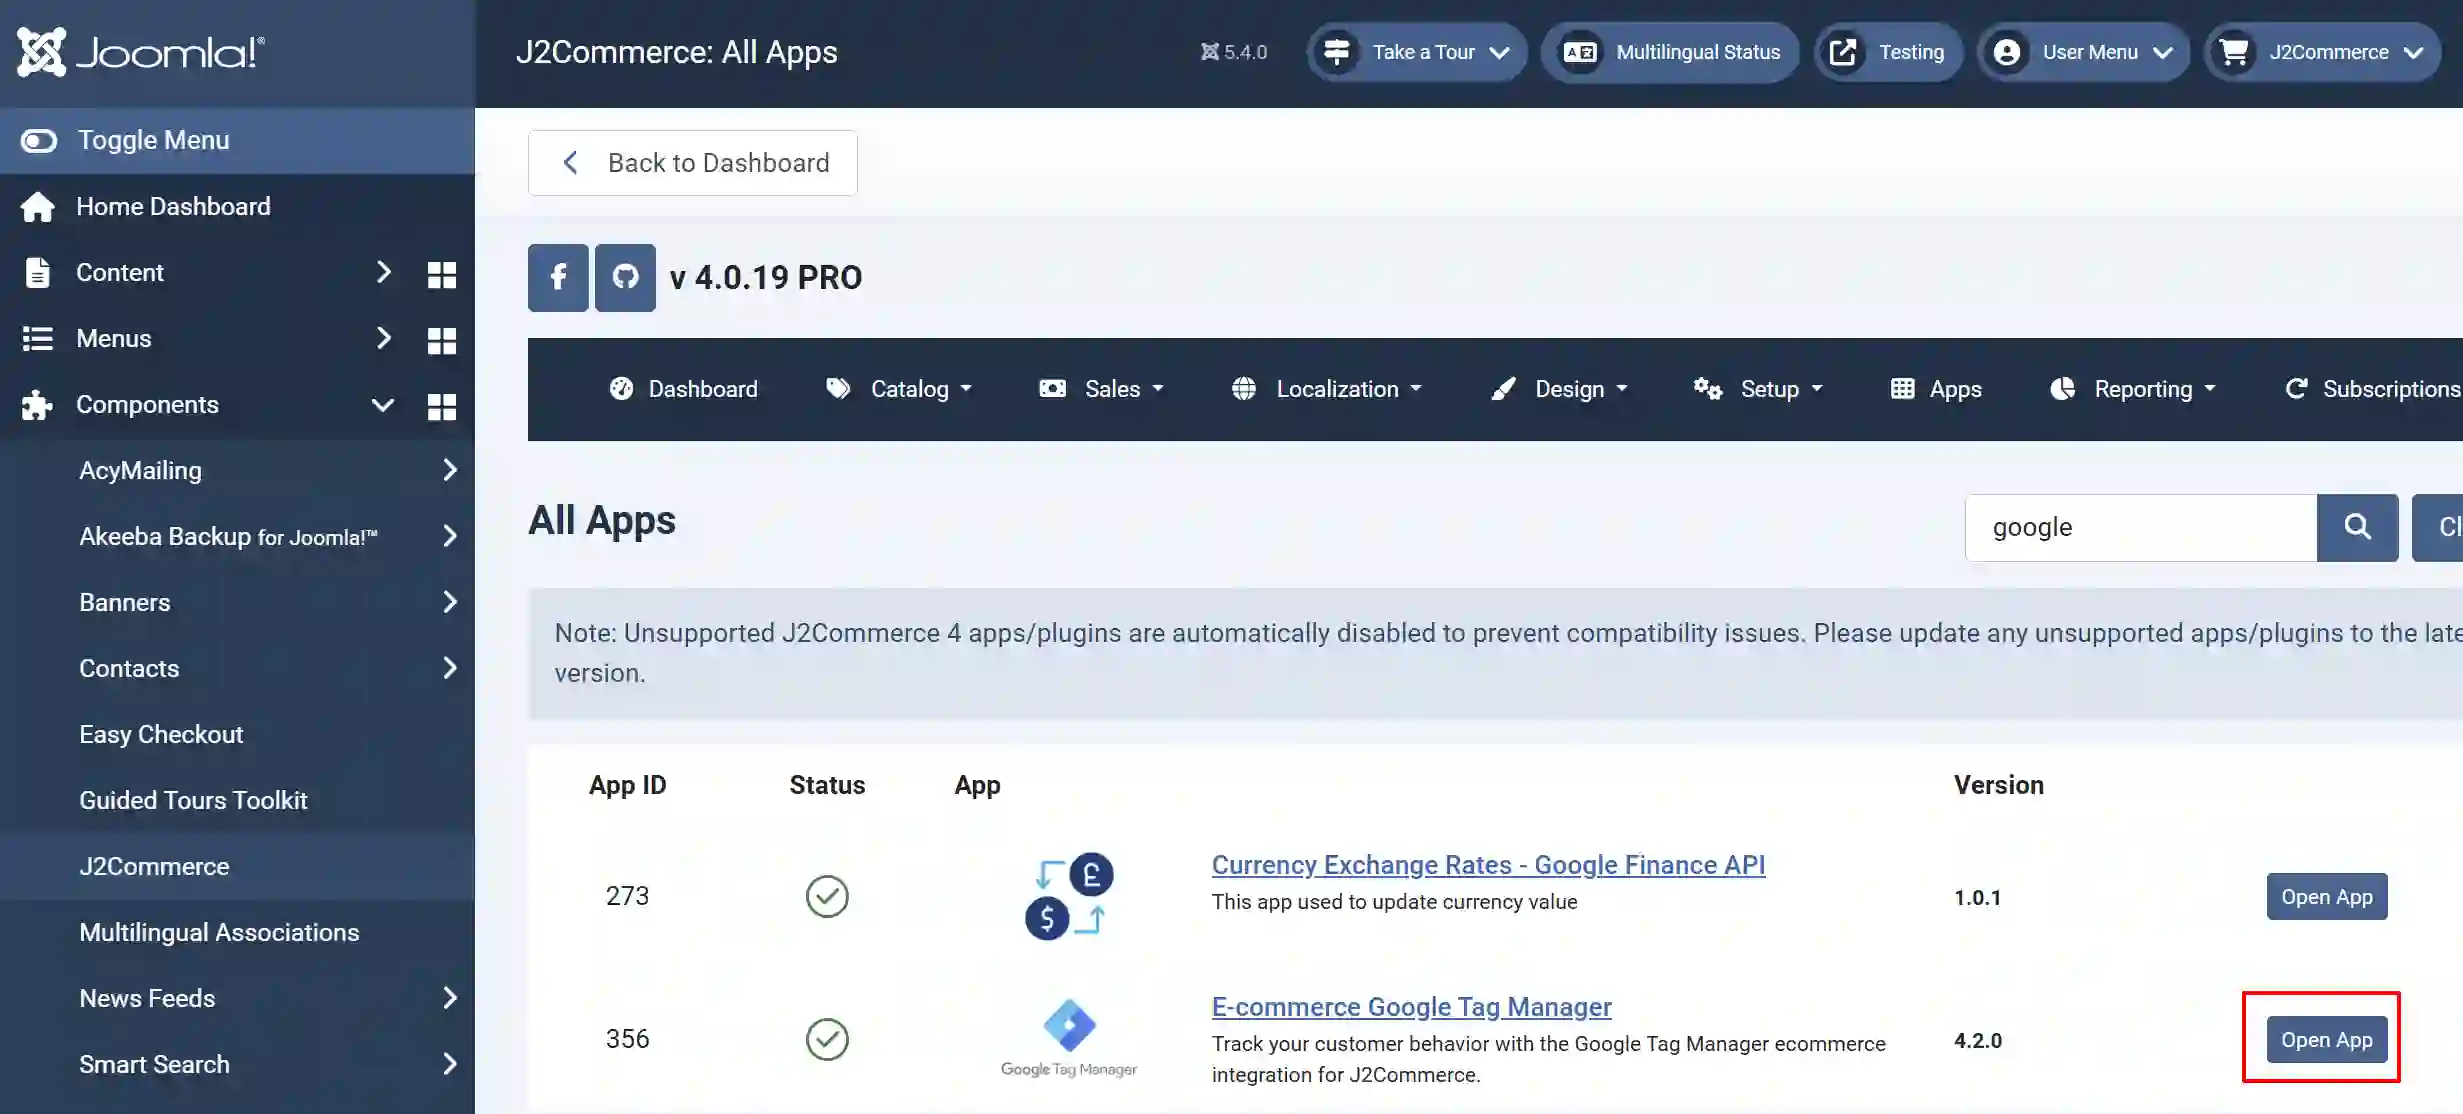
Enable the App
Go to J2Commerce > Apps > search for the Google Tag Manager app
Click on the 'X' under Status to enable it.
Creating an Account with Google Tag Manager
Go to: tagmanager.google.com
Click Create Account

Assign your website to Google Tag Manager
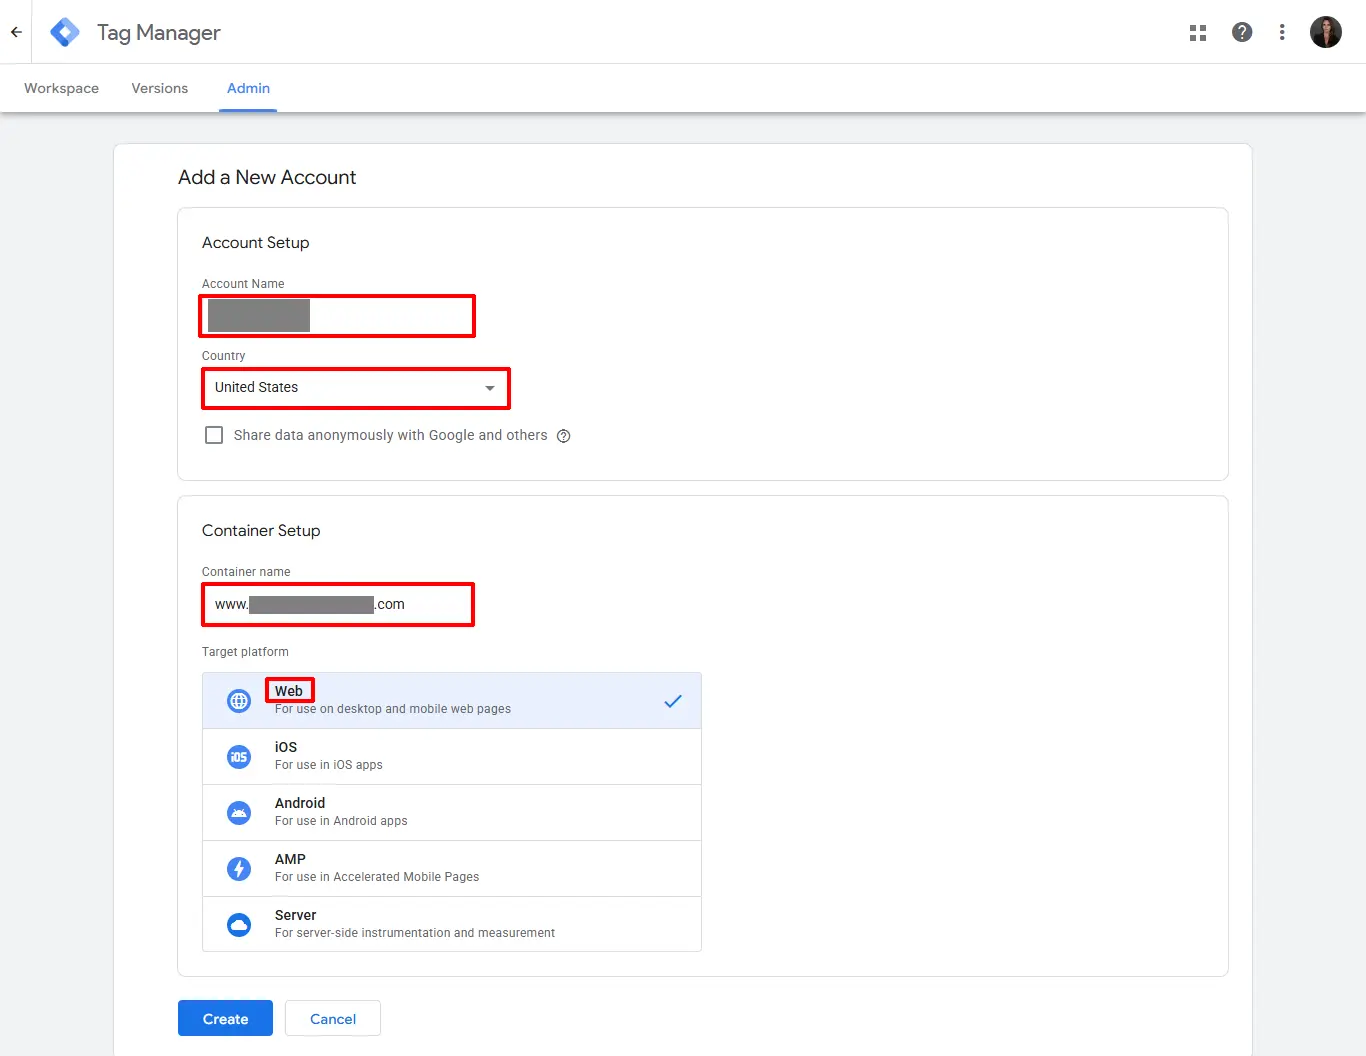
Account Setup:
Account Name: Usually your business name
Country: The Country for your Website location
Container Setup:
Container Name: Your website name
Target Platform: Web
Click Create → Accept the Terms
Important: Ignore the pop-up screen with the two GTM code snippets. You don't need to copy those. Your Google Tag Manager App in J2Commerce will automatically add it to every page for you.
**Go to your Google Analytics, or if you have an Admin Ad Account, and get the ID because you will need the ID later on in a future step**
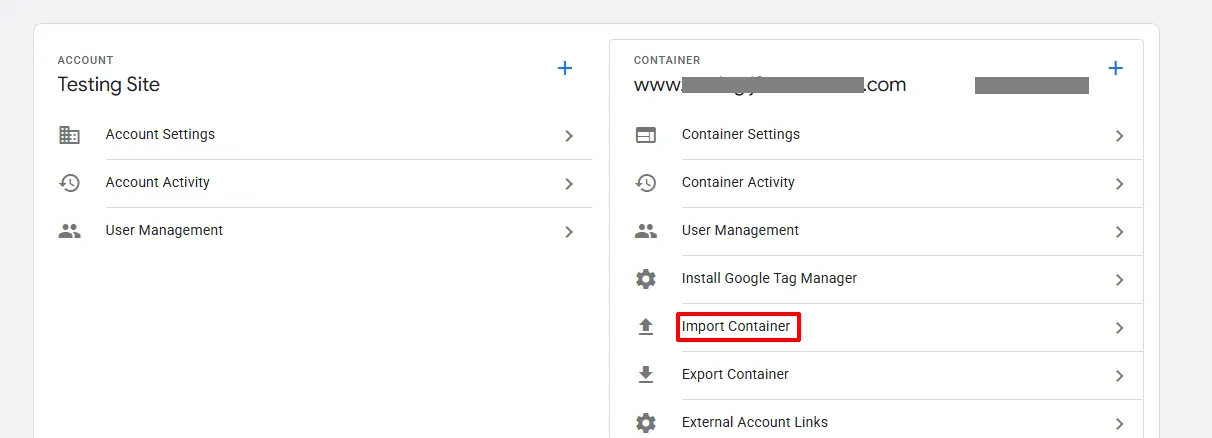
Import the Container File
Go to the Admin tab and click on Import Container
Click on Choose Container File
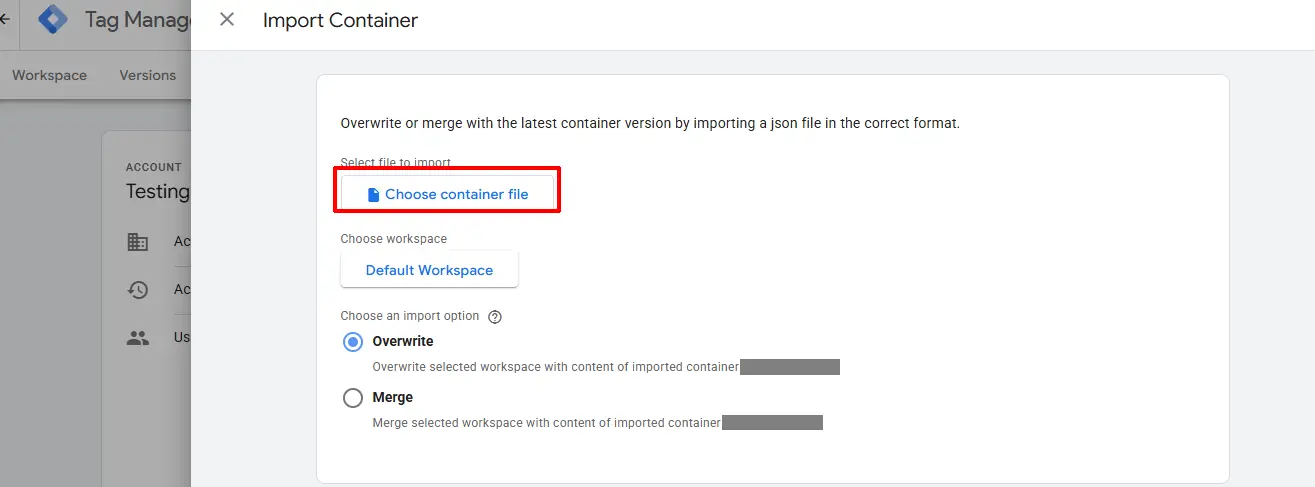
Locate the import file ( tag_manager_container_export.json) that was included with your Google Tag Manager App. Most of the files will be included; however, you may have to add a few manually.
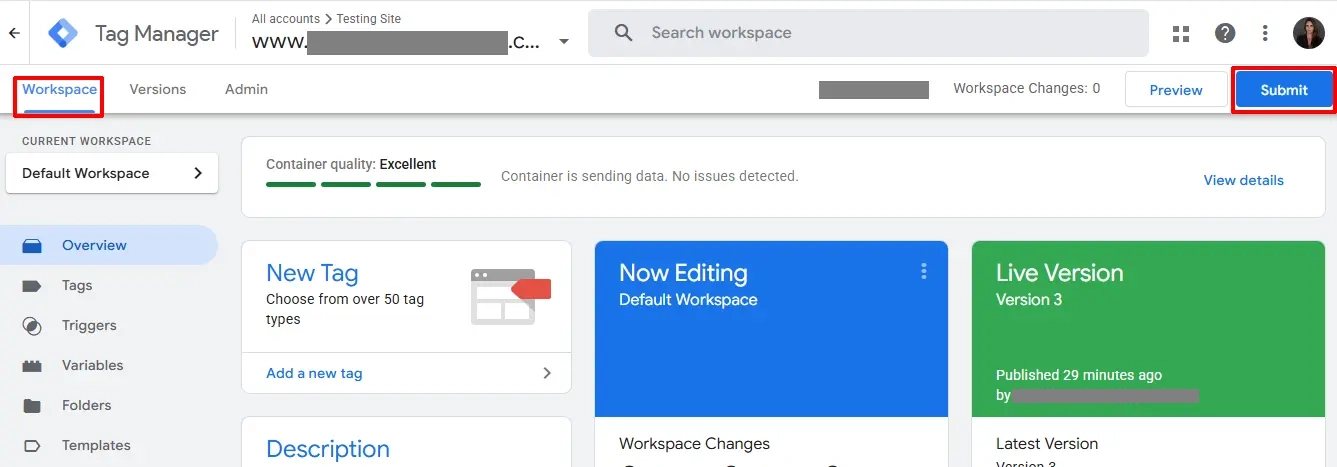
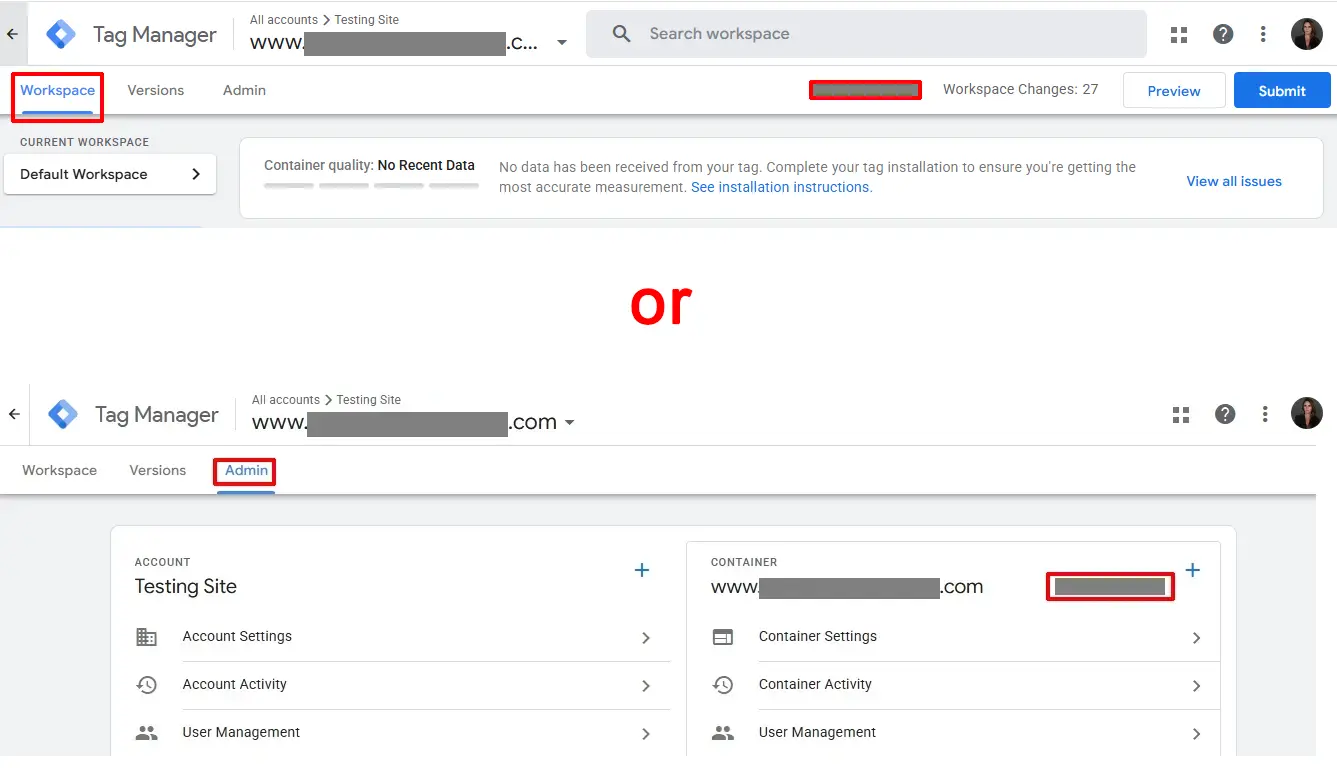
Click on the Workspace tab
Click the blue Submit button in the upper right corner when you are ready to go live.
Click Publish
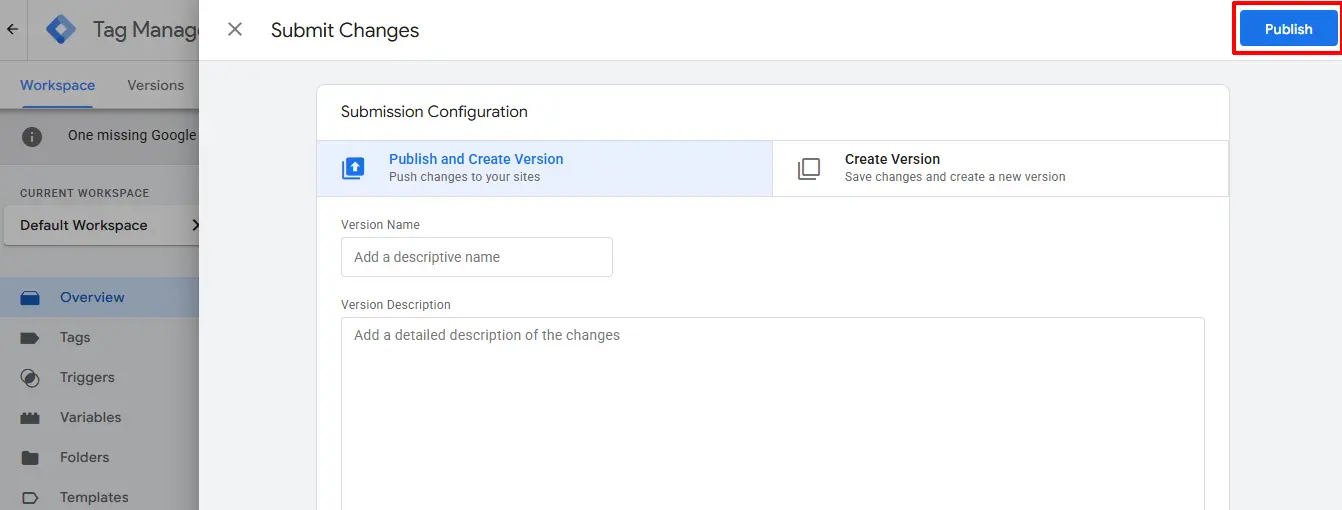
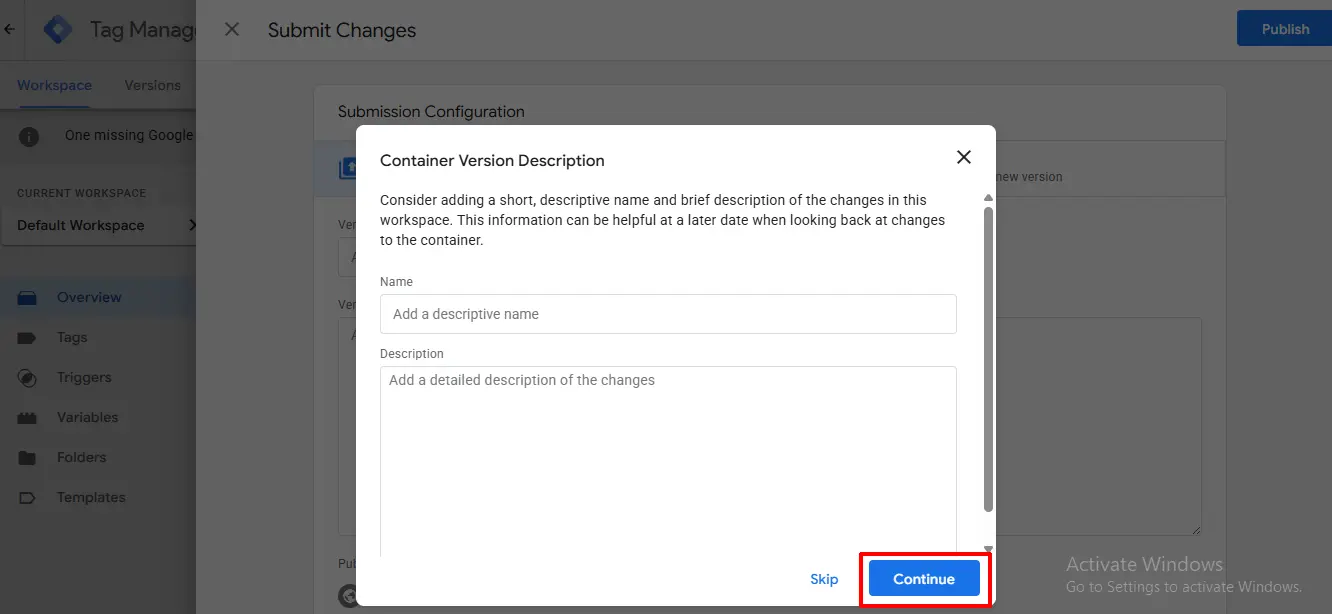
You can choose to add a Name and a short Description if you choose to; otherwise, you can just click Continue
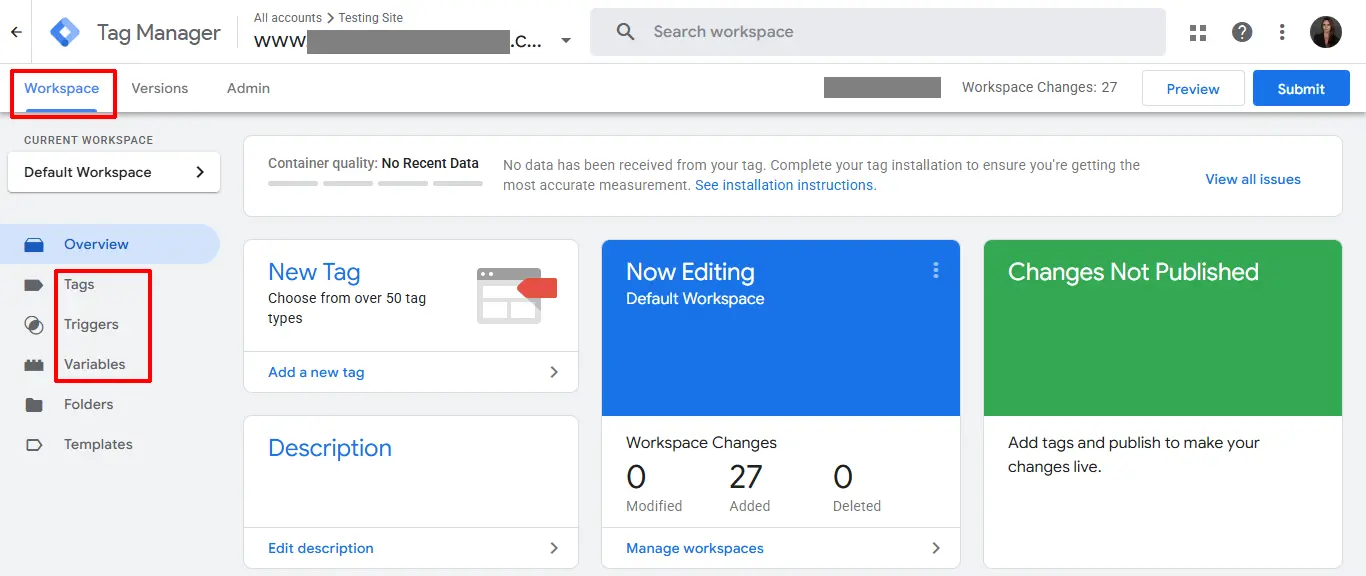
Once the file has been imported and you have submitted the changes, all of the attributes have been placed in the appropriate categories for you. ie: Tags, Triggers, and Variables.
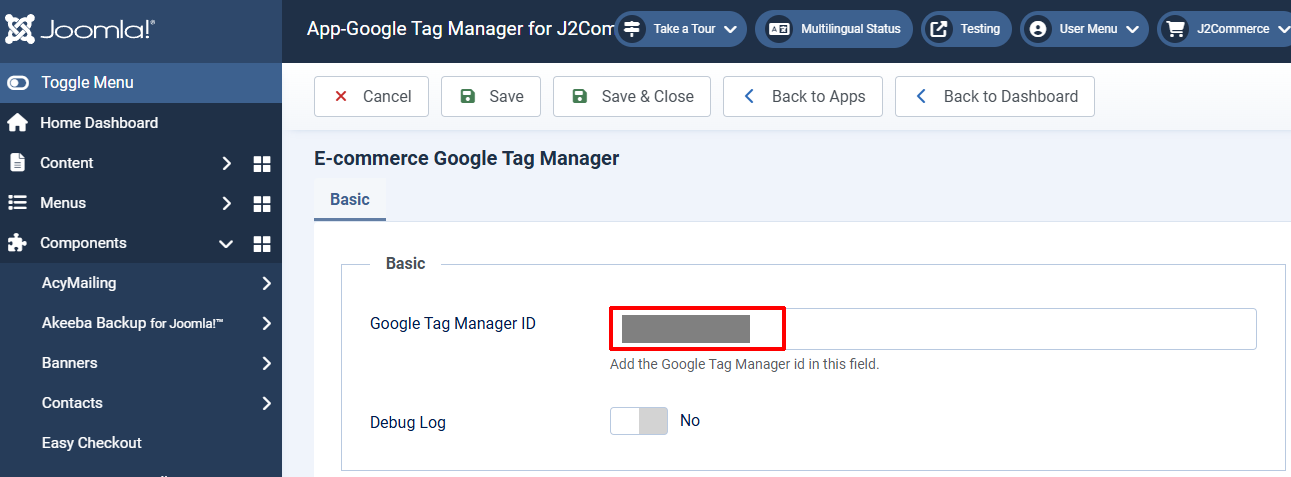
Adding the Google Tag Manager ID
Go to J2Commerce > Apps > search for Google Tag Manager
Click on "Open App" or the Title to start setting up the app
Enter your Google Tag Manager ID that you received when you signed up on their website. Once you do this part, you have now connected Google Tag Manager with your website
Locating the Google Tag Manager ID: It is found on the Workspace tab or Admin tab of the Google Tag Manager website.
Adding Tag Manager to Google Analytics
It is recommended that you connect Google Tag Manager (GTM) to Google Analytics (GA4) for your site because it gives more control, cleaner tracking, and better marketing data without constantly editing site code.
Creating a New Account
If you don't have a Google Analytics account, you can create one here.
Existing Account
Once logged in to your account, follow the steps below.
-
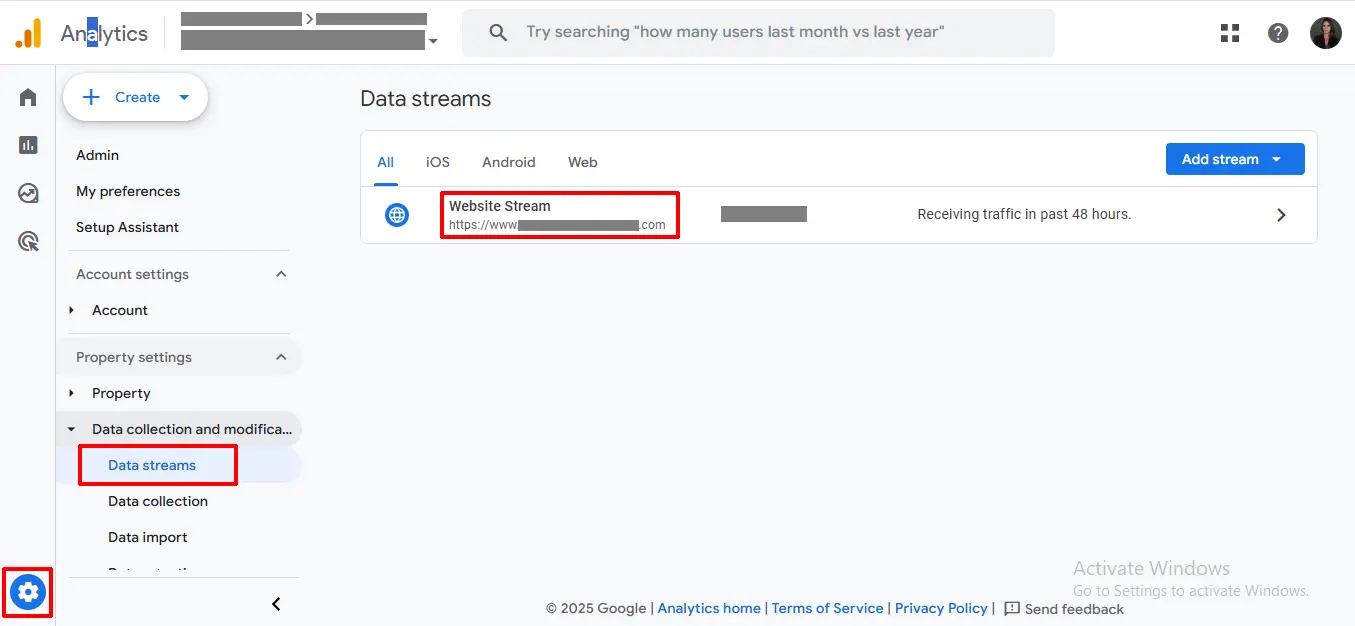
Go to the blue cog wheel at the bottom left corner
-
Click on Data Streams
-
Click on your website Stream account
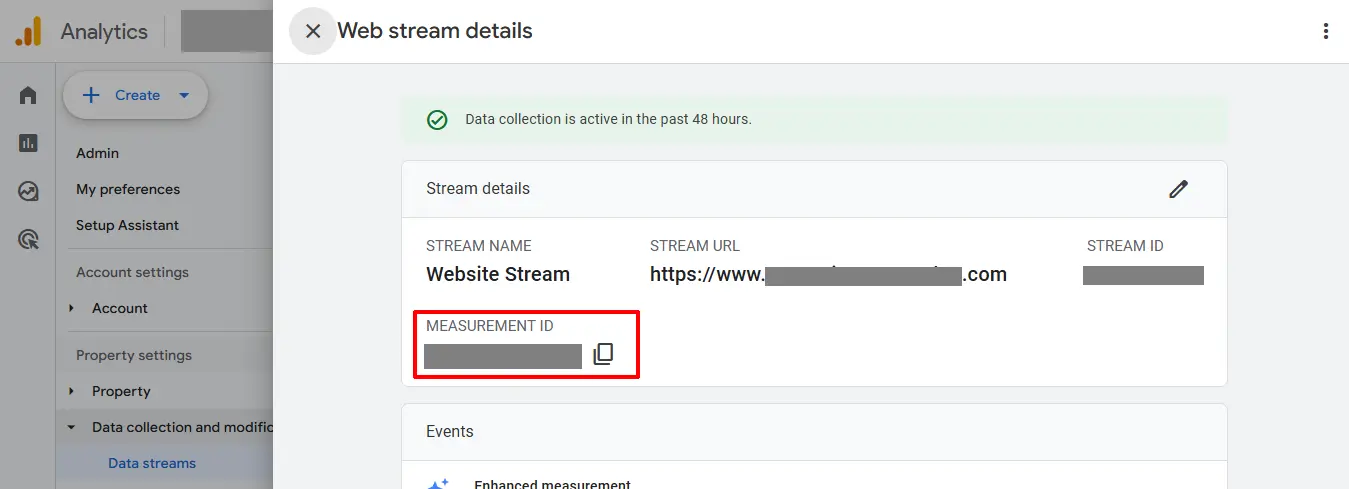
Google Analytics ID
Once you have opened up your site account, you will find your Measurement ID number, which needs to be added to your Google Tag Manager site.
Creating a Google Analytics Tag
The next step is adding that Measurement ID to your Google Tag Manager account
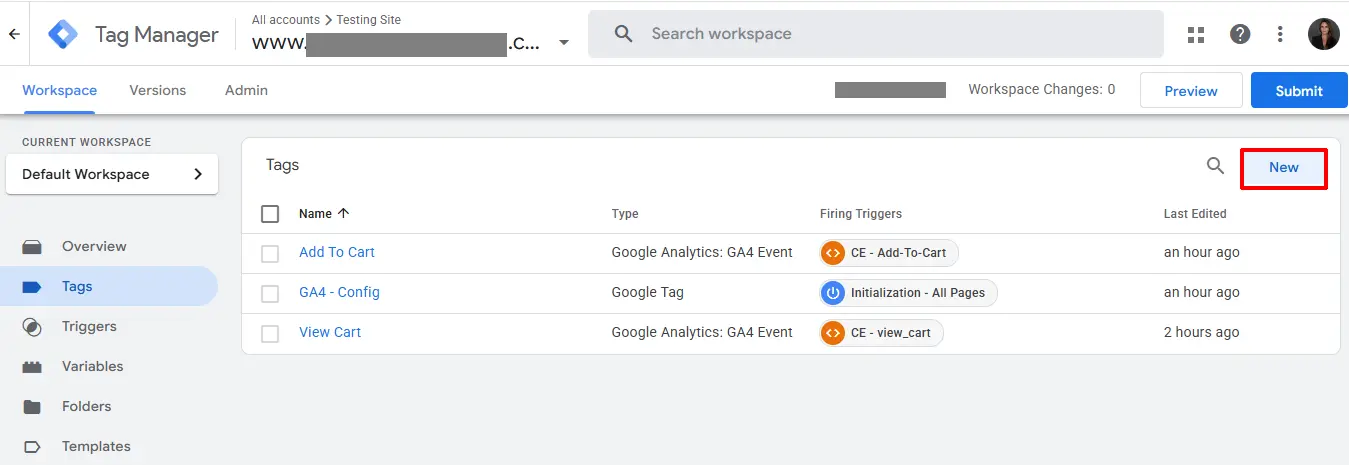
Go back to your Tag Manager Account > Workspace tab > Tags
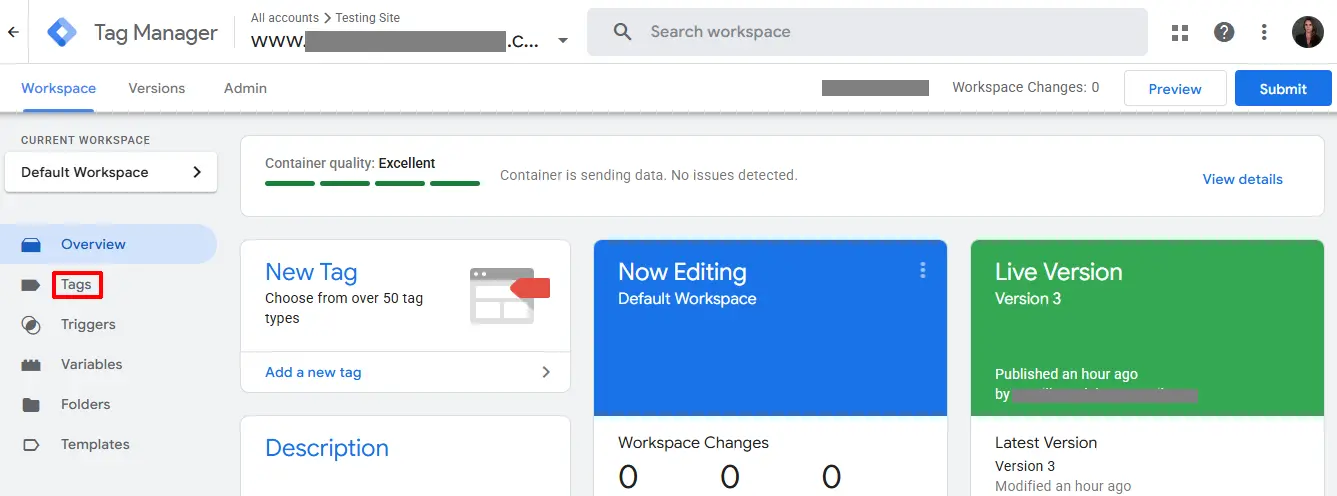
Click New
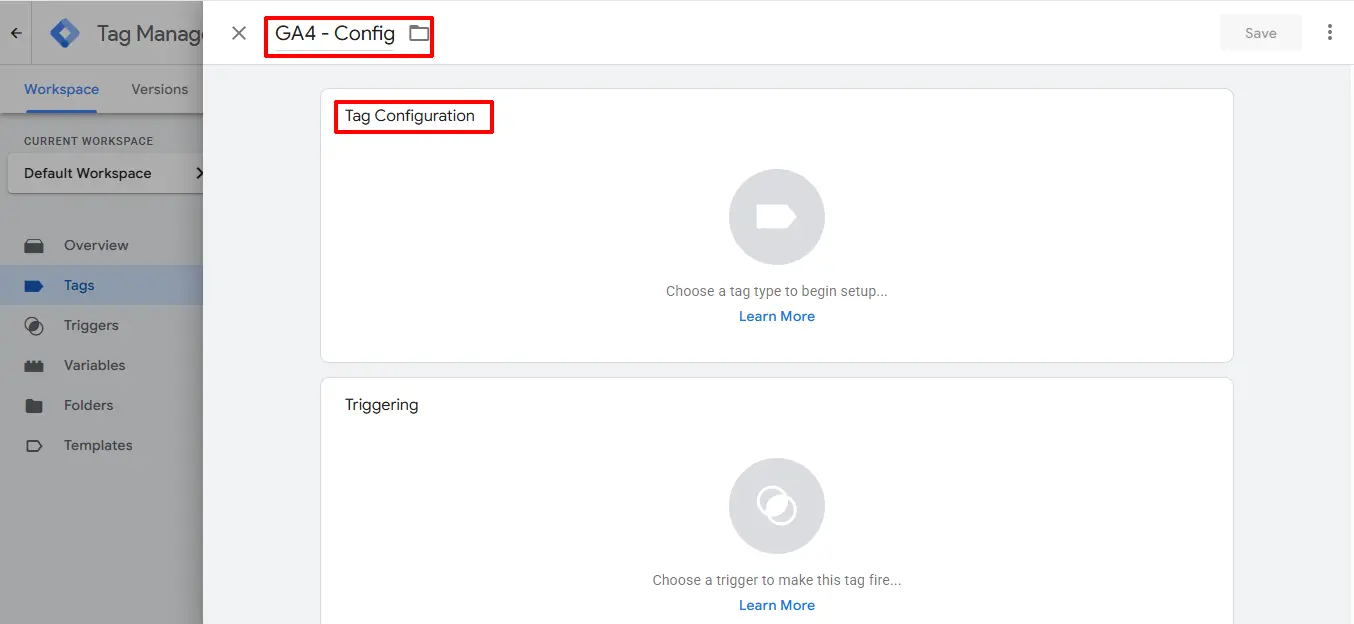
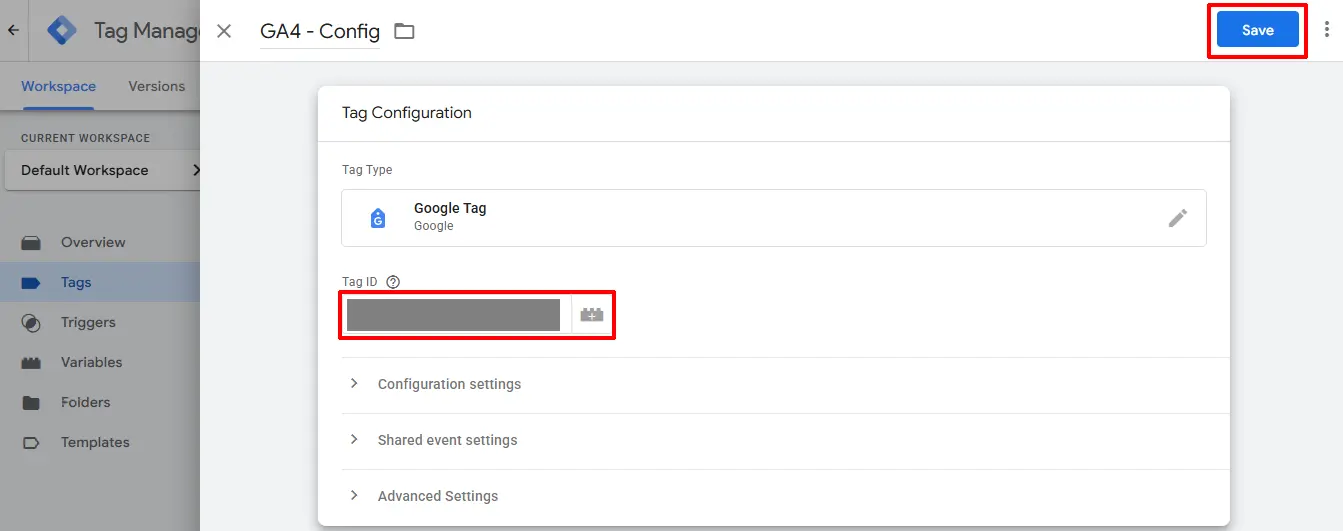
Tag Name: Name the new tag GA4-Config, or you can name it anything you want.
Tag Configuration: Click on Tag Config
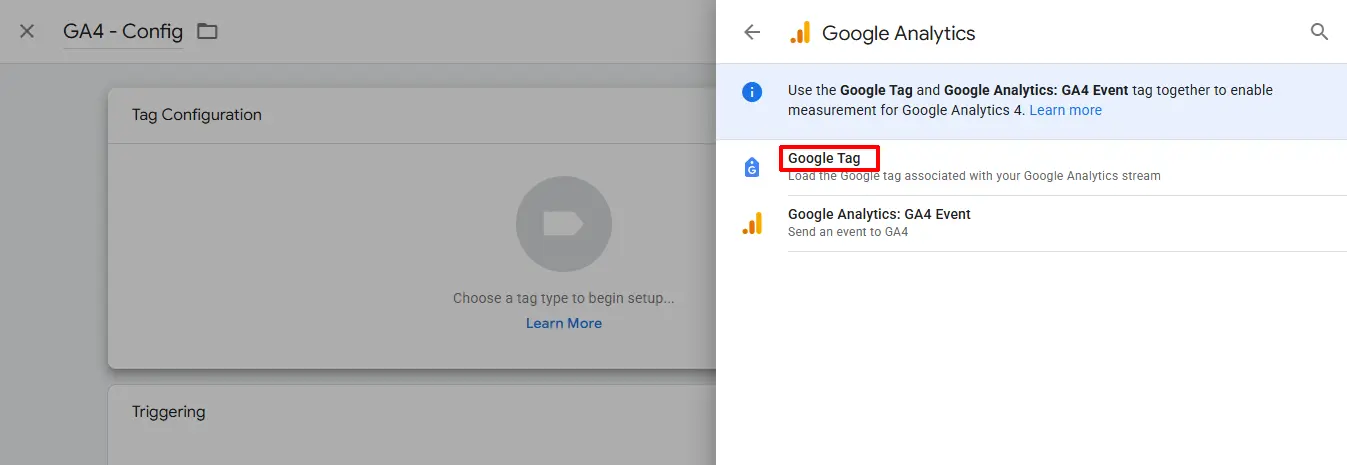
Choose Google Analytics
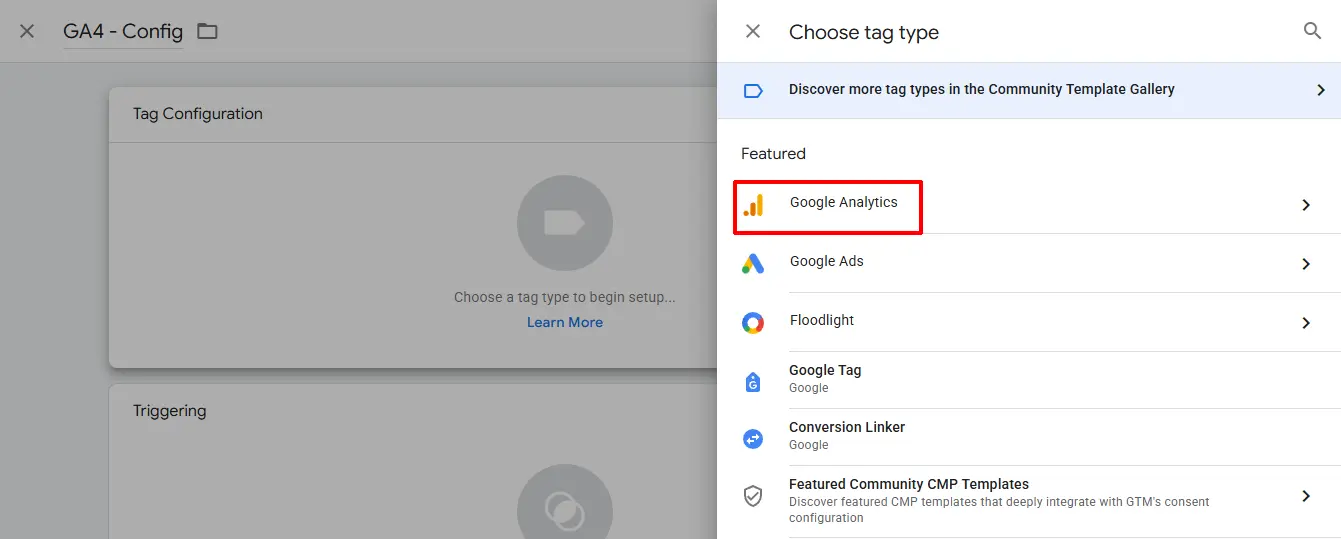
Choose Google Tag
Copy the Measurement ID you received from your Google Analytics site and paste it in the Tag ID section.
Click Save
You're finished setting up your account for success. If you need support, contact us at J2Commerce.com/support.