Sample Data Plugin
The J2Commerce Sample Data plugin lets you populate a new store with realistic sample products, customer accounts, and orders. This is essential for testing payment gateways, evaluating shipping options, and demonstrating store features before adding real inventory.
The Sample Data plugin will only work on a new website that has no products. If you have any products set up, then you will not see the Sample Data plugin in the J2Commerce Dashboard
Enable the Plugin
-
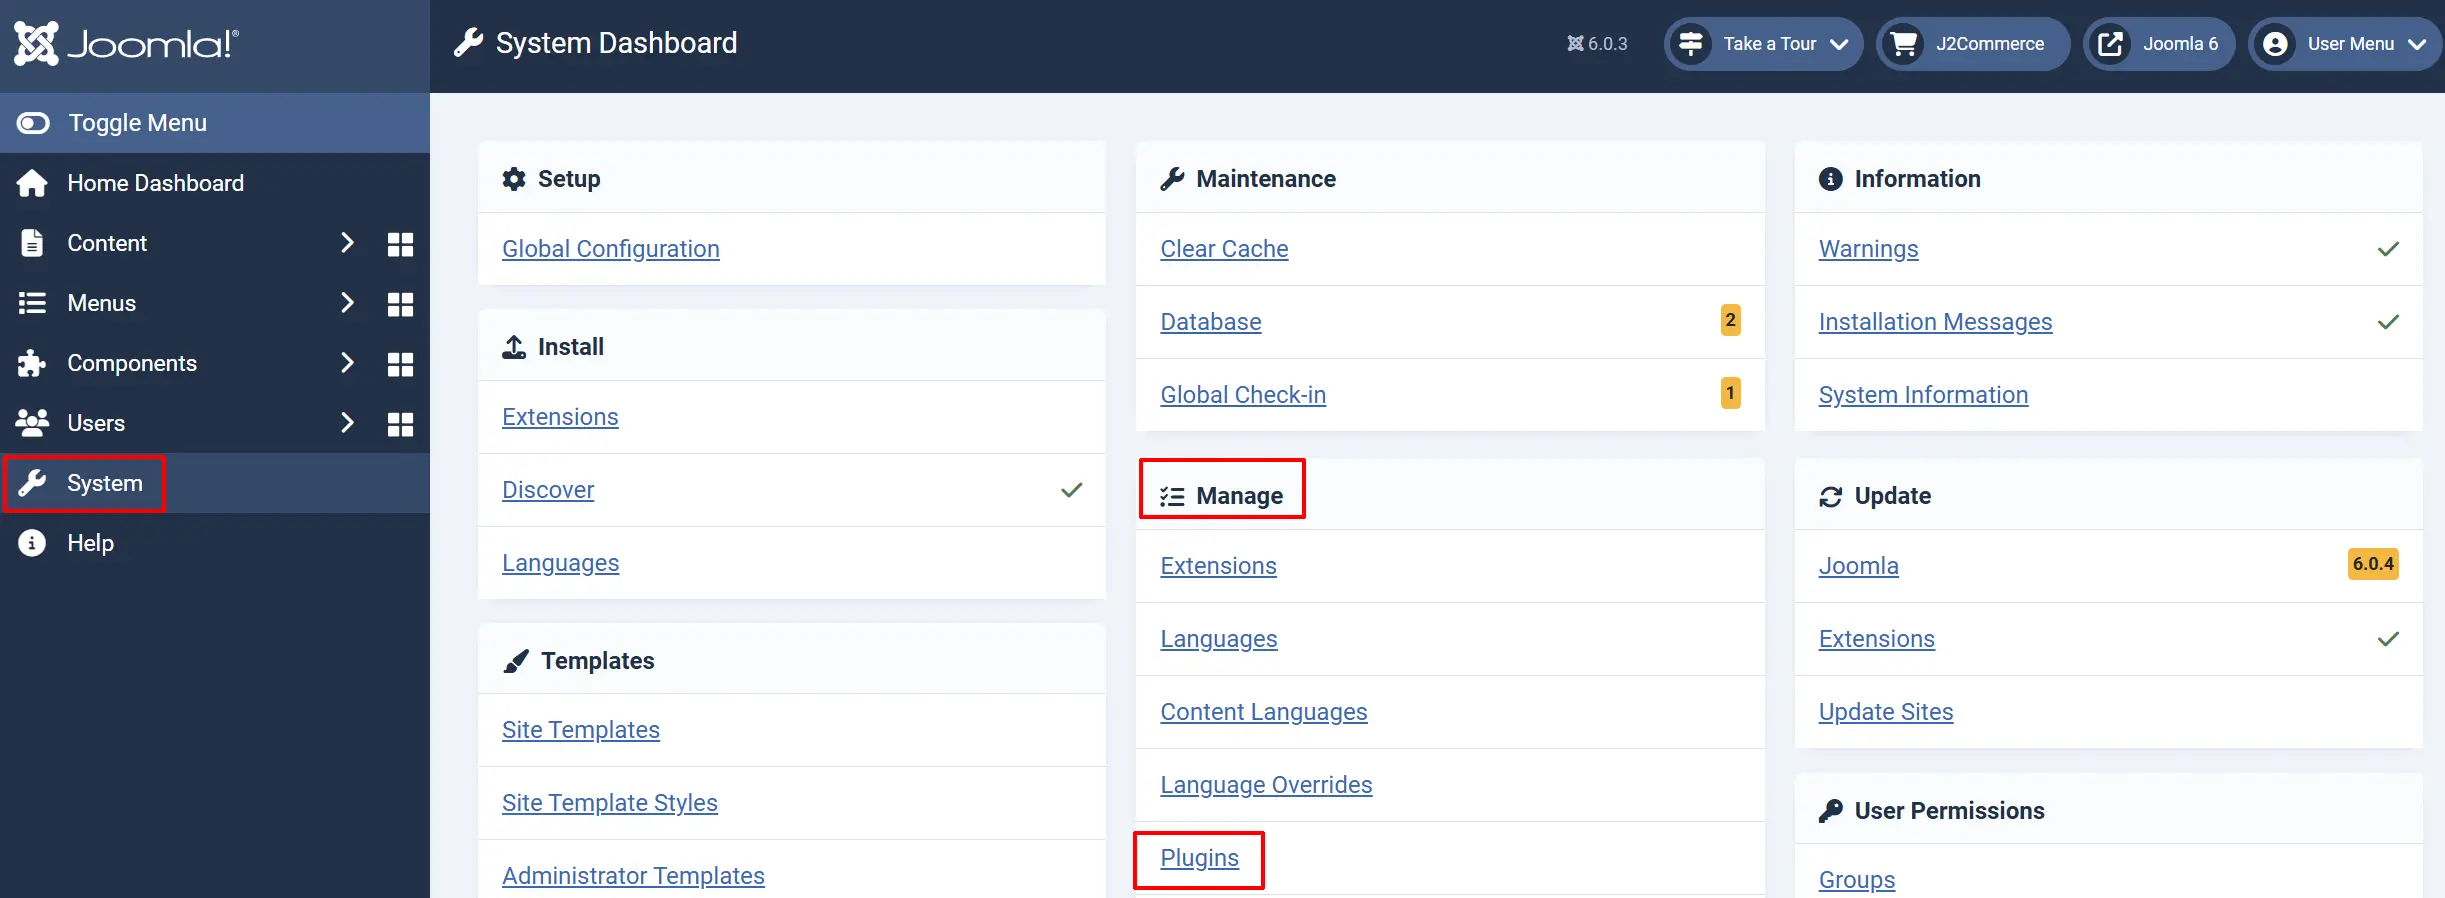
Go to System -> Manage -> Plugins.
-
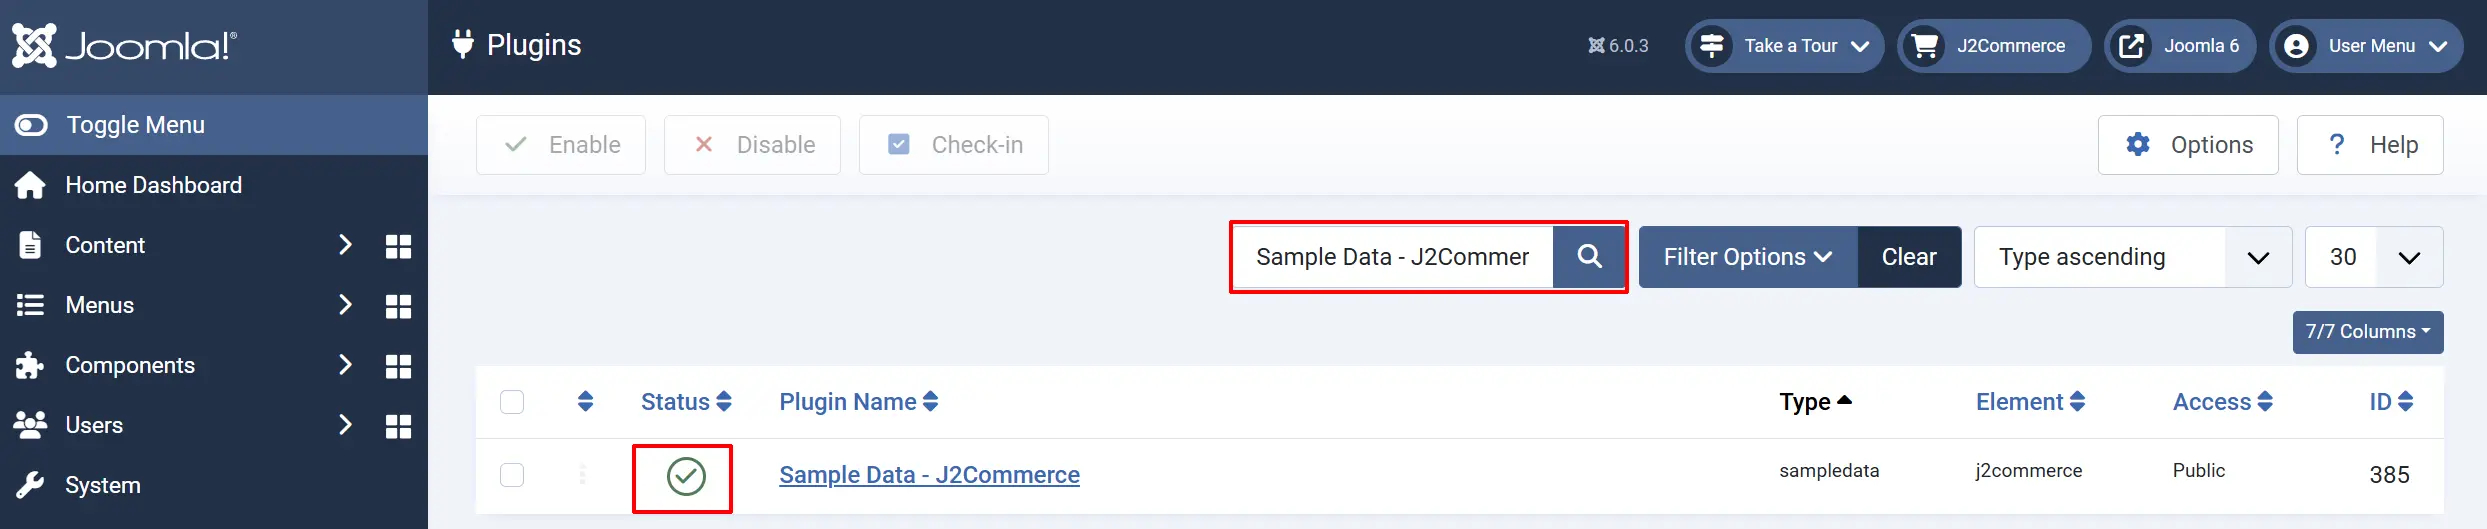
Search for Sample Data - J2Commerce.
-
Click the checkbox next to it and then click Enable in the toolbar.
What Sample Data Creates
When you run the sample data plugin, it creates the following types of content:
Categories
Sample product categories organized into a hierarchy with parent and child categories:
Parent Categories: Examples: Electronics, Clothing, Home & Garden, Sporting Goods, Books & Media
Child Categories: Examples: Laptops & Computers, Smartphones & Tablets, Men's Clothing, Women's Clothing, Kitchen & Dining
Each category includes SEO-friendly aliases and can be nested up to two levels deep.
Manufacturers
Brand names associated with products:
Manufacturer Examples: TechNova, StyleCraft, EcoHome, ActivePro, ReadWell Publishing, GadgetPrime, UrbanWear, GreenNest, SportMax, MediaHouse
Products
The plugin creates several product types with realistic names, descriptions, and pricing:
Simple Products: Standard products with a single SKU and fixed price
Variable Products: Products with variants (size, color, etc.) that have different SKUs and prices
Configurable Products: Products with customer-selectable options
Flexivariable Products: Advanced variable products with flexible attribute combinations
Downloadable Products: Digital products with file downloads
Each product includes:
- Product name and description
- Main image (SVG placeholder)
- Price and special pricing
- Stock quantity
- Category assignment
- Manufacturer association
Customers
Sample customer accounts with realistic names, email addresses, and complete address data:
Names: Examples: James Smith, Mary Johnson, John Williams, Patricia Brown
Locations: Examples: New York, Los Angeles, Chicago, Houston, Toronto, London, Berlin, Sydney
Addresses: Examples: Complete billing and shipping addresses with zone and country
Orders
Complete orders with:
- Order status history (Pending, Confirmed, Shipped, Delivered)
- Multiple products per order
- Customer billing and shipping addresses
- Payment method records
- Order totals and tax calculations
Coupons and Vouchers
Discount codes for testing the checkout process:
Coupons: Percentage or fixed-amount discounts applied at checkout
Gift Vouchers: Fixed-value vouchers that can be applied as payment
How to Run Sample Data
Step 1: Access the Sample Data Screen
- Go to J2Commerce -> Dashboard.
- Click the Sample Data tab in the left sidebar.
The Sample Data option only appears when the J2Commerce Sample Data plugin is enabled.
Step 2: Choose a Profile
The plugin offers three preset profiles with different amounts of data:
| Profile | Categories | Products | Customers | Orders | Coupons | Vouchers |
|---|---|---|---|---|---|---|
| Minimal | 3 | 7 (5 simple + 2 variable) | 5 | 10 | 2 | 2 |
| Standard | 5 | 17 (10 simple + 5 variable + 2 configurable) | 20 | 50 | 5 | 3 |
| Full | 10 | 100 (40 simple + 25 variable + 15 configurable + 10 flexivariable + 10 downloadable) | 100 | 500 | 15 | 5 |
Choose the profile that fits your needs:
- Minimal — For quick testing on local development environments. Creates enough data to verify functionality without cluttering your store.
- Standard — For thorough testing and demonstration. A good balance between realism and manageability.
- Full — For performance testing and comprehensive evaluation. Creates a large dataset that mimics a real store.
Step 3: Run the Installation
-
Select your preferred profile by clicking the radio button.
-
Click Install Sample Data.
-
A progress bar appears showing four steps:
- Step 1: Categories and manufacturers created
- Step 2: Products and images created
- Step 3: Customers and orders created
- Step 4: Coupons and vouchers created
-
Wait for the progress bar to reach 100%. A success message confirms completion.
Each step must be completed successfully before the next begins. If any step fails, an error message displays with details.
After Installation
Verify the Data
After the sample data installation completes:
- Go to J2Commerce -> Catalog -> Products to see the sample products.
- Go to J2Commerce -> Sales -> Orders to see sample orders.
- Go to J2Commerce -> Customers to see sample customer accounts.
- Go to J2Commerce -> Marketing -> Coupons to see discount coupons.
Test Your Store
Use the sample data to:
- Add products to the cart and test checkout flow
- Apply coupon codes at checkout
- View order history as different sample customers
- Test search and filtering functionality
- Verify category navigation and product listing pages
Removing Sample Data
Removing sample data permanently deletes all products, categories, customers, orders, and coupons created by the plugin. This cannot be undone.
To remove sample data:
- Go to J2Commerce -> Dashboard.
- Click the Sample Data tab.
- Click Remove Sample Data.
- Confirm the removal when prompted.
The plugin identifies sample data by a special tag (j2commerce-sample-data) in the database, ensuring only sample data is removed without affecting your real products or orders.
Tips
- Run sample data on a fresh installation for the cleanest results. Adding sample data to a store with existing products may cause category or naming conflicts.
- Use the Minimal profile for quick testing during development. Switch to Standard or Full when demonstrating to clients or testing performance.
- Sample products use SVG placeholder images. Replace them with your own product images for realistic demonstrations.
- Customer accounts created by sample data use realistic email patterns (e.g.,
james.smith@example.com). These are not real addresses, but you may want to verify no real customers use similar addresses. - Orders created by sample data are marked with order statuses that progress through the typical order workflow. This lets you test status change notifications and filters.
Troubleshooting
The Sample Data option does not appear in the Dashboard
Cause: The plugin may be disabled, or the J2Commerce component is not properly installed.
Solution:
- Go to System -> Manage -> Plugins.
- Search for Sample Data - J2Commerce.
- If the plugin exists but shows as Disabled, click to enable it.
- If the plugin is missing, reinstall the J2Commerce component package.
Installation fails at Step 1
Cause: Database permission issues or existing data conflicts.
Solution:
- Verify your database user has CREATE and INSERT permissions.
- Check that the
#__j2commerce_*tables exist (J2Commerce should be fully installed). - Try removing any existing sample data before running again.
- Check the Joomla error log at
administrator/logs/error.phpfor specific database errors.
Products appear but have no images
Cause: The media folder permissions may prevent image copying.
Solution:
- Verify the
media/plg_sampledata_j2commerce/images/directory is readable. - Check that
images/the directory in your Joomla root is writable. - The plugin uses SVG placeholder images. Ensure your server serves SVG files with the correct MIME type (
image/svg+xml).
Sample data appears incomplete
Cause: A step failed silently, or the browser timed out during installation.
Solution:
- Remove existing sample data using the Remove Sample Data button.
- Increase your PHP timeout settings (
max_execution_timeandrequest_terminate_timeoutfor PHP-FPM). - For the Full profile, ensure at least a 120-second timeout.
- Re-run the sample data installation.
Cannot log in as sample customers
Cause: Sample customer accounts are created with randomly generated passwords that are not displayed.
Solution:
Sample customer accounts are designed for order data and address testing, not for logging in. To test the customer login experience:
- Go to Users -> Manage.
- Find a sample customer account.
- Click to edit and set a known password.
- Log in from the frontend with that email and password.