Shippo Shipping
The Shippo Shipping plugin connects your J2Commerce store to Shippo, a multi-carrier shipping platform that works with USPS, UPS, FedEx, DHL Express, Canada Post, and dozens of other carriers through a single account. At checkout, customers see real-time rates pulled directly from your connected carrier accounts. After an order is placed, you can buy and print a shipping label without leaving the J2Commerce order view, void a label if plans change, and refresh tracking status on demand — or let the cron task update everything automatically.
Requirements
- PHP 8.3.0+
- Joomla! 6.x
- J2Commerce 6.x
- A Shippo account (free tier available)
- At least one carrier account connected in your Shippo Dashboard (USPS, UPS, FedEx, etc.)
- A Shippo API token (test or live)
Purchase and Download the Plugin
Step 1: Go to our J2Commerce website > Extension
Step 2: Locate the Shippo Extension -> click View Details -> Add to cart -> Checkout.
Step 3: Go to your My Downloads under your profile button at the top right corner and search for the app. Click Available Versions -> View Files -> Download
Install the Plugin
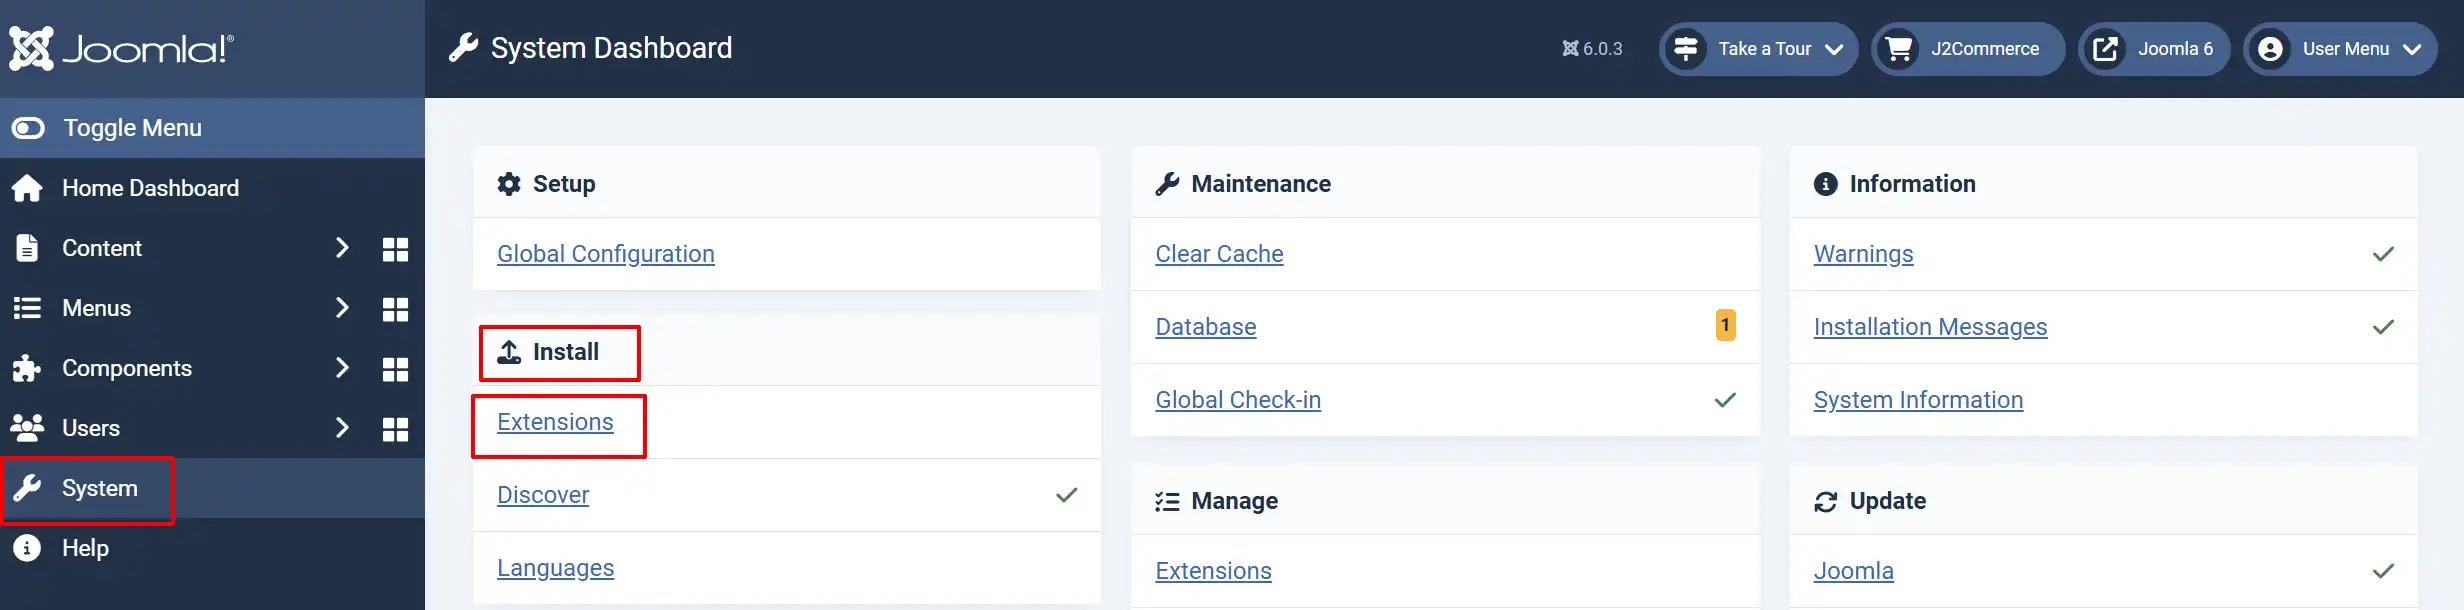
Go to System -> Install -> Extensions.
Upload the shipping_shippo.zip package file
Enable the Plugin
There are two ways you can access the Plugin.
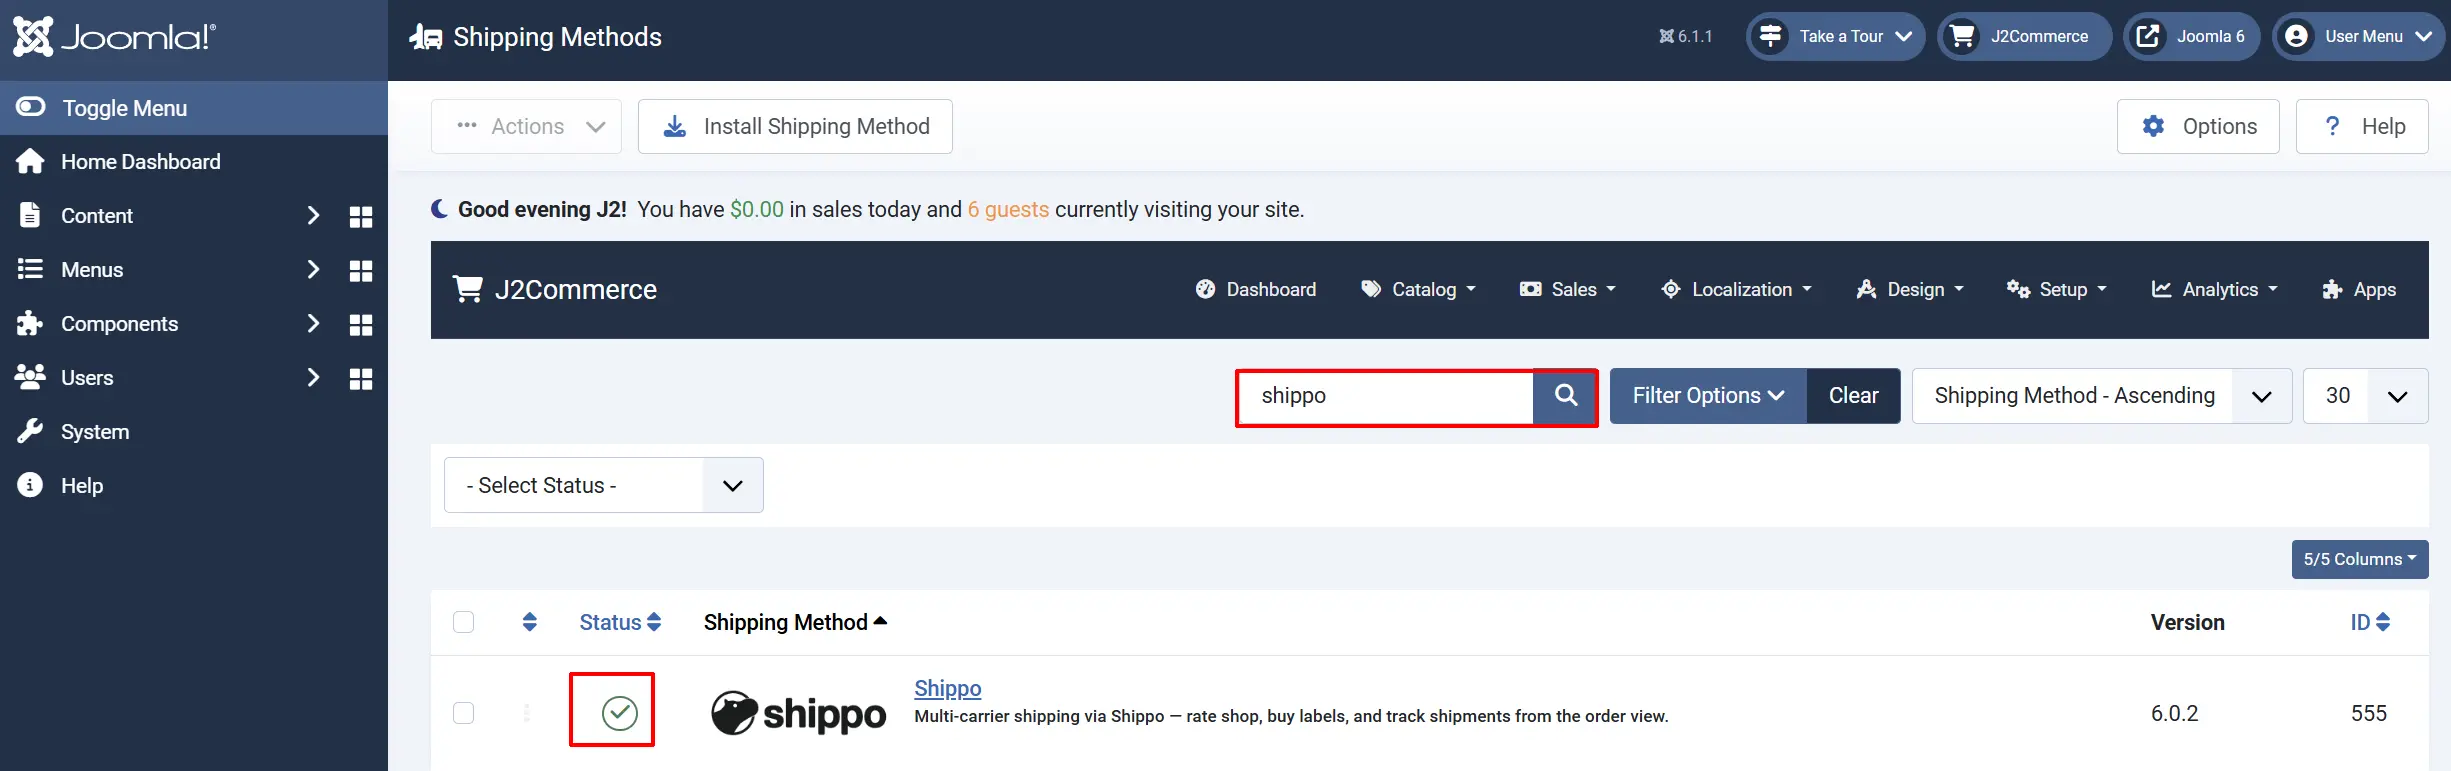
Option A: Go to the J2Commerce icon at the top right corner -> Setup -> Shipping Methods
Option B: Go to Components on the left sidebar -> J2Commerce -> Dashboard -> Setup -> Shipping Methods

Look for Shippo, click the X, and it will turn into a green checkmark. It is now enabled and ready for setup.
Configure the Plugin
Once you click on the Shippo Title next to the green checkmark, you are ready to start setting up the parameters.
Helpful Tip: Click on the Toggle Inline Help button on any app/plugin you install and it will show a description below each section. See image below

API Credentials

Test Mode: When enabled, the plugin uses your test API token and processes test shipments only. Turn this off when you are ready to go live.
Live API Token: Your Shippo live API key. Shown only when Test Mode is off. Starts with shippo_live_.
Test API Token: Your Shippo test API key. Shown only when Test Mode is on. Starts with shippo_test_.
Getting your Shippo API token
- Log in to your Shippo Dashboard.
- Click your account name in the top-right corner -> API.
- Under API Keys, copy the key that matches the mode you need — the live key starts with
shippo_live_and the test key starts withshippo_test_. - Paste the key into the matching field in the plugin settings and click Save.
Origin Address
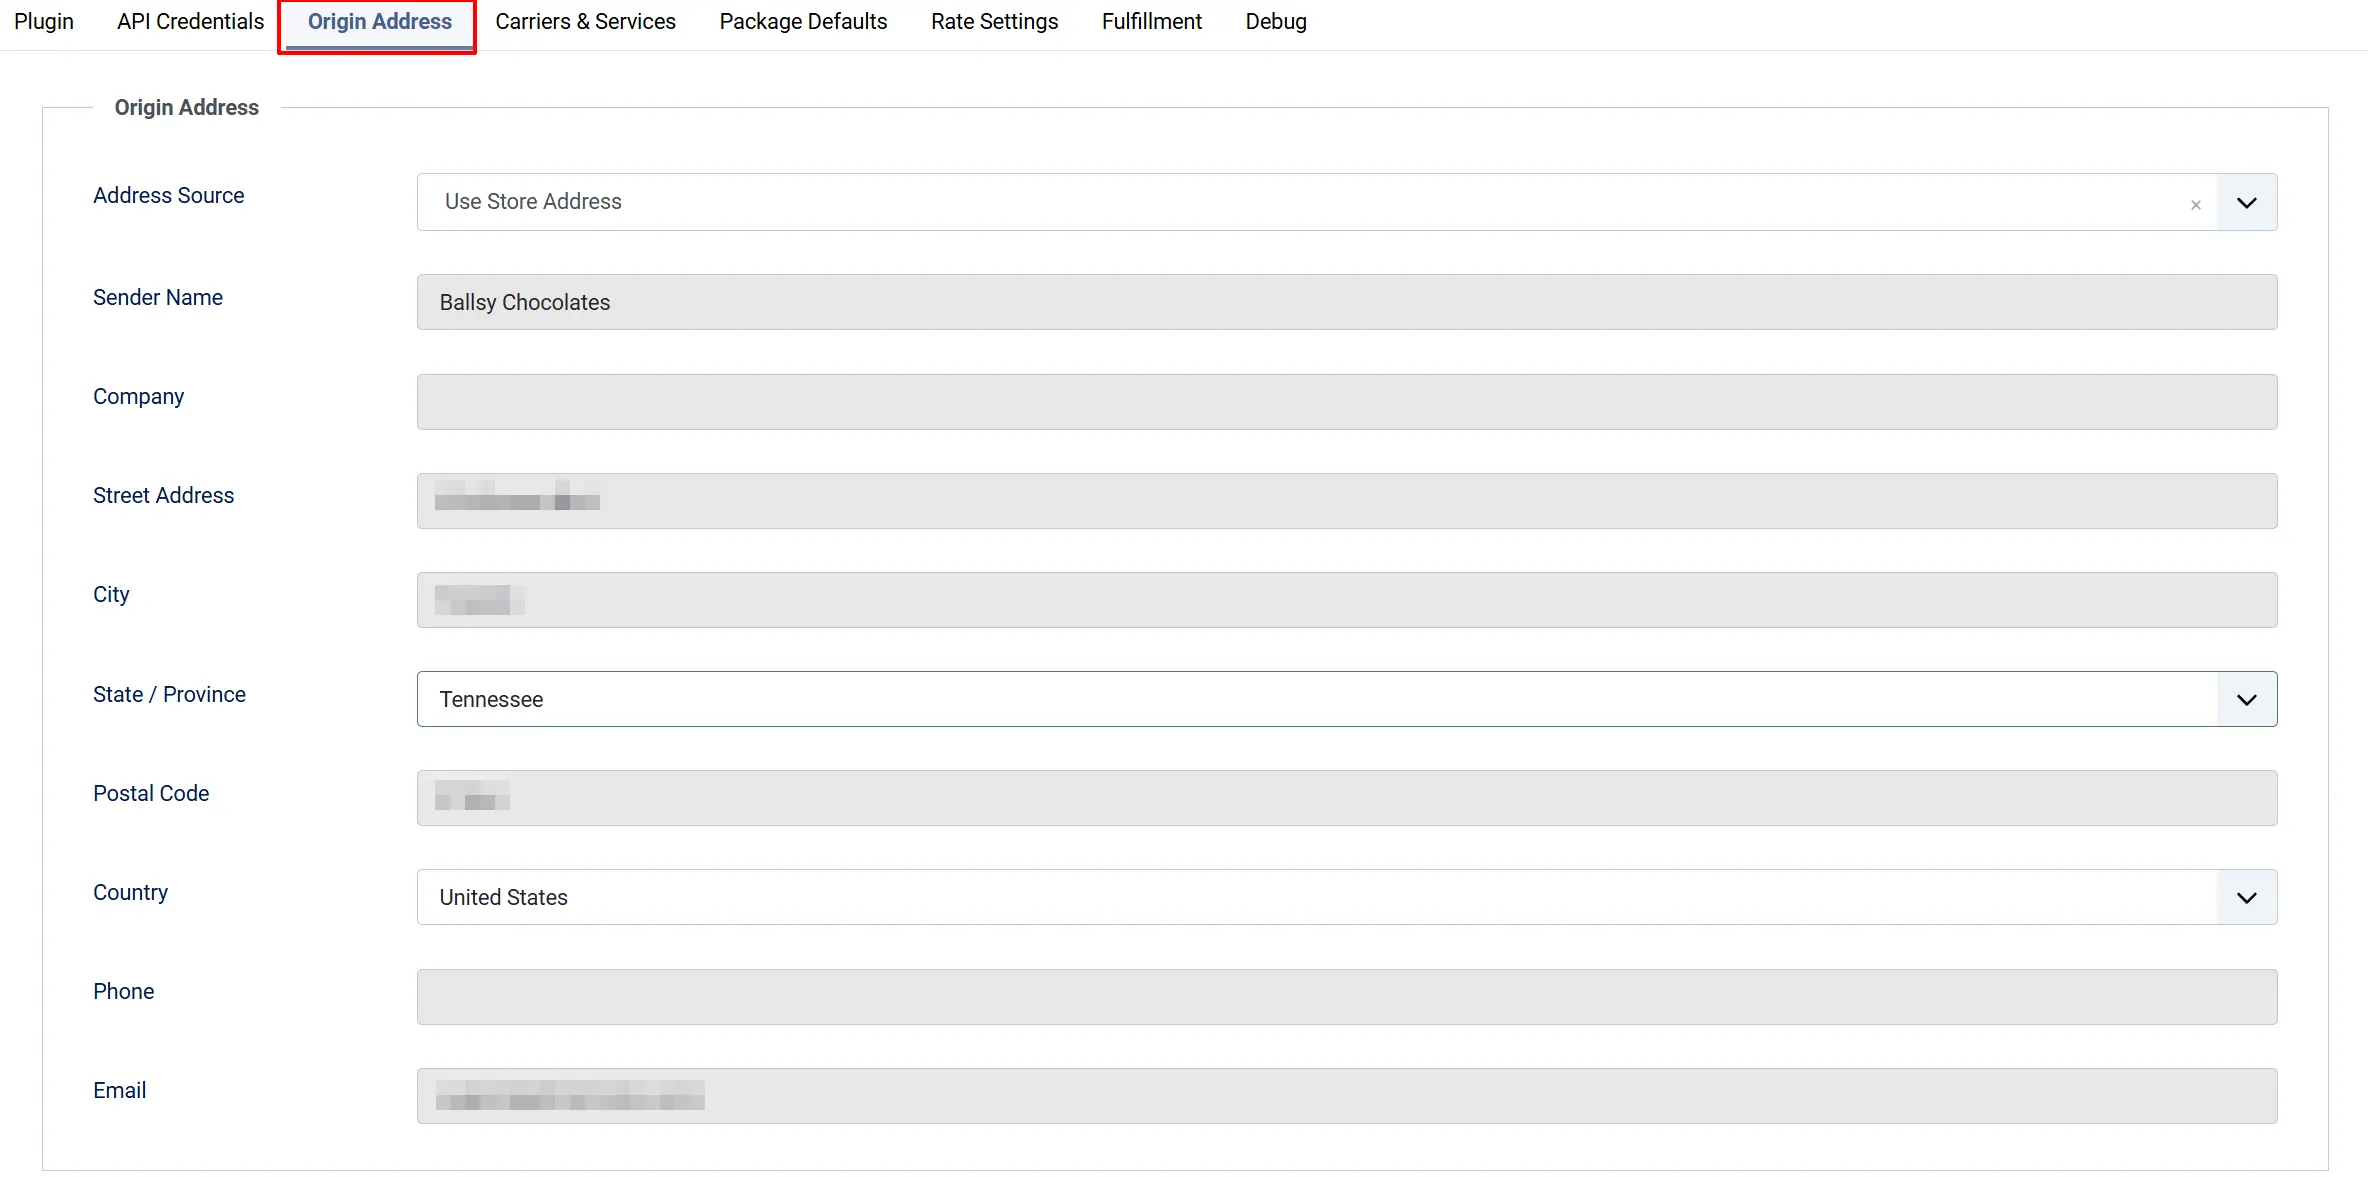
These fields define where your packages ship from. This address appears on all outbound labels.
Address Source: Choose Use Store Address to pull the address you already set in J2Commerce configuration, or Add New Address to enter a different pickup location.
Sender Name: Name printed on outbound labels.
Company: Optional company name for the sender address.
Street Address: Pickup or shipper street address.
City: Origin city.
State / Province: Origin state or province.
Postal Code: Origin ZIP or postal code.
Country: Origin country.
Phone: Sender phone number. Some carriers require this.
Email: Sender email address.
If you choose Use Store Address, the plugin reads your store address directly from J2Commerce configuration. You do not need to fill in the individual fields below it.
Carriers and Services
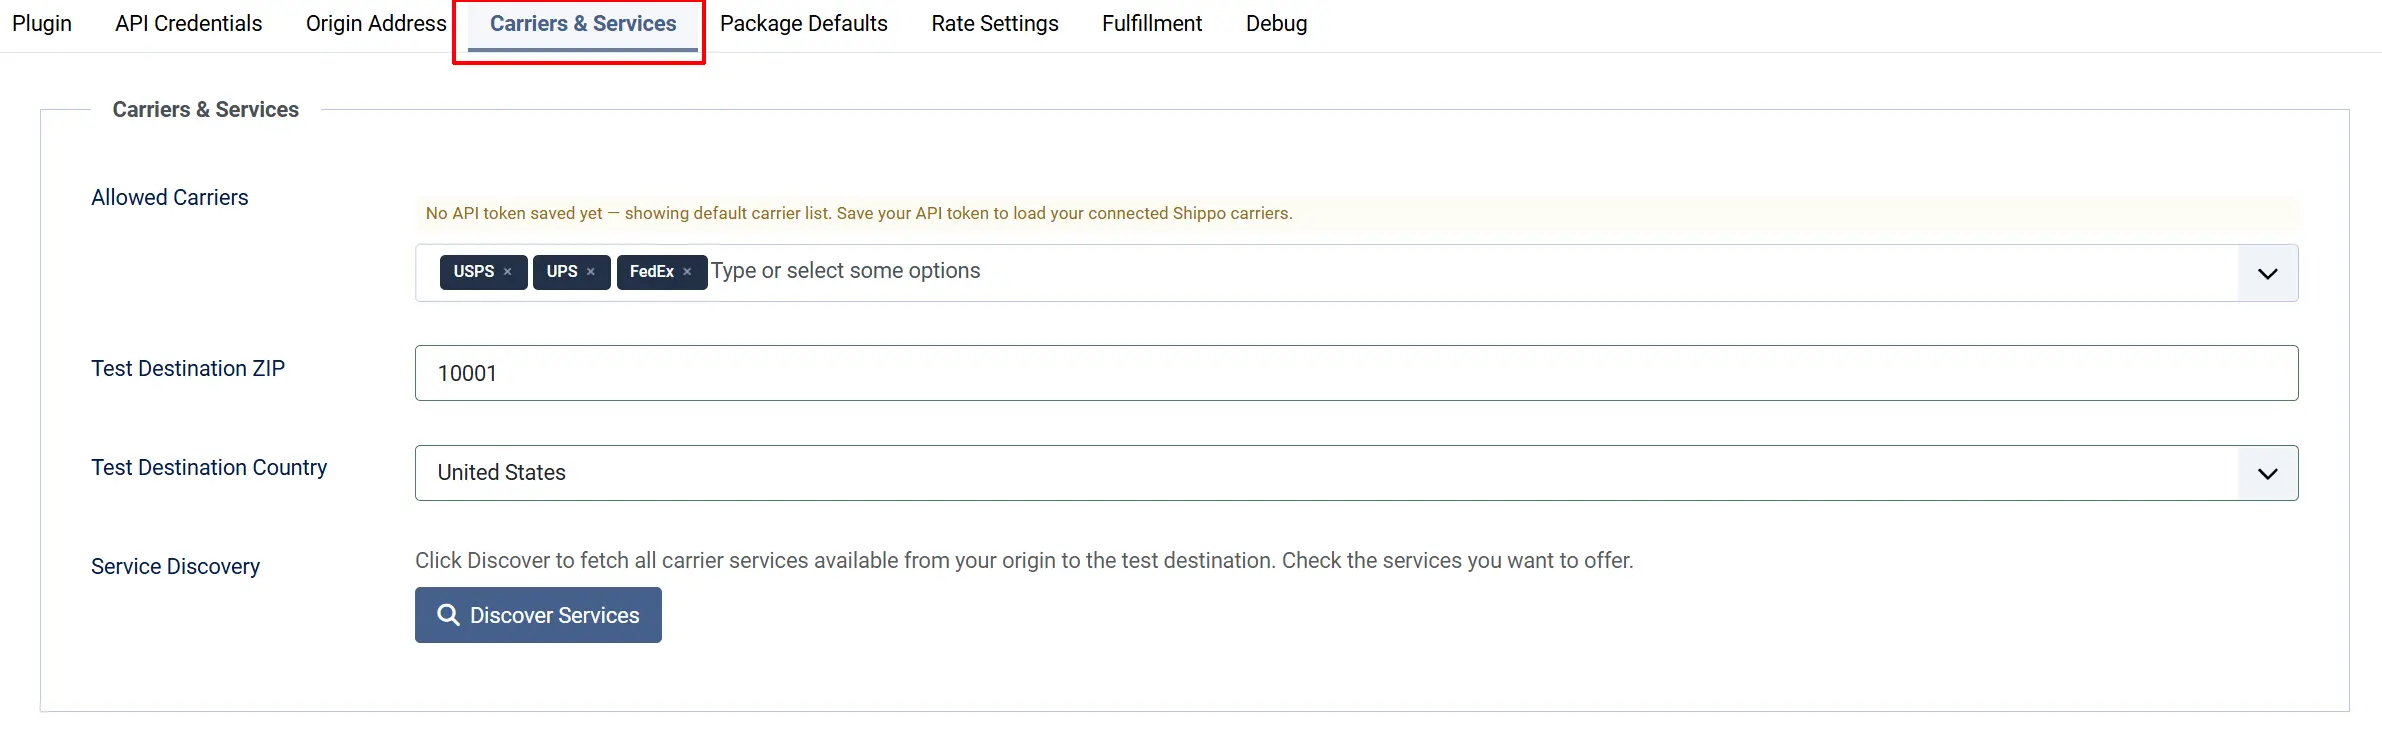
This tab controls which carriers and services appear at checkout.
Allowed Carriers: Select the carriers you want to show rates for. Leave all options selected to display every carrier connected to your Shippo account.
Test Destination ZIP: ZIP or postal code used when running Service Discovery (see below).
Test Destination Country: Country used when running Service Discovery.
Service Discovery: Click Discover Services to fetch the full list of services available from your connected carrier accounts. Check the services you want to offer at checkout, then save.
How Service Discovery works: When you click Discover Services, the plugin asks Shippo for every service level across all your connected carrier accounts. You check the ones you want, save the plugin, and those are the only services shown to customers at checkout. If you leave nothing checked, all available services are shown.
Package Defaults
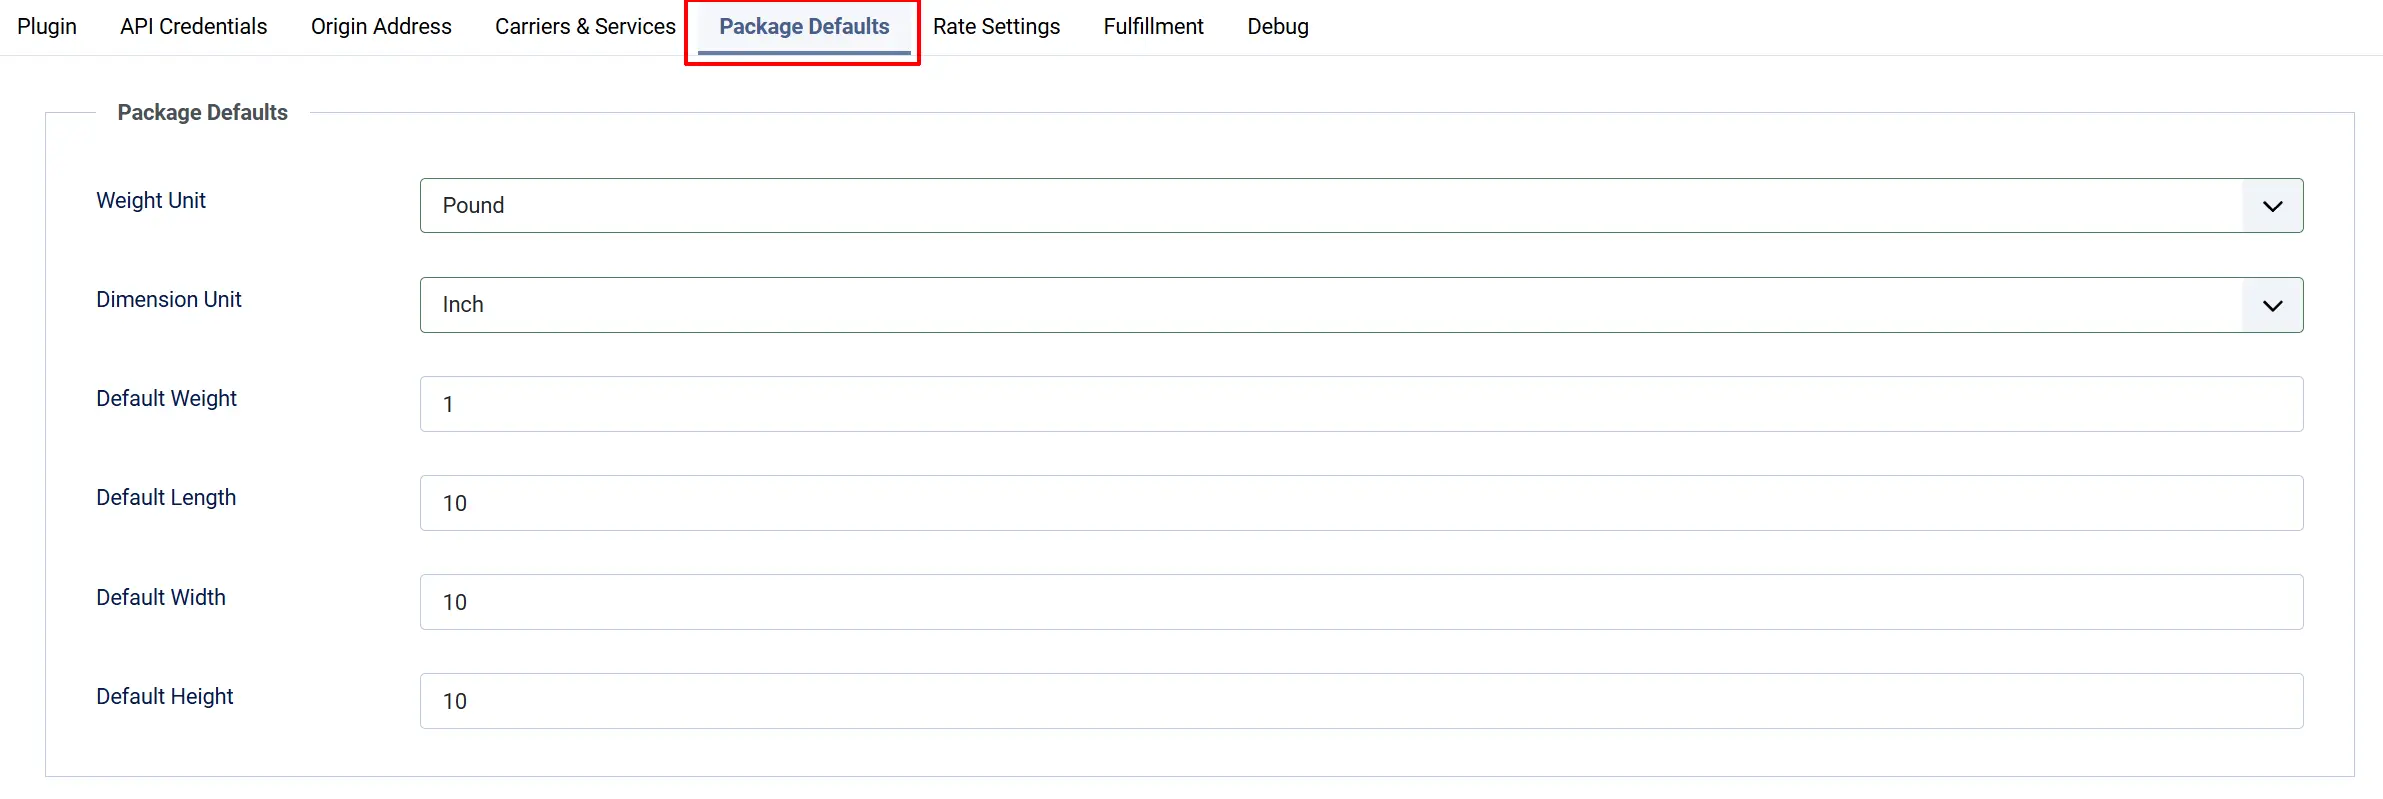
These values are used when a product does not have weight or dimensions set. The plugin sums the weight of all items in the cart and uses the largest single dimension for length, width, and height.
Weight Unit: Unit for package weight. Must match the weight unit set on your products.
Default Weight: Weight applied per item when a product has no weight set.
Dimension Unit: Unit for package dimensions.
Default Length: Box length when product dimensions are not set.
Default Width: Box width when product dimensions are not set.
Default Height: Box height when product dimensions are not set.
Set your product weights in J2Commerce -> Catalog -> Products for the most accurate rates. The default weight is a fallback — correct product weights always take priority.
Rate Settings
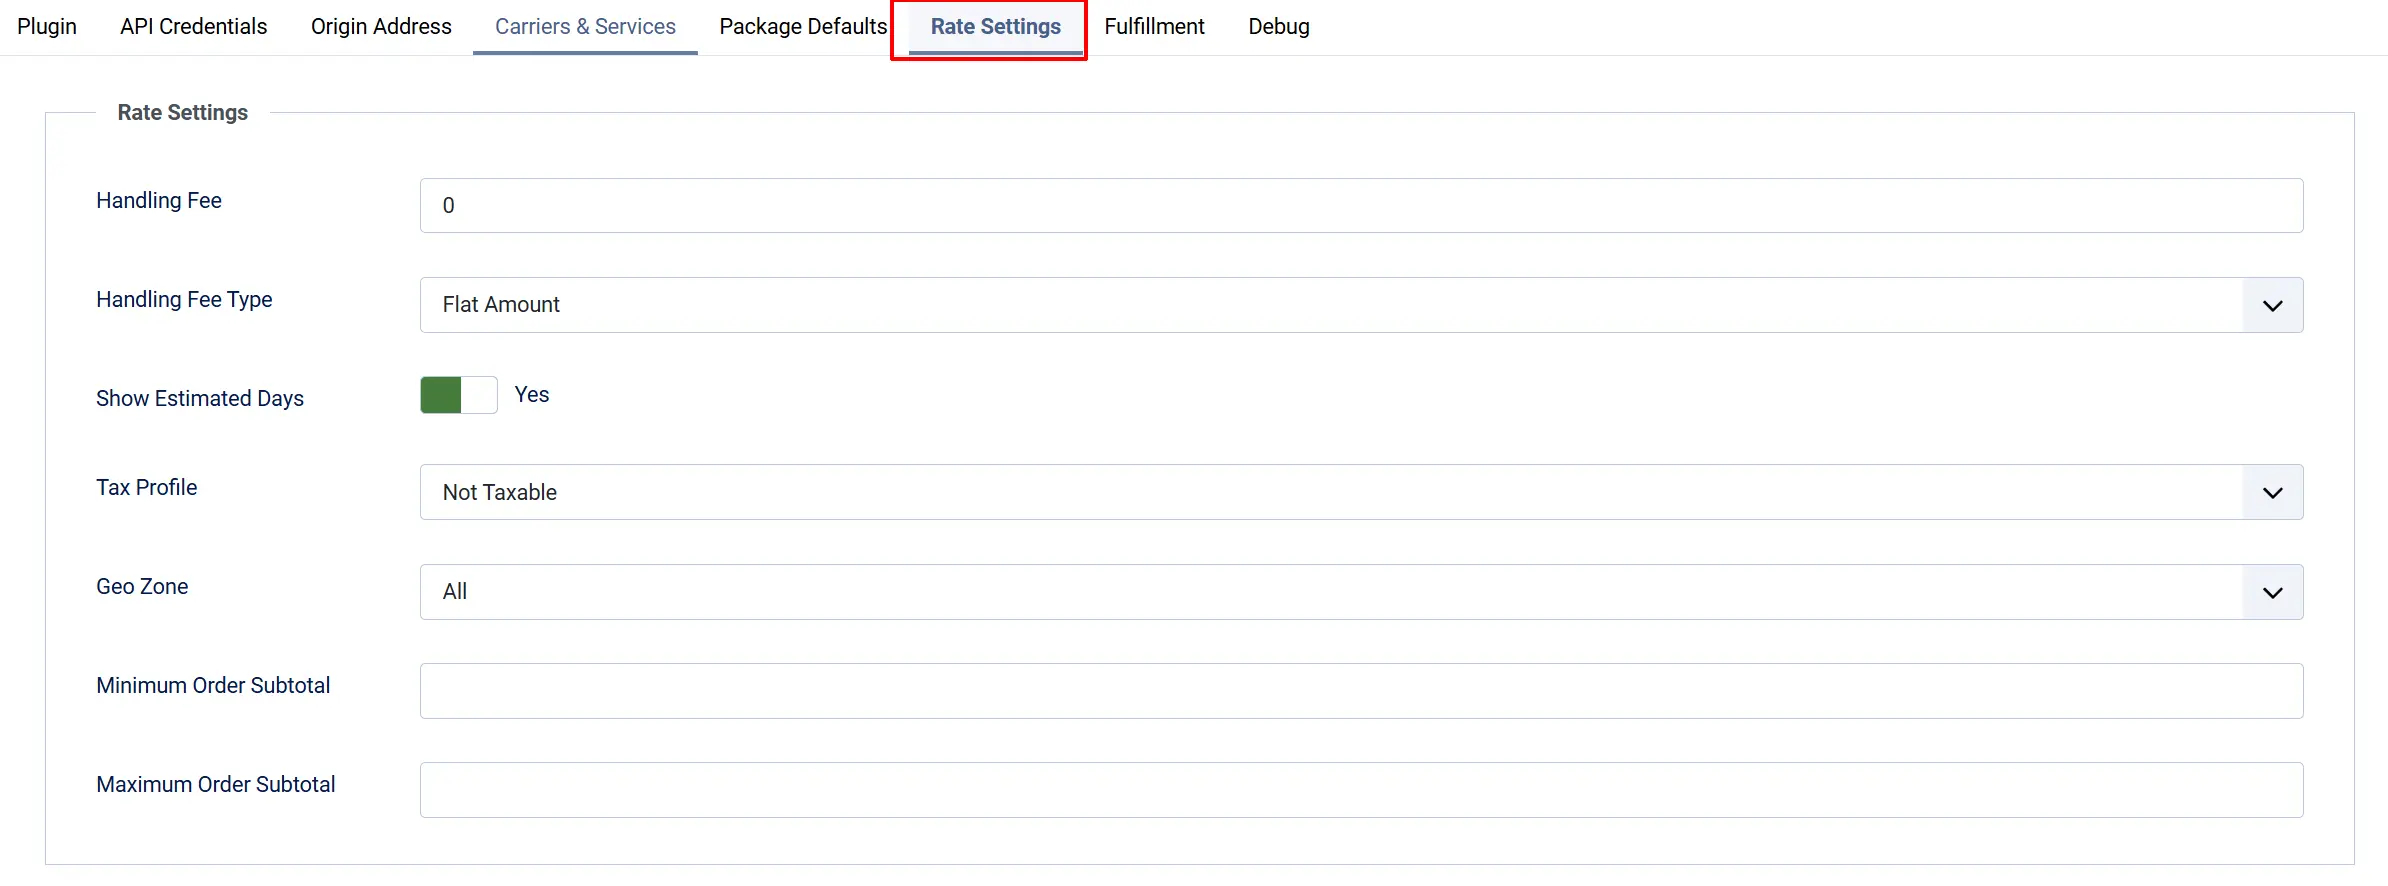
Handling Fee: A fixed or percentage amount added to every carrier rate before it is shown to the customer. Enter 0 to skip.
Handling Fee Type: Flat Amount adds the same dollar amount to every rate. Percentage adds a percentage of the carrier rate.
Show Estimated Days: When enabled, the estimated transit time (for example, "3 business days") is appended to the rate name at checkout.
Tax Profile: Select a tax profile to apply sales tax on shipping. Leave on No Tax for tax-free shipping.
Geo Zone: Restrict Shippo rates to a specific geo zone. Leave on All Zones to show rates worldwide.
Minimum Order Subtotal: Only show rates when the cart subtotal is at or above this amount. Leave blank for no minimum.
Maximum Order Subtotal: Only show rates when the cart subtotal is at or below this amount. Leave blank for no maximum.
Fulfillment
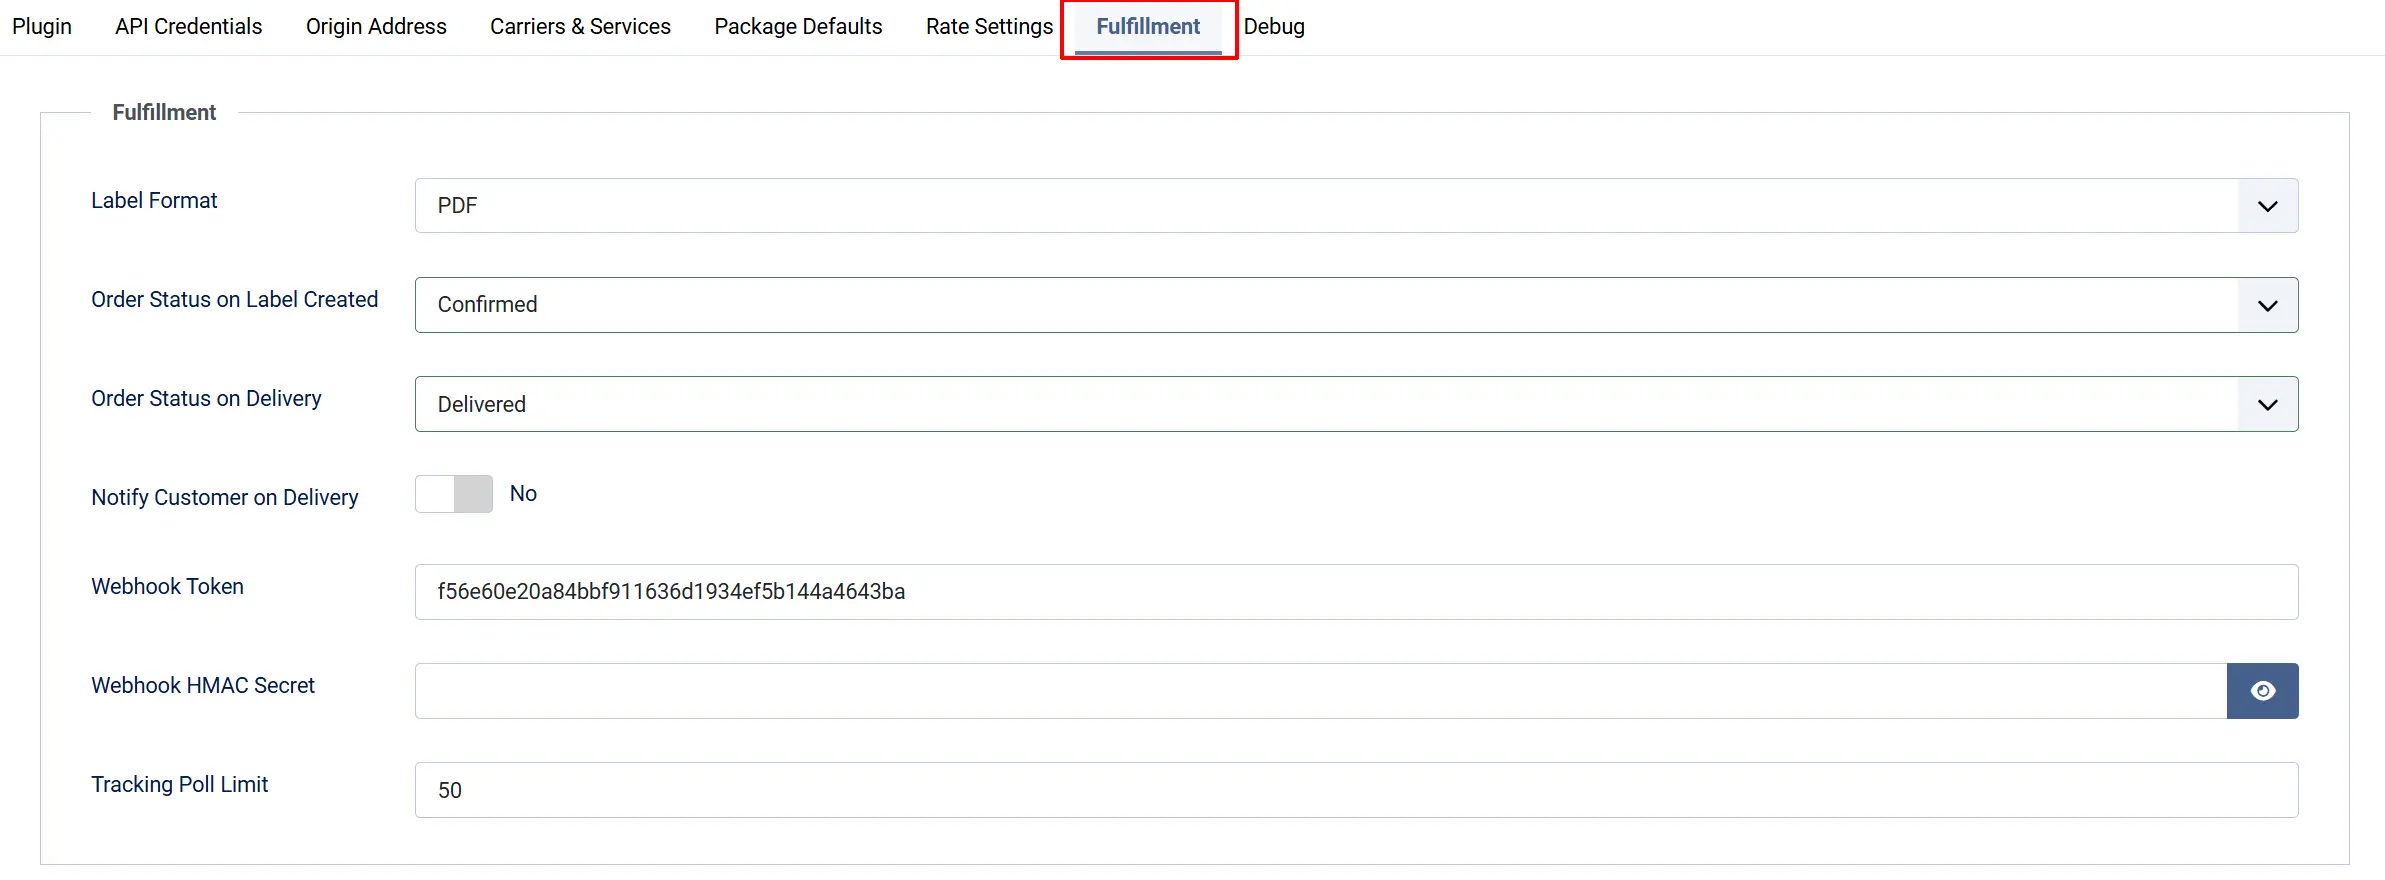
These settings control label creation, tracking, and automatic order status changes.
Label Format: File format for generated labels. Choose PDF for standard printers, PDF 4x6 for thermal label printers (4-inch × 6-inch), PNG for image labels, or ZPL II for Zebra and compatible thermal printers.
Order Status on Label Created: The order is automatically moved to this status when you purchase a label. Choose Keep Current Status to leave the status unchanged.
Order Status on Delivery: The order is automatically moved to this status when tracking confirms delivery. Choose Keep Current Status to leave the status unchanged.
Notify Customer on Delivery: When enabled, J2Commerce fires the delivery notification email when tracking status changes to delivered.
Webhook Token: A security token you create yourself. Append &token=[your-value] to the webhook URL you register in Shippo. Requests without the matching token are rejected. Leave blank to accept all webhook requests (not recommended).
Webhook HMAC Secret: Enterprise feature only. Leave blank unless Shippo support has set up HMAC webhook signing for your account (takes approximately 10 business days). Use the Webhook Token field for standard security instead.
Tracking Poll Limit: Maximum number of pending labels checked per cron run. Increase if you have high order volume.
Debug

Debug Logging: When enabled, all API calls and errors are written to a shipping_shippo.php log file. Turn this off in production — it generates a large log and may expose API details.
How It Works
-
Customer enters their shipping address at checkout. The plugin checks whether the address falls within your configured geo zone (if any) and whether the cart subtotal is within your minimum and maximum limits.
-
The plugin calls the Shippo API. It sends your origin address, the customer's destination, and the parcel dimensions and weight to Shippo and receives a list of live carrier rates in return.
-
Rates are filtered and displayed. Only carriers and services you have enabled appear in the list. If you set a handling fee, it is added to each rate before display. If Show Estimated Days is on, the transit time appears next to the rate name.
-
The customer selects a rate and places the order. The chosen carrier, service, and rate are saved with the order.
-
You open the order in the J2Commerce admin. A Shippo Shipping Labels panel appears at the bottom of the order details. Click Create Label to open a modal where you can select the carrier and service, confirm or adjust the package dimensions, and see the live label price before committing.
-
You purchase the label. Shippo charges the label cost to your Shippo account. The tracking number and a link to the label PDF appear in the panel. If you set an Order Status on Label Created, the order moves to that status automatically.
-
The customer receives a tracking link. When J2Commerce sends a status-change email for the shipped or delivered status, the tracking number and a direct link to the carrier tracking page are included in the email automatically.
-
Tracking updates automatically. The J2Commerce cron task polls Shippo for tracking updates on all open labels (up to the Tracking Poll Limit per run). You can also click Refresh Tracking on an individual order at any time. When a shipment is marked delivered, the order moves to the Order Status on Delivery status and — if enabled — fires the delivery notification email.
-
If you need to cancel a label, click Void next to the label in the order panel. Voided labels are marked in the panel so you have a clear record.
Display Conditions
Shippo rates appear at checkout only when all of the following are true:
- The plugin is enabled in J2Commerce -> Setup -> Shipping Method.
- A valid API token (test or live) is saved.
- An origin address with at least a postal code is configured, or your J2Commerce store address is complete.
- The cart contains at least one shippable product.
- The customer's destination address (or at minimum, their country) is known.
- The customer's destination falls within the configured Geo Zone (or All Zones is selected).
- The cart subtotal meets the Minimum Order Subtotal (if set) and does not exceed the Maximum Order Subtotal (if set).
Tips
-
Connect carriers in Shippo before saving the plugin. The Allowed Carriers dropdown and Service Discovery both read from your connected Shippo carrier accounts. If no carriers are connected, you will see a default list rather than your actual accounts.
-
Run Service Discovery after adding a new carrier. Click Discover Services whenever you add or remove a carrier account in Shippo to refresh the available service list.
-
Use Test Mode until you are ready to ship. Test mode uses test credentials and generates fake labels. No real postage is charged. Switch to your live API token only when you are ready to process real orders.
-
Set real product weights. Accurate weights lead to accurate rates. The default weight is only a fallback for products where no weight is set.
-
PDF 4x6 is the standard format for thermal label printers (Dymo, Zebra, Rollo, etc.). If you print on a regular inkjet or laser printer, use standard PDF.
-
The label modal lets you re-quote. If you want to check the price before committing, open Create Label, change the weight or dimensions, click Update Rates, and review the live rates before confirming.
Troubleshooting
No Shippo rates appear at checkout
Cause: The API token is missing or incorrect, the origin address is incomplete, or no services are enabled.
Solution:
- Go to J2Commerce -> Setup -> Shipping Method, click Shippo to open the settings.
- Confirm Test Mode is set correctly and the matching API token (test or live) is filled in.
- Check the Origin Address tab — at minimum, a postal code and country must be set (or Use Store Address must point to a complete store address).
- Open the Carriers and Services tab. If you have run Service Discovery, confirm at least one service is checked. If the list is empty, check your Shippo Dashboard to ensure at least one carrier account is active.
- Enable Debug Logging temporarily, clear the Joomla cache, and attempt a checkout. Review the log at System -> Logs for any API error messages, then disable debug logging again.
"Invalid API token" error or no rates returned after entering a token
Cause: The token was entered for the wrong mode, or the token was copied incorrectly.
Solution:
- Confirm Test Mode is Yes if you are using a
shippo_test_token, or No if you are using ashippo_live_token. - Log in to your Shippo Dashboard -> API and copy the full token again, including the
shippo_test_orshippo_live_prefix. - Paste the token into the correct field, click Save, and test checkout again.
Labels will not generate from the order view
Cause: The order was not placed with Shippo as the shipping method, or the origin address is incomplete.
Solution:
- Open the order in J2Commerce -> Sales -> Orders. The Shippo Shipping Labels panel only appears on orders where the customer chose a Shippo rate at checkout.
- Check the Origin Address settings — all fields must be complete for label creation.
- If you see an error in the label modal, enable Debug Logging, try again, and check the log for details.
Tracking status is not updating
Cause: The J2Commerce cron task is not running, or the tracking number has not yet been picked up by the carrier.
Solution:
- Verify the Joomla cron task is configured. Go to System -> Scheduled Tasks and confirm the J2Commerce task is active and running on schedule.
- Click Refresh Tracking directly on the order to trigger an immediate update for that order.
- Allow some time after label purchase — carriers can take several hours to register a tracking number in their system.
Webhook delivery status events are not arriving
Cause: The webhook URL is not registered in Shippo, or the token does not match.
Solution:
- In your Shippo Dashboard, go to API -> Webhooks and confirm a webhook is registered pointing to your site.
- The webhook URL follows this pattern:
https://[your-site]/index.php?option=com_ajax&plugin=Shipping_shippo&group=j2commerce&task=webhook&format=raw. If you set a Webhook Token, append&token=[your-value]to that URL. - Make sure the Webhook Token in the plugin settings exactly matches the
tokenvalue in the URL you registered in Shippo.