Canadapost shipping plugin
Requirements
- with PHP 8.1.0 +
- Joomla! 4.x/ Joomla! 5.x +
- J2Commerce / J2Store 4.x +
Purchase the Plugin
Step 1: Go to our J2Commerce website > Extensions > Shipping Plugins
Step 2: Locate the Canada Post Shipping App > click View Details > Add to cart > Checkout.
Step 3: Go to your My Downloads under your profile button at the top right corner and search for the app. Click Available Versions > View Files > Download Now
Install the Plugin
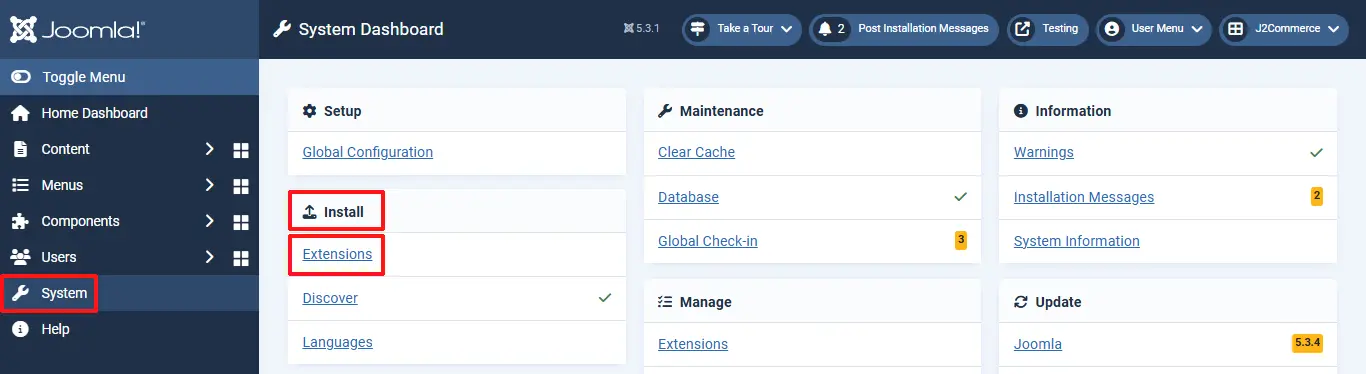
Go to System > Install > Extensions
Click on the Browse button and select the DHL Express Shipping zip file you saved during the download process. You will receive a message of success once installed.
Enable the Plugin
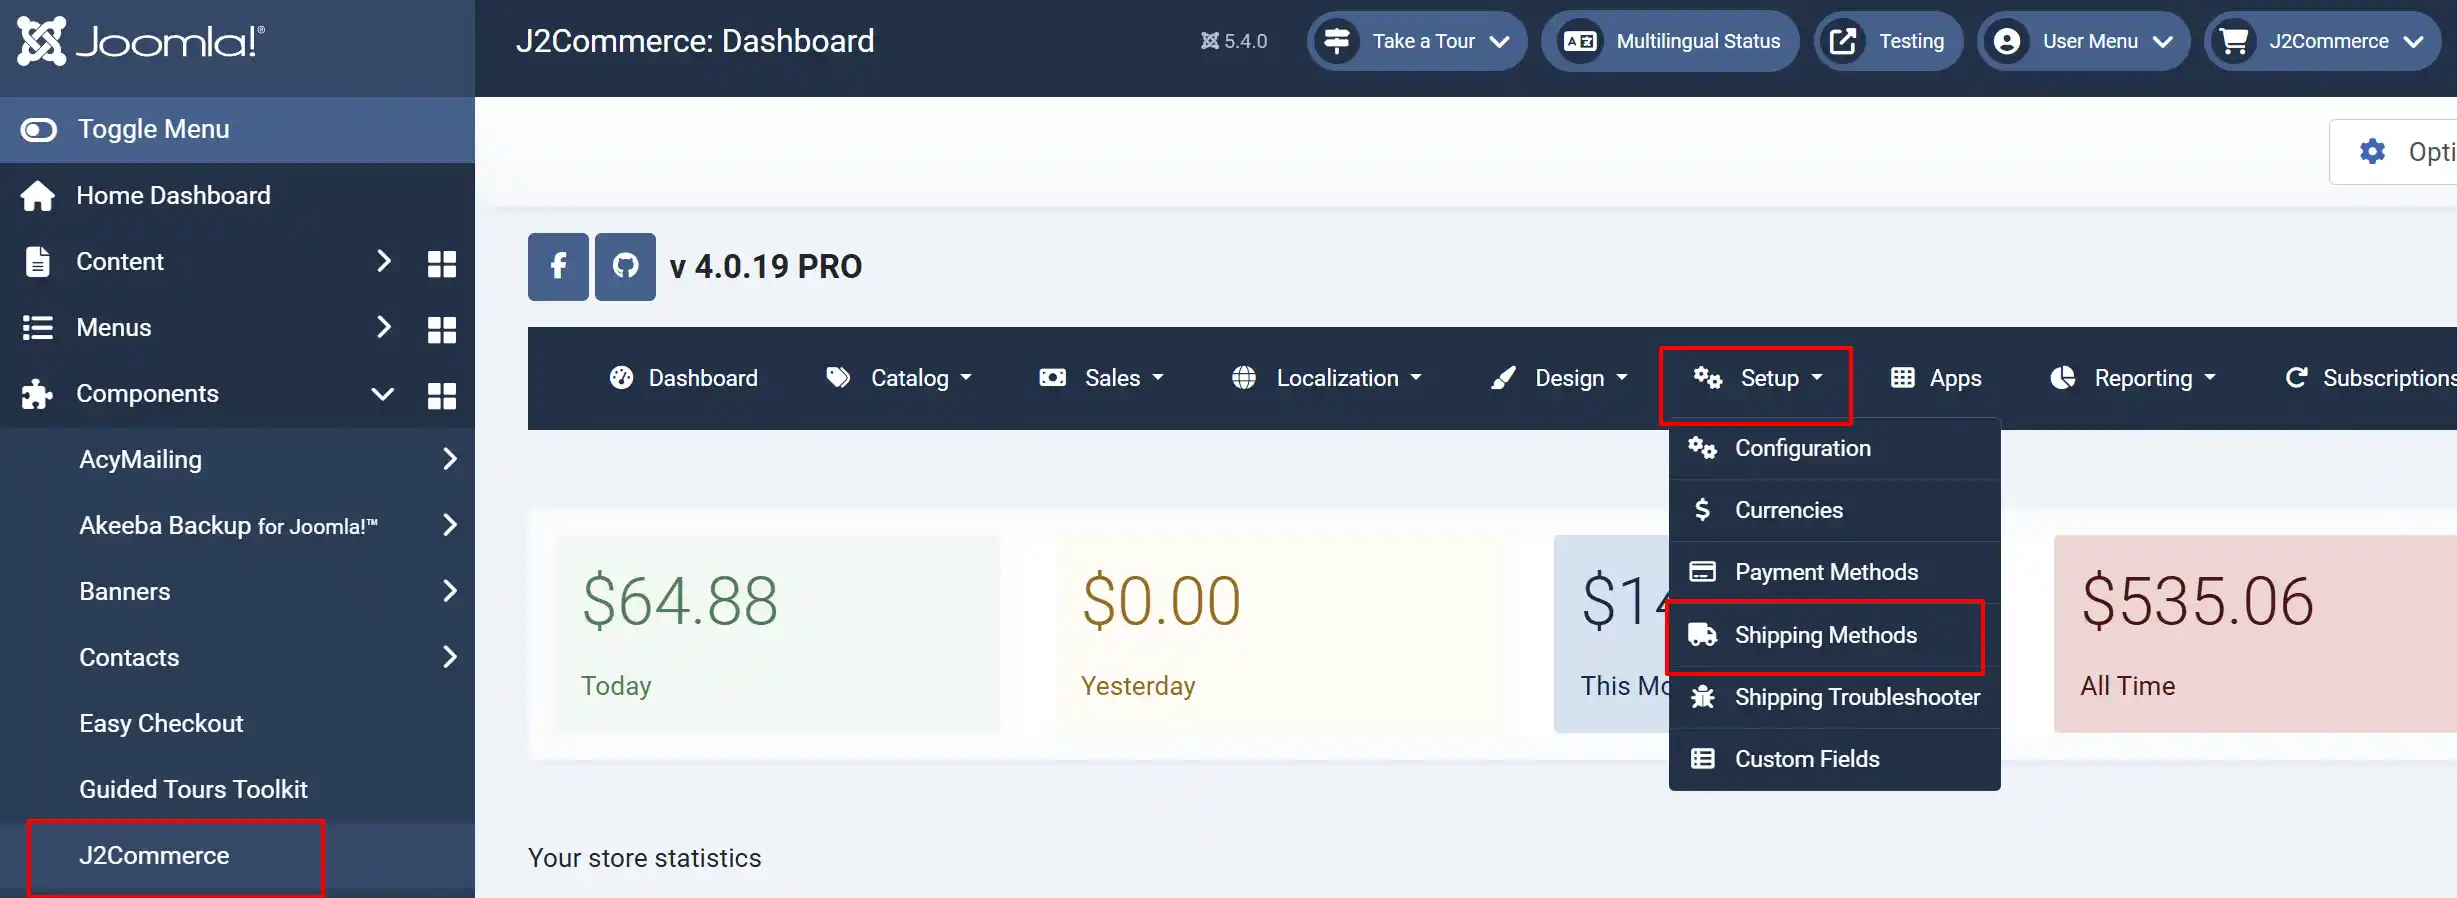
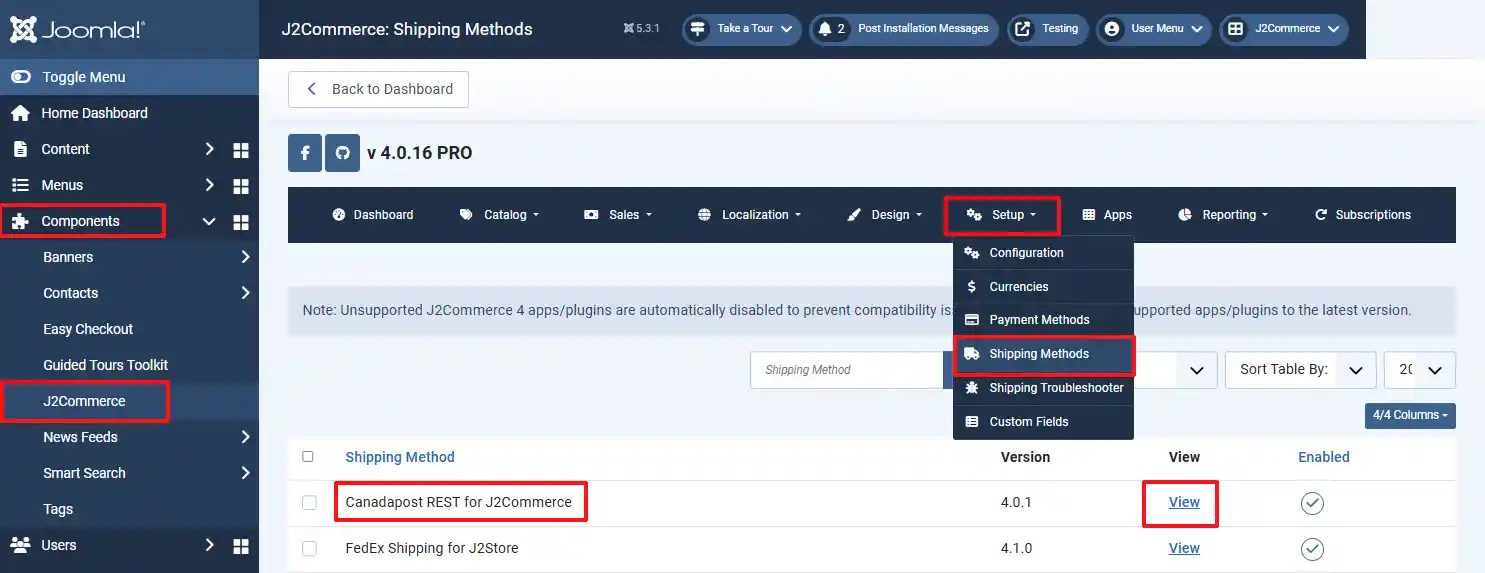
Go to J2Commerce > Setup > Shipping Methods
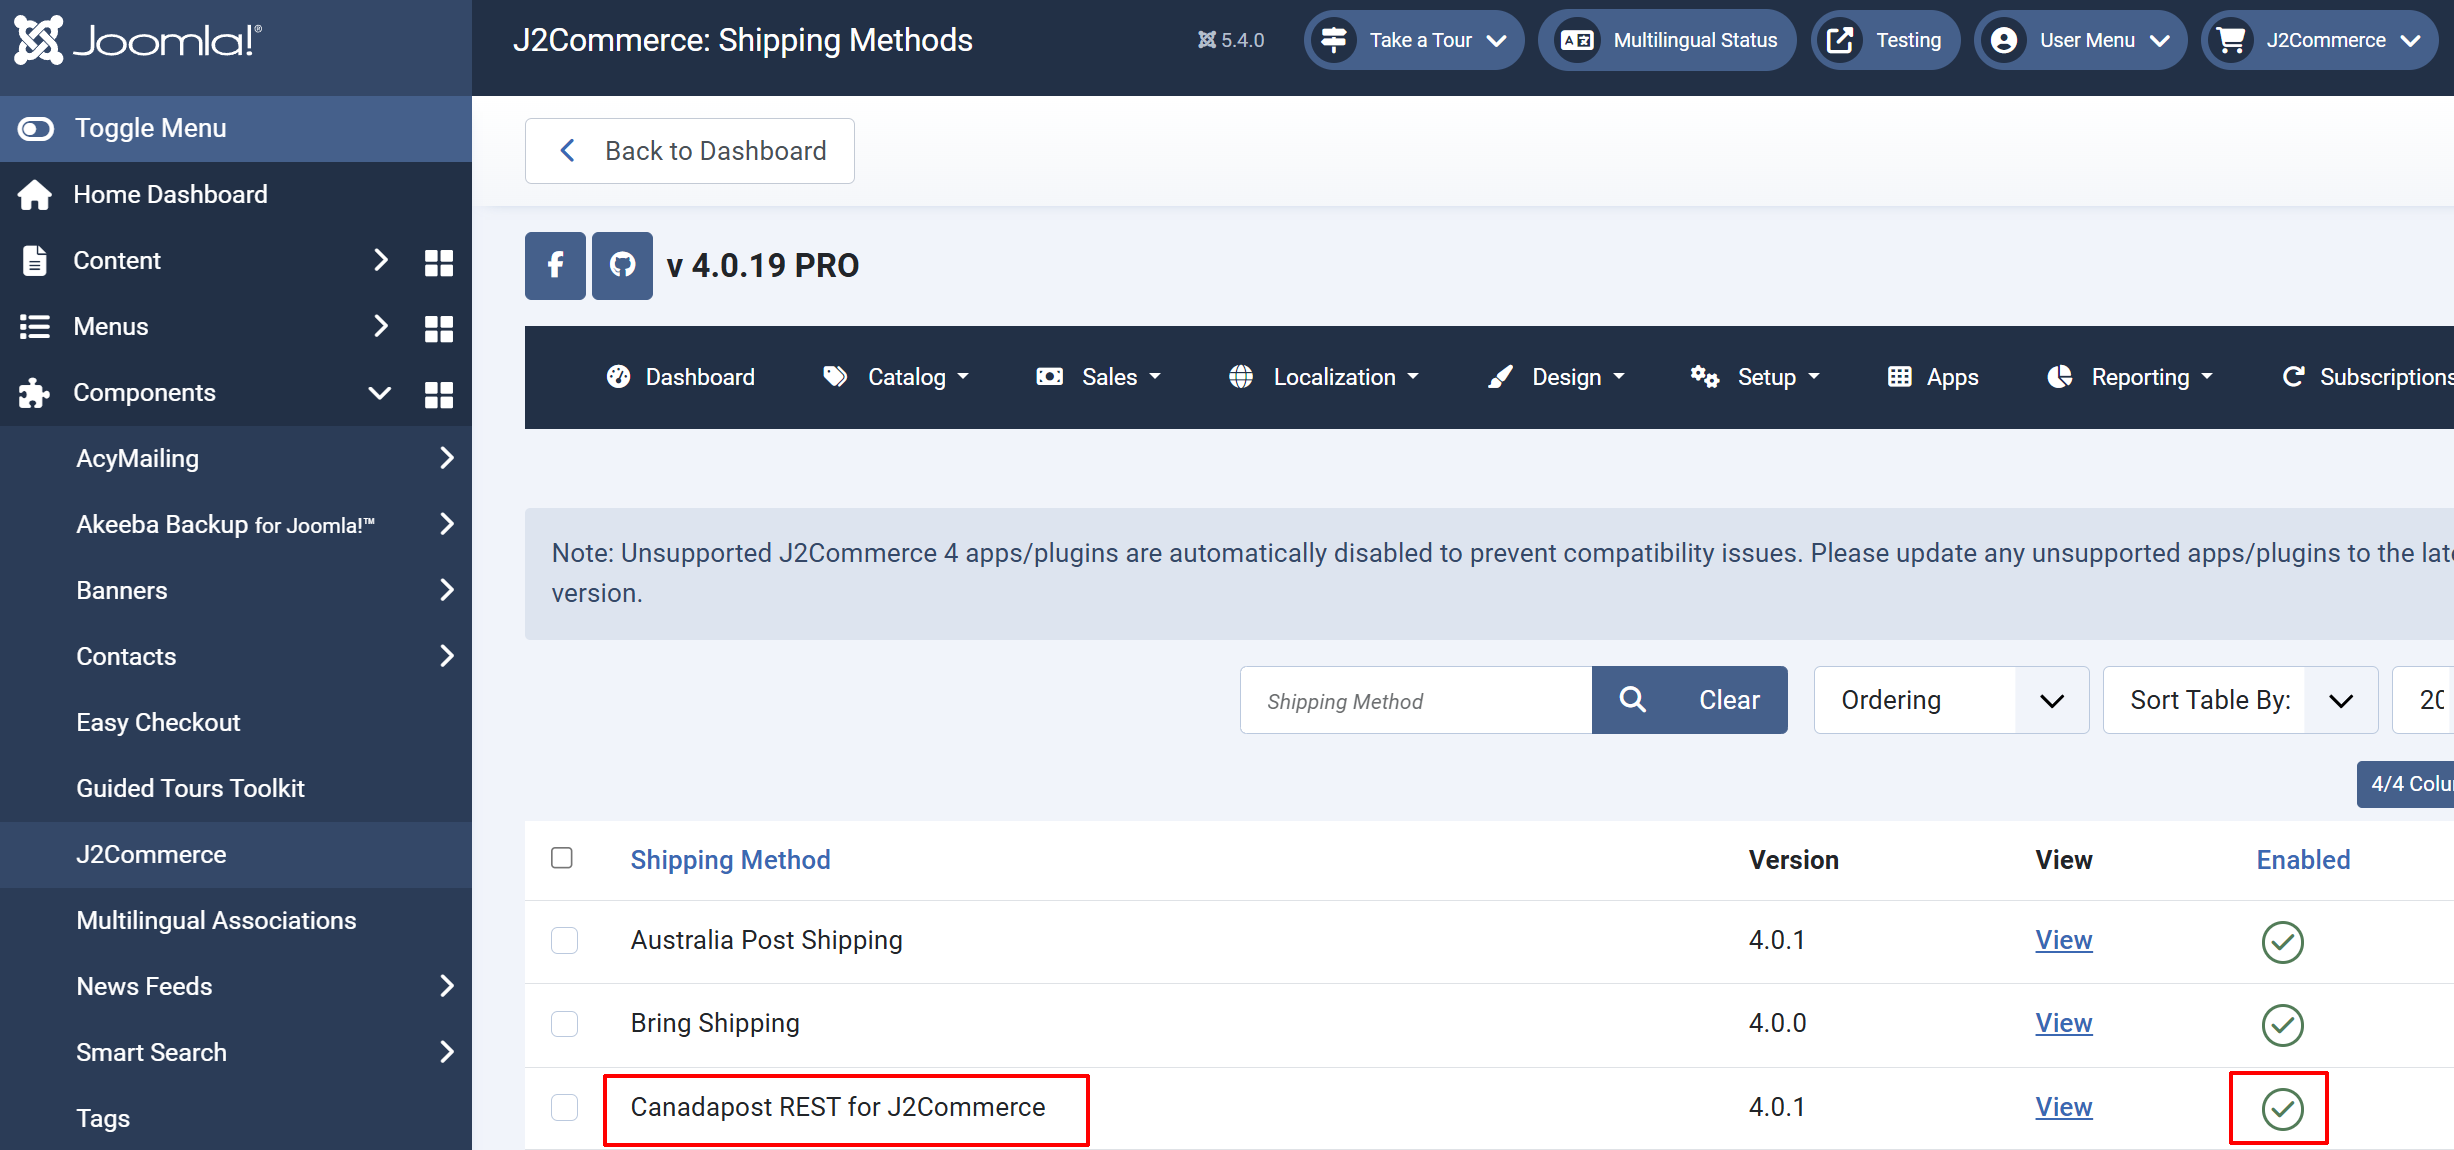
Locate the Canada Post Shipping Plugin
Click the 'X' to enable it. It will turn into a checkmark
Before you begin setting up the parameters in the app, you will need your API Keys. Follow the steps below to access your API Keys, and Customer Number
How to Register with Canada Post and Obtain Your API Key:
Sign in or Sign up by going to their main website here: If you are already registered with Canada Post, then Sign in to the Canada Post website using your registered Username and Password.
Don’t have an account yet? Sign up now.
Join the Developer Program:
Once you’ve signed in to their website, select Join Now on the main Developer program page. Read and accept the terms and conditions of the Program to become a member.
Get your API keys:
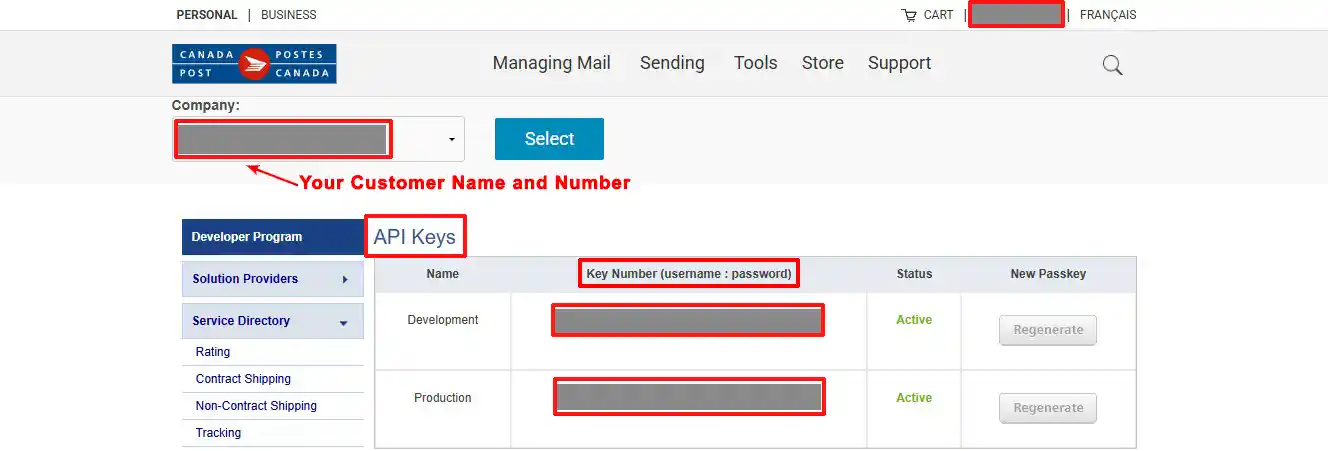
Once you are logged in to your account, go to this link to get your API Keys. You should see the API keys that are displayed on the main Developer Program page. These API keys are unique codes, used to access Canada Post web service and Postmen API. Note down the API keys (one for development and one for production).
Setting up the Plugin
Go to J2Commerce > Setup > Shipping Methods
Locate the Canada Post Plugin and click View to open it
Plugin tab
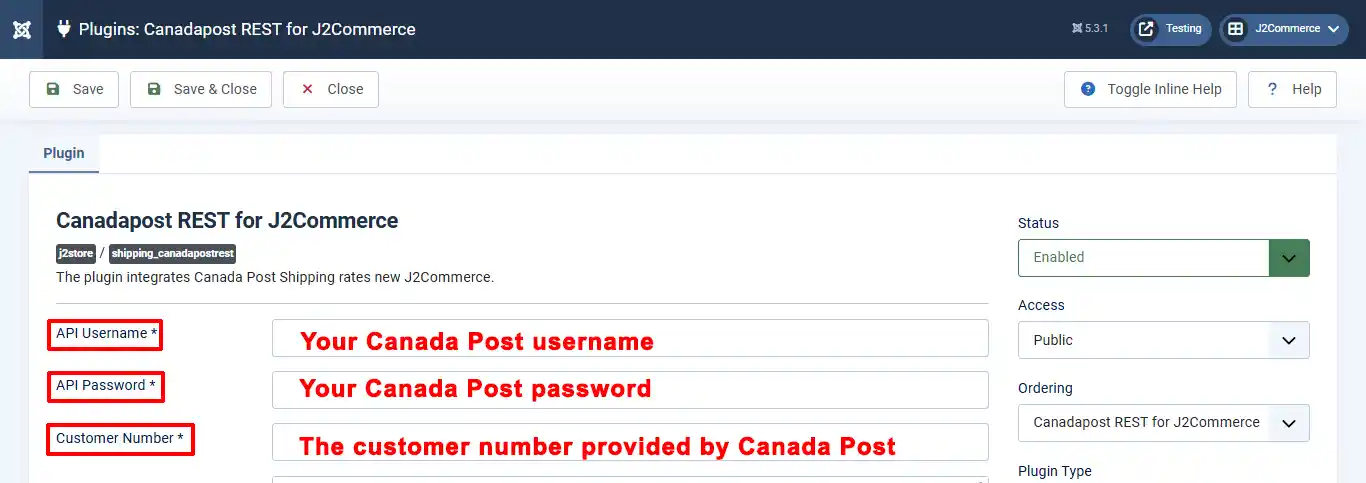
API Username: Your CanadaPost username
API Password: Your CanadaPost password
Customer Number: The customer number provided by Canada Post
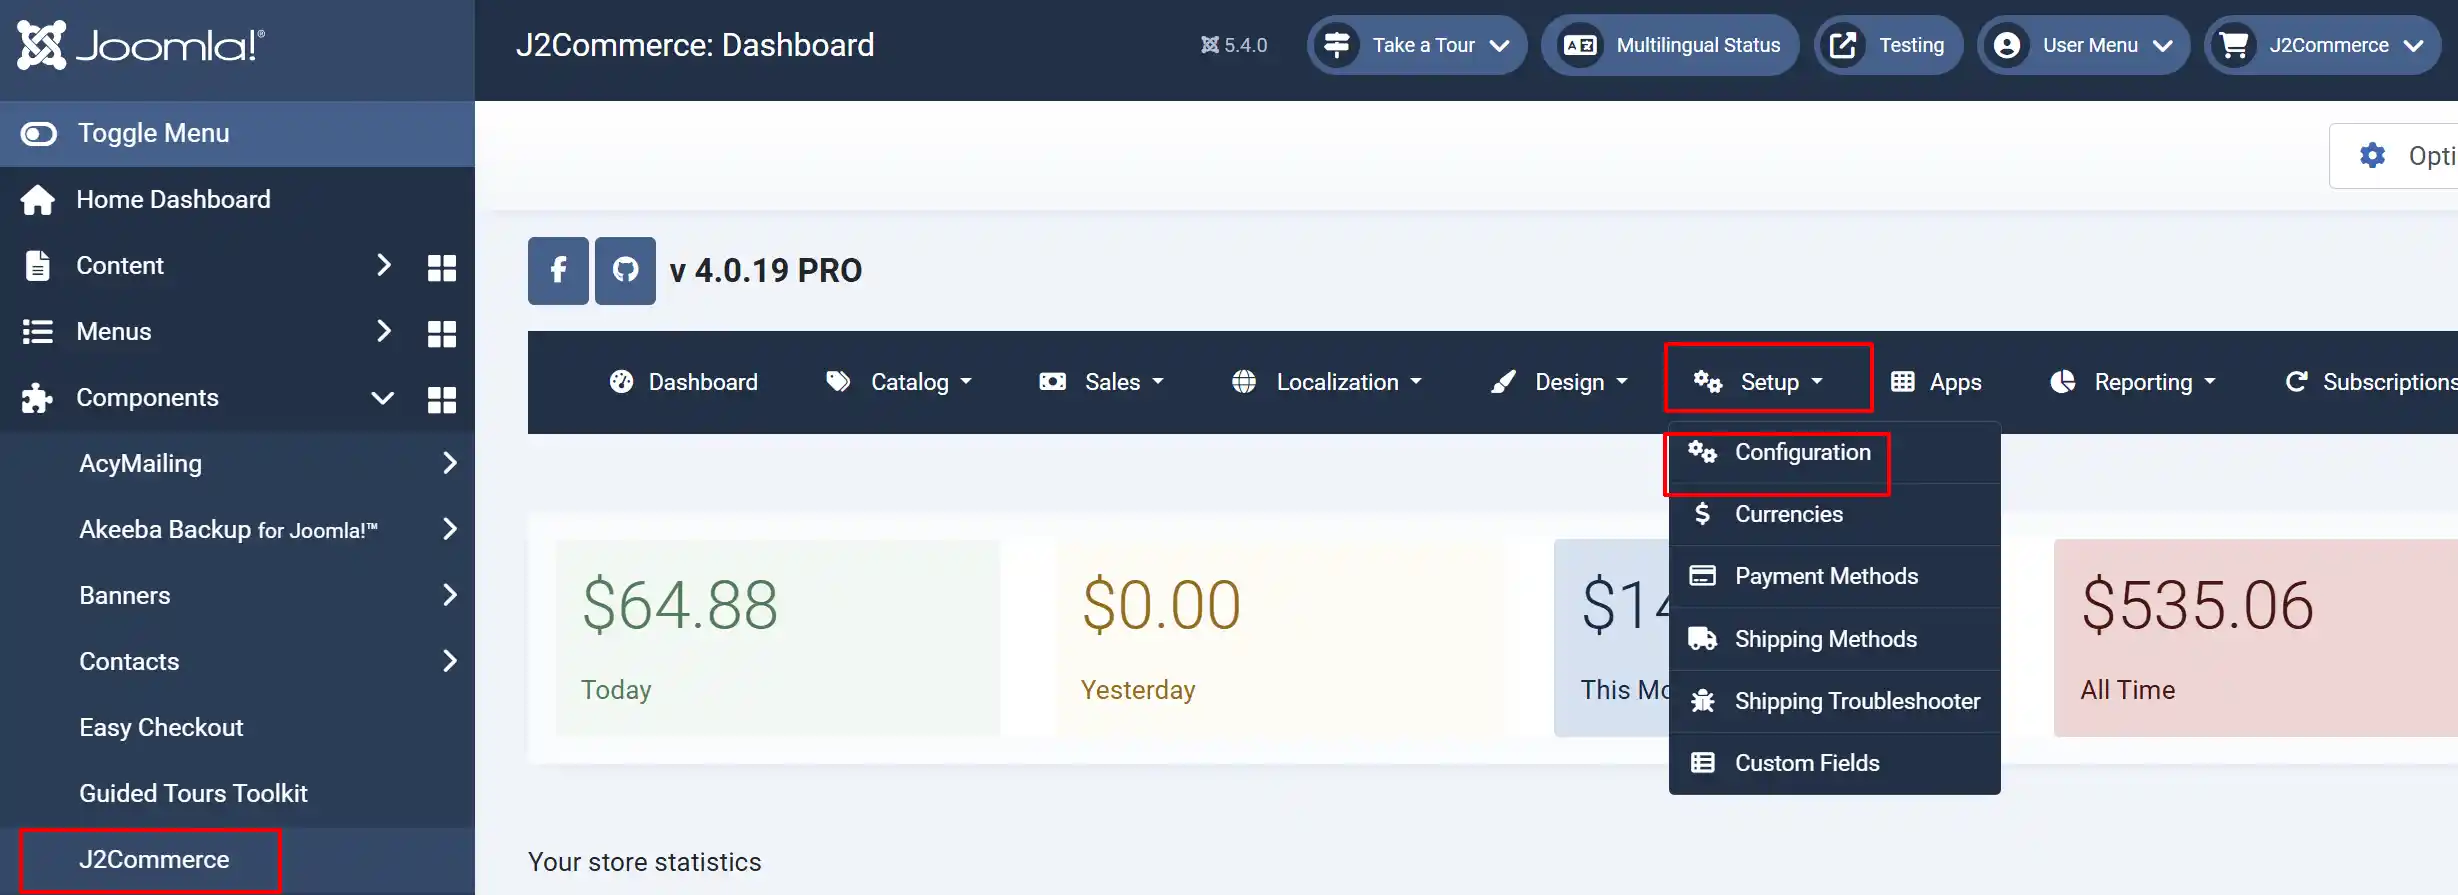
***Make sure you are using the same parameters you used when setting up your store in the backend. If you need help remembering how to check on it, go to J2Commerce > Setup > Configuration. See the screenshot below
Important steps to remember
-
Make sure that you have set the Default Weight Class to Kilogram (KG) or Pound (LB) in your Store Profile (from the image shown above)
-
Make sure that you entered your Postal Code/Zip correctly in your Store Profile under the Configuration section (from the image shown above)
-
Make sure that you have set the Dimensions and Weight fields in your products correctly
-
Make sure that you have set the 'Enable Shipping' to Yes in your products
Setting up the Parameters
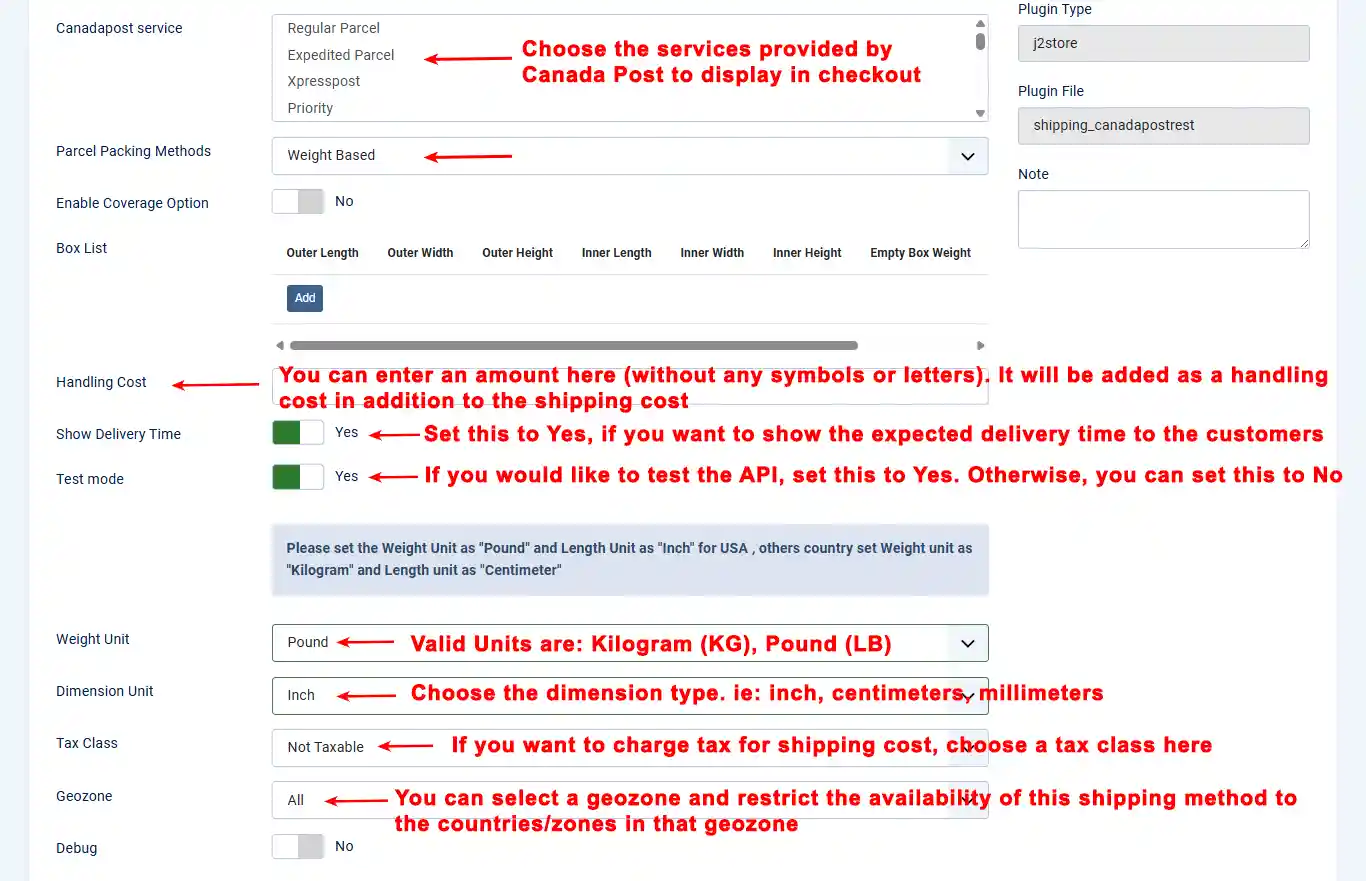
Canada Post Service: Choose the services provided by Canada Post to display in checkout.
NOTE: This is a mandatory option for version 3.2.24. Not selecting the service will make the shipping method unavailable.
Handling cost: You can enter an amount here (without any symbols or letters). It will be added as a handling cost in addition to the shipping cost.
Show delivery time: Set this to Yes if you want to show the expected delivery time to the customers.
Test mode: If you would like to test the API, set this to Yes. Otherwise, you can set this to No.
Weight Unit: Valid Units are: Kilogram (KG), Pound (LB).
IMPORTANT: Make sure to set your default weight class to either KG or LB in your store profile. All your products should be using the same weight class
Dimension Unit: Choose the dimension type. ie: inch, centimeters, millimeters. All your products should use the same dimension class
Tax Class: If you want to charge tax for shipping costs, choose a tax class here. Otherwise, leave this field empty/do not select any option.
Geozone: You can select a geozone and restrict the availability of this shipping method to the countries/zones in that geozone. Leave empty/unselected to make this shipping method available to customers from all regions.
Debug: If you set this to Yes, then debug messages will be logged and saved in the cache folder in your Joomla root directory. Set this to No in Live websites.