US Sales Tax Configuration
This guide walks you through setting up sales tax for a US-based J2Commerce store. The example uses Texas with an 8.5% sales tax rate, but you can adapt it to any state.
Important Legal Notice
US law requires you to collect sales tax in states where you have a physical presence — such as stores, distribution centers, or headquarters. Stores with annual revenues exceeding approximately $2 million should consider using a third-party tax provider for automated rate calculations.
The information and examples provided are for general informational purposes only and do not constitute tax or legal advice. J2Commerce and its employees or affiliates make no representations or warranties regarding accuracy or applicability and accept no liability for VAT or tax compliance. Tax regulations, including but not limited to, US, CANADIAN tax or EU VAT rules for digital and physical goods, are complex and subject to change. Users are solely responsible for ensuring compliance and should consult a qualified tax advisor.
Prerequisites
- J2Commerce is installed and configured
- At least one product created
- Understanding of your state's sales tax rate
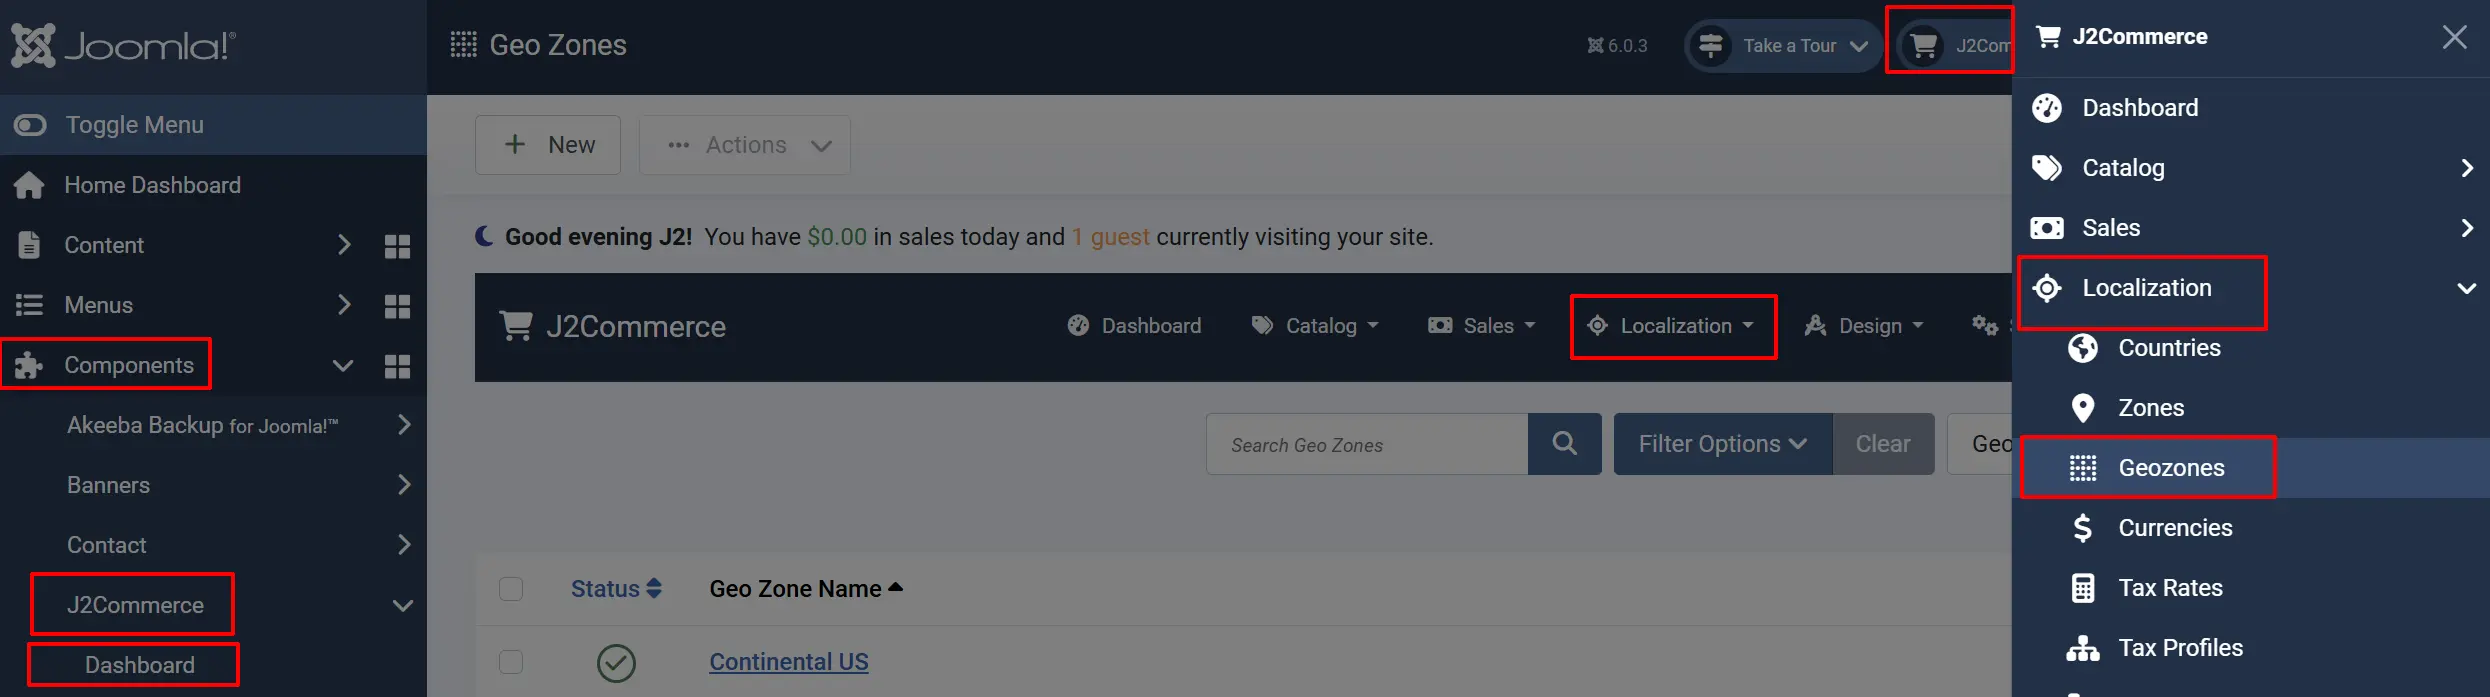
Step 1: Create a Geozone
A geozone defines the geographic area where you charge tax.
- Go to J2Commerce -> Localization -> Geozones.
-
Click New to create a new geozone.
-
Fill in the fields:
| Field | Value | Description |
|---|---|---|
| Geozone Name | Texas Zone | A descriptive name for this zone |
| Country | United States | Select from the dropdown |
| Zone | Texas | Select the specific state |
| Status | Published | Must be published to apply |
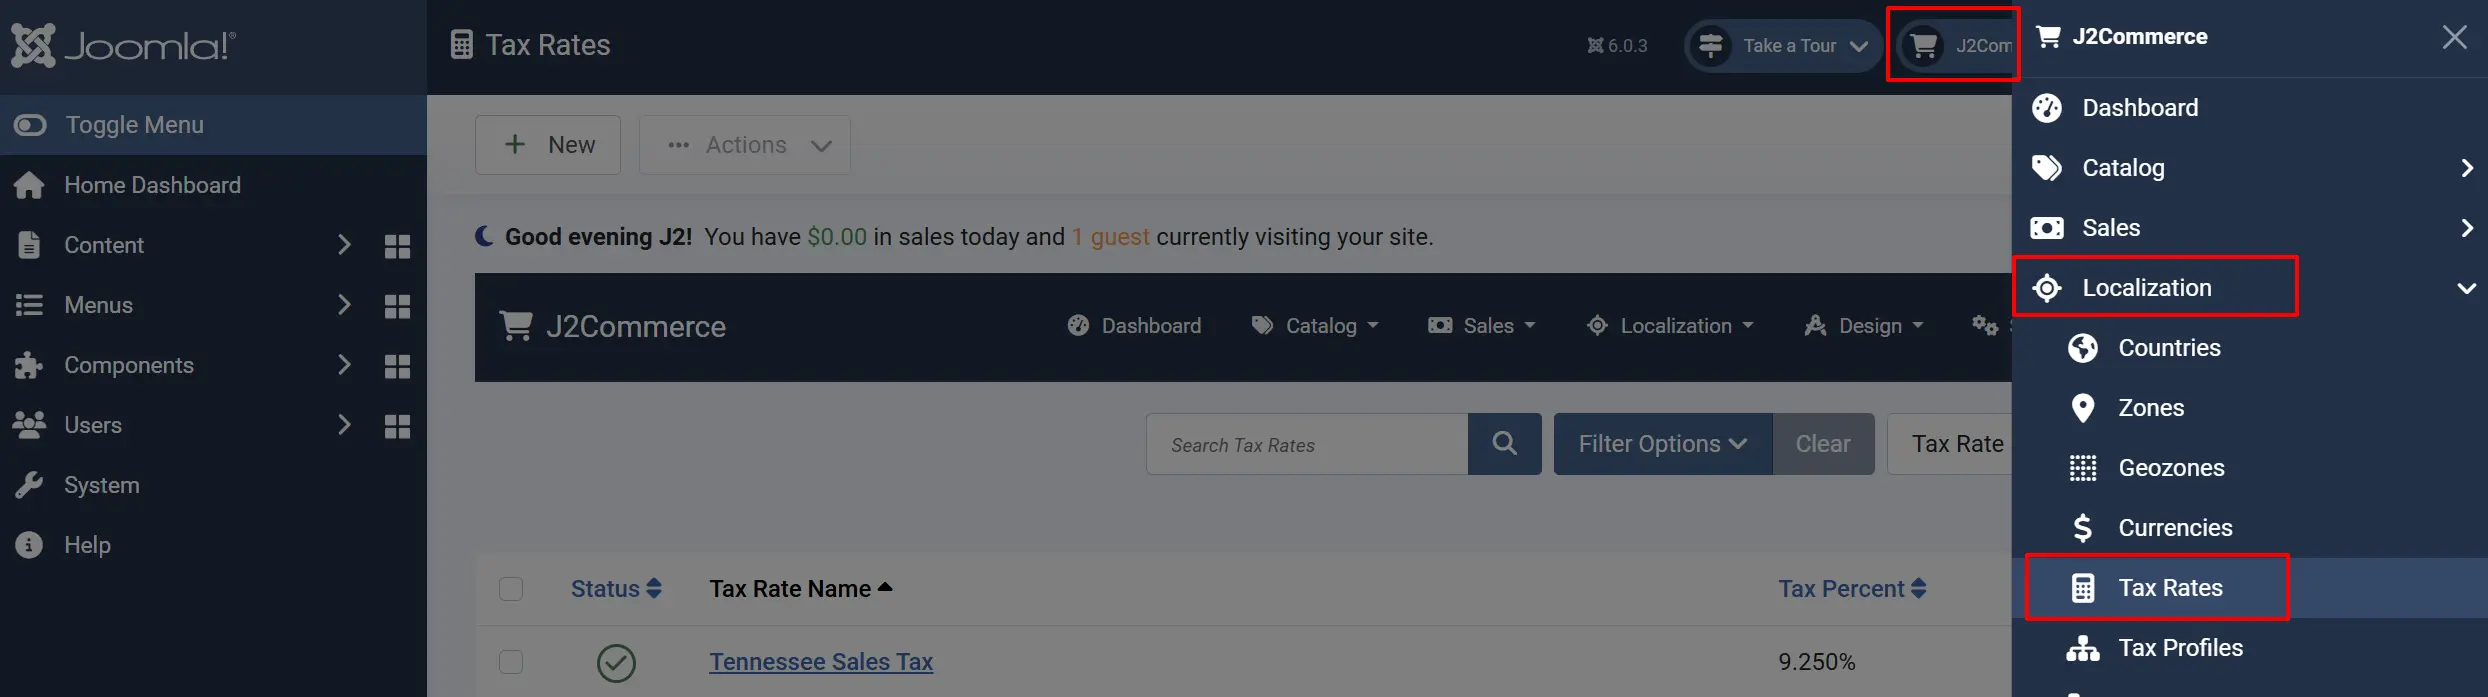
Step 2: Create a Tax Rate
The tax rate defines the percentage to charge and where it applies.
- Go to J2Commerce -> Localization -> Tax Rates.
-
Click New to create a new tax rate.
-
Fill in the fields:
| Field | Value | Description |
|---|---|---|
| Name | Sales Tax | A descriptive name (shown on invoices) |
| Tax Percent | 8.5 | Your state's sales tax rate |
| Geo Zone | Texas Zone | Select the geozone from Step 1 |
| Status | Published | Must be published to apply |
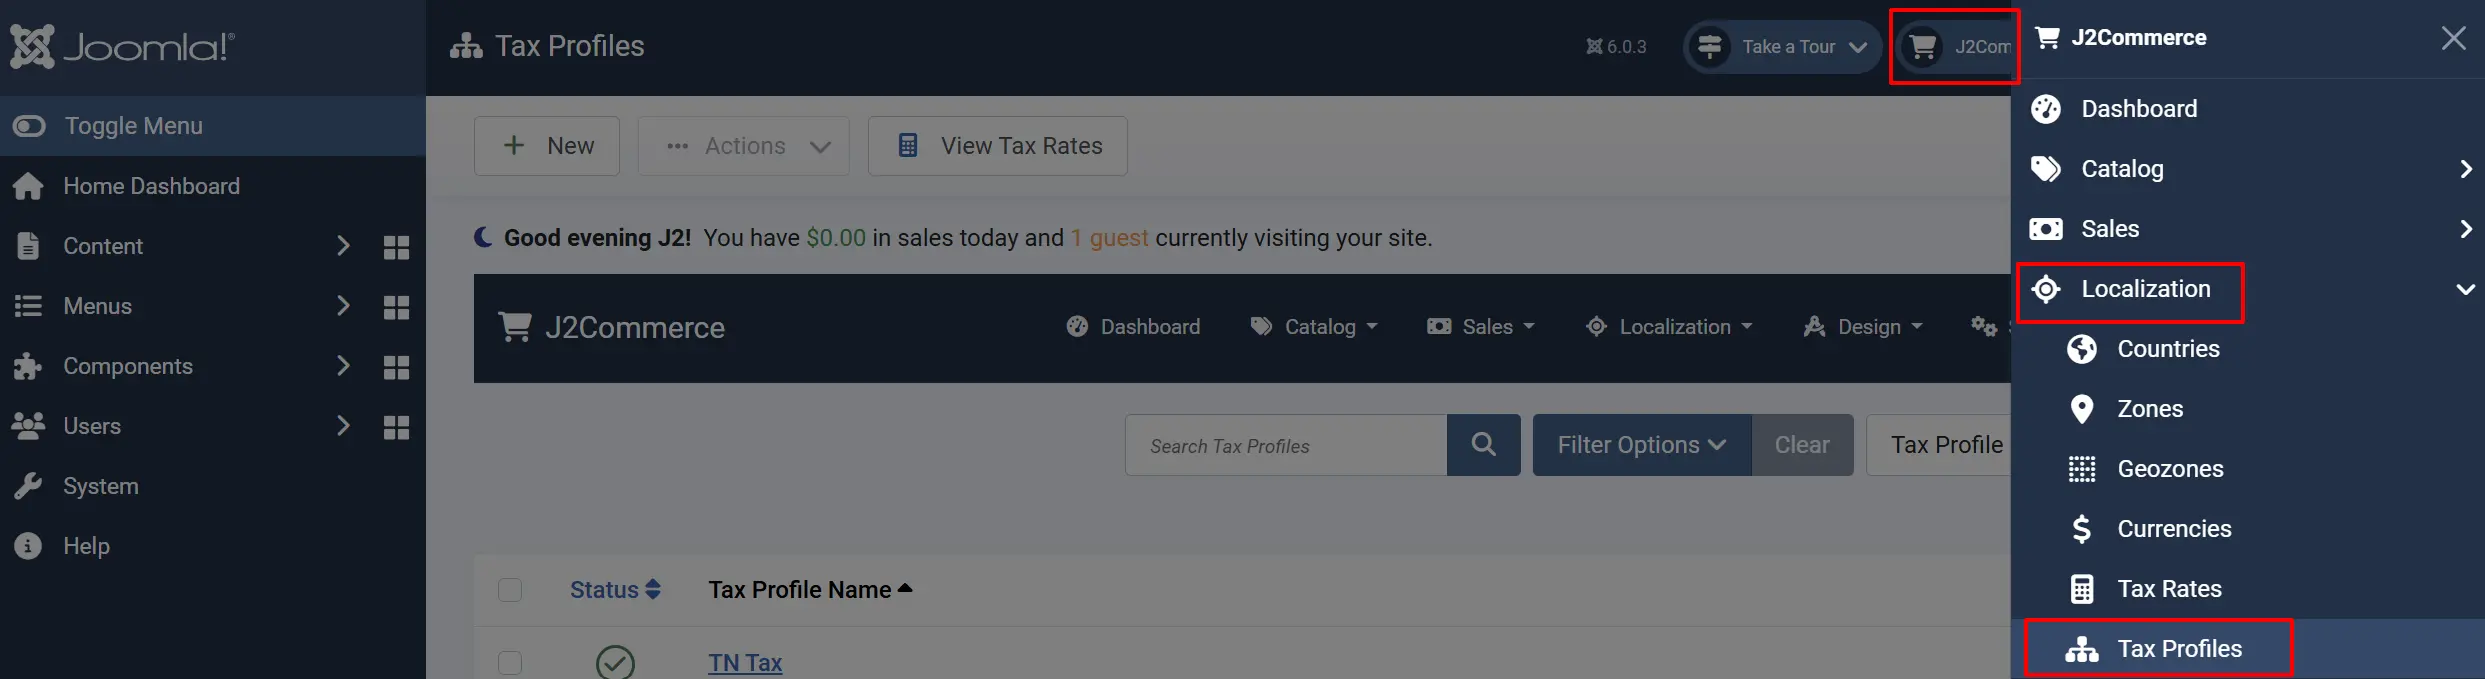
Step 3: Create a Tax Profile
A tax profile links the tax rate to an address type.
- Go to J2Commerce -> Localization -> Tax Profiles.
-
Click New to create a new tax profile.
-
Fill in the fields:
| Field | Value | Description |
|---|---|---|
| Name | Default Tax Class | A descriptive name |
| Status | Published | Must be published to apply |
-
In the Tax Rules tab section, click Add.
-
Configure the tax rule:
| Field | Value | Description |
|---|---|---|
| Tax Rate | Sales Tax | Select the tax rate from Step 2 |
| Address Type | Shipping Address | Use the shipping address for tax calculation |
Step 4: Configure Global Tax Settings
Set how J2Commerce handles tax display and calculation.
- Go to J2Commerce -> Setup -> Configuration.
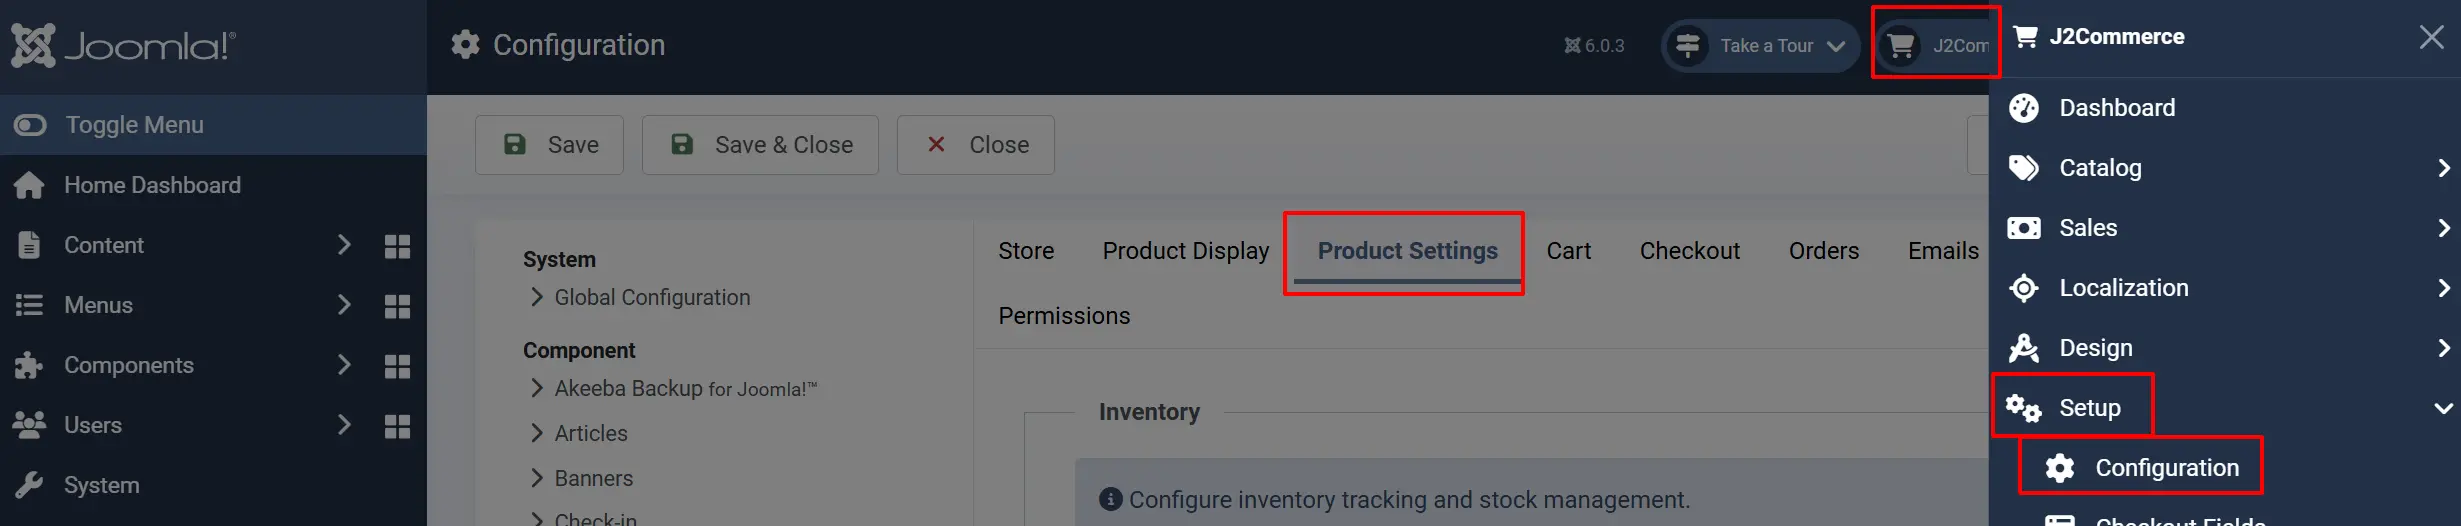
-
Click the Product Settings tab.
-
Configure the following settings:
| Setting | Value | Description |
|---|---|---|
| Prices Include Tax | Prices exclude tax | Are your product prices entered with tax included? Canadian stores typically enter prices without tax |
| Calculate tax based on | Shipping address | Use the billing or shipping address for tax calculation. Tax based on destination |
| Default Tax Address | Store address | Address to use for tax when the customer has not entered an address. Used before the customer enters their address |
| Price Display | Price Only | How to display prices on product pages. Show prices without tax |
| Show Tax Info | Never | Display tax information text with prices. Show prices without tax |
| Combine Tax Calculations | Yes | Select 'Yes' to combine all applicable tax calculations into one line item at checkout. For example, Sales Tax on products and shipping will display as a single line item instead of two separate tax charges. |
| Prices Include Tax | Prices exclude tax | Are your product prices entered with tax included? Canadian stores typically enter prices without tax |
Step 5: Apply Tax Profile to Products
Each product must have a tax profile assigned for tax to apply.
- Go to Content -> Articles and open a product article.
- Click the J2Commerce tab.
- Go to the General tab.
- Find the Tax Profile field and select your tax class (e.g., "Default Tax Class").
- Click Save.
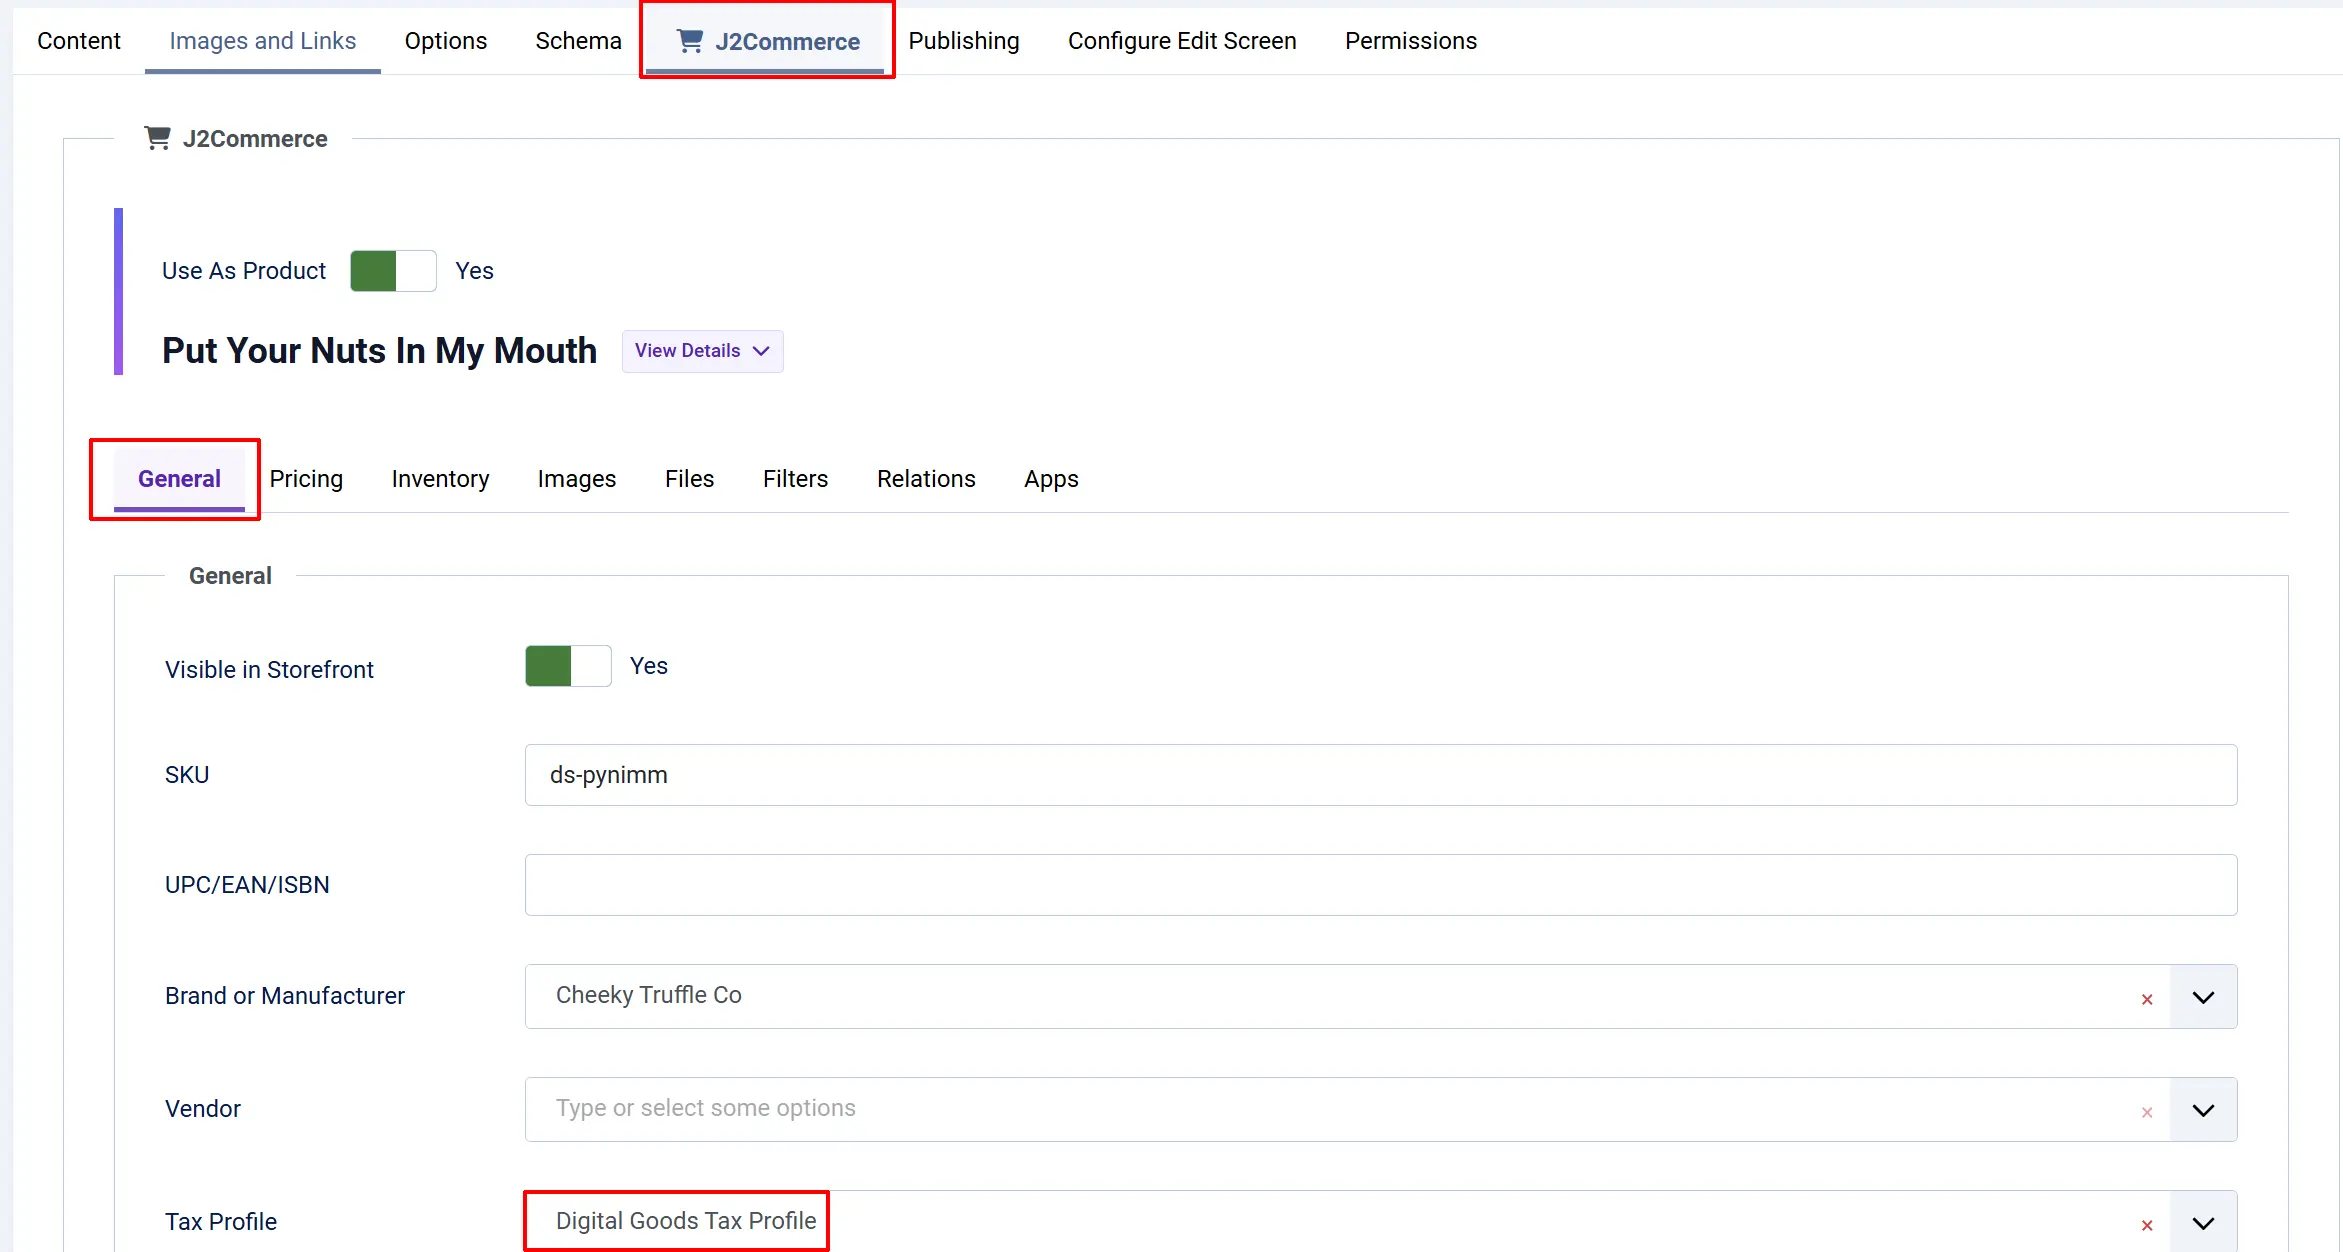
If you do not select a tax profile for a product, tax will NOT be applied in the storefront. Every taxable product must have a tax profile assigned.
Multiple State Tax Example
If you need to collect tax in multiple states, create additional geozones and tax rates:
- Create a geozone for each state (e.g., "California Zone", "New York Zone")
- Create a tax rate for each state with the correct percentage
- Add all tax rates to your single tax profile with "Shipping Address" as the associated address
J2Commerce will automatically apply the correct rate based on the customer's shipping address.
Tips
- Keep your tax rates up to date as state rates change
- Consider using the Advanced Tax Rates App for complex scenarios with multiple jurisdictions
- Test your tax configuration with different addresses before going live
Troubleshooting
Tax is not being applied at checkout
Cause: The product does not have a tax profile assigned.
Solution: Edit the product article, go to the J2Commerce tab, and select a tax profile in the General tab.
Tax shows the wrong rate
Cause: The geozone or tax rate is misconfigured.
Solution:
- Verify the geozone includes the correct state
- Check that the tax rate percentage is correct
- Ensure the tax rate is enabled
Tax appears for customers outside my state
Cause: The geozone is configured for all zones instead of a specific state.
Solution: Edit the geozone and change "Zone" from "All zones" to your specific state.