Store Setup
There are several options available for your online store. Any misconfiguration here will affect your storefront’s behavior. So take your time and configure the store correctly.
Requirements
- with PHP 8.3.0 +
- Joomla! 6.x
- J2Commerce 6.x
How to set up your Configuration
Go to Settings -> Global Configuration
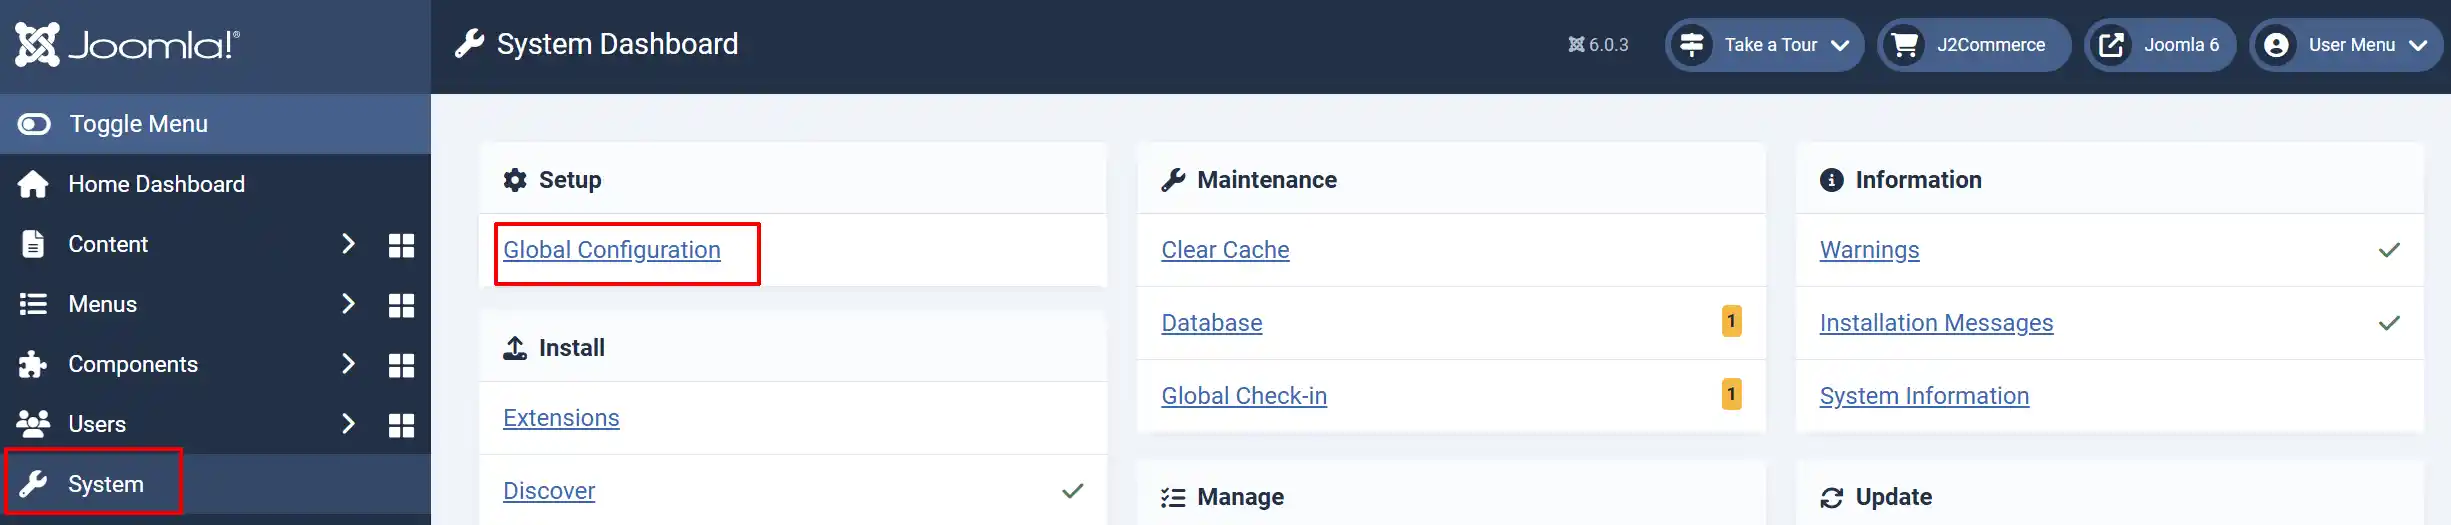
Go to J2Commerce -> Store tab and start filling in your store information
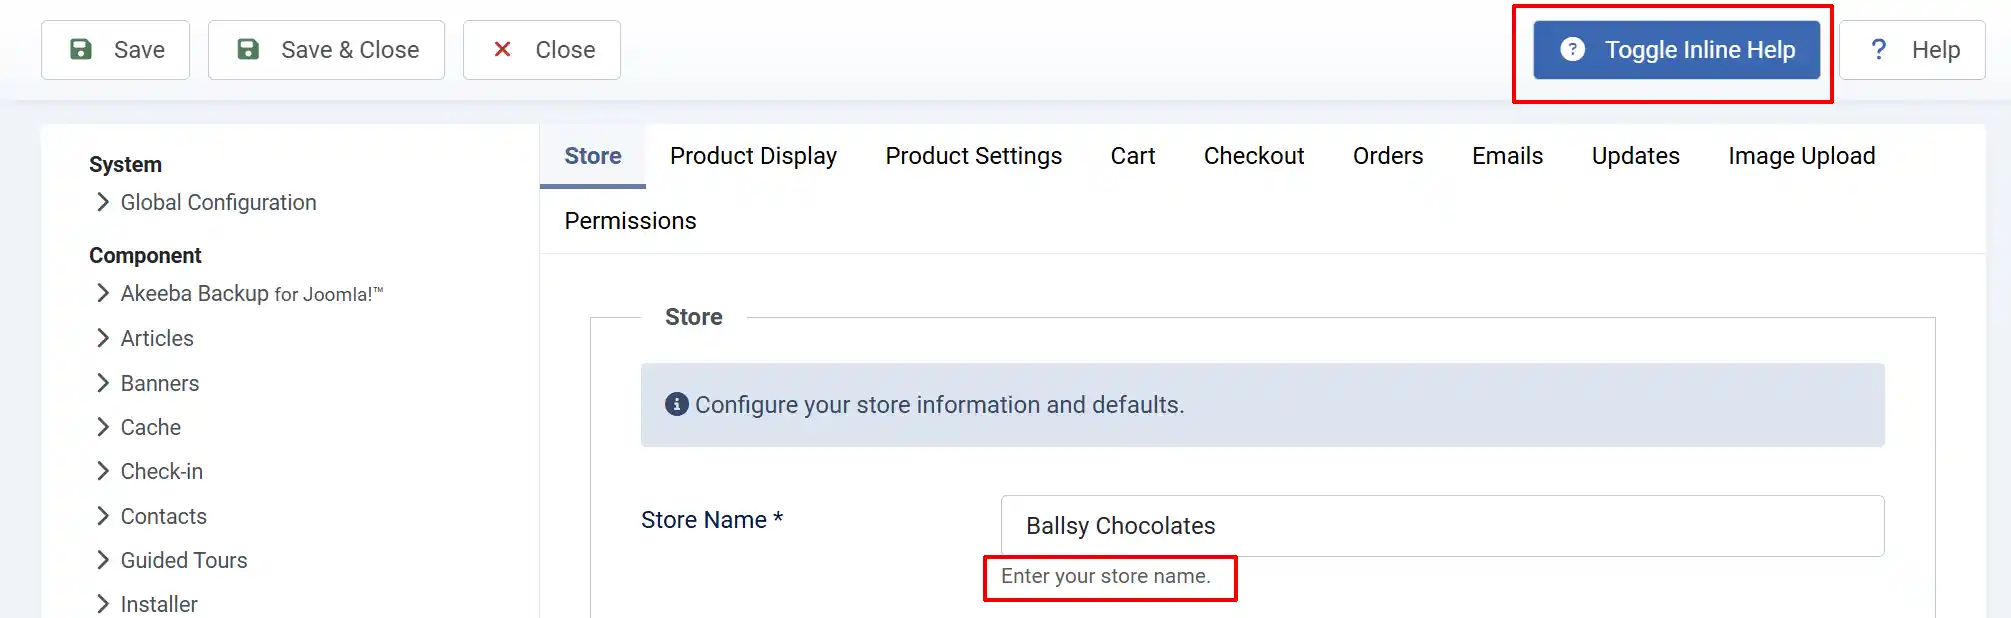
Helpful Tip: When you click on the Toggle Inline Help button, it will show a description below each section. See image below
Store Tab
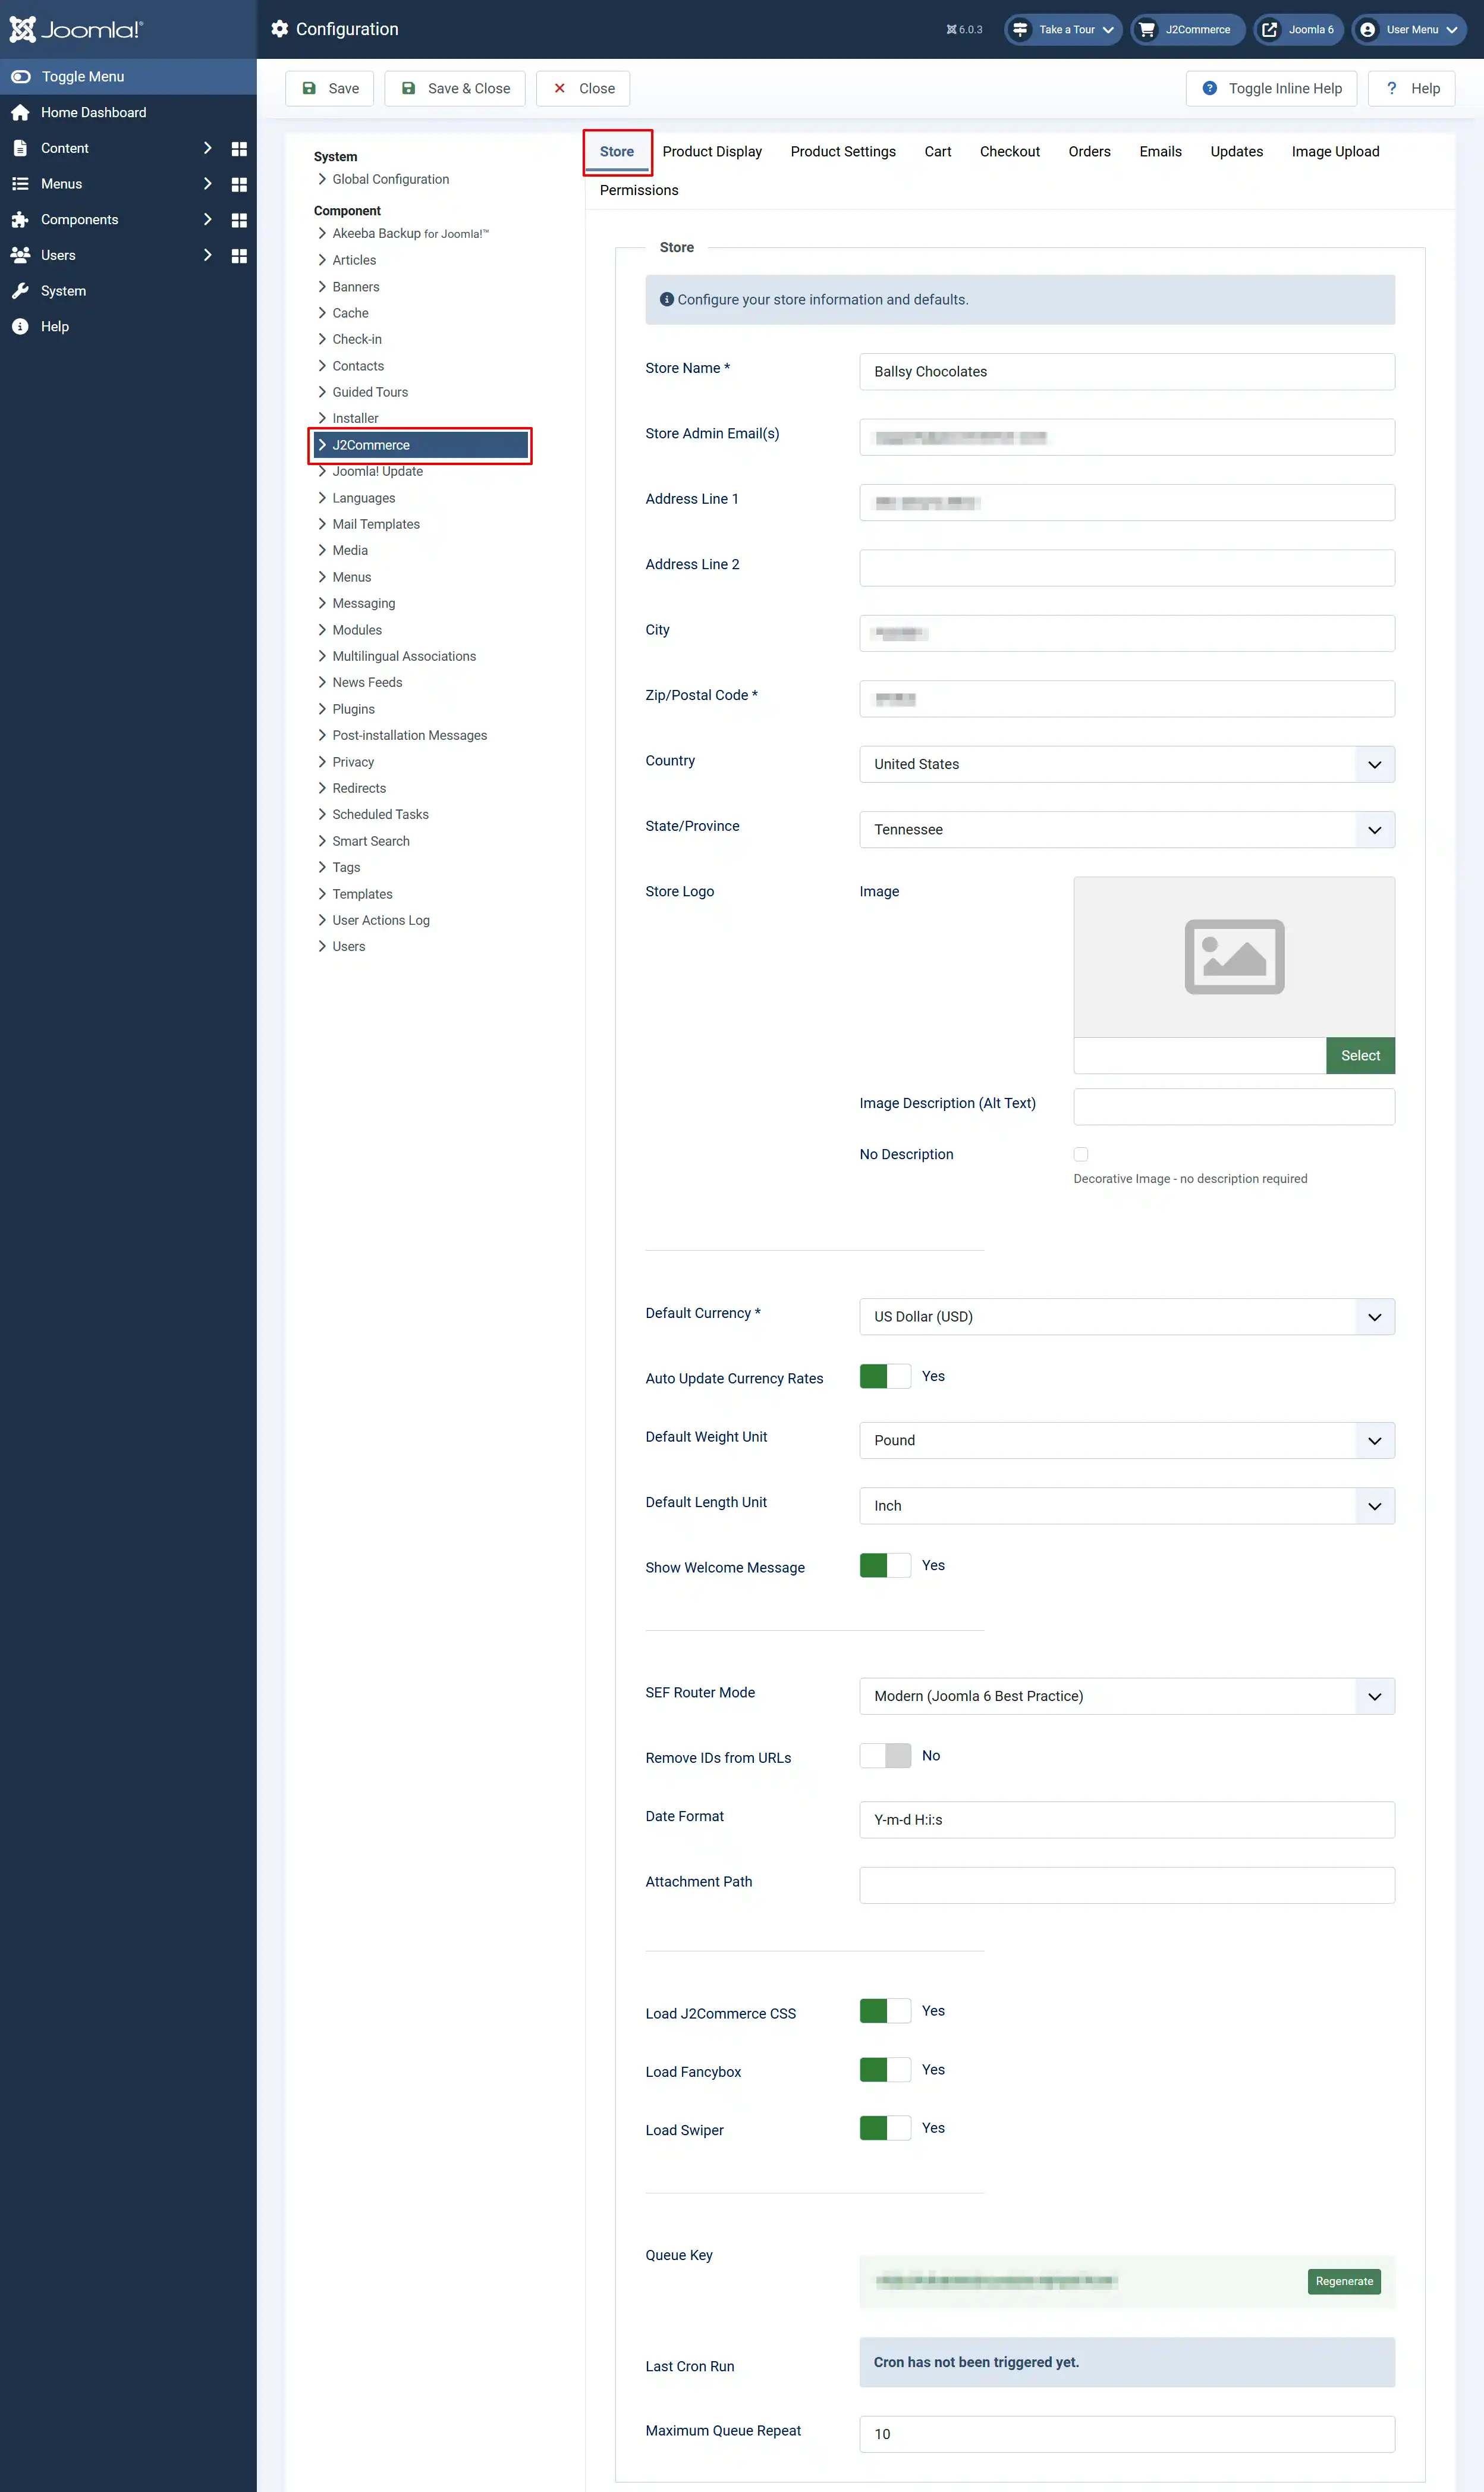
Store Name: Enter your store name
Store Admin Email(s): Order notifications and payment validation errors will be sent to the email(s) provided in this setting. You can enter multiple emails in a comma-separated format.
Address: Enter your store address
Store Logo: Upload your store logo. PNG files are usually the best format
Default Currency: Select the default currency for your store
Auto Update Currency Rates: Select 'Yes' to automatically update currency exchange rates
Manage Store Currencies: Choose how to manage which currencies are enabled in your store
Default Weight Unit: Enter the weight unit your store uses. ie, pound, gram, kilogram, ounce
Default Length Unit: Enter the length unit your store uses. ie, inch, foot, meter, etc.
Show Welcome Message: Select 'Yes' to show the welcome message with the current sales for the day and current site visitors above the J2Commerce navigation menu
SEF Router Mode: Choose URL routing pattern.
-
Legacy maintains J2Store compatibility (shortest URLs).
-
Modern follows Joomla 6 standards with category hierarchy in URLs (better SEO).
Remove IDs from URLs: Select 'Yes' to remove numeric IDs from product and category URLs. Only available with Modern router. Generates cleanest URLs but requires unique aliases.
Date Format: PHP date format for displaying dates
Attachment Path: Path for email attachments
Default Subtemplate: Select the default subtemplate theme used for product listing and detail views across your store. This can be overridden per menu item
Load J2Commerce CSS: Select 'Yes' to load the J2Commerce stylesheet
Load Fancybox: Select 'Yes' to load the Fancybox Javascript library
Load Swiper: Select 'Yes' to load the Swiper Javascript library
Queue Key: This security key can be used for execution of queue and cron jobs required by apps and plugins. This will ensure only legitimate requests are allowed and executed. The cron / queue requests without this key will be denied access
Last Cron Run: When the cron job last ran
Maximum Queue Repeat: Set maximum queue repeat for Queue system
Product Display Tab
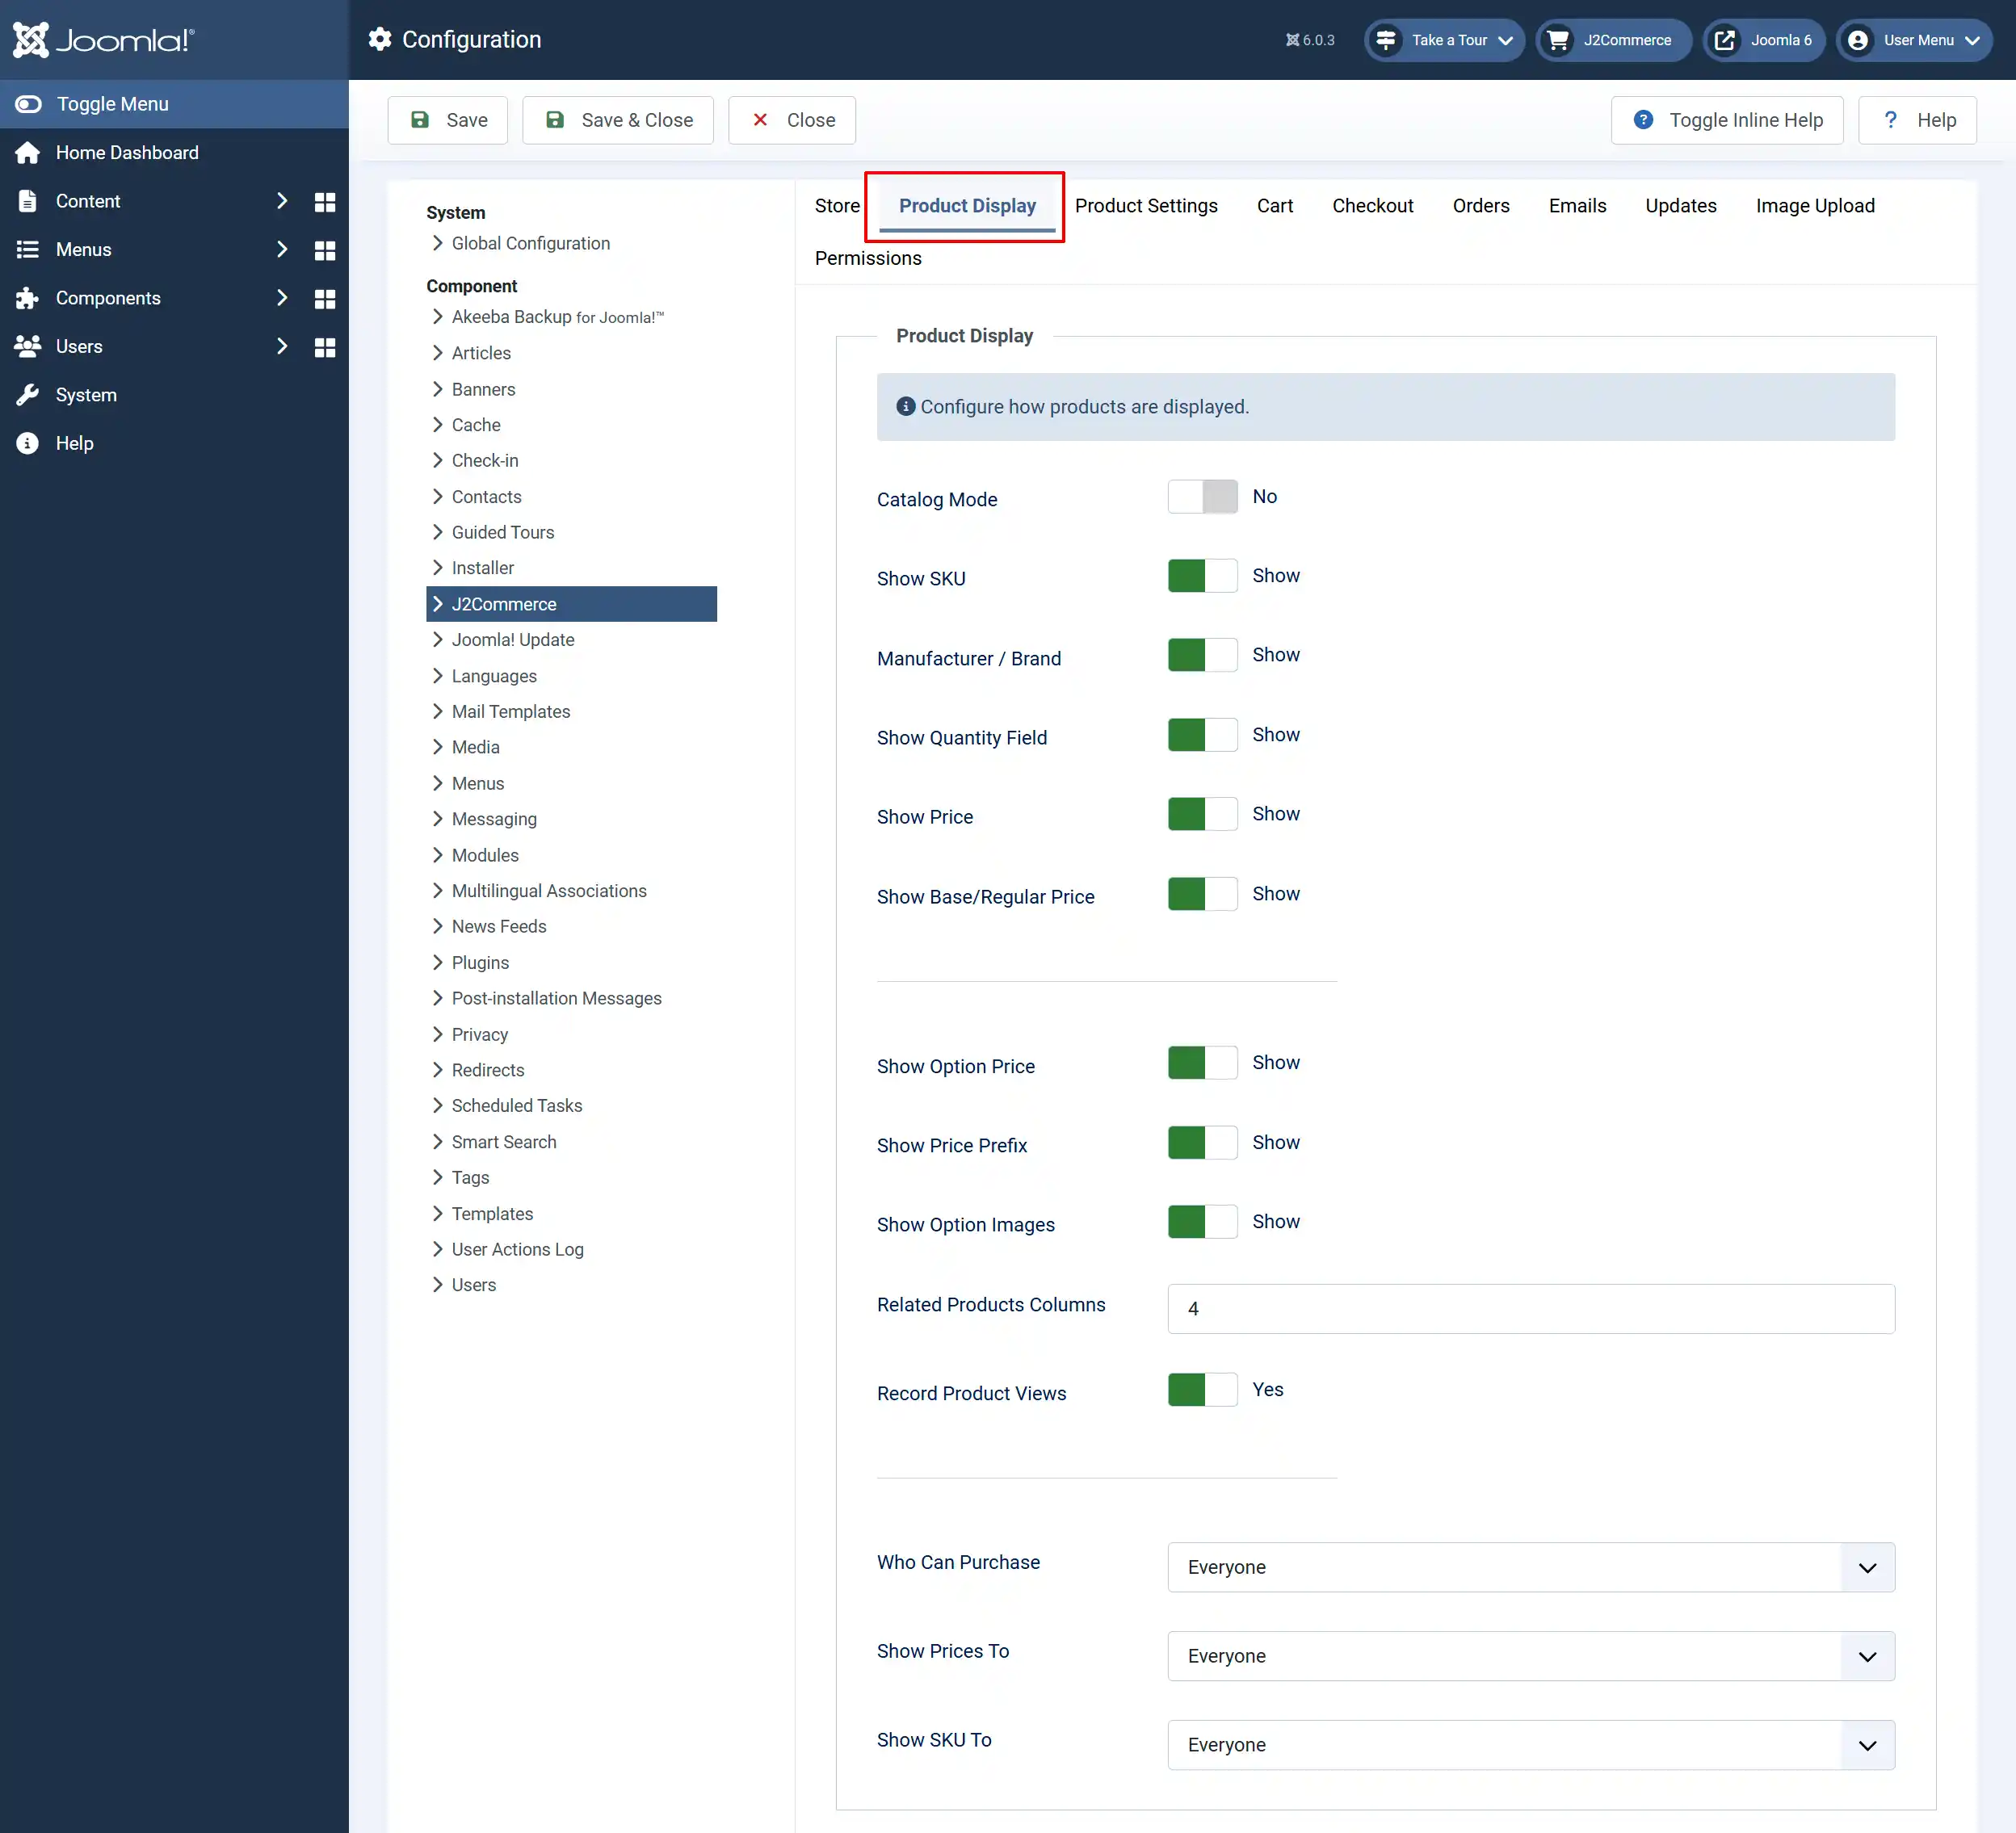
Catalog Mode: Select 'Yes' to enable catalog mode to hide add to cart buttons
Show SKU: Select 'Show' to display product SKU on product pages
Manufacturer / Brand: Select 'Show' to display the manufacturer/brand on product pages
Show Quantity Field: Setting this to 'No' will hide the quantity input field in both the product and cart views
Show Price: Select 'Show' to display product prices
Show Base/Regular Price: If advanced pricing is used, then you can show a strike-out base price
Show Option Price: Should the options show the price modifiers?
Show Price Prefix: Should the options show the price prefix (ie: =/-) of price modifiers?
Show Option Images: This setting applies only to radio type options. Setting this yes will show an image near the option in product pages
Related Products Columns: Number of columns for related products display
Record Product Views: Track the number of times each product is viewed. Used for popularity sorting
Who Can Purchase: Restrict purchasing to registered users. Everyone or Registered Users Only.
Show Prices To: Who can see product prices. Everyone or Registered Users Only.
Show SKU To: Who can see product SKUs. Everyone or Registered Users Only.
Product Settings Tab
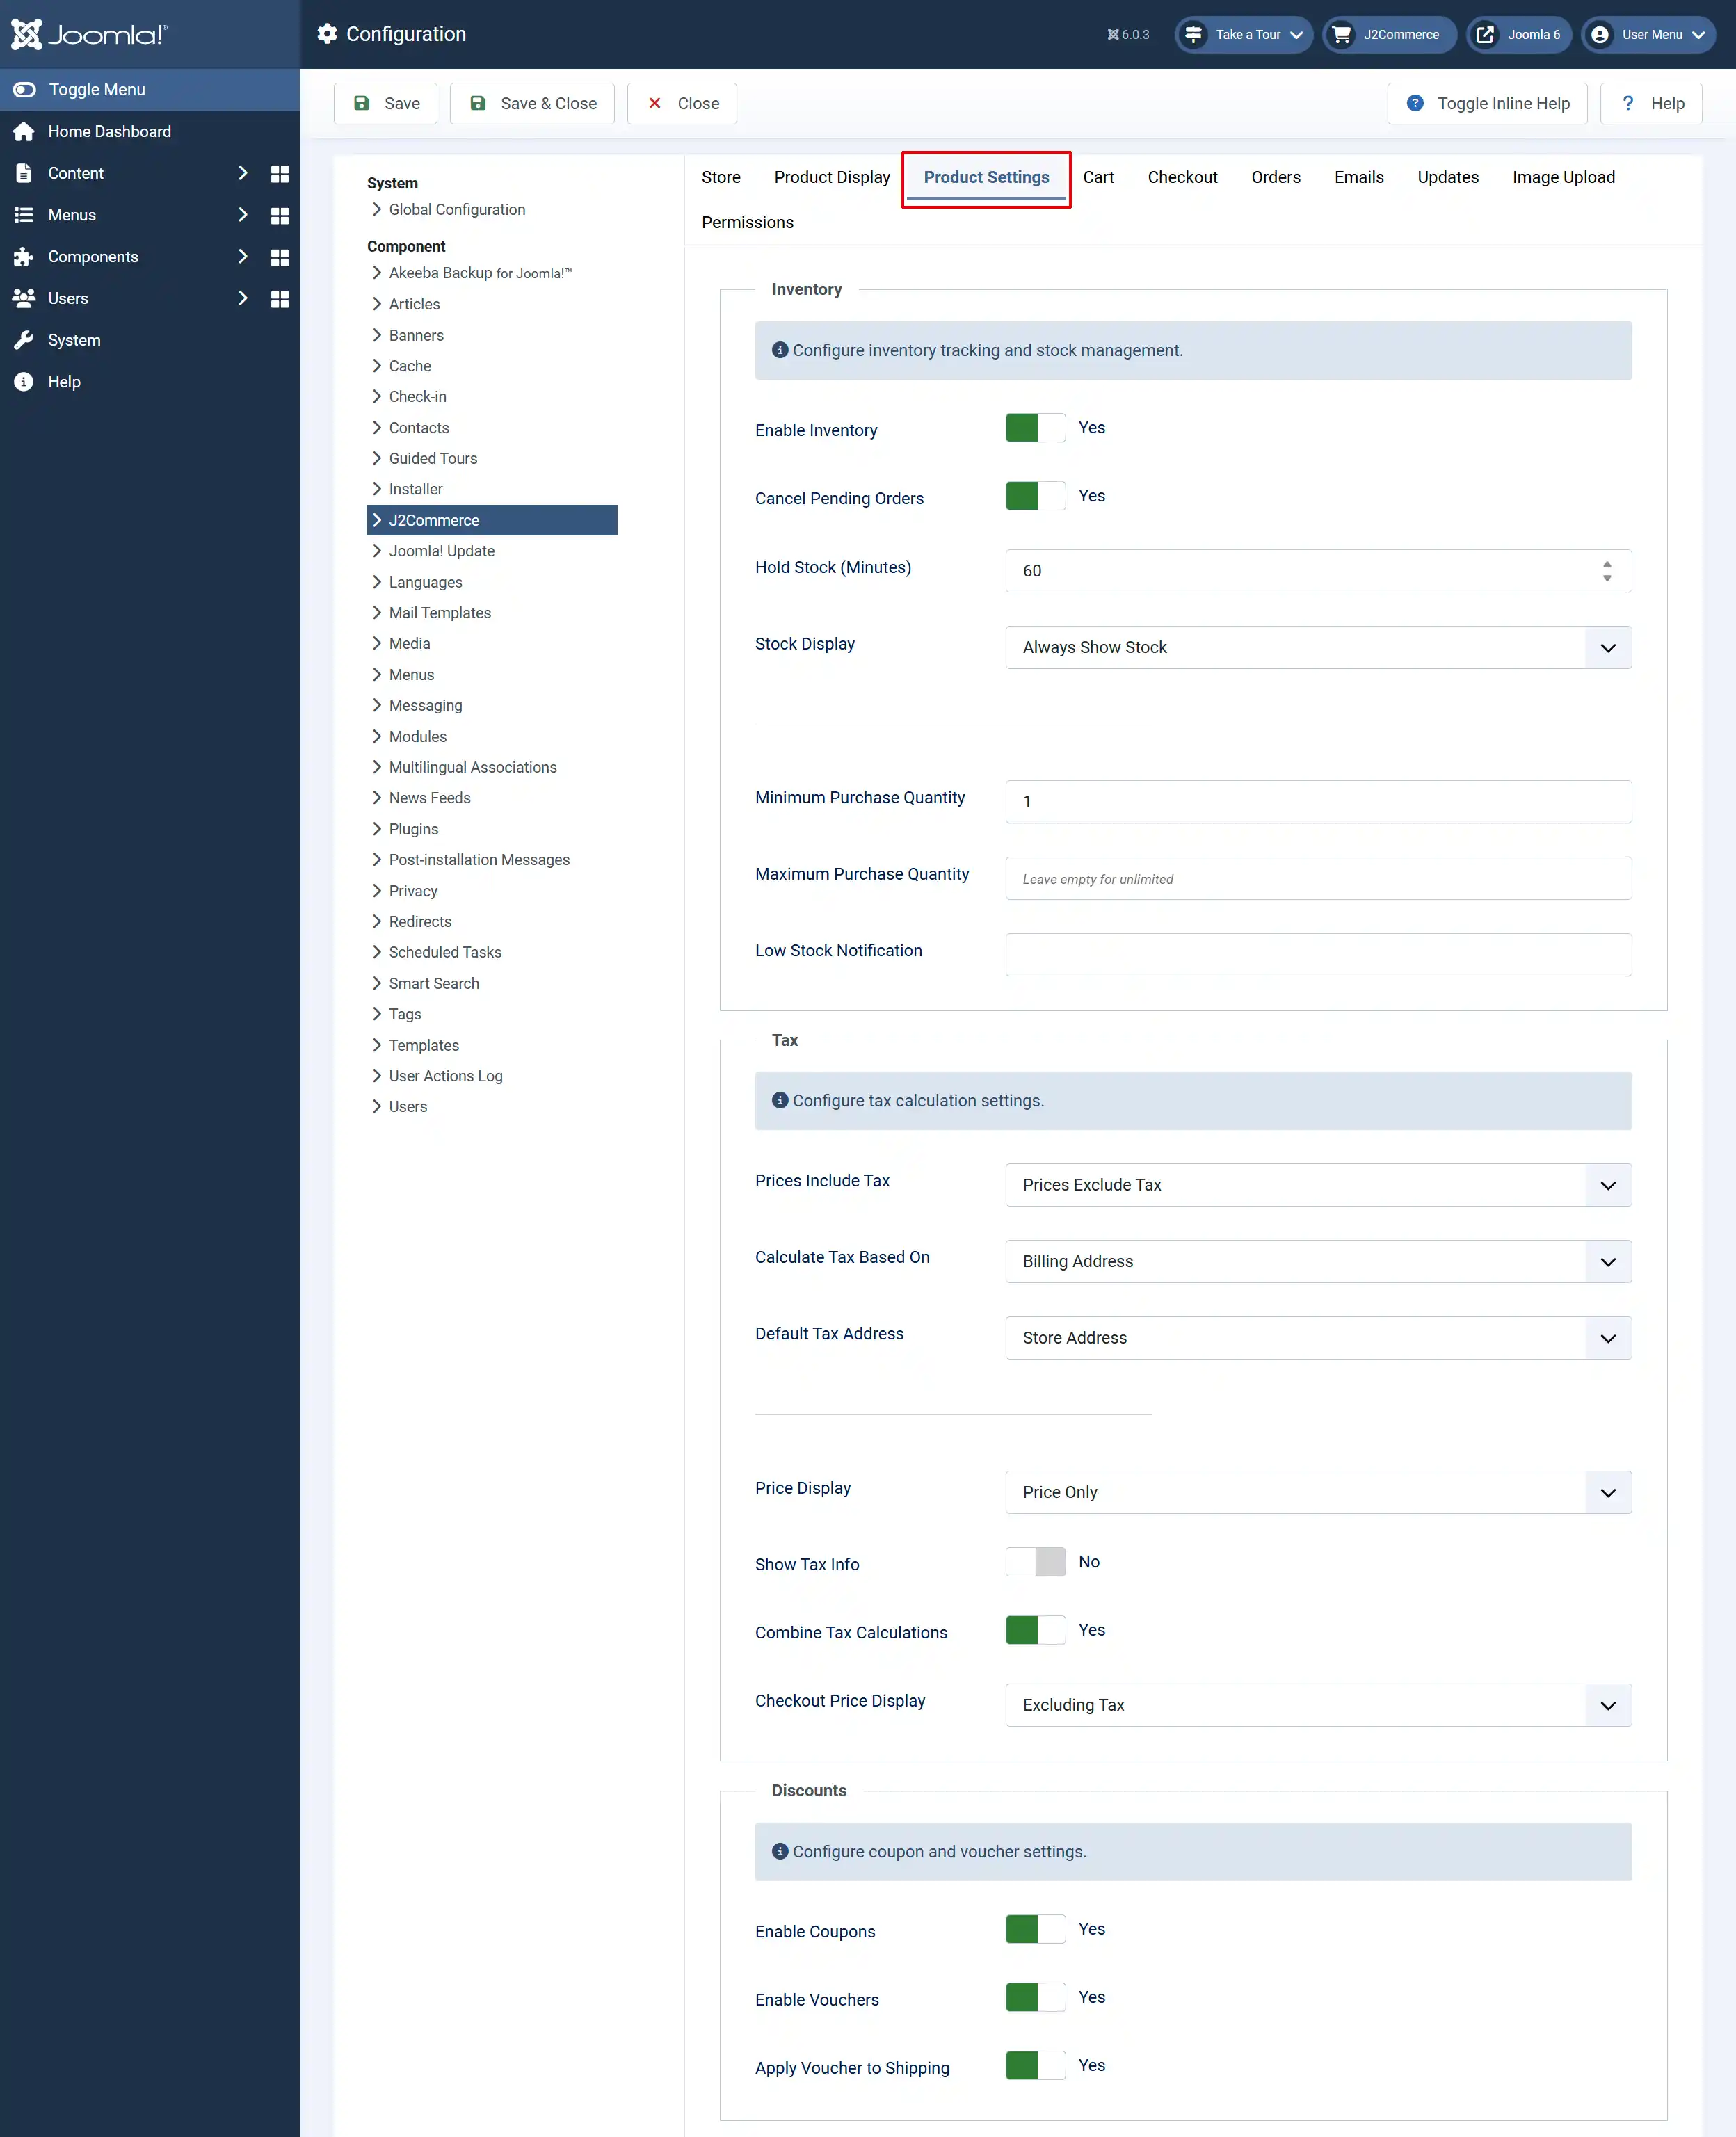
Enable Inventory: Select 'Yes' to track and manage product stock levels
Cancel Pending Orders: Select 'Yes' to automatically cancel orders that remain pending too long
Hold Stock (Minutes): Minutes to hold stock for pending orders
Stock Display: When to display stock levels to customers. Always, Only When Low, Never Show
Minimum Purchase Quantity: The minimum quantity a customer can purchase
Maximum Purchase Quantity: The maximum quantity a customer can purchase. Leave empty for unlimited
Low Stock Notification: Notify admin when stock falls below this level
Prices Include Tax: Are your product prices entered with tax included?
Calculate Tax Based On: Use billing or shipping address for tax calculation.
Default Tax Address: Address to use for tax when the customer has not entered an address
Price Display: How to display prices on product pages
Show Tax Info: Display tax information text with prices
Combine Tax Calculations: Select 'Yes' to combine all applicable tax calculations into one line item at checkout. For example, Sales Tax on products and shipping will display as a single line item instead of two separate tax charges
Enable Coupons: Allow customers to use discount coupons
Enable Vouchers: Allow customers to use gift vouchers
Apply Voucher to Shipping: Allow vouchers to cover shipping costs
Cart Tab
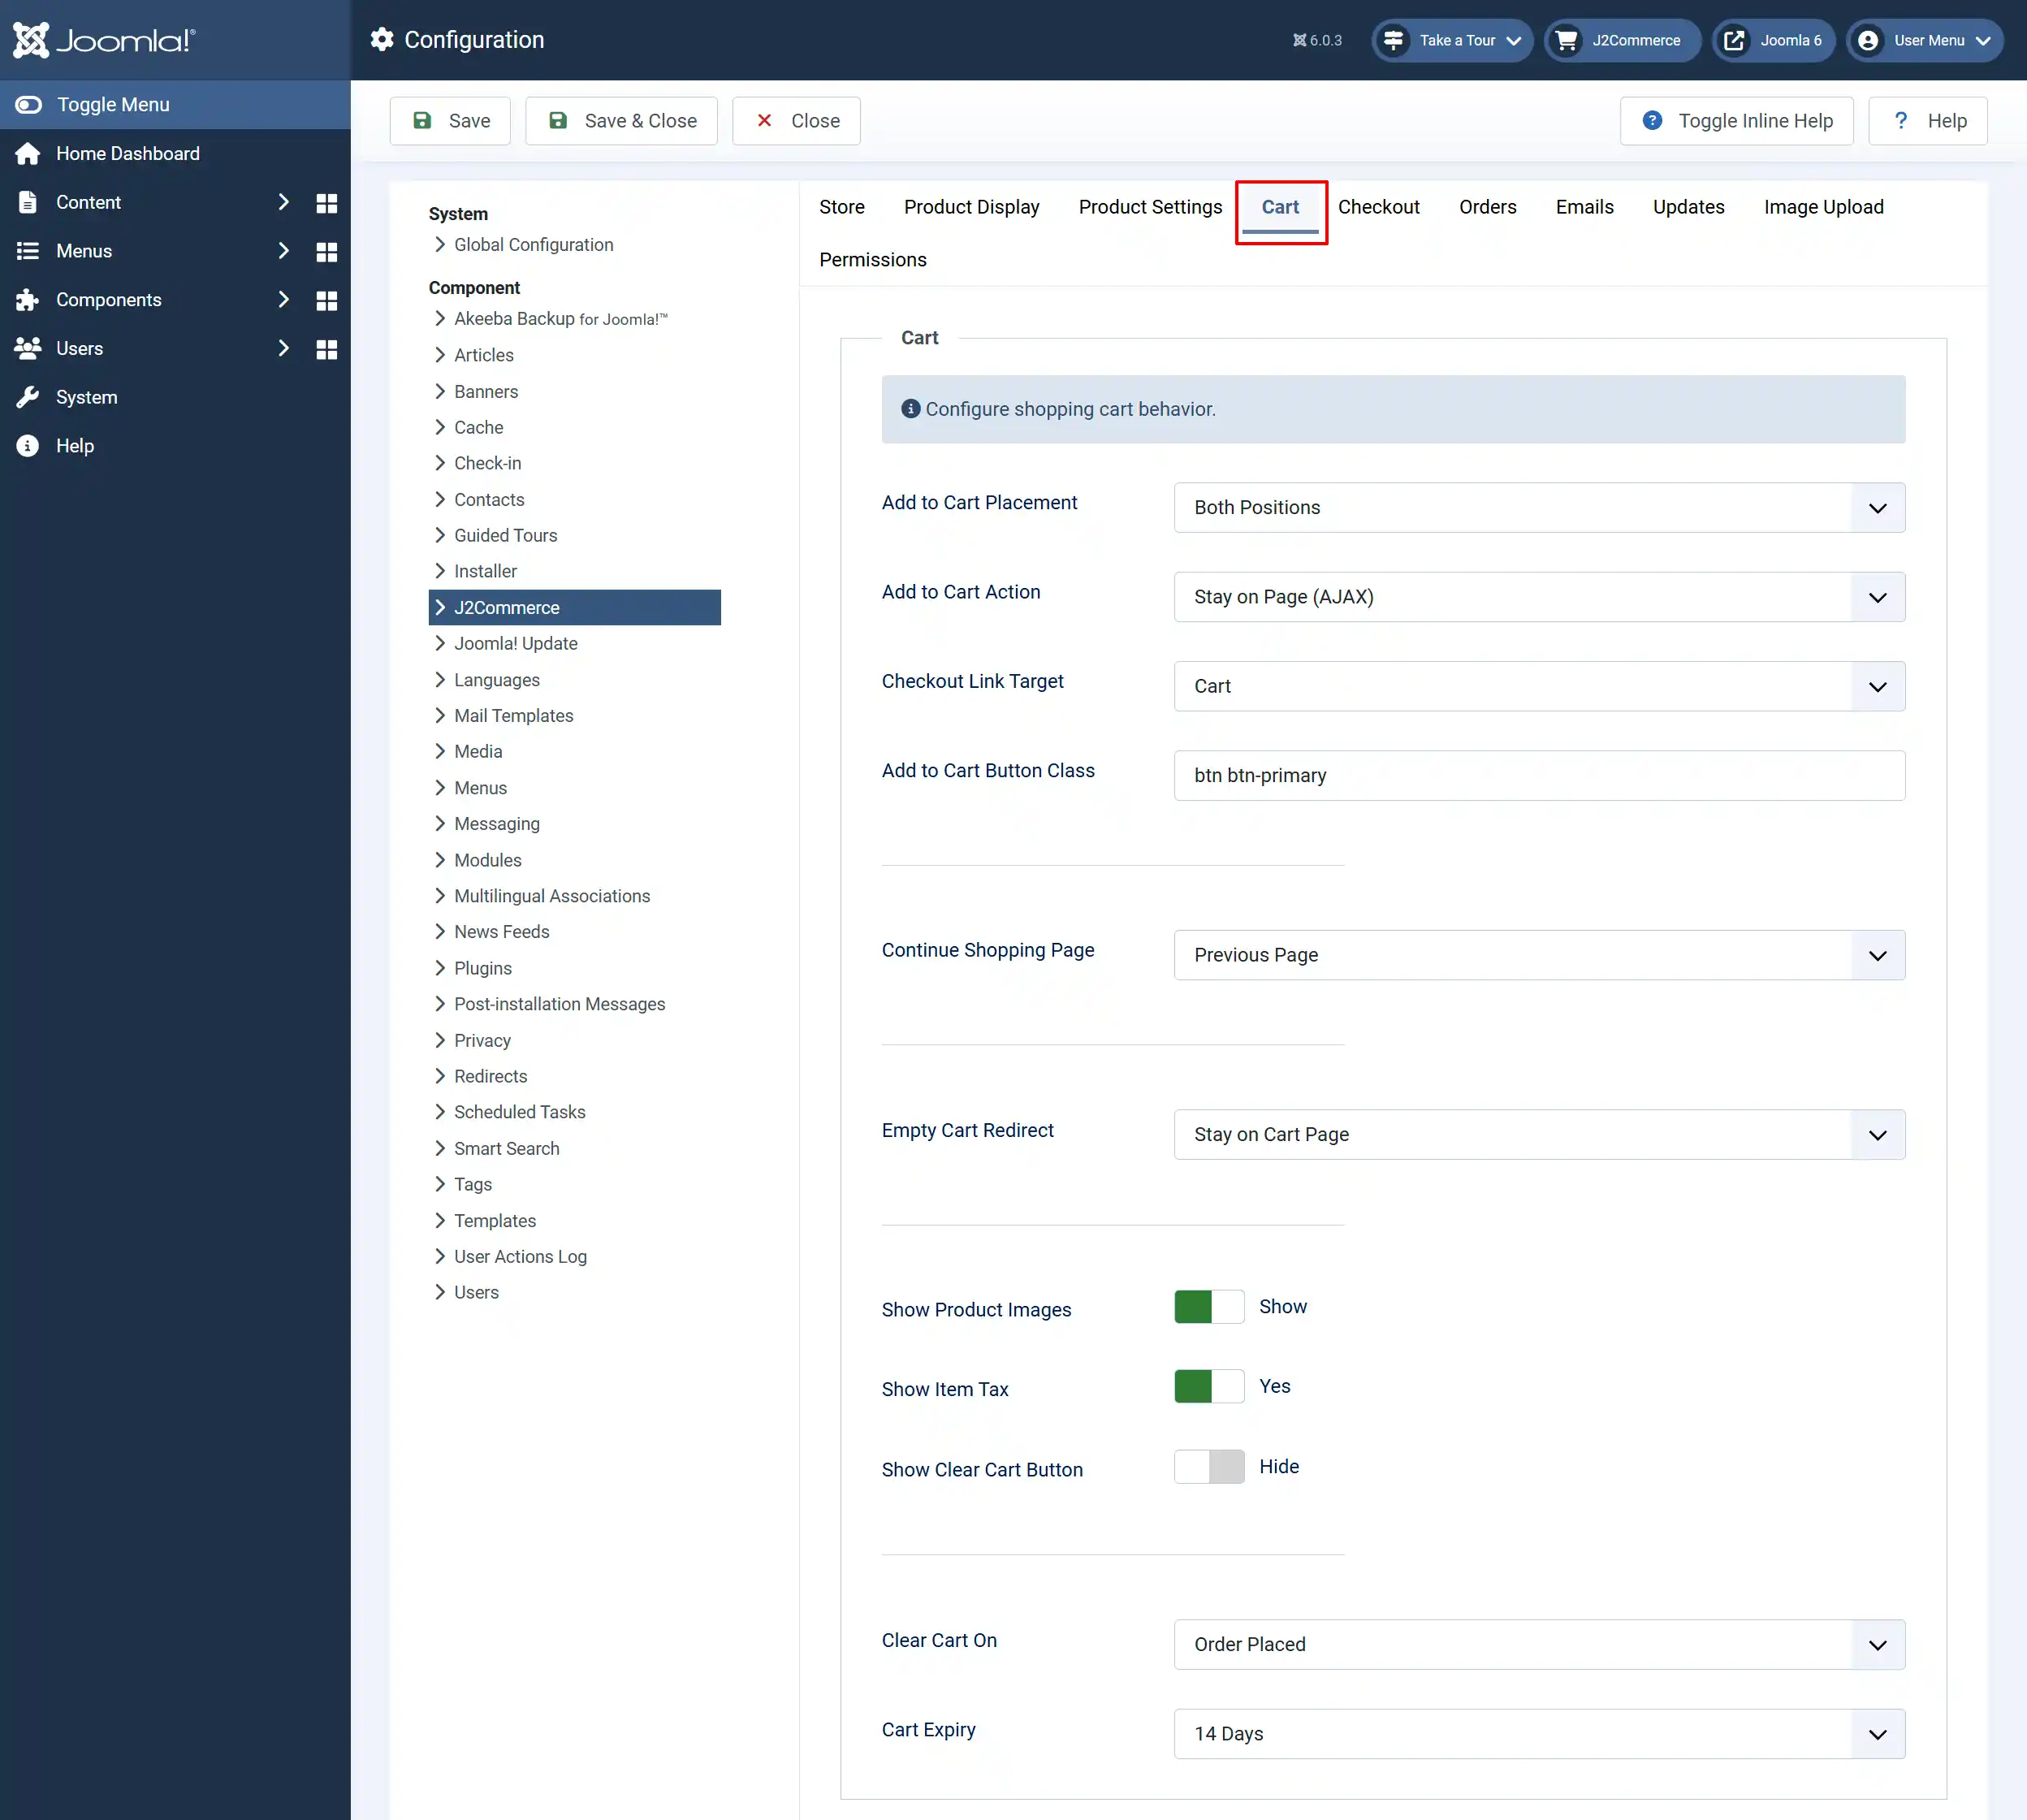
Add to Cart Placement: Where to display the add to cart button
Add to Cart Action: What happens when adding to cart
Checkout Link Target: Where the Checkout link points after adding an item to the cart. Cart = shopping cart page, Checkout = go directly to checkout
Add to Cart Button Class: CSS class for the add to cart button
Continue Shopping Page: Where to redirect when clicking Continue Shopping
Empty Cart Redirect: Where to redirect when cart is empty
Show Product Images: Display product thumbnails in cart.
Show Item Tax: Display tax amount per item in cart
Show Clear Cart Button: Display a button to clear all cart items
Clear Cart On: When to clear the shopping cart
Cart Expiry: Days before abandoned carts are cleared
Checkout Tab
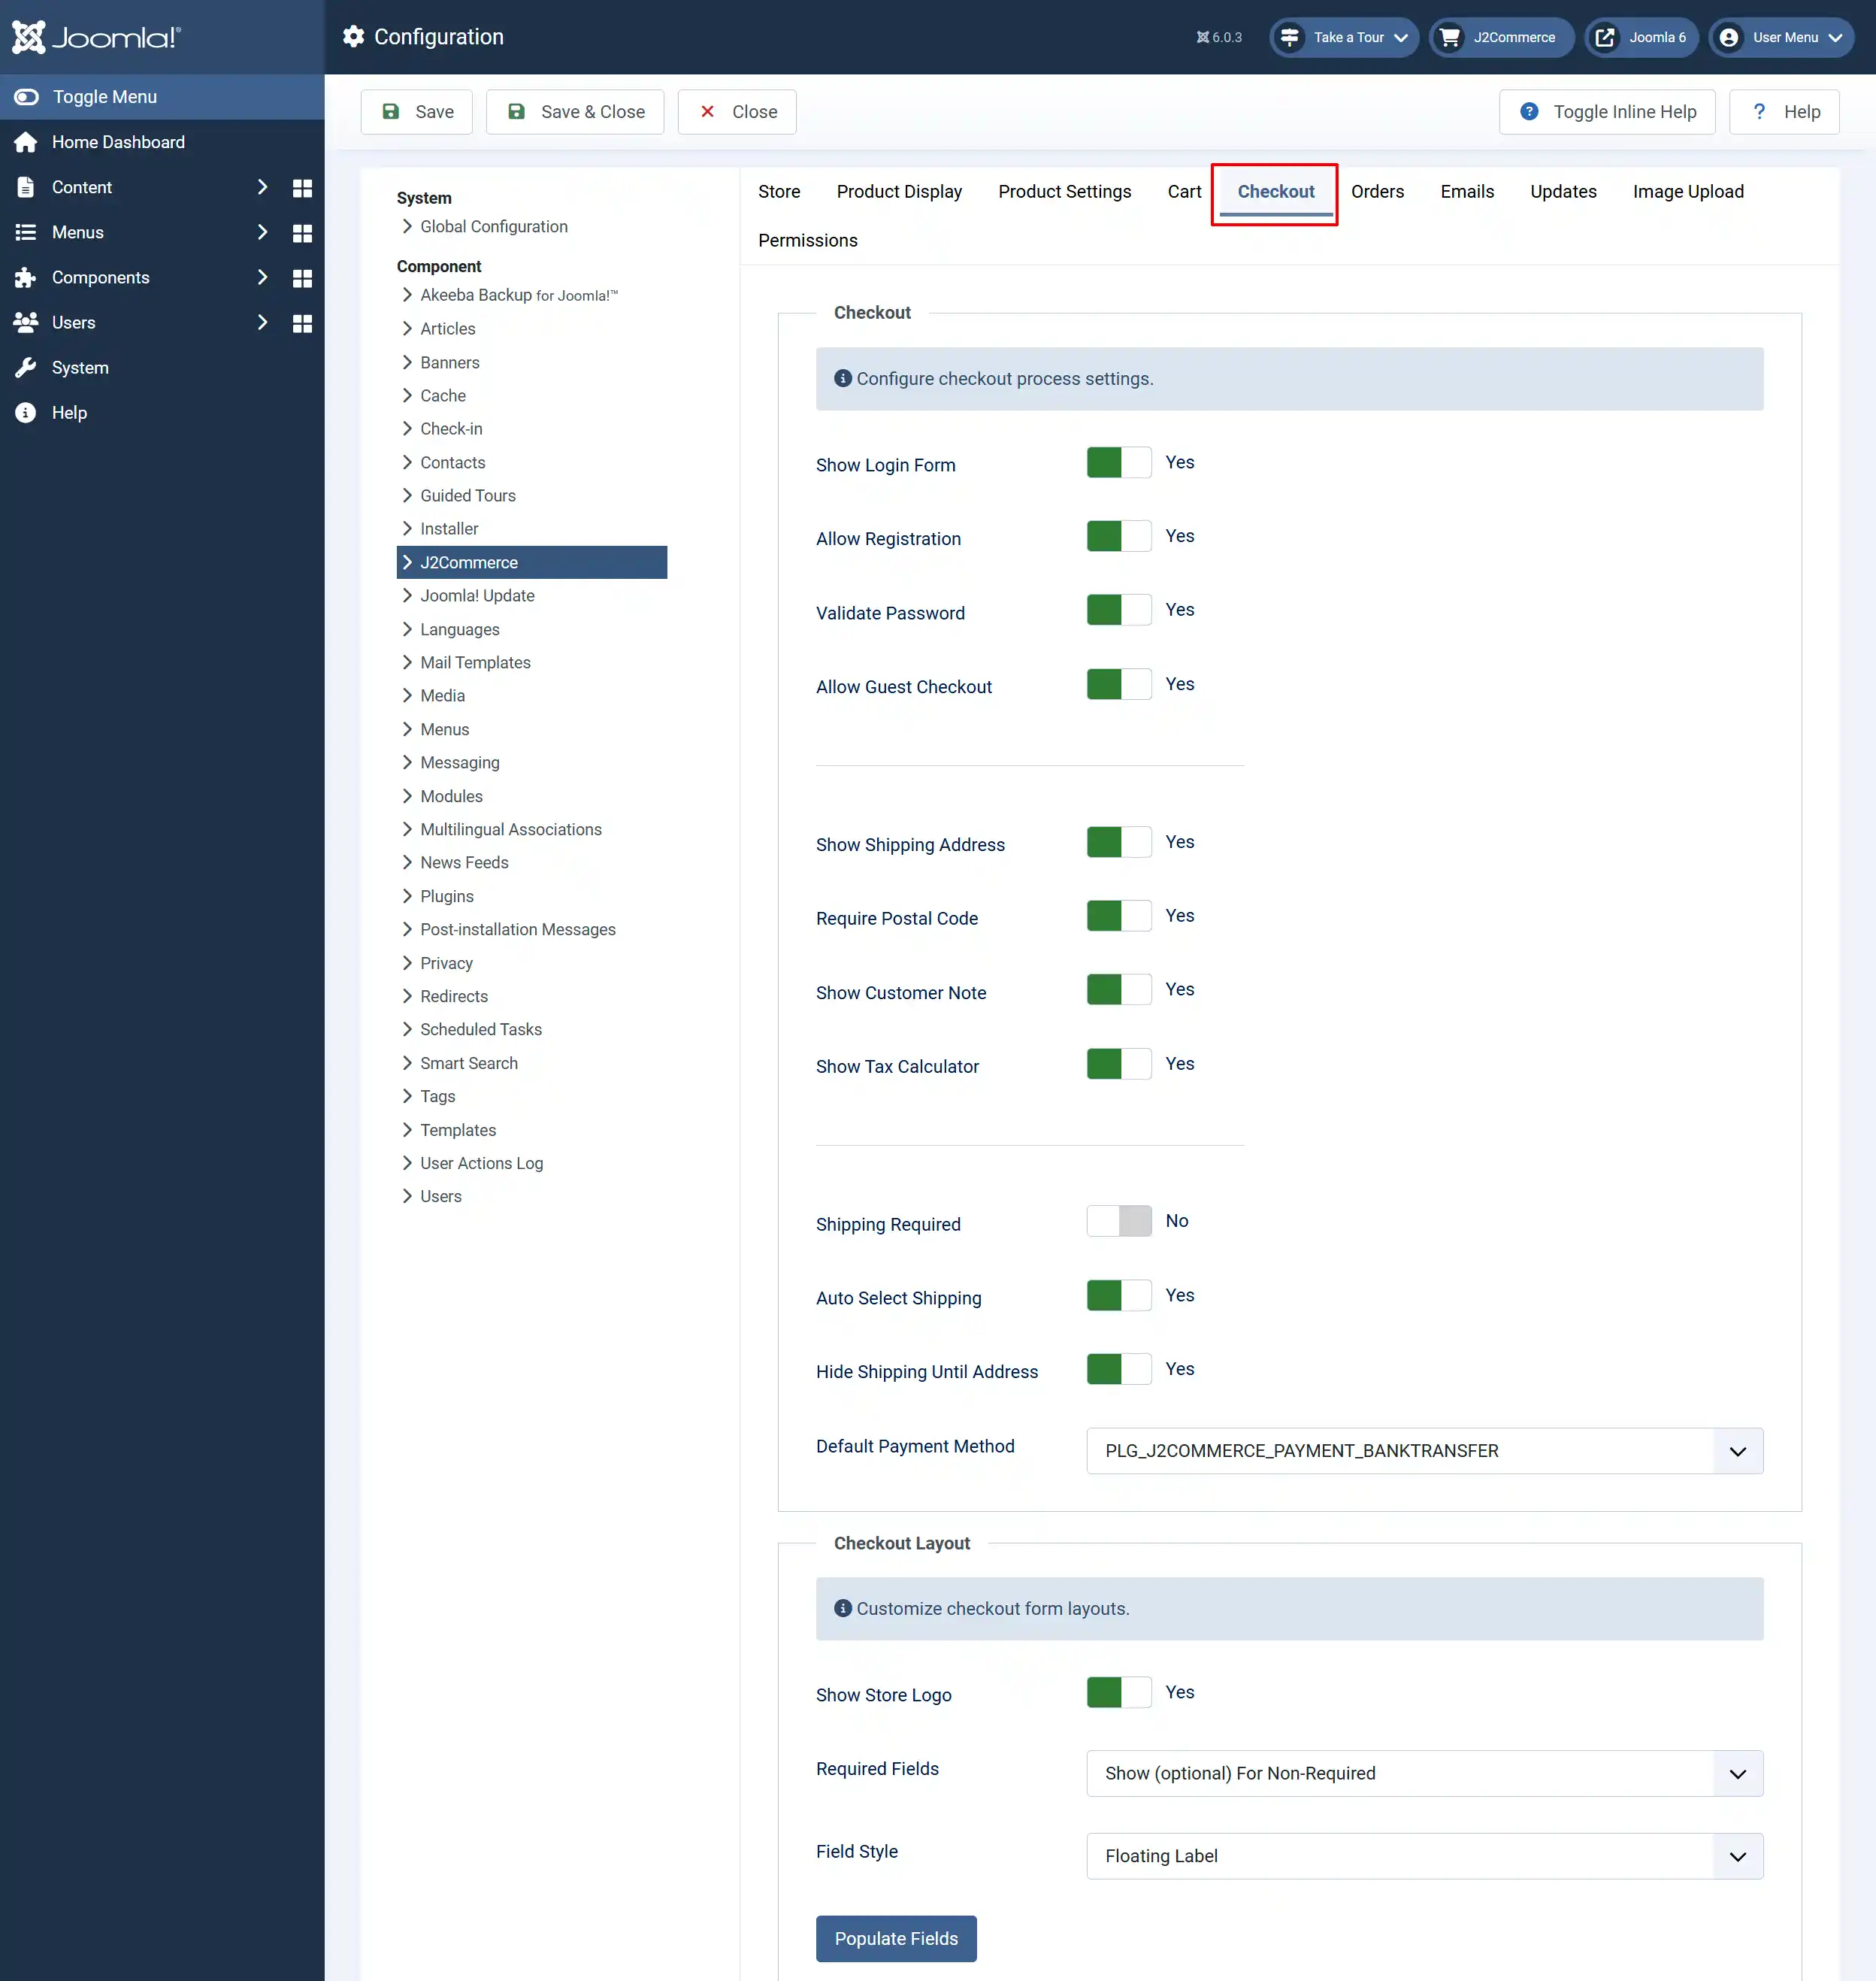
Show Login Form: Select 'Yes' to display login form during checkout
Allow Registration: Select 'Yes' to allow new user registration during checkout
Validate Password: Select 'Yes' to require password confirmation during registration
Allow Guest Checkout: Select 'Yes' to allow checkout without creating an account
Show Shipping Address: Select 'Yes' to display a separate shipping address form
Require Postal Code: Select 'Yes' to make postal code a required field
Checkout Price Display: How to display prices during checkout
Show Customer Note: Select 'Yes' if you allow customers to add order notes
Show Tax Calculator: Select 'Yes' if you want to display the tax estimate calculator in cart
Shipping Required: Select 'Yes' if your store requires a shipping method selection
Auto Select Shipping: Select 'Yes' to automatically select the least expensive shipping method
Hide Shipping Until Address: Select 'Yes' to hide shipping options until the address is entered
Default Payment Method: Pre-select this payment method at checkout
Show Store Logo: Select 'Yes' to display the store logo at the top of the checkout page. The logo is taken from the Store Logo field in the Store tab. The logo will only display if the alt text is also provided
Required Fields: Choose how required fields are indicated in checkout forms.
-
'Show Red Asterisk' adds a red * after required field labels.
-
'Show (optional)' adds an (optional) label after non-required fields instead
Field Style: Choose the form field style for checkout.
-
'Normal' uses standard label-above-input layout.
-
'Floating Label' uses Bootstrap 5 floating labels, where the label animates inside the field.
Orders Tab

Invoice Prefix: Prefix for invoice numbers (e.g., INV-)
Show Order Link: Setting this 'Yes' will show a link to the order history page to the customer after the payment
Show Downloads: Select 'Yes' to display the download area for digital products
Show Logout Link: Select 'Show' to display the logout link in my profile
Filter Orders by Status: You can limit customers to see only orders with the selected statuses in this field.
Helpful Tip: In the example photo above, the customer would only see 'Confirmed' orders under their My Account. If you want them to see other statuses like refunded, voided, cancelled, etc, then add those options here.
Show Terms & Conditions: Select 'Yes' to display terms and conditions during checkout
Prepare Content: Select 'Yes' to run content plugins on product descriptions
Email Tab
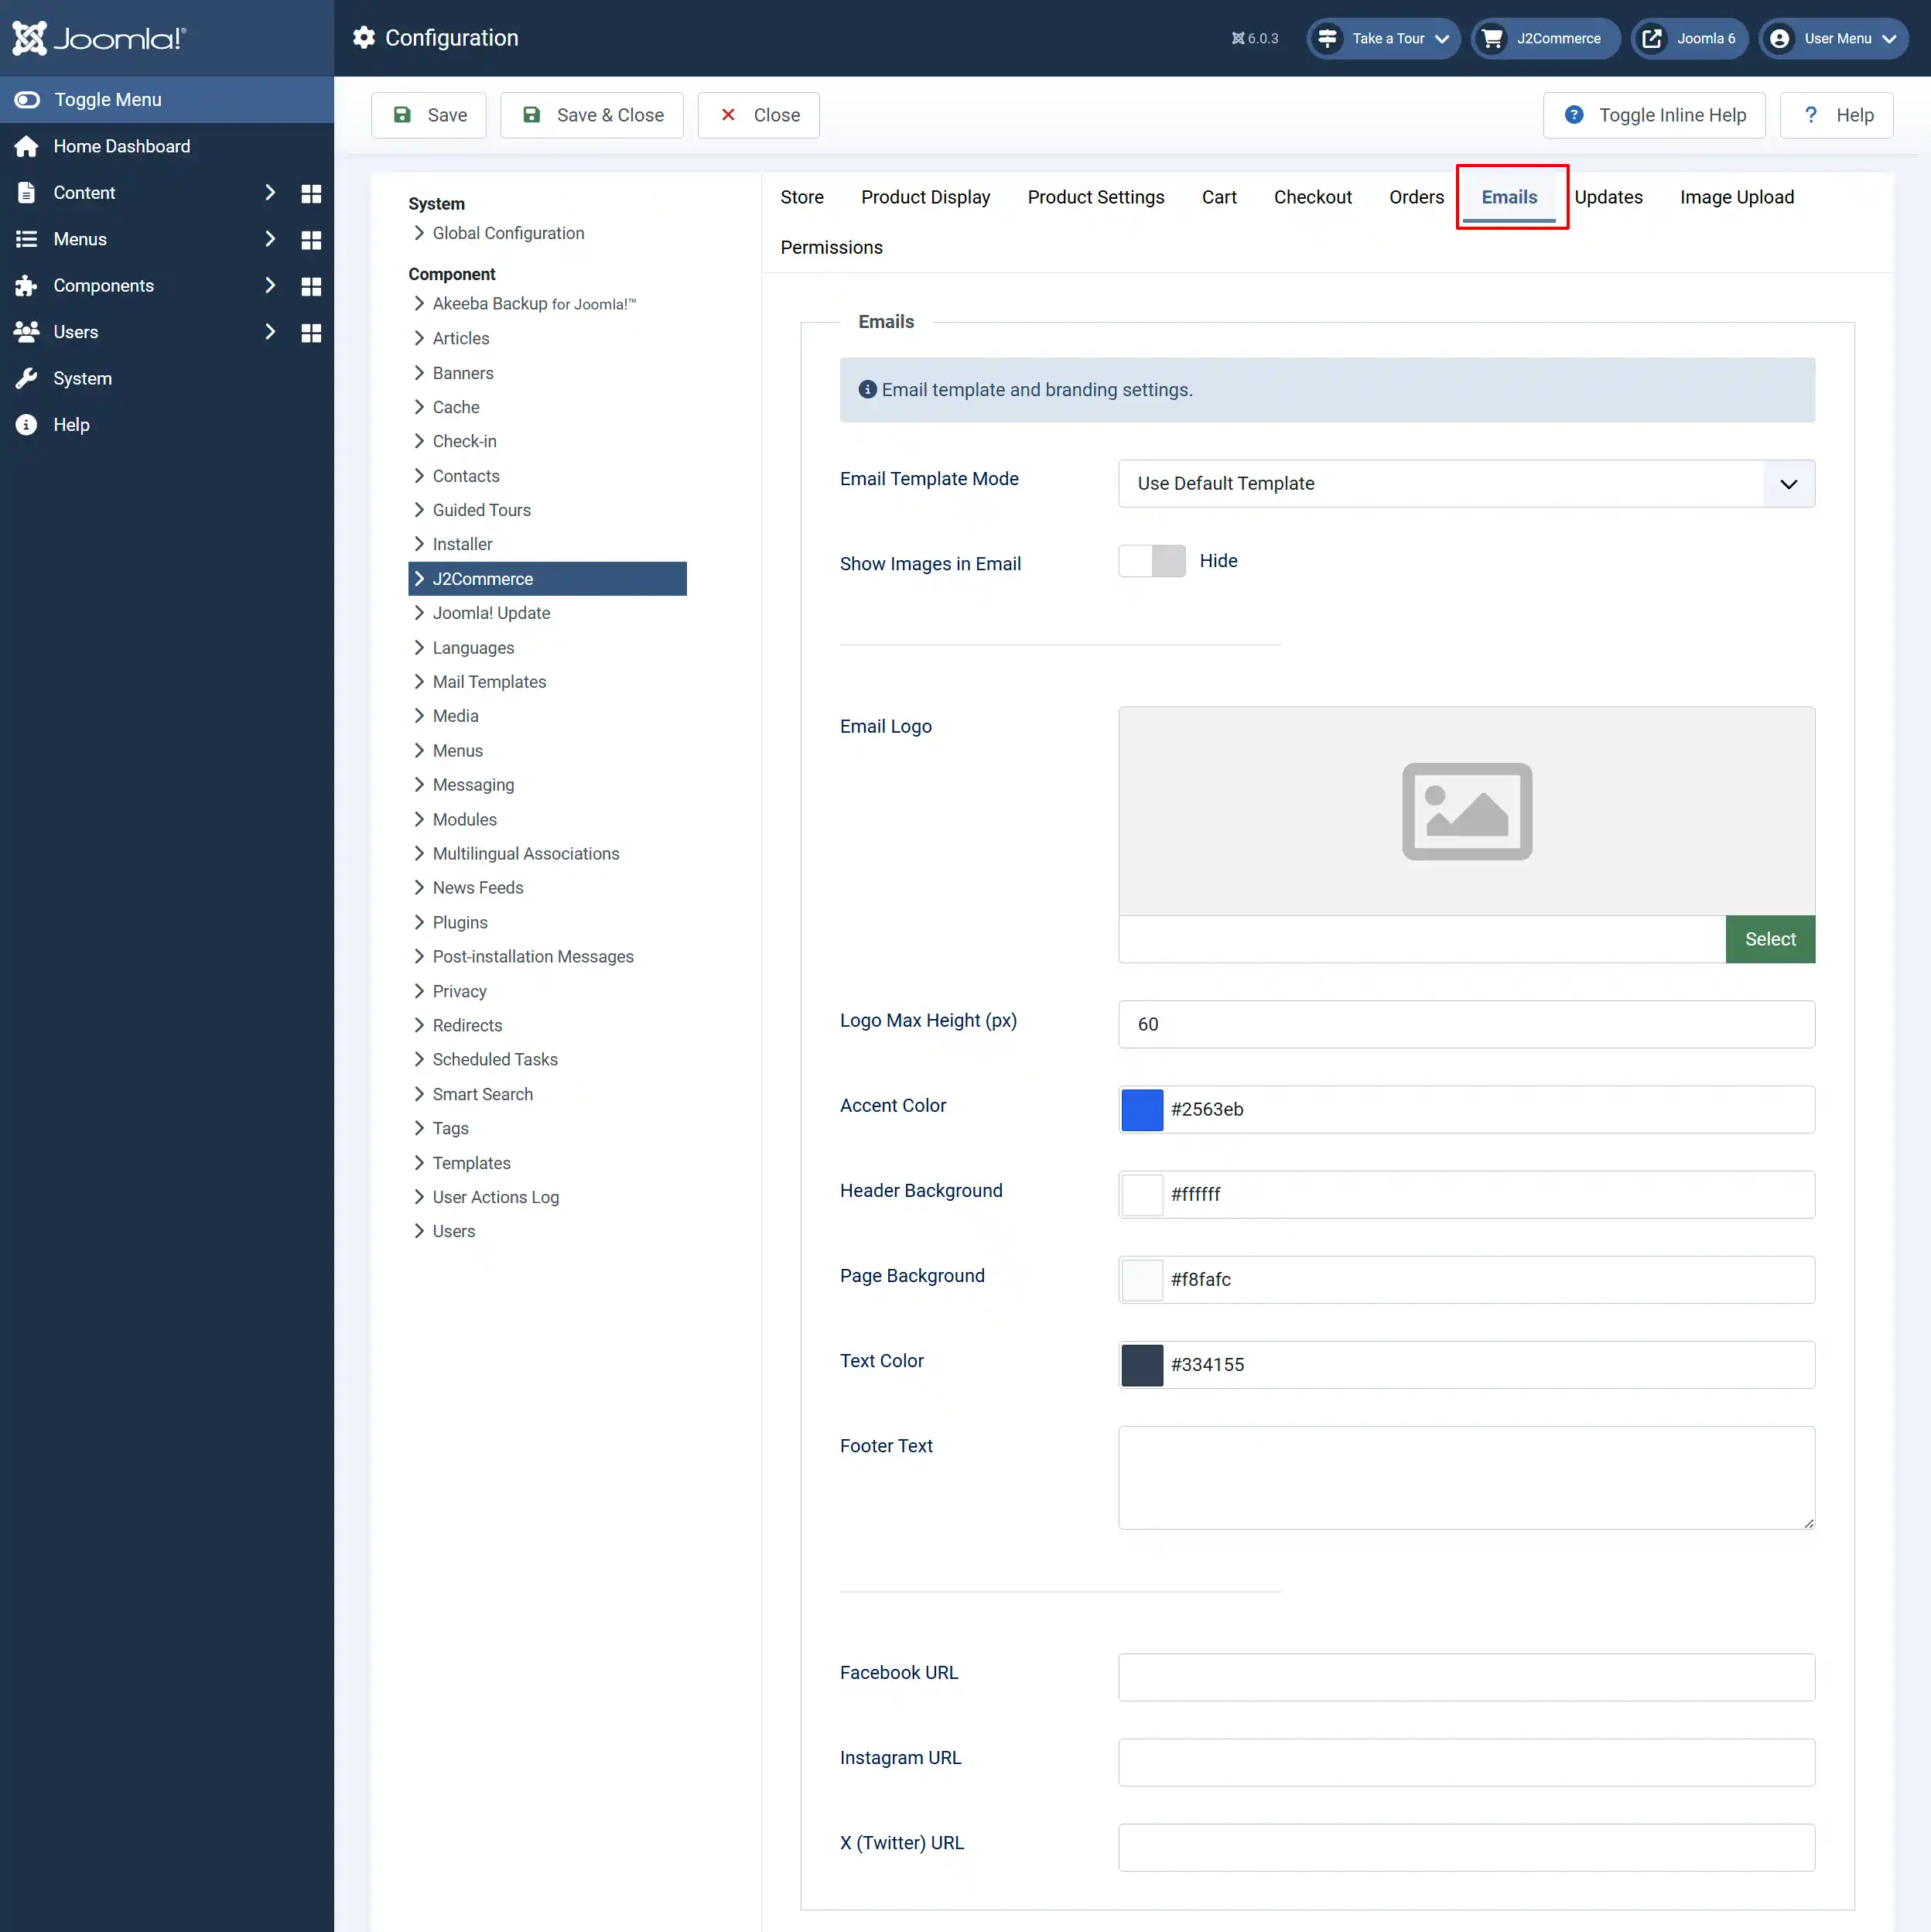
You can add your Logo, customize the colors in the email to match your brand, add icon/links to your social media accounts, etc...
Image Upload Tab
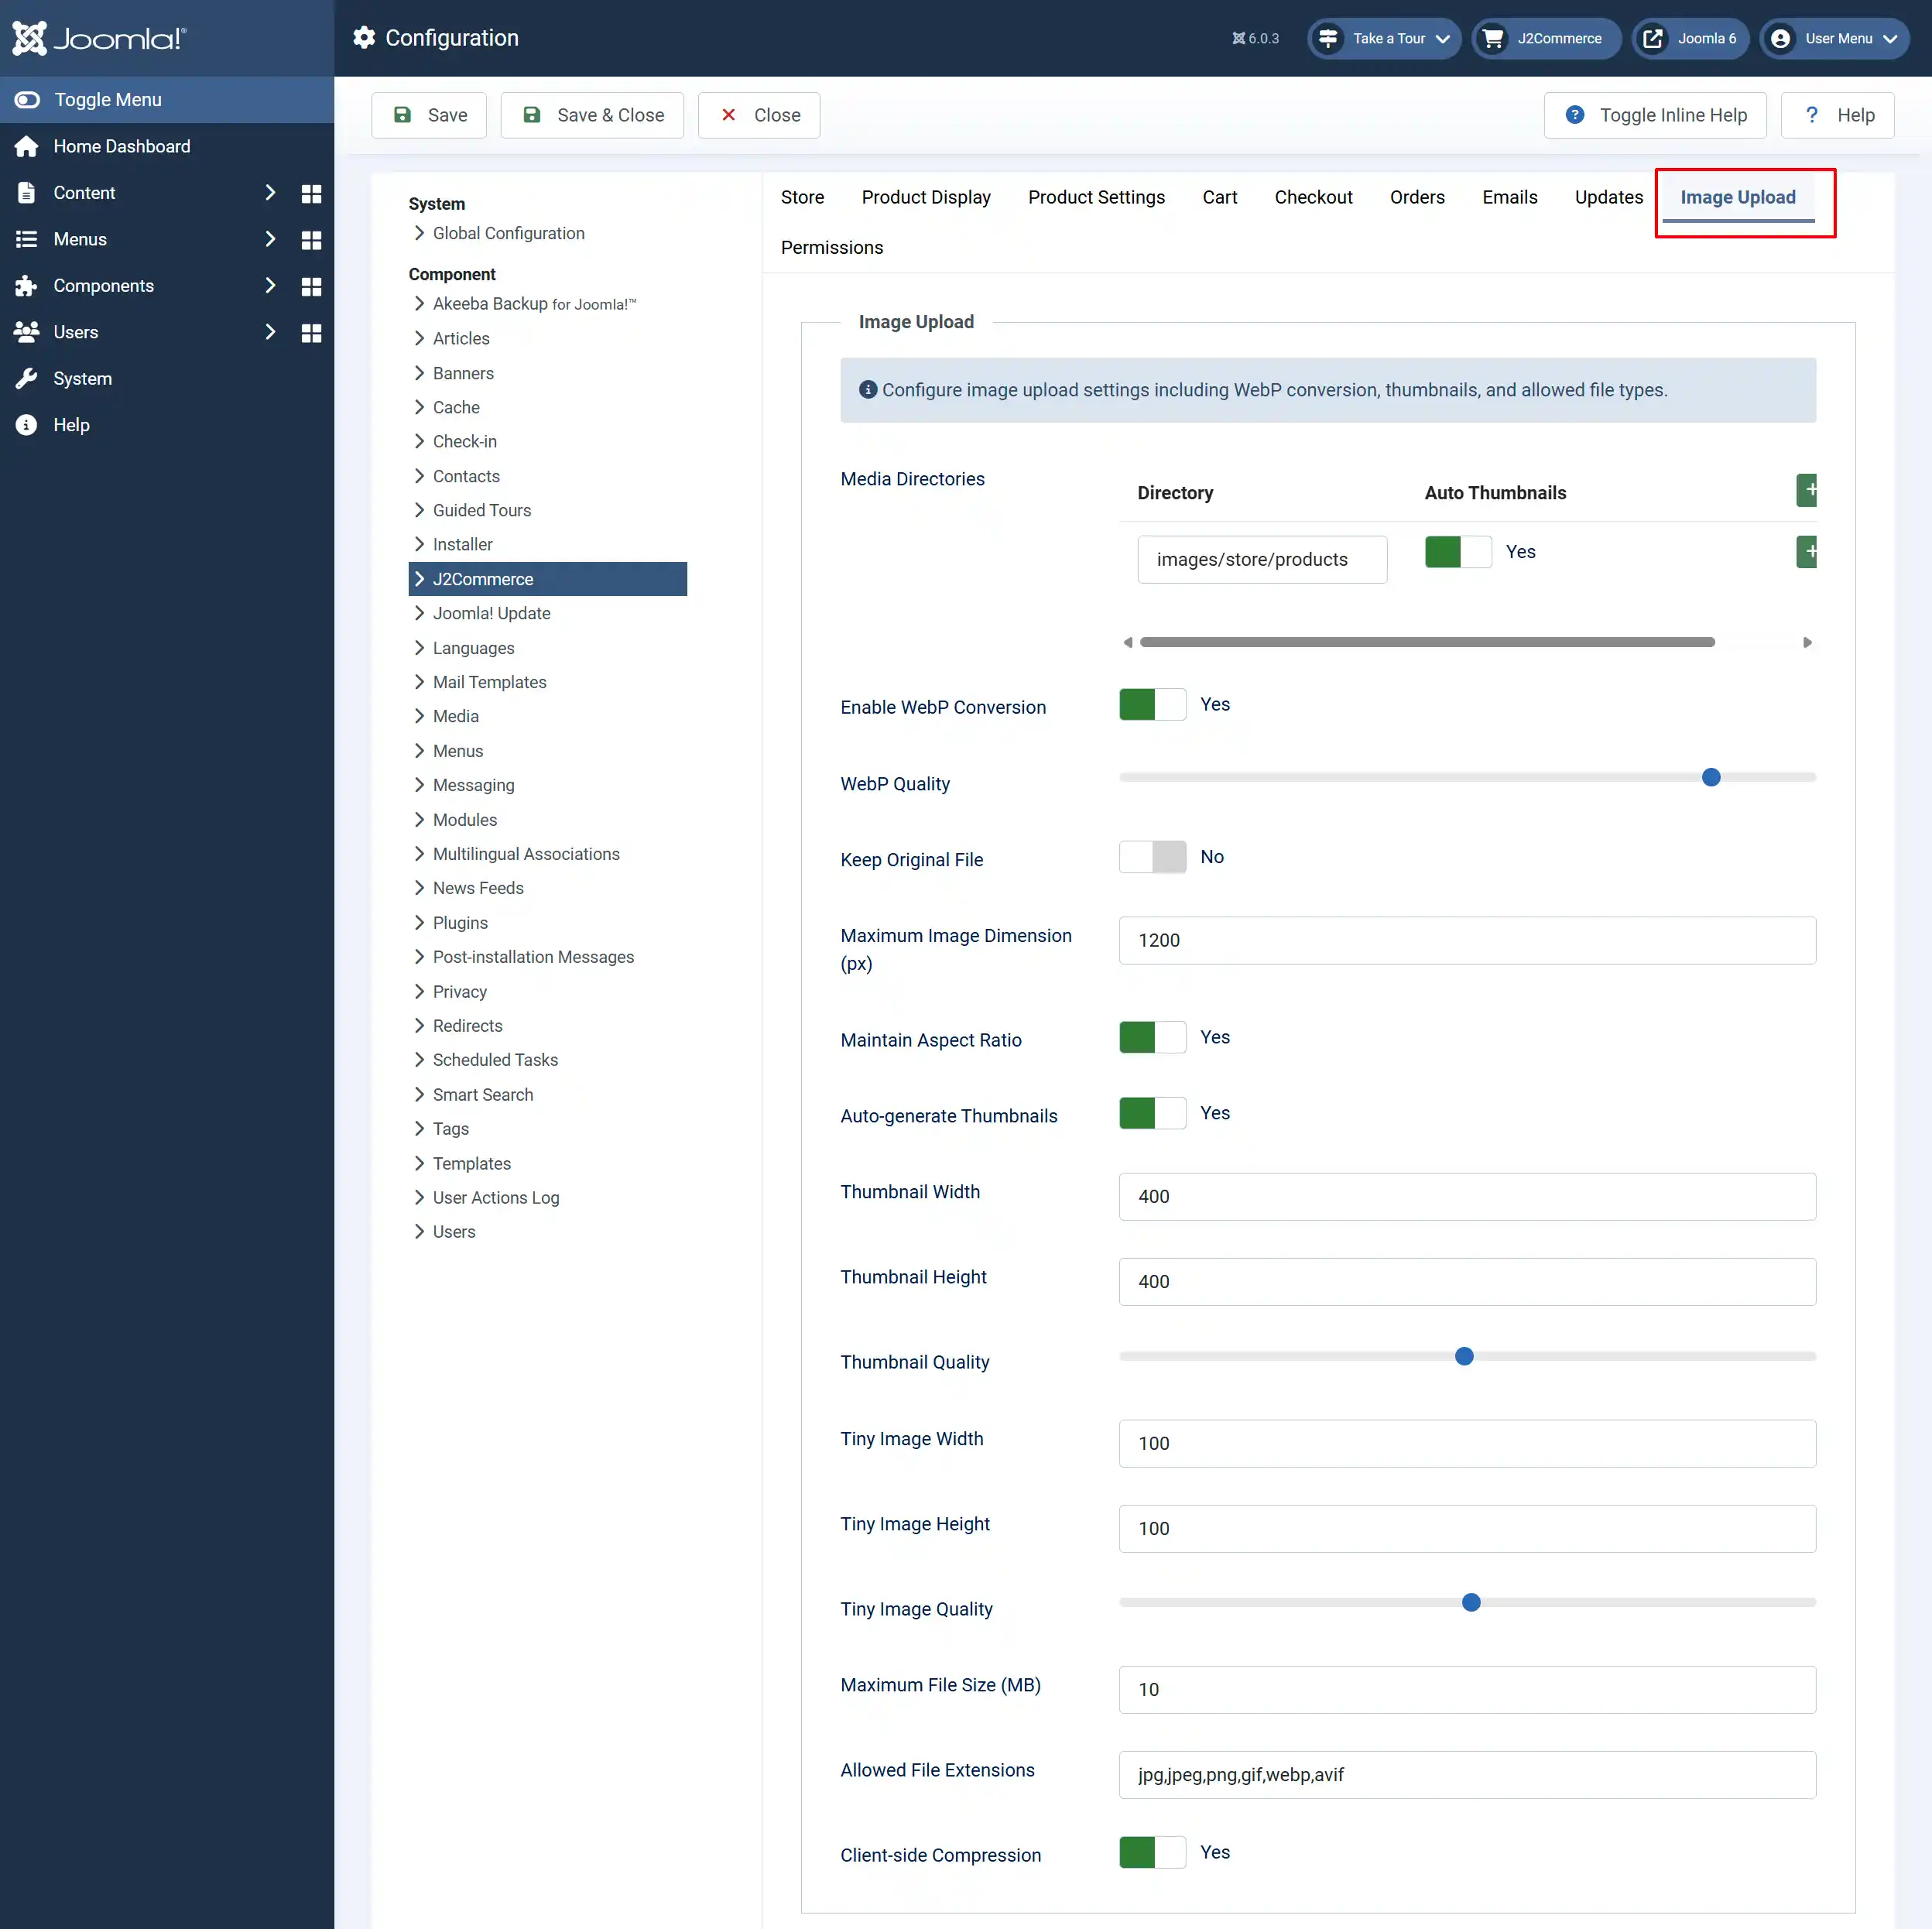
Configure image upload settings, including WebP conversion, thumbnails, and allowed file types
Media Directories: Configure which directories the image uploader manages. For example: (images/store/products)
Enable WebP Conversion: Automatically convert uploaded images to WebP format
WebP Quality: Quality setting for WebP conversion (1-100)
Keep Original File: Keep the original image file alongside the WebP version
Maximum Image Dimension (px): Maximum pixel size for the longest dimension of uploaded images. Images larger than this will be resized during WebP conversion. Set to 0 to disable resizing
Maintain Aspect Ratio: When enabled, images are resized proportionally so the longest side matches the max dimension. When disabled, images are fitted into a square with white padding
Auto-generate Thumbnails: Automatically create thumbnail versions of uploaded images
Thumbnail / Tiny Image Sizing: It is suggested to keep the Thumbnails to 400px and the Tiny Image set to 100px
Client-side Compression: Select 'Yes' to compress images in the browser before uploading