Getting Started with J2Commerce
This guide walks you through setting up your first J2Commerce store. Whether you're migrating from another platform or starting fresh, you'll have a functioning store ready to sell in under 15 minutes.
Prerequisites
Before you begin, make sure you have:
- Joomla 6.x installed and running
- PHP 8.3 or higher
- J2Commerce installed (see Installation)
The Setup Wizard
When you first open J2Commerce, the Setup Wizard appears automatically. This guided onboarding walks you through configuring your store in six simple steps:
- Store Info: Name, address, and contact details
- Currency: Your default currency and measurement units
- Tax: Tax inclusion preferences and rates
- Product Type: What you're selling (physical, digital, or service)
- Payment: Payment method setup
- Ready: Final review and sample data option
For detailed information about each step, see the Onboarding documentation.
You can re-run the Setup Wizard anytime from the Dashboard by clicking the Setup Guide button in the toolbar.
Quick Start Checklist
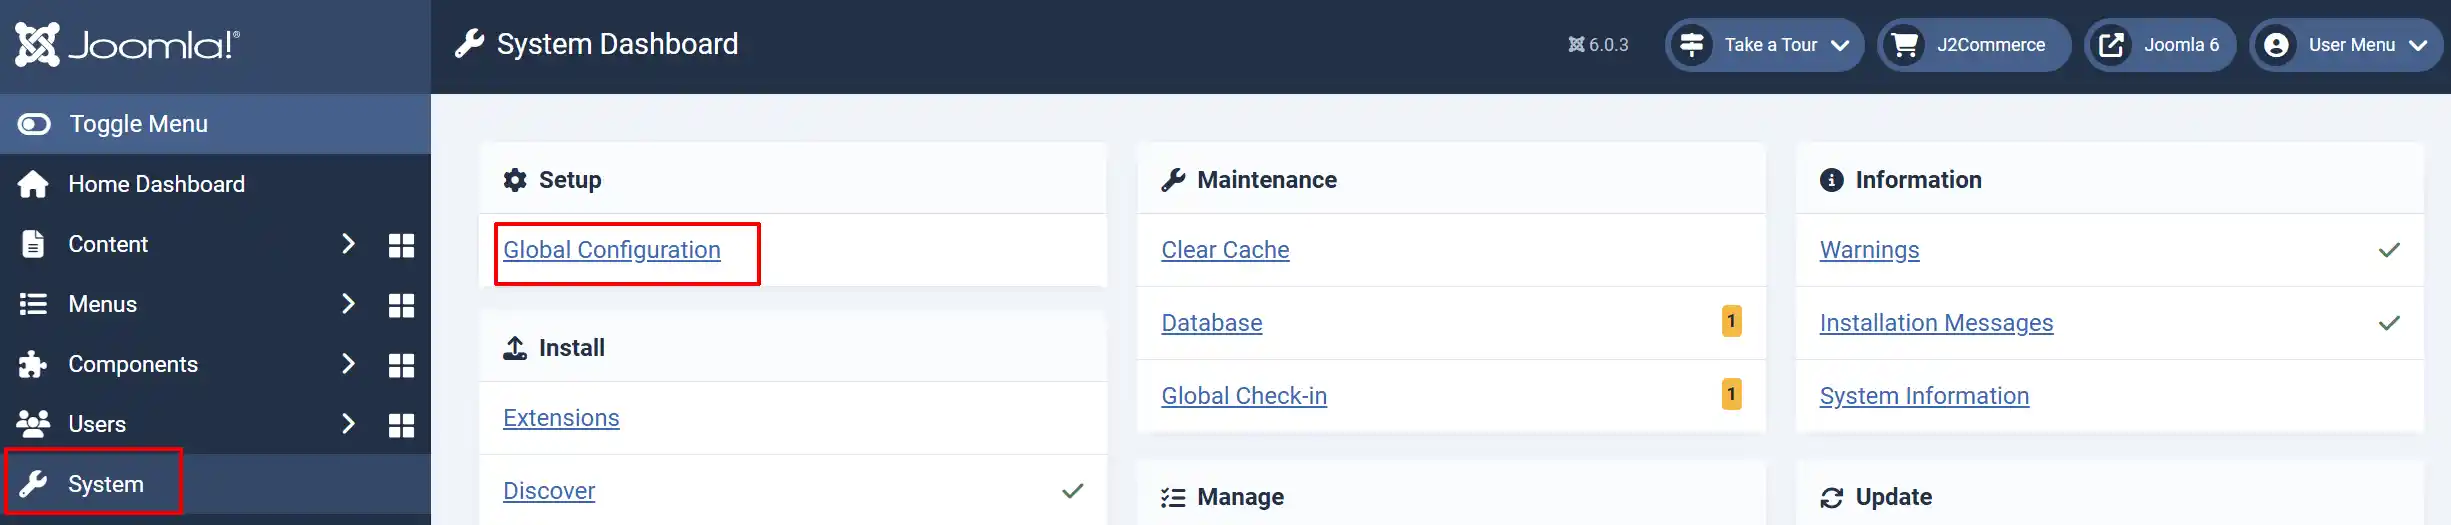
Configure Basic Store Information
Go to Settings -> Global Configuration
Go to J2Commerce -> Store tab and start filling in your store information
Enter your store name, email, and address
Set your default currency and measurement units
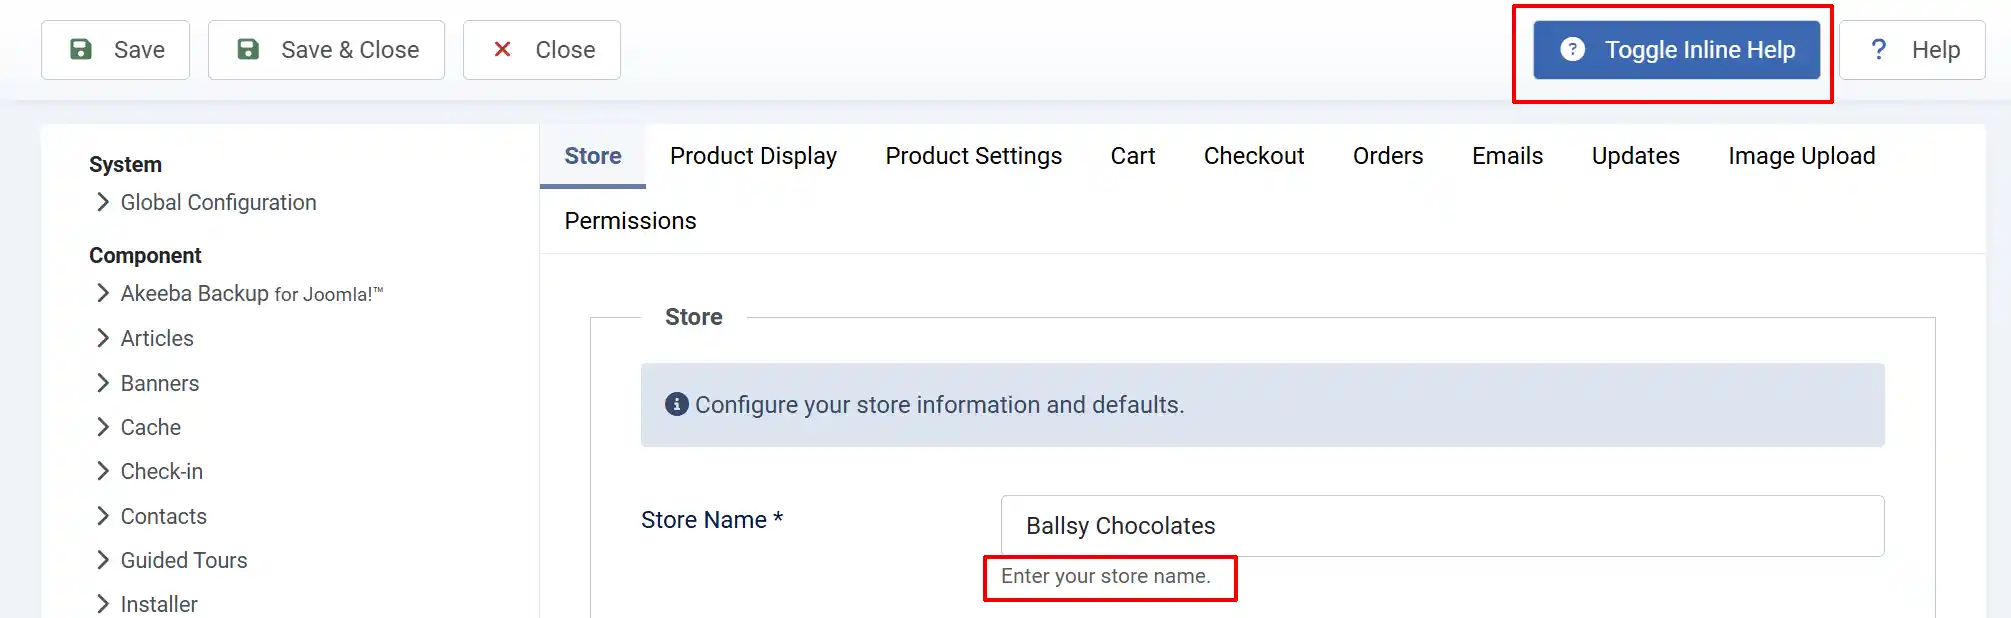
Helpful Tip: When you click on the Toggle Inline Help button, it will show a description below each section. See image below
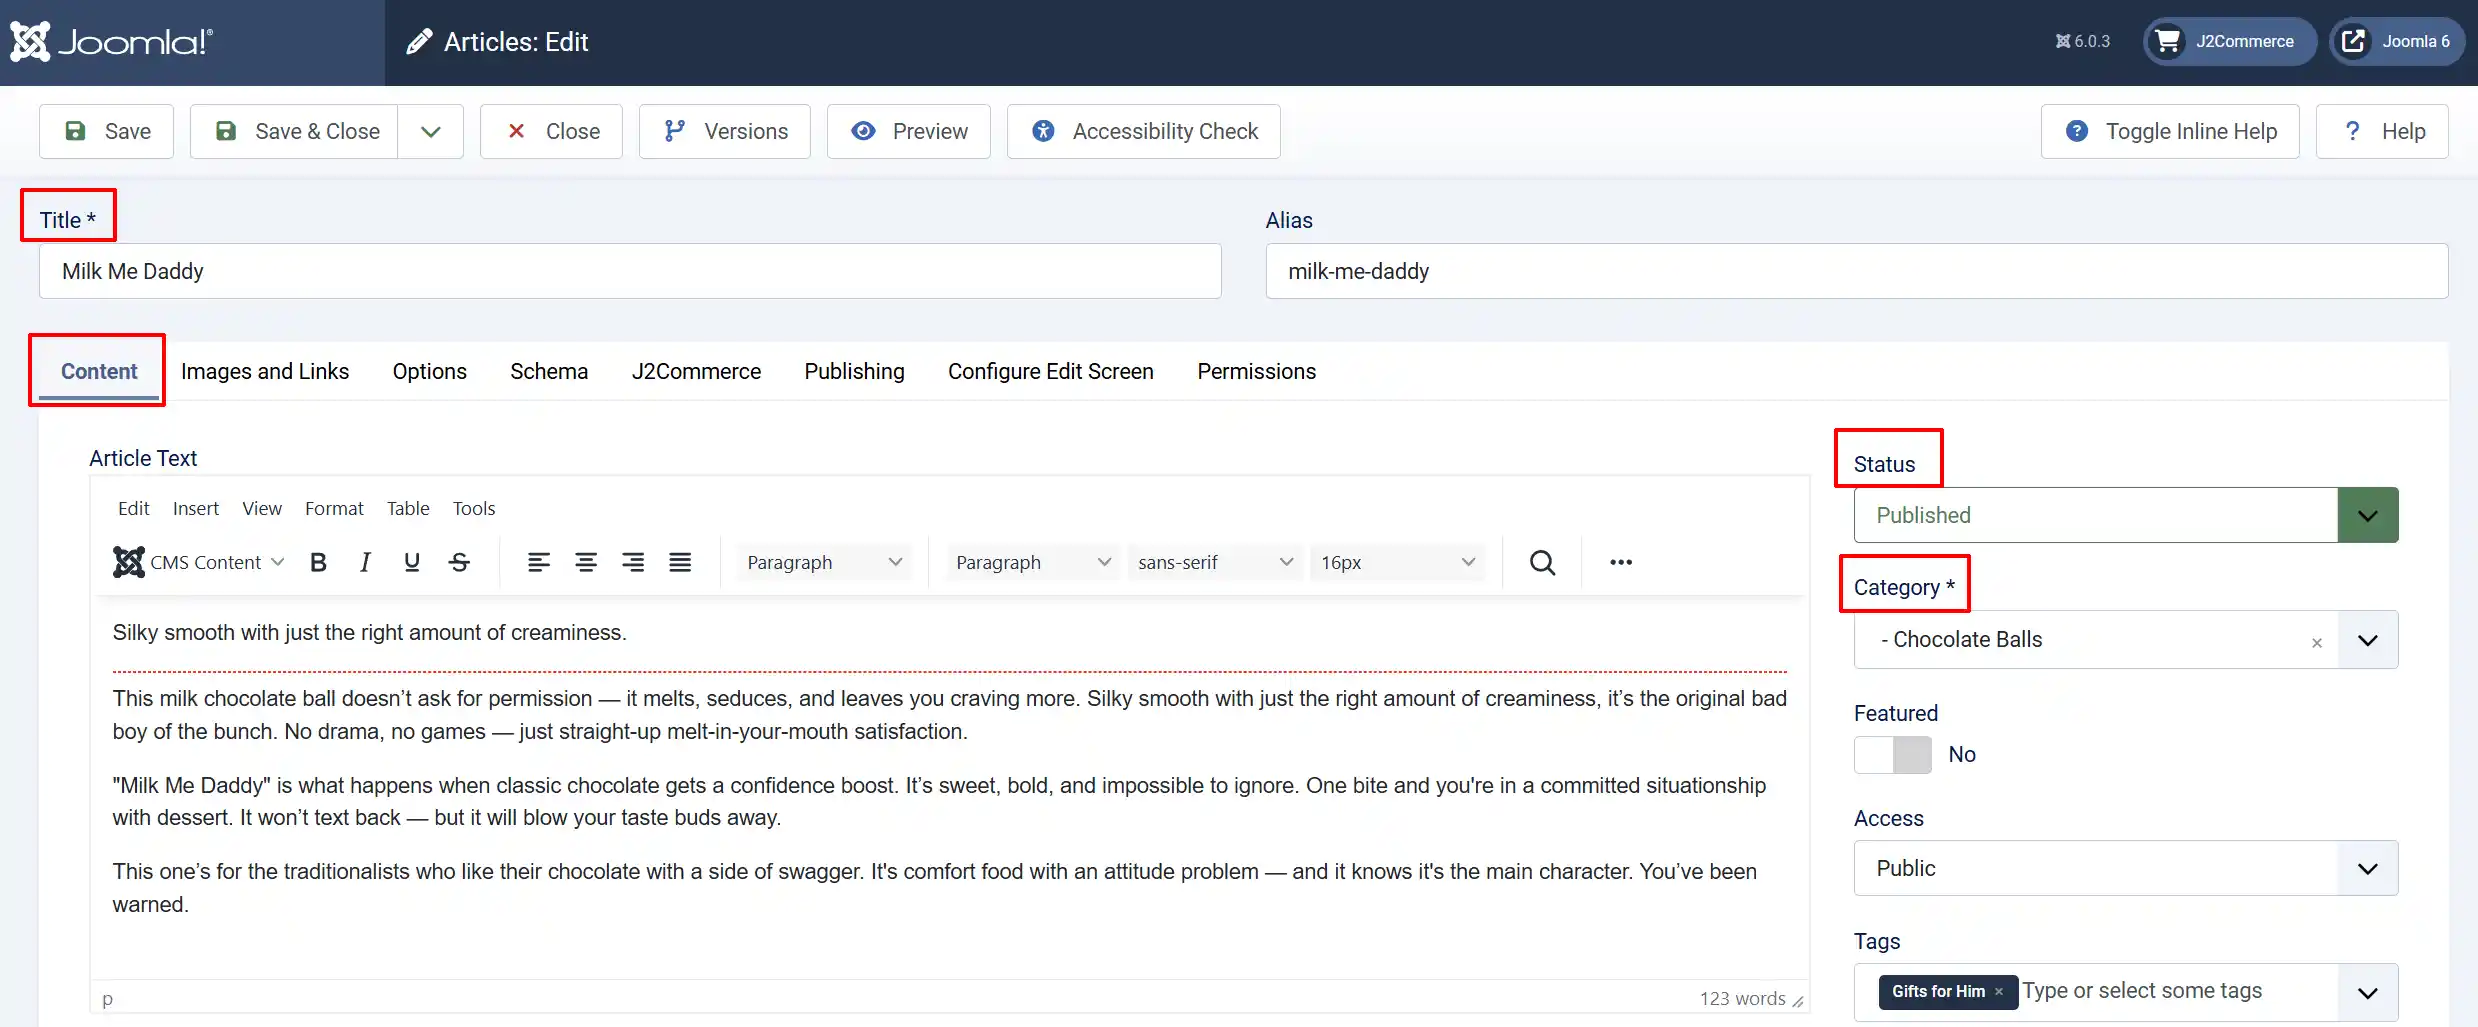
Create Your First Product
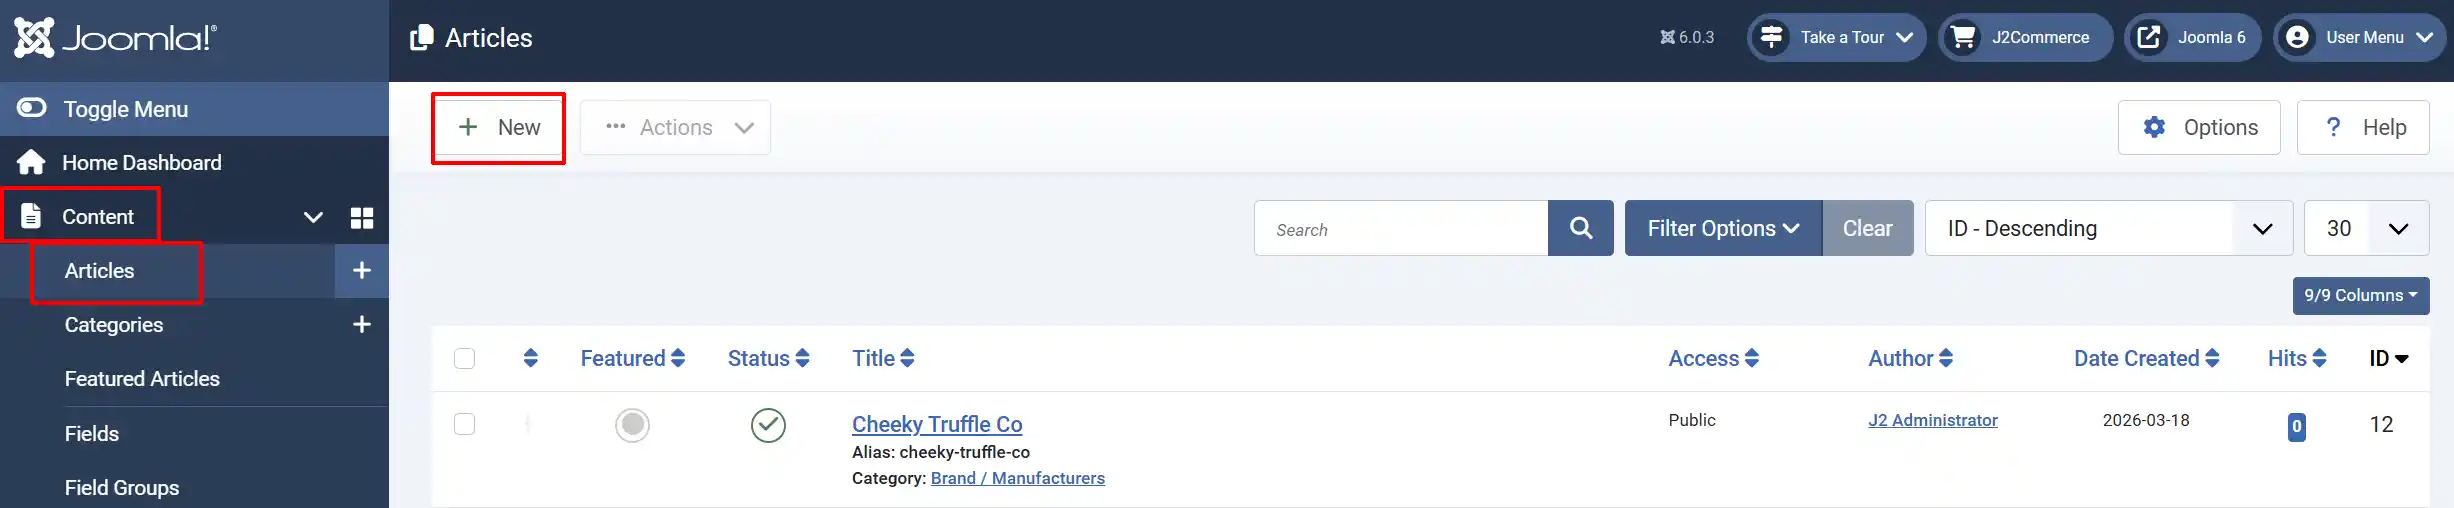
There are multiple ways to navigate to the location for creating a new product.
Option A: Go to Content -> Articles -> New.
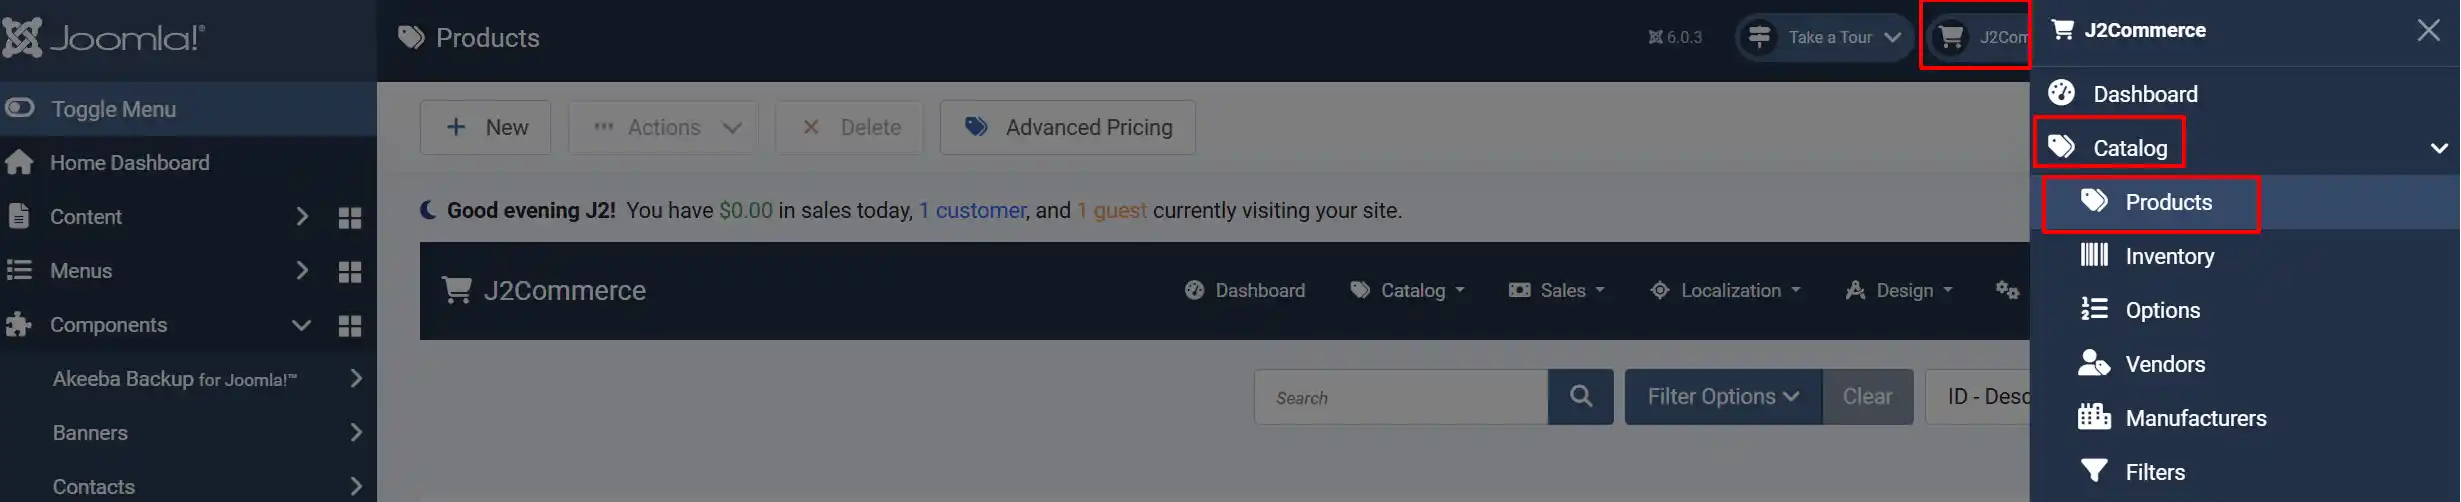
Option B: Or go to J2Commerce -> Catalog -> Product -> New
Creating a New Product
-
Enter a product title and description.
-
Assign the article to a category (the category determines which J2Commerce category listing it appears in).
-
Make sure the Status is 'Published'. Published means it's viewable on the frontend
Configuring the Product

Click on the J2Commerce tab to start configuring the product details
Use As Product: Set this to 'Yes' to set the product type
Product Type: Set to Simple for a single-item product with one price and no variants.
Click Save and Continue
Fill in the product details: For more help setting up a standard Simple product, go to https://docs.j2commerce.com/v6/catalog/product-types/simple_product and follow the steps.
Set Up Payments
J2Commerce includes several payment plugins ready to enable:
Go to the J2Commerce tab in the top right corner -> Setup -> Payment Method
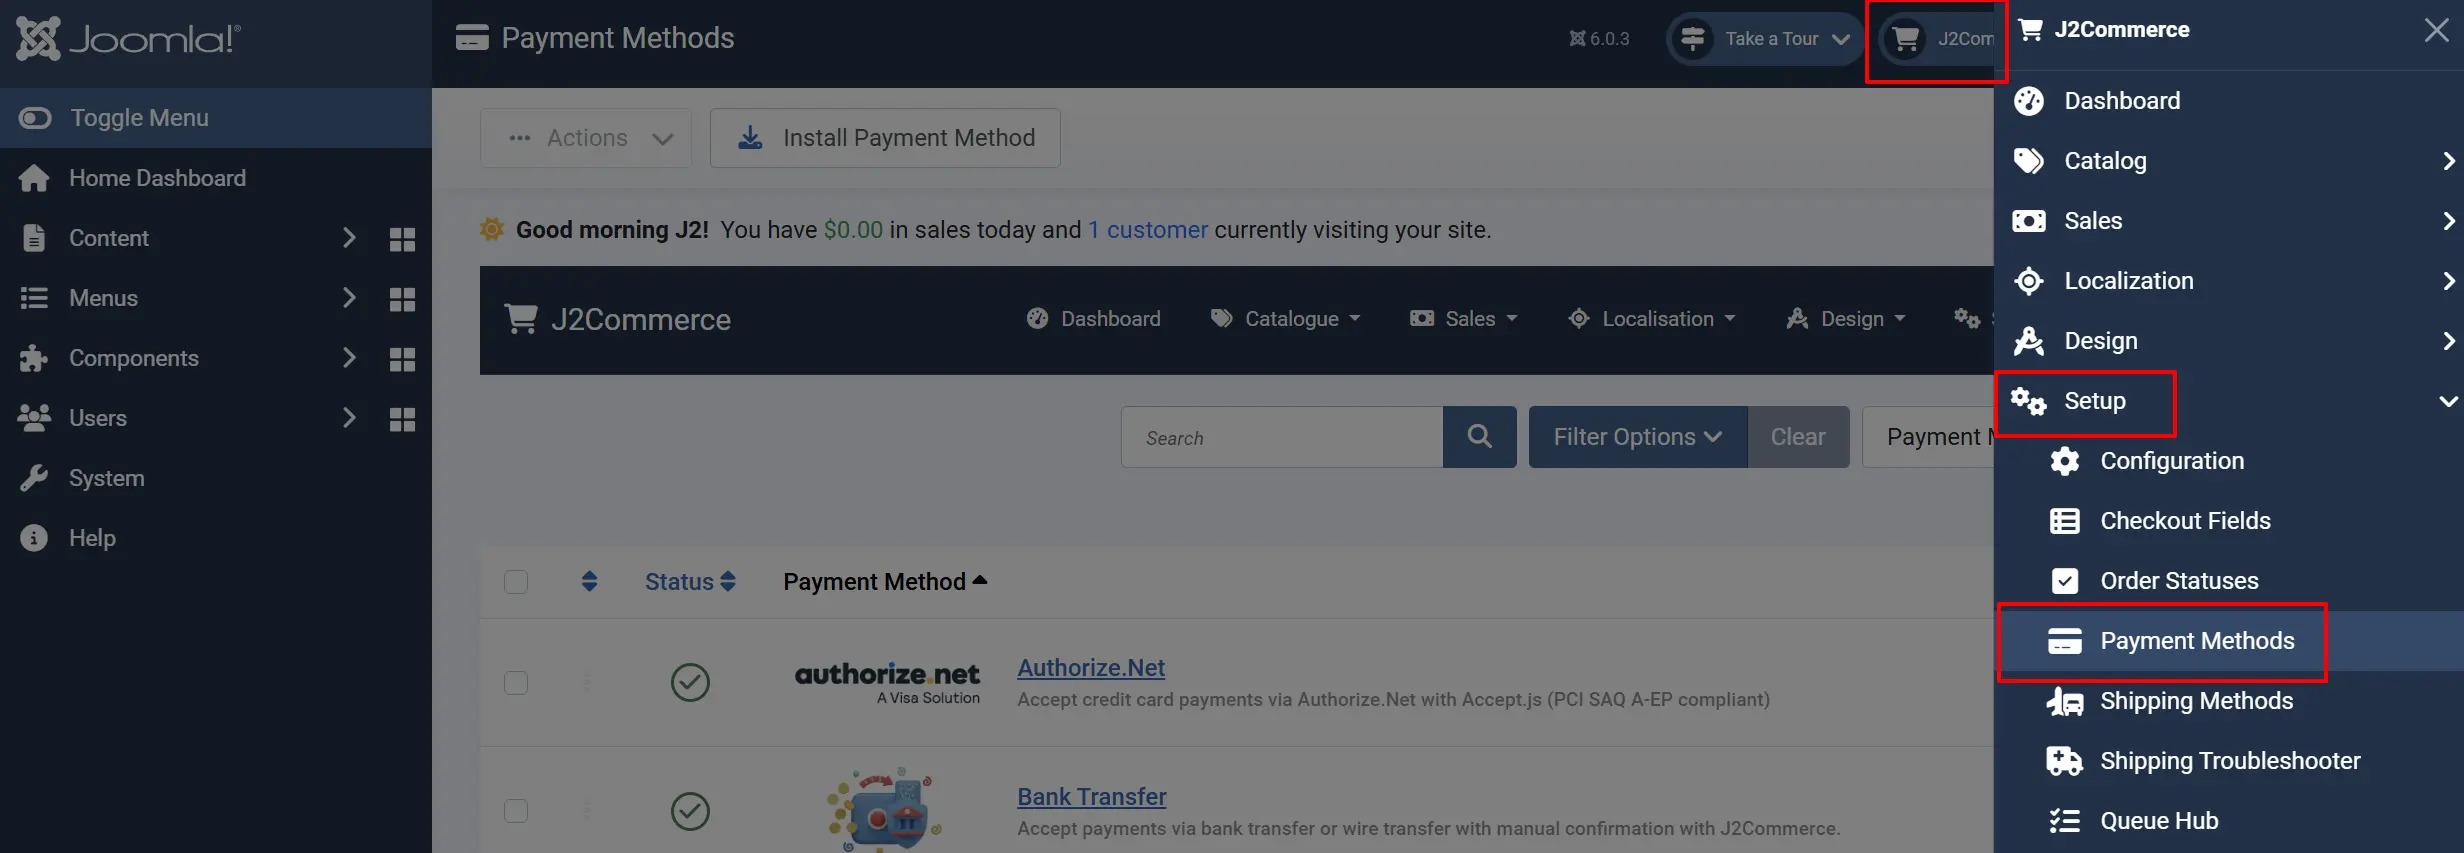
Click on a payment method to configure it:
-
Stripe: Enter your API keys
-
PayPal: Enter your business email
-
Kustom: Configure your account settings
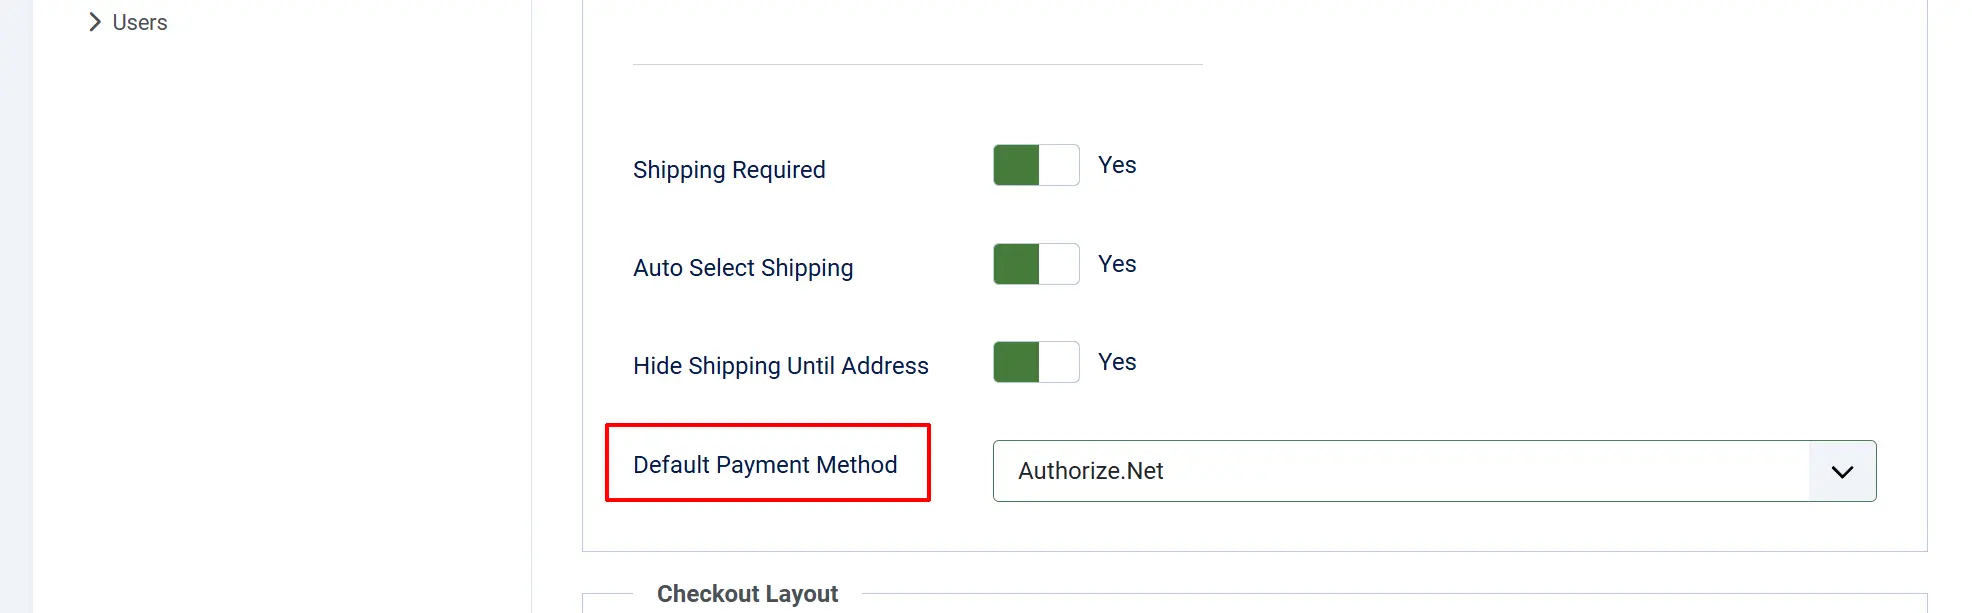
Set one as the Default Payment Method by going to J2Commerce -> Setup -> Configuration -> Checkout tab -> Default Payment Method
Configure Shipping (if selling physical products)
Go to the J2Commerce tab in the top right corner -> Setup -> Shipping Method

Enable one or more shipping methods:
-
Free Shipping: Set a minimum order amount
-
Flat Rate: Fixed price per order
-
UPS/FedEx/USPS: Enter your carrier credentials
Set up shipping zones to control where you ship
Create Categories
Categories help organize your products:
Go to the J2Commerce tab in the top right corner -> Content -> Categories
Click New
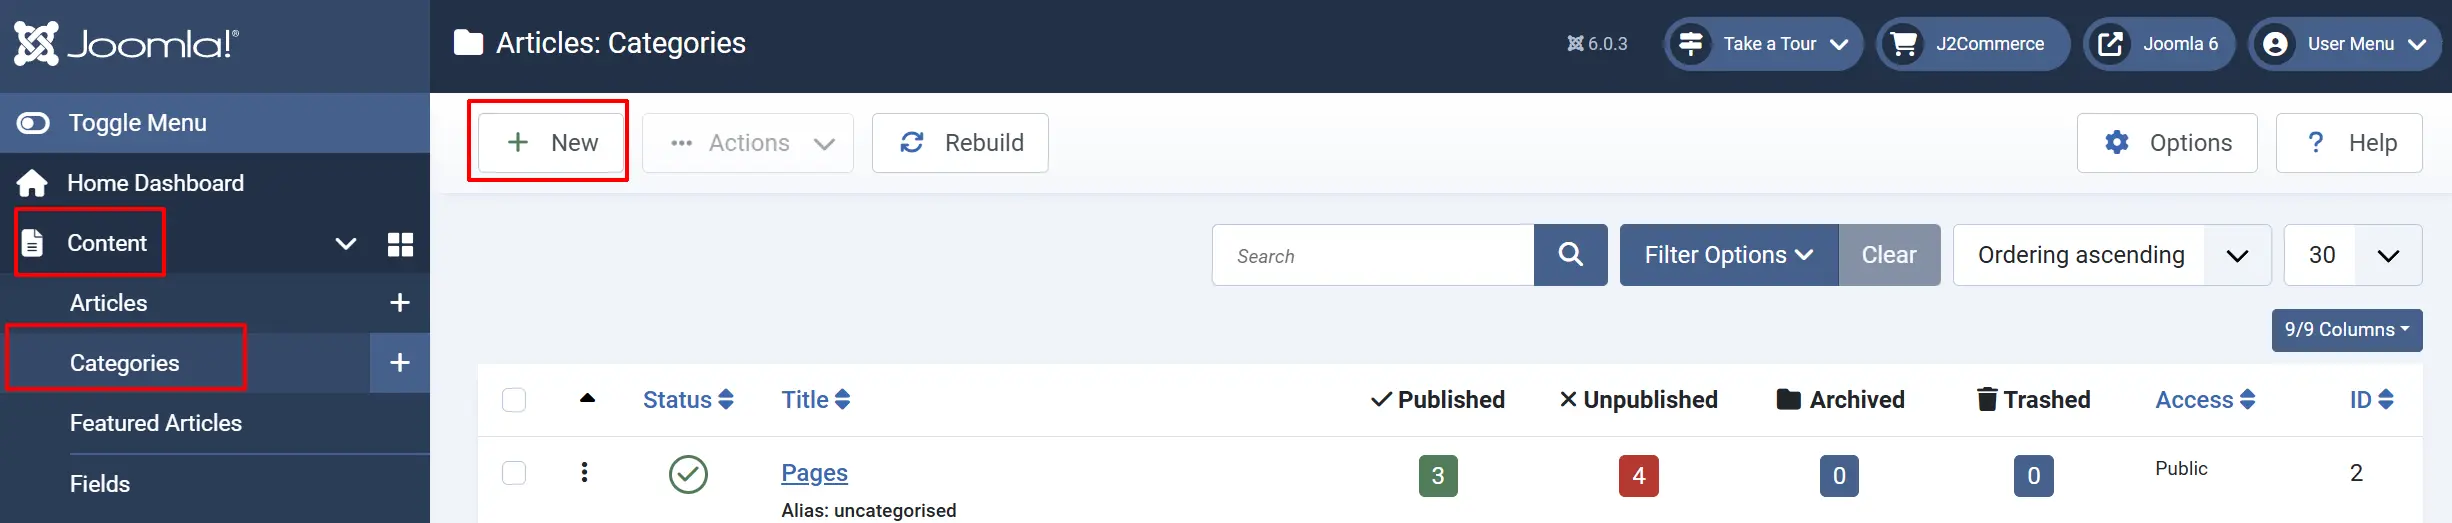
Enter a category name and description
Assign a parent category, if needed, in the Category tab
Upload a category image under the Options tab
Click Save & Close
Set Up Taxes
Before you can set up a Tax Profile, you need to set up the Geozone first, then the Tax Rate and then the Tax Profile. You can find all three of them by going to the J2Commerce tab in the top right corner -> Localization ->
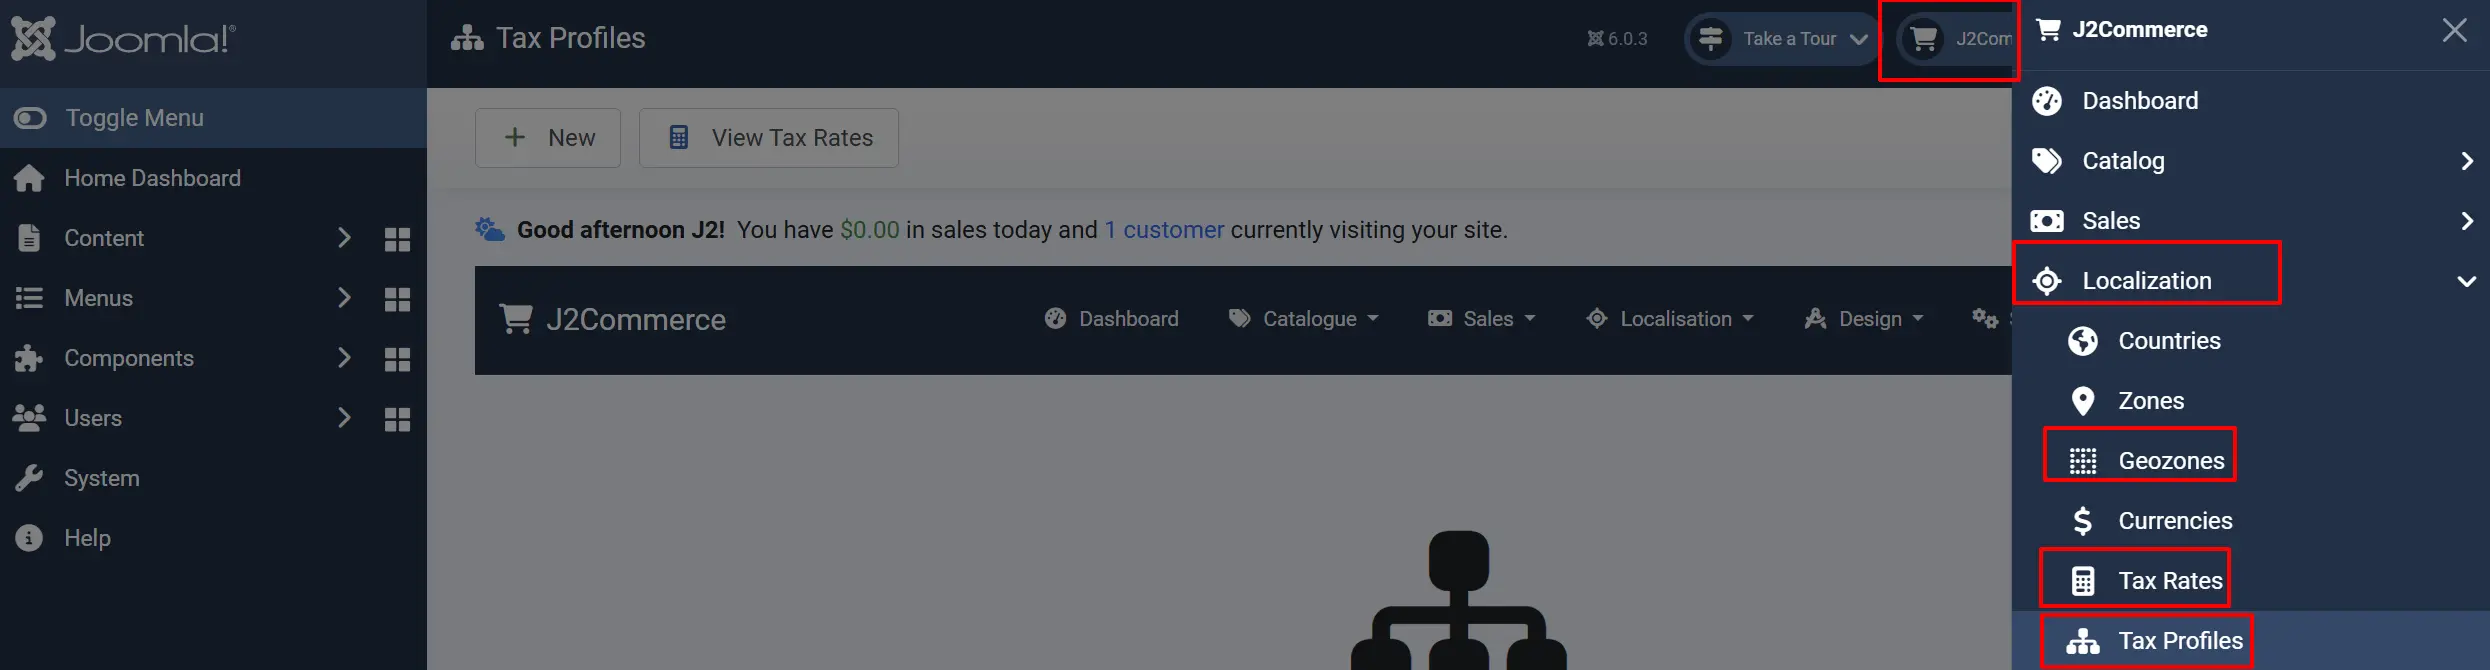
Go to the J2Commerce tab in the top right corner -> Localization -> Tax Profiles
Create a new tax profile or edit the default
Add tax rules for your regions
Associate products with tax profiles
Understanding the Admin Interface
Navigation Bar

The navigation bar at the top of every J2Commerce page provides quick access to:
Products: Manage your product catalog
Orders: View and process customer orders
Customers: View customer accounts and history
Catalog: Categories, filters, options, manufacturers, vendors
Shipping: Configure shipping methods and zones
Payments: Manage payment gateways
Apps: Install and configure app plugins
Reports: Sales, product, and customer analytics
Settings: Global configuration and store settings
Dashboard
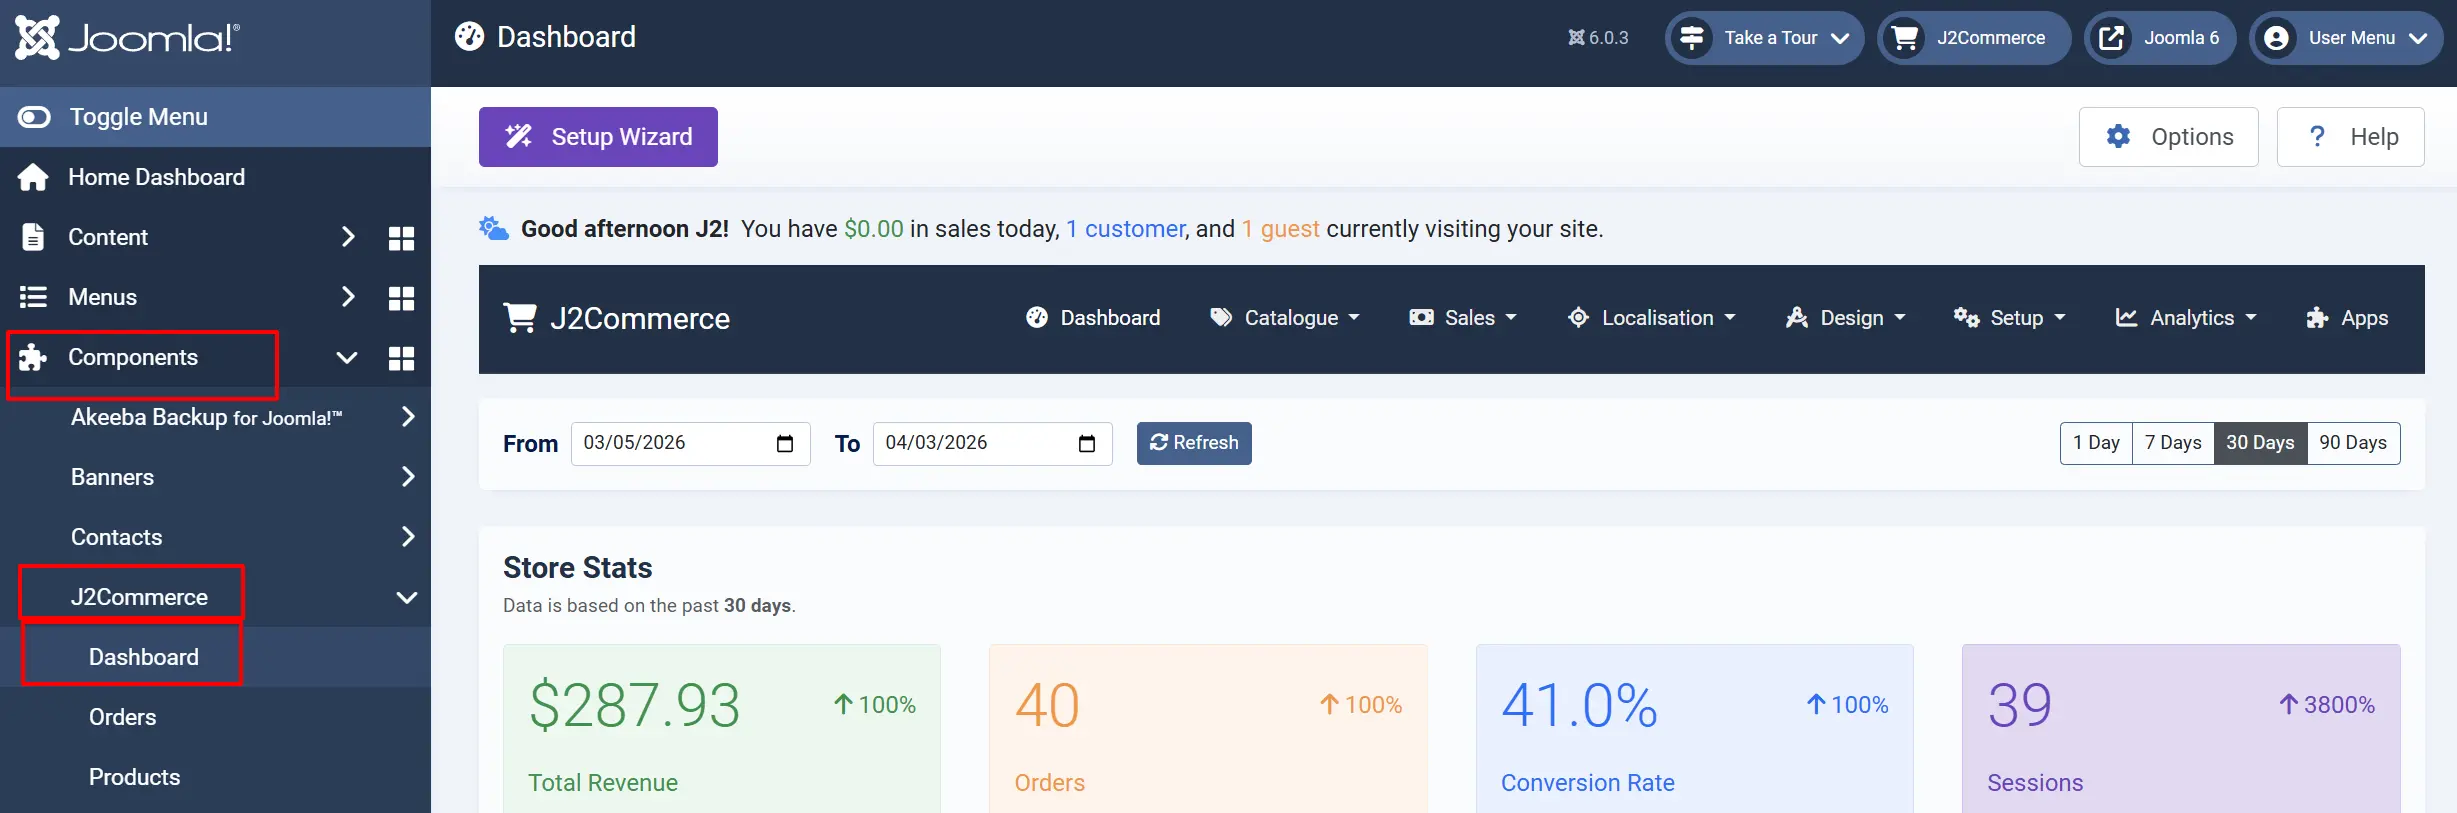
The J2Commerce Dashboard is your home base. It shows:
- Today's revenue and order count
- Sales trends over time
- Recent orders needing attention
- Low stock alerts for inventory
For detailed dashboard information, see the Dashboard documentation.
What's Next?
- Onboarding Guide -- Deep dive into the setup wizard
- Product Types -- Learn about all product types
- Store Setup -- Full configuration reference
- Dashboard -- Master the admin dashboard