Onboarding Setup Wizard
The first time you access J2Commerce, a guided Setup Wizard appears to help you configure your store. This step-by-step wizard walks you through every setting needed to launch your store, from your business address to payment processing.
Overview
The Setup Wizard is a 6-step modal that appears automatically when:
- J2Commerce is installed for the first time
- The onboarding has not been completed (
onboarding_complete = 0)
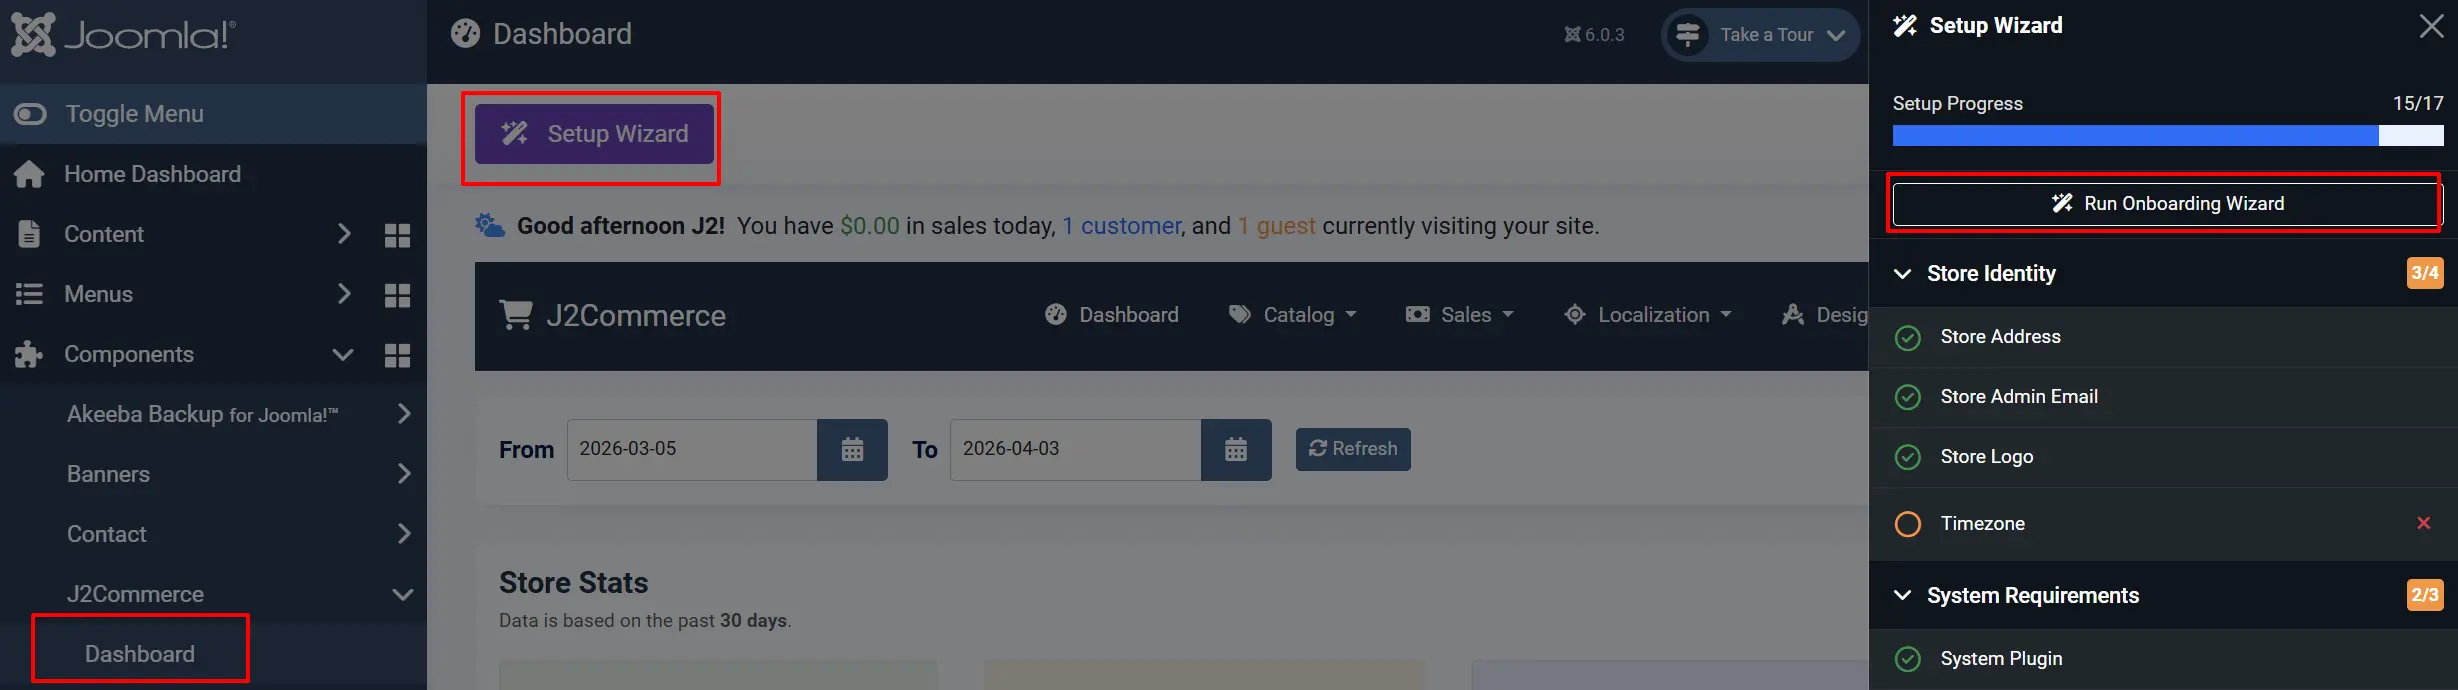
You can re-run the wizard anytime from the Dashboard by clicking Setup Wizard -> Run Onboarding Wizard
Accessing the Setup Wizard
Automatic Display
On first access to Components -> J2Commerce -> Dashboard, the wizard displays automatically if setup is incomplete. If you click out of it without finishing the steps, you can get back into it by going back to your Dashboard -> Setup Wizard -> Run Onboarding Wizard
Manual Access
To re-run the wizard:
- Click the Setup Wizard button in the Dashboard toolbar
- Or navigate directly:
index.php?option=com_j2commerce&view=dashboard&rerun_onboarding=1
The Six Steps
Step 1: Store Info
Purpose: Set your basic store identity and location.
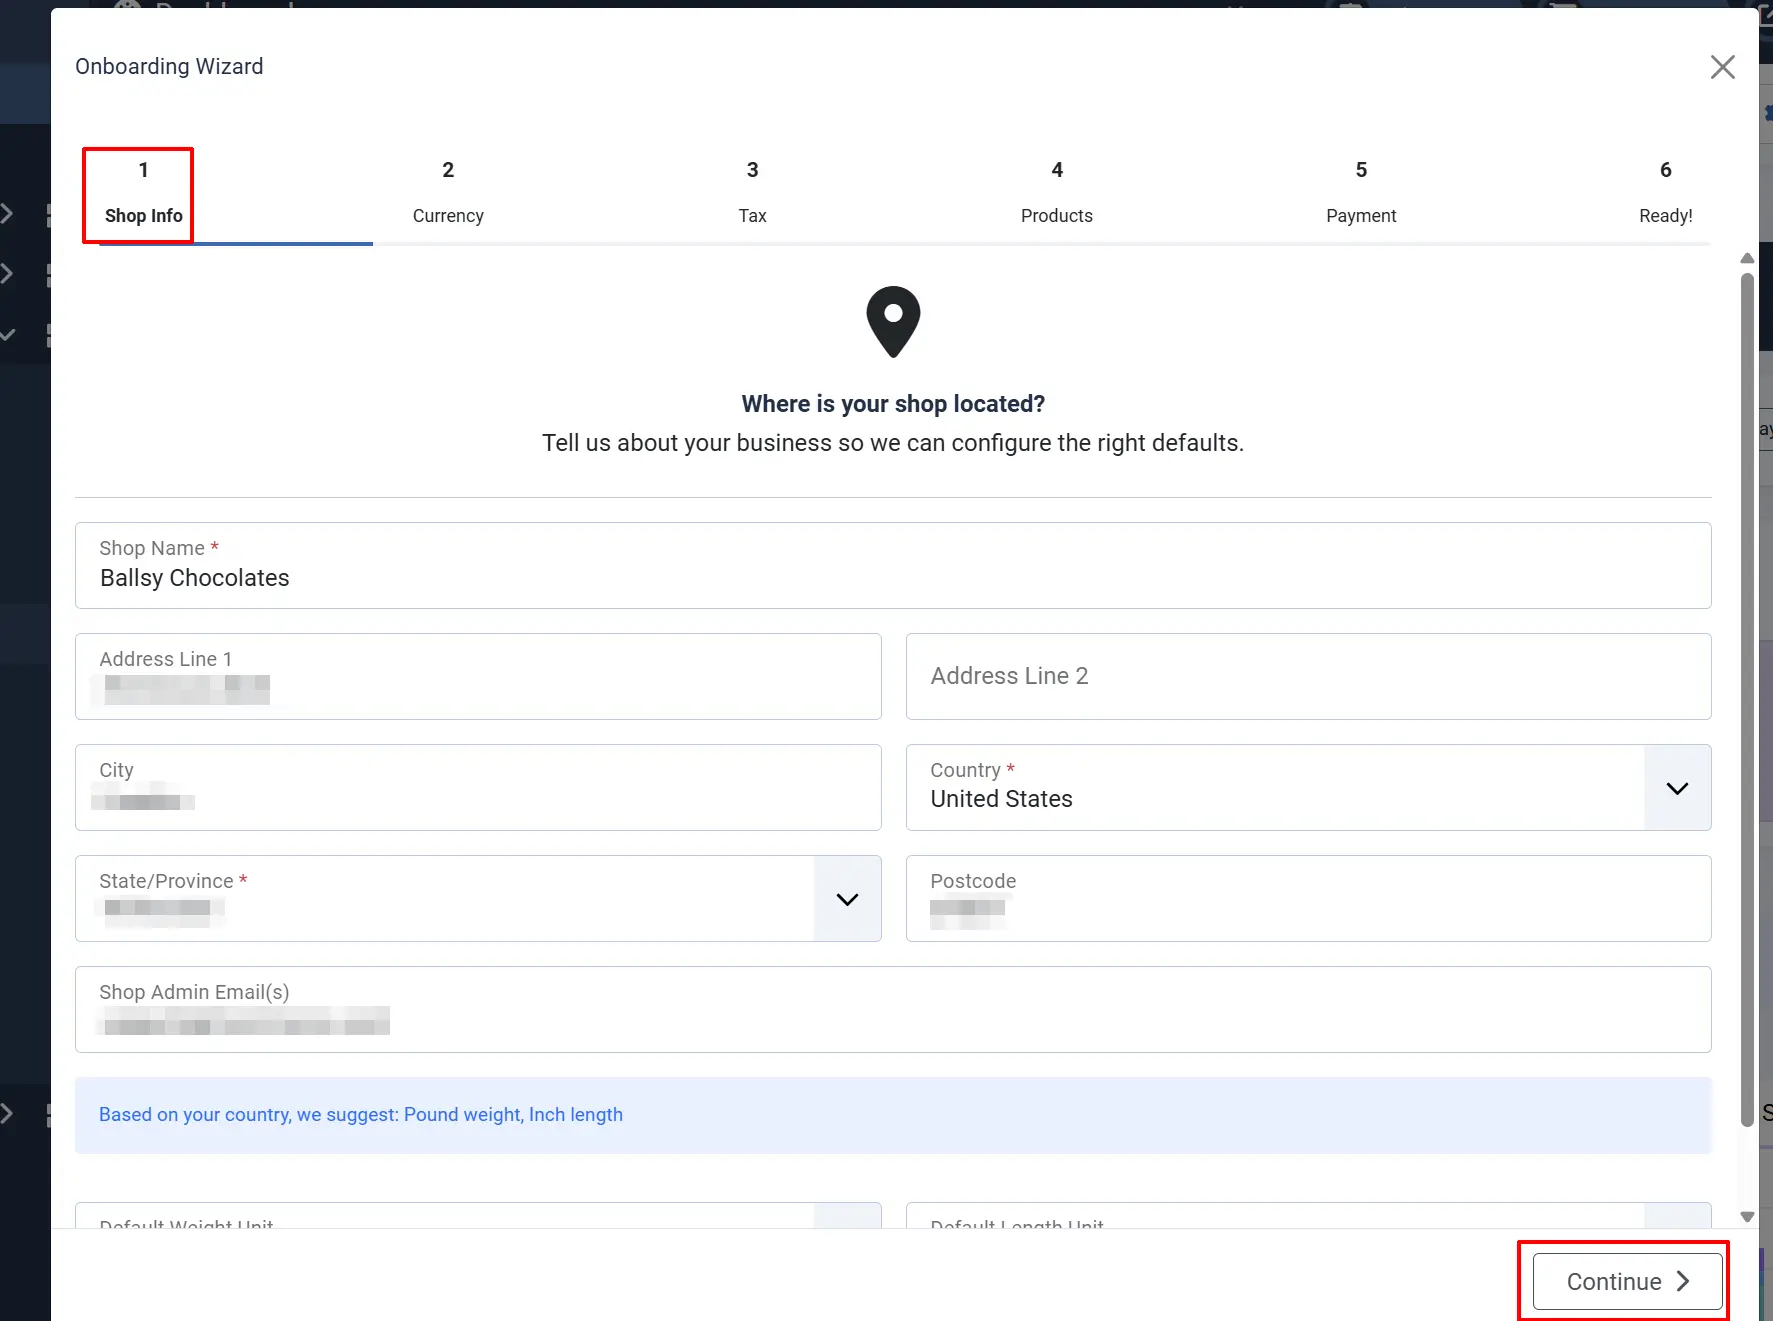
Fields:
| Field | Required | Description |
|---|---|---|
| Store Name | Yes | Your business name is displayed to customers |
| Address Line 1 | No | Primary street address |
| Address Line 2 | No | Additional address info |
| City | No | Store city |
| Country | Yes | Store country (dropdown of enabled countries) |
| State/Zone | Yes | Store state/province (dynamically loaded based on country) |
| ZIP/Postal Code | No | Postal code for shipping calculations |
| Admin Email | No | Email for order notifications |
| Weight Class | No | Default weight measurement unit |
| Length Class | No | Default length measurement unit |
What it creates:
- A default geozone matching your country and zone
- Syncs weight and length conversion values
Country defaults:
- US (223): USD, pound, inch, tax excluded
- UK (222): GBP, kilogram, cm, tax included
- Canada (38): CAD, pound, cm, tax excluded
- EU countries: EUR, kilogram, cm, tax included
Step 2: Currency
Purpose: Configure your store's currency and measurement units.
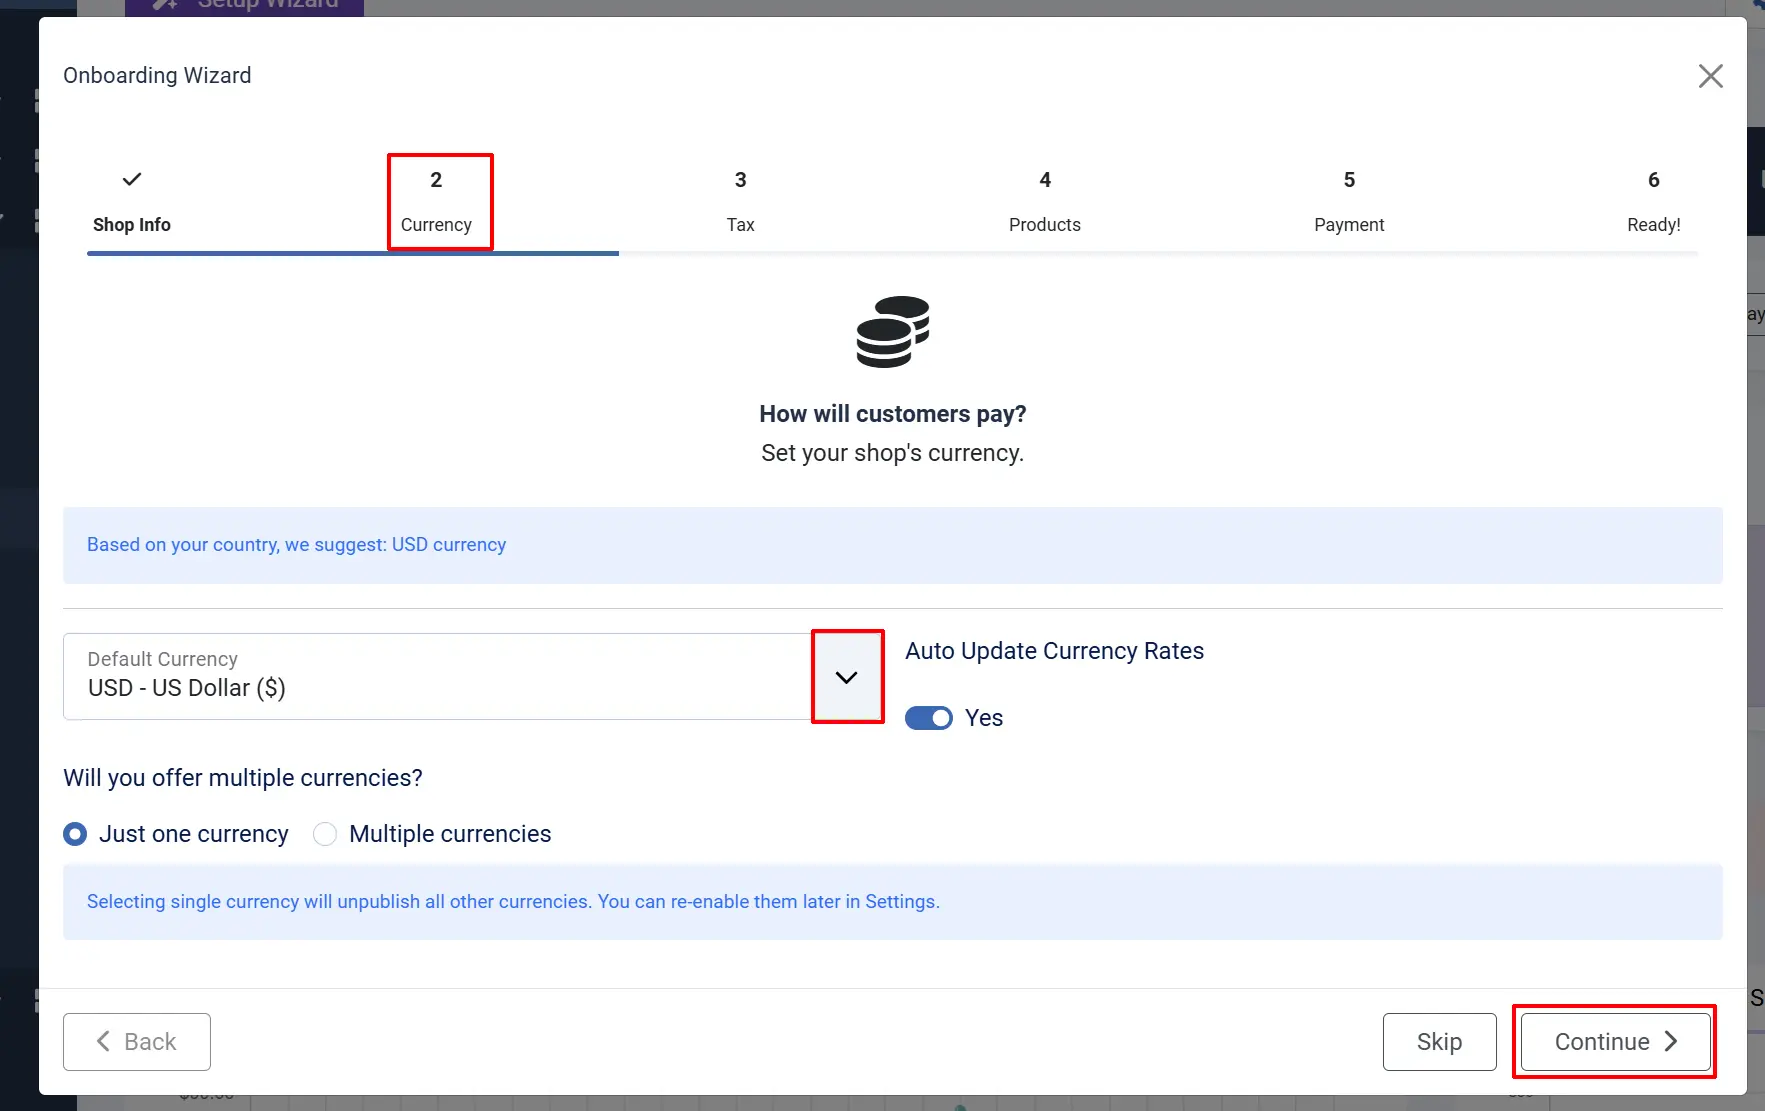
Fields:
| Field | Required | Description |
|---|---|---|
| Currency | Yes | Default currency for pricing |
| Currency Auto-Update | No | Enable automatic exchange rate updates |
| Currency Mode | No | Single currency or multi-currency |
Currency Modes:
- Single Currency: Only the selected currency is enabled
- Multi-Currency: Multiple currencies available with base rate setting
What it does:
- Enables/disables currencies based on mode selection
- Sets base currency value to 1.0 for multi-currency mode
Step 3: Tax
Purpose: Configure how tax is applied to your products.
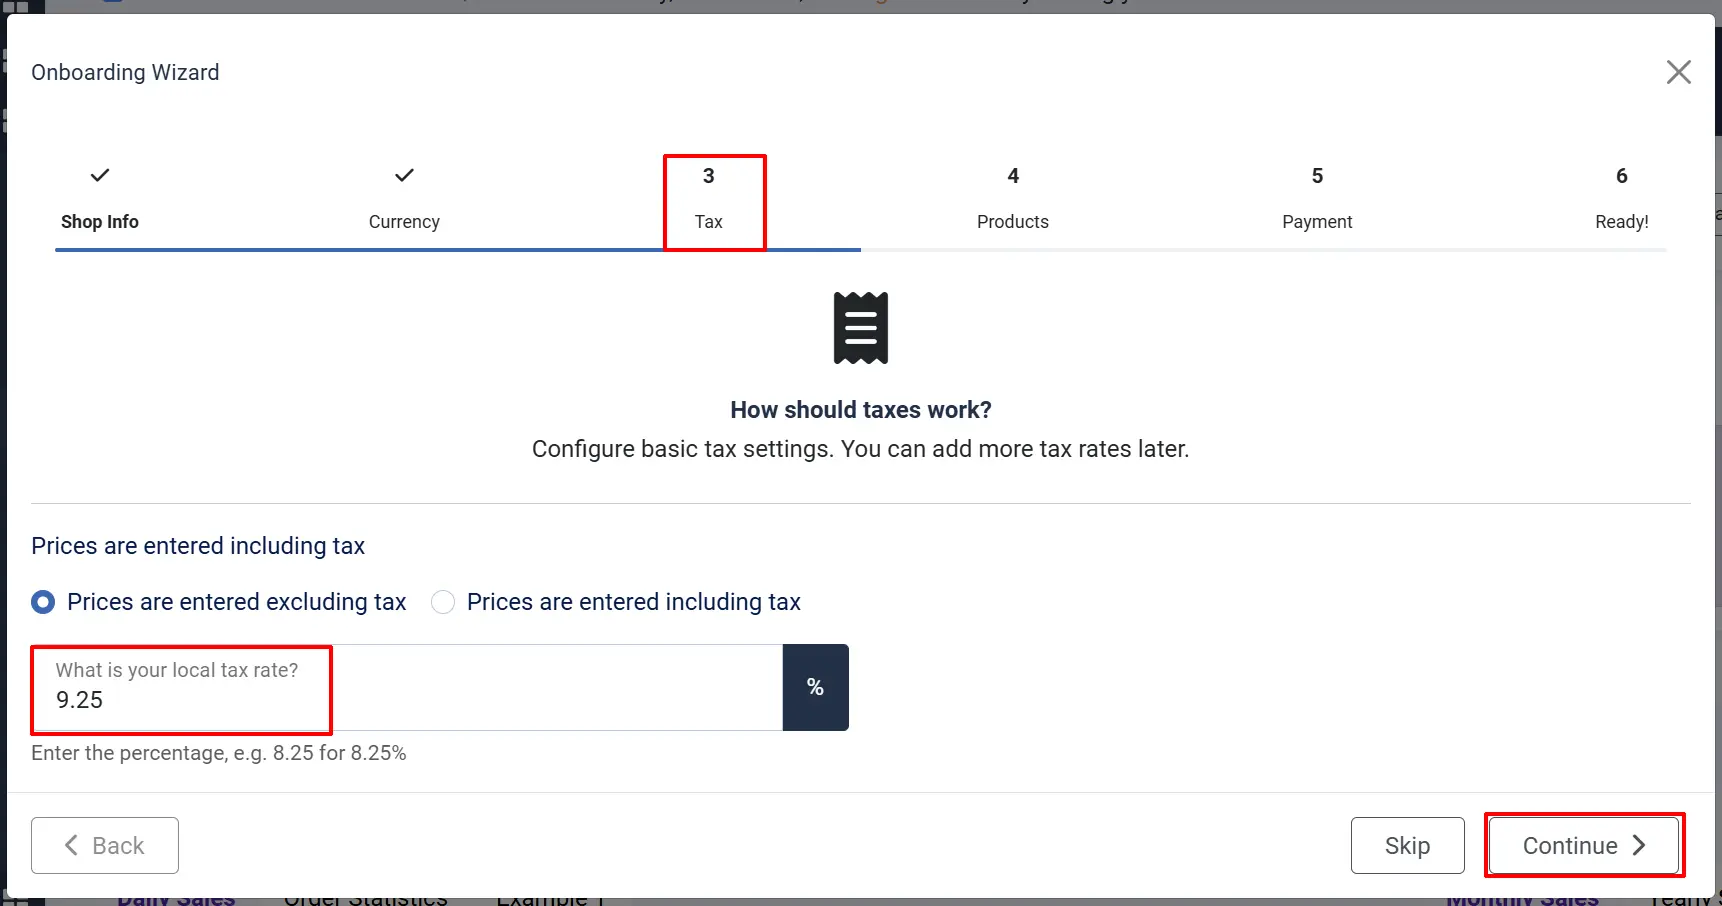
Fields:
| Field | Required | Description |
|---|---|---|
| Prices Include Tax | Yes/No | Whether product prices include tax |
| Tax Rate % | No | Default tax rate (0-100) |
What it creates:
- Geozone Rule (for your default zone)
- Tax Rate
- Tax Profile
- Tax Rule linking everything together
For more complex tax situations, use the Tax Profiles section in Catalog after completing the wizard.
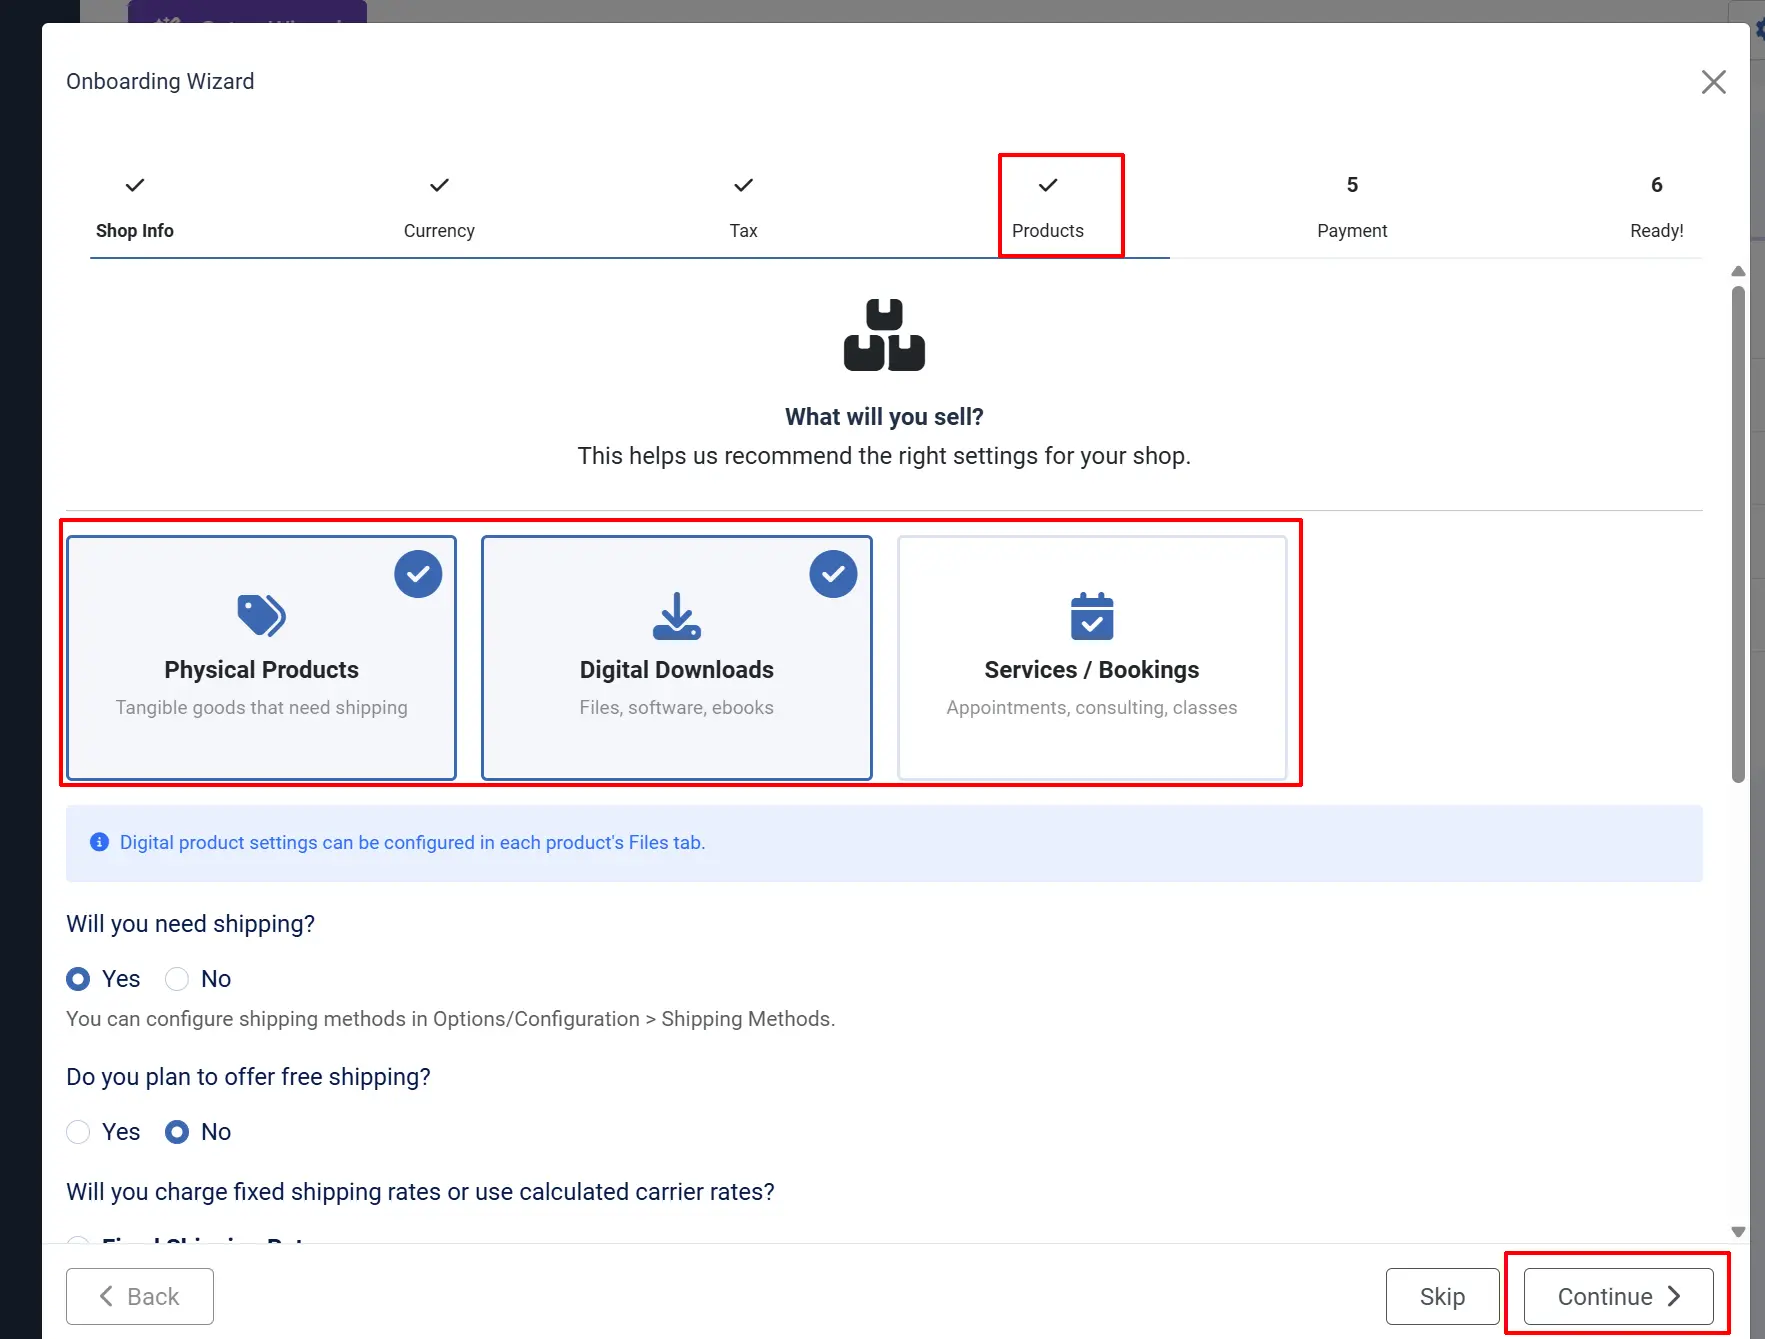
Step 4: Product Type & Shipping
Purpose: Define what you're selling and configure shipping.
Fields:
Product Types (multi-select):
- Physical Products: Tangible items that ship
- Digital Products: Downloadable files
- Services: Non-physical offerings
Shipping Options:
| Field | Required | Description |
|---|---|---|
| Require Shipping | No | Whether products require shipping |
| Offer Free Shipping | No | Enable free shipping option |
| Shipping Rate Type | No | How shipping is calculated |
Fixed Shipping Method Types:
- Per Order (flat rate)
- Per Quantity
- Per Price (percentage of subtotal)
- Per Item (flat per item)
- Per Item Weight (weight-based per item)
- Per Order Weight (weight-based total)
- Per Item Percentage
Rate Table Columns:
- Geozone (where rate applies)
- Weight Range (min-max, optional)
- Cost (base rate)
- Handling Fee (additional charge)
What it creates:
- Free shipping plugin with a minimum subtotal threshold
- Shipping method record
- Shipping rate records for configured zones and weights
Step 5: Payment
Purpose: Configure your payment methods.
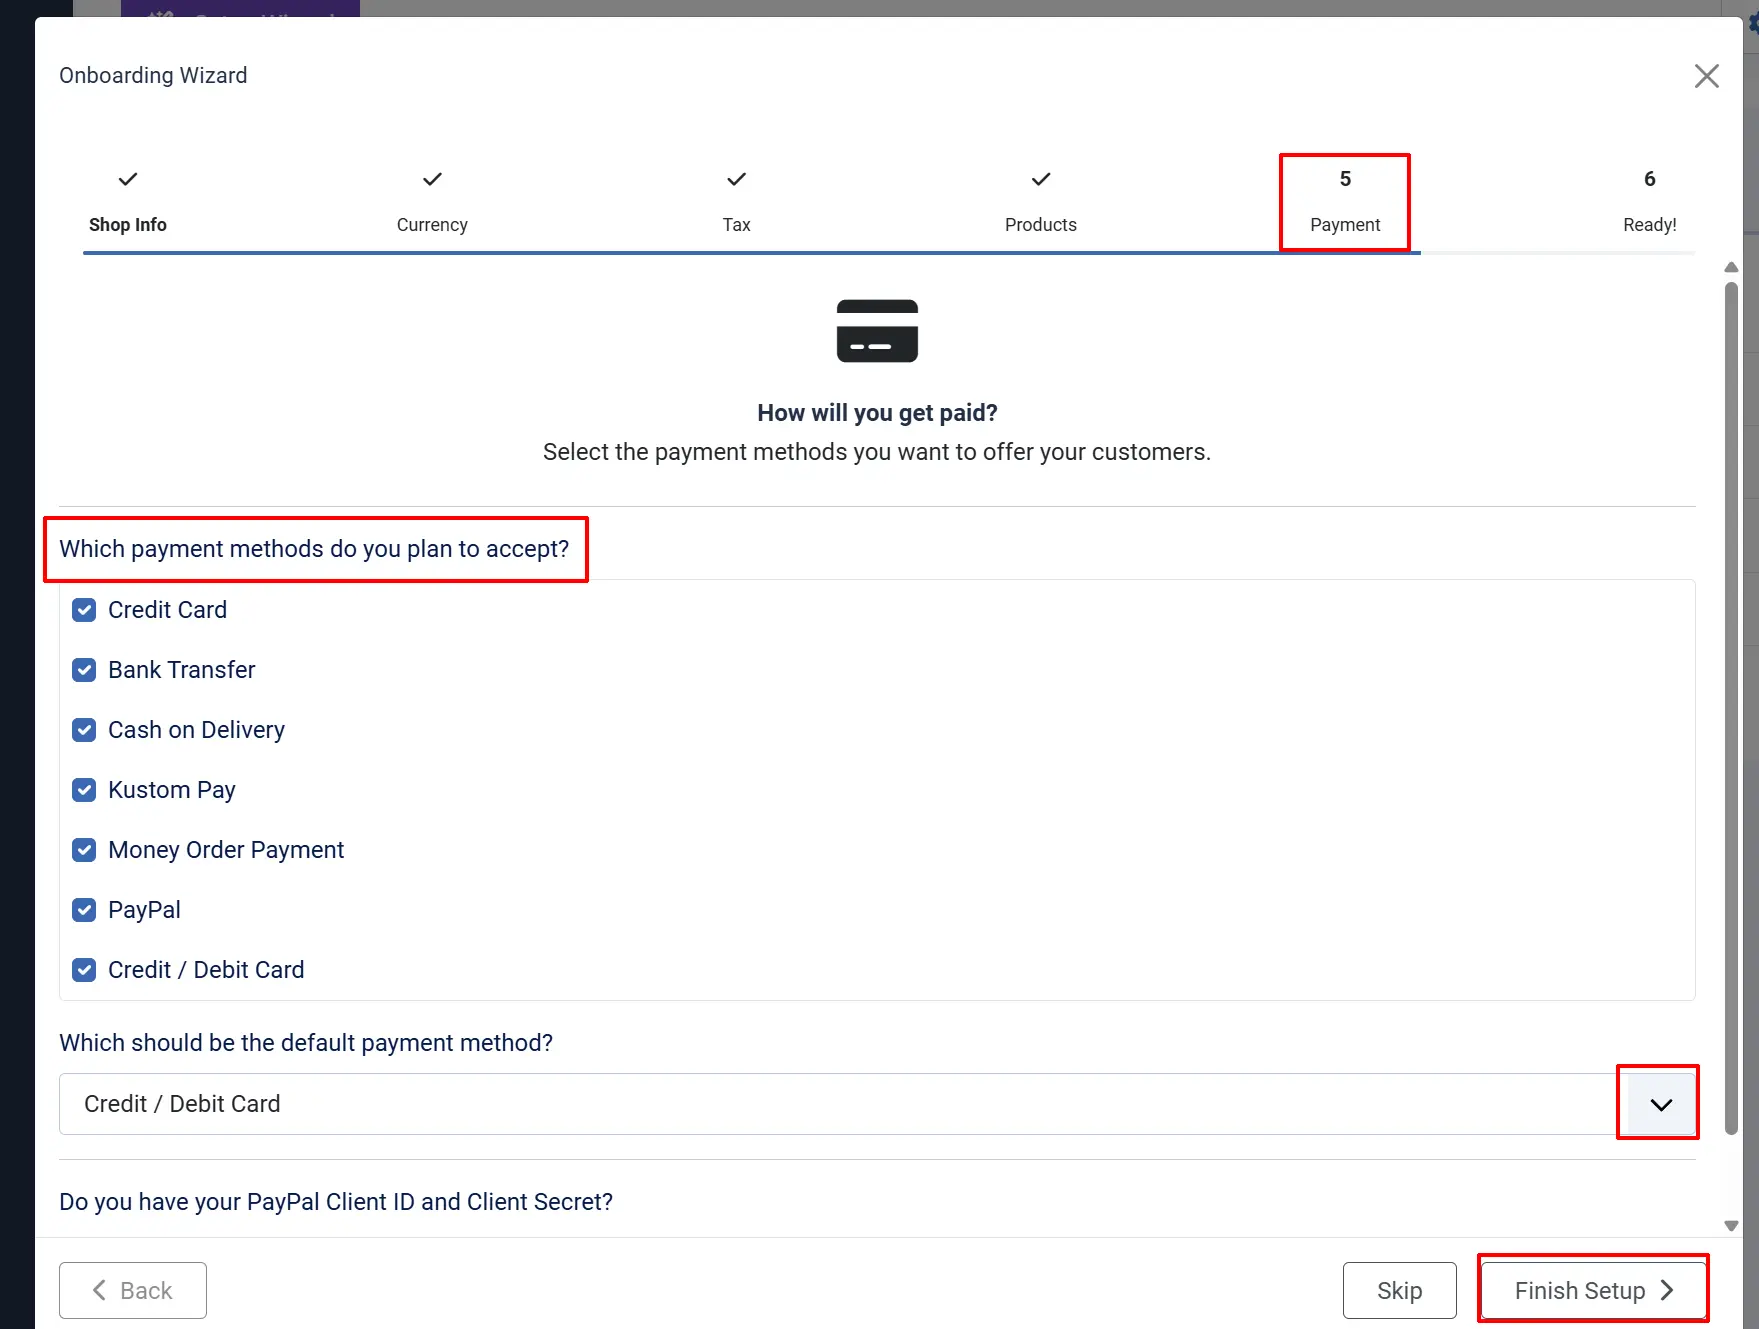
Fields:
| Field | Required | Description |
|---|---|---|
| Payment Plugins | No | List of installed plugins (checkboxes) |
| Enable Unpublished | No | Button to reveal and enable more plugins |
| Default Payment Method | No | Primary payment option |
| PayPal Configuration | Conditional | Shown when PayPal is selected |
PayPal Fields (when PayPal is selected):
| Field | Required | Description |
|---|---|---|
| Have Keys | Radio | Select if you have API credentials |
| Need Help | Radio | Link to PayPal documentation |
| Client ID | Conditional | PayPal app client ID |
| Client Secret | Conditional | PayPal app client secret |
What it does:
- Enables/disables selected payment plugins
- Saves PayPal API credentials if provided
- Sets the default payment method
Step 6: Ready!
Purpose: Review your settings and optionally load sample data.
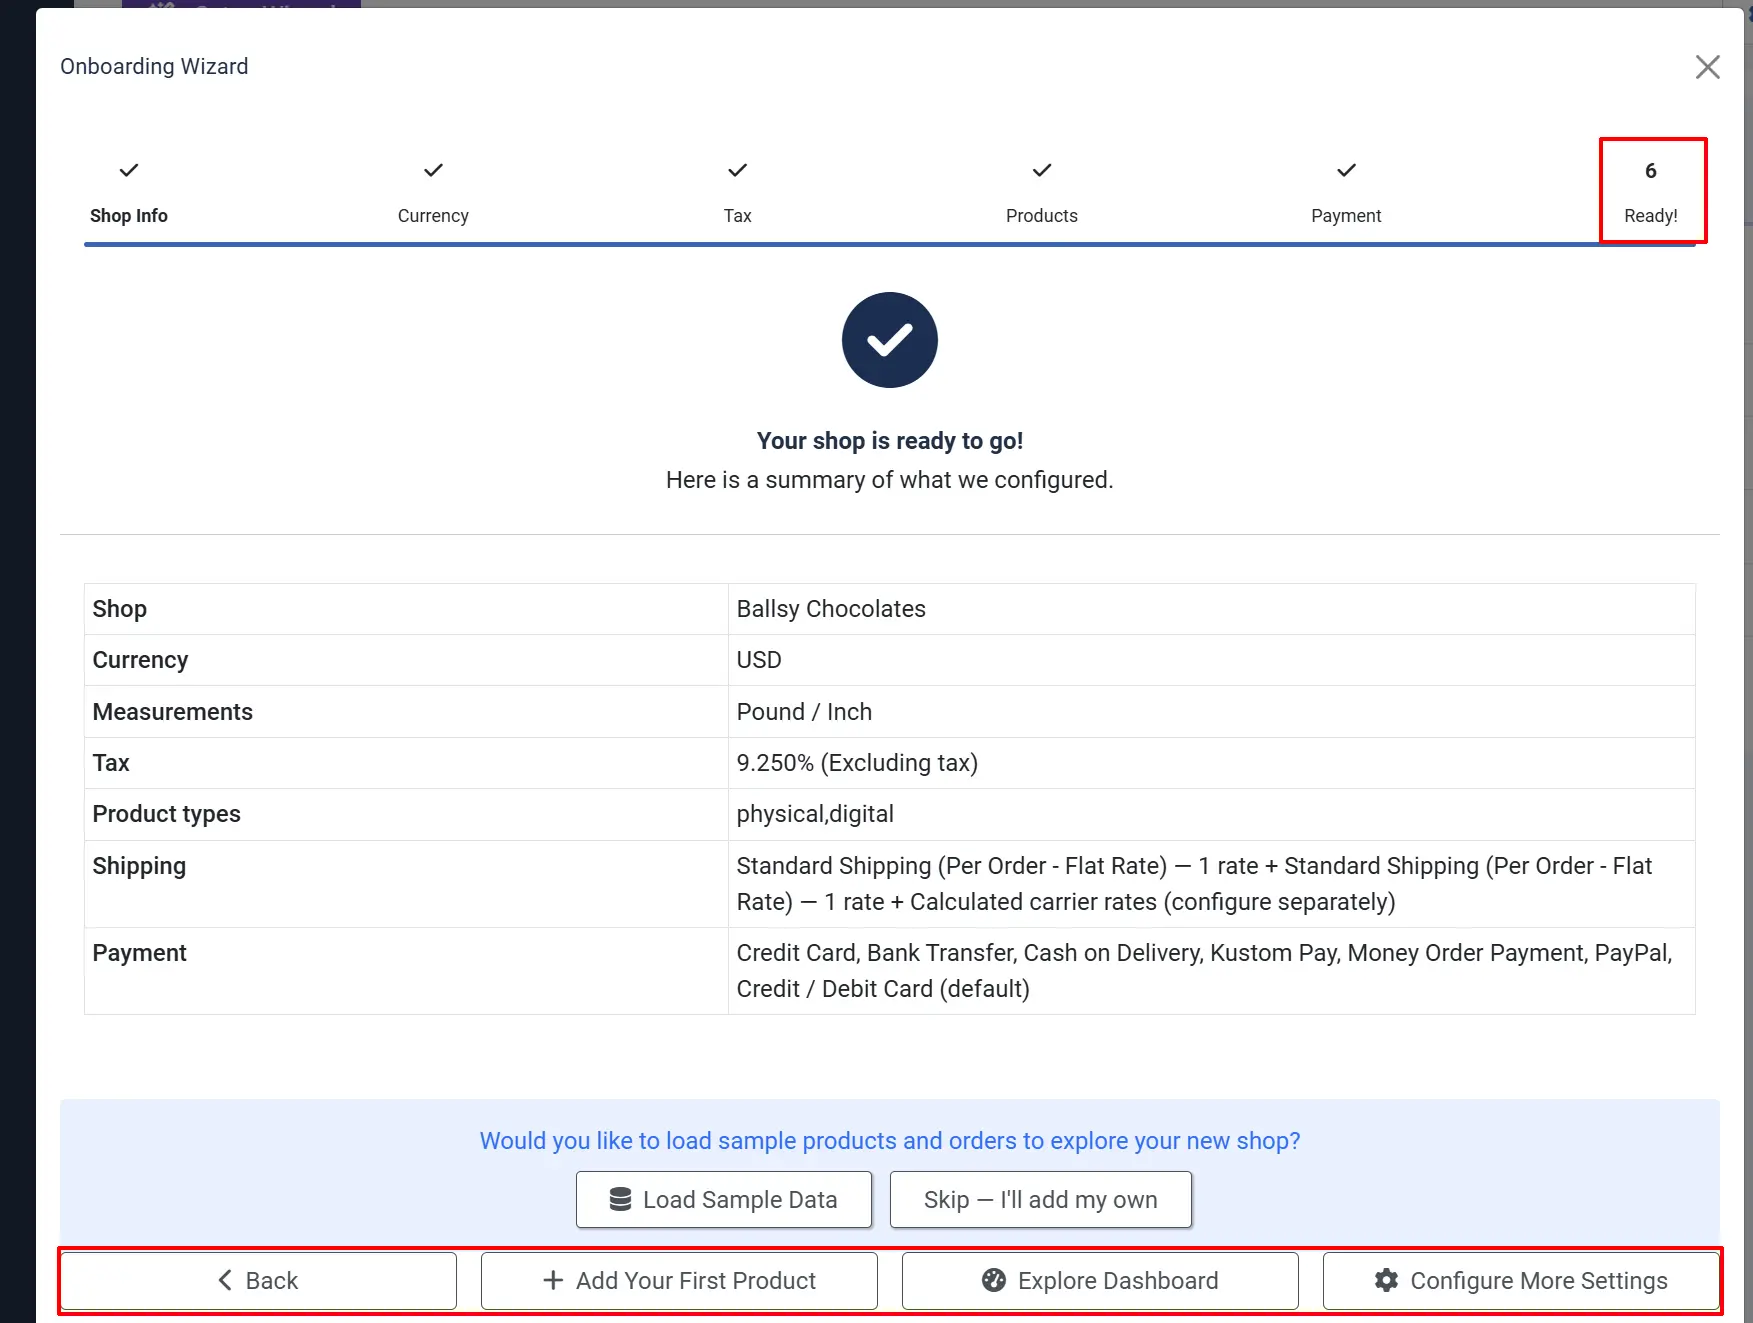
Summary Display: The wizard displays a summary of all configured settings:
- Store name and location
- Currency and measurement units
- Tax configuration
- Product types selected
- Shipping methods configured
- Payment methods enabled
Actions:

Load Sample Data: Creates demo products, customers, and orders for testing
Note: Load Sample Data will set up everything for you so you know what the whole process is supposed to look like. Remember, these are "fake" products and information; you should click the Remove Sample Data button before going live
Tip: Load Sample Data will NOT appear if you already have products set up. It only appears for new stores
Add Your First Product: Opens the product creation form
Explore Dashboard: Closes the wizard and opens the Dashboard
Configure More Settings: Opens the component configuration
What it does:
- Sets
onboarding_complete = 1 - Marks setup as finished
- Optionally creates sample data via the
j2c_load_sample_dataMCP function
Progress and Resume
The wizard saves progress as you complete each step. If you close and return:
- You resume from your last incomplete step
- Completed steps show checkmarks in the stepper
- Step progress saved in
onboarding_last_stepconfig
Re-Running the Wizard
When to Re-Run
Consider re-running the wizard when:
- Starting a new store from scratch
- Testing different configurations
- Wanting to reset all store settings
How to Re-Run
- Go to Components -> J2Commerce -> Dashboard
- Click the Setup Wizard in the toolbar
- Click the Run Onboarding Wizard link
- Confirm the action
Or navigate directly:
index.php?option=com_j2commerce&view=dashboard&rerun_onboarding=1
Stored Configuration
All wizard settings are saved to component params (#__extensions table) as JSON:
| Key | Description |
|---|---|
store_name | Store display name |
store_address_* | Store address fields |
country_id, zone_id | Store location |
admin_email | Notification email |
config_weight_class_id | Default weight unit |
config_length_class_id | Default length unit |
config_currency | Default currency code |
config_currency_auto | Auto-update setting |
config_including_tax | Tax inclusion setting |
require_shipping | Shipping requirement |
onboarding_shipping_rate_type | Shipping calculation type |
onboarding_product_types | Selected product types |
default_payment_method | Default payment plugin |
onboarding_complete | Wizard completion flag |
onboarding_last_step | Last completed step number |
Settings vs Wizard
The Setup Wizard configures basic settings to get you started. For full control, use:
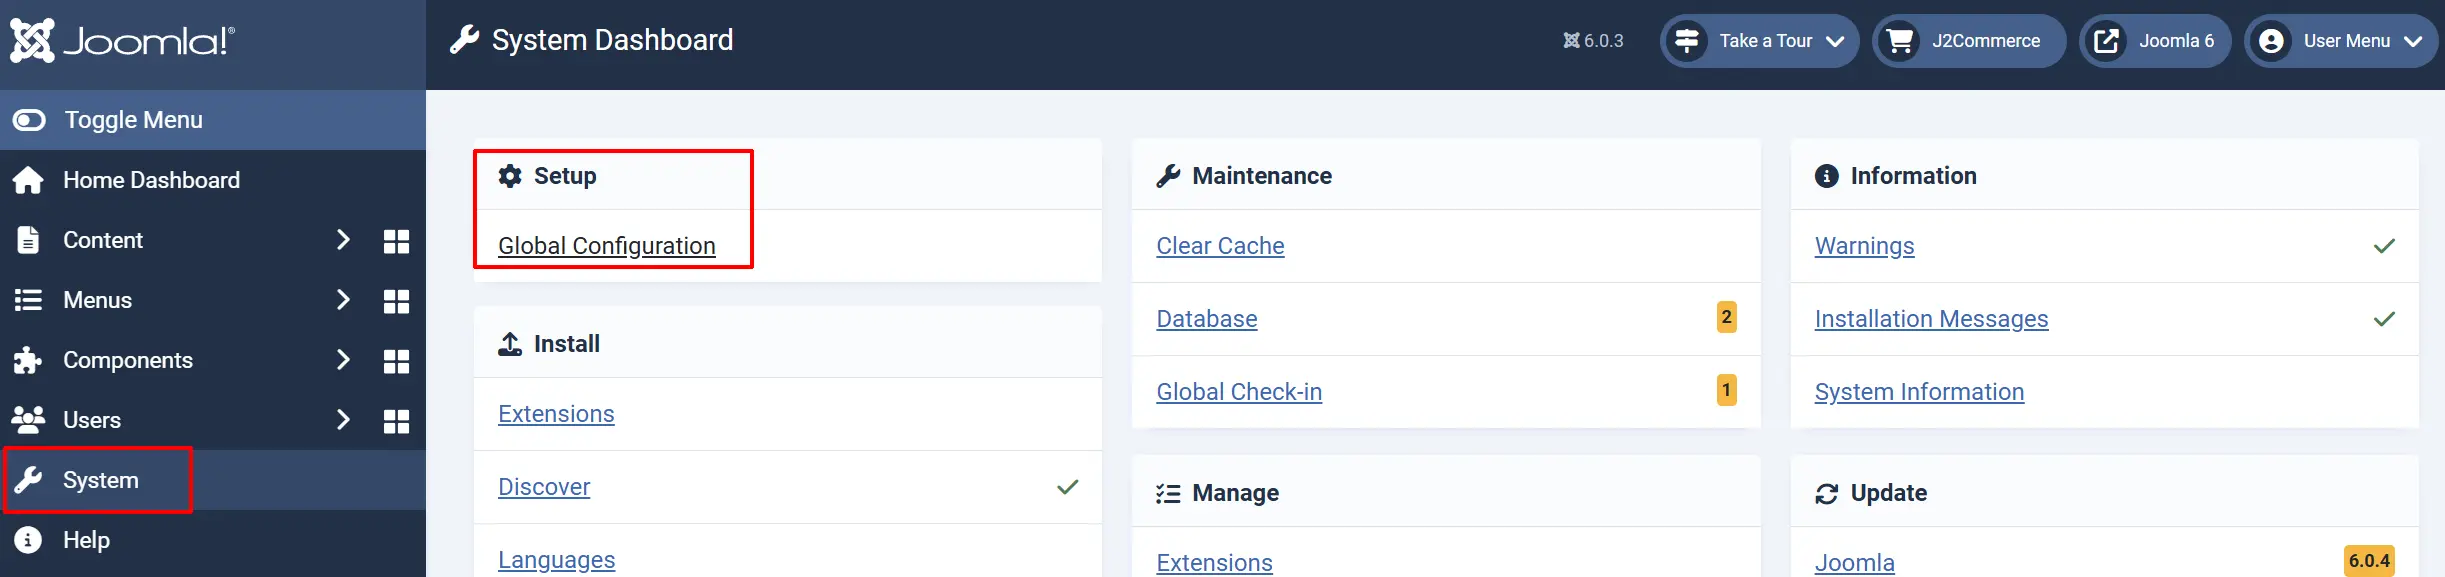
- Settings -> Global Configuration (gear icon): Component-wide settings
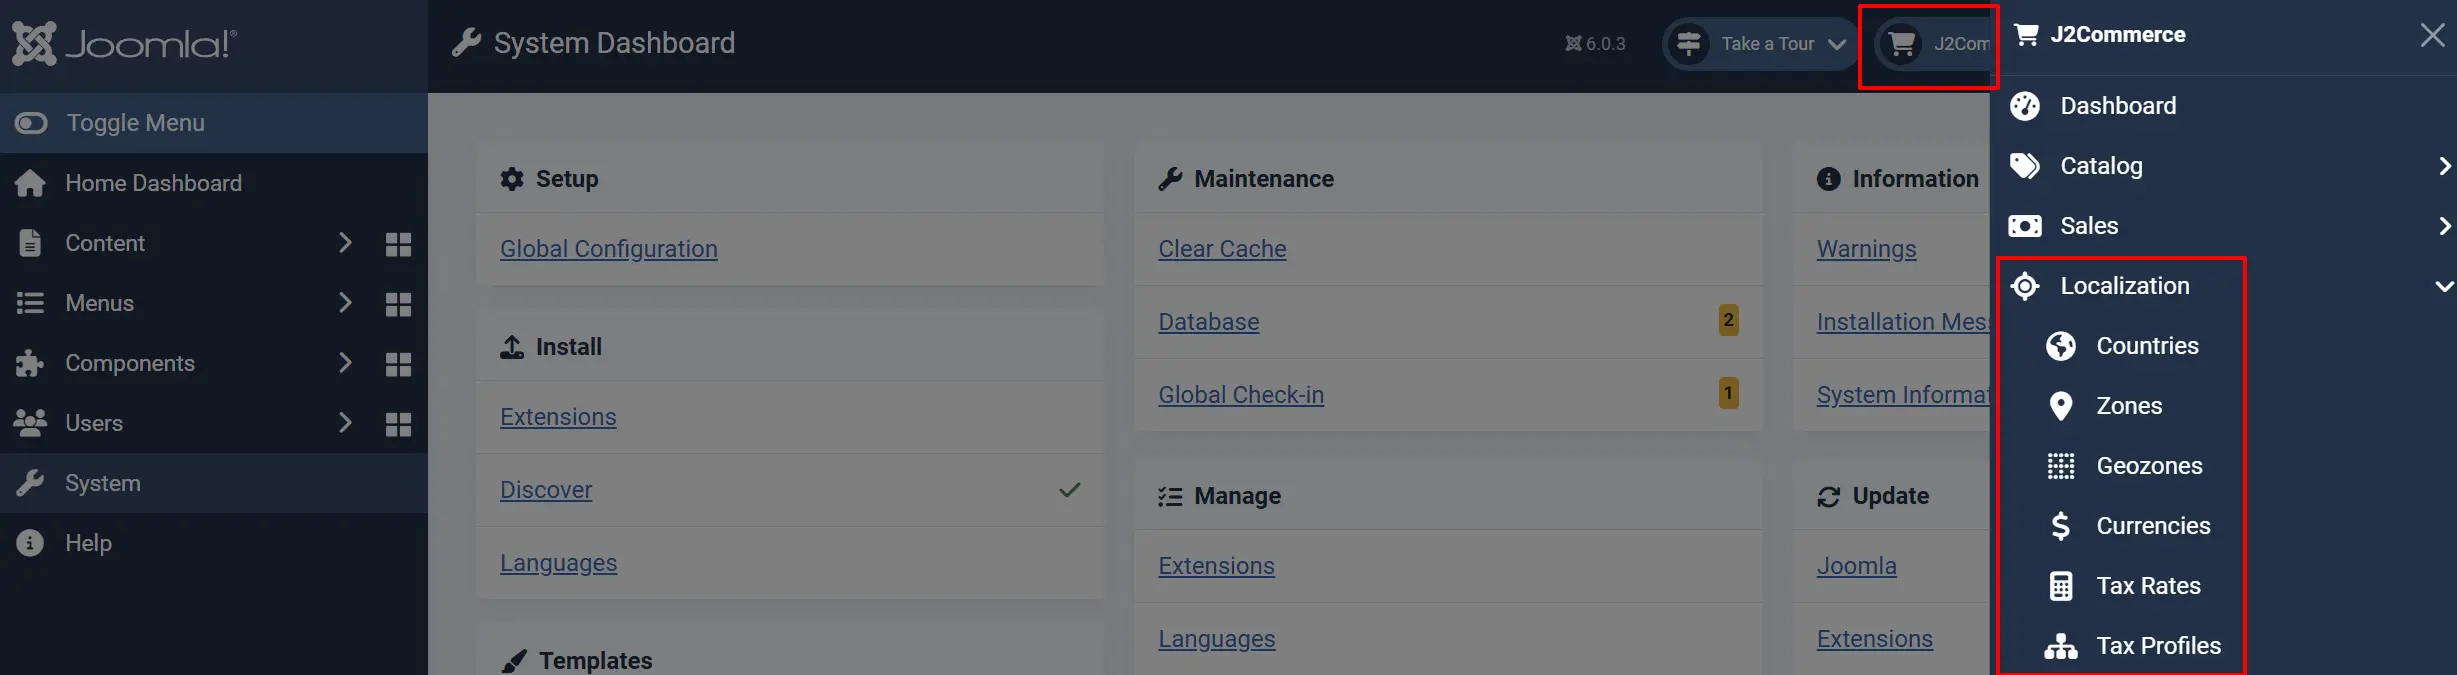
- J2Commerce -> Localization -> Tax Profiles: Advanced tax rules
- J2Commerce -> Localization -> Geozones: Shipping zone management
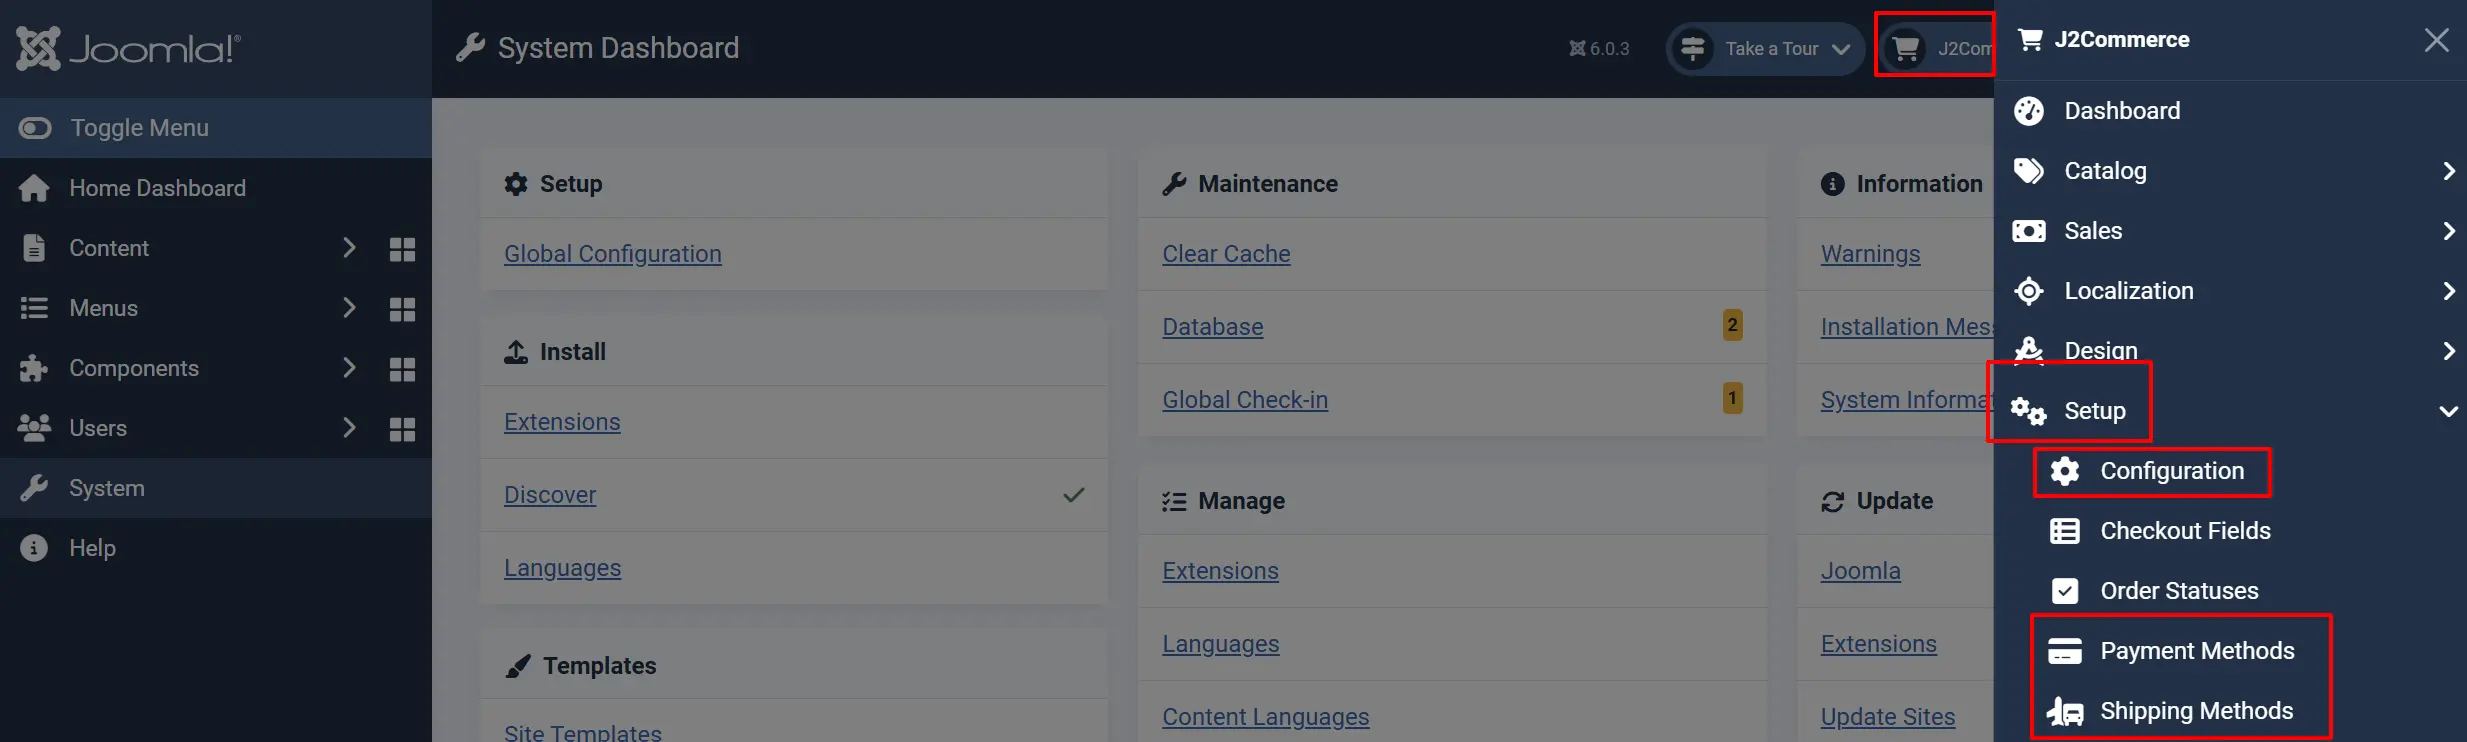
- J2Commerce -> Setup -> Configuration: Detailed store settings
- J2Commerce -> Setup -> Payment Methods: Detailed payment gateway settings
- J2Commerce -> Setup -> Shipping Method: Additional shipping methods and rates
The wizard is designed for initial setup; the settings pages handle ongoing configuration.
What's Next?
- Dashboard: Monitor your configured store
- Store Setup: Access all store settings
- Product Types: Start adding products
- Custom Fields: Configure checkout fields