Vendors
Vendors in J2Commerce represent the suppliers or companies whose products you sell in your store. You can create a vendor profile for each supplier, link it to a Joomla user account, and then assign products to that vendor. This makes it easy to filter and organize your catalog by supplier.
Accessing Vendors
There are two ways you can access Vendors.
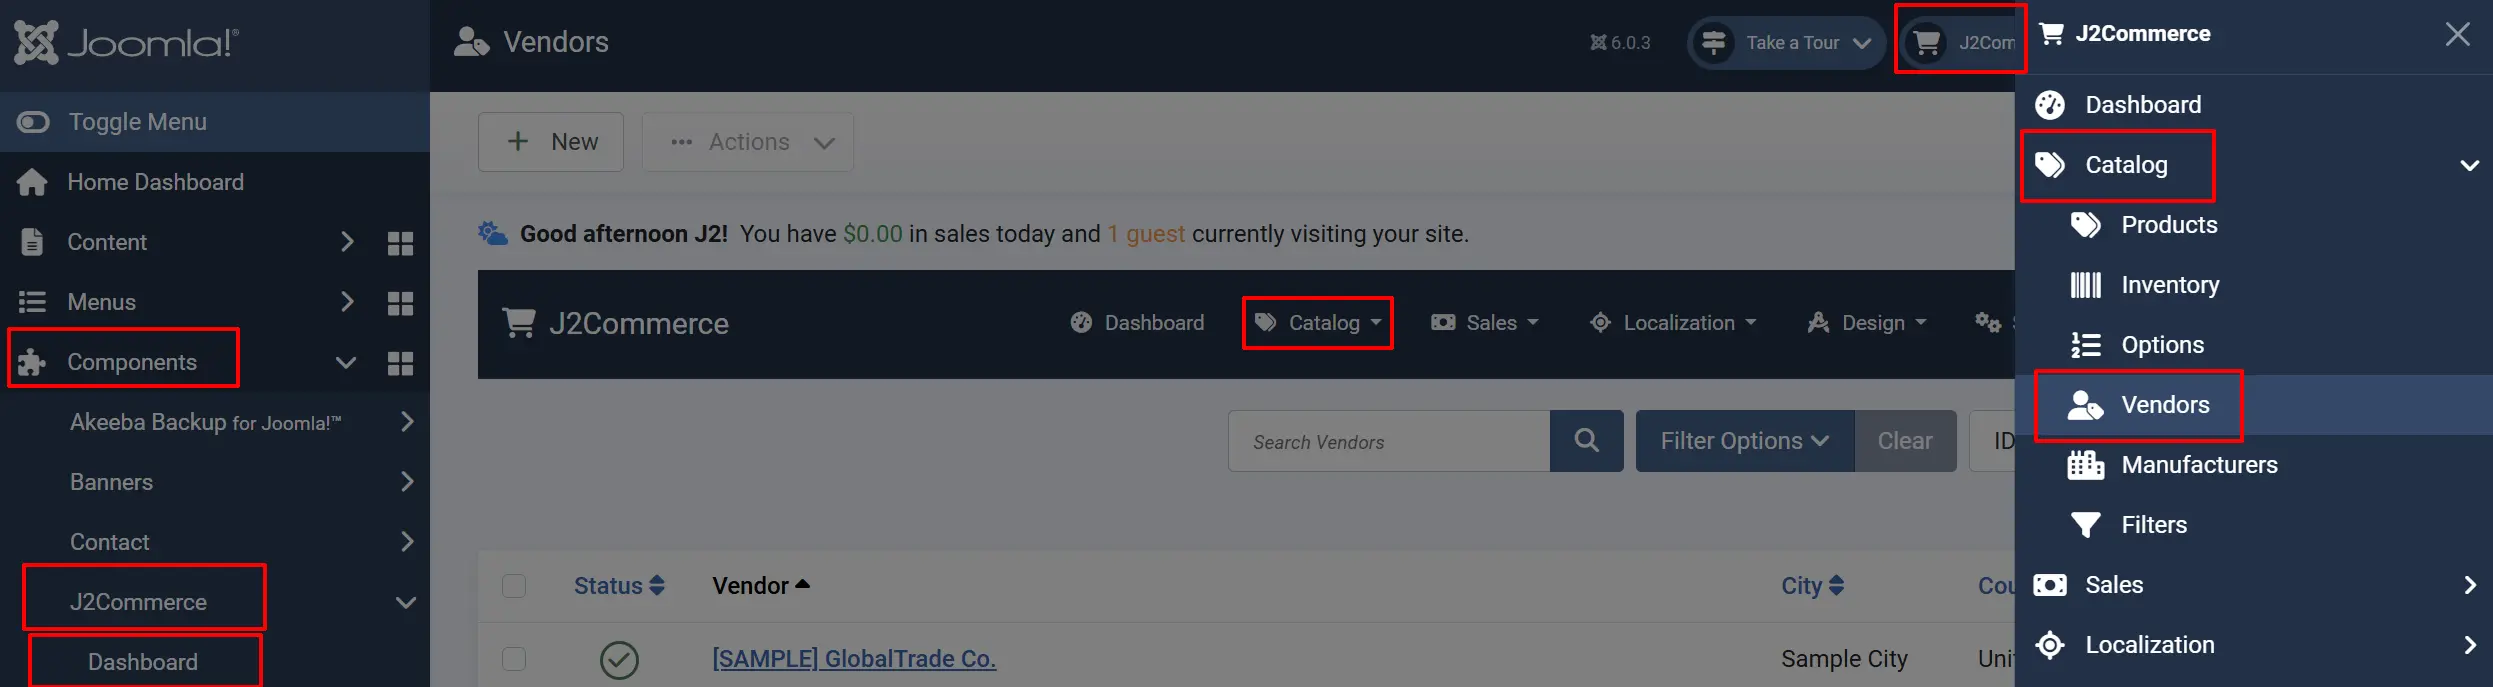
Option A: Go to the J2Commerce icon at the top right corner -> Catalog -> Vendors
Option B: Go to Components on the left sidebar -> J2Commerce -> Dashboard -> Catalog -> Vendors
Select New to create a new Vendor.
Understanding the Vendors List
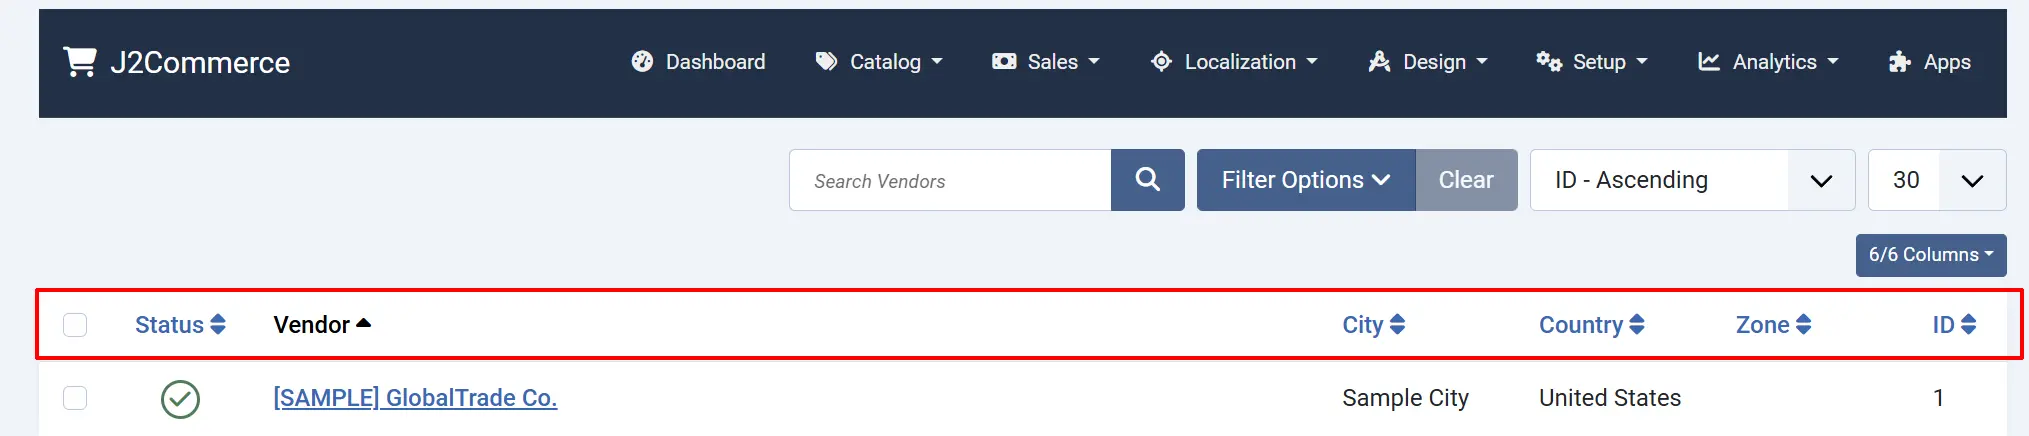
Each row in the list represents one vendor.
Status: Whether the vendor is published (green) or unpublished (red). Click to toggle.
Vendor: The company or brand name. Click to open and edit.
City: The vendor's city from their address record.
Country: The vendor's country.
Zone / State: The vendor's state or province.
ID: The internal vendor ID number.
Toolbar Actions

New: Opens the form to create a new vendor.
Actions: Only activates as a dropdown when at least one vendor is selected
-
Publish: Publishes the selected vendor.
-
Unpublish: Unpublishes the selected vendor.
-
Trash: Moves the selected vendor to the trash.
Options: Opens the global J2Commerce configuration settings.
Help: Opens the J2Commerce documentation.
Searching and Filtering
Type in the search bar to find vendors by username, company name, or city.
To search by an exact vendor ID, type id: followed by the number (e.g., id:5).
Click Search Tools to show additional filters:

Select Status: Show only Published, Unpublished, or Trashed vendor.
Select Country: Show only vendors from a specific country.
Creating a Vendor
- Click New in the toolbar.
- Fill in the vendor details (see field descriptions below).
- Click Save & Close to save and return to the list, or Save to stay on the form.
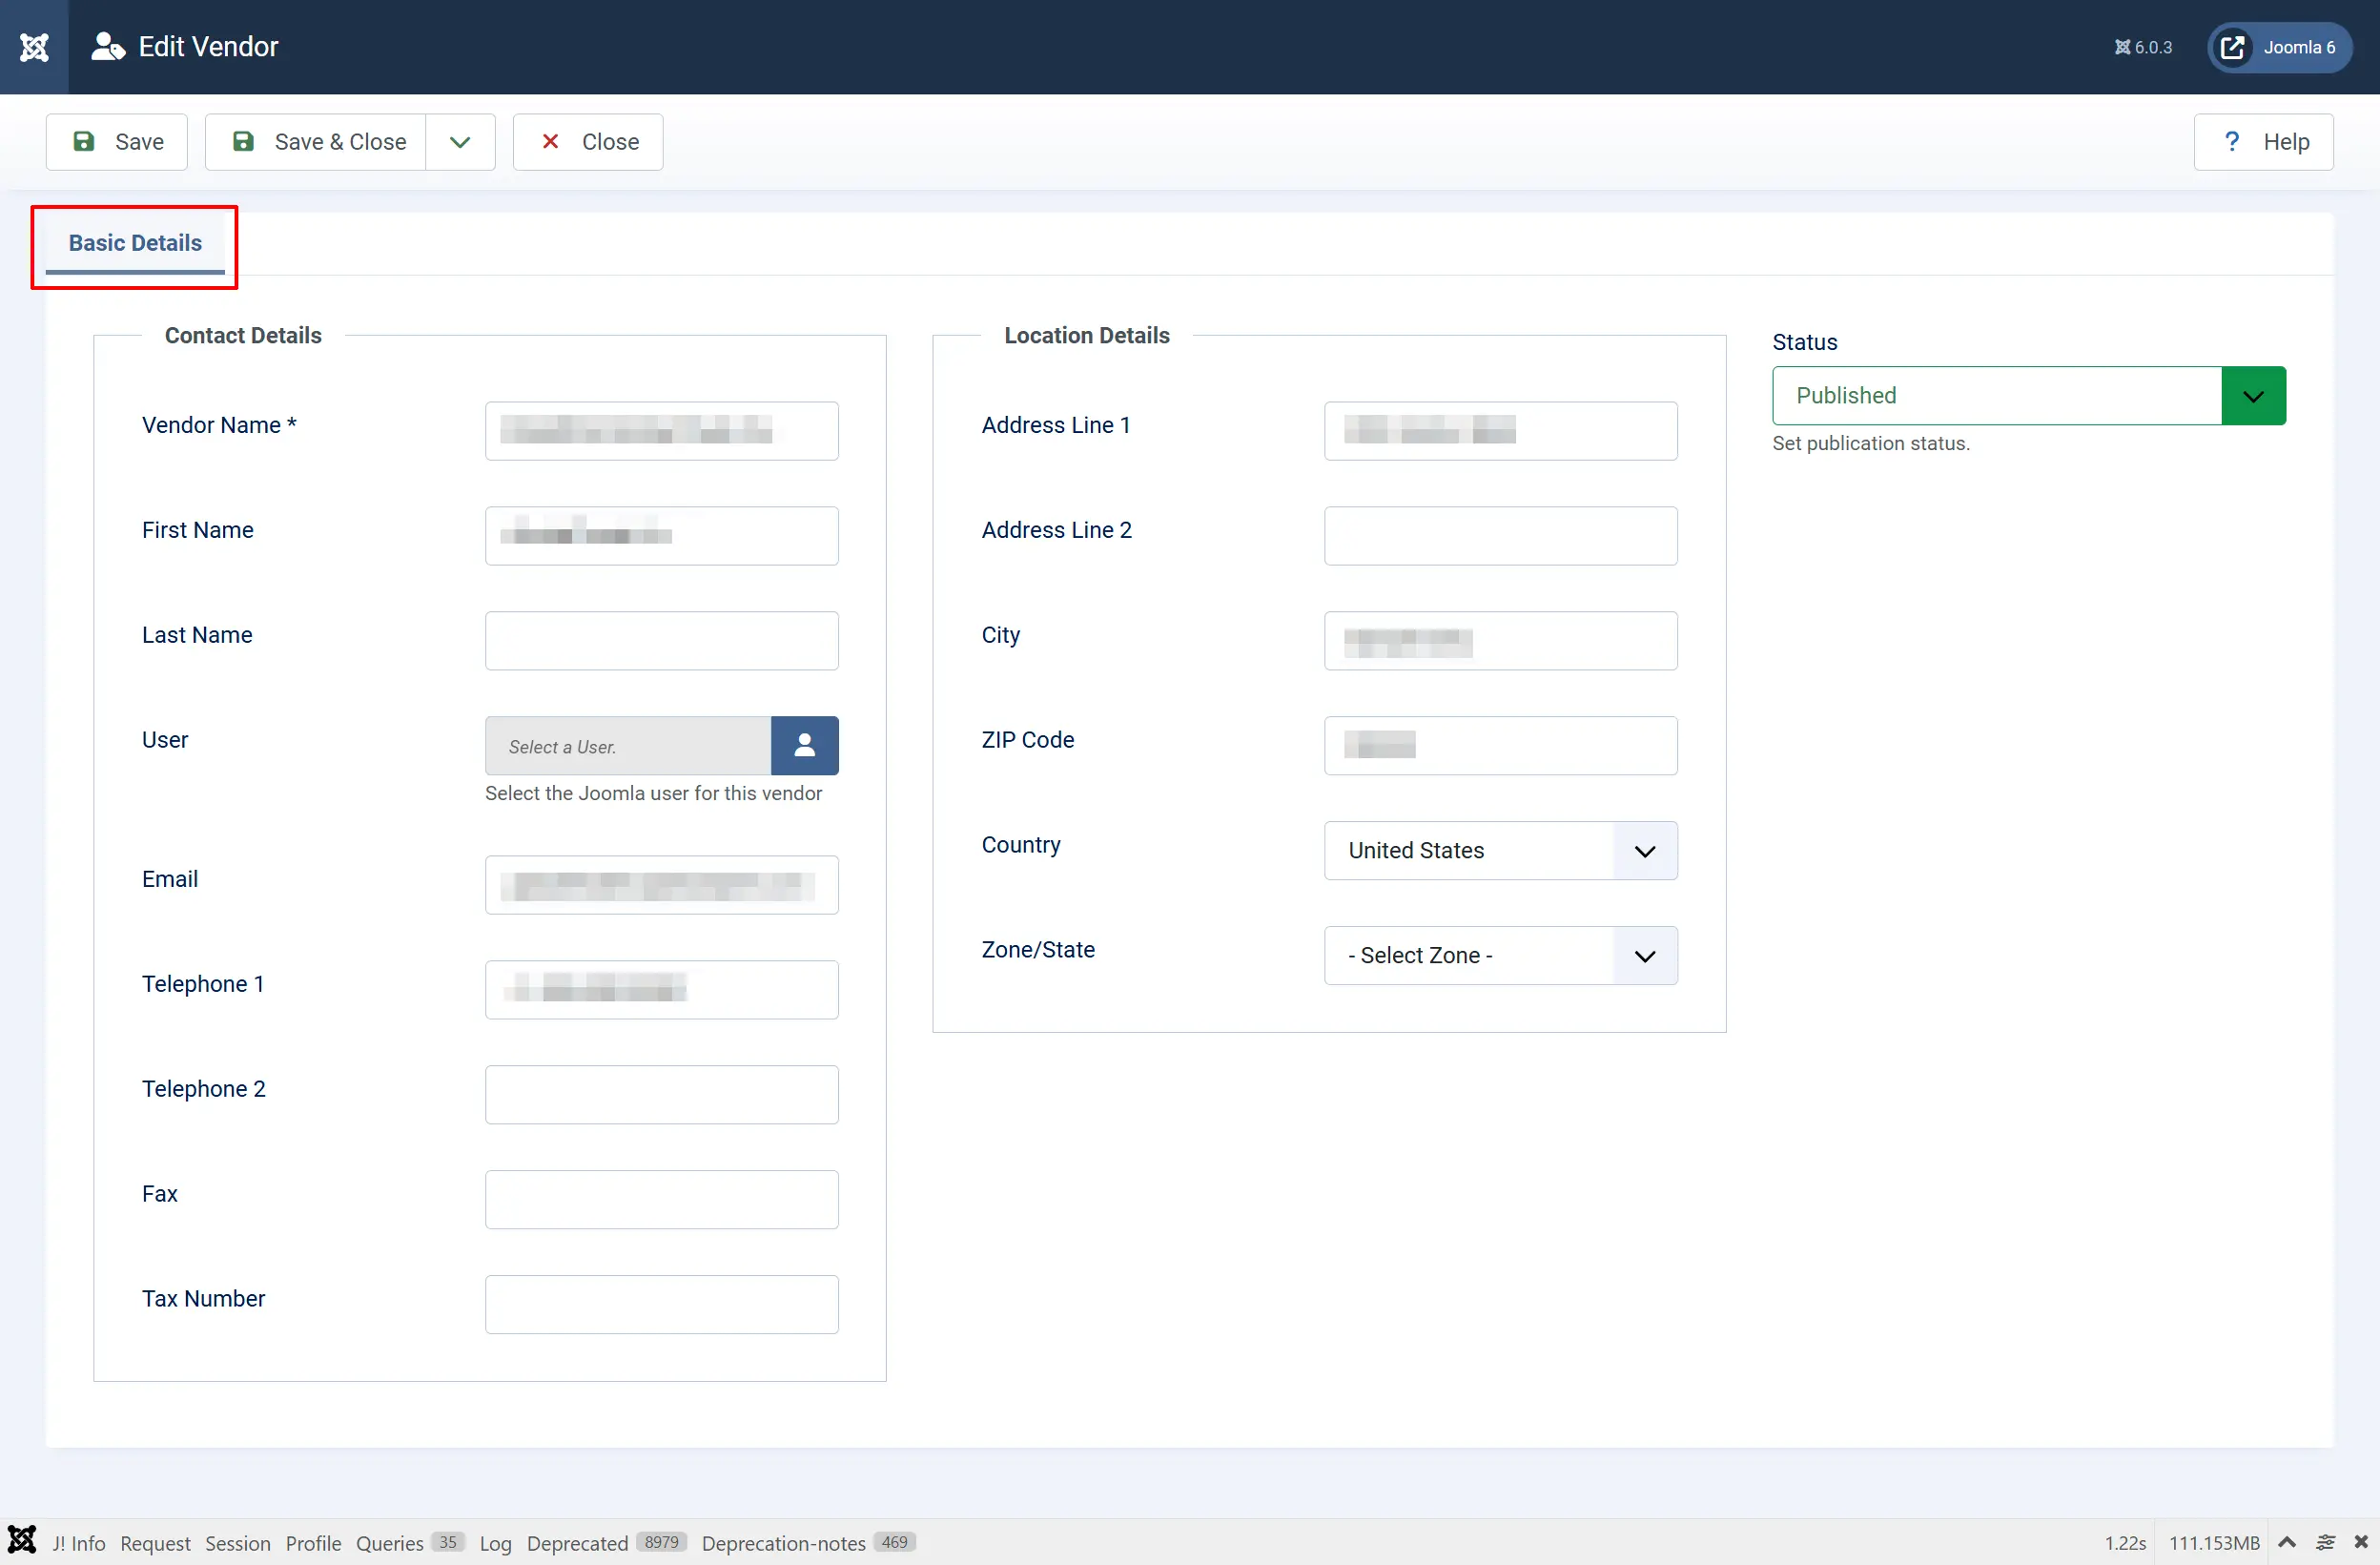
Contact Information
Vendor Name: The brand or company name. This is the only required field and is what appears in product dropdowns and storefront filters.
First Name: Contact person's first name (optional).
Last Name: Contact person's last name (optional).
Joomla User: The Joomla user account linked to this vendor. Required — select from your existing Joomla users.
Email: Contact email address (optional).
Phone: Primary phone number (optional).
Phone 2: Secondary phone number (optional).
Fax: Fax number (optional).
Tax Number / VAT ID: The manufacturer's tax or VAT registration number (optional).
Address
Address Line 1: Street address.
Address Line 2: Apartment, suite, or unit number.
City: City name.
ZIP / Postal Code: ZIP or postal code.
Country: Select from the countries list. Selecting a country automatically loads the available states or provinces below.
Zone / State: State, province, or region — loaded automatically based on the selected country.
Status (sidebar)
Status: Set to Published to make the manufacturer active in product dropdowns and storefront filters, or Unpublished to hide it.
Only the Vendor Name and Joomla User fields are required. You can fill in the address details later if needed.
Publishing and Unpublishing Vendors

An unpublished vendor does not appear in product filter dropdowns on the storefront or in the admin product filter. Products assigned to an unpublished vendor are not affected — they remain visible in the catalog.
To toggle a single vendor: Click the status icon in the Status column.
To toggle multiple vendors: Check their boxes and click Publish or Unpublish in the toolbar.
Deleting Vendors
Vendors must be trashed before they can be permanently deleted.
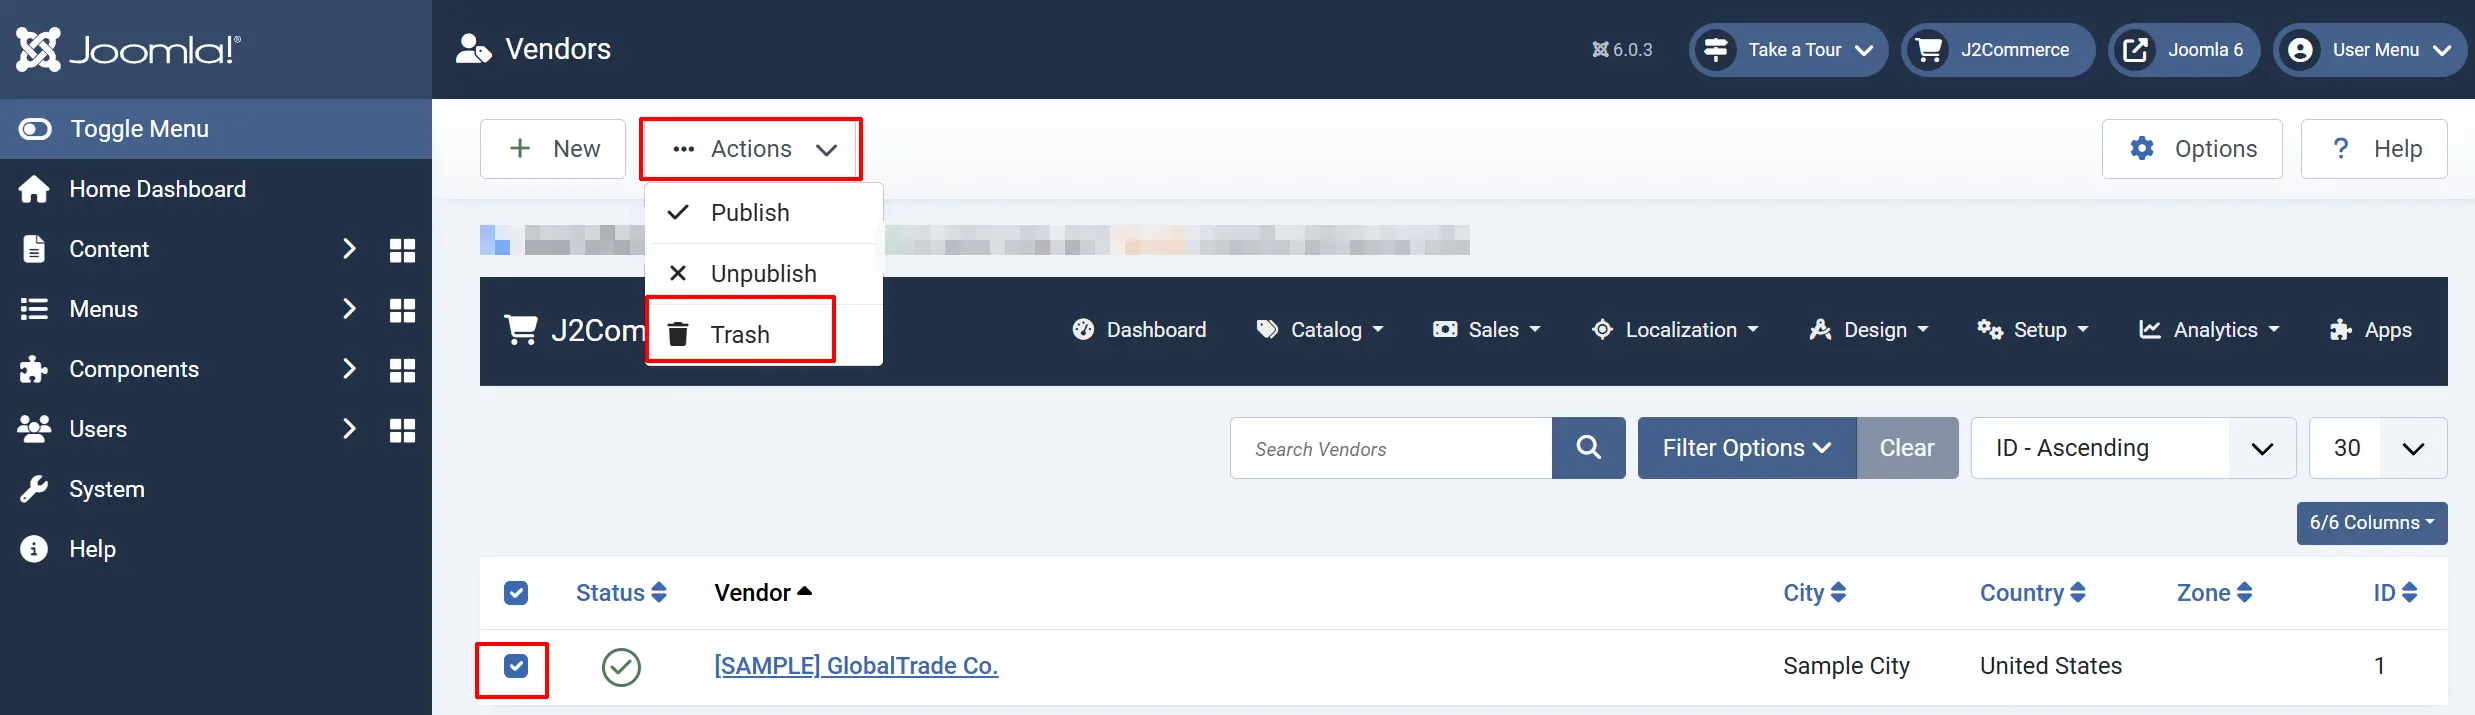
Step 1 — Trash the vendor:
- Check the box next to the vendor.
- Click Trash in the toolbar.
Step 2 — Permanently delete:
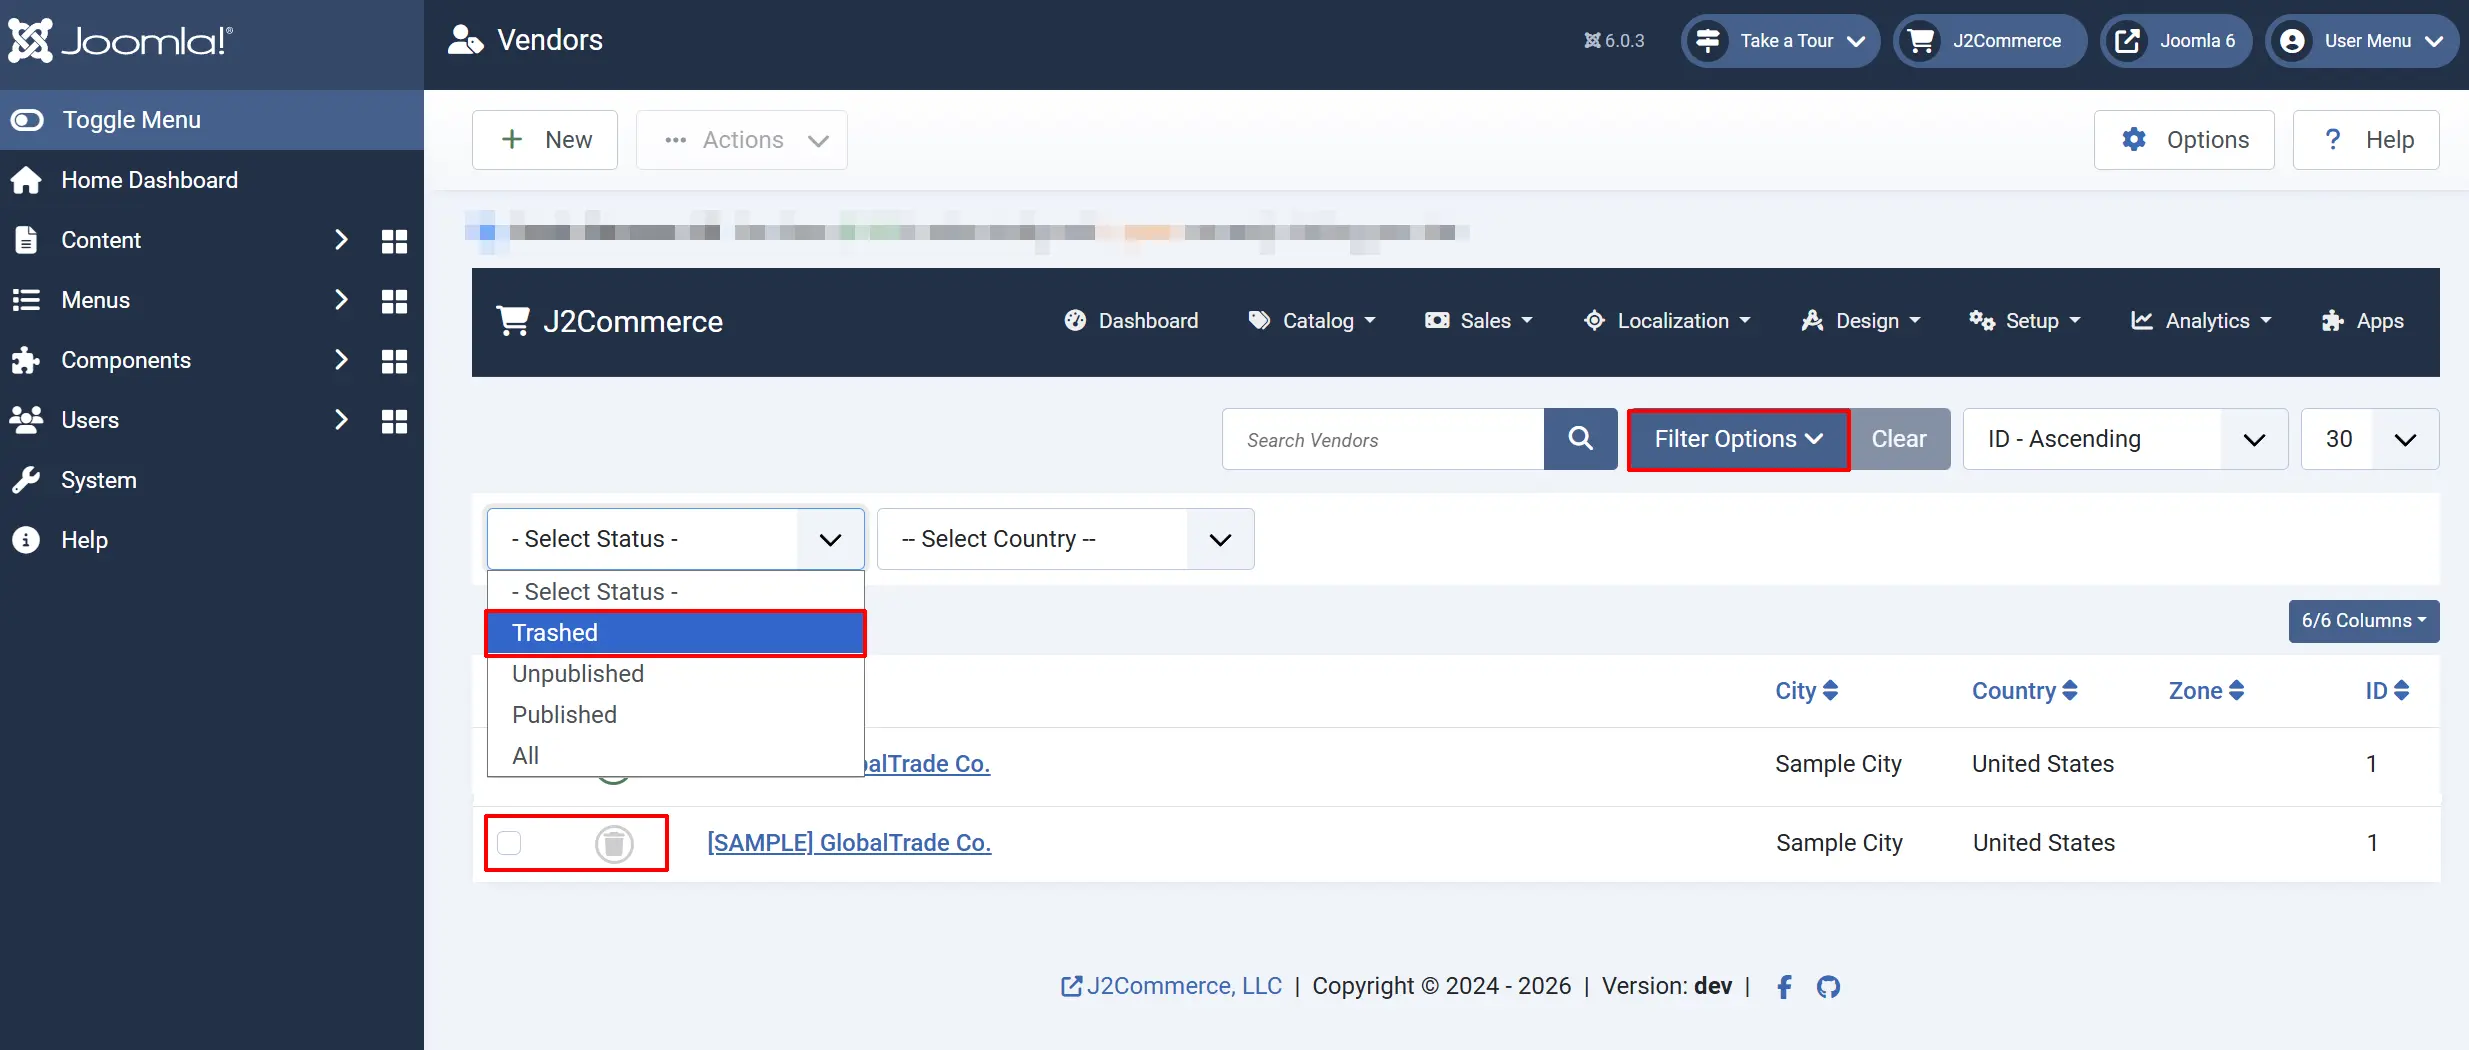
- Filter the list by Status: Trashed.
- Check the box next to the vendor.
- Click Delete in the toolbar.
- Confirm when prompted.
Deleting a vendor does not delete or unpublish any products assigned to it. Those products simply lose their vendor assignment.
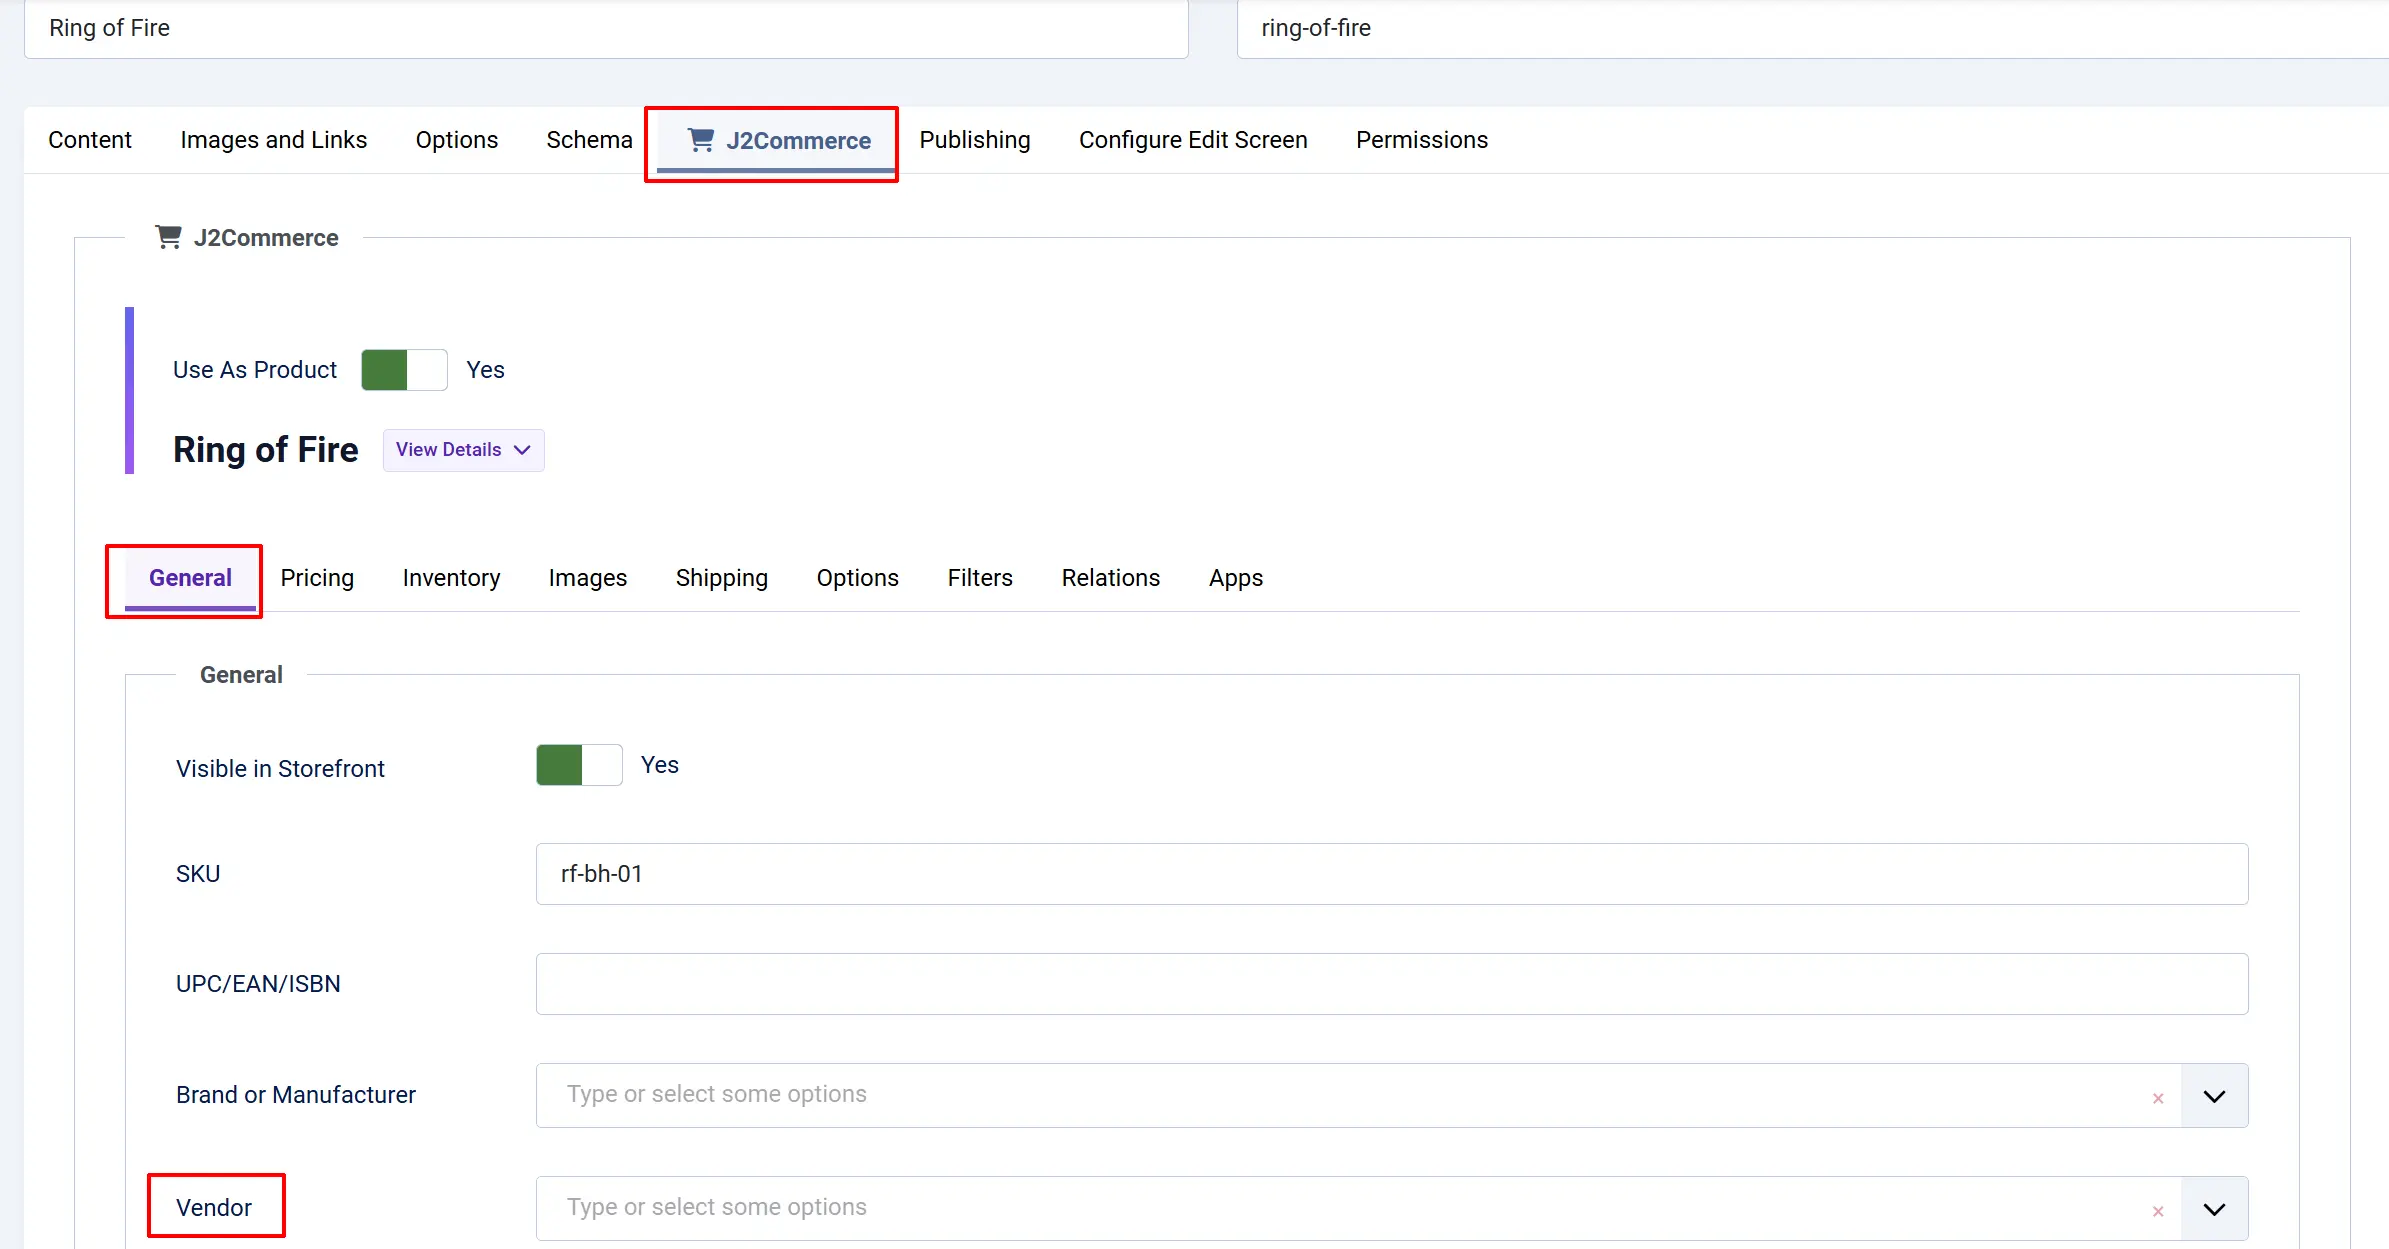
Assigning Vendors to Products
Once a vendor is created, you can assign it to products from the product edit screen.
- Go to J2Commerce -> Catalog -> Products.

-
Click a product name to open it.
-
Go to the J2Commerce tab -> General tab and find the Vendor field.
-
Select the vendor from the dropdown.
-
Click Save.
You can also filter the products list by vendor using the Vendor filter in Search Tools.
Tips
- The Vendor Name field is what appears in the product filter on your storefront. Use the supplier's full company name for clarity.
- Linking a vendor to a Joomla user is required, but the user does not need any special permissions. You can create a standard Registered user account for each vendor if you want them to log in.
- Use the Country filter in the vendors list to quickly view all vendors from a specific country — useful when managing international suppliers.
Troubleshooting
A vendor does not appear in the product Vendor filter
Cause: The vendor may be unpublished.
Solution:
Go to Vendors, find the vendor, and check the Status column. If the circle is red, click it to publish the vendor. Published vendors appear in all product filter dropdowns.
The Zone / State dropdown is empty after selecting a country
Cause: No zones have been configured for that country in J2Commerce.
Solution:
Go to J2Commerce -> Localization -> Zones and add the required zones for that country, then return to the vendor and select the zone.
I cannot save a vendor — it says a required field is missing
Cause: The Vendor Name or Joomla User field is empty.
Solution:
Both fields are required. Enter the company name in Vendor Name and select a user from the Joomla User field, then save again.