Creating Options
Who doesn’t prefer choices when they wish to buy their favorite chocolates? Obviously, your users would love it when the products have additional options. J2Commerce allows you to create options of various types.
Requirements
- with PHP 8.3.0 +
- Joomla! 6.x
- J2Commerce 6.x
For Instance
Let's suppose you are trying to sell a customizable box of chocolates. In the examples below, we will show what it looks like to add Options to different types of products. The end of this document will show what it looks like on the frontend for both a simple product with Options and a Flex Variant with Options.
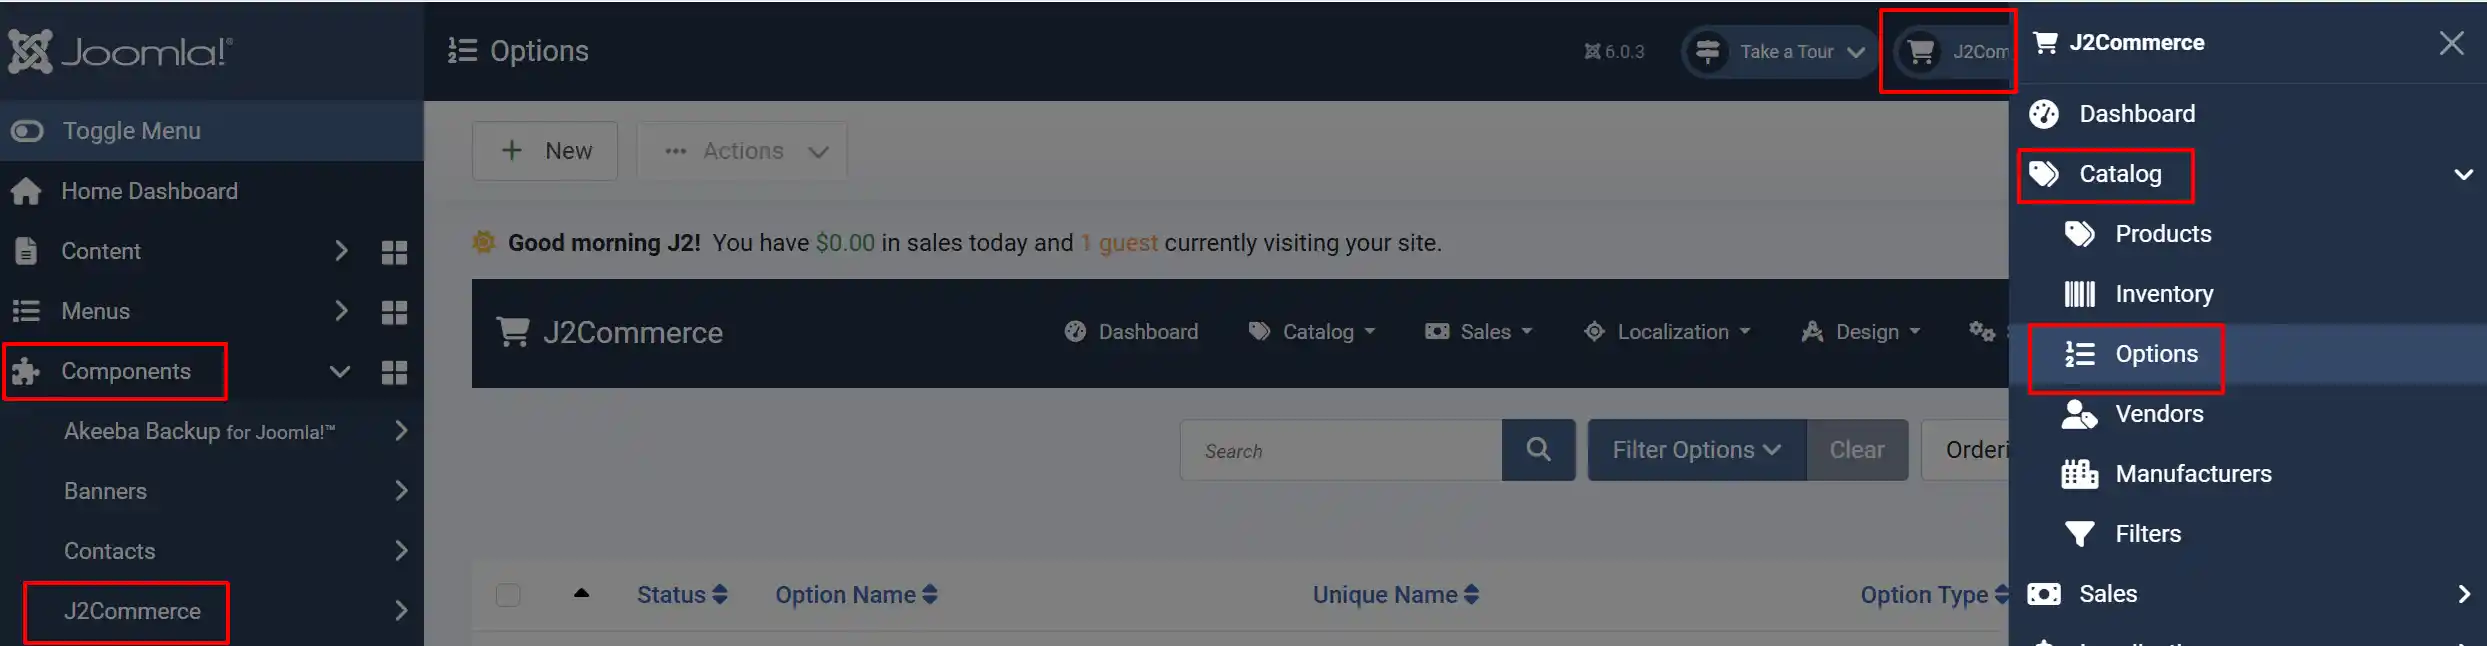
Locating Options
There are two ways you can access Options.
Option A: Go to the J2Commerce icon at the top right corner -> Catalog -> Options
Option B: Go to Components on the left sidebar -> J2Commerce -> Dashboard -> Catalog -> Options
Select New to create a new option
Select New to create a new option. (for example, Name: Size, Type: select).
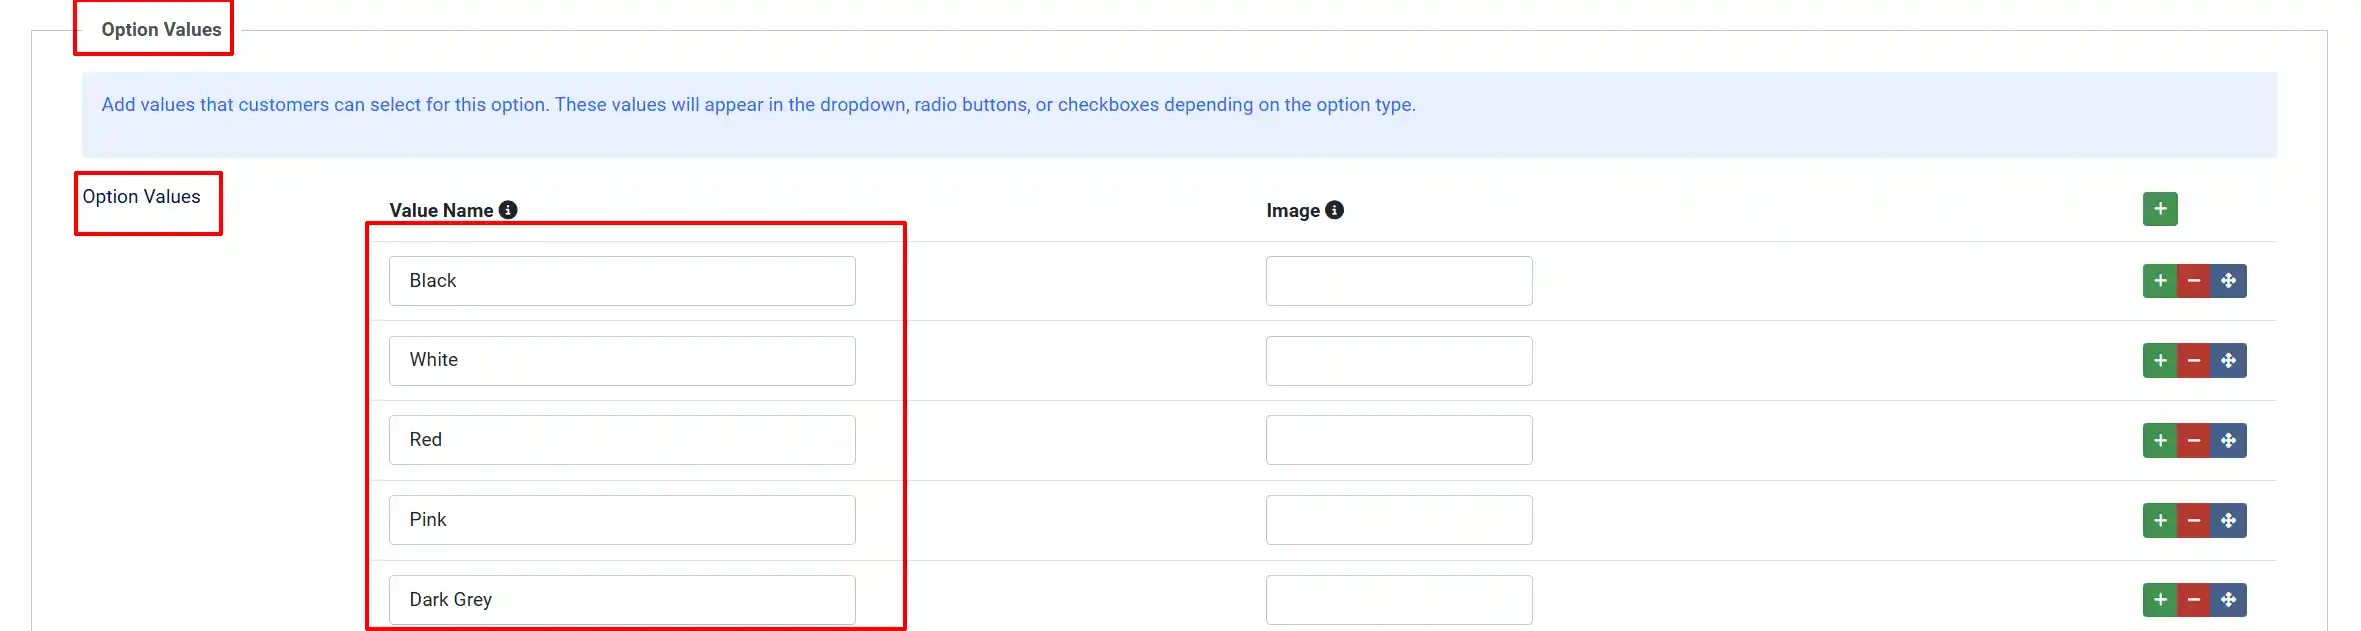
Add the option values (Small, Medium, Large) to the option
Repeat for each option you plan to use (e.g., create a separate "Color" option with values Red, Blue, Green).
You only need to do this once. The same options can be reused across many products.
Option Name: The label customers see on the product page, for example, "Size" or "Color".
Option Unique Name: An internal identifier (no spaces) used to distinguish options with the same display name.
Type: Controls the input style shown to customers. See the table below for all types.
Option Types
Select: A dropdown menu
Radio: Clickable button group
Checkbox: Multiple-choice checkboxes
Color: Color swatch buttons
Text: A single-line text input
Textarea: A multi-line text input
Date / Datetime / Time: A date or time picker
Number: A numeric input field
File / Image: A file upload input
Email / URL: A formatted text input
IMPORTANT: For Select, Radio, Checkbox, and Color option types, add your option values in the Option Values section that appears below the type field. Each value needs a name, and optionally an image.
Setting up the Options
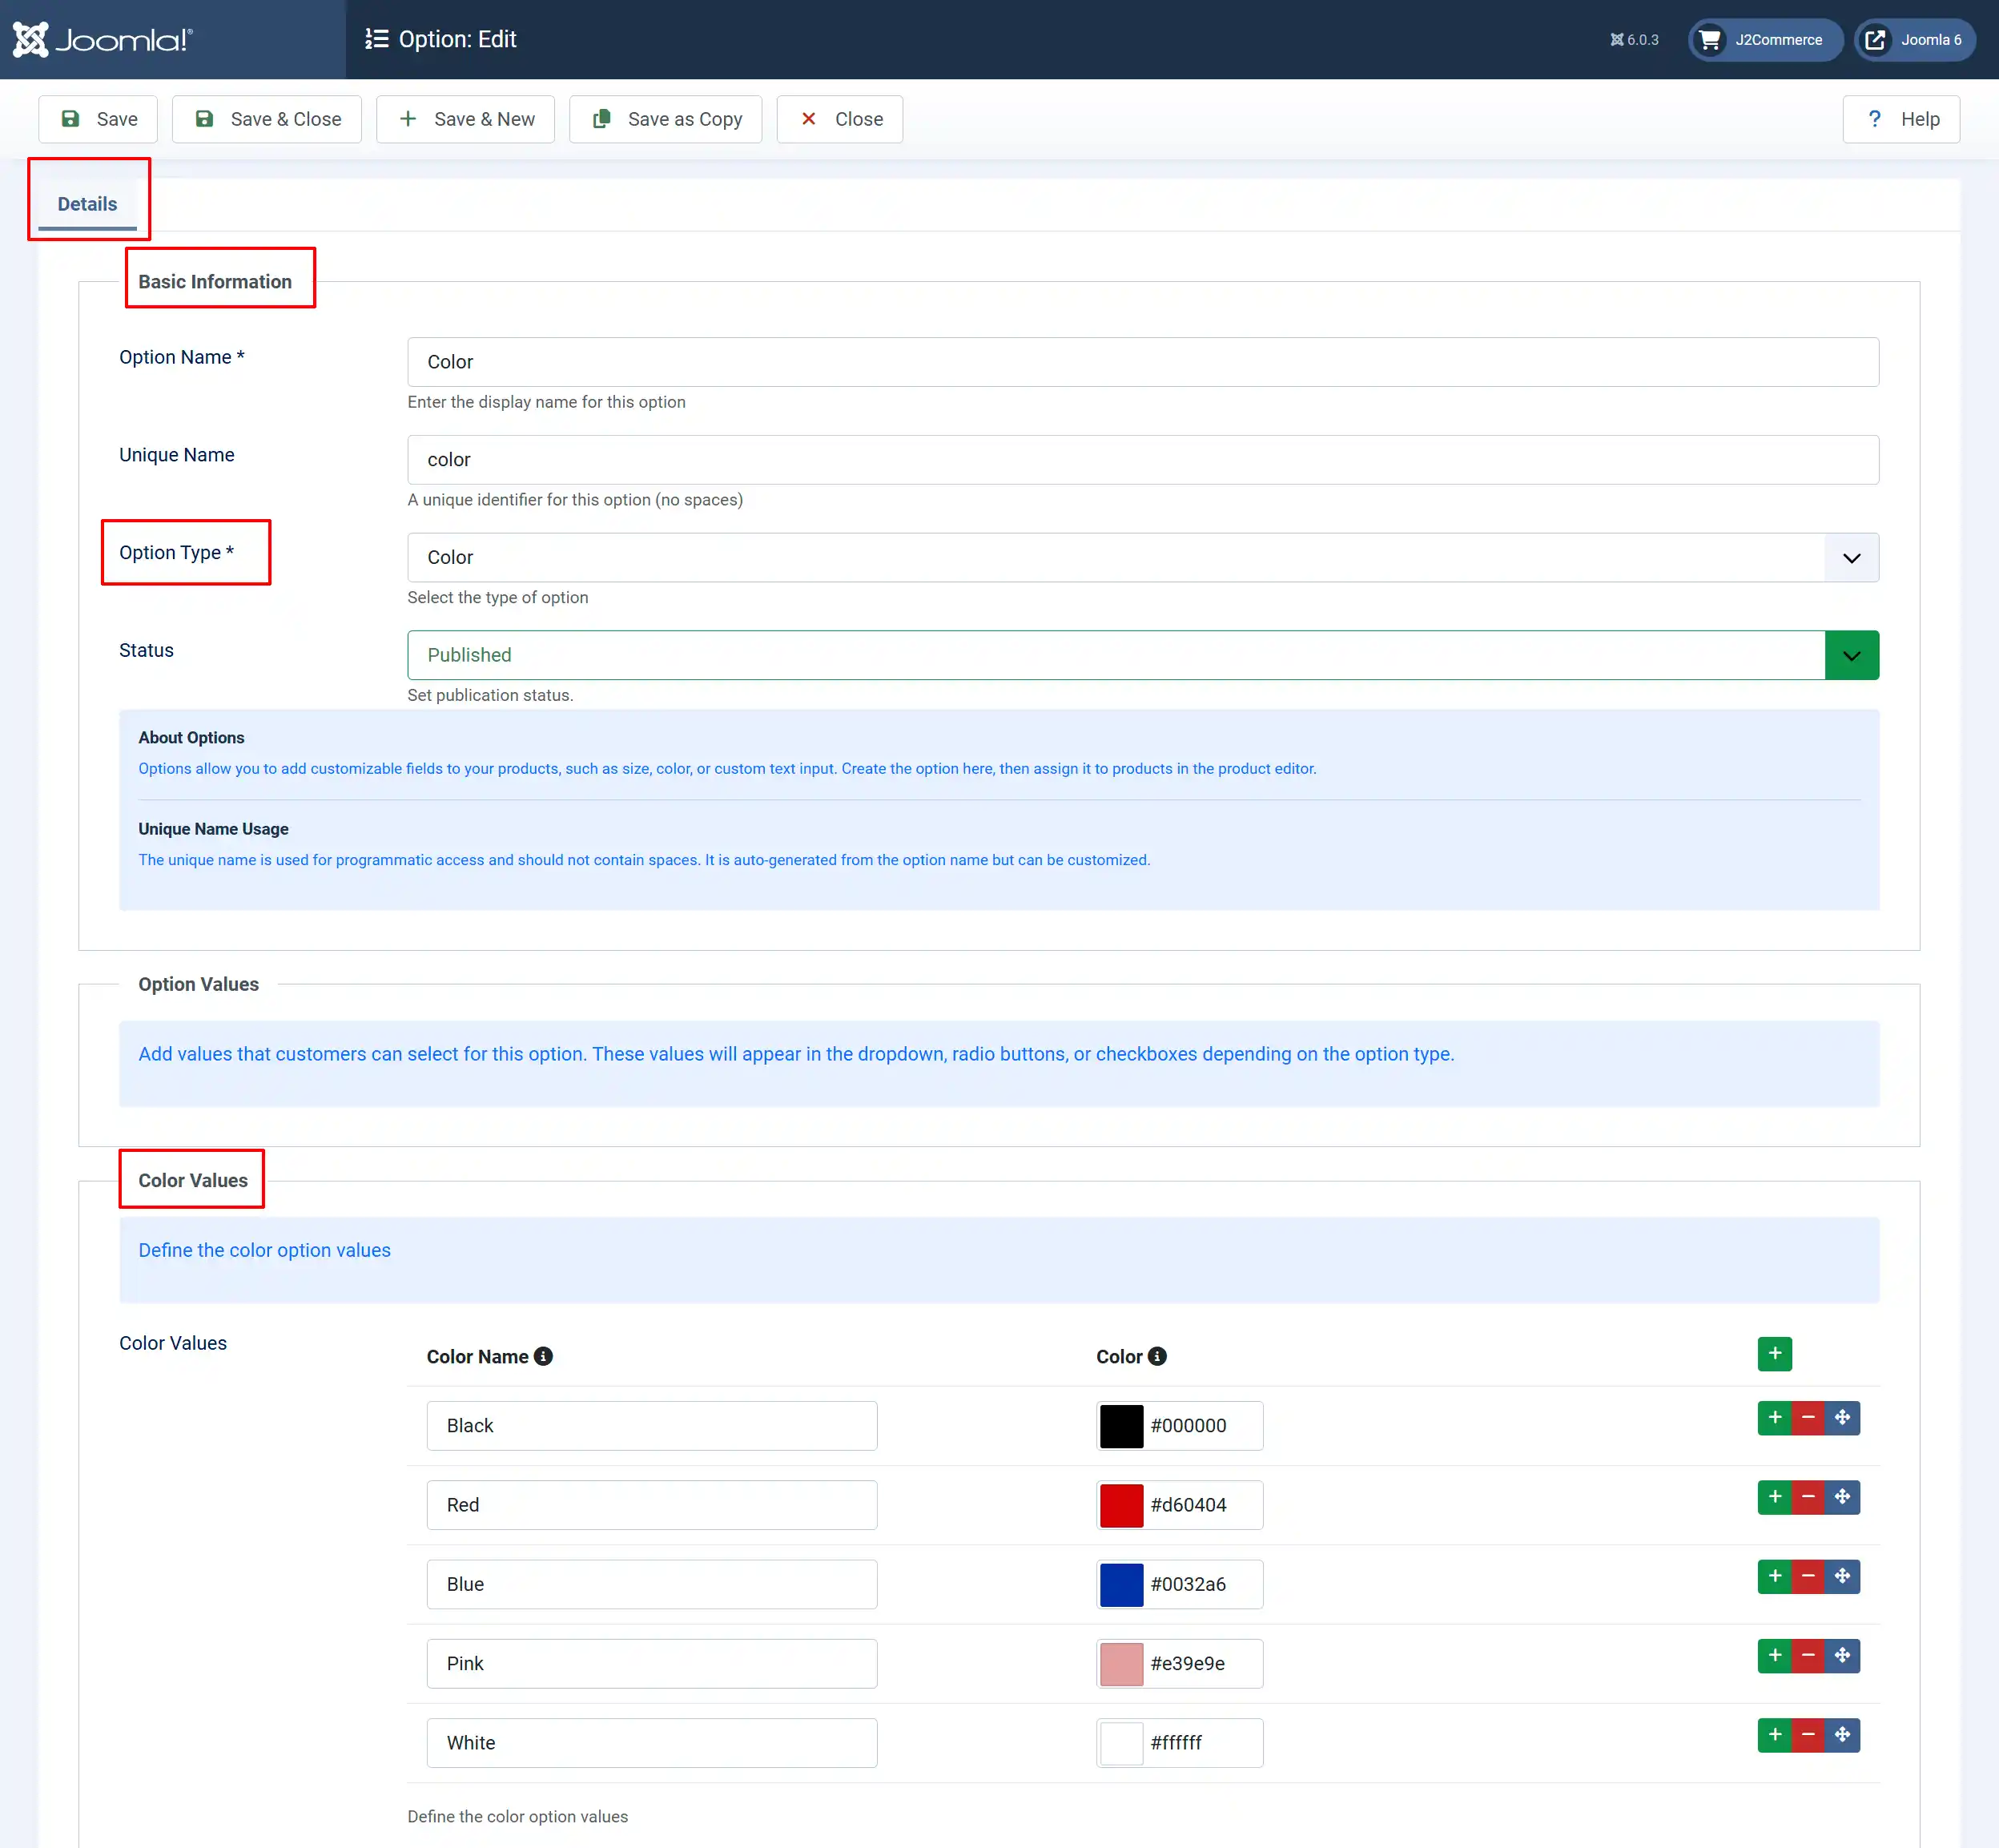
Option Name: Enter the unique name. This is the name that will be seen on the frontend. In our case, let us create the color option for the example.
Unique Name: A unique identifier for this option (no spaces)
Option Type: Choose the Option type. Each variation type will create the corresponding Value at the bottom. In this example, we are choosing the color as they type. The value section at the bottom will now allow us to customize the colors for the customers to see.
Status: Set this to Published in order for you to add it to a product.
Color Values: Because we chose Color as the type, we can now customize the colors.
Another example, if you chose Radio as the type, you would be able to add an image to each option. Or the checkbox type is popular for sizing options like Small, Medium, Large.
Create a text area type option for collecting the text to be displayed on the shirt.
Frontend View
The example below shows what it will look like on the frontend when adding the color as an option to a product.

Add Options to your Product
Now, it's time to add them to your product.
Navigate to Content -> Categories -> Articles ->
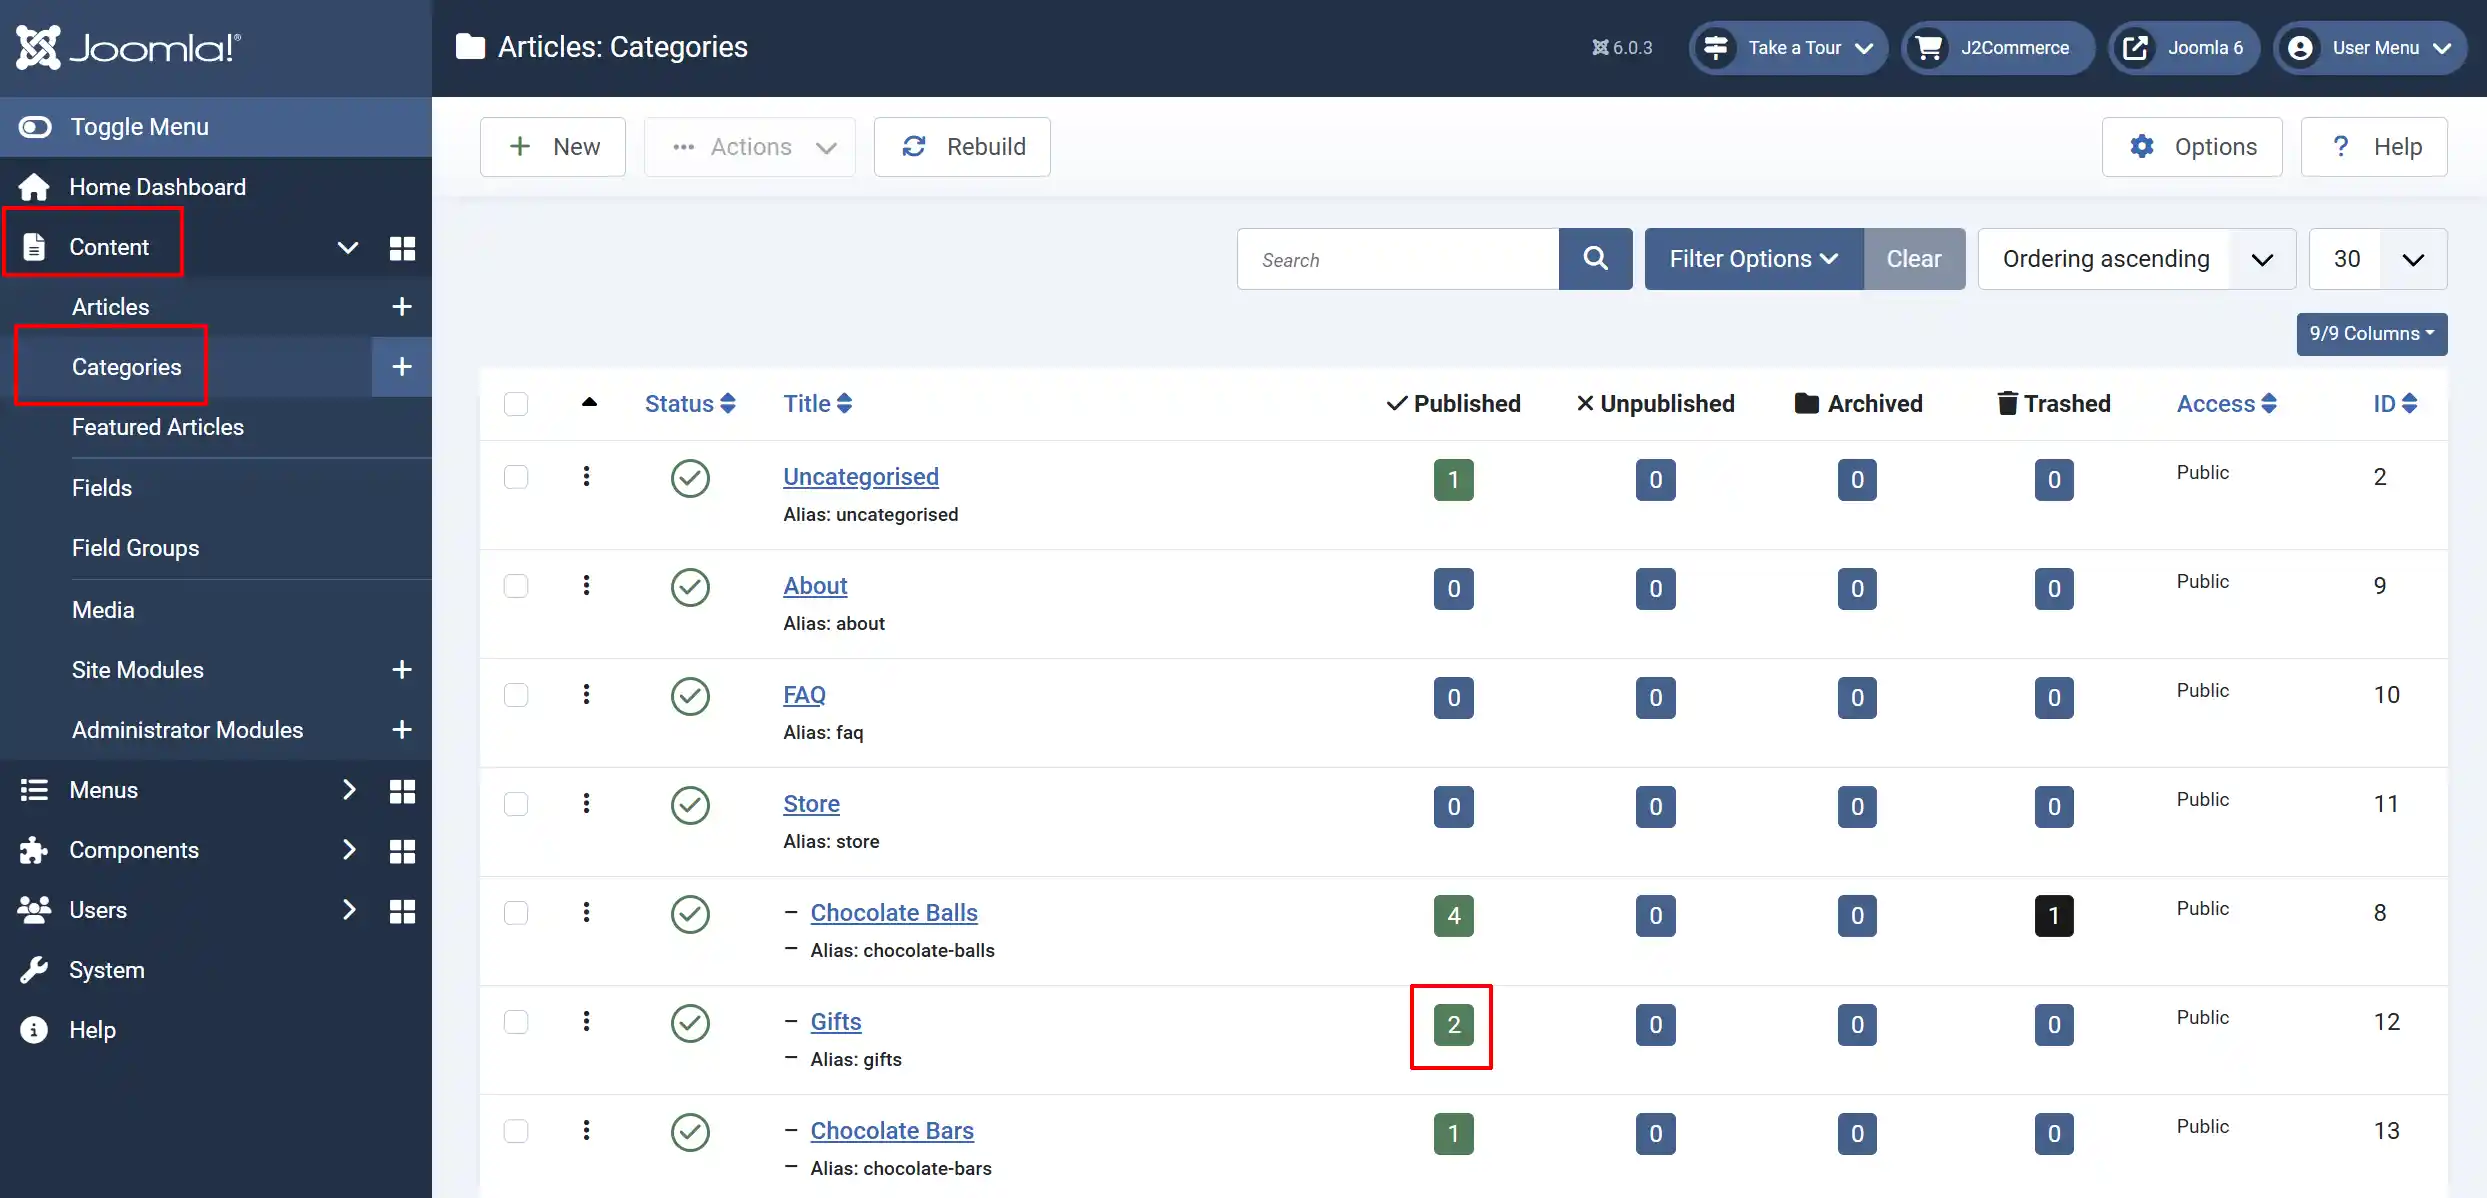
Click on your product -> J2Commerce tab -> Options tab
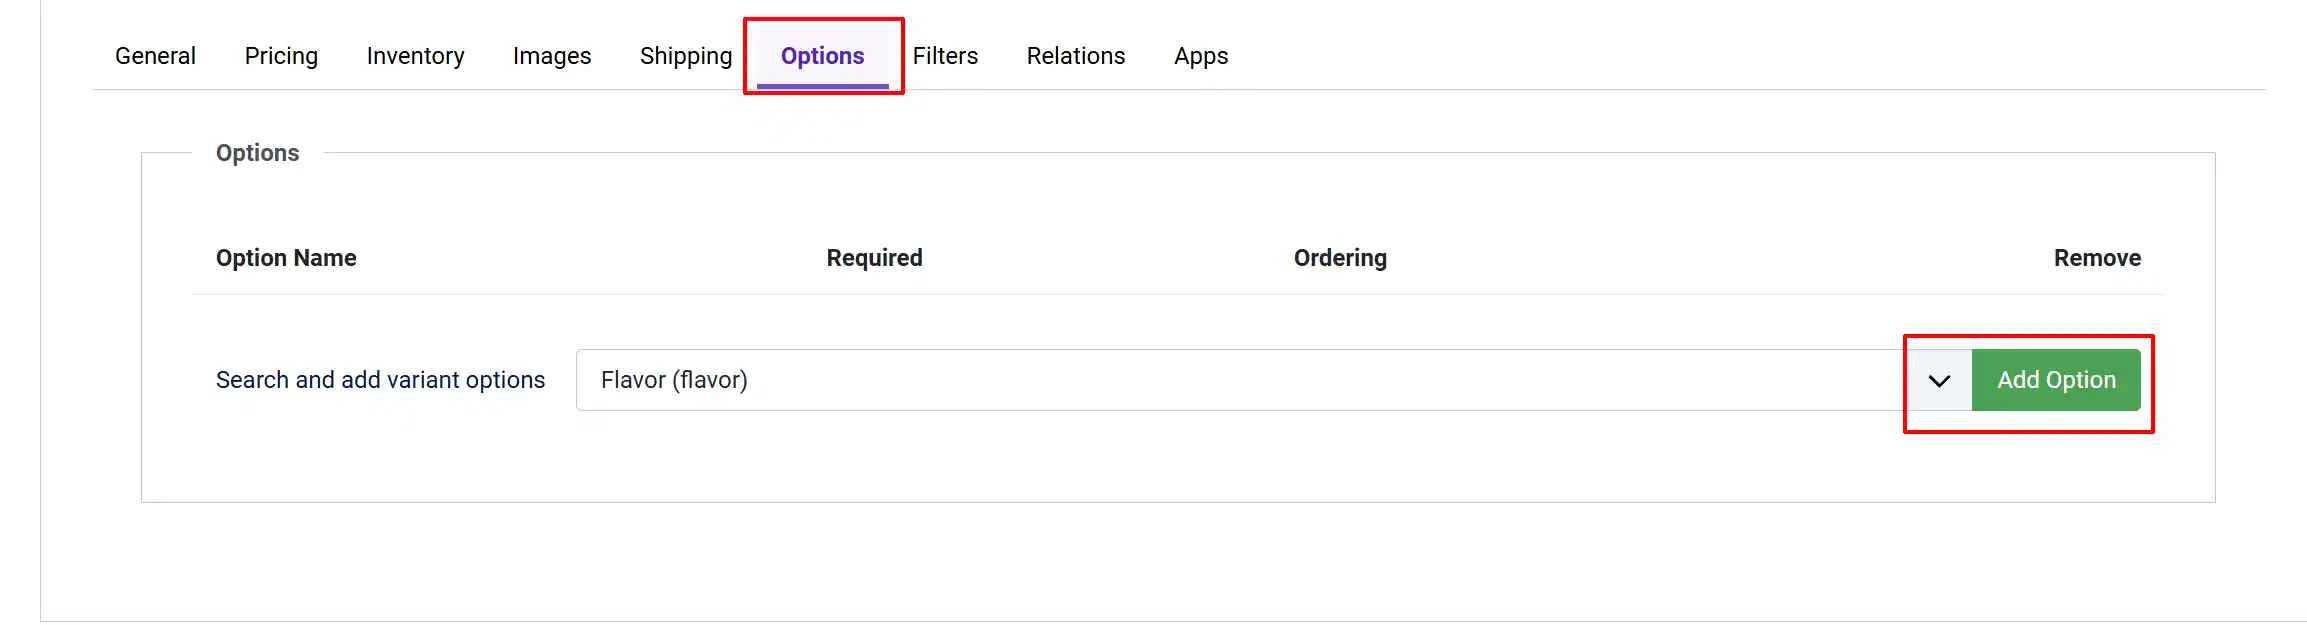
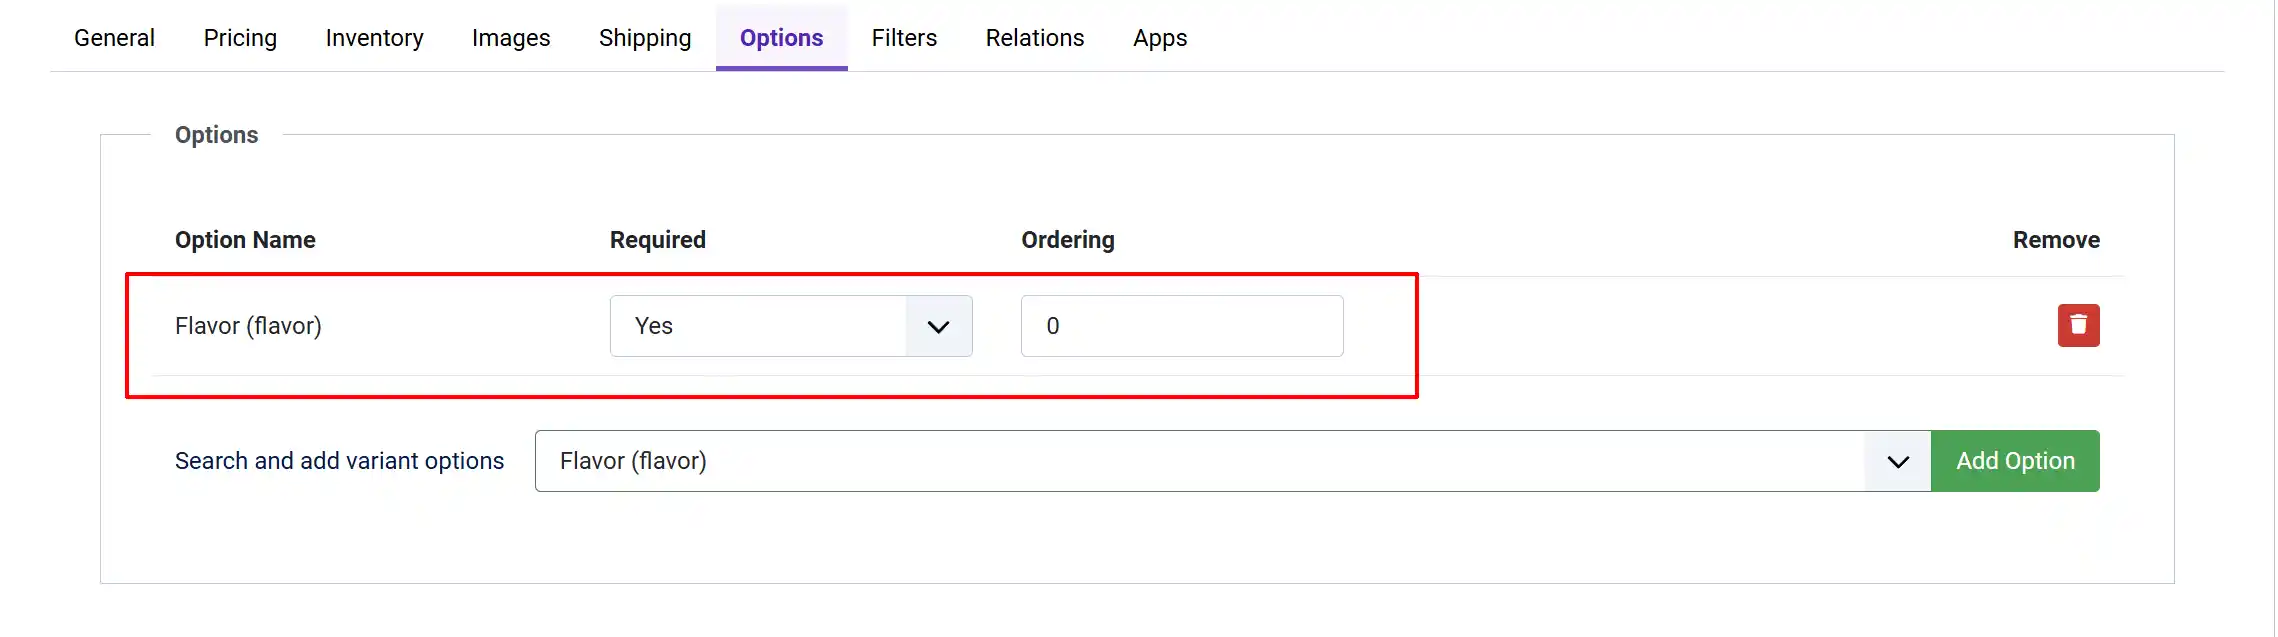
Add as many options as you wish and save the article once. If your product requires that the customer choose an option before placing the order, then make it required.
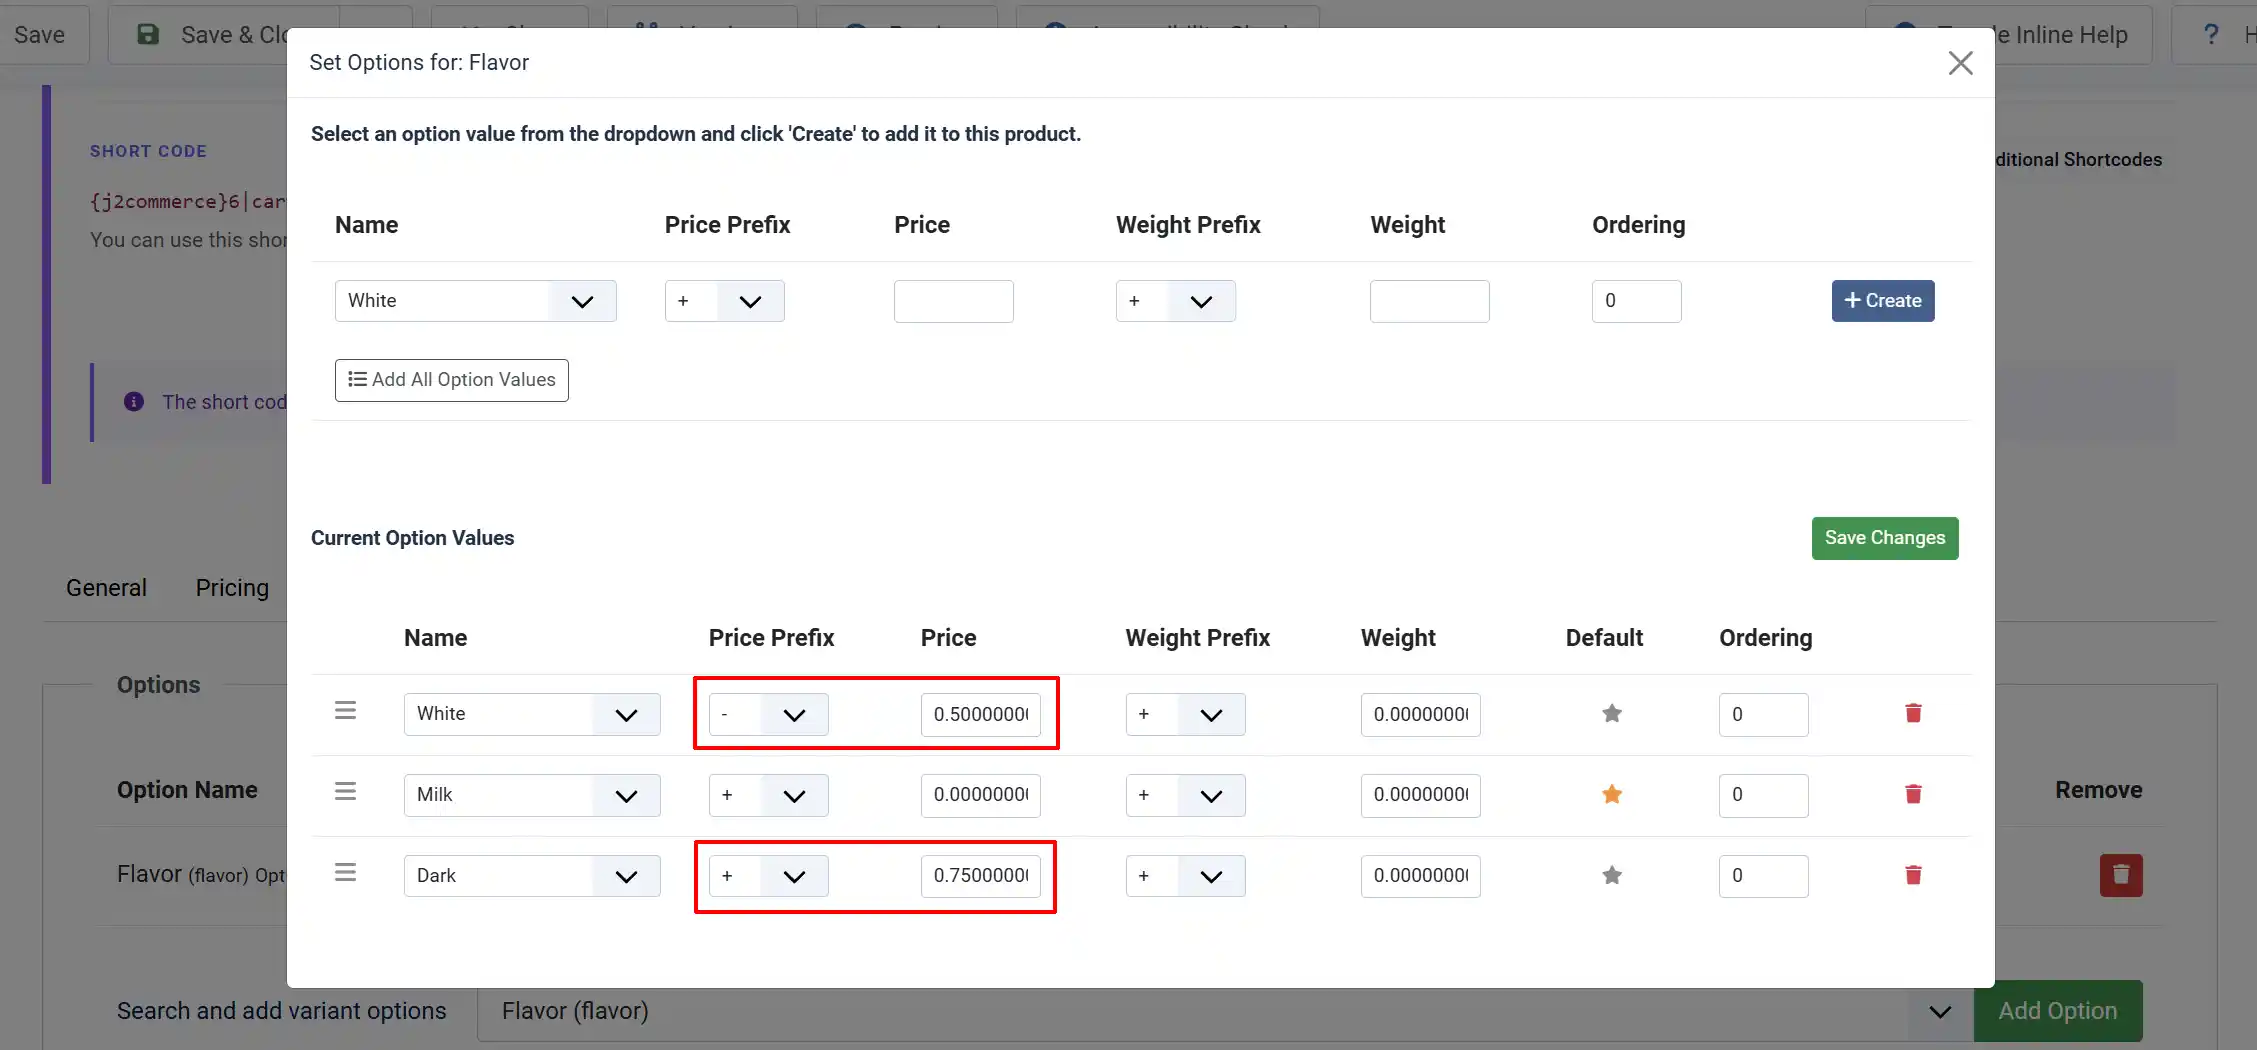
Click on the Set Option Values
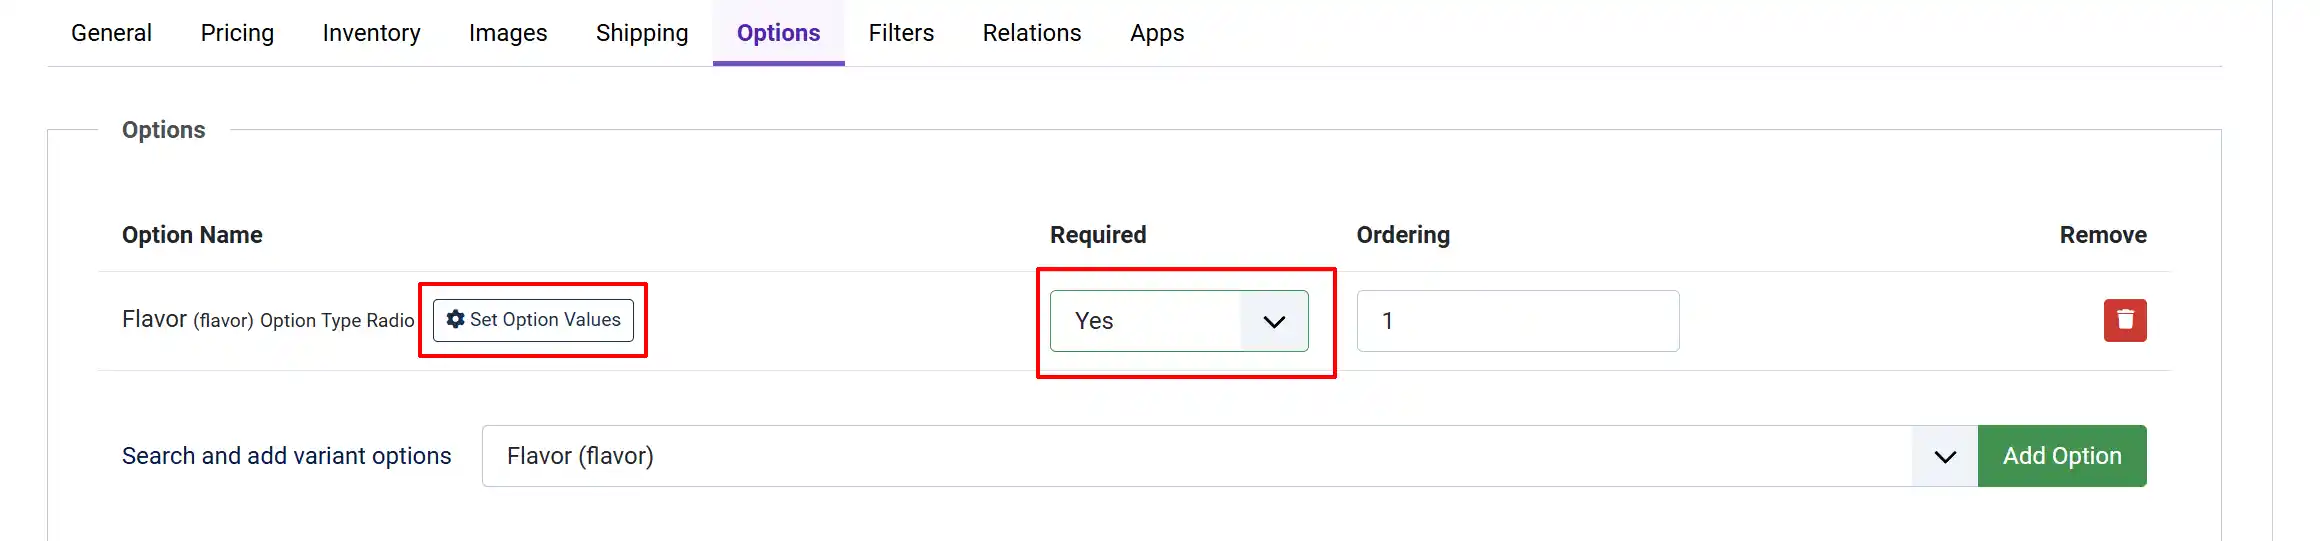
The pop-up window will allow you to select each attribute that is offered for each option. You can rearrange the order of the options and choose which option will be the default option for the customer to see by clicking on the star to the right.
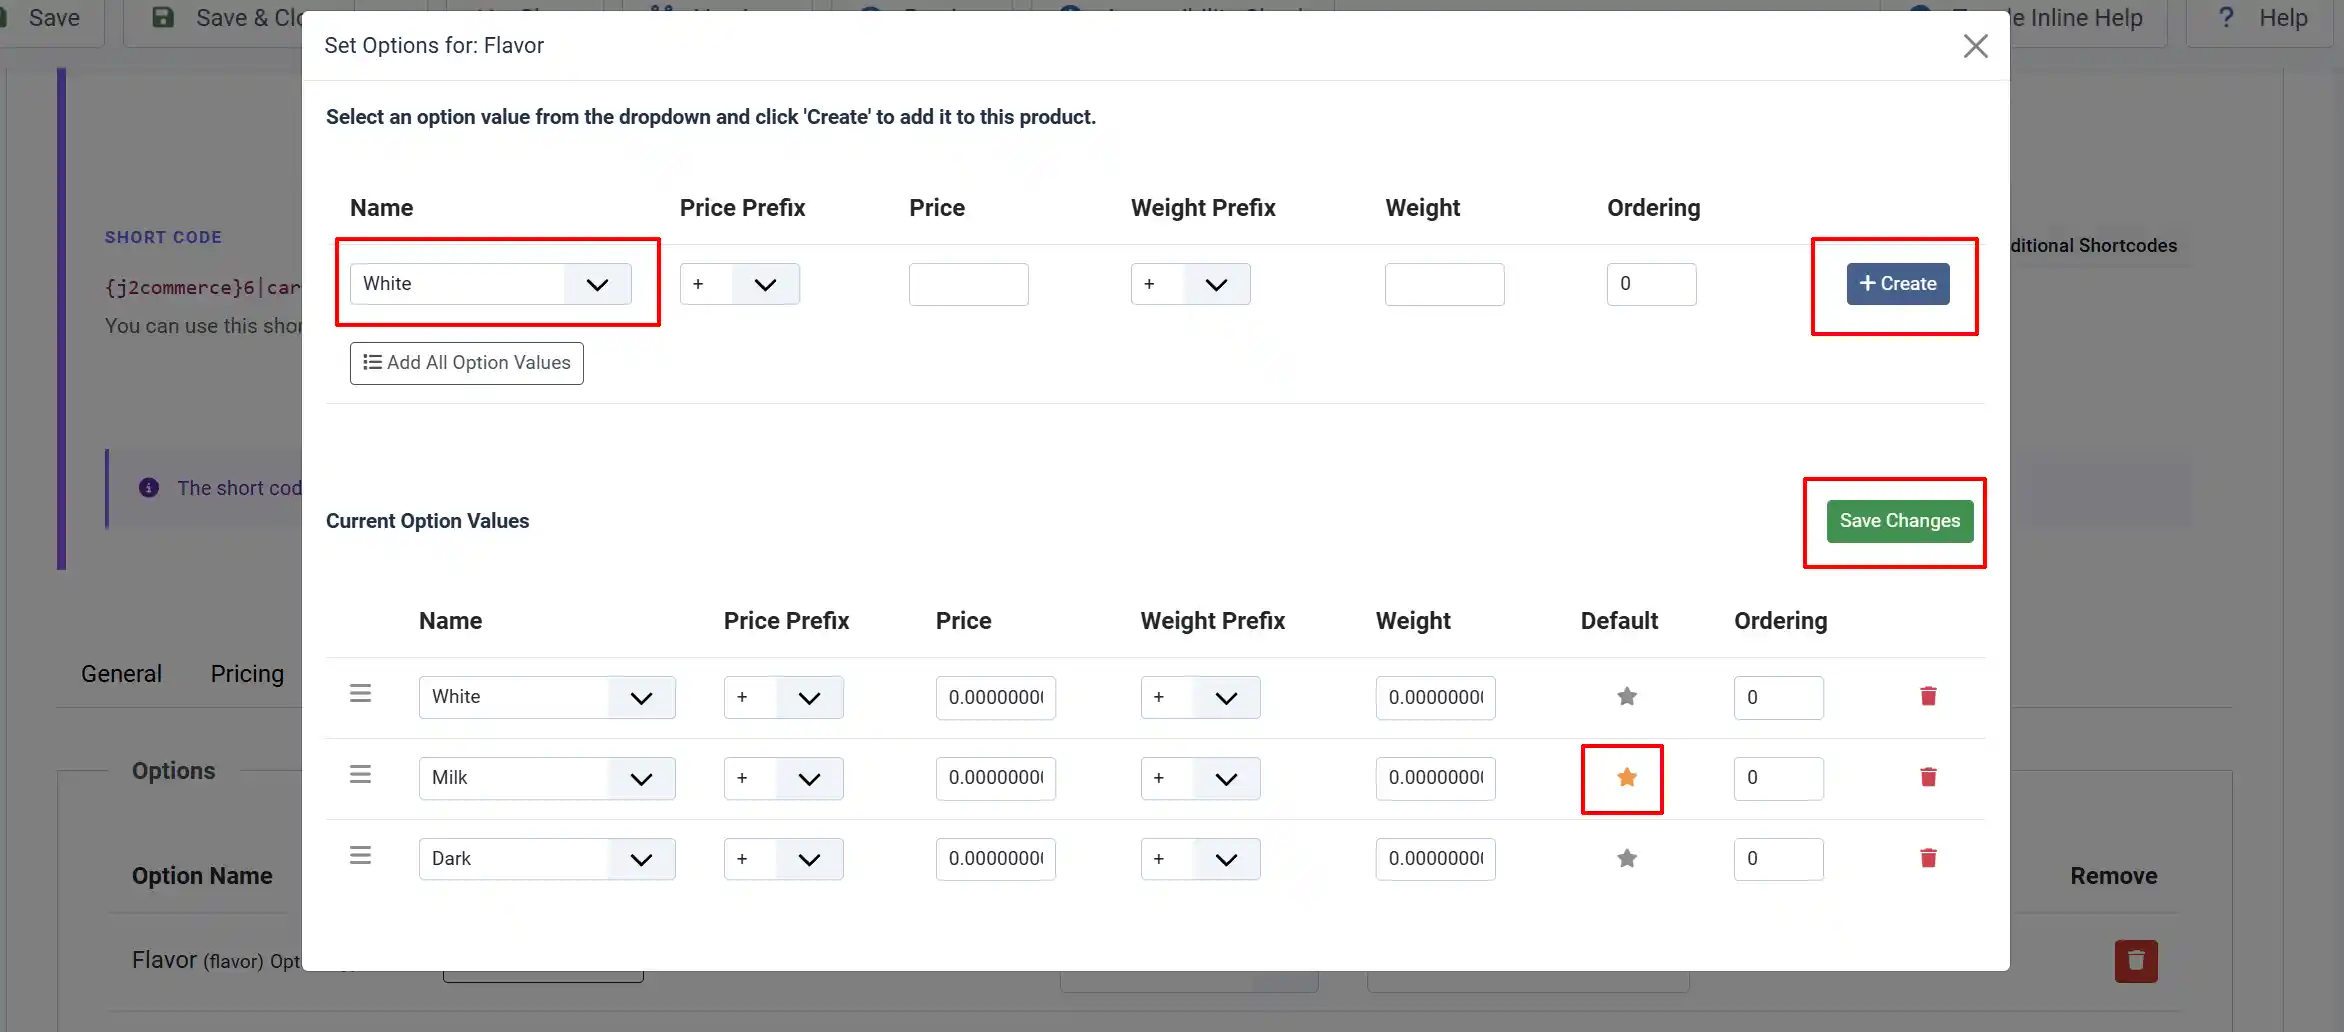
You can also set special pricing for each attribute if they differ from the main product. The Prefix section determines if it's going to be more or less (+/-) than the main product price.
In the example below, we made the white chocolates .50 less and the Dark Chocolates .75 more than the main default option
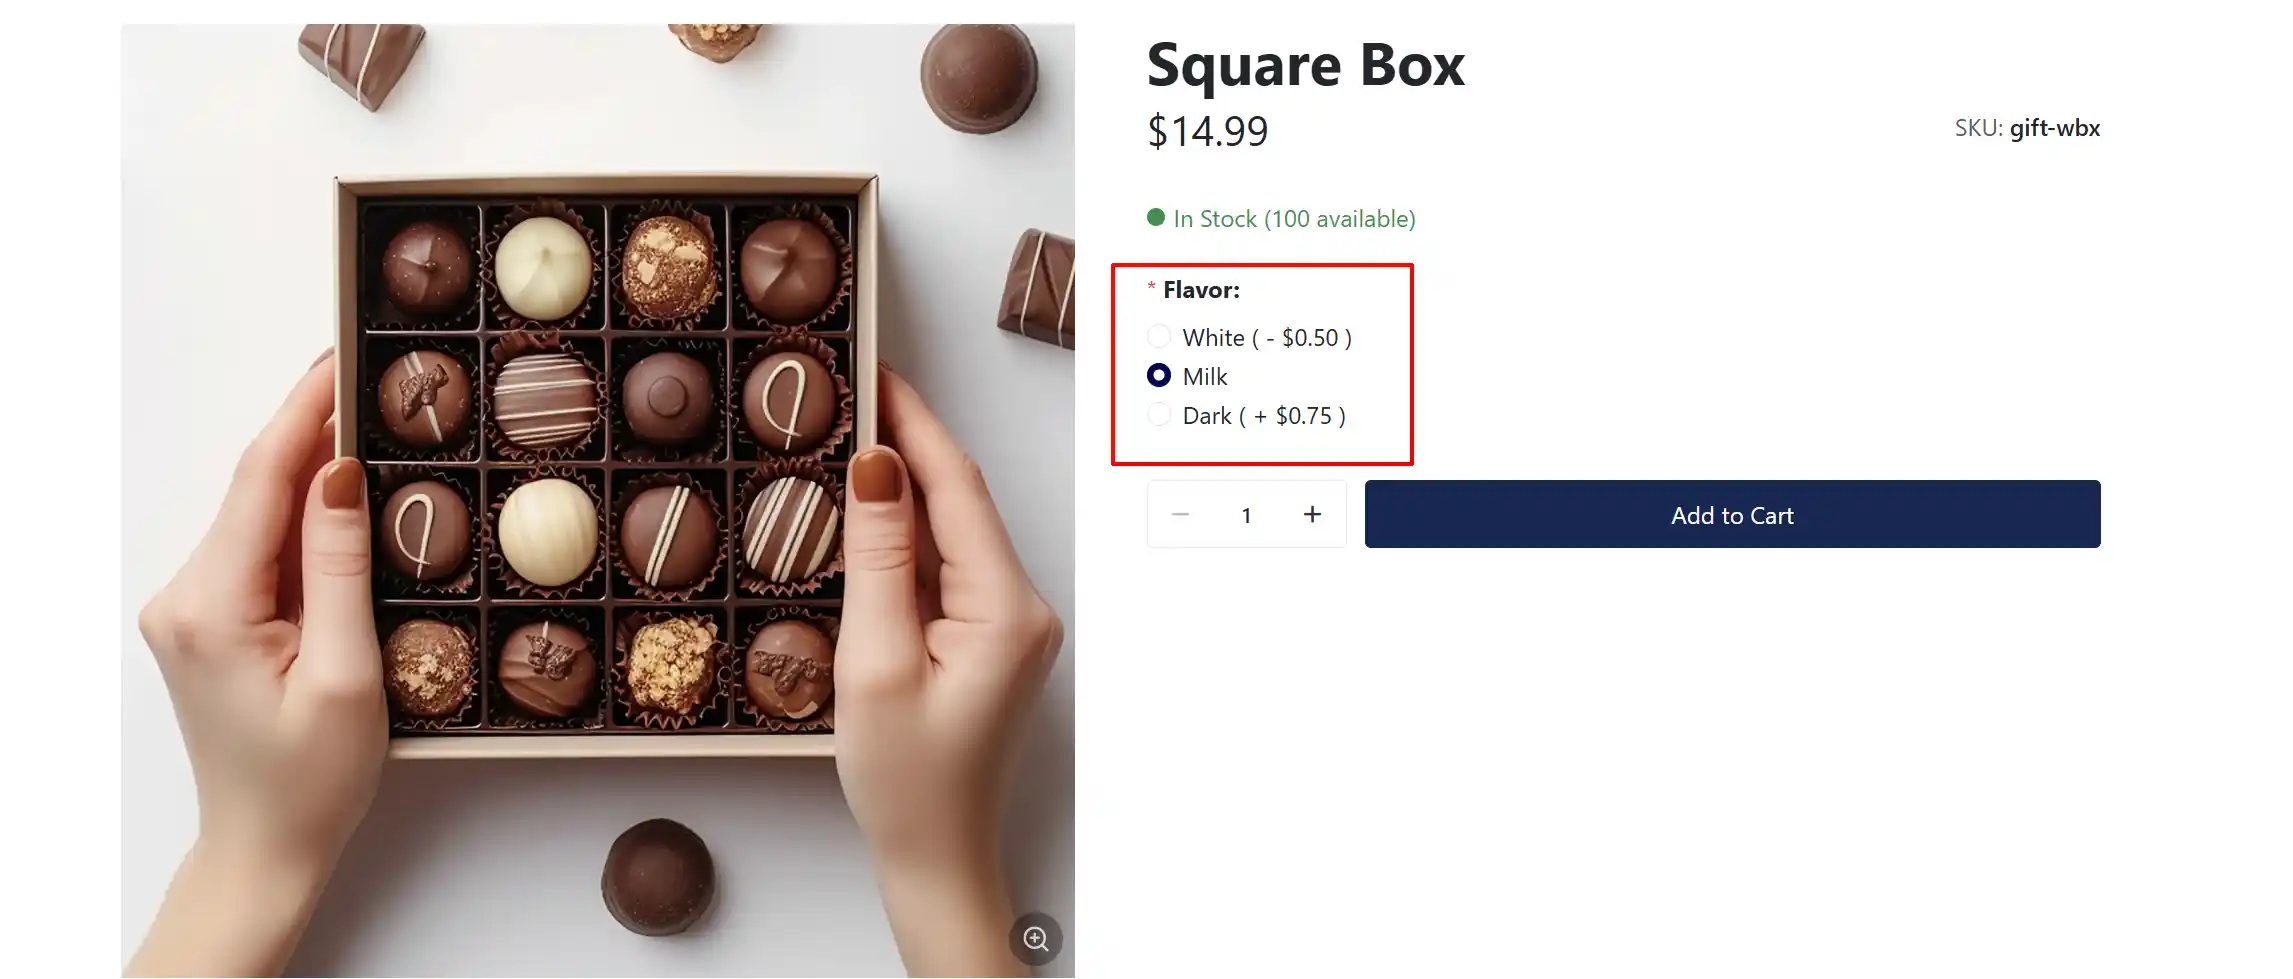
Frontend View
The example below shows adding flavor options with different pricing on a simple product
The example below shows adding individual photos to the color option. This is for a Flex Variant Product and the customer chose the pink box. The image changes based on the customer's choice, so they can see what it would look like before purchasing.
