Creating Filters
Filters are used to narrow down the search for a particular product.
In this page, first Filter Groups are created, and in each group, some Filter Names will be added, and based on the Filter Name, products will be searched.
- E.g., Filter Group: Flavor
- Filter Names: Milk, Dark, White, Mixed
NOTE: If you are adding a large number of filters (1000+), make sure "max_input_vars" in your PHP.ini is set to a higher number as well
Requirements
- with PHP 8.3.0 +
- Joomla! 6.x
- J2Commerce 6.x
Locating Filters
You have to create the filter before you can add it to your products. So let's create the filter first and then we will add it to a product.
There are two ways you can access the plugin.
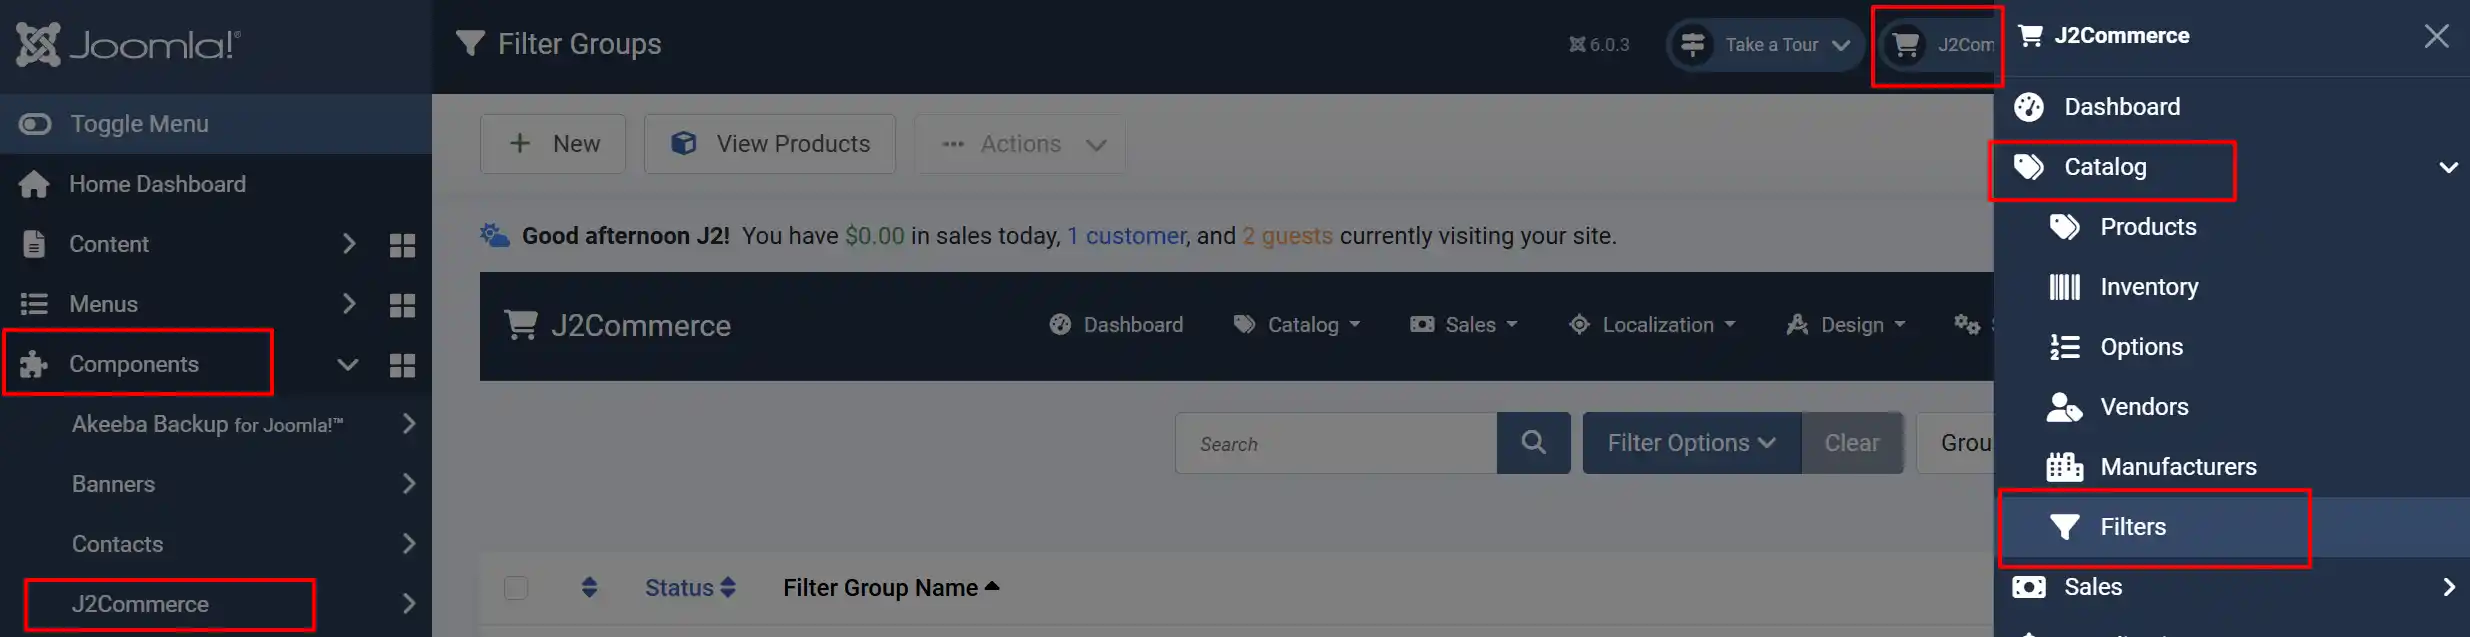
Option a: Go to the J2Commerce icon at the top right corner -> Catalog -> Filters
Option b: Go to Components on the left sidebar -> J2Commerce -> Dashboard -> Catalog -> Filters
Creating a Filter Group
The filter page shows all of your current Filter Groups, and now we are going to create a new Group called 'Flavor.'

Creating Filter Values
In the example below, the Filter Group is 'Flavor,' and its filter values are 'Dark', 'Milk', 'White', 'Mixed' for a chocolate company. You can add/remove or rearrange the order of the filter value
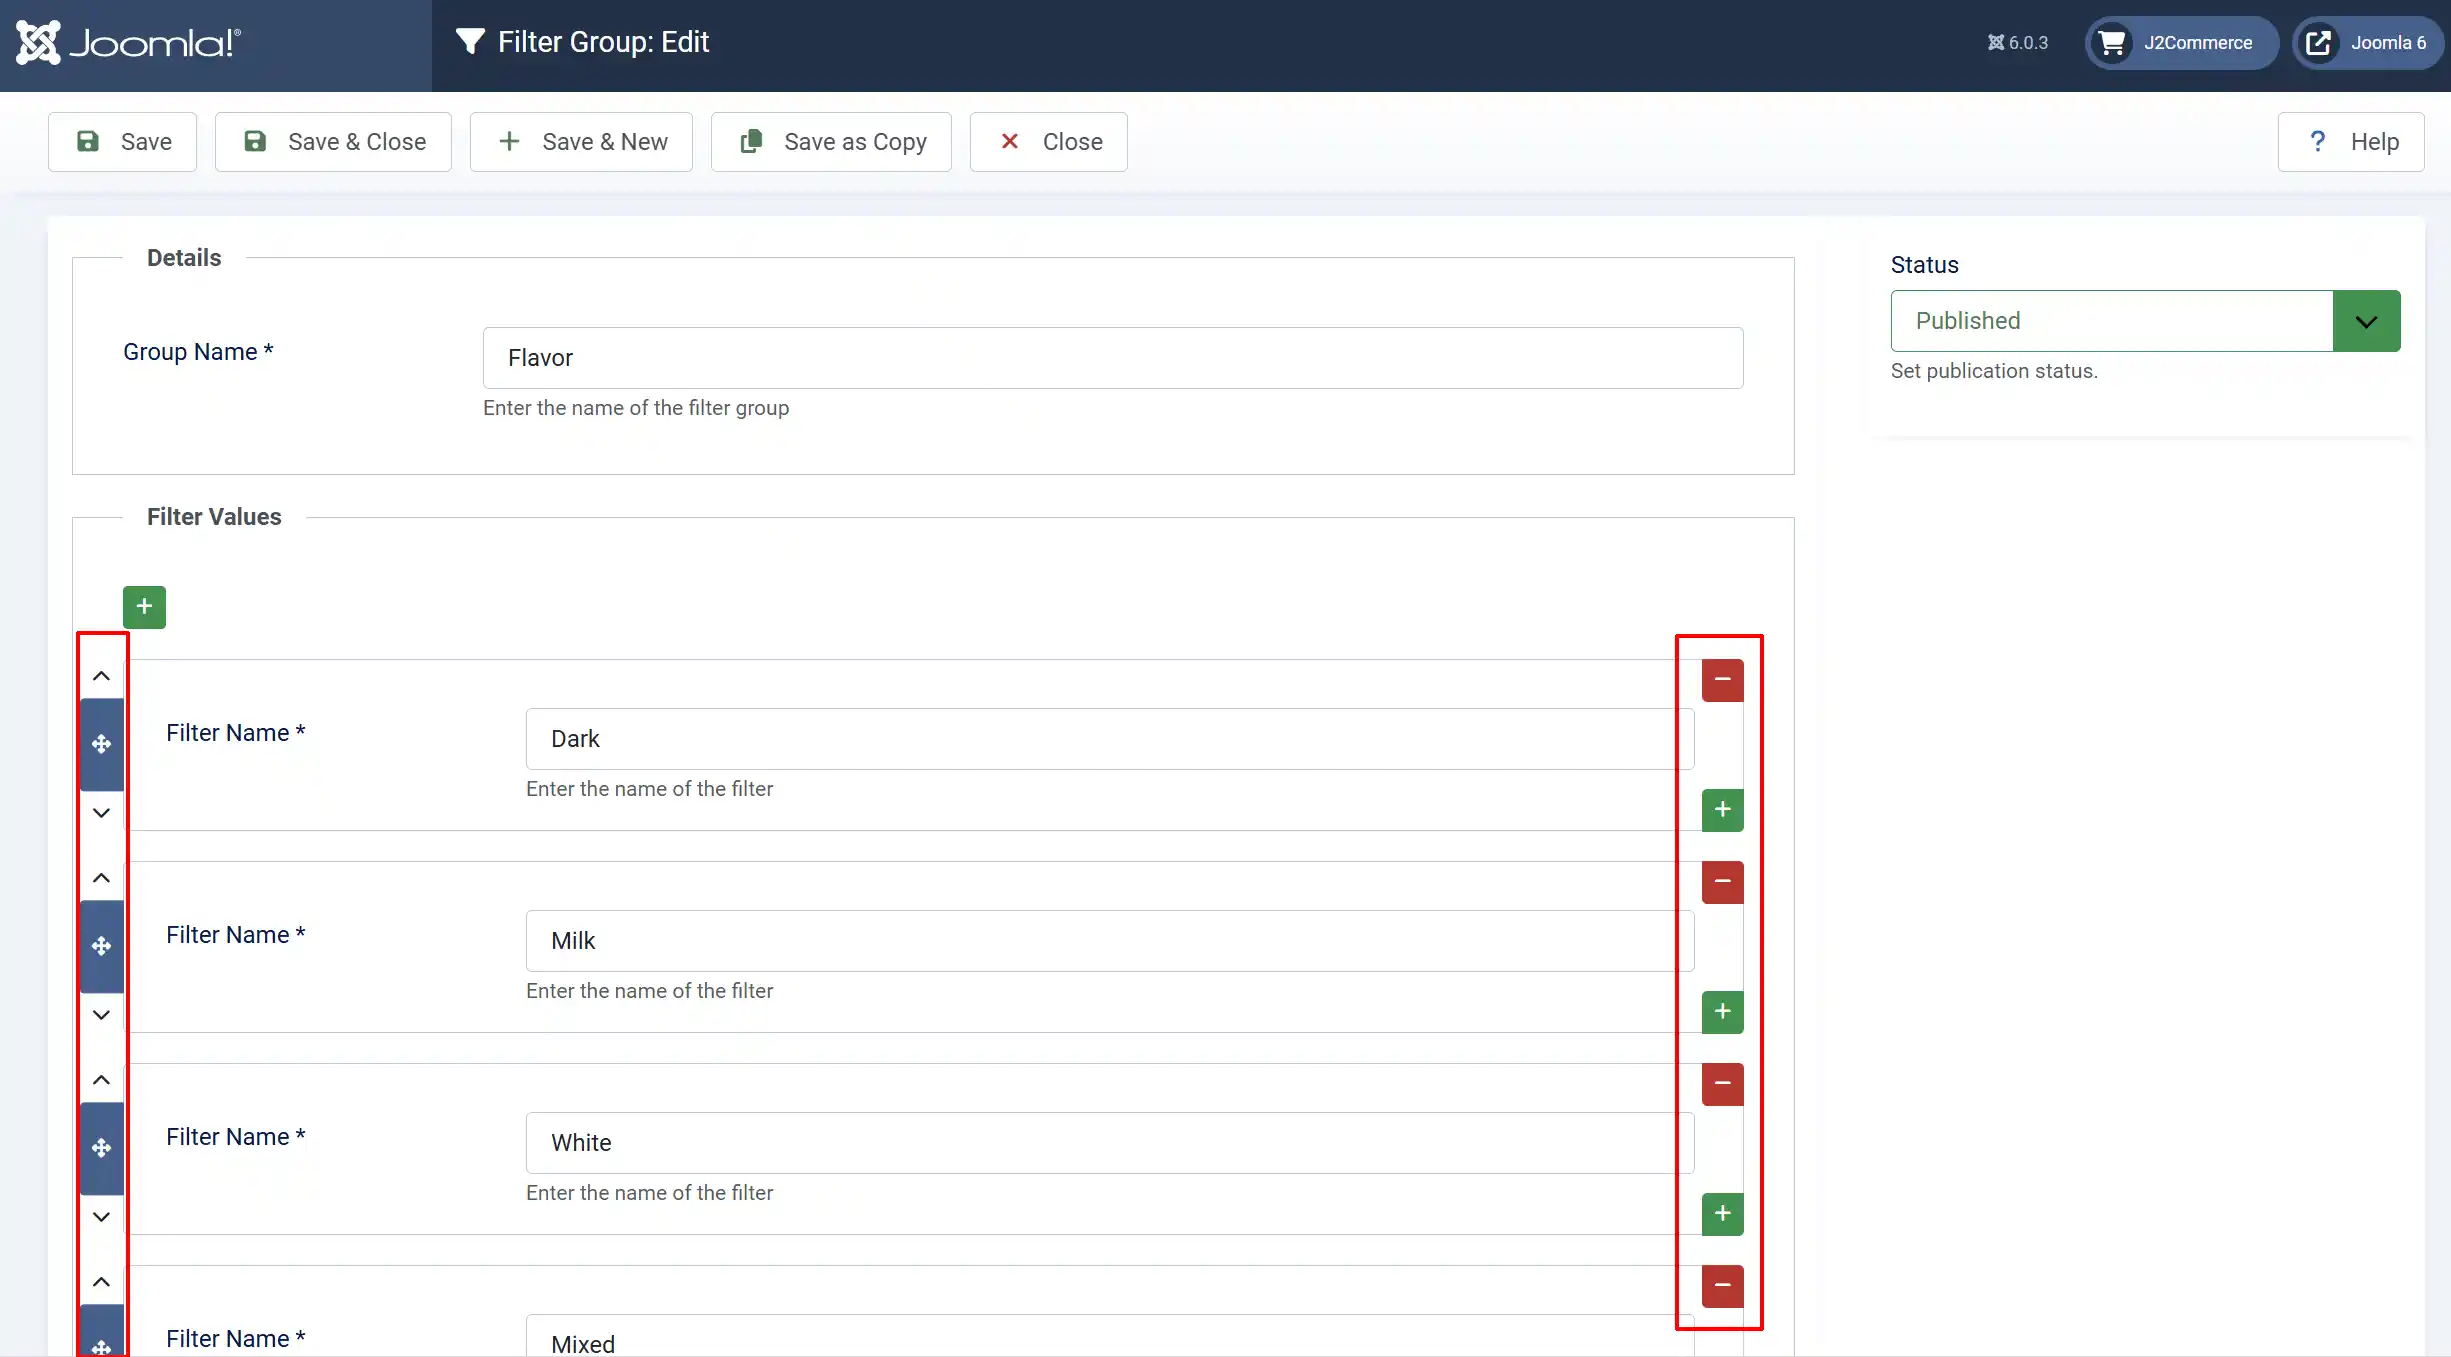
Now that you have created the filters, you can add them to your products. If you need to add more filters in the future for different products, just go back into the Filter Group called 'Flavor' and add more filter values
Adding filters to products
Content -> Categories -> Article
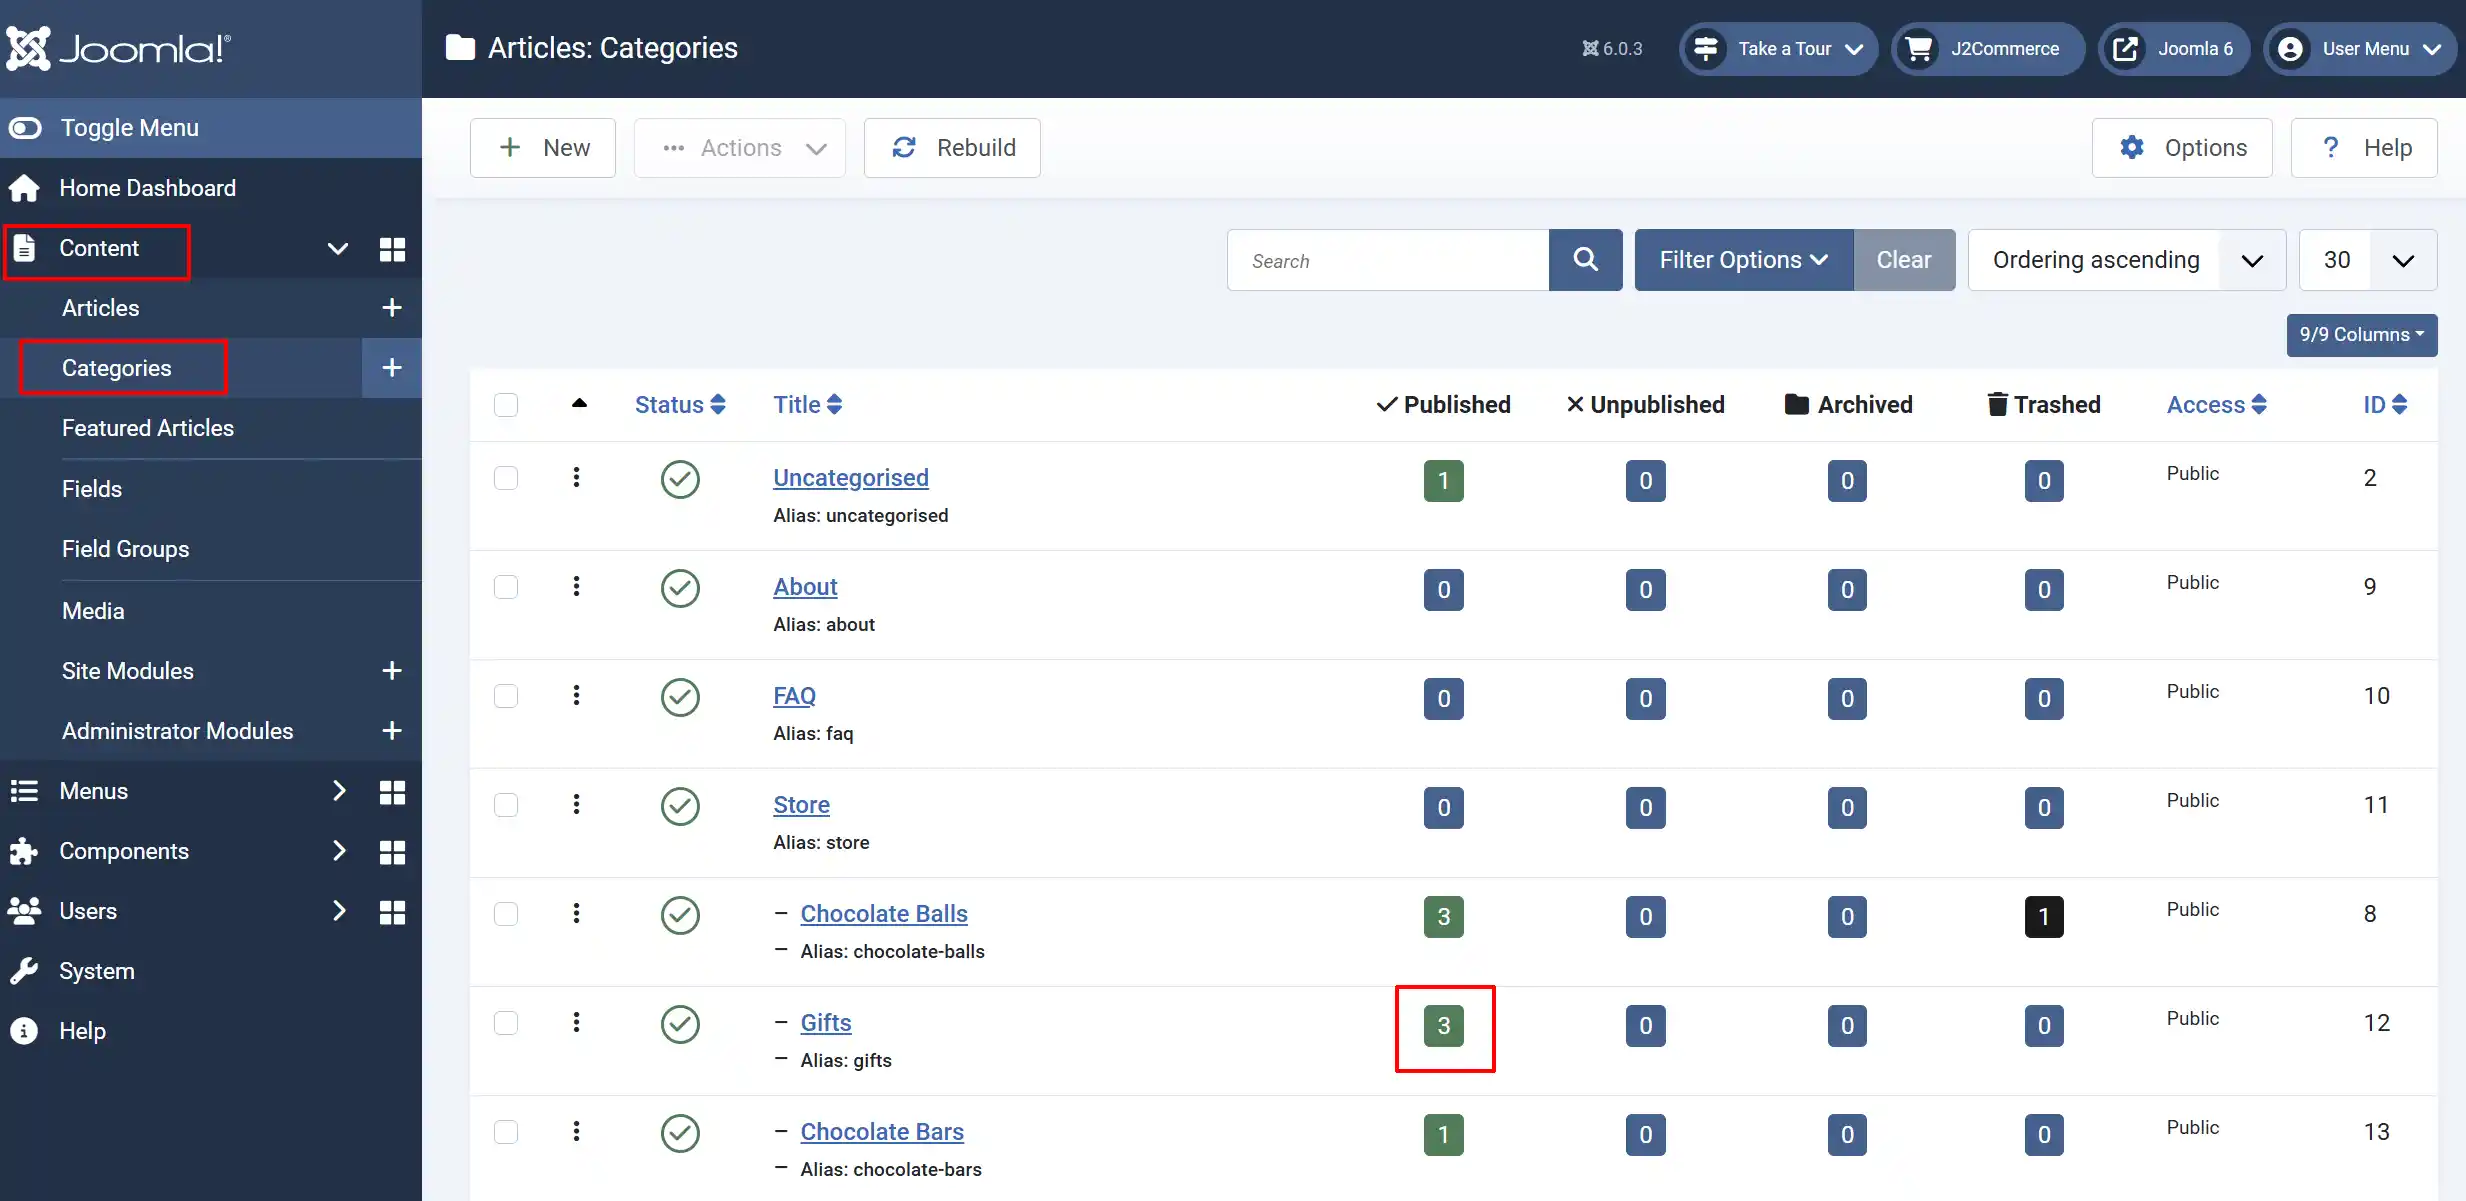
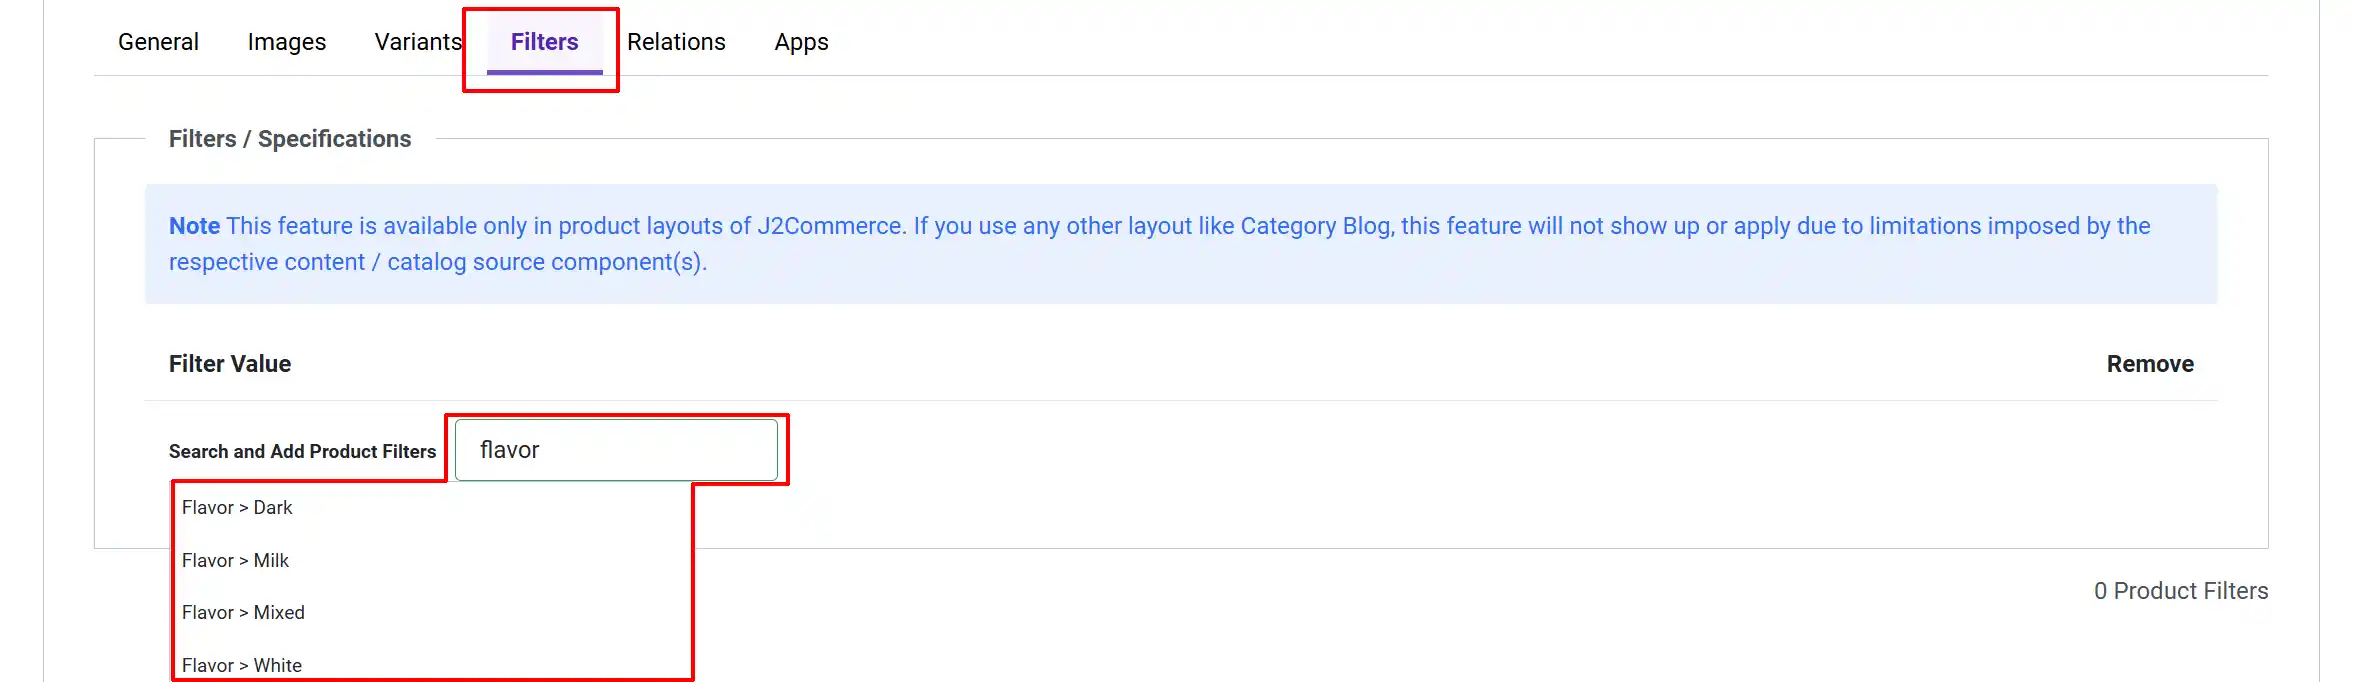
Click on the product you want to add filters to. J2Commerce tab -> Filters tab
Type the first few letters of the unique name of the product filters in the search box.
It will display the search results in a dropdown. Choose the filters from the dropdown and save the product.
If your filter doesn't show up in this section, then it's because you forgot to add filter values to the filter group mentioned above.
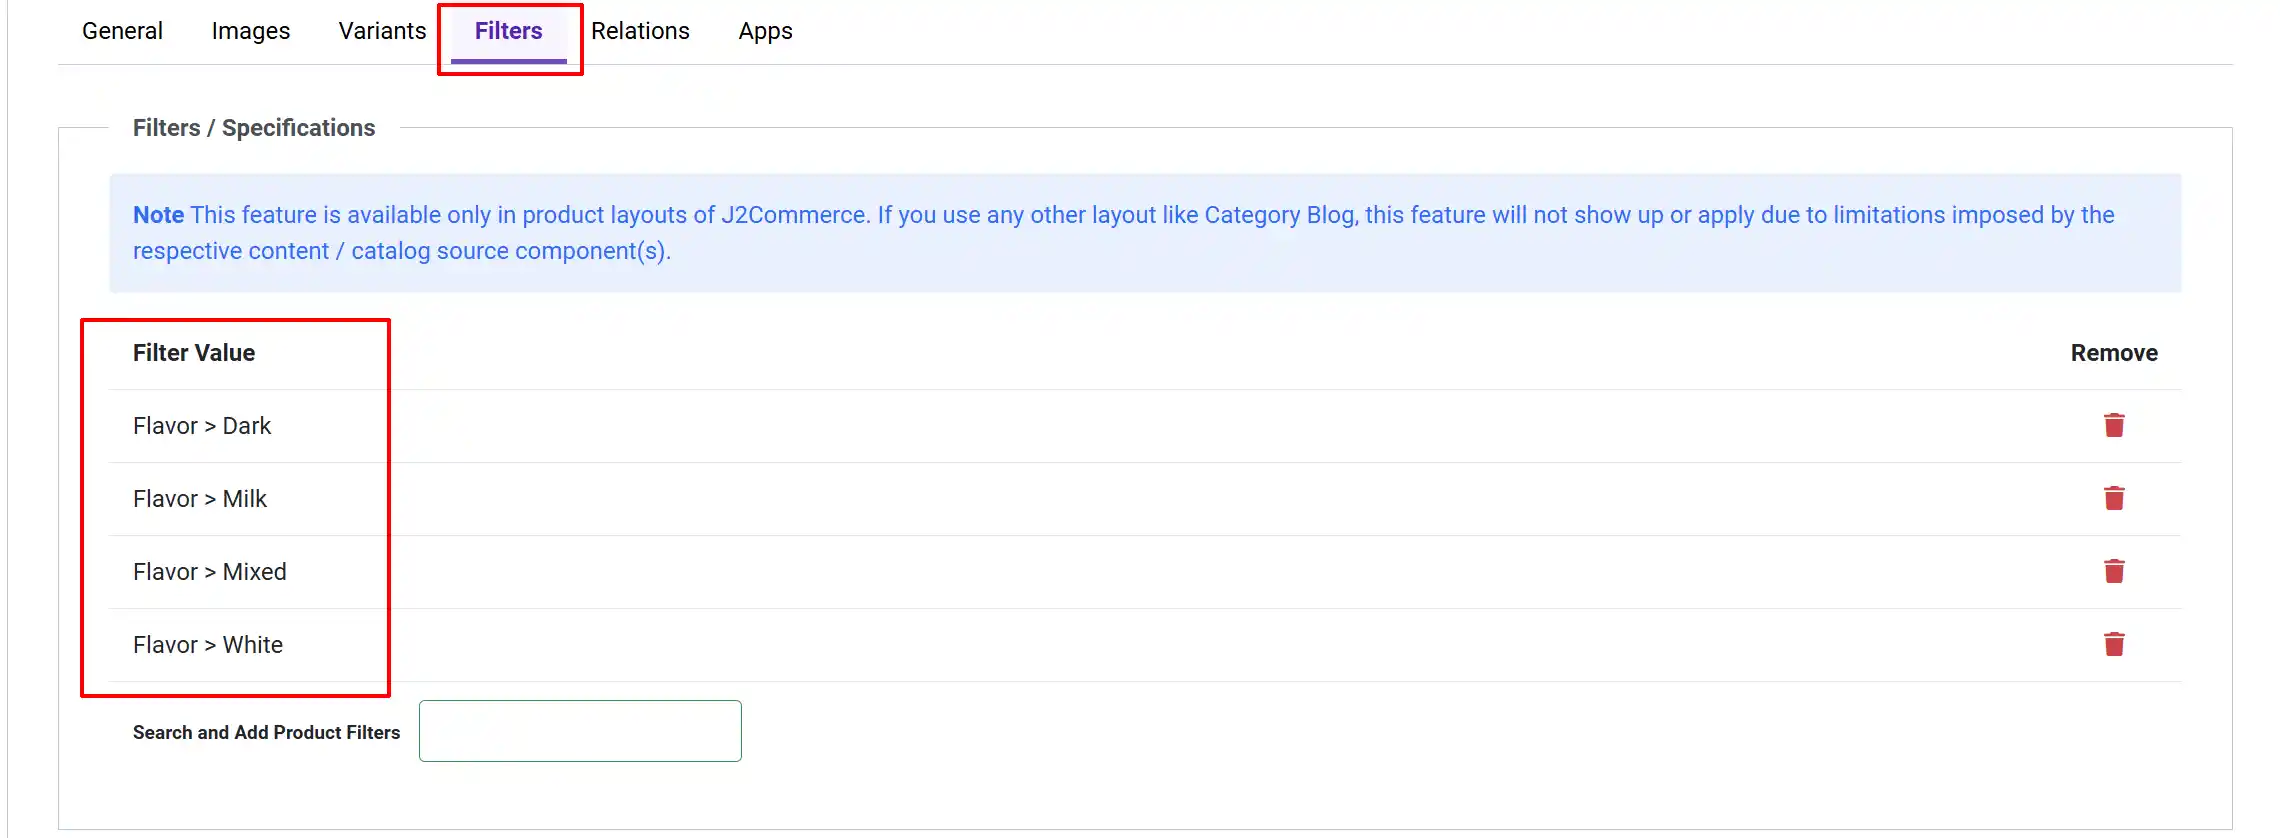
You can add as many filters as needed to each product
Stylizing the Filters for the Frontend
The following section is all controlled by how you set up your store menu link. There are many different ways to display the filters on the product pages. They are all controlled by just two sections. The Specifications and Description and Specifications sections.
Go to Menu -> Main Menu -> Store
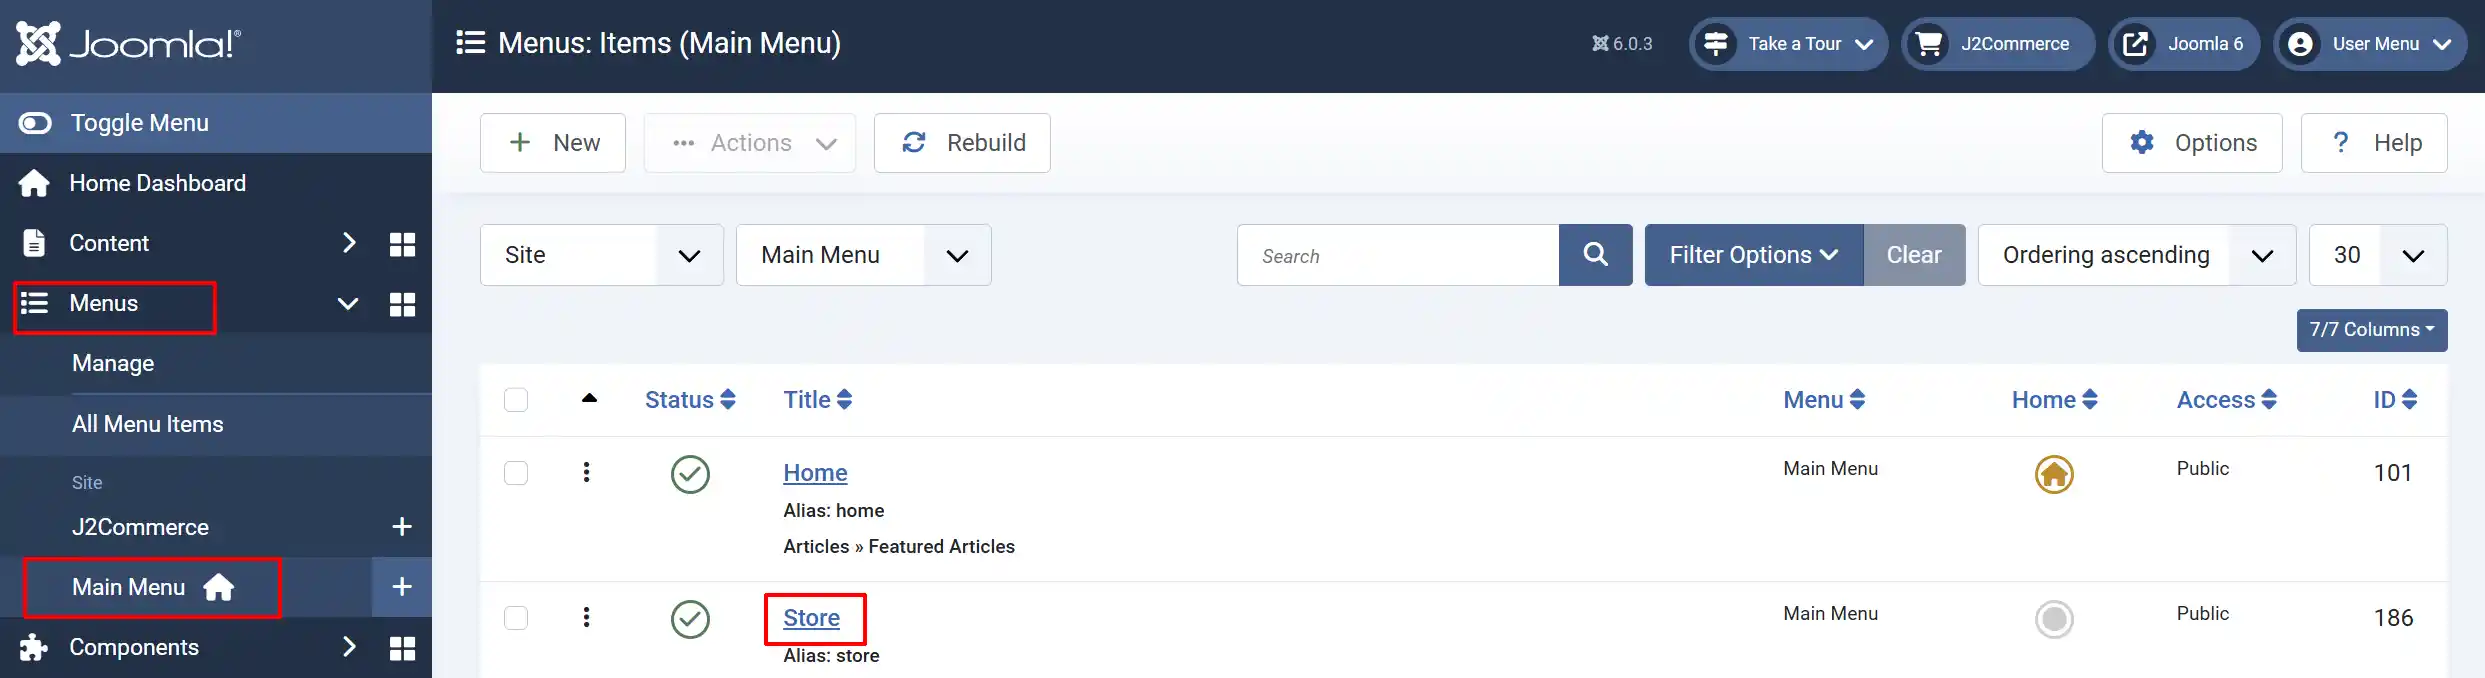
Select the Product tab and scroll to the bottom until you see Specifications.
Example 1:
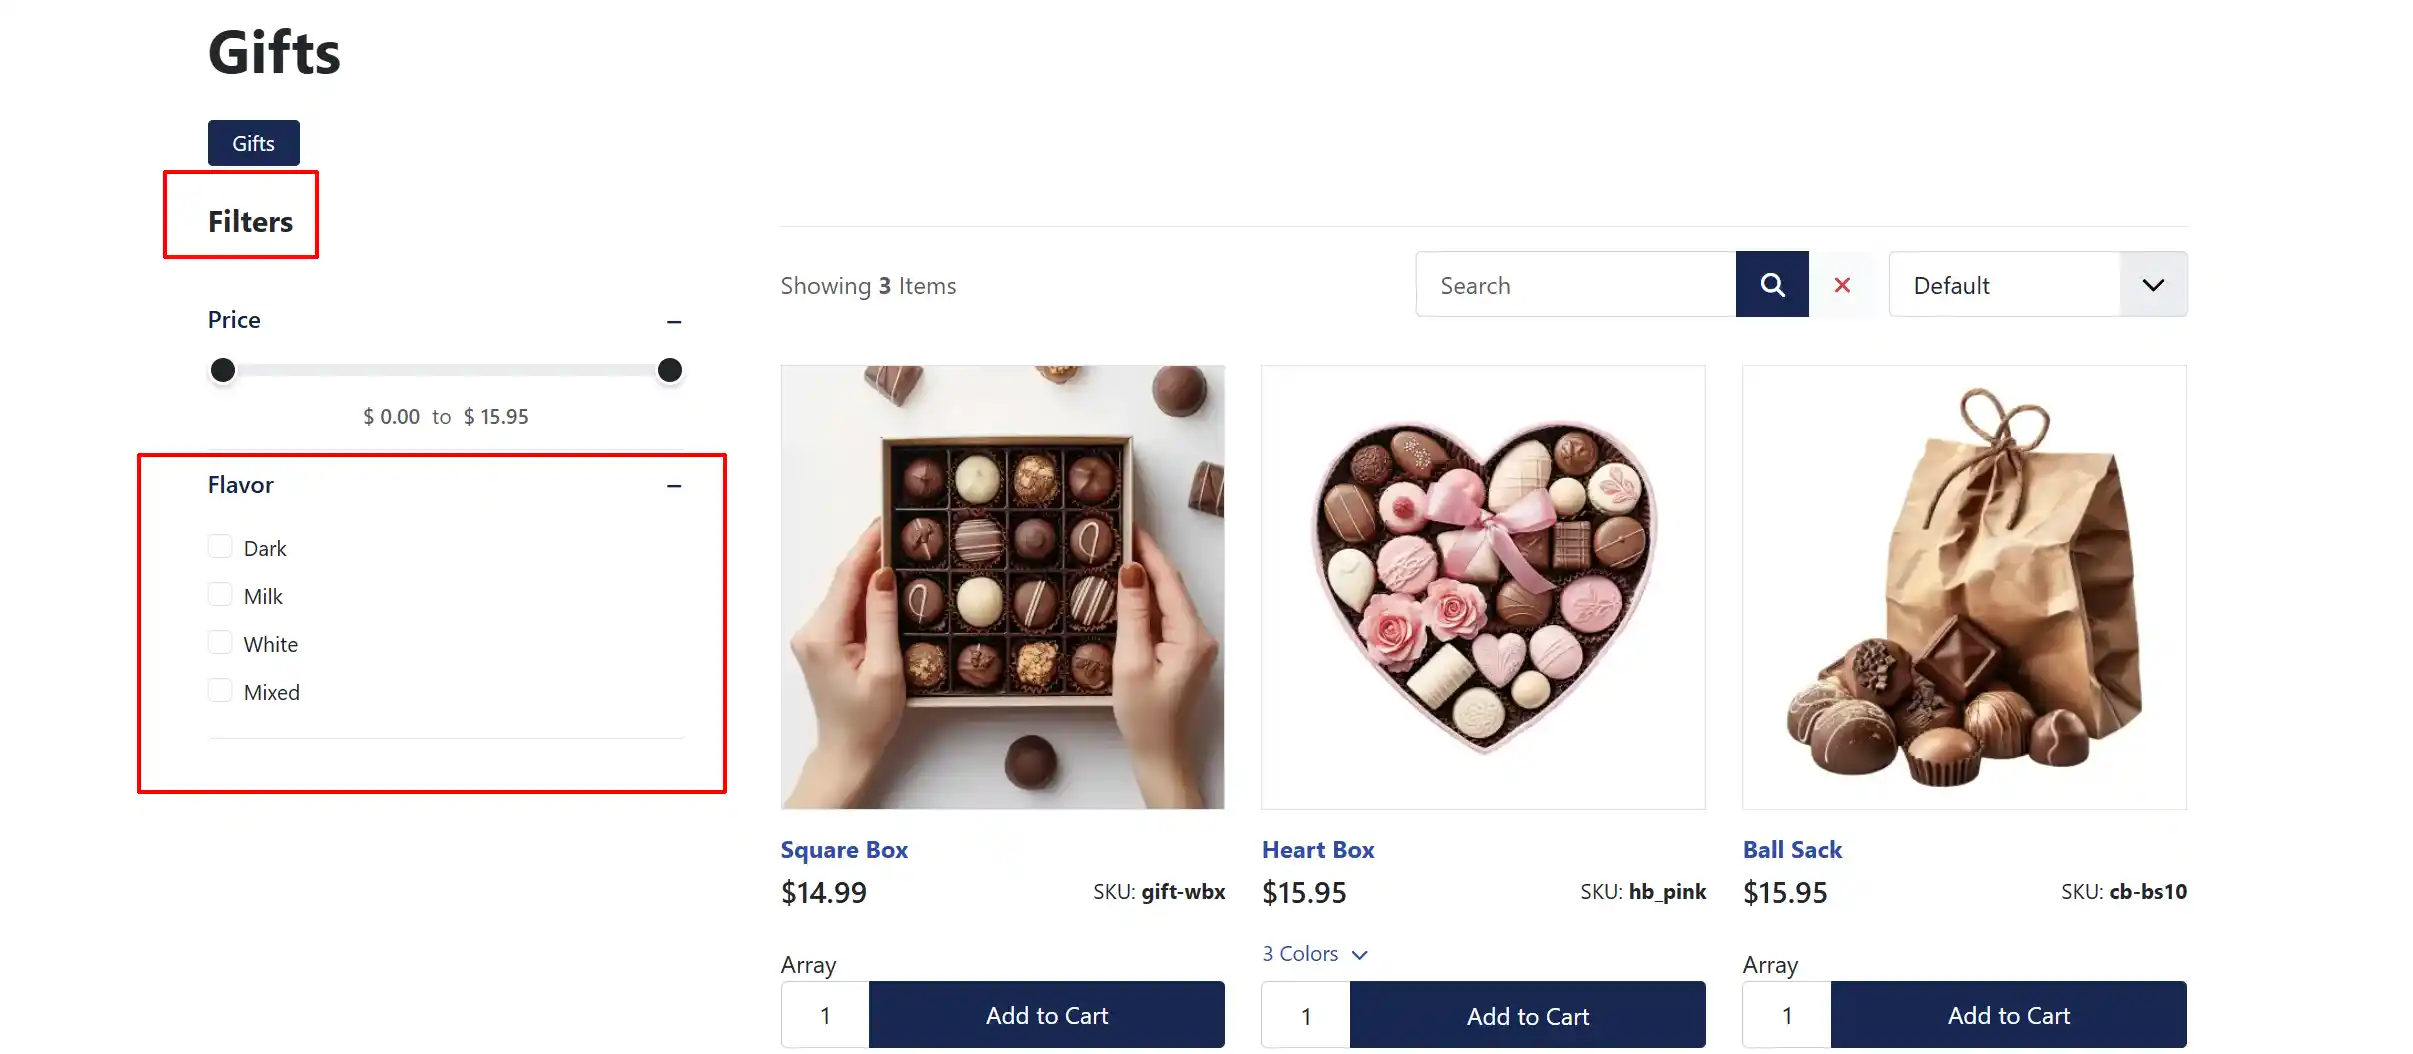
As a default, Specifications will be set as 'No'. This means that any specifications that belong to a product will not appear on the individual product pages. ie, filters, dimensions, weight, etc. The Filters will appear on the category page, though.

Frontend - Category Page
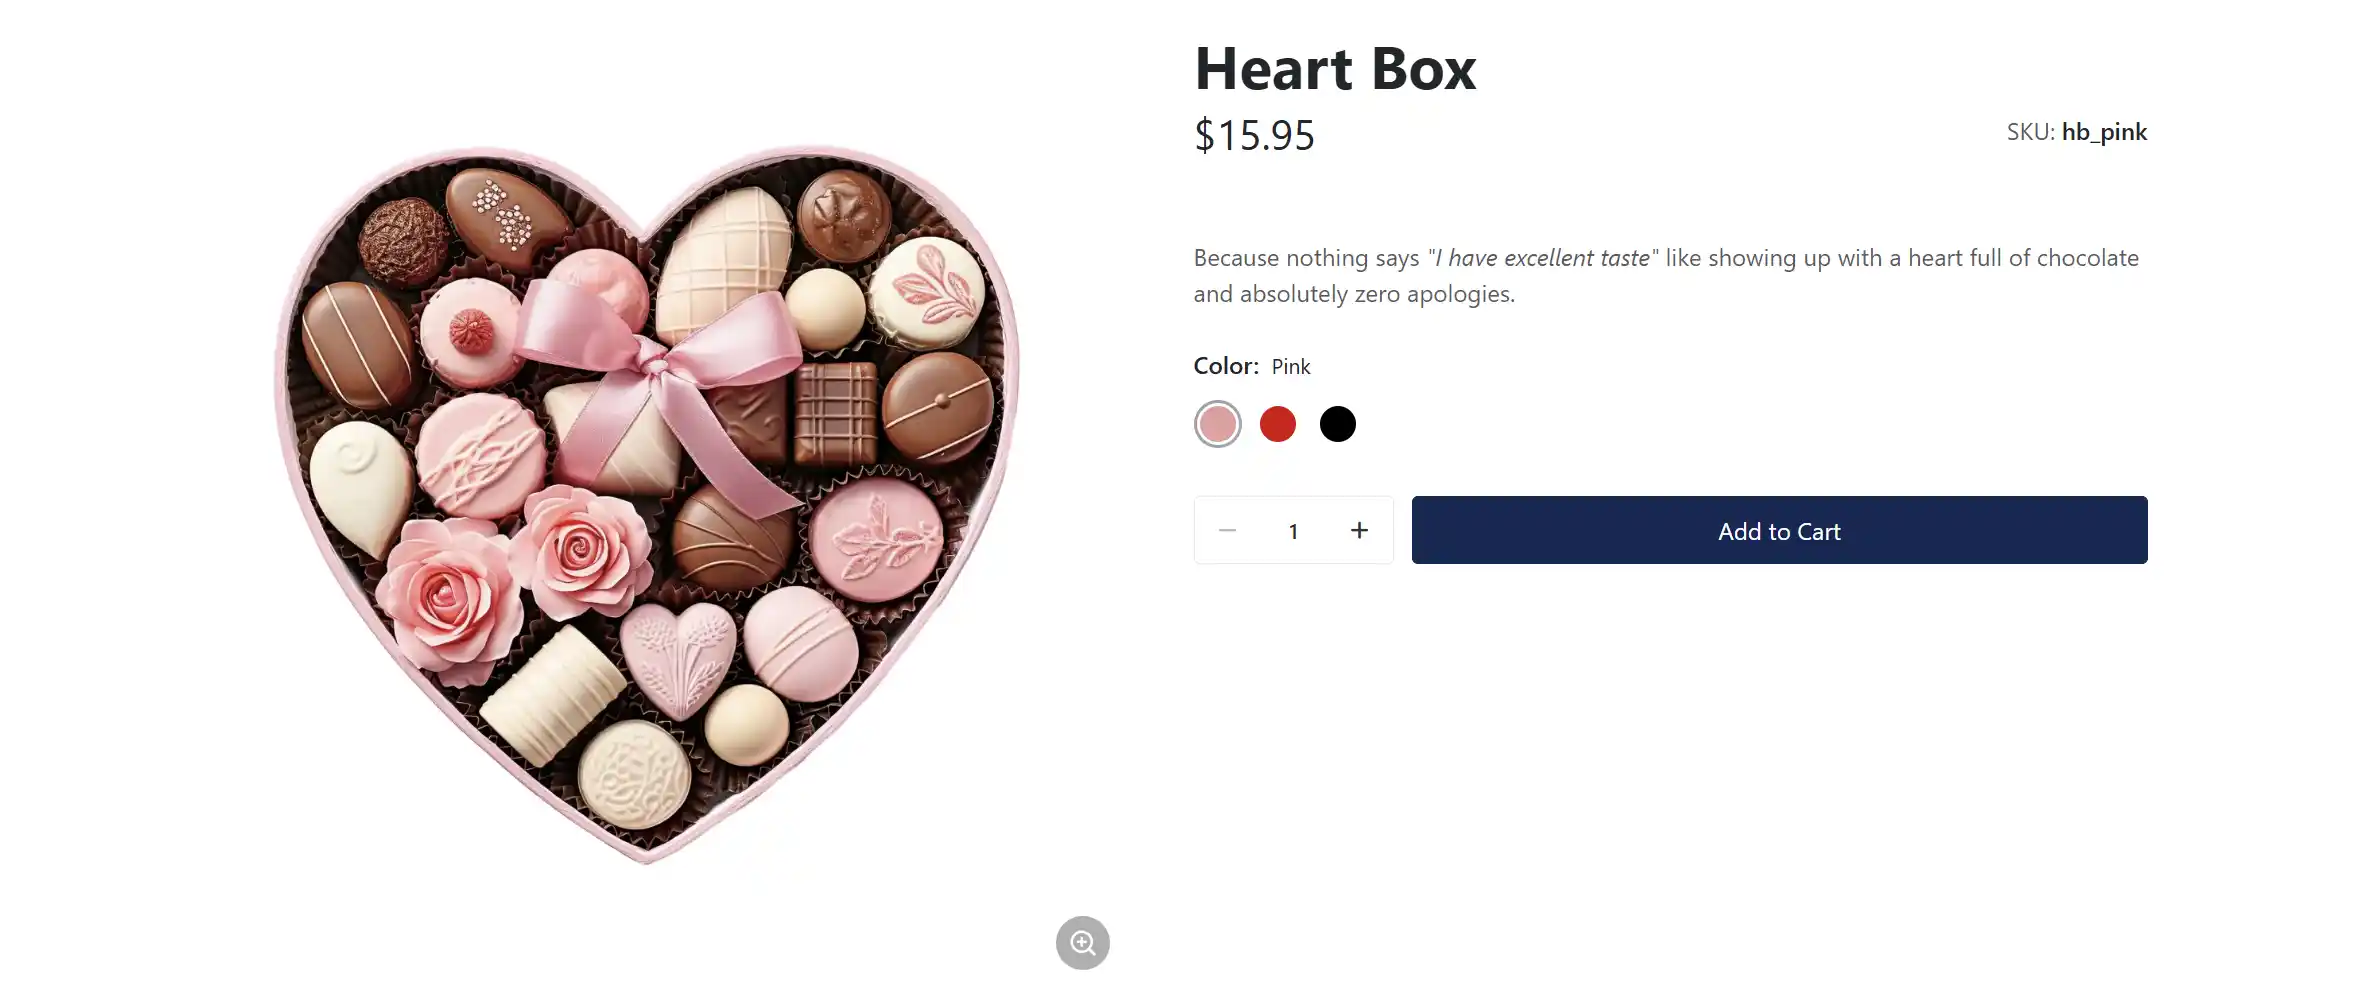
Frontend - Product Page
Example 2:
Once you select 'Yes' for Specifications, two more options will appear
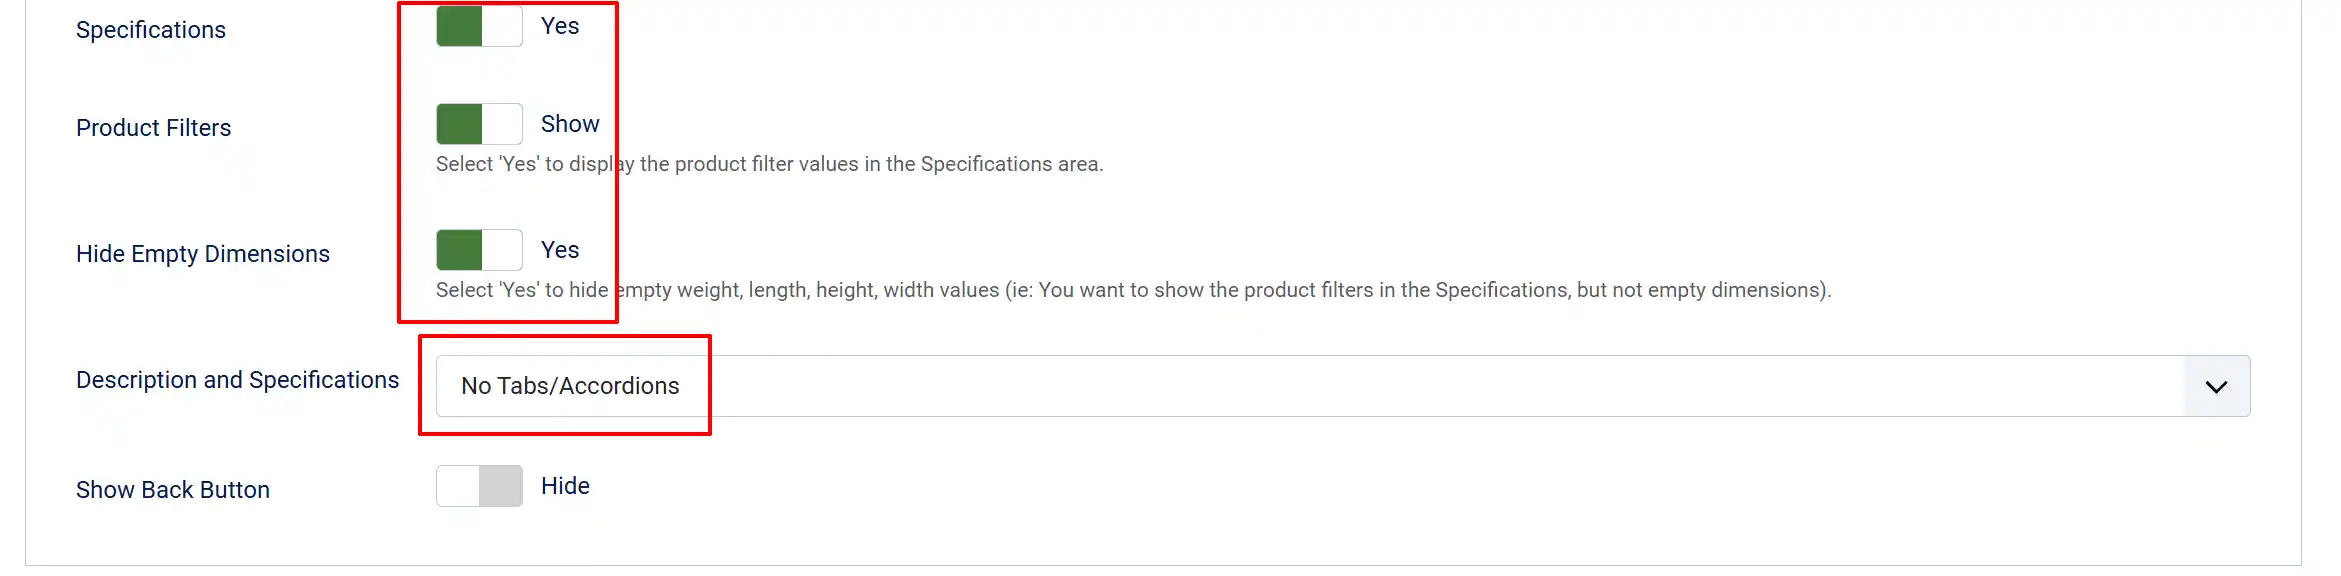
Product Filters: Select 'Show' to display the product filter values in the Specifications area.
Hide Empty Dimensions: Select 'Yes' to hide empty weight, length, height, and width values (i.e., you want to show the product filters in the Specifications, but not empty dimensions).
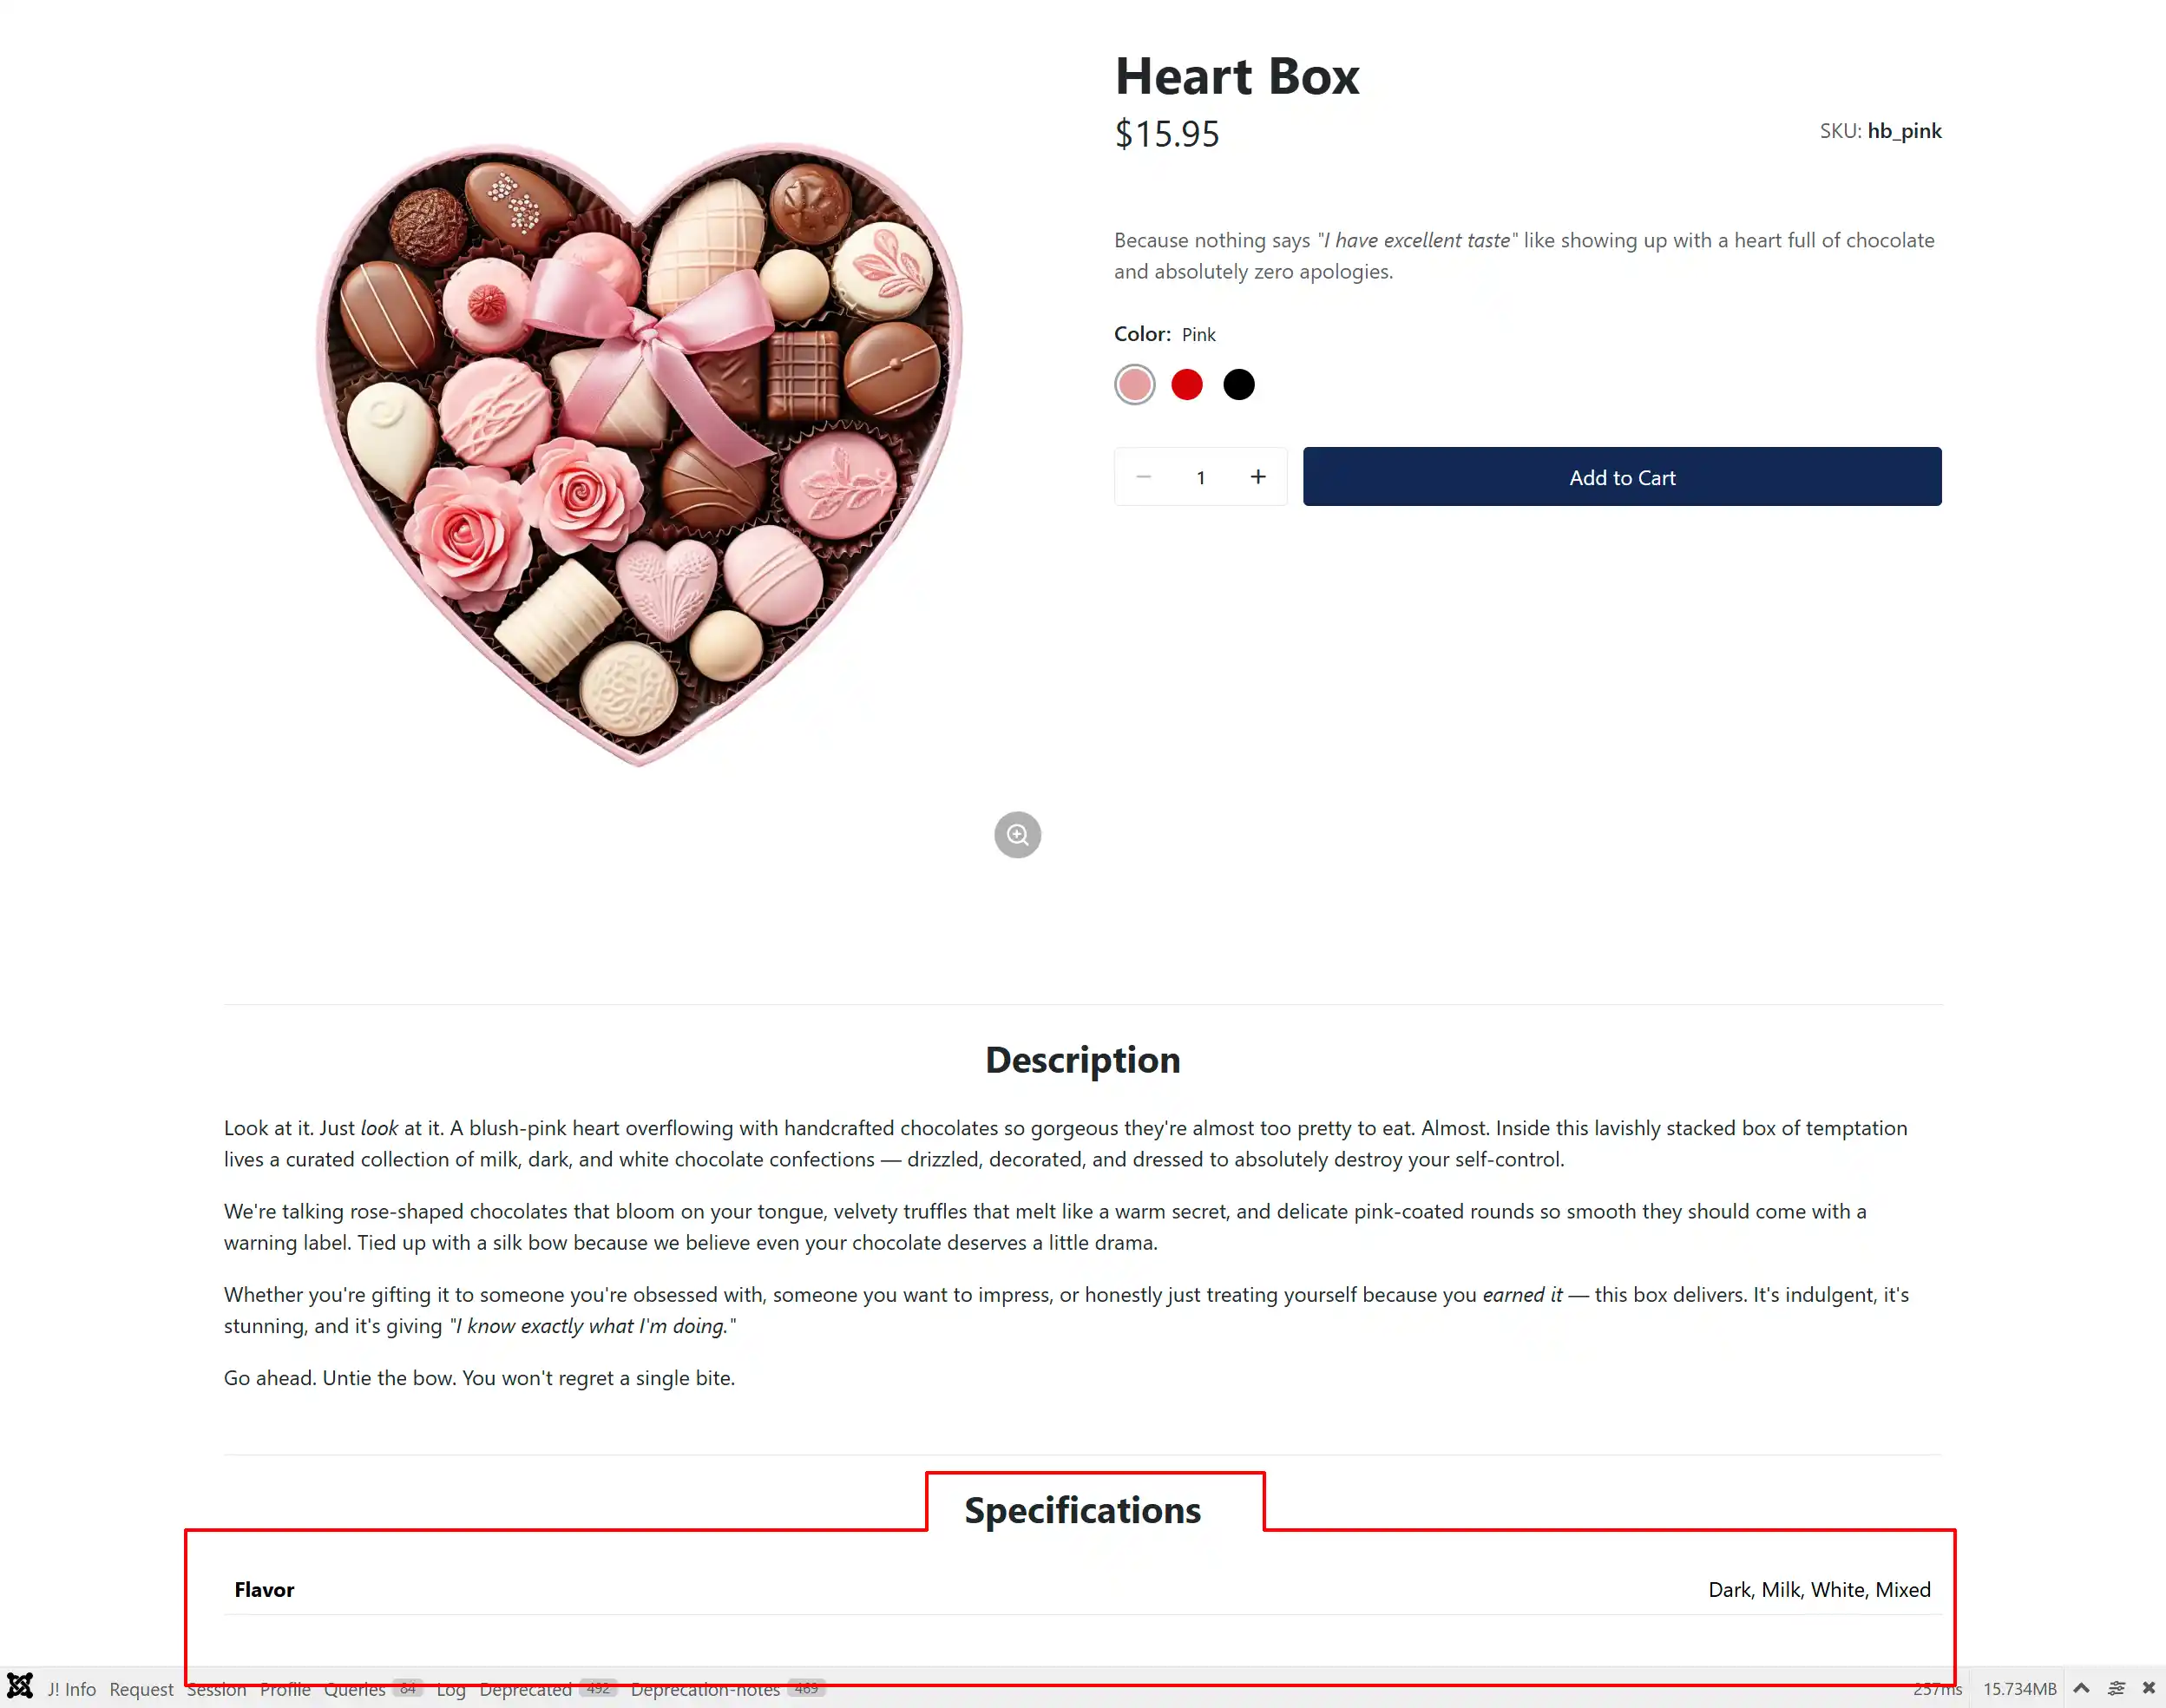
Description and Specifications: (No Tabs/Accordions) They will appear on top of each other.
Example 3:
We will keep the previous options the same and only change how the Description and Specifications are shown.
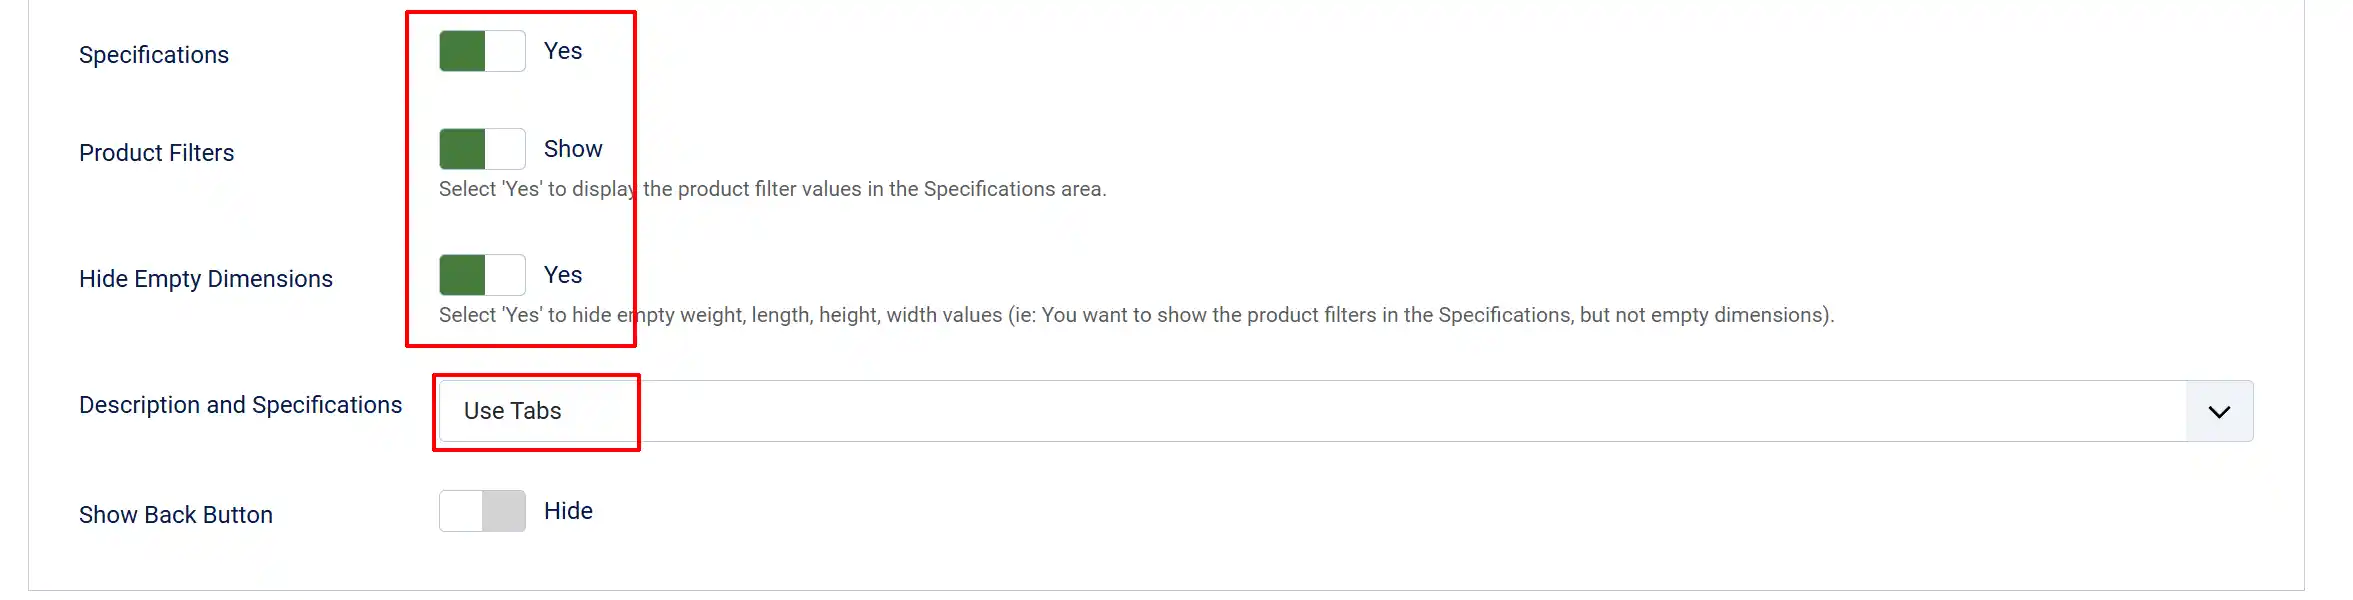
Description and Specifications: (Use Tabs) They are now next to each other in separate tabs
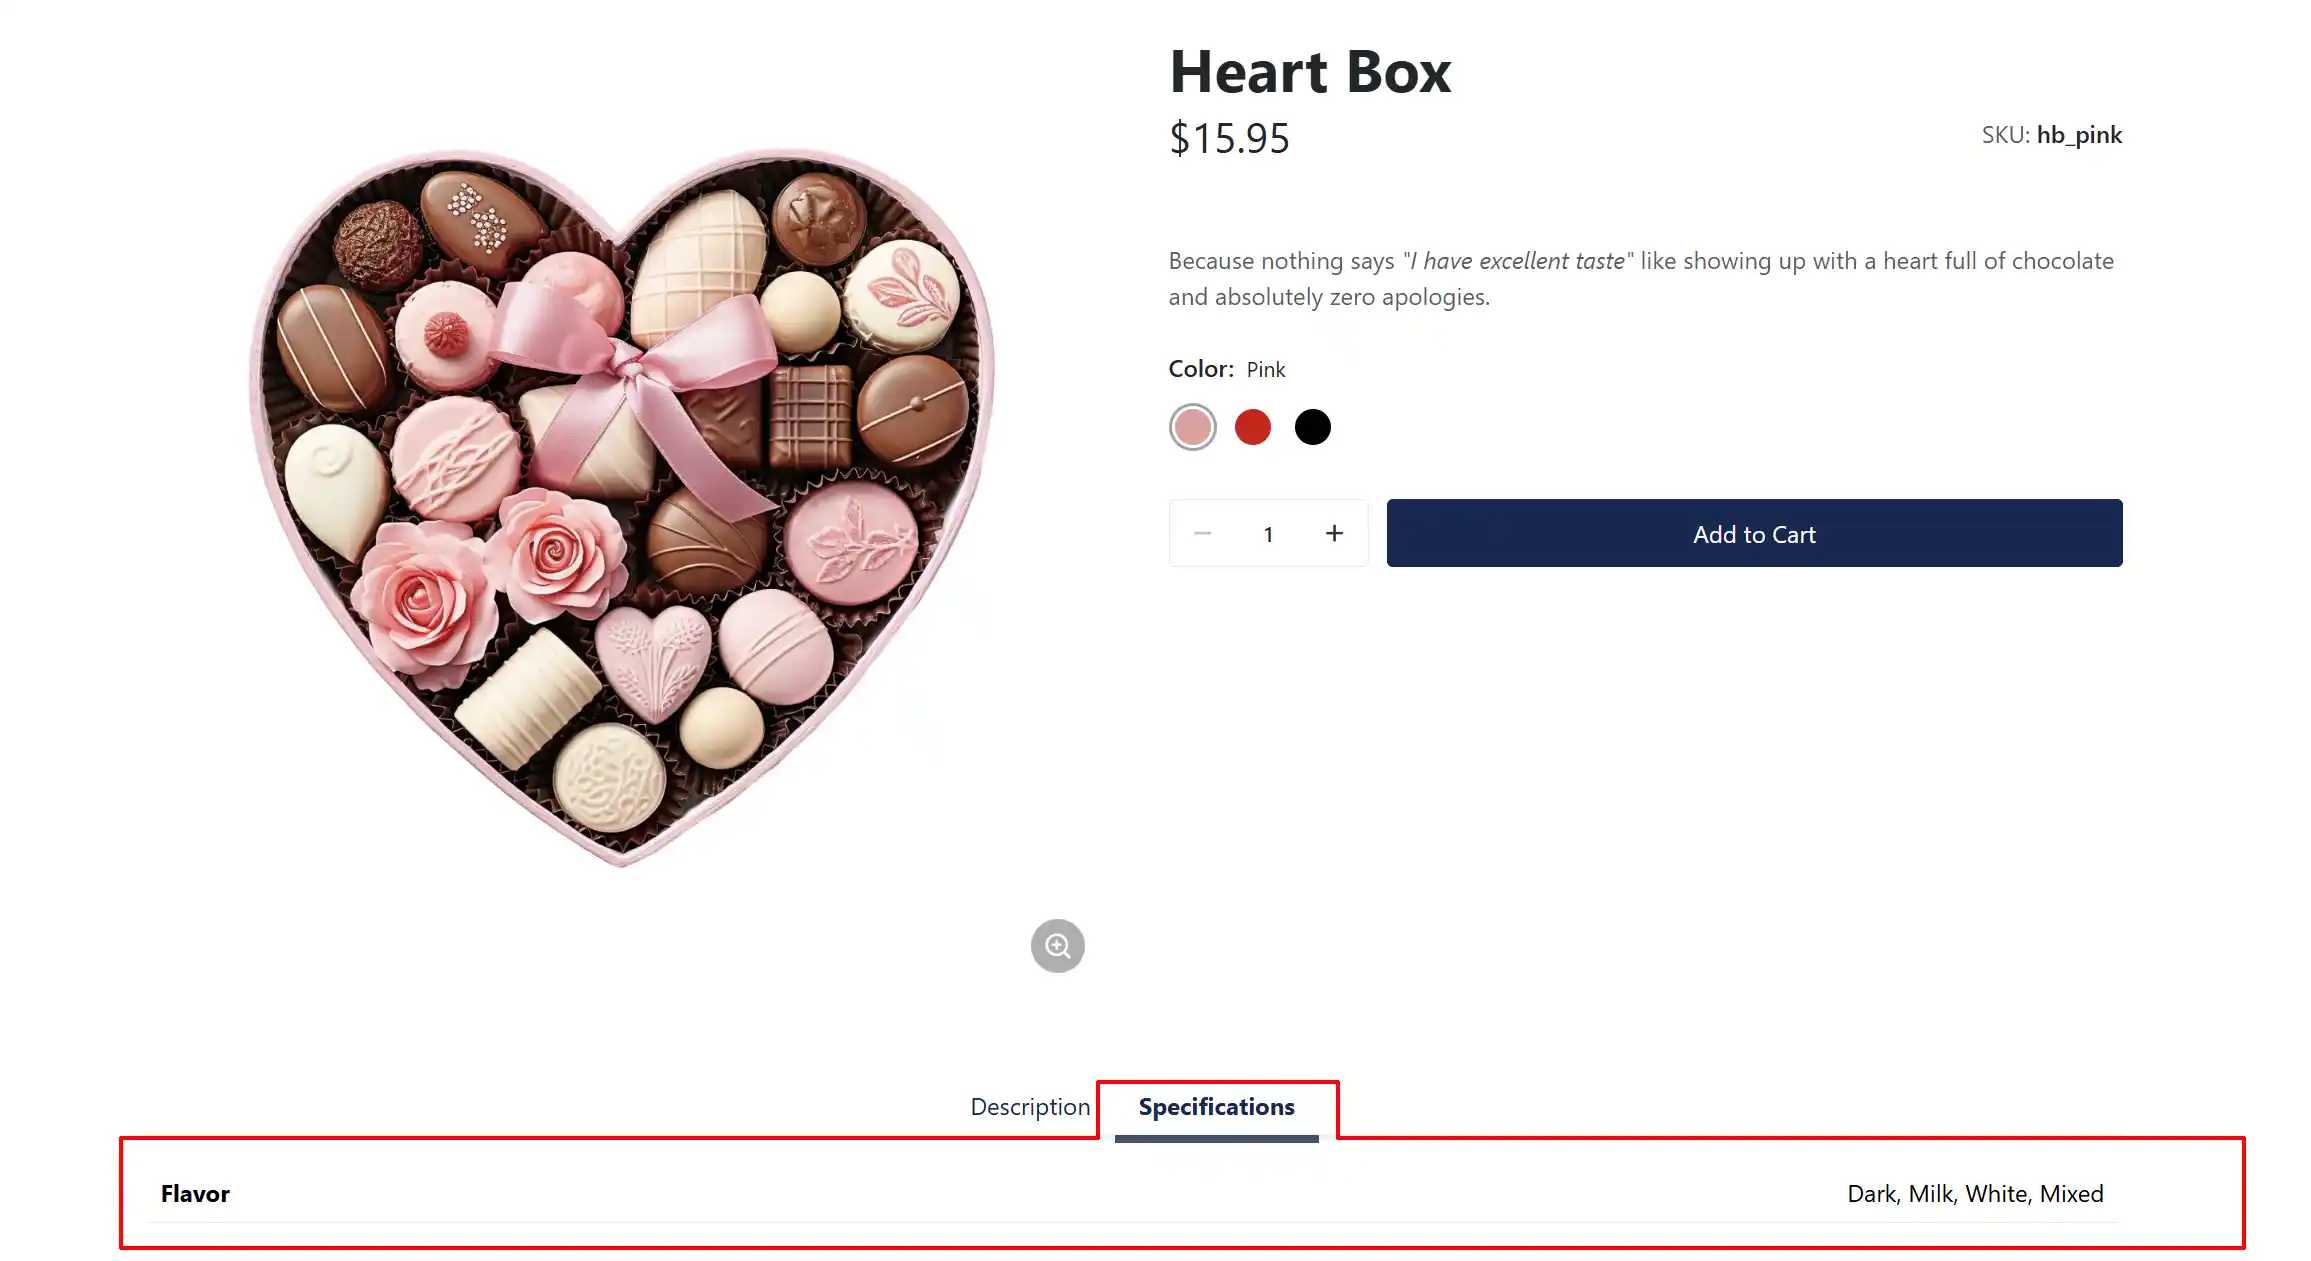
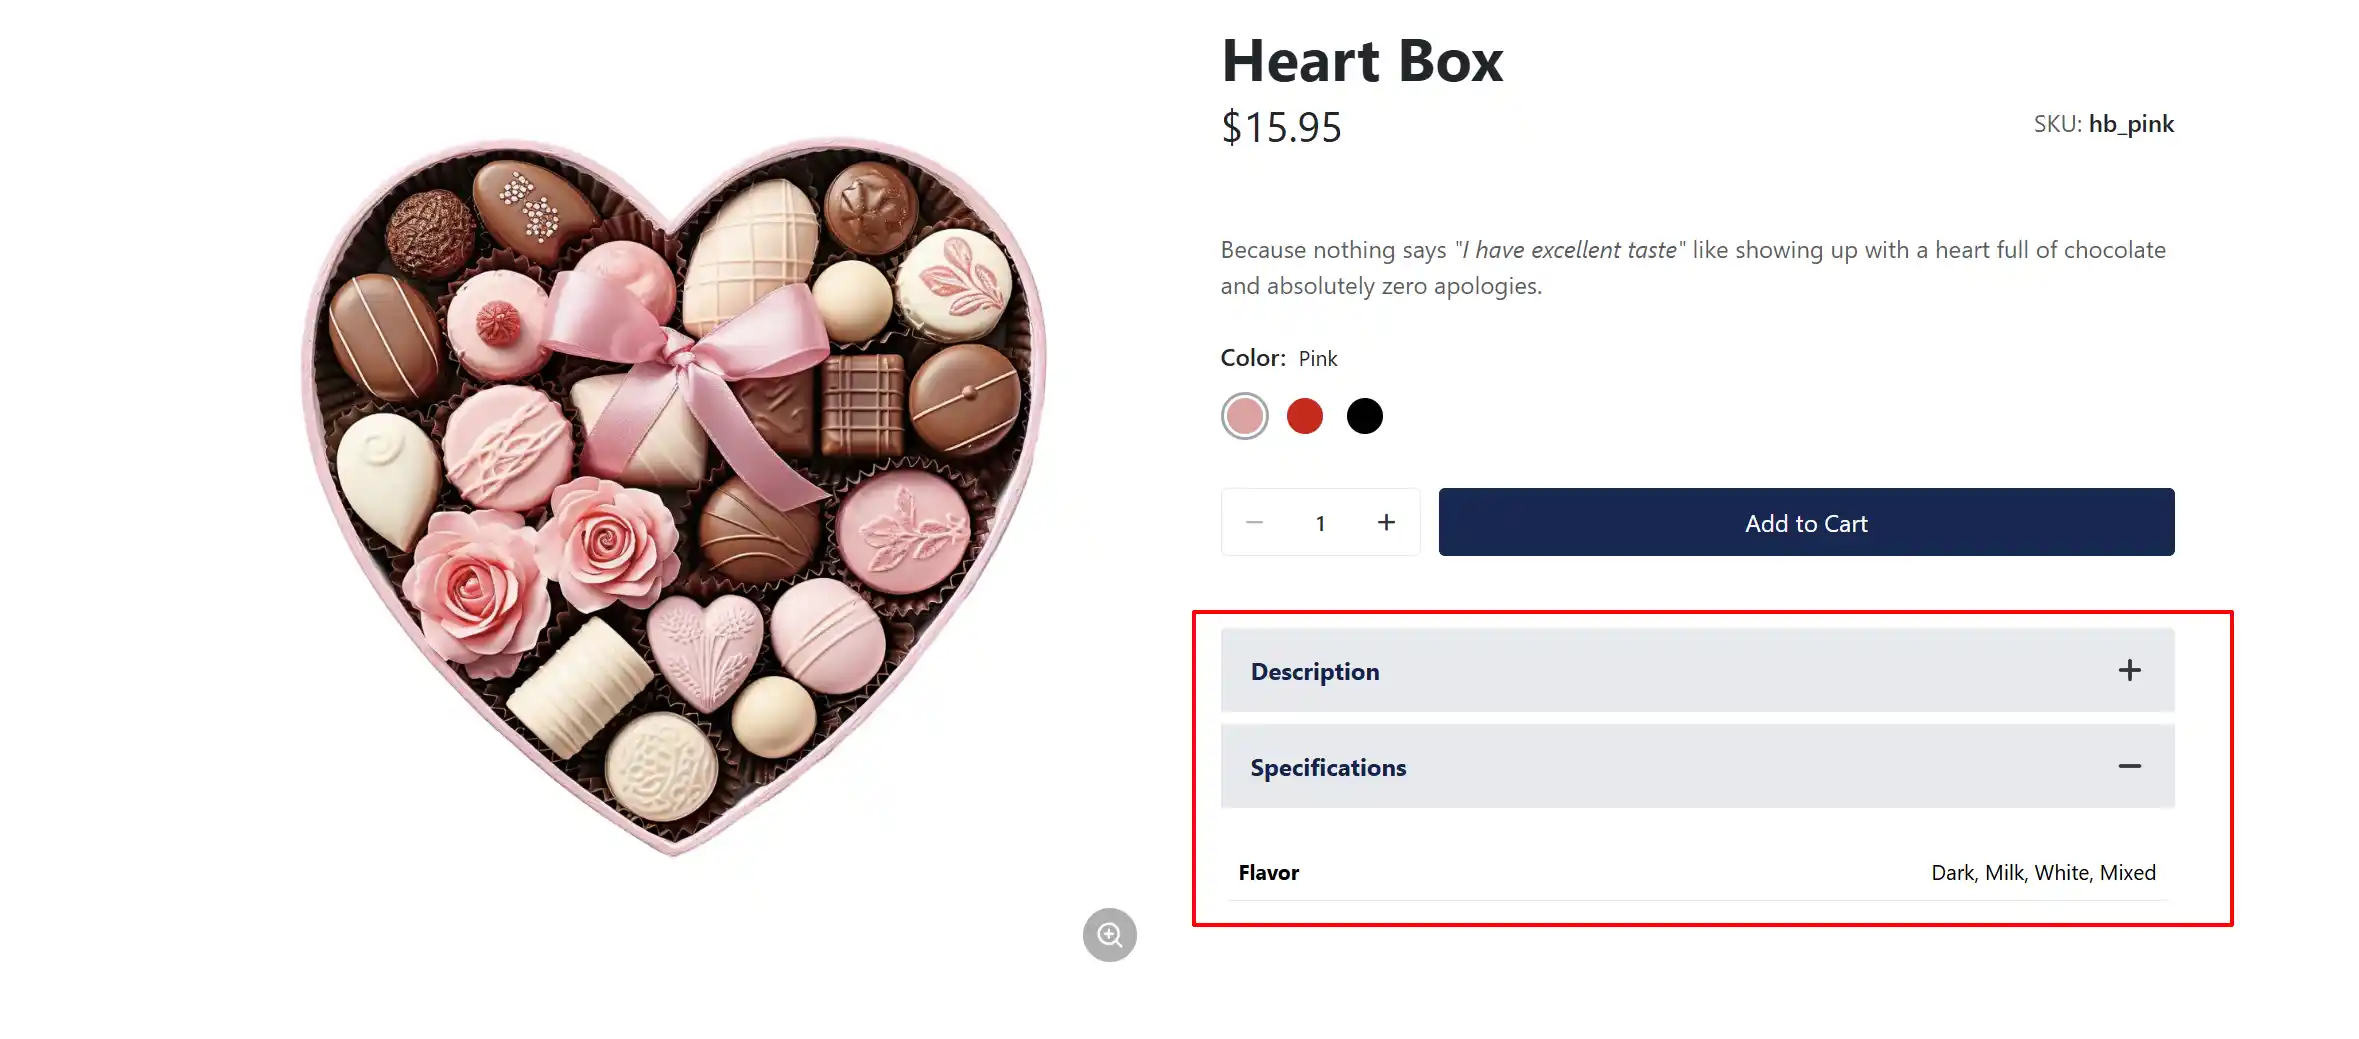
Example 4:
We will keep the previous options the same and only change how the Description and Specifications are shown.
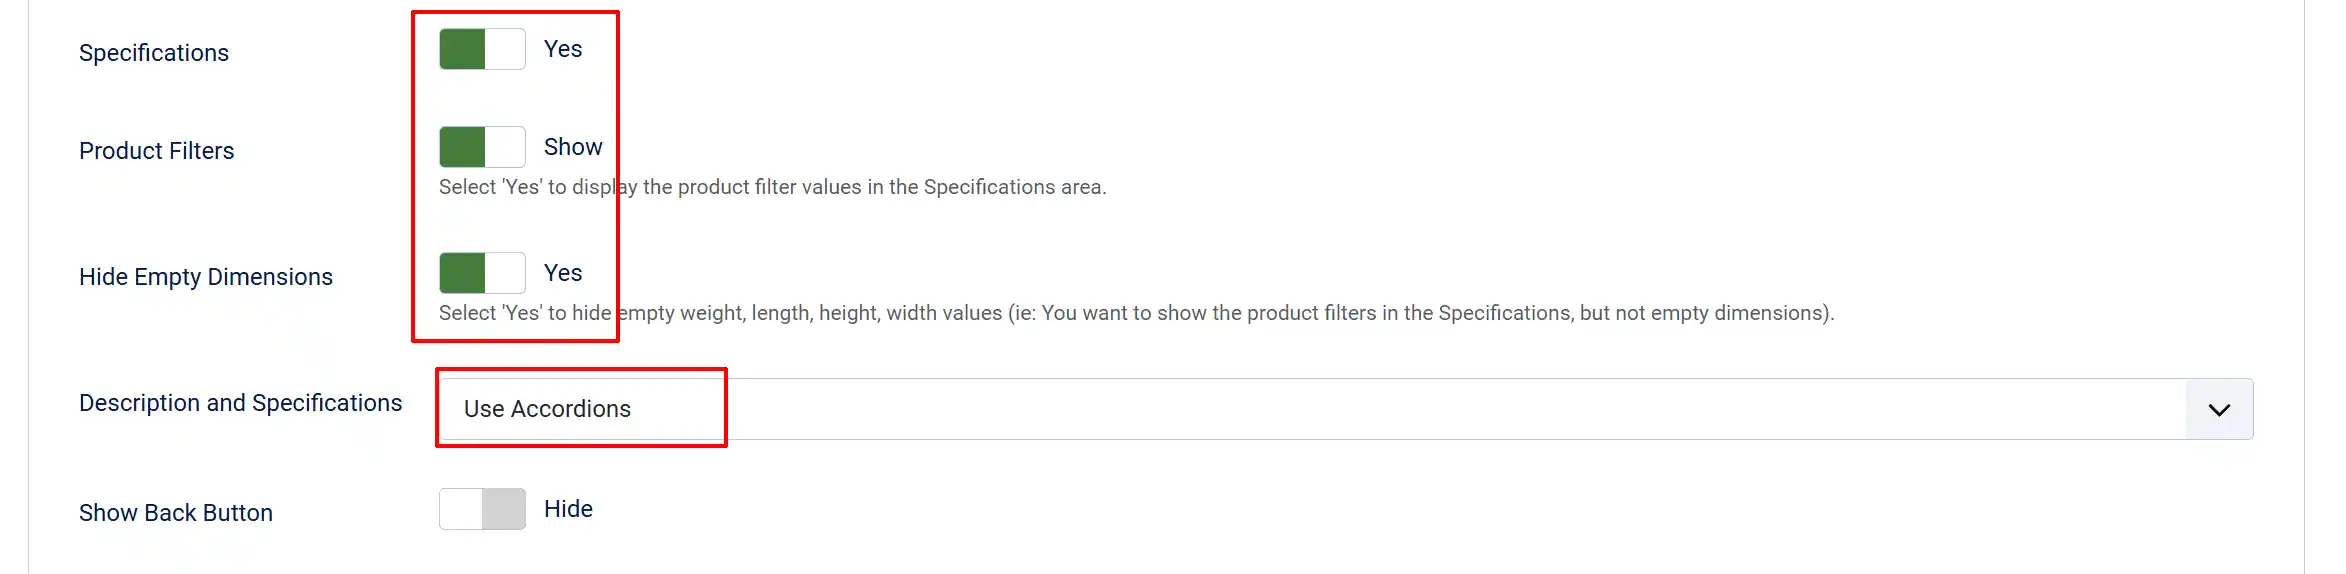
Description and Specifications: (Use Accordions) They are now under the Add to Cart button in an accordion style that can be opened or closed.