Inventory
The Inventory screen gives you a single place to check and update stock levels across all your products. You can see how many units are available, turn stock tracking on or off for individual products, and manually mark items as in stock or out of stock — all without opening each product individually.
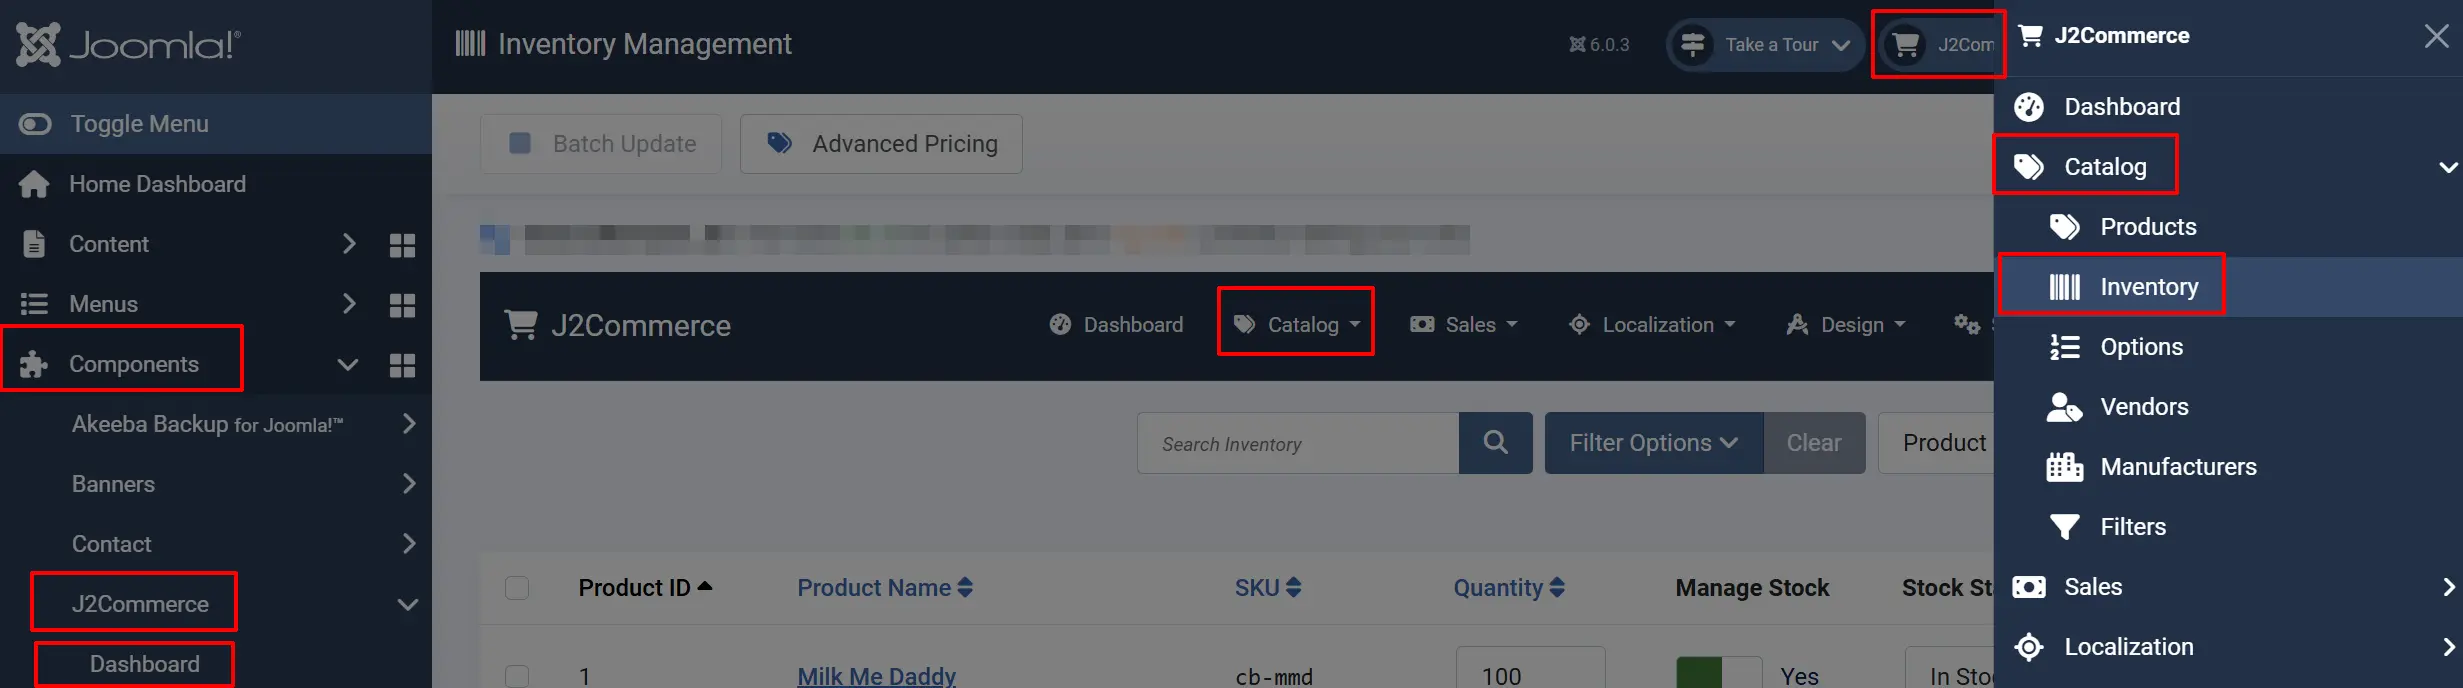
Accessing Inventory
There are two ways you can access Manufacturers.
Option A: Go to the J2Commerce icon at the top right corner -> Catalog -> Manufacturers
Option B: Go to Components on the left sidebar -> J2Commerce -> Dashboard -> Catalog -> Manufacturers
Understanding the Inventory List

Each row in the list represents one product. The columns are:
Product ID: The internal ID number for the product.
Product Name: The product title. Click to open the product for editing.
SKU: The Stock Keeping Unit code for this product or its master variant.
Quantity: The current number of units available.
Manage Stock: Whether J2Commerce tracks inventory for this item. Toggle Yes or Never.
Stock Status: A manual flag — In Stock or Out of Stock.
Actions: A Save button to apply your changes to that row.
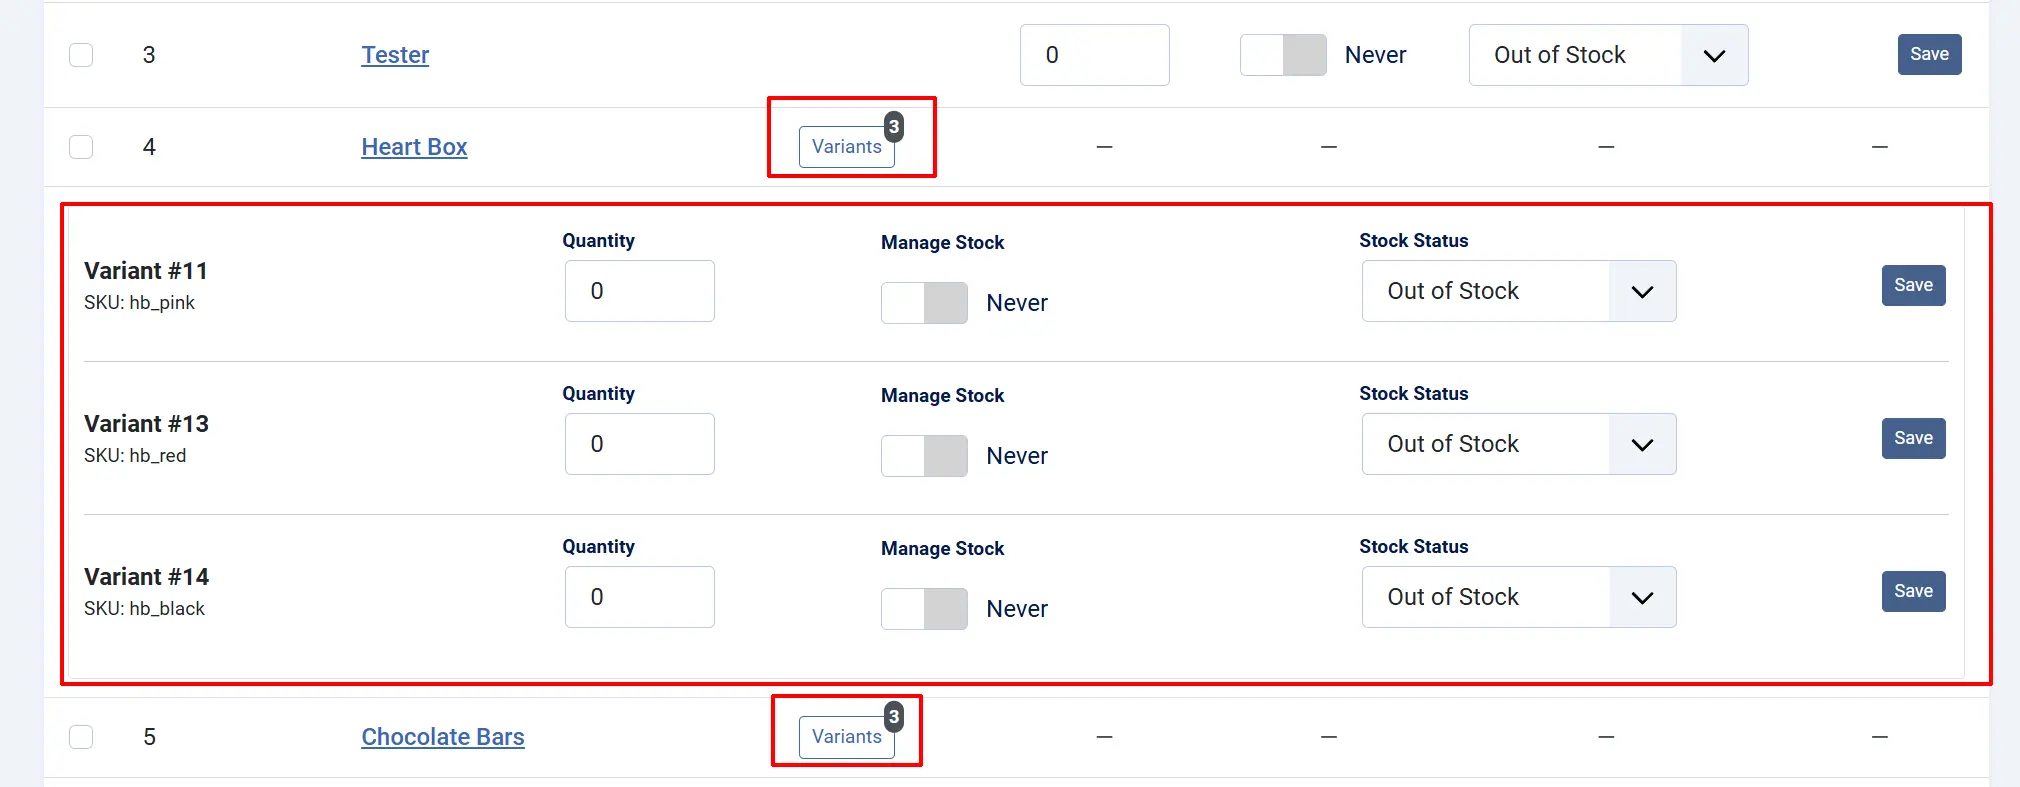
Variable Products
Products with selectable options (such as size or color) show a Variants button instead of editable fields in the main row. Click Variants to expand a panel showing each option combination with its own quantity, manage stock, and stock status settings.
How Inventory Tracking Works
There are two separate settings that control how a product behaves when stock runs low:
Manage Stock (Yes / Never) : When set to Yes, J2Commerce actively tracks the quantity for this item. Customers cannot add more to their cart than you have in stock. : When set to Never, J2Commerce ignores the quantity field entirely. The product is always purchasable regardless of what the quantity shows.
Stock Status (In Stock / Out of Stock) : This is a manual override that you control directly. Setting a product to Out of Stock prevents customers from purchasing it, even if the quantity is greater than zero. : This is useful when you need to pause sales temporarily — for example, while waiting for a restock shipment.
Use Manage Stock: Yes for physical products where you want automatic enforcement. Use Stock Status: Out of Stock when you need a quick manual hold on purchases.
Updating Stock for a Simple Product
- Find the product in the list. Use the search bar or filters to narrow it down.
- Edit the Quantity, Manage Stock, or Stock Status fields directly in the row.
- Click the Save button at the end of that row.
The page confirms the save with a brief "Saved" message next to the button. No page reload is needed.

Updating Stock for a Variable Product
- Find the product in the list.
- Click the Variants button to expand its variant panel.
- Each variant row shows its own SKU, quantity, manage stock toggle, and stock status.
- Update the fields for the variant you want to change.
- Click Save on that variant row.
Searching and Filtering
Use the search bar to find products by name, SKU, or product ID.
To search by an exact product ID, type id: followed by the number (e.g., id:42).
Click Search Tools to show additional filters:
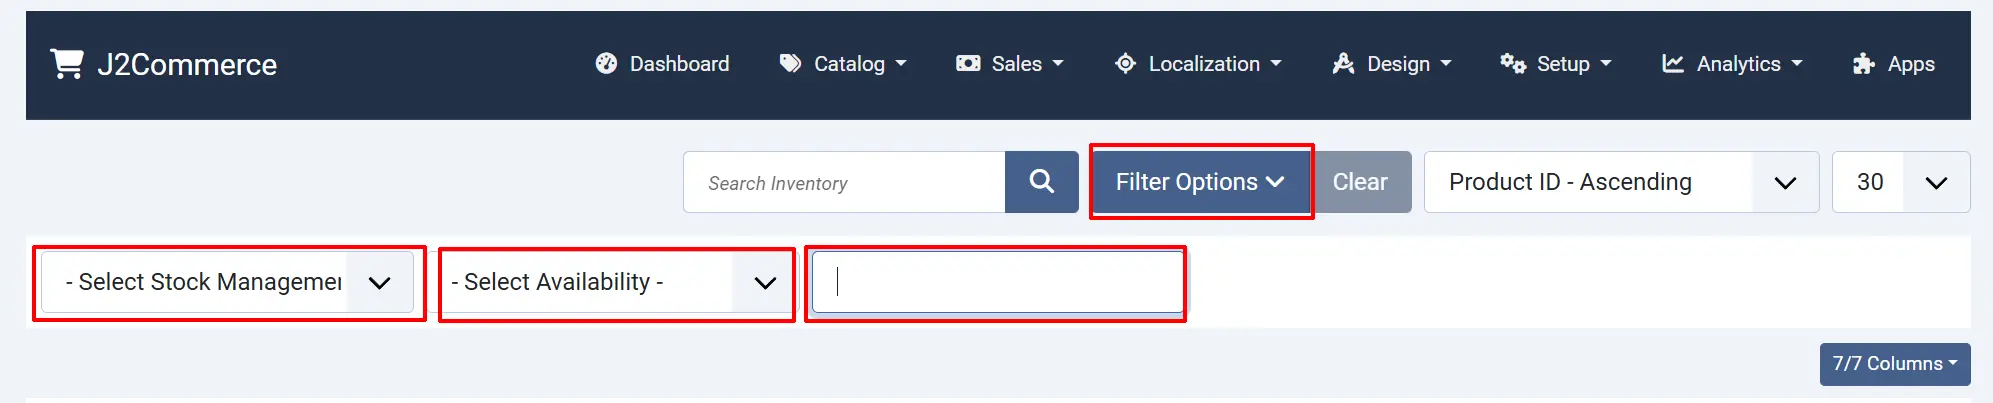
Manage Stock: Show only products where stock tracking is managed or not managed.
Availability: Show only products marked In Stock or Out of Stock.
Product Type: Filter by product type (Simple, Variable, etc.).
Sorting the List
Click any column heading to sort the list by that column. Click again to reverse the order. You can sort by:
- Product ID
- Product Name
- SKU
- Quantity
Batch Updating Inventory
When you need to apply the same stock settings to many products at once, use Batch Update instead of saving each row individually.
-
Check the boxes next to the products you want to update.
-
Click Batch Update in the toolbar.
-
Fill in one or more of the batch fields:
- Quantity — sets the stock level for all selected products.
- Manage Stock — turns stock tracking on or off for all selected products.
- Stock Status — marks all selected products as In Stock or Out of Stock.
-
Click Process.
Only the fields you fill in are updated. Fields left empty are not changed.
Toolbar Actions

Batch Update: Opens the batch update panel to update multiple products at once. At least one product must be checked to activate the Batch Update button.
Advanced Pricing: Opens the Advanced Pricing manager.
Options: Opens the global J2Commerce configuration settings.
Help: Opens the J2Commerce documentation.
Tips
- Sort by Quantity (ascending) to bring your lowest-stock products to the top so you can quickly identify what needs restocking.
- If you do not want to track stock for a product at all, set Manage Stock to Never. The quantity field becomes informational only and has no effect on purchasing.
- Setting Stock Status to Out of Stock is the fastest way to temporarily prevent purchases — no need to delete the product or unpublish it.
- For variable products, each variant manages its own stock independently. A product can have some variants in stock and others out of stock at the same time.
Troubleshooting
A product shows quantity > (0) but customers cannot add it to the cart
Cause: The Stock Status is manually set to Out of Stock, which overrides the quantity.
Solution:
Find the product in the Inventory list and change Stock Status to In Stock, then click Save.
I updated the quantity but the storefront still shows the old stock level
Cause: Joomla page caching may be serving a cached version of the product page.
Solution:
- Go to Home Dashboard -> System -> Clear Cache and clear all cache groups.
- Reload the product page on the front end.
If caching is not the issue, verify that Manage Stock is set to Yes for that product — if it is set to No, the quantity is not enforced and the display may not update as expected.
I cannot see the Save button for a variant product's main row
Cause: Variable products do not have editable fields in the main row. Stock is managed per variant.
Solution:
Click the Variants button on that row to expand the variant panel. Each variant has its own editable fields and Save button.
After a batch update, some products were not changed
Cause: Only checked items are affected by a batch operation.
Solution:
Scroll through the list and verify the correct rows were checked before running the batch. Use the checkbox at the top of the list to select all items on the current page.