Checkout Fields
These are created for additional details to be used in checkout processes that involve billing, payment, shipping etc. For instance, the ‘last name’ of a customer is not required for billing, but it is required for shipment. So, it is created as a checkout field and made to be displayed in the shipping address.
Requirements
- with PHP 8.3.0 +
- Joomla! 6.x
- J2Commerce 6.x
Locating Checkout Fields
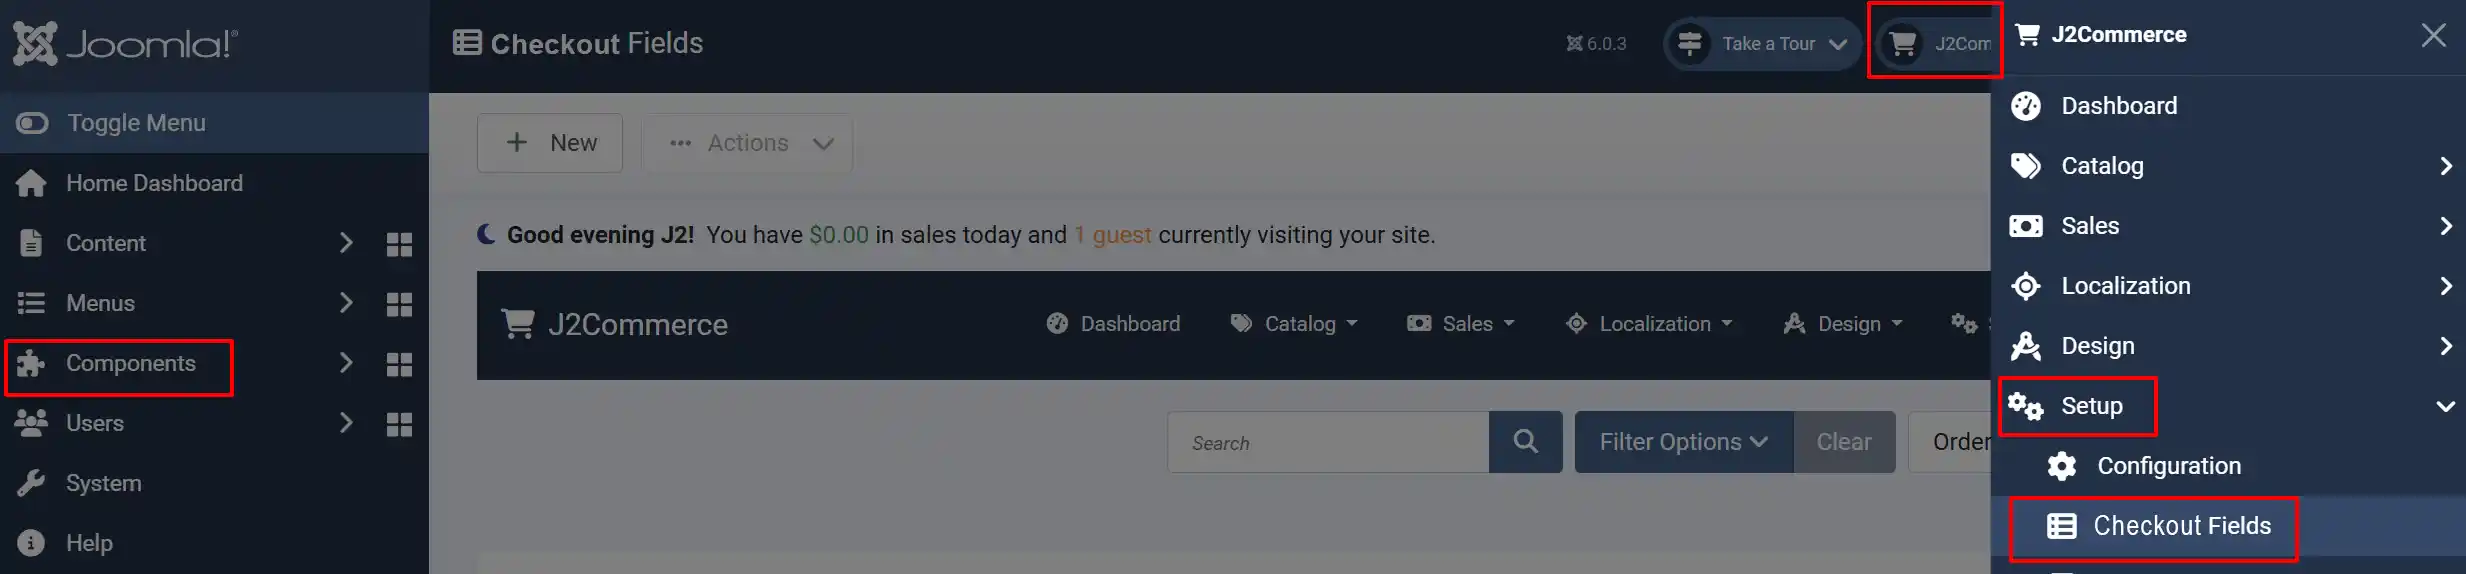
There are two ways you can access the plugin.
Option A: Go to the J2Commerce icon at the top right corner -> Setup -> Checkout Fields
Option B: Go to Components on the left sidebar -> J2Commerce -> Dashboard -> Setup -> Checkout Fields
There are two types of checkout field, namely, Core Checkout Fields and Non-Core Checkout Fields.
Checkout fields that are in J2Commerce by default are Core checkout field, and those that are created by users are Non-Core checkout field.
Core checkout field can be edited as per the user's wish, but it is not advisable to make changes to Core checkout field except for changing the name and label of the fields.
Standard Checkout Fields

The following is a list of Core checkout field:
- first_name
- last_name
- address_1
- address_2
- phone_1
- phone_2
- city
- zip
- country
- company
- tax number
- zone_id
- country_id
Creating a Custom Checkout Field
Apart from these Core checkout field, you can create your own checkout field according to your requirements.
NOTE: We recommend you look through the ones that already exist before you create a new one so you don't have duplicates.
For example, if you want to add a custom note for your reference, you can create it as a checkout field and make it be displayed in the billing or shipping process.
Let us see how to create a checkout field.
In the checkout field list view, click the New button. You will get a screen as shown in the image below.
Basic Tab

To add a checkout field, we need to enter the following details. They are given below one by one:
Field Name: Name of the checkout field that is displayed in the layout
Field name should be enclosed with square brackets (for example, [custom_address3] )
NOTE: The remaining fields after the Field Type is selected will be different based on the Field Type chosen, and the details have to be fed as required by the changed fields
Field Type: This is the type of field you are about to create, and there are 13 types available to choose from - they are: Text, Email, Text Area, wysiwyg editor (what you see is what you get), Radio, Checkbox, Single Dropdown, Zone/Country List, Date, Time, Date Time, Custom Text, and Telephone
Core Field: Core fields are required by the system and cannot be deleted
Required: Select 'Yes' to make this field mandatory during checkout
Status: Set the status to 'Published' in order for it to appear as an option.
Countries Tab
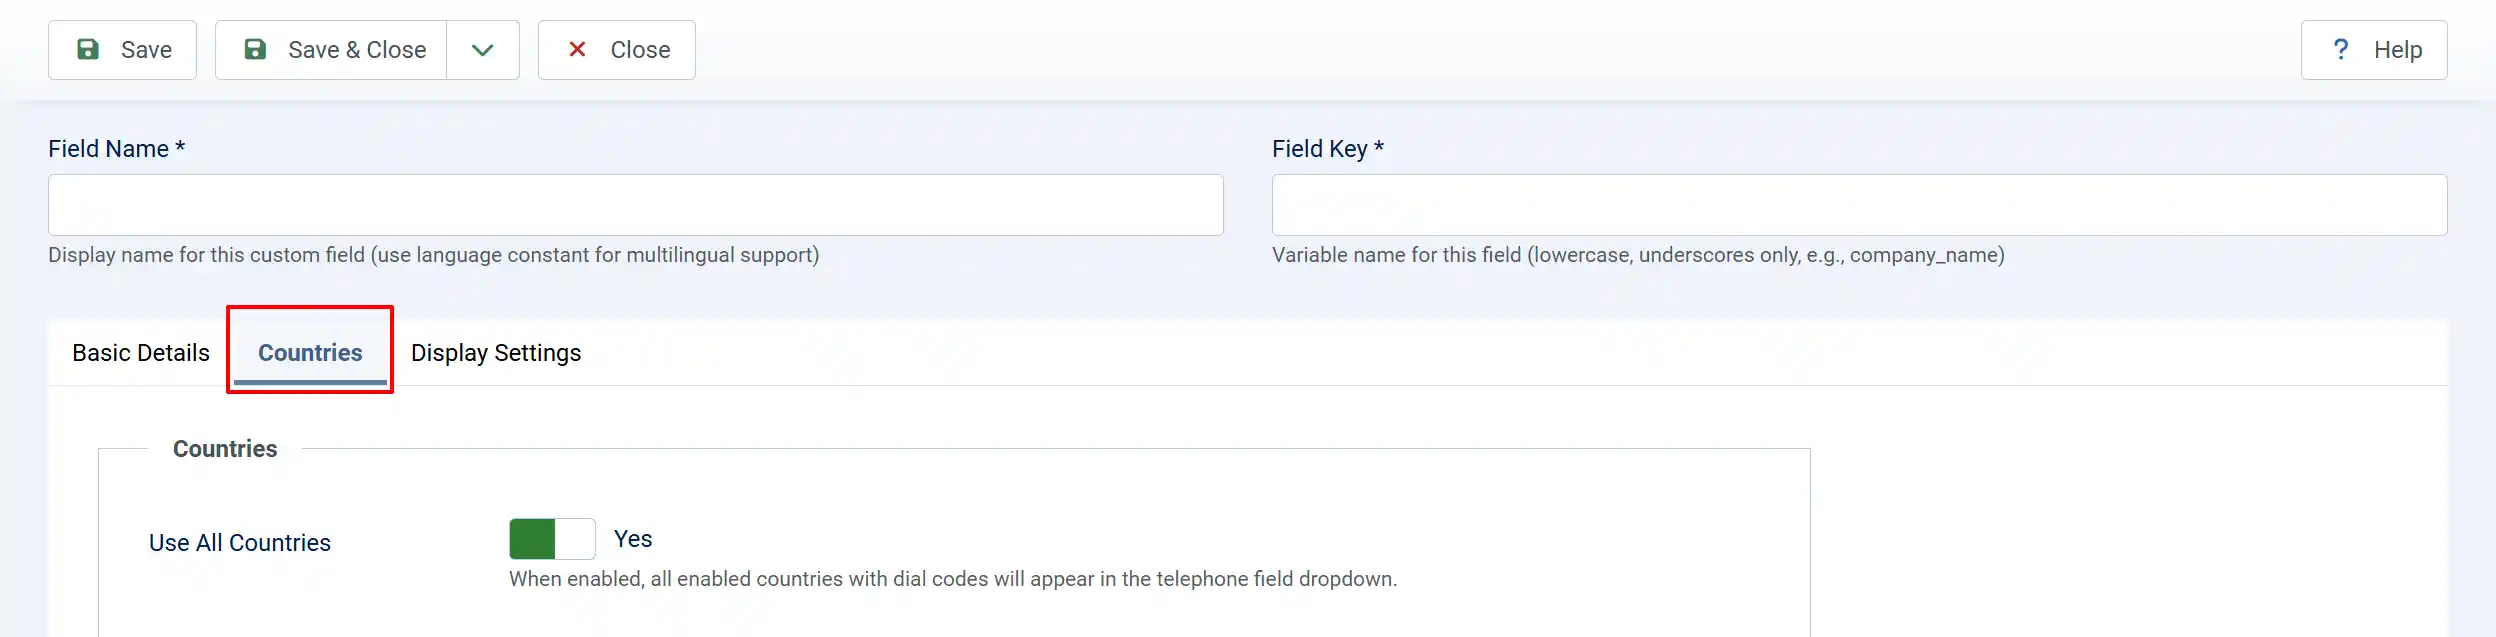
Use All Countries:
-
Select 'Yes' to enable all countries with dial codes to appear in the telephone field dropdown.
-
Select 'No' to choose which countries are available in the telephone dropdown. Only enabled countries in the store will appear in the frontend
Display Settings Tab
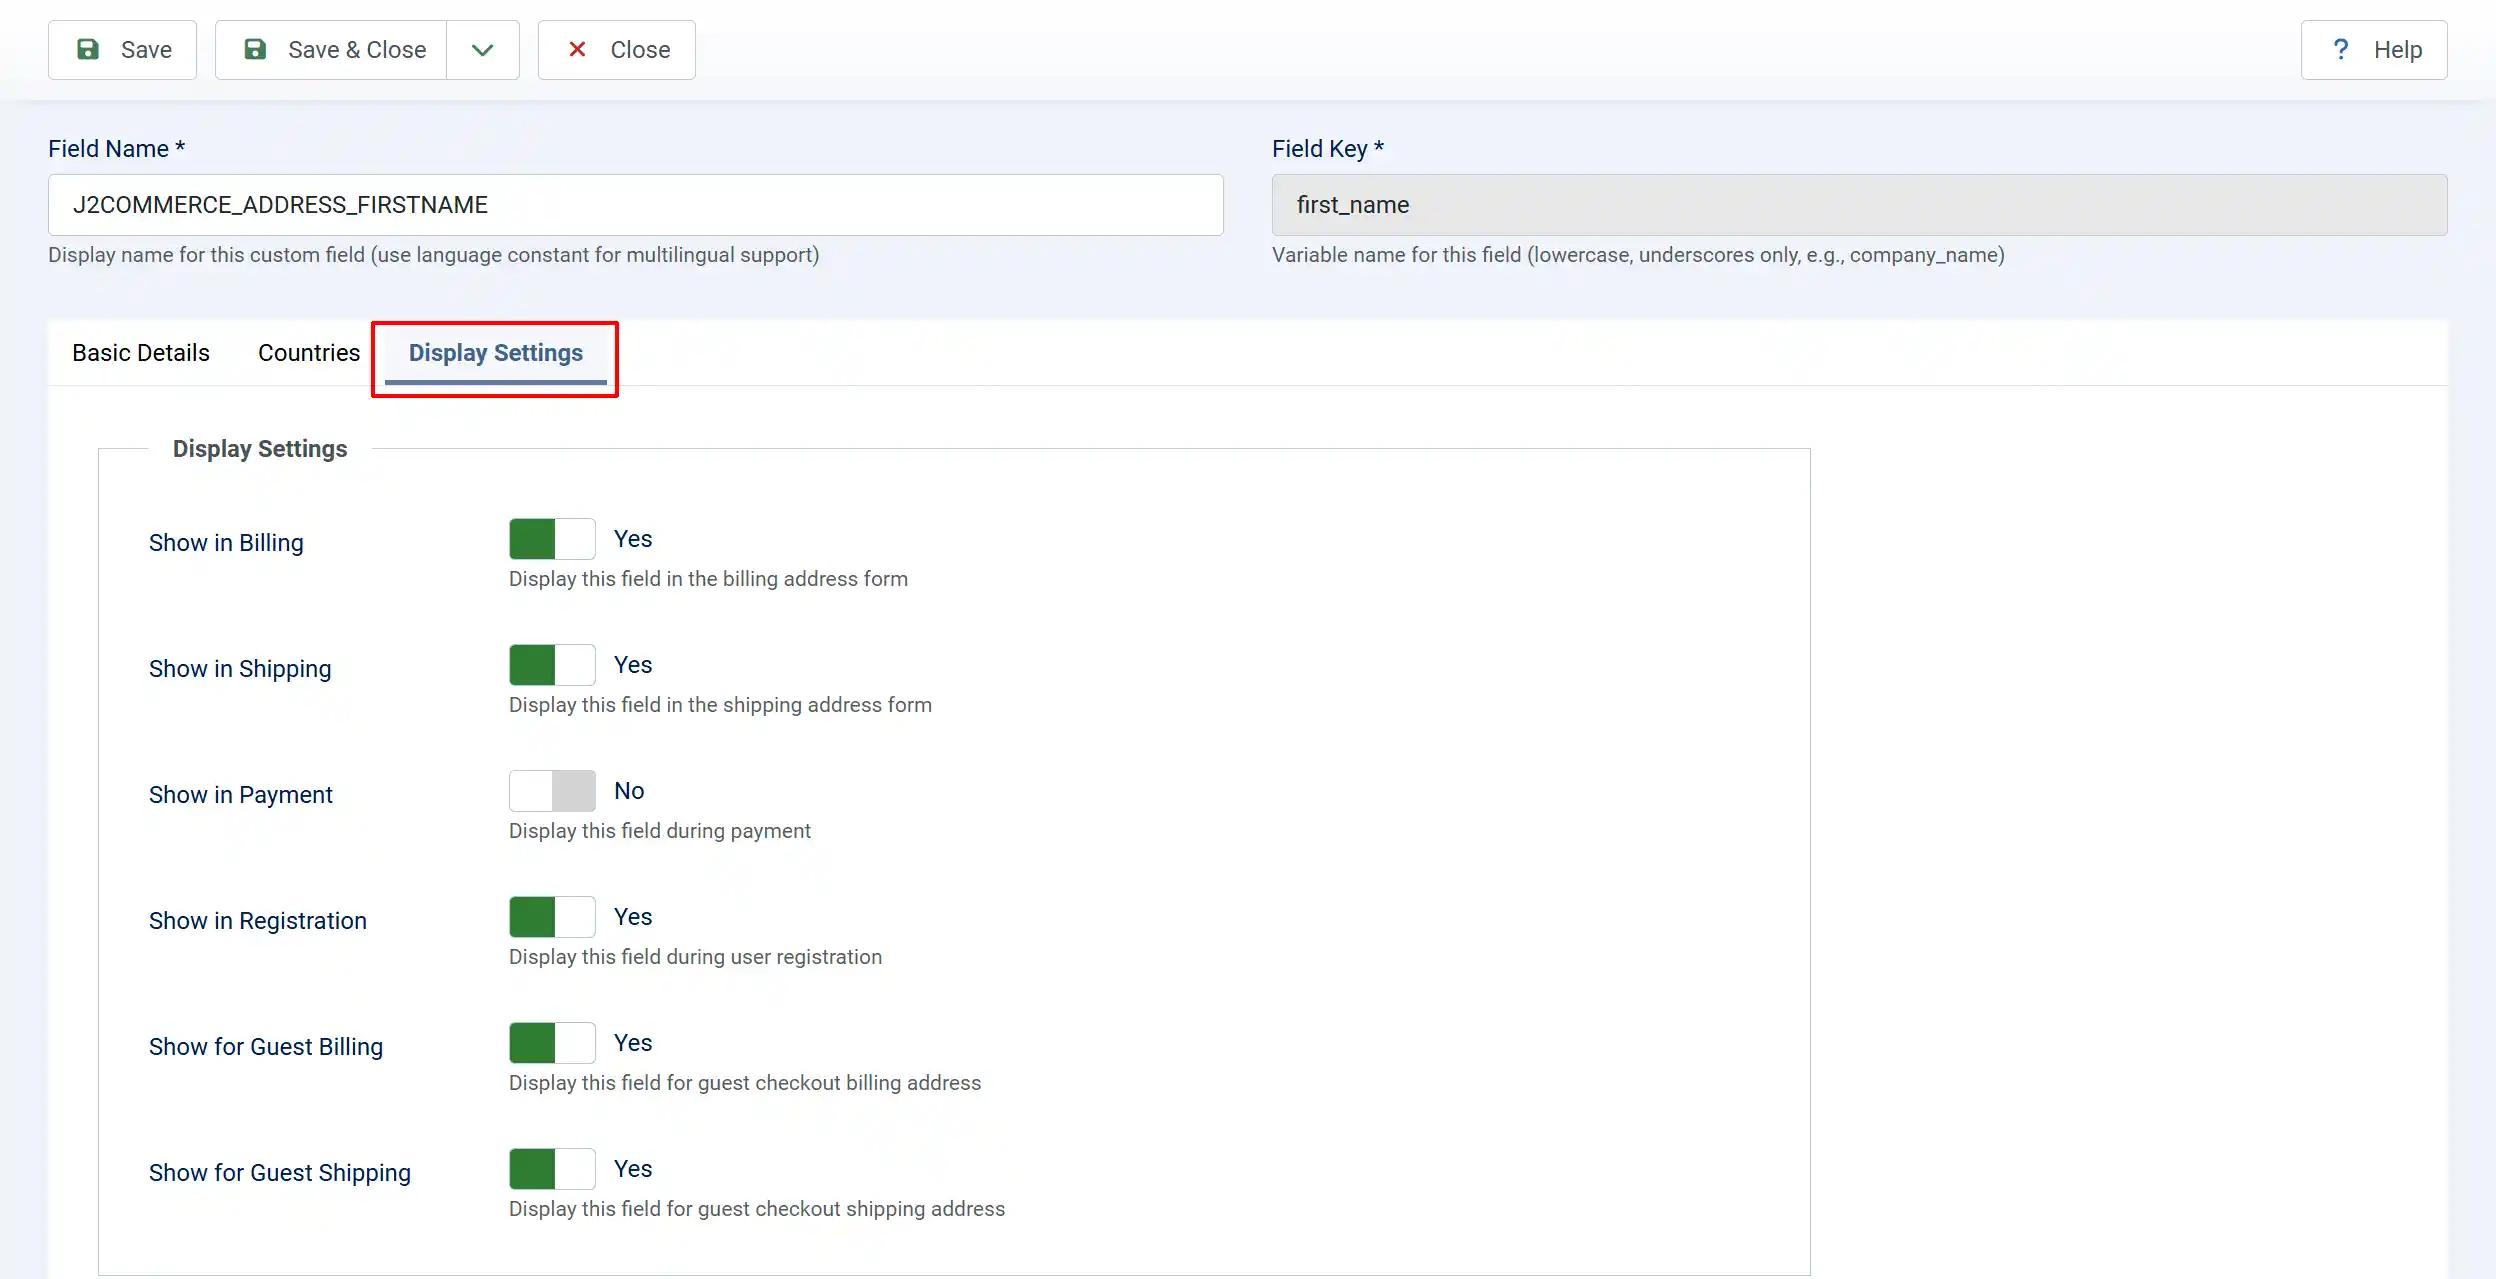
Show in Billing: Select 'Yes' to display this field in the billing address form
Show in Shipping: Select 'Yes' to display this field in the shipping address form
Show in Payment: Select 'Yes' to display this field during payment
Show in Registration: Select 'Yes' to display this field during user registration
Show for Guest Billing: Select 'Yes' to display this field for guest checkout billing address
Show for Guest Shipping: Select 'Yes' to display this field for guest checkout shipping address
Add the Checkout Field in the checkout layout
Go to J2Commerce -> setup -> configuration -> checkout tab -> checkout layout
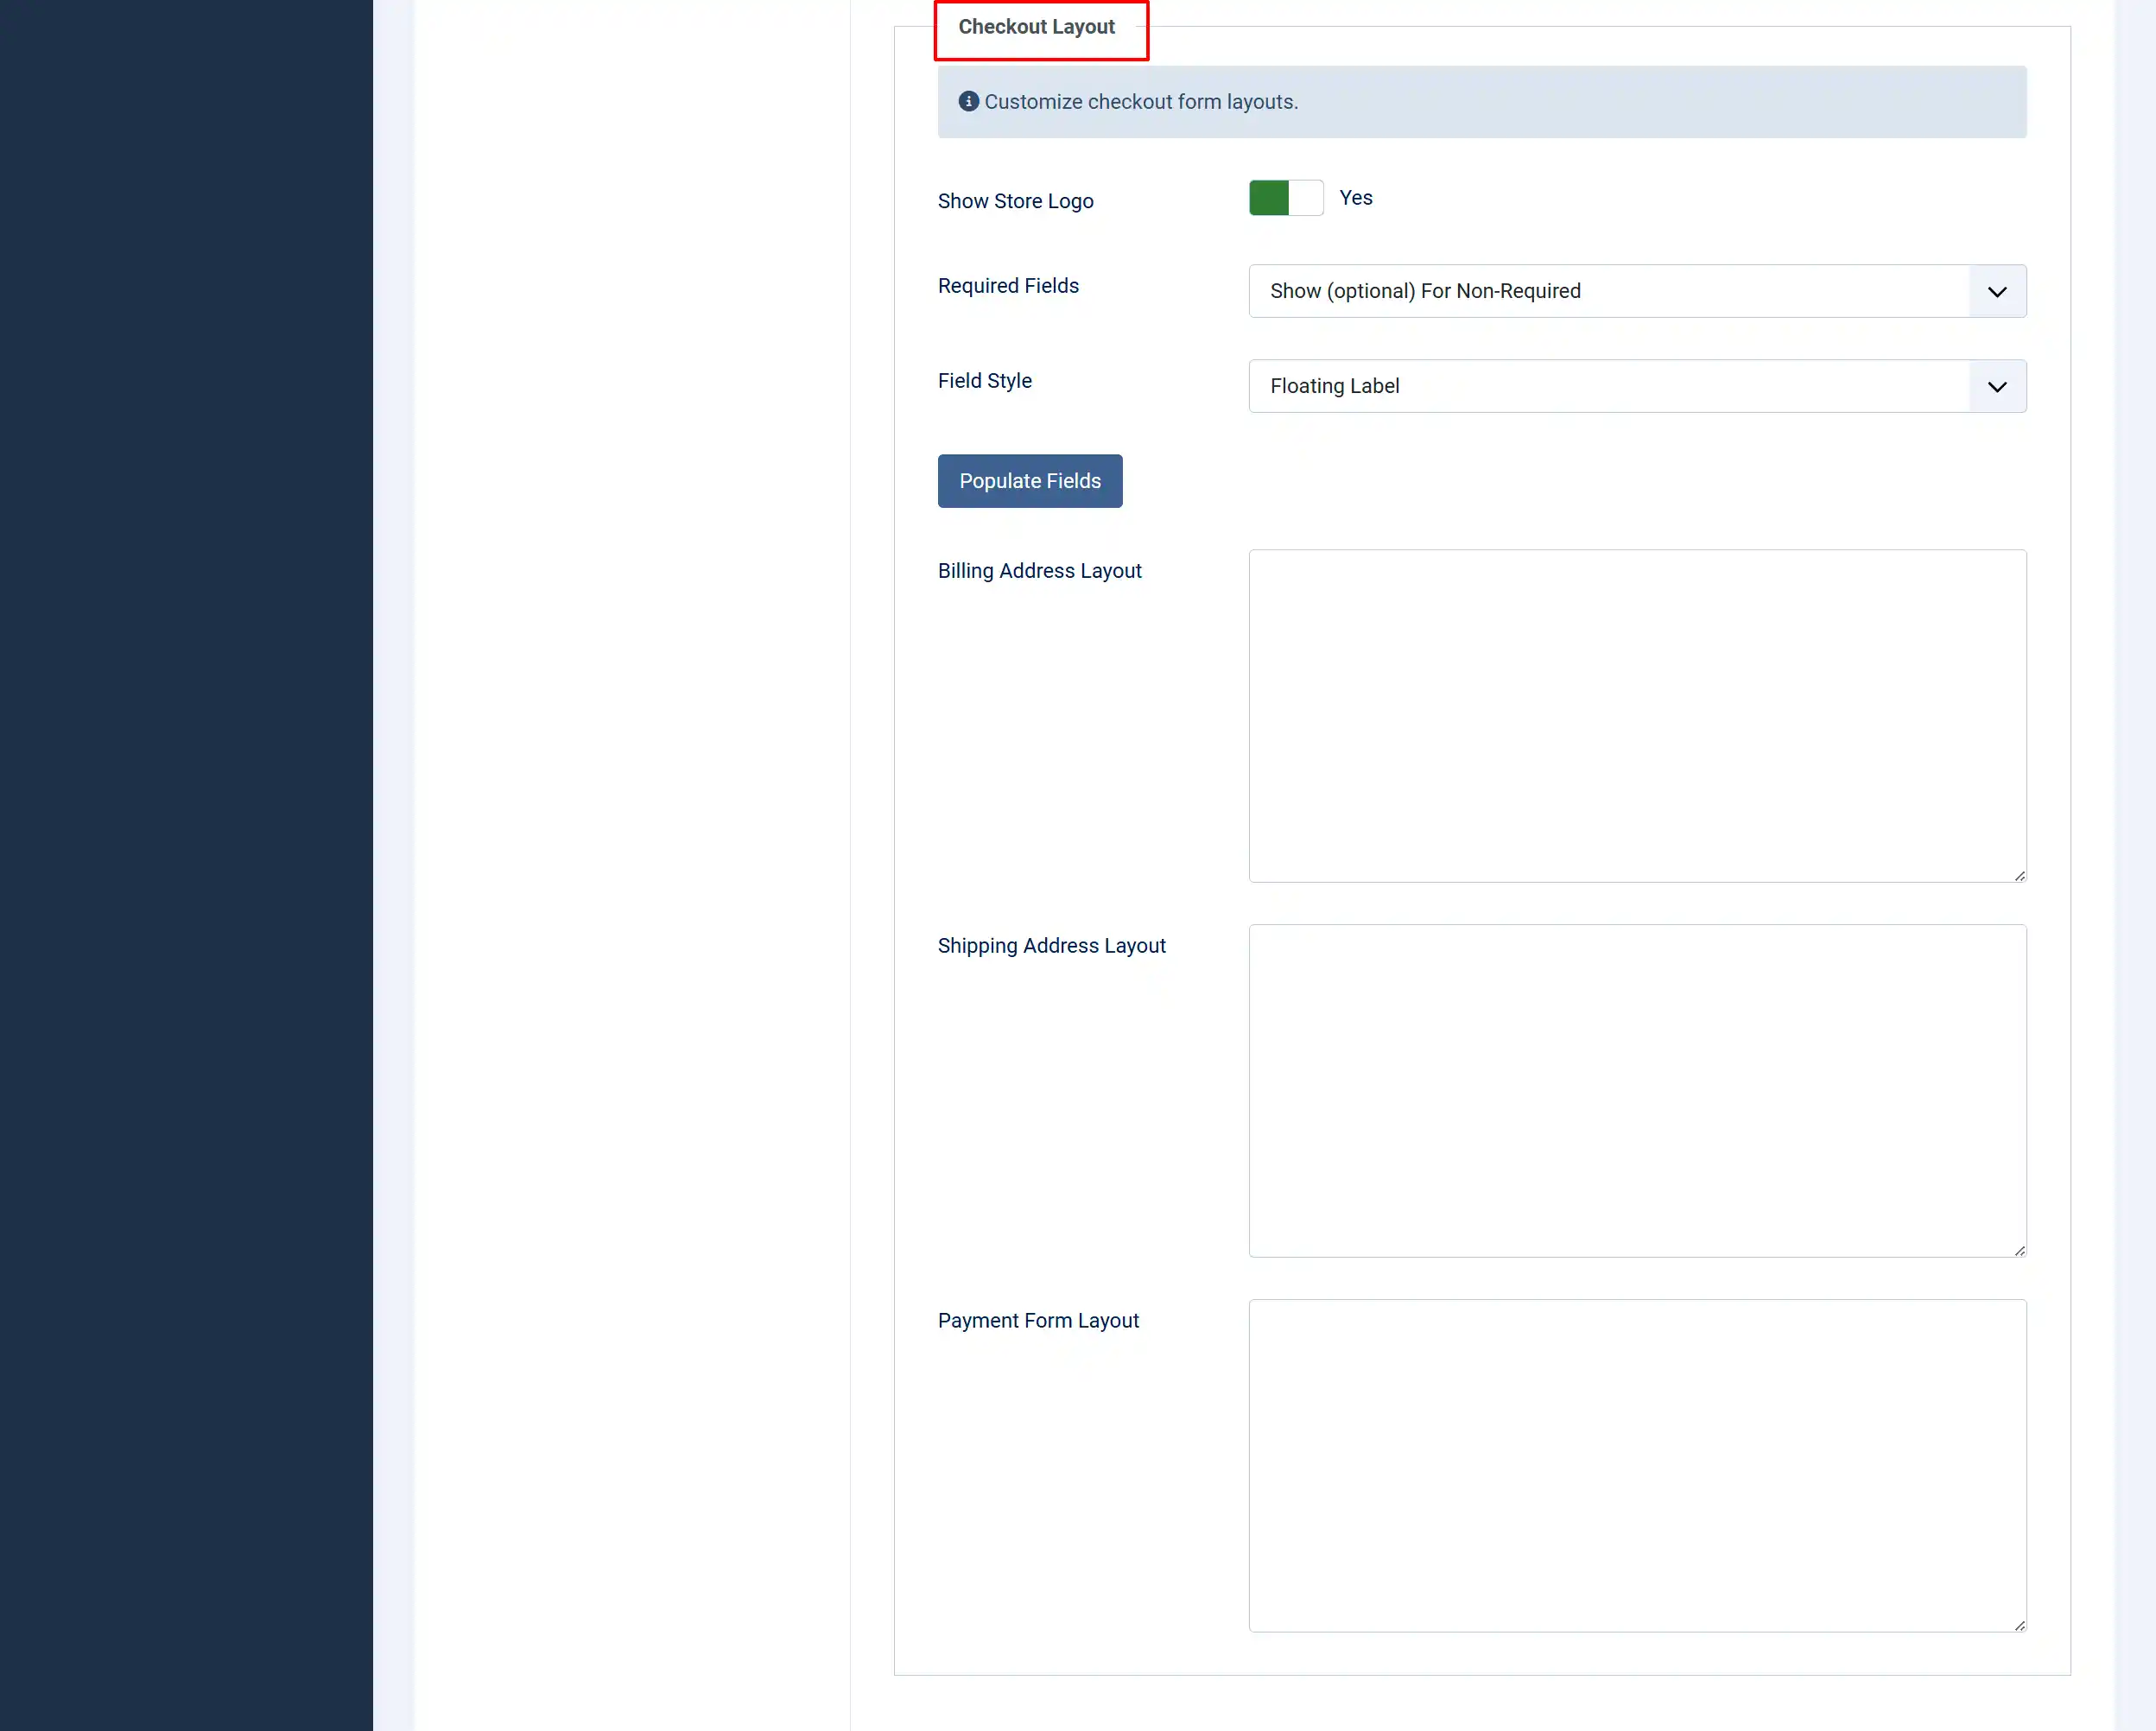
You can find the three layouts (billing address layout, shipping address layout, payment form layout).
Here you can edit the billing and shipping layouts by reordering the fields or by adding new fields (custom fields).
For example, if you have created the field called custom_address3 with the selection of billing address layout in custom field display settings, and if you want to display it in the checkout layout, add it in the billing layout section in the J2Commerce configuration checkout layout tab.
Adding Checkout Fields to the Checkout Layout
Checkout field can be used to collect extra input from users. For example, if you wish to collect the desired delivery date from the users at the checkout page, this can be done by creating a date-type checkout field and adding it to the checkout layout as indicated below:

Adding the checkout field at the J2Commerce > Setup > Configuration > Checkout layout page in the desired layout would display the checkout field in that particular layout, thereby allowing users to choose their desired input.
And if you wish to send the chosen checkout field in the email notifications, this can be done by adding the shortcode of the checkout field in the email template.
How to add checkout fields inside the email template?
Also, you can add the checkout fields you have created in the editor. To add a checkout field in the editor for display, you need to follow the format given below:
[CUSTOM_BILLING_FIELD:FIELDNAME ]
Keep in mind the following when you add a checkout field to the editor:
- The checkout field should be enclosed in []
- All the letters should be in CAPITAL letters
- ‘CUSTOM’ is the first word inside the []
- Next, the section in which you have created the field, like ‘BILLING_FIELD’
- And finally, the field name
Refer to the image below for a clearer understanding.
-800eb9f6bbf60a1143a8fb444c22fa50.webp)