Products Tag View
Introduction
Normally, with the Product list view, we were displaying the products based on categories. With this new feature, we will be able to display products based on the tags.
When a tag is added to two or more products in the backend, the products that fall under that particular tag will be displayed in the front end when the menu is chosen.
The difference between the product list layout and the product tag layout is that we use categories for filtering in the former, while we use tags to filter the articles in the latter.
Tags in Joomla! Provide a flexible way of organizing content. Once an item is tagged with a specific tag, browsing to the link for that tag will give a list of all items that have been tagged with that tag.
Requirements
- with PHP 8.3.0 +
- Joomla! 6.x
- J2Commerce 6.x
Overview
- It is necessary to create a product tag before creating a menu of the type product tags.
- Create an article and add the tag to it.
- Create the menu item of the type Product tags and choose the tag that will act as the filter to display the products (More like the category).
Locating Tags
You have to create the tags before you can add them to your products. So let's create the tags first, and then we will add them to a product.
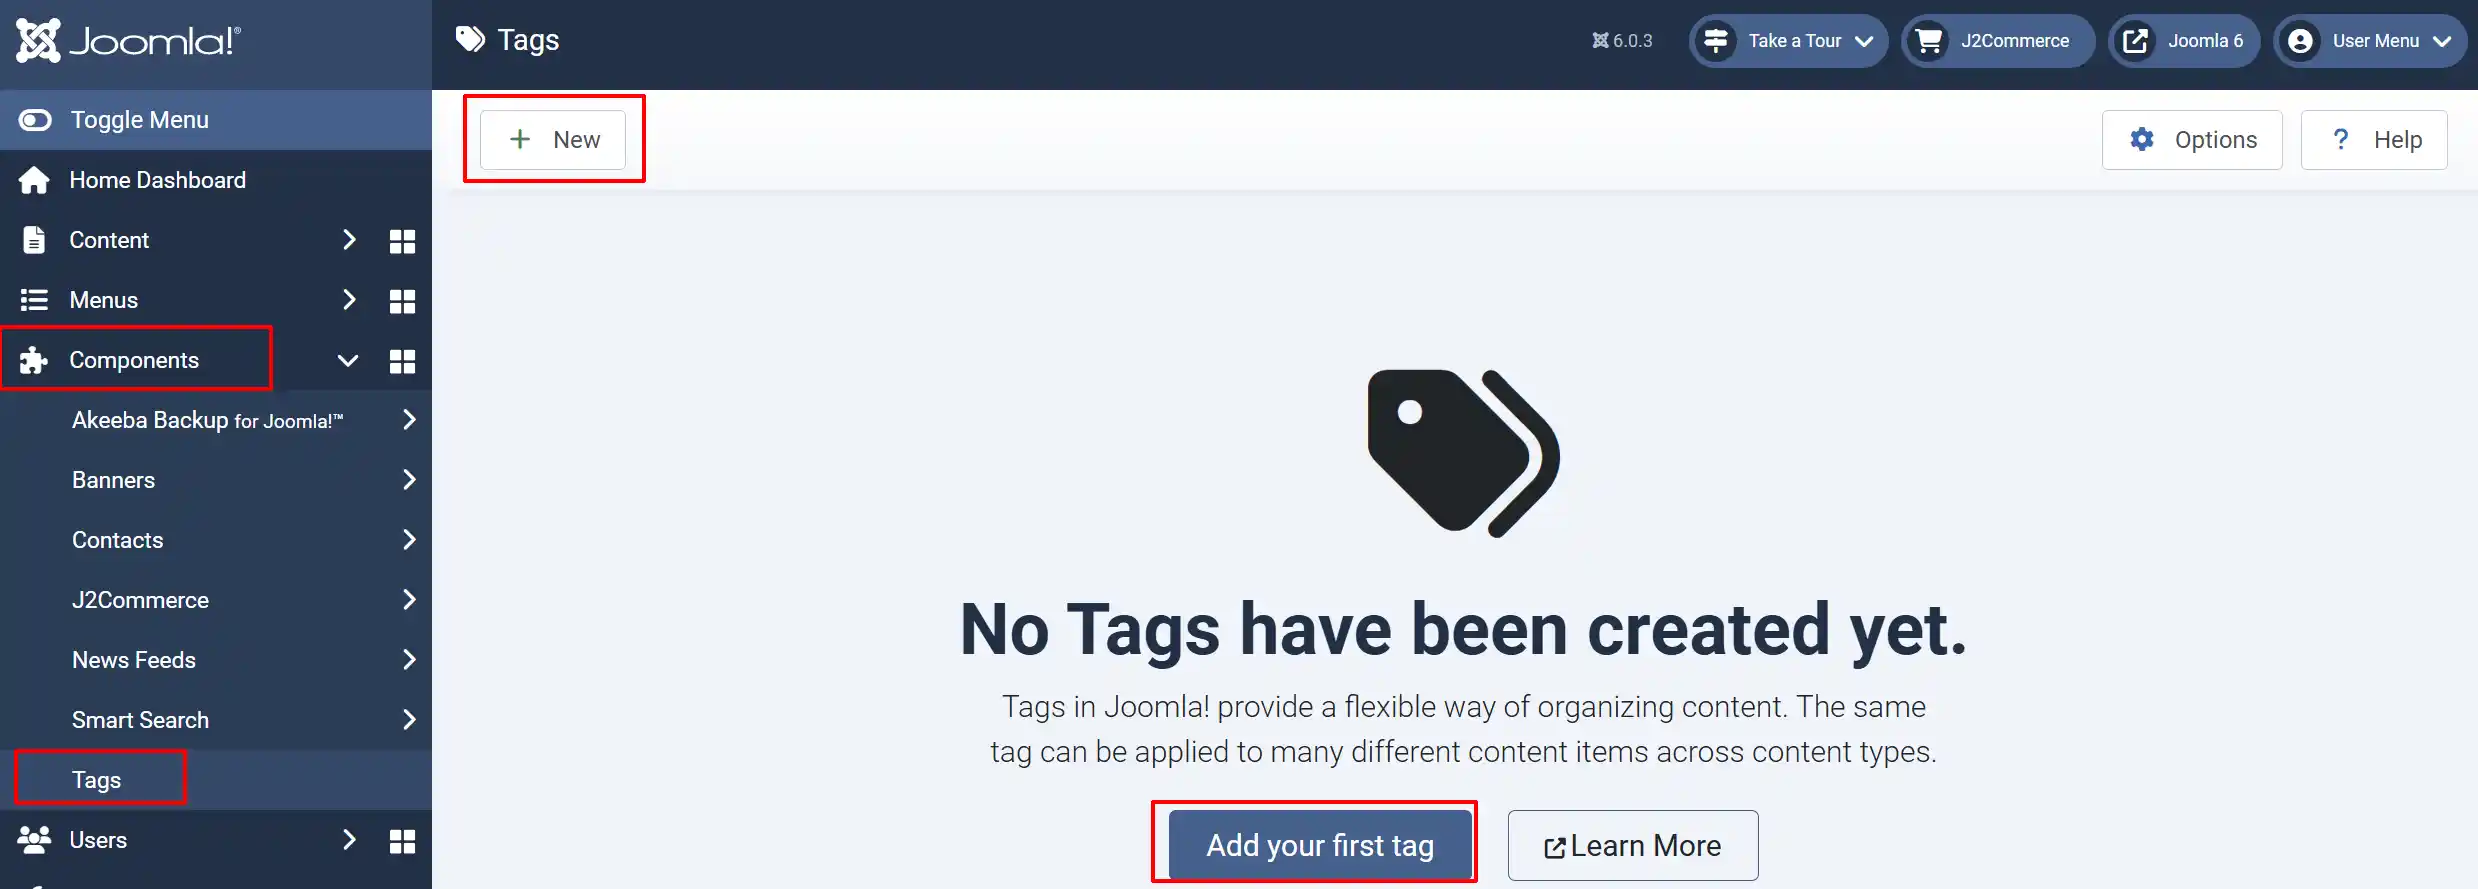
Go to Components on the left sidebar -> Tags -> New
Creating a tag
To create a tag, the steps given below have to be followed:
Enter the title of the tag.
You can also give a description to the tag, and choose the parent tag (if any) as per the requirements.
You can also add a note to the tag, refer to the user groups, and choose the language for which the tag has to be applied.
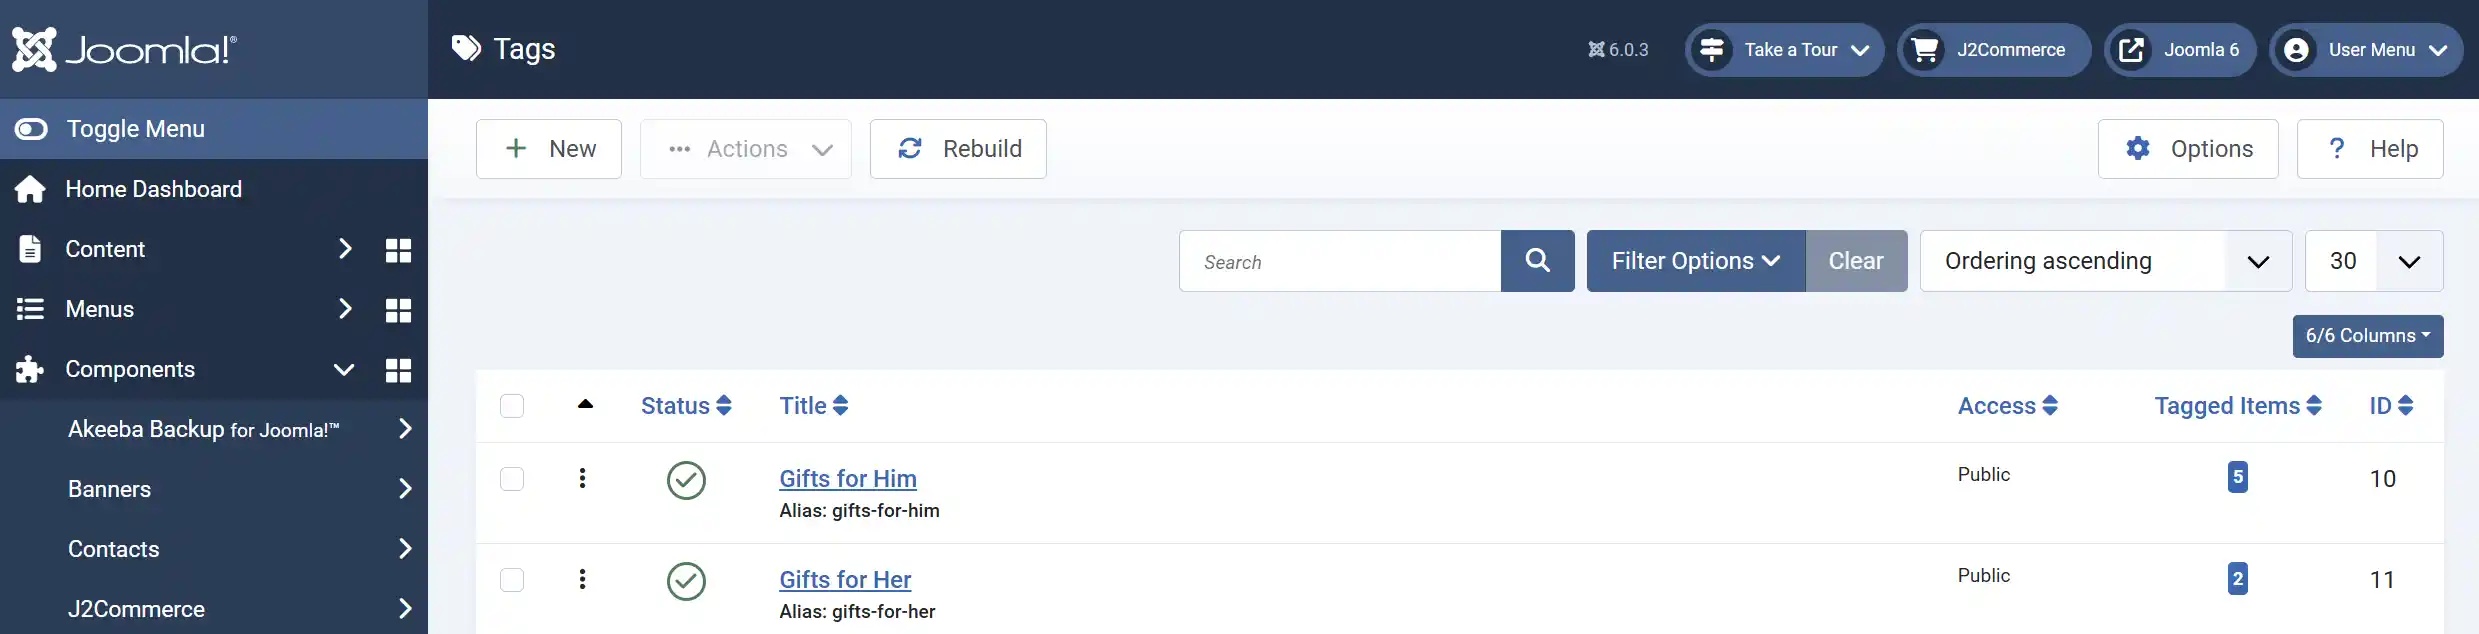
The following screenshot is an example of a tag:
Adding a tag to the product
Once a tag has been created, the next step will be to add it to the product. That can be done as simply as this:
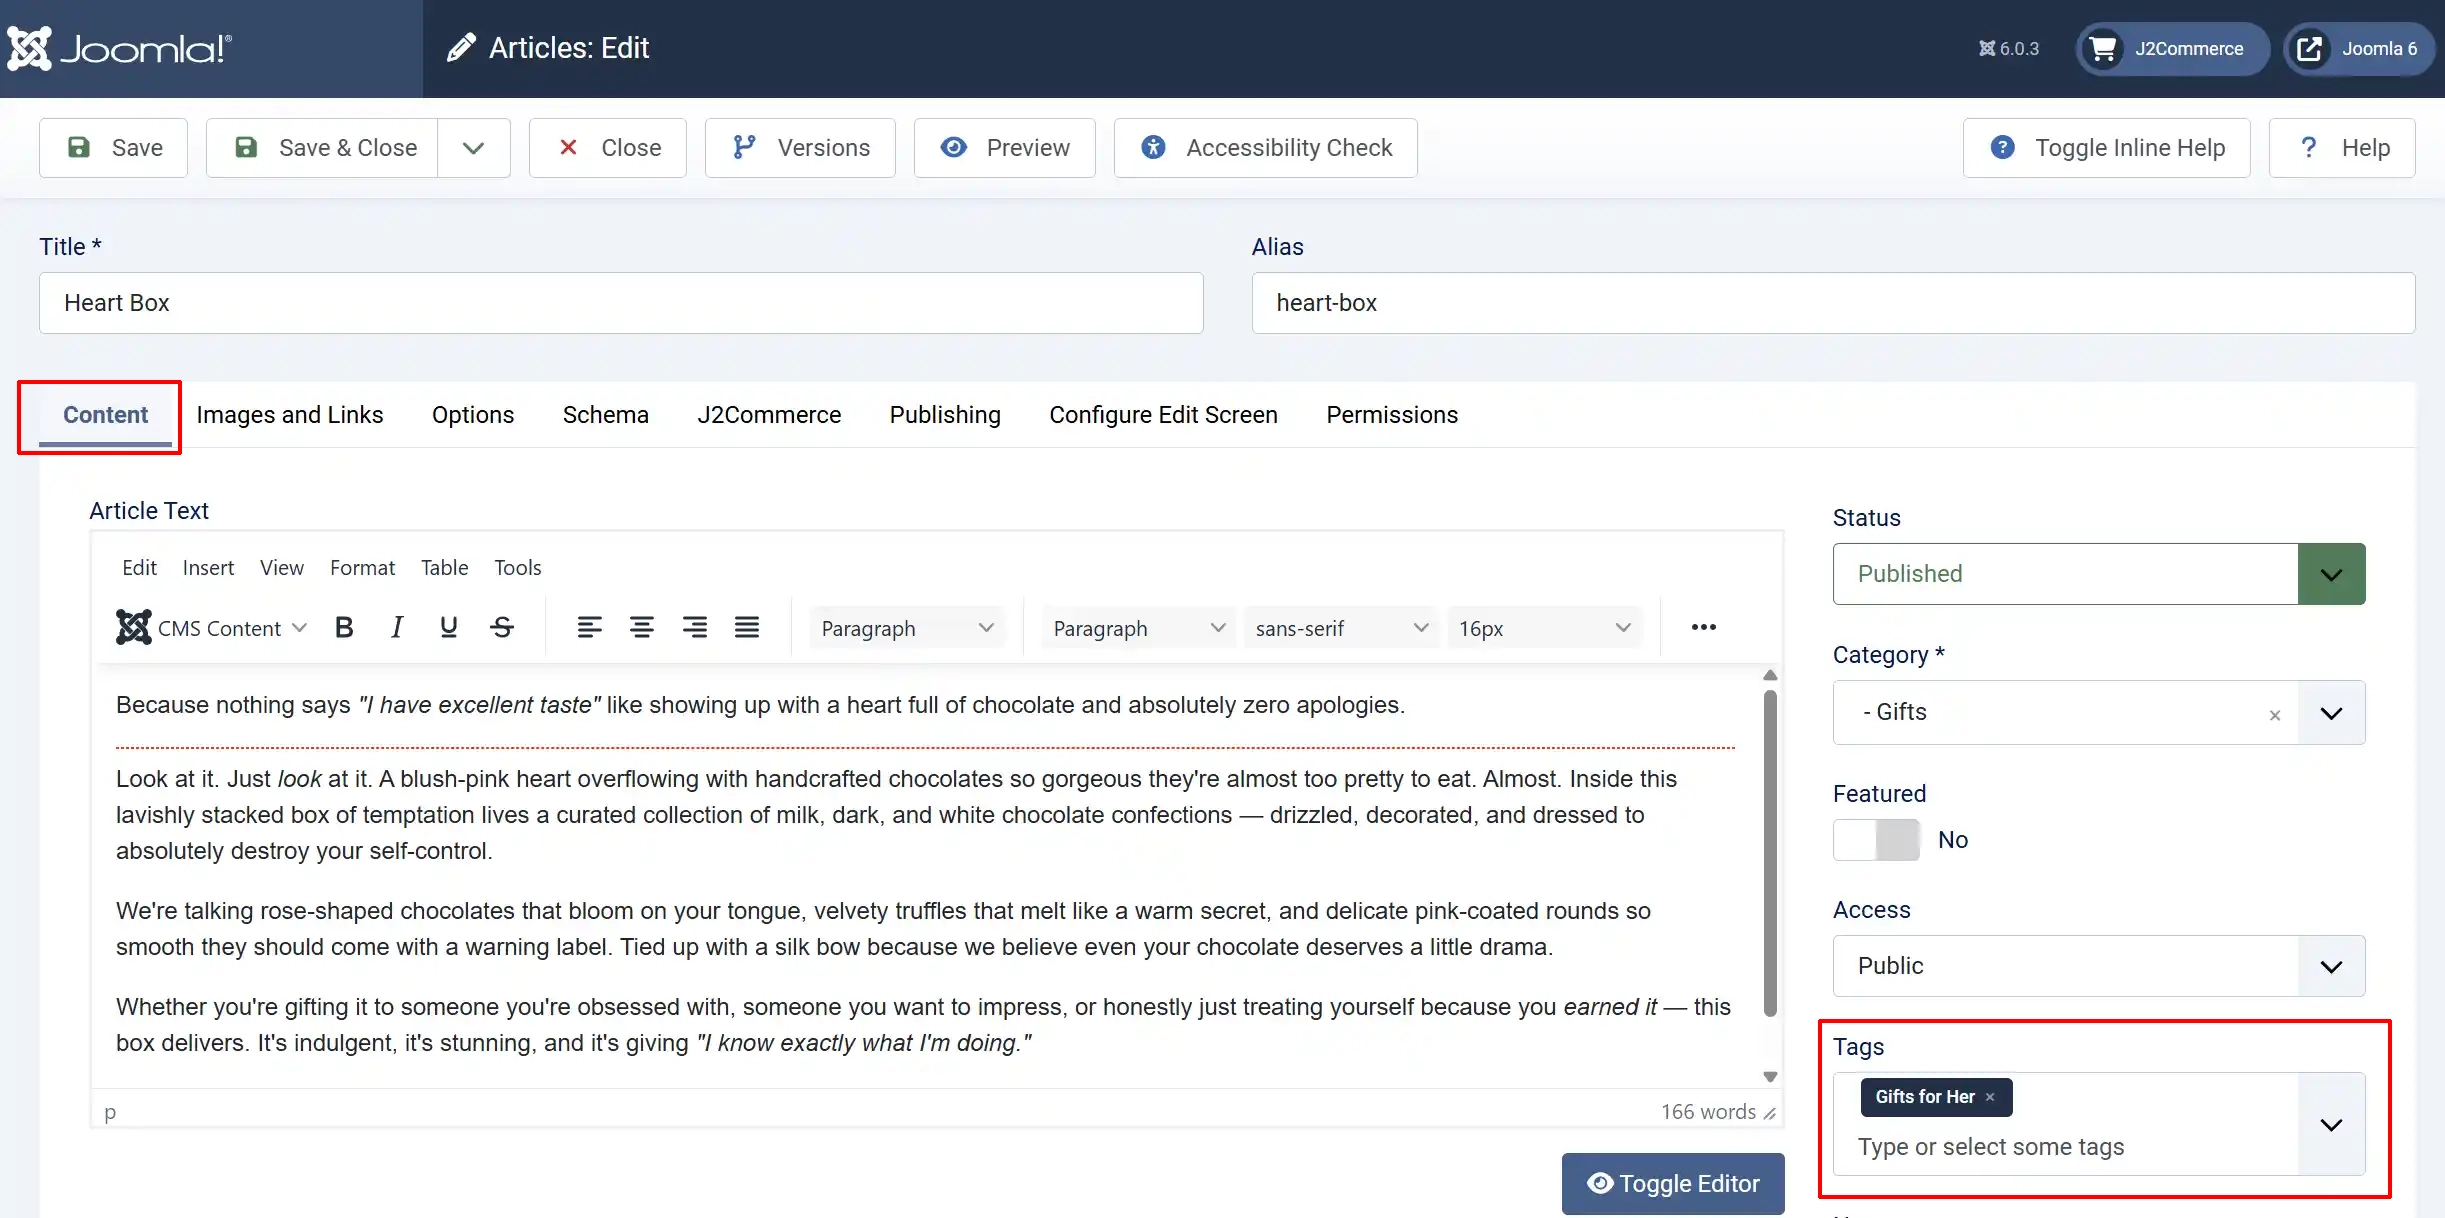
Navigate to Content -> Categories -> Article -> locate the product.
In the Content tab -> Tags.
Start typing in the name of the tags and click on the ones that you wish to add. You can add as many as needed.
Tag Menu
After creating the tag and adding it to the product’s article, the next step will be to create a menu item of the type Product Tags. The following are the steps that have to be done:
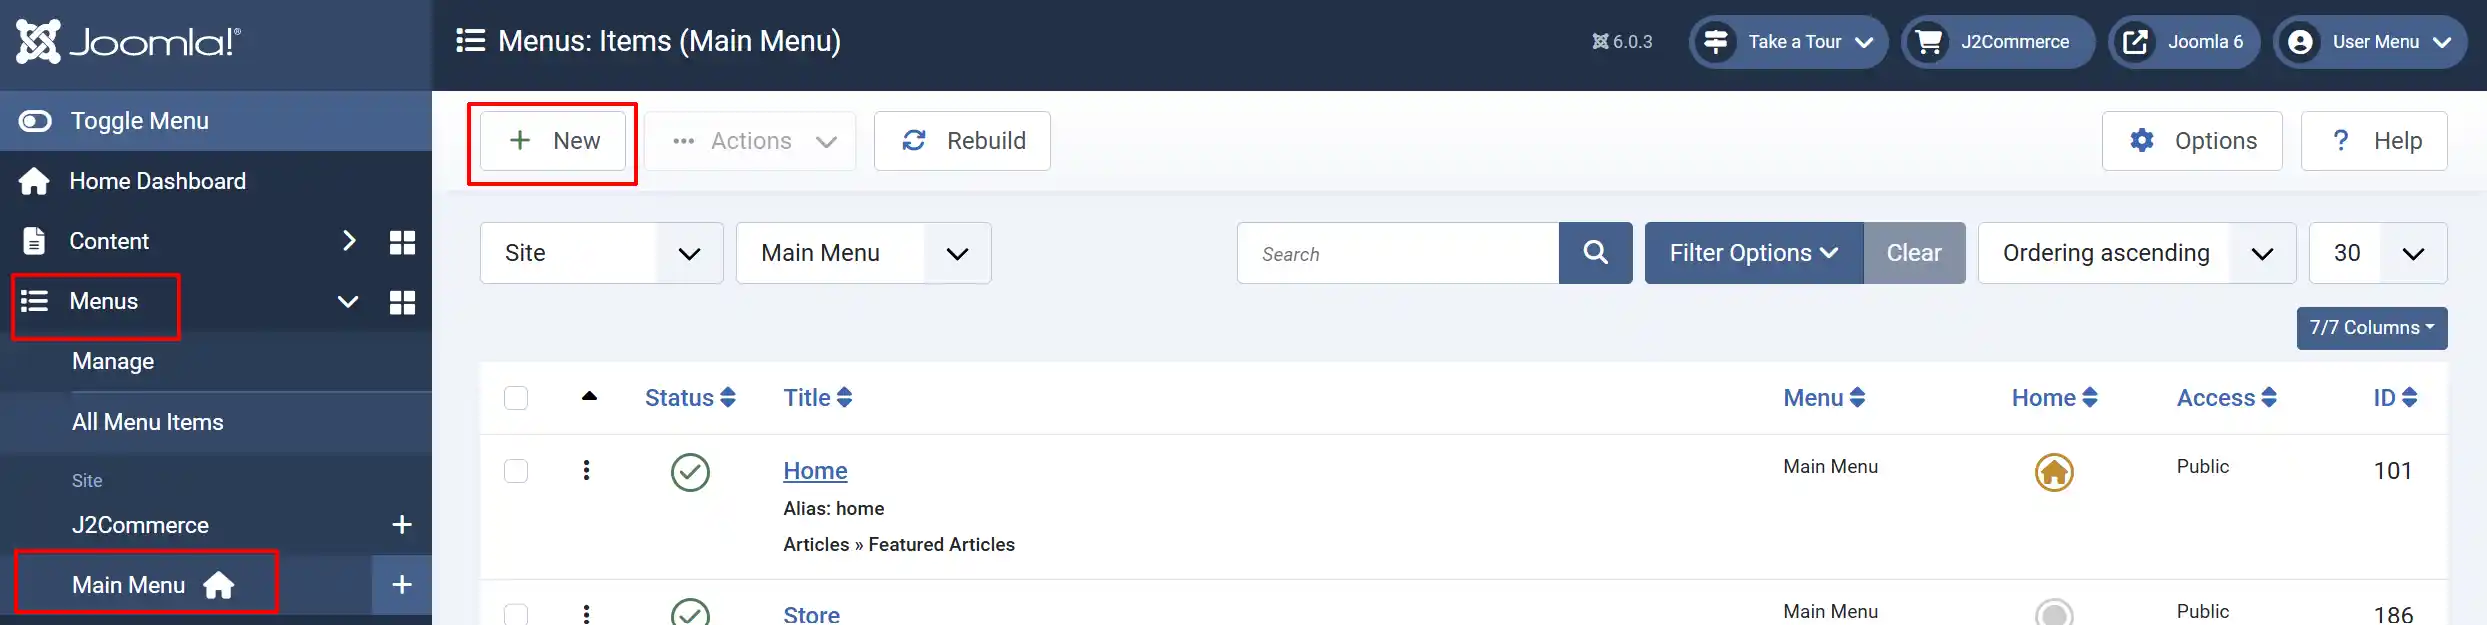
Click on Menus -> Menu Items -> New
Creating a Menu for Tags
Details Tab
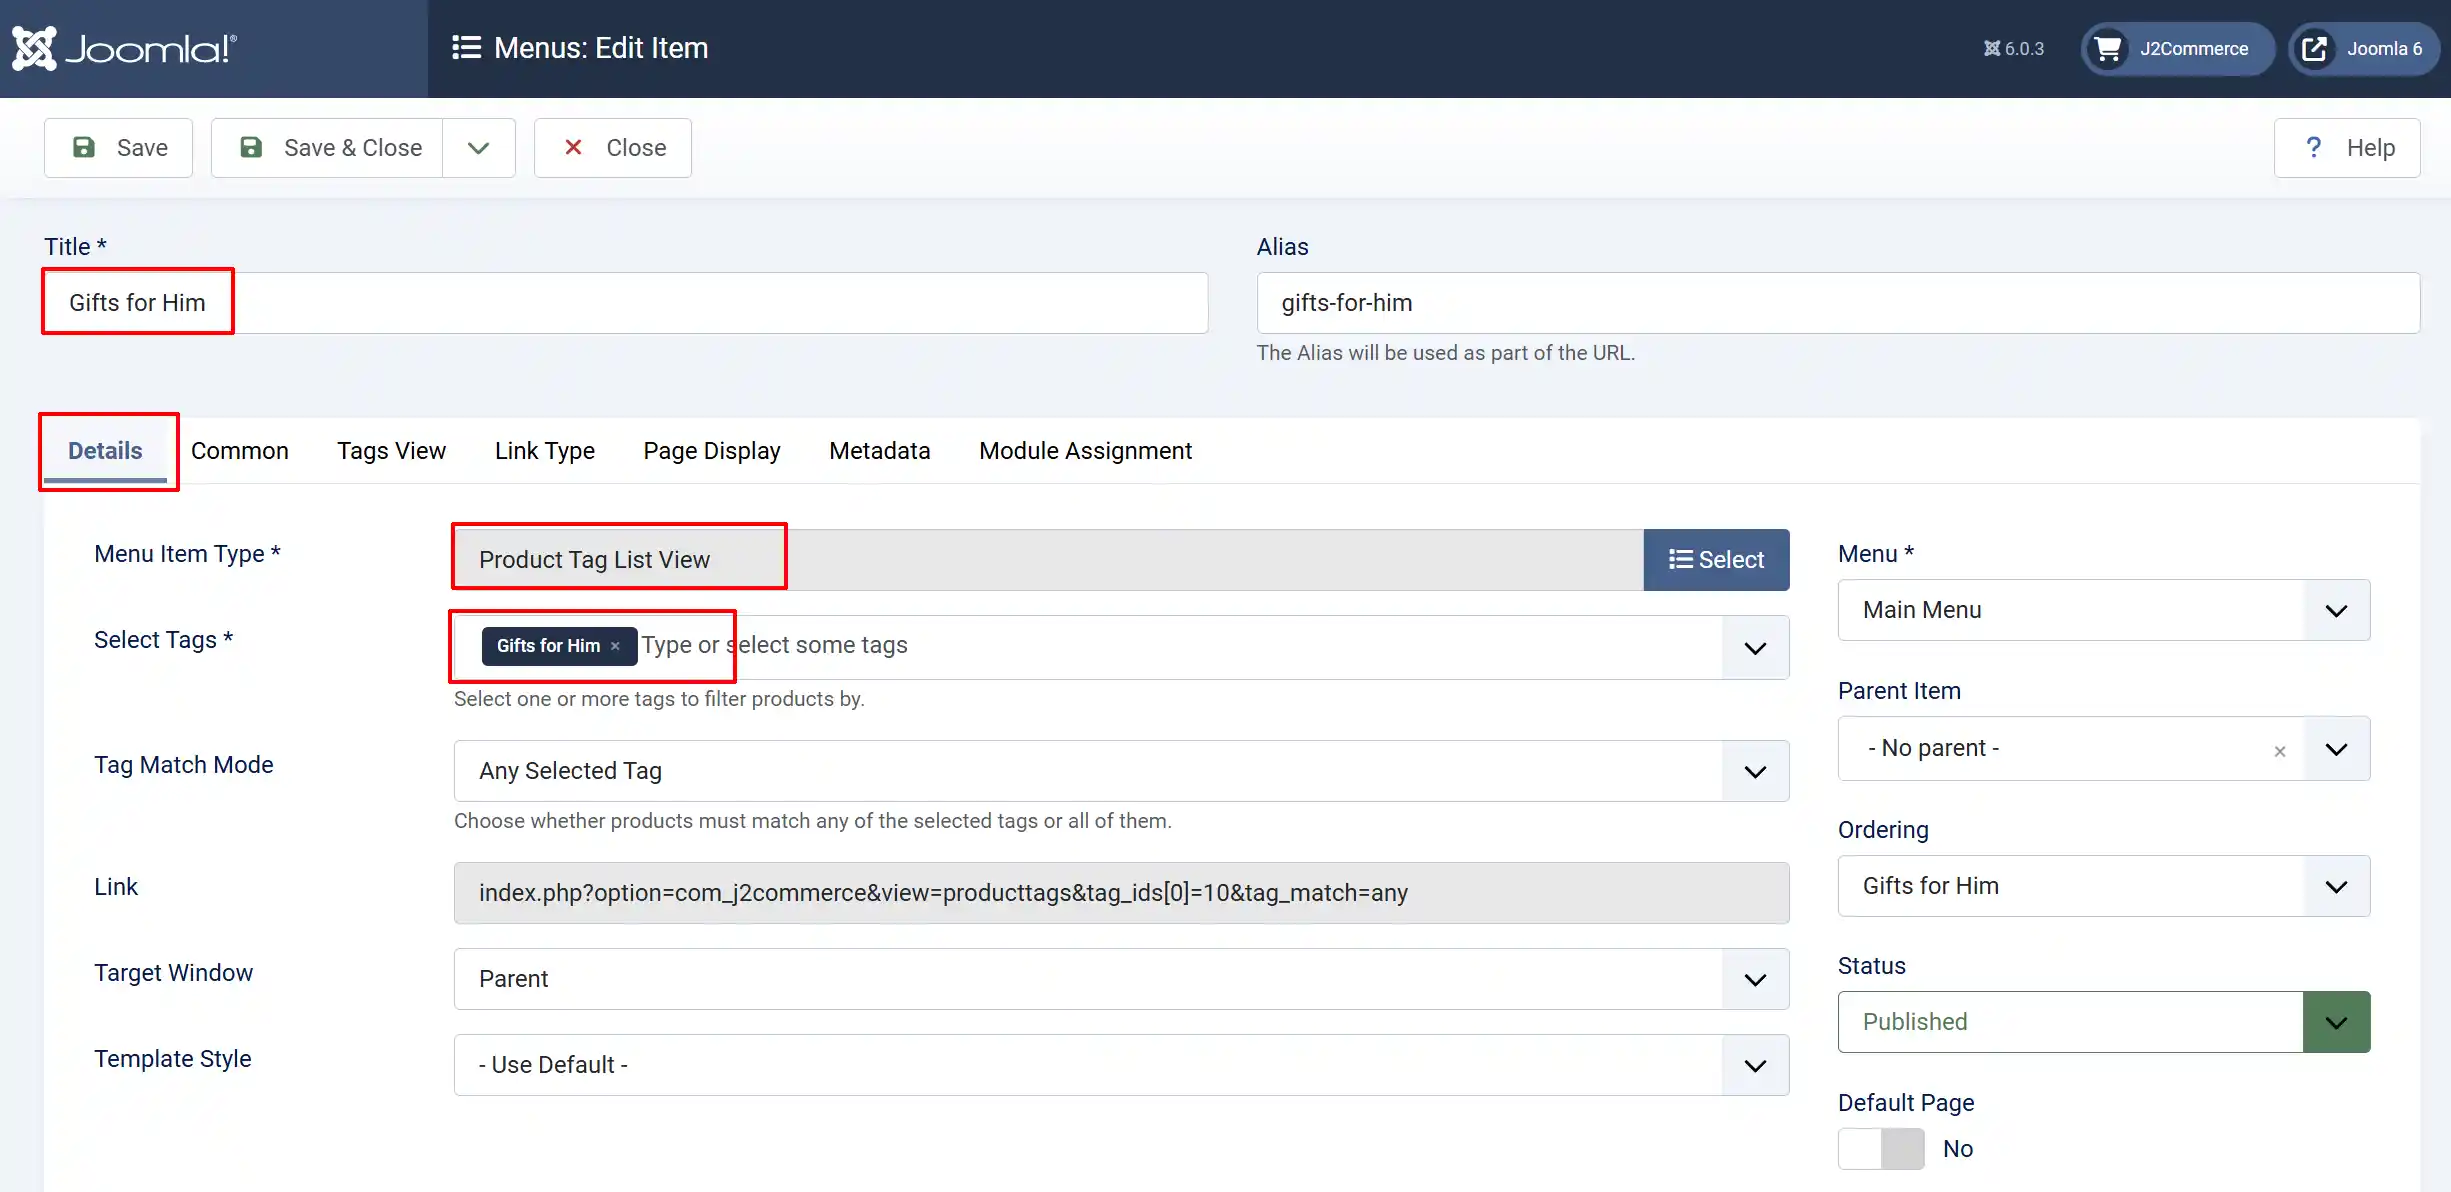
Title: Name the menu the same name as the tags you created
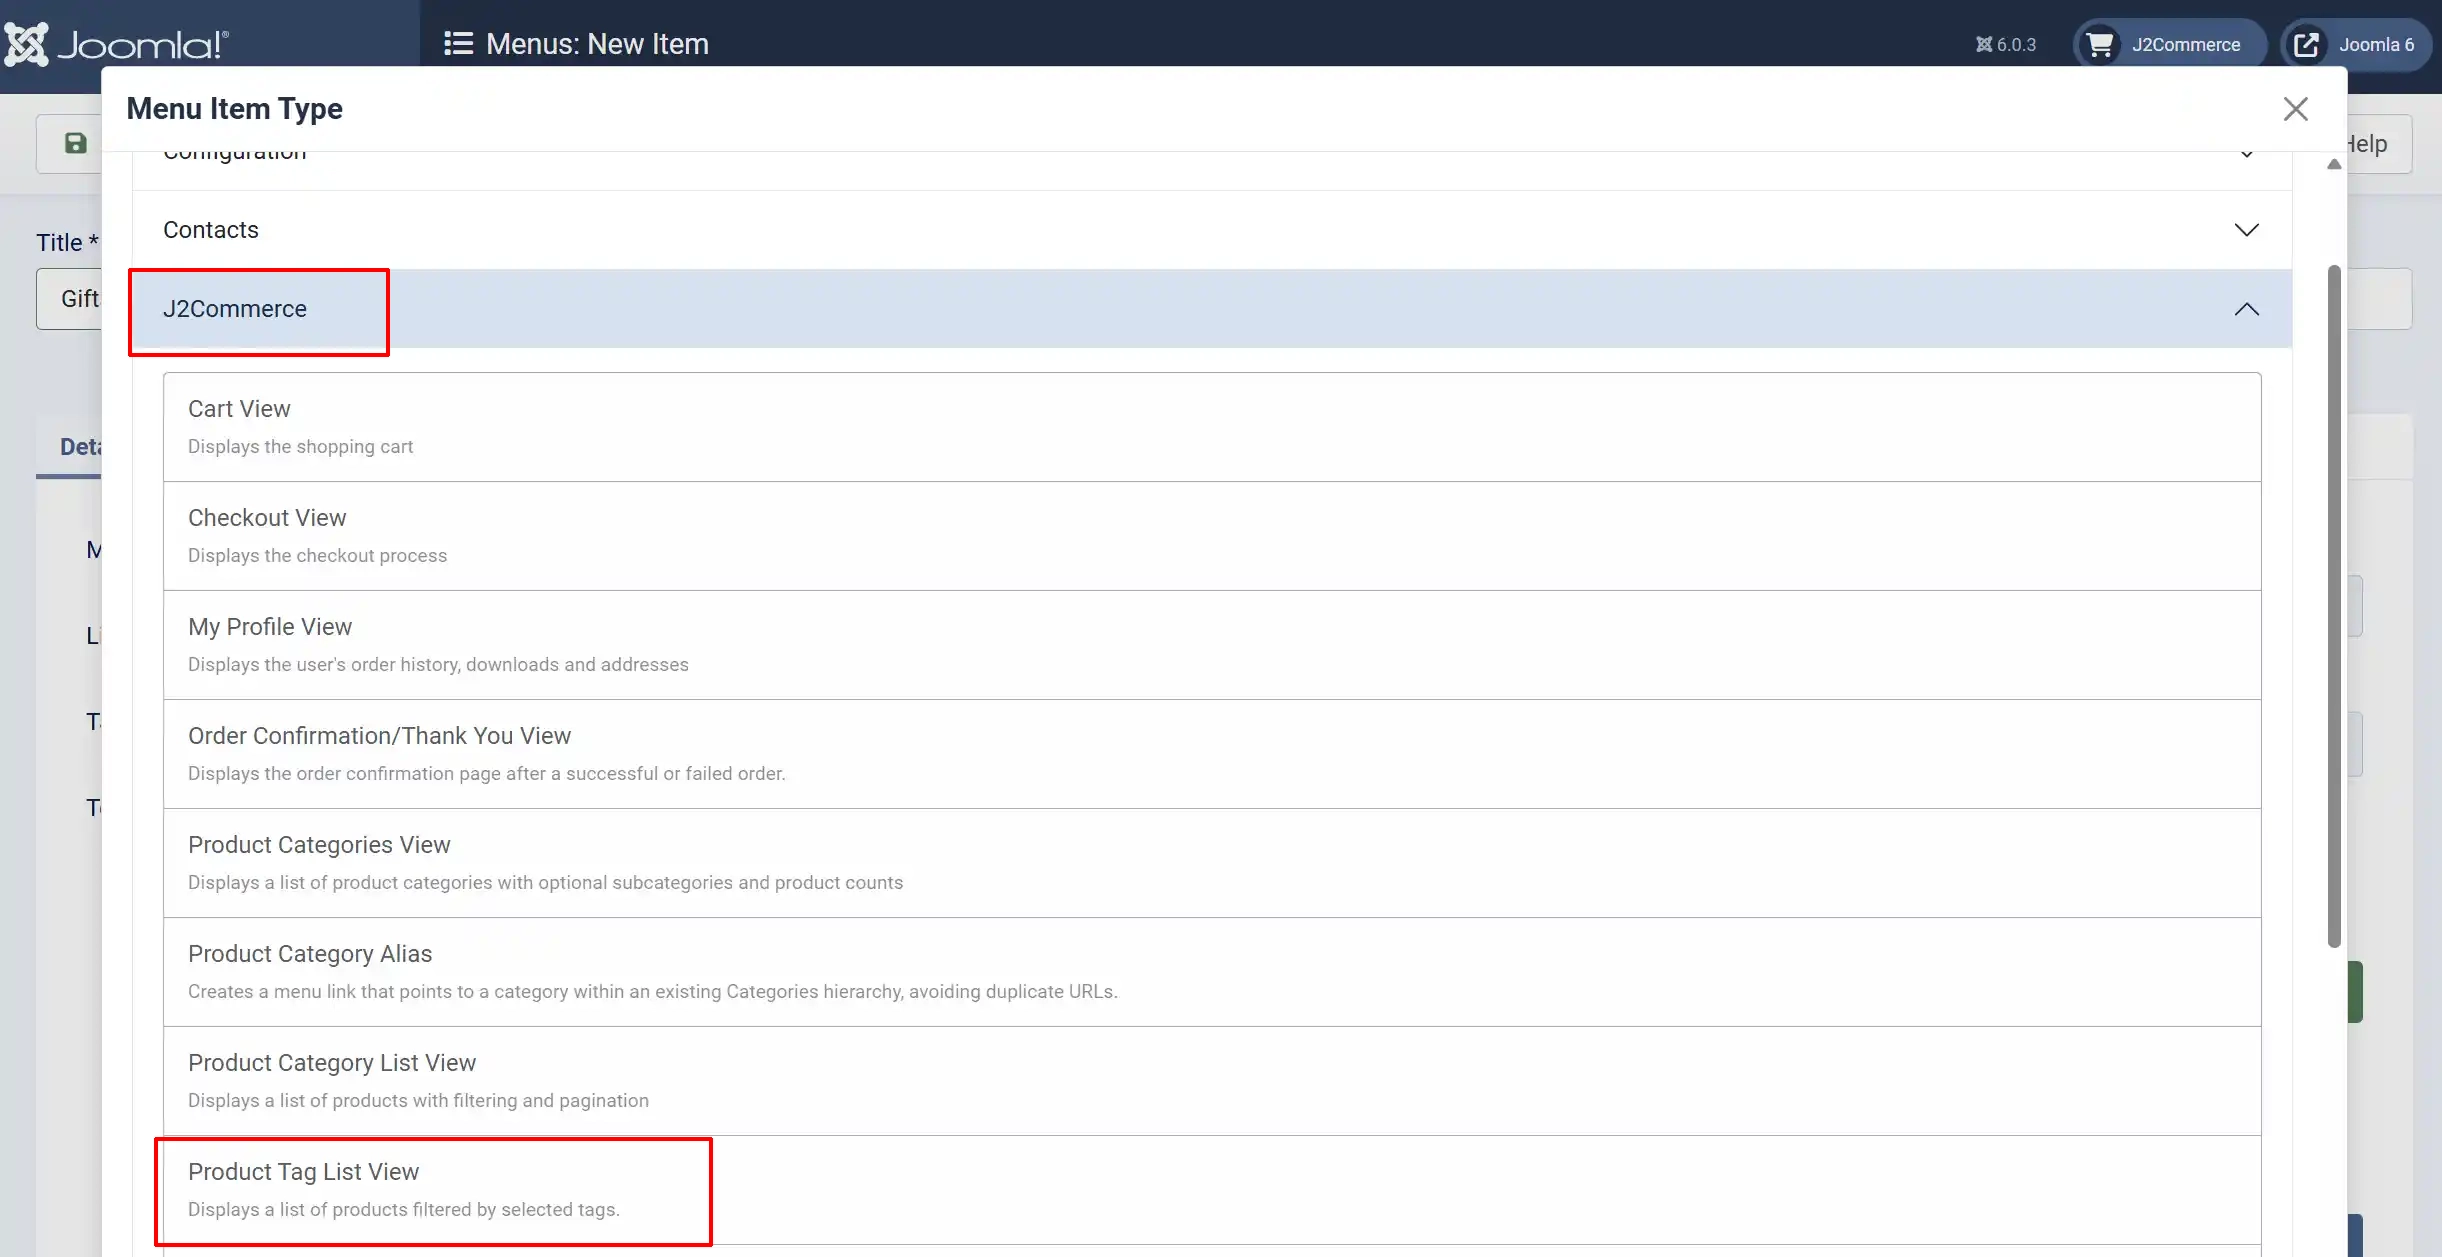
Menu Item Type: Click Select -> J2Commerce -> Product Tag List View
Select Tags: Select one or more tags to filter products by. Choose the tag that has to be associated with the menu item.
Common Tab
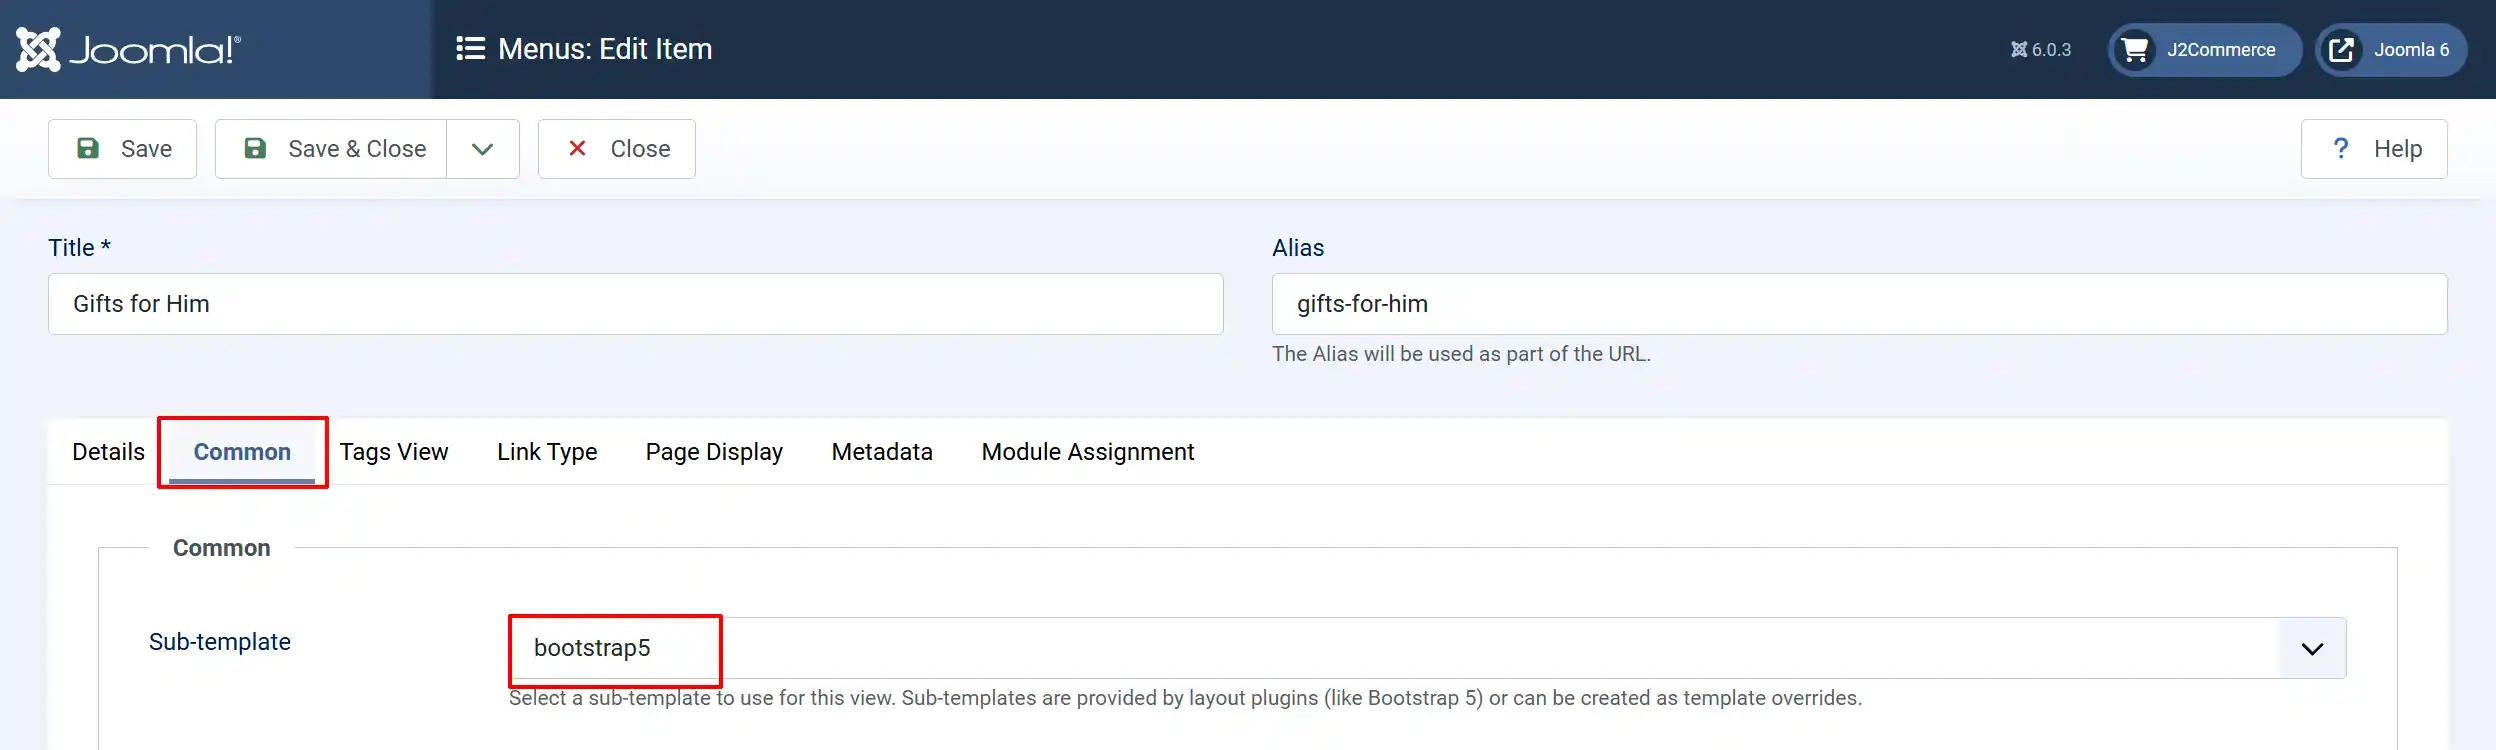
Sub-template: Switch it to bootstrap5. This is the sub-template that should be chosen to display the tags on the layout, unlike the default one.
Tag View Tab
Note: There are 3 categories we recommend that you change from the default items.
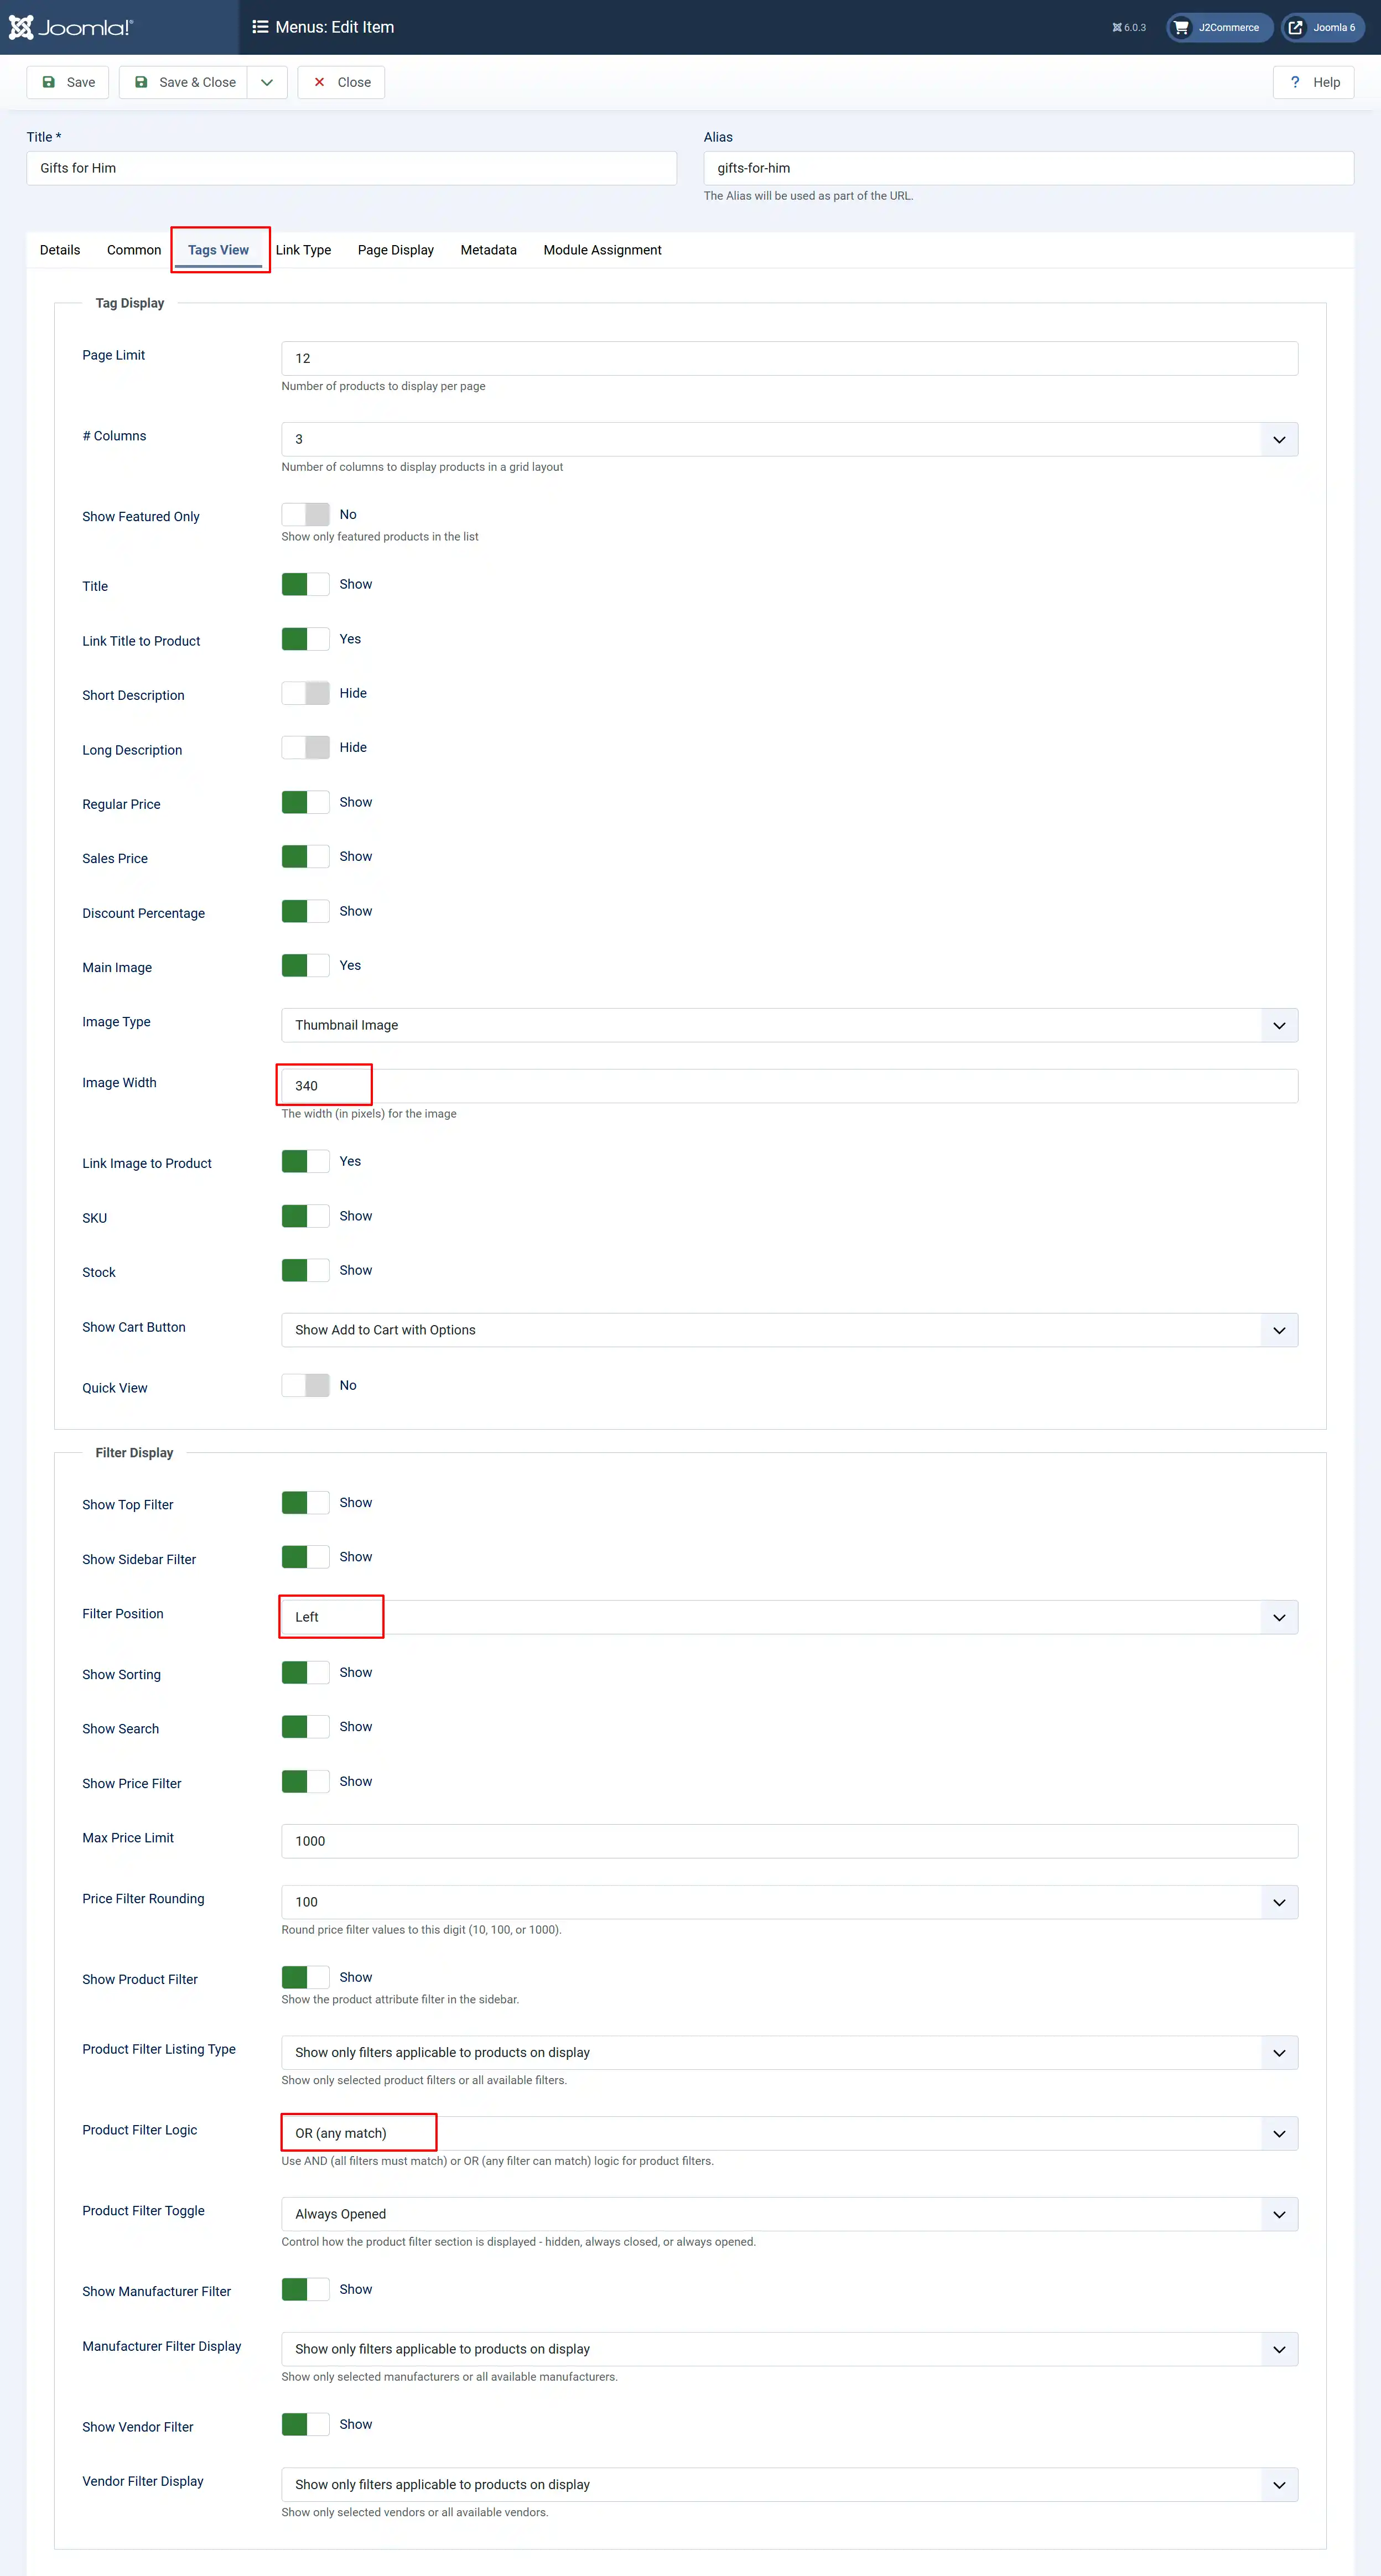
Image Width: We have switched it to 340px so the thumbnail fills the box evenly but you can choose any width of your choosing
Filter Position: You can choose to have it show up on the left or the right. We have chosen the Left view for our examples.
Product Filter Logic: Use AND (all filters must match) or OR (any filter can match) logic for product filters. We chose OR for this example
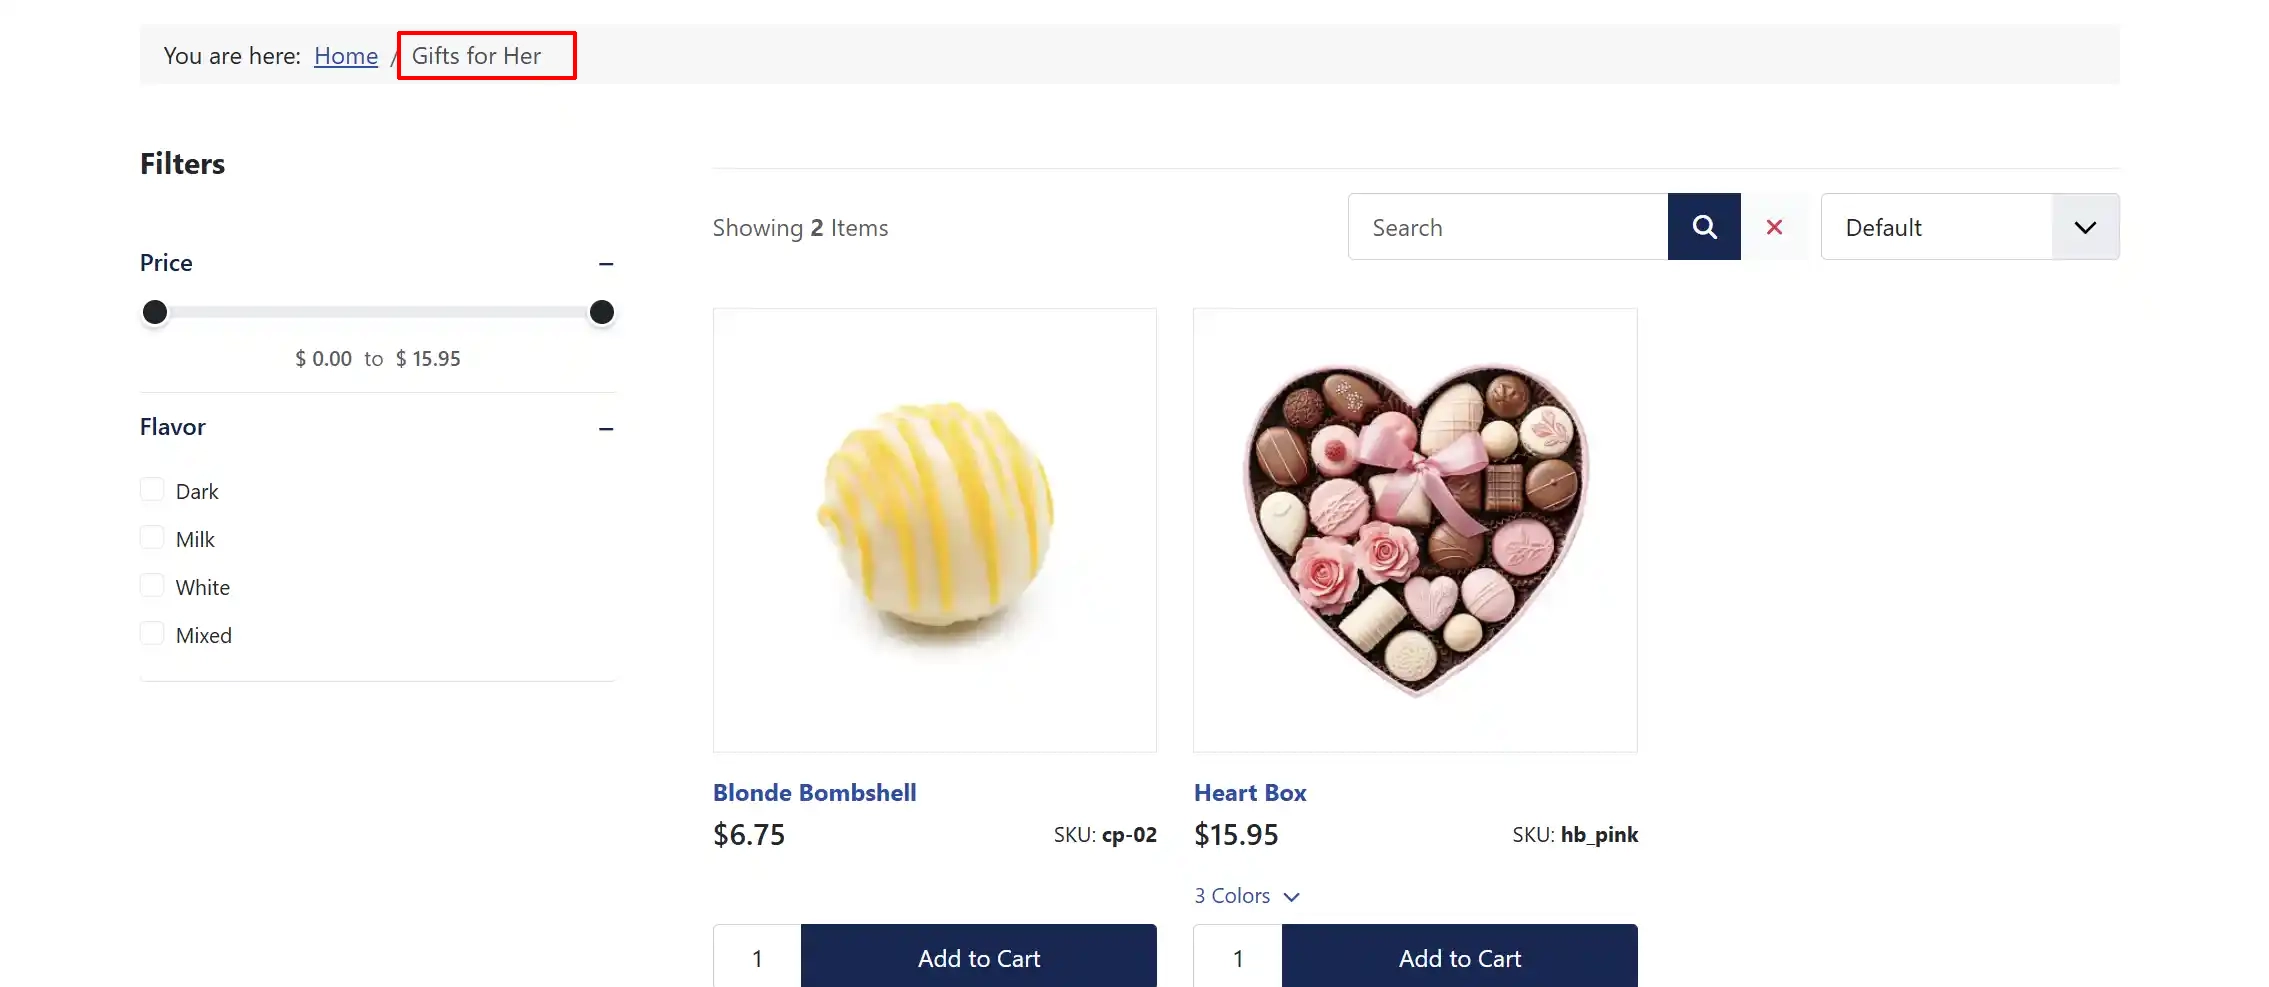
Frontend View
The following Image shows all of the images that were tagged with the tag Gift for Her.