Product Display Module
The module that helps you to display the products wherever you want on your site. Sometimes you would like to showcase Best-Selling products or Featured products on your site in a specific place. In this case, the product display module will do that.
Purchase Module
Step 1: Go to our J2Commerce website > Extensions > Modules
Step 2: Locate the Product Display module > click View Details > Add to cart > Checkout.
Step 3: Go to your My Downloads or My Account under your profile button at the top right corner and search for the app. Click Available Versions > View Files > Download Now
Installation: You can install this Product Display module using the Joomla installer. The following steps help you with a successful installation.
Install the Module
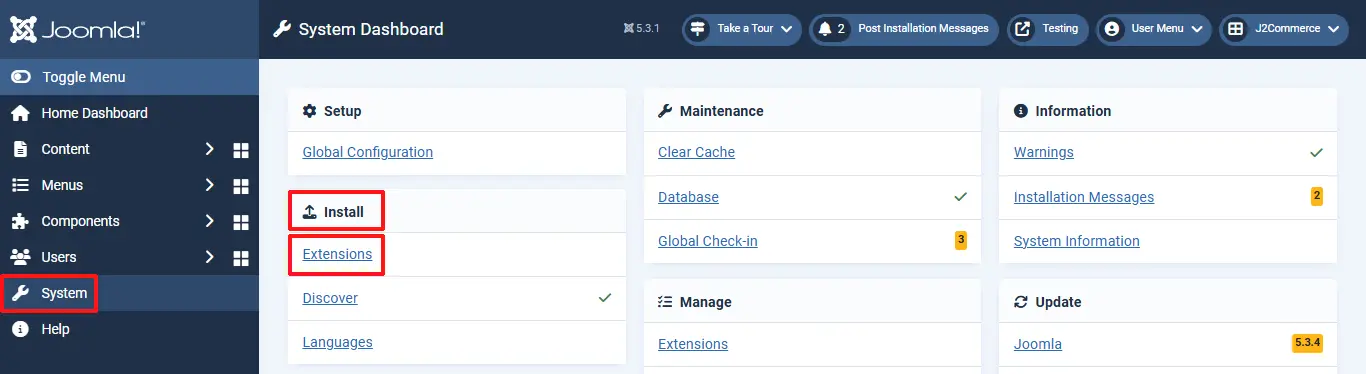
In the Joomla admin, go to System > Install > Extensions
Click on the Browse button and select the Product Display zip file you saved during the download process. You will receive a message of success once installed.
Enable the Module
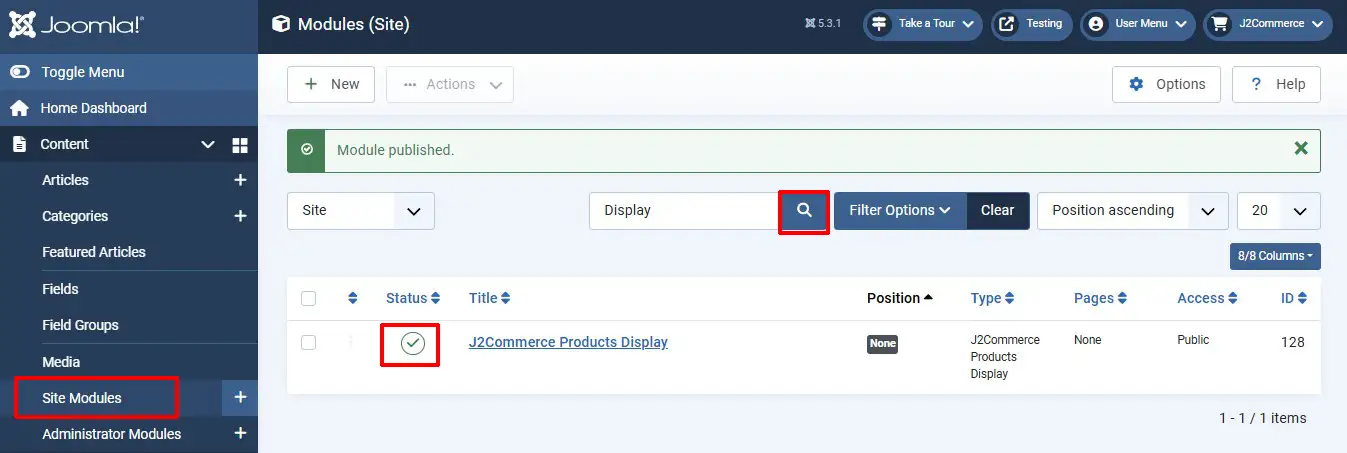
In the Joomla Installer on the left sidebar, select Content > Site Modules > Products Display module
Enable the plugin by clicking on the 'X'. It will turn into a checkmark. Once it's enabled, click on the module title to open it
Setting Up The Module Parameter
Module Tab
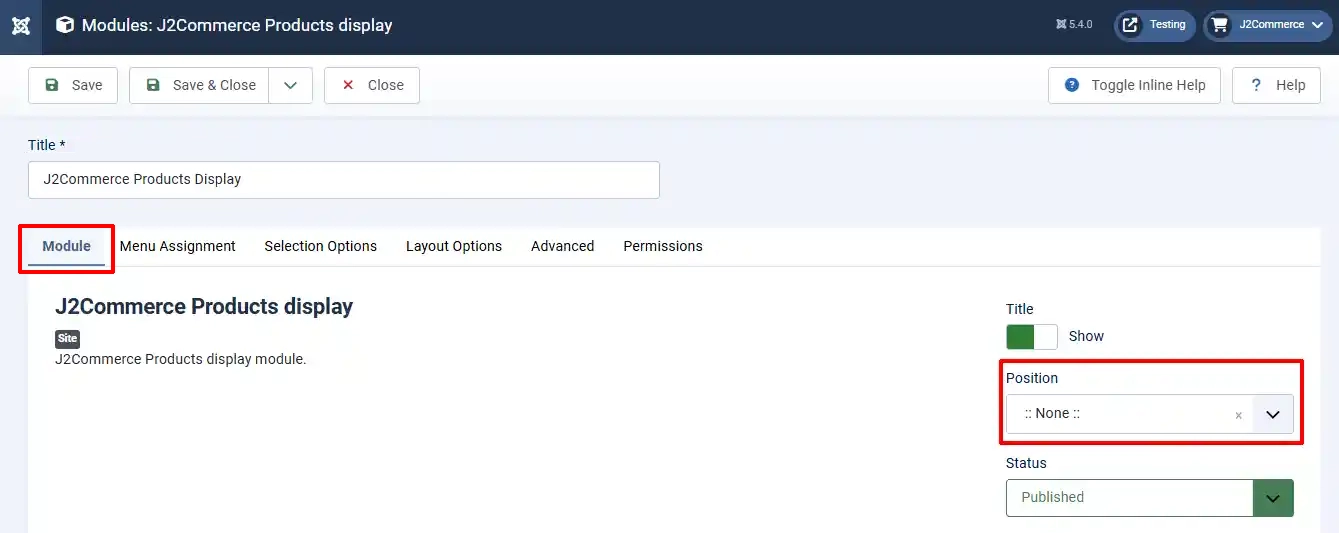
Position: Select the position location you want your chosen modules to appear on your website. For Example: If you want them to show on your Home Page, then where on the home page do you want them to appear?
Menu Assignment Tab
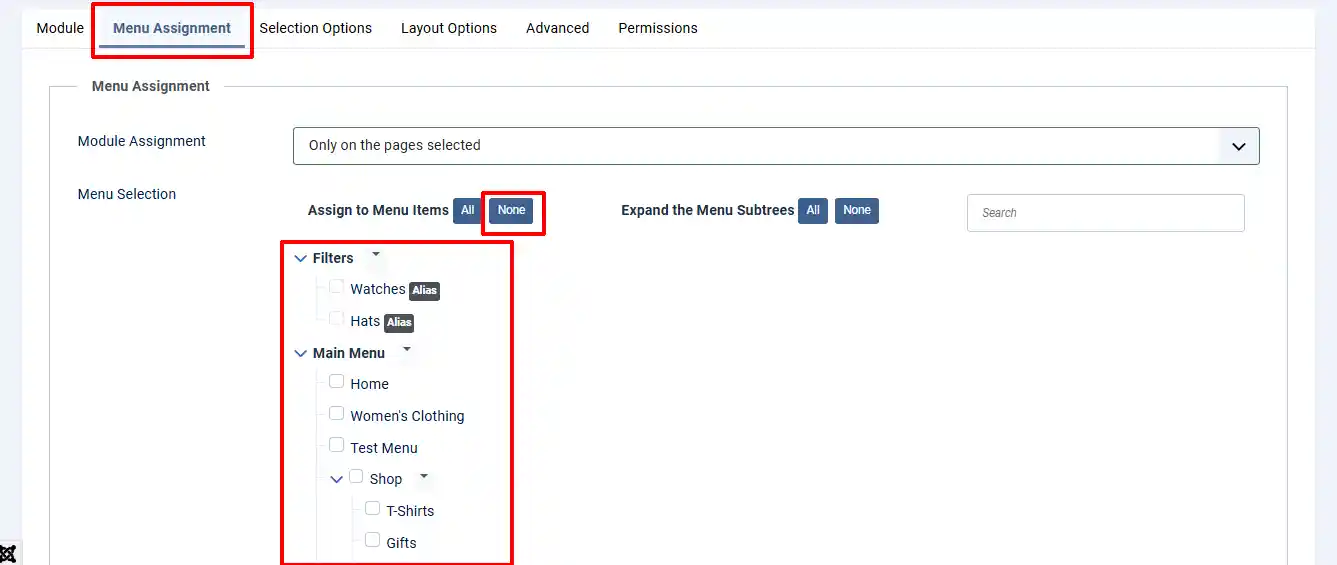
Module Assignment:
-
On All Pages: Select this if you want your selected items to appear on all of the pages.
-
No Pages: Select this if you want your selected items to appear on none of the pages.
-
Only On Selected Pages: Select this if you want your selected items to appear on specific pages that you select below in the Menu Selection
-
On All Pages Except Those Selected: Select this if you want your selected items to appear on all pages except for the ones you select below in the Menu Selection
Menu Selection:
Assign to Menu Items:
-
All: If you choose All, it will select all of the pages and you can remove the ones you don't want
-
None: If you choose None, then you can select only the pages you want
Selection Options Tab
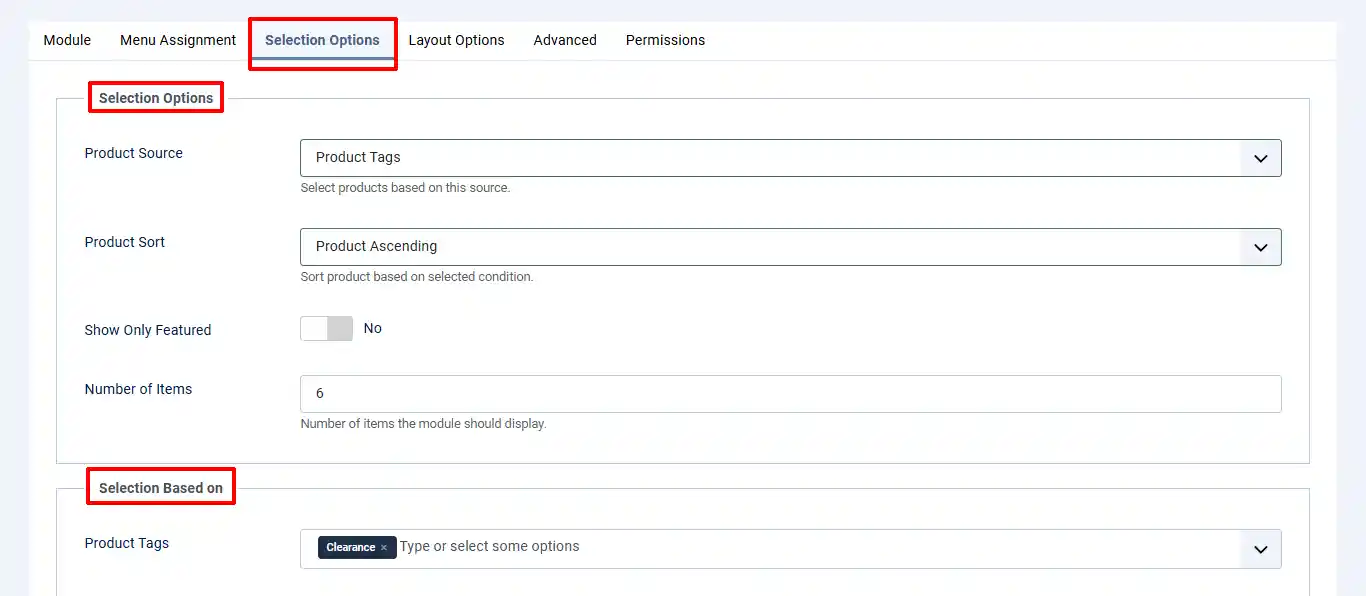
Product Source: There are four sources from which you could fetch and display the products. For example, if you would like to display the products from Tags, then choose Product Tags as your product source.
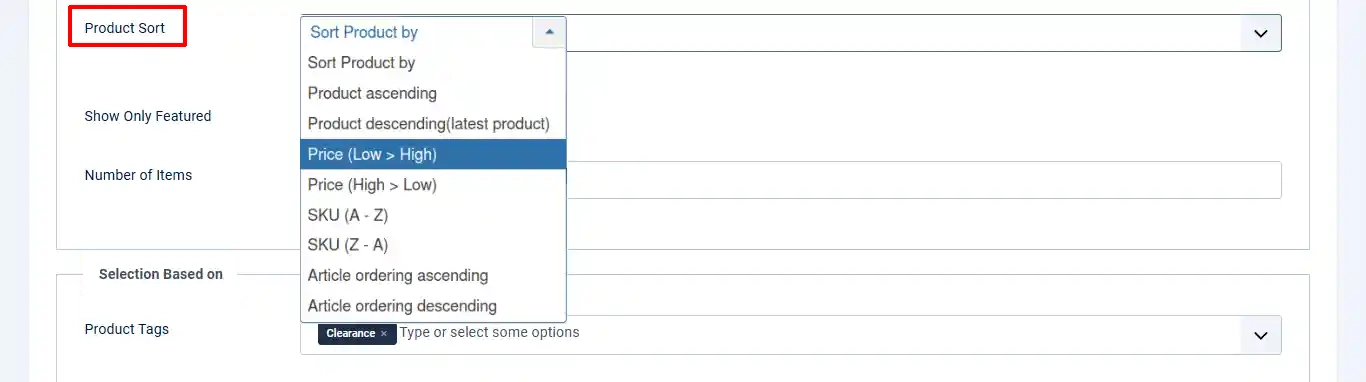
Product Sort: You can sort out the arrangement of the product by using this option. For example, if you would like to display the products based on SKU, then you can choose either SKU (A_Z) or SKU (Z_A).
Selection Based On: This selection will change based on what you chose for the Product Source above. For example:
Product Tags:

If you have chosen Product tags as your product source, then you will have to select the tags here. Products under the selected tags here will be displayed on the frontend.
Category:

If you have chosen the categories as your product source (to the above parameter), then you must select product categories here. Products under the selected categories here will be displayed on the frontend.
Include Subcategory
If you want to include sub-categories of the above selected categories, then set this option to YES.
Subcategory level
If you have enabled including subcategories, then you must have to choose the level of subcategories to include. For example, 3.
Selected Products:
This option will be used only if you have chosen Selected products as your product source. The following steps should be done to add specific products to the module:
-
Click on Add products button.

-
The pop-up window will be displayed on the screen. In the pop-up window, check the box next to the product name.
-
After selecting the products, click on the set values button and close the pop-up window.
-
The products will be added. Save.
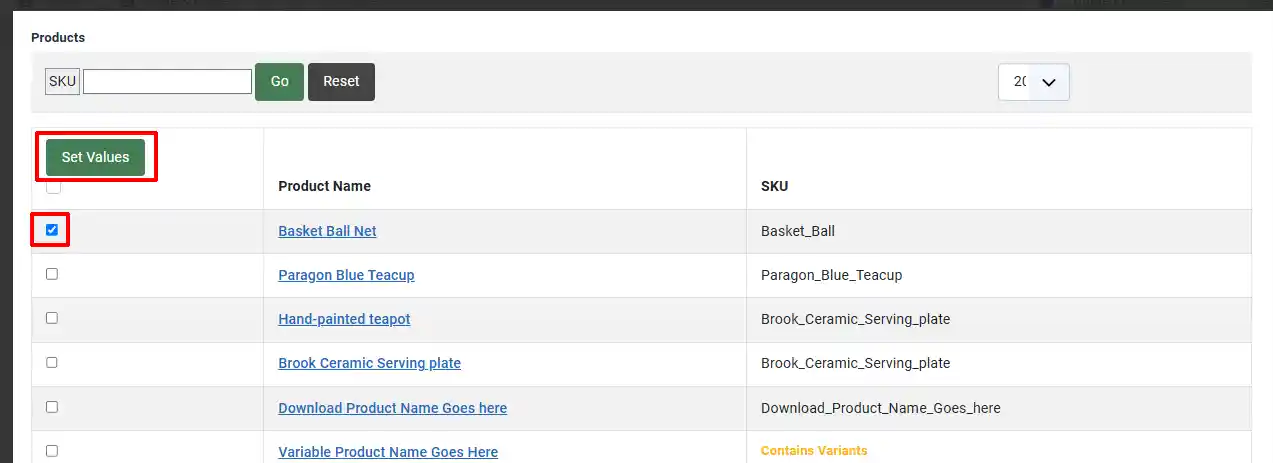
You will now see the products you chose listed here.

Layout Options Tab
Layout Options:
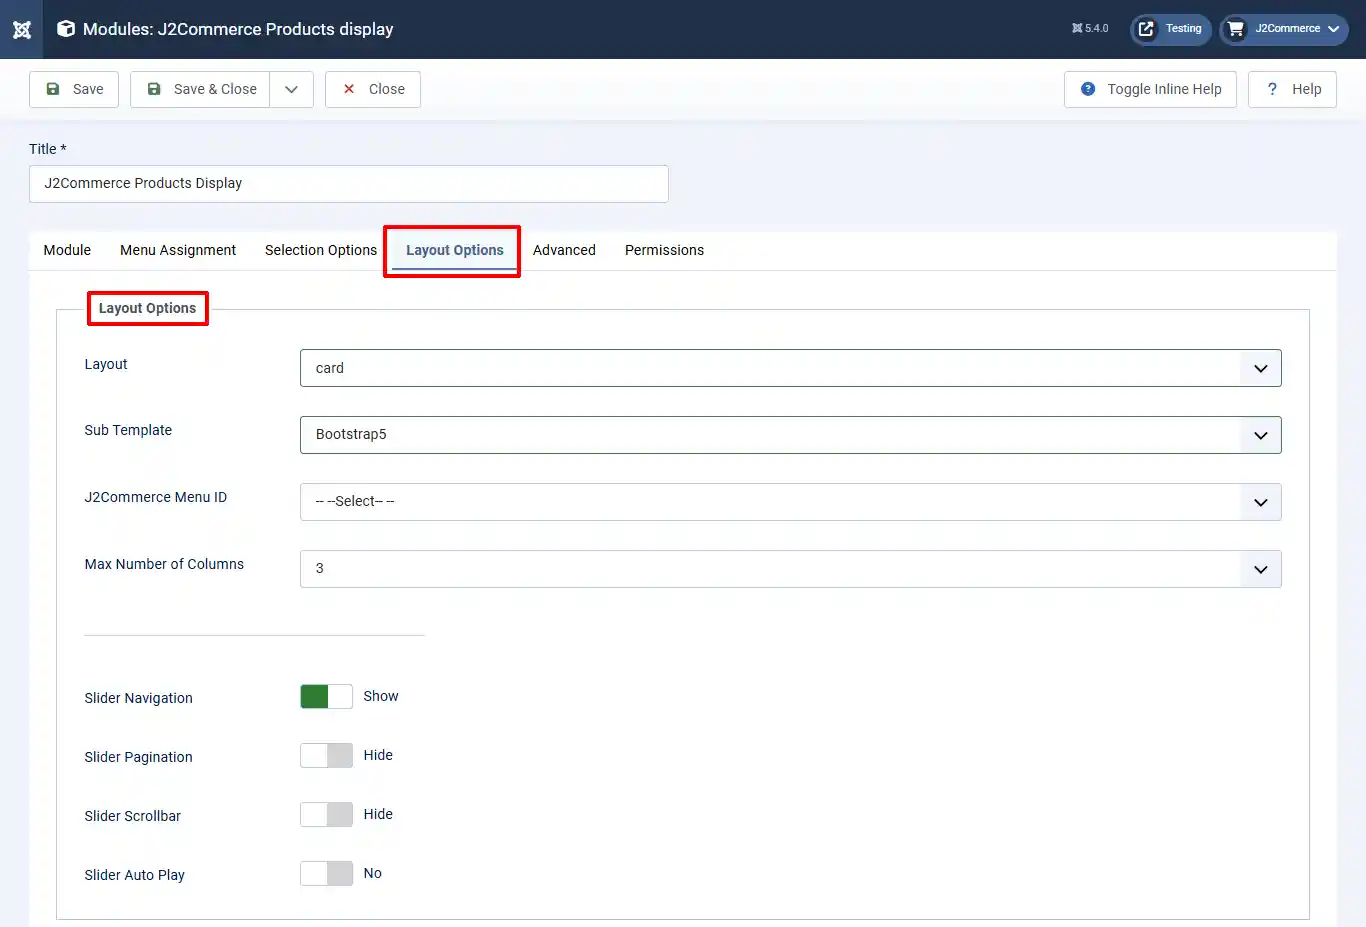
Layout: You have three options to choose from.
-
Default: A clean and minimal presentation that lists products in a straightforward format—ideal for simplicity
-
Card: Each product is displayed as a distinct card, including visuals and key details. This layout offers a more engaging and organized look
-
Carousel: Products appear in a horizontal slider with optional animation. Great for showcasing featured items or creating a dynamic browsing experience
Sub Template: Select the option, Bootstrap 5. Create alternate layouts for this module within your Joomla! template's /html/mod_j2commerce_products folder. The module will then pickup the new sub-template auto-magically.
J2Store menu ID:
Select J2Commerce menu ID for display products (Not required). If you have at least one menu item with type as J2Store > Product list view, the links on the product will take the ID of that menu. If you don’t have a menu, then the link will use the non-sef url for the title and image on the product.
If you wants to use sef url, then create at least one menu item with type J2Store > Product list view and then choose this menu in this option.
Max Number of Columns: The maximum number of columns when displayed as a grid. Product items will flow into the next row when the number of items exceeds the number of columns. Set to 0 to disable grid layout. Ignore for carousels.
This tab has options to show/hide several things displayed on the module as per your wish. Refer to the screenshot below:
Slider Navigation: Slider navigation arrows
Slider Pagination: Slider pagination bullets
Slider Scrollbar: Slider scrollbar for navigation
Slider Auto Play: Enable auto-play of slides
Product Settings:

Show Title: Select Yes if you want your show title to be displayed
Link Titles: Select Yes to link the product title to the product
Show SKU: Select Yes to show SKU in product view
Show Introtext: Select Yes to display the introtext
Enable beforeDisplayContent Event for article: Enable/Disable beforeDisplayContent Event for article
Enable afterDisplayContent Event for article: Enable/Disable afterDisplayContent Event for article
Cart Block Settings:

Show Base Price: Select Yes if you want to show the base price of products
Show Tax Info: Select Yes if you want to show tax info text in the product
Show Special Price: Select Yes if you want to display when there is an offer price
Show Offer: Select Yes if you want to show when there is an offer for the product that offer is displayed
Show Stock: Select Yes if you want to display how much inventory you have left
Add to Cart: Select Yes if you want to display add to cart button with option, without option, etc
Show Only Icon Labels: Select Yes if you want to show only icon labels for add to cart and view details buttons
Product Image Settings:
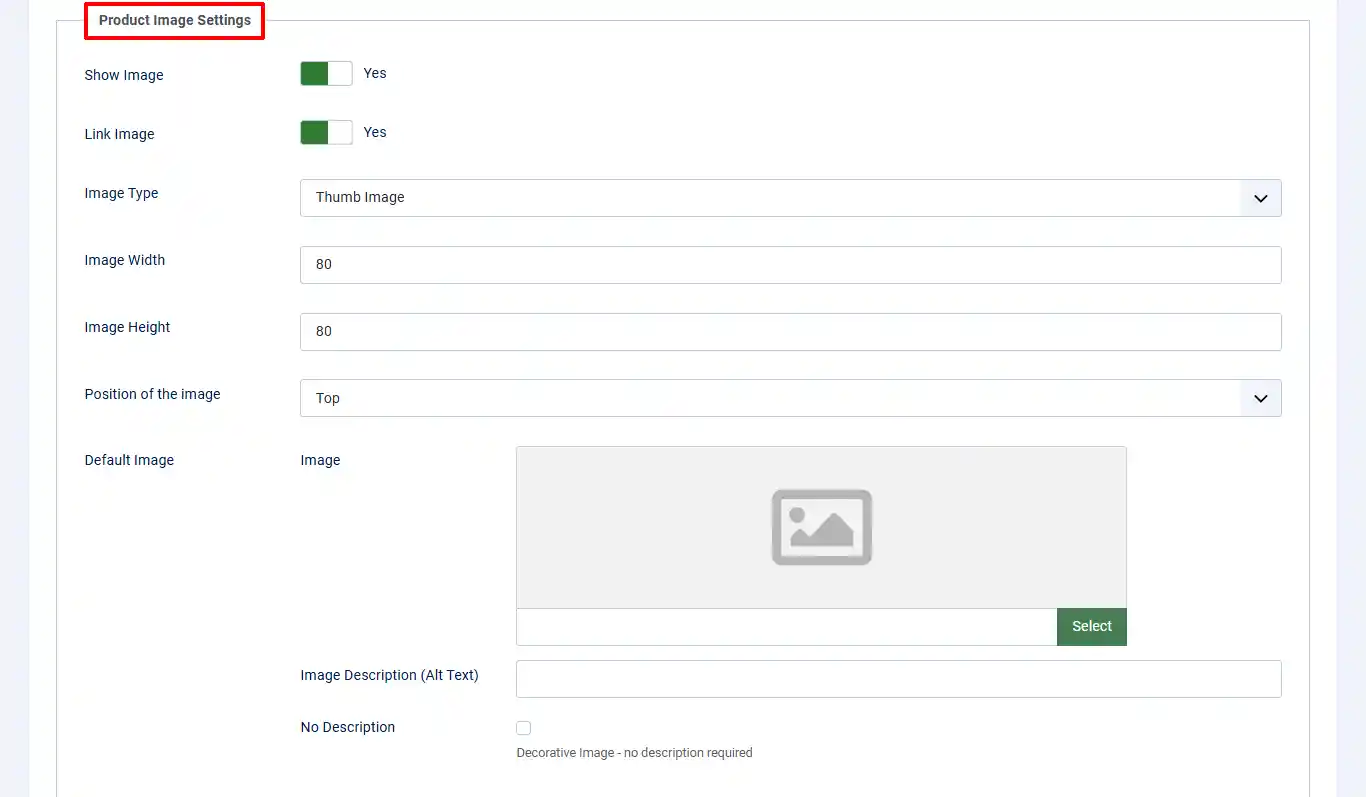
Show Image: Select Yes if you want to display or hide the product image
Link Image: Select yes to link the image to the product. When the image is clicked the user is taken to the product
Image Type: Select either the Main image or thumb image of the product you wish to display
Image Width: Set the image size in pixels. For instance 80
Image Height: Set the image height in pixels. For instance 80
Position of the image: Image can be positioned at the top, left or right of the cart block
Default Image: Select a default image to display when a product does not have an image
Video Tutorial: To configure the product display module, follow the video below: