Advanced Checkout
Requirements
- PHP 8.1.0 +
- Joomla! 4.x/ Joomla! 5.x +
- J2Commerce / J2Store 4.x +
Purchase the App
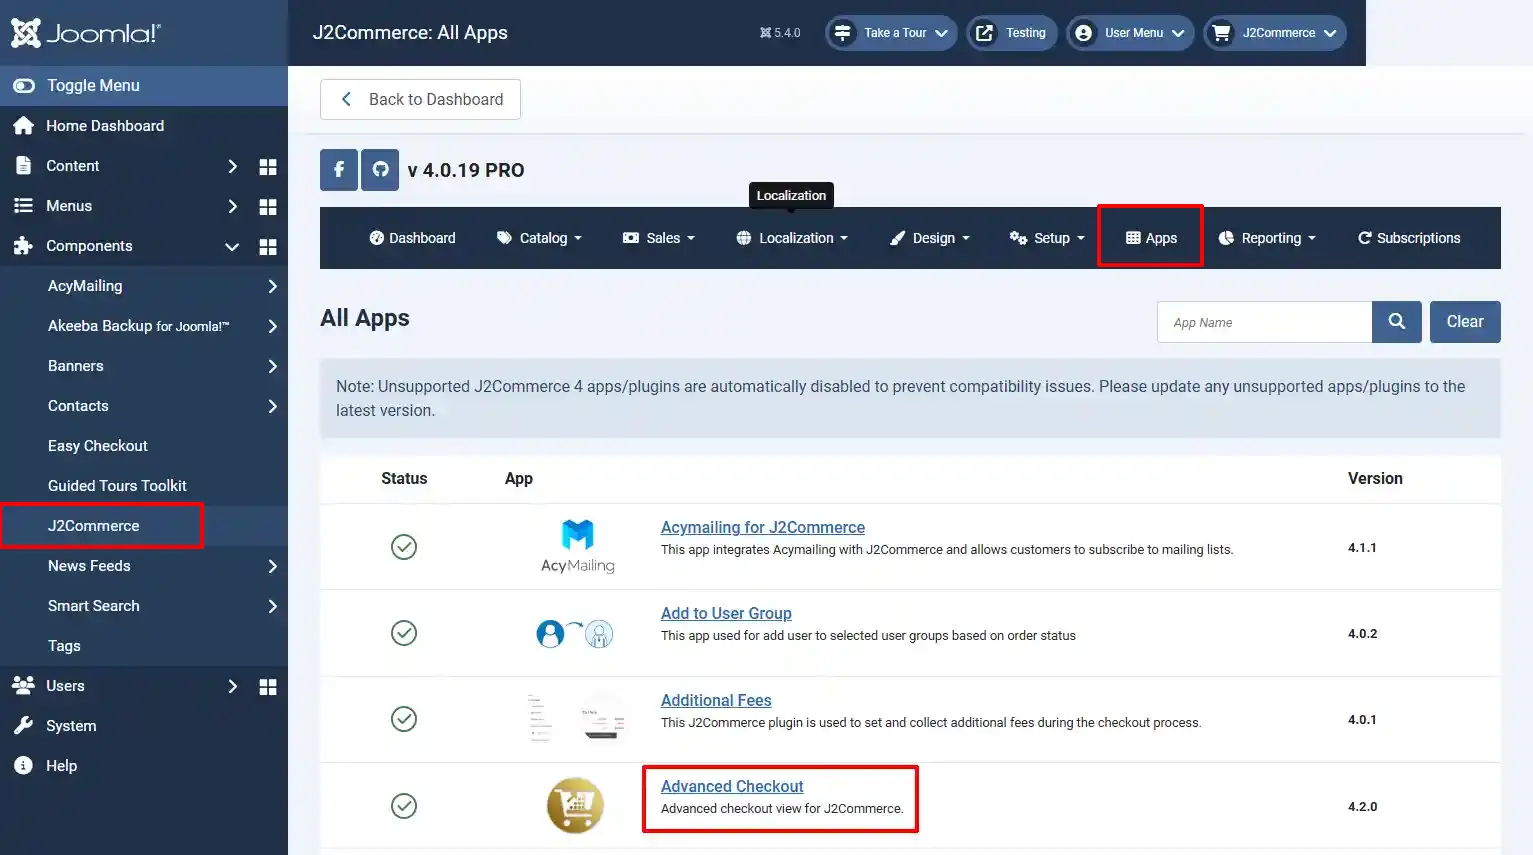
Step 1: Go to our J2Commerce website > Extensions > Apps
Step 2: Go to Extensions > Apps > Locate the Advanced Checkout App > click View Details > Add to cart > Checkout.
Step 3: Go to your My Downloads or My Account under your profile button at the top right corner and search for the app. Click Available Versions > View Files > Download Now
Install the App
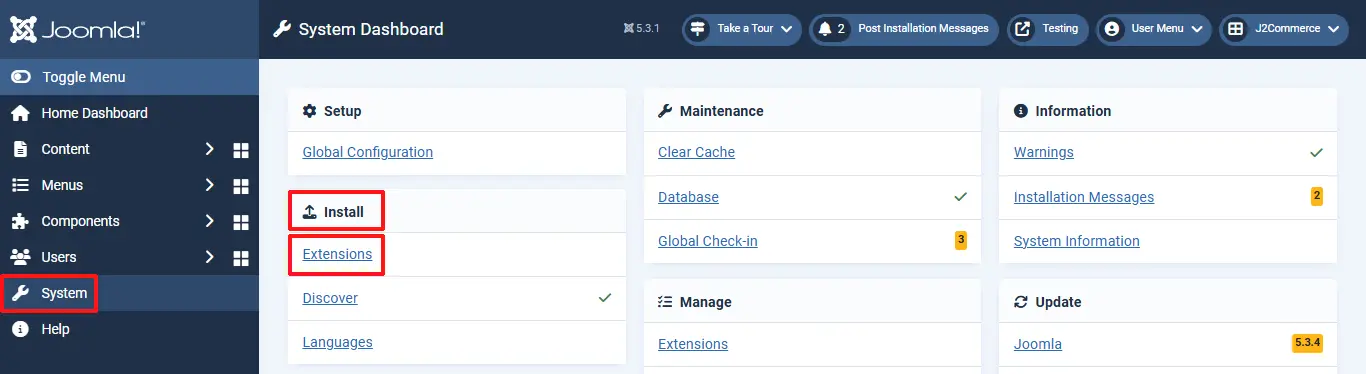
Use the Joomla! installer to install the app. Go to System > Install > Extensions > install the app
Enable the App
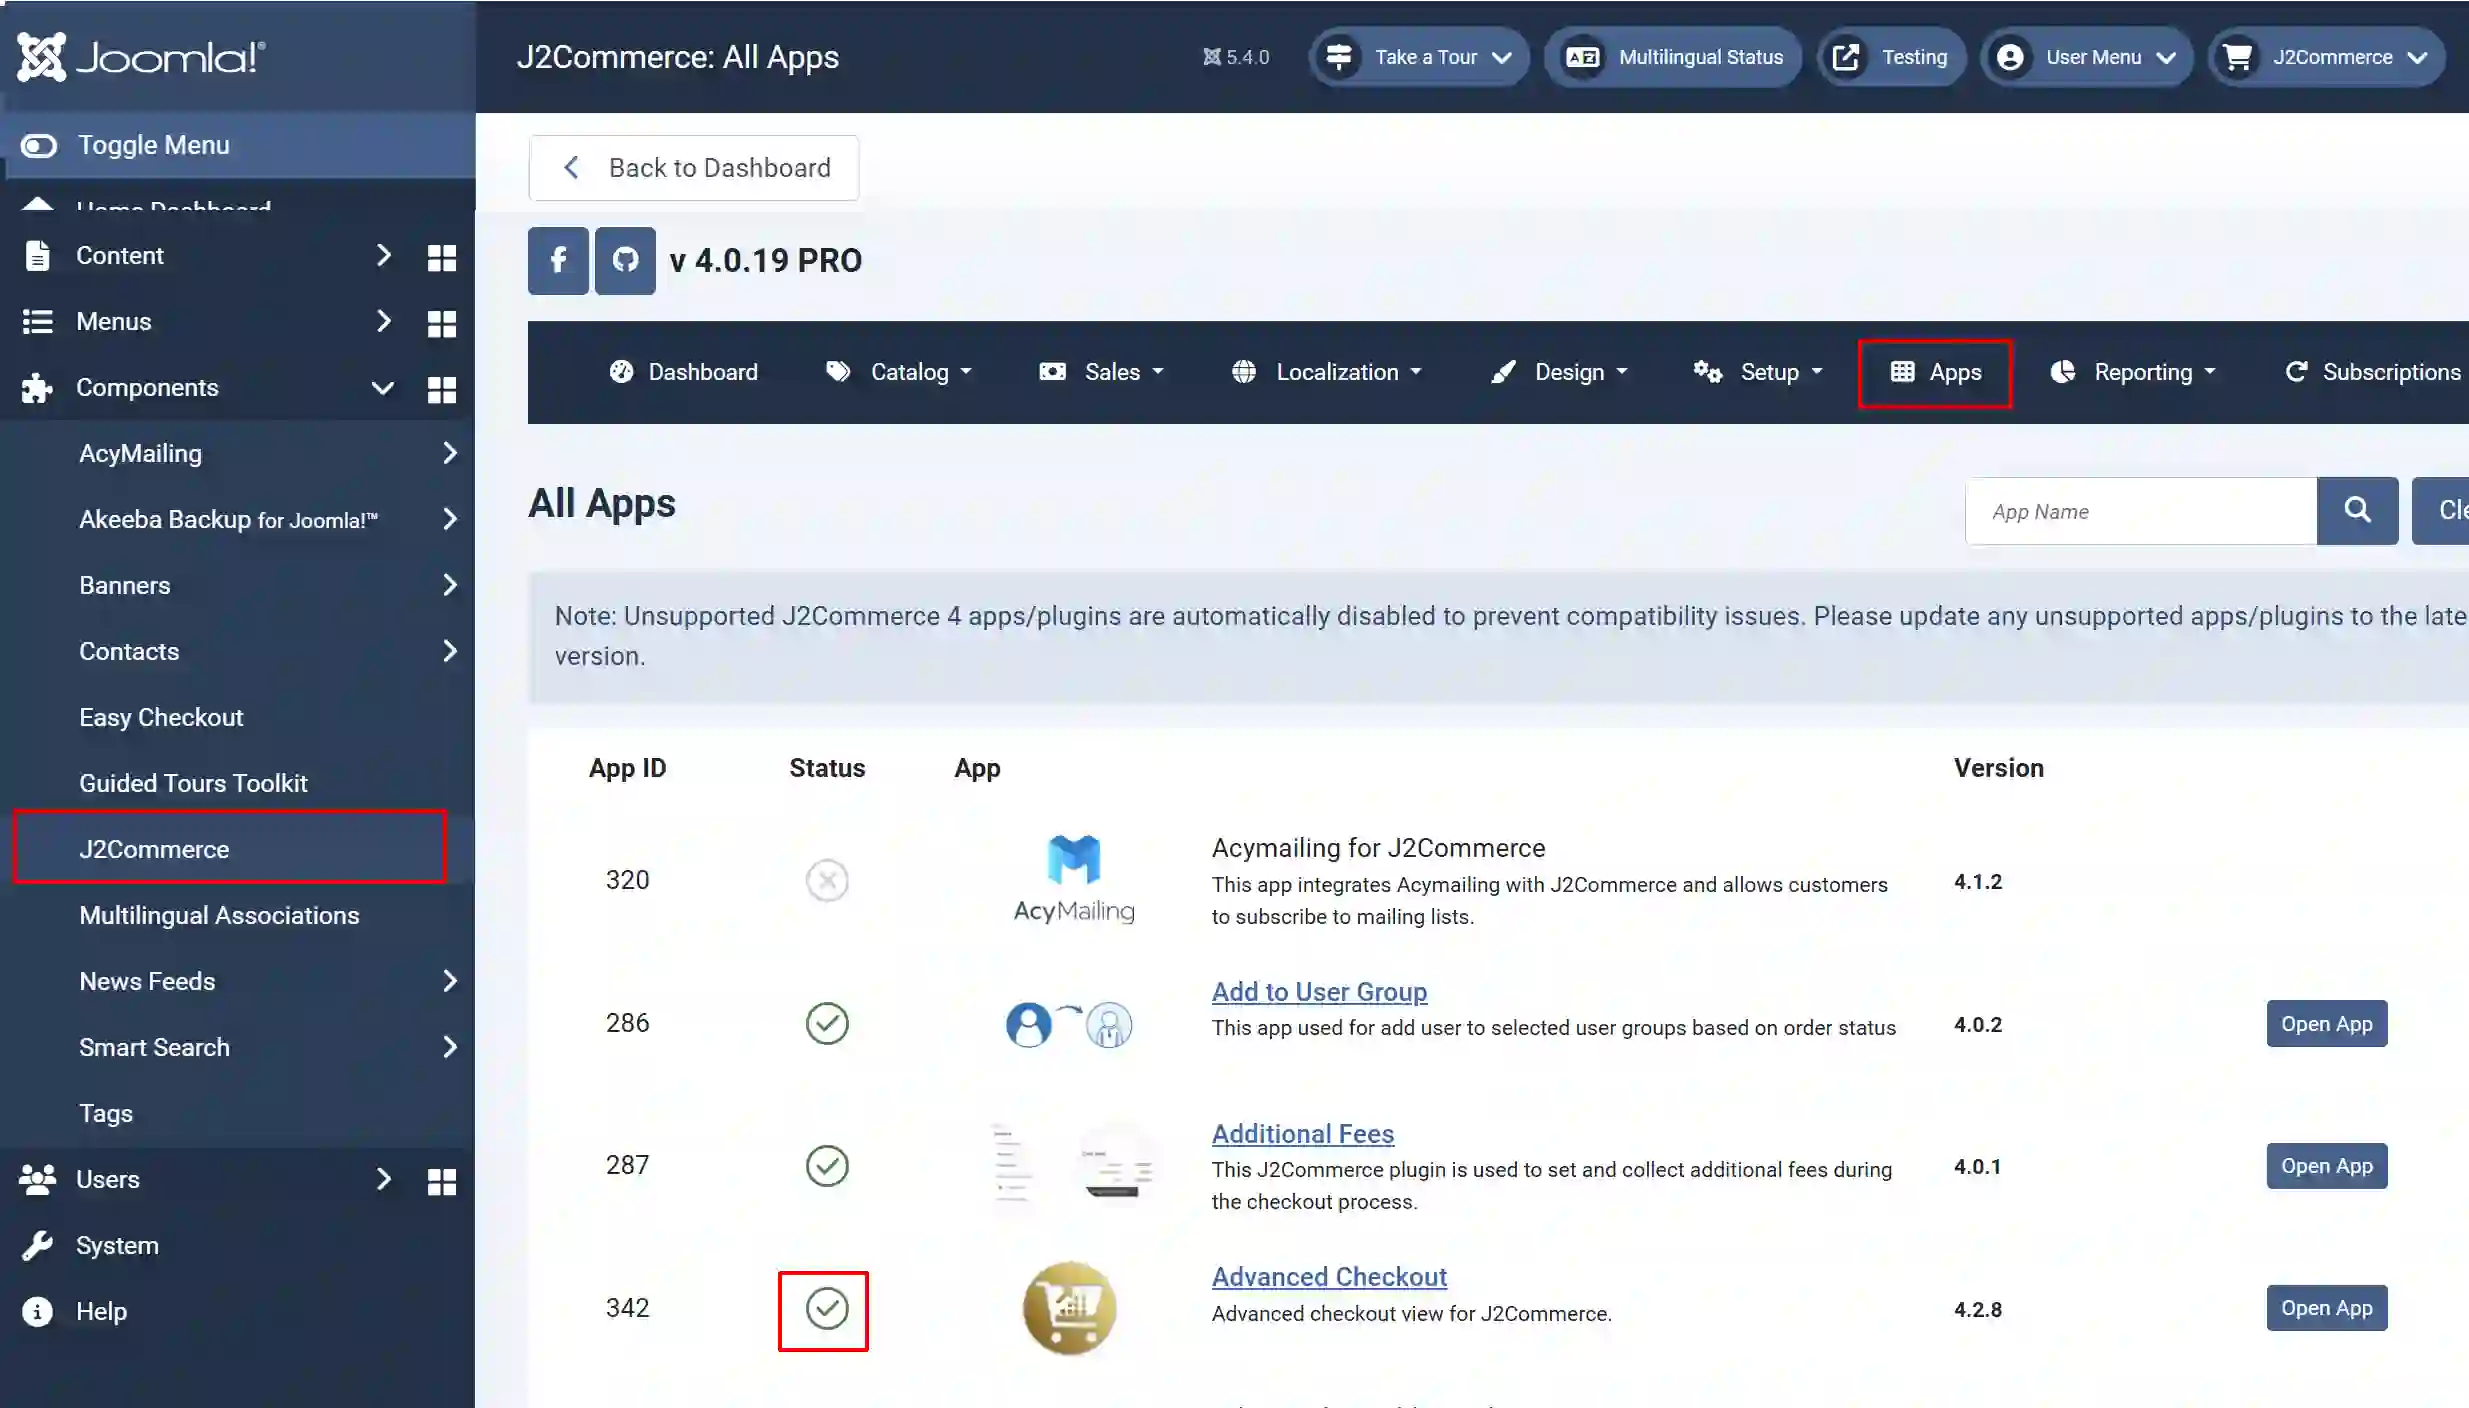
Select J2Commerce > Apps > Advanced Checkout
Enable the app by clicking on the 'X'. It will turn into a checkmark.
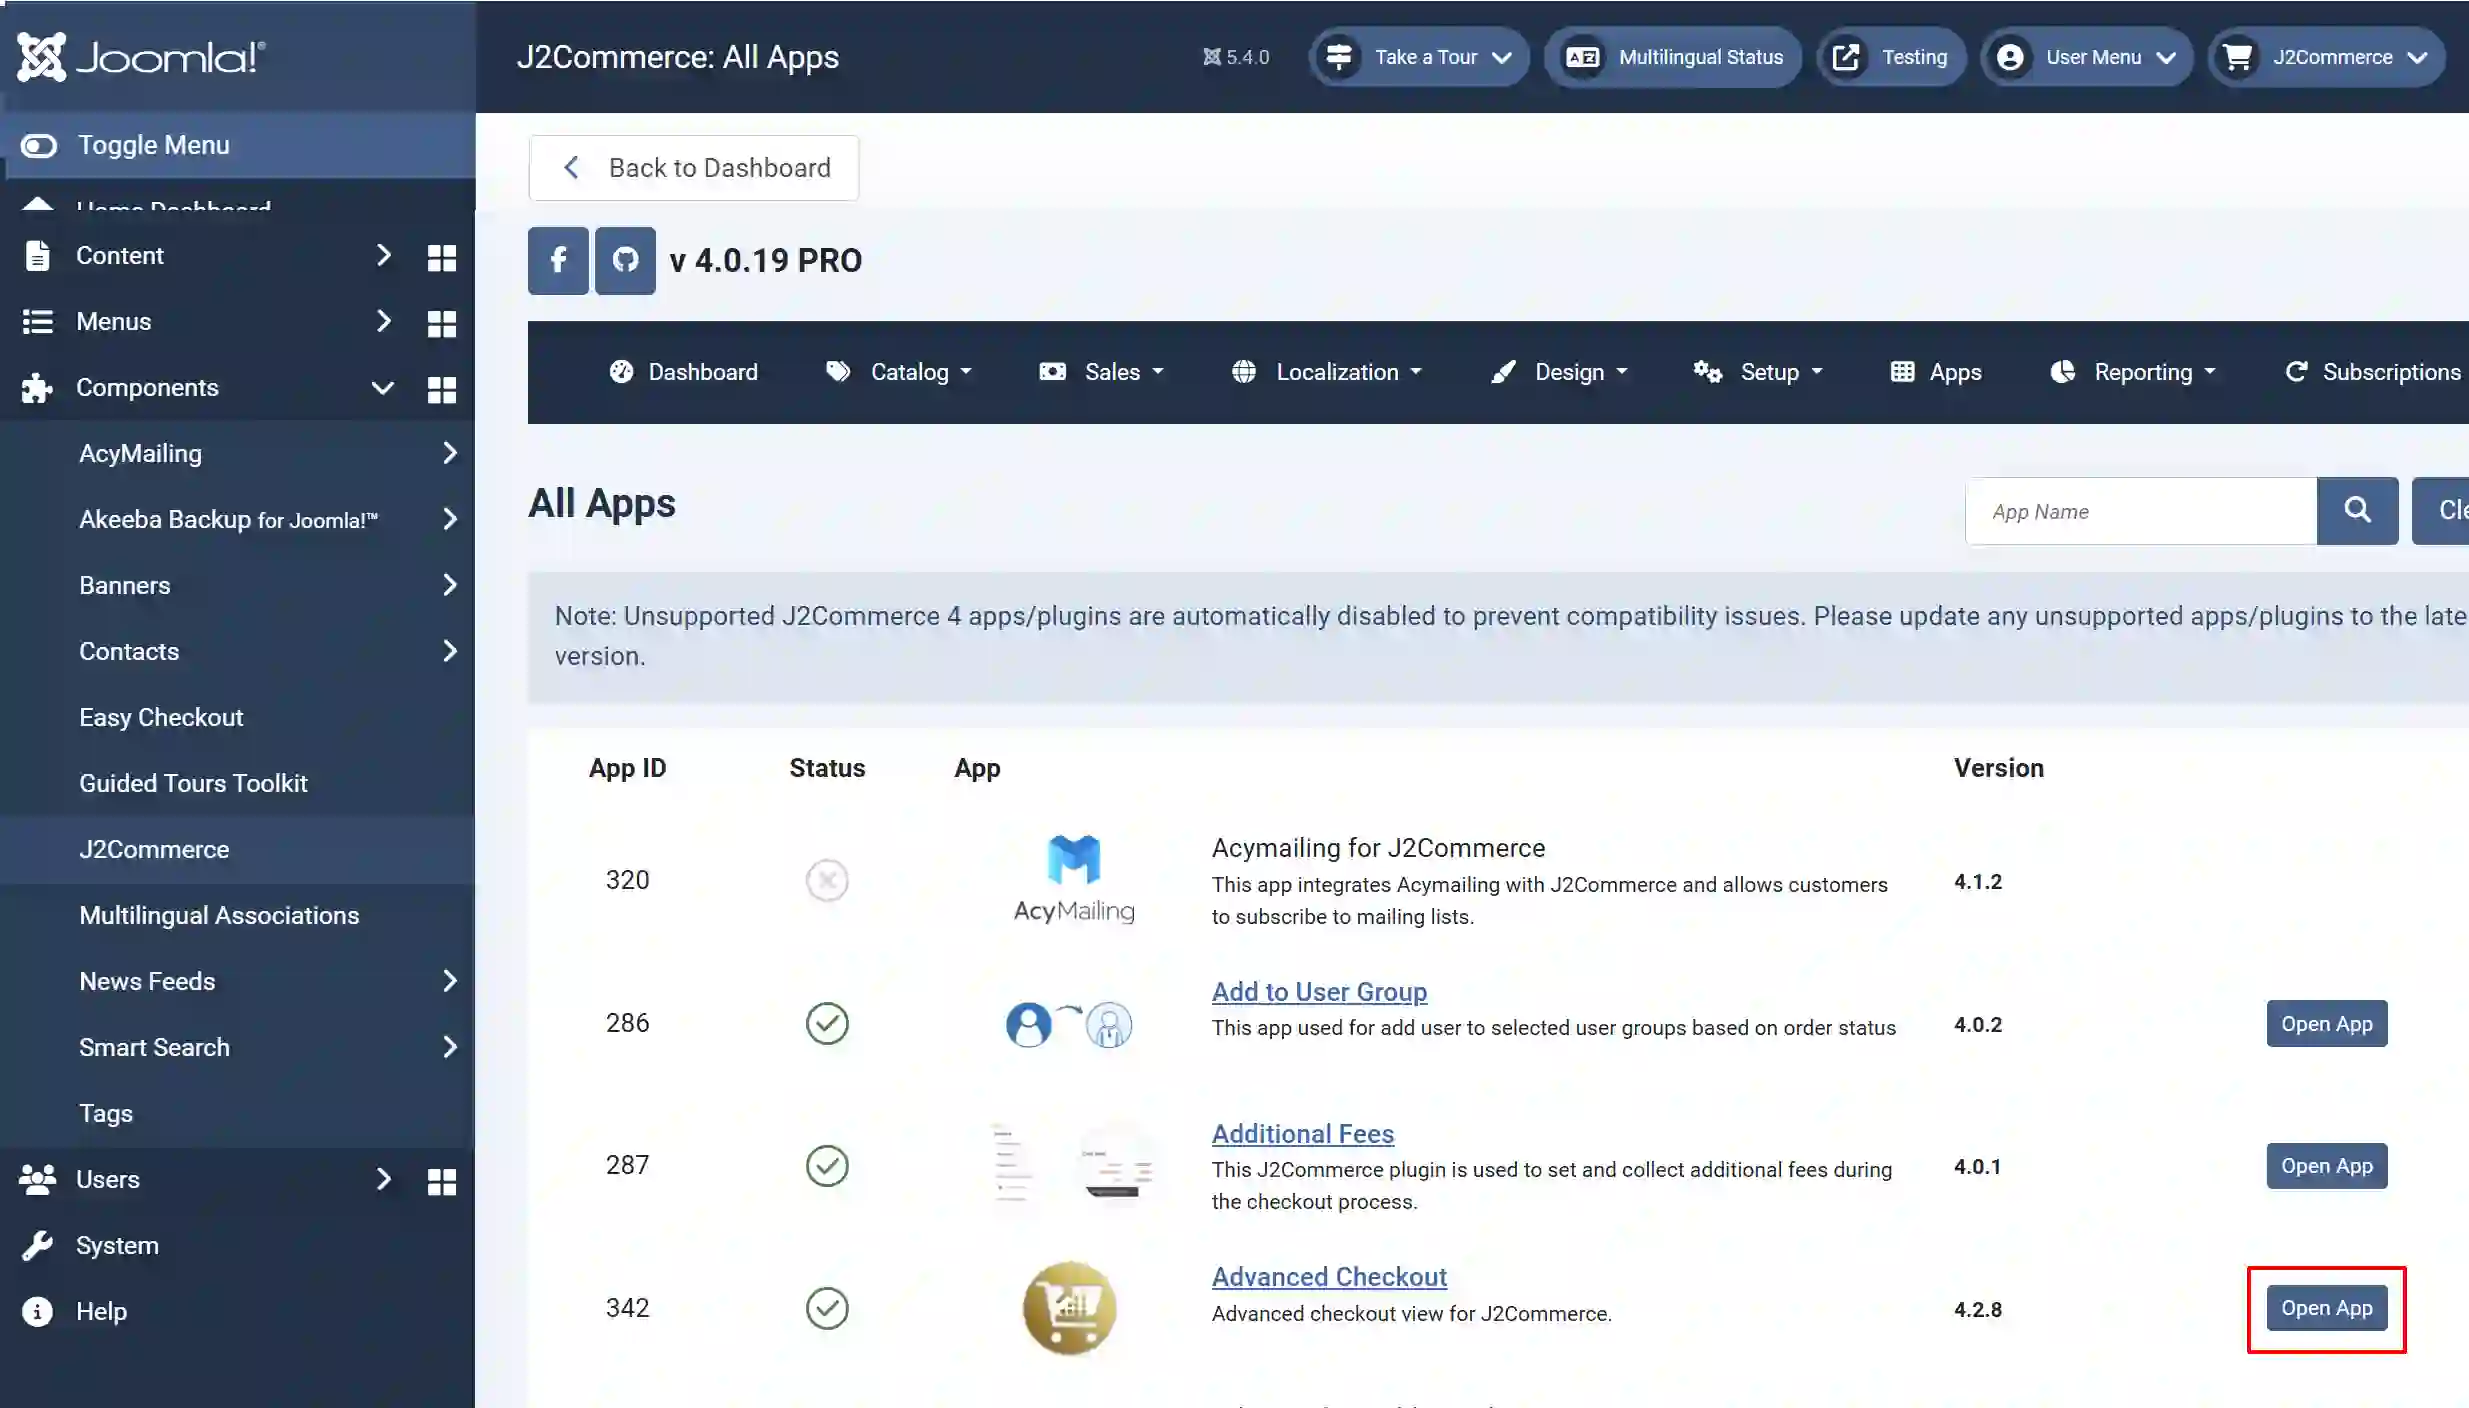
Click on "Open App" or the Title to start setting up the app.
Setting up the Menu
Before you set up the parameters, you need to set up the menu for it.
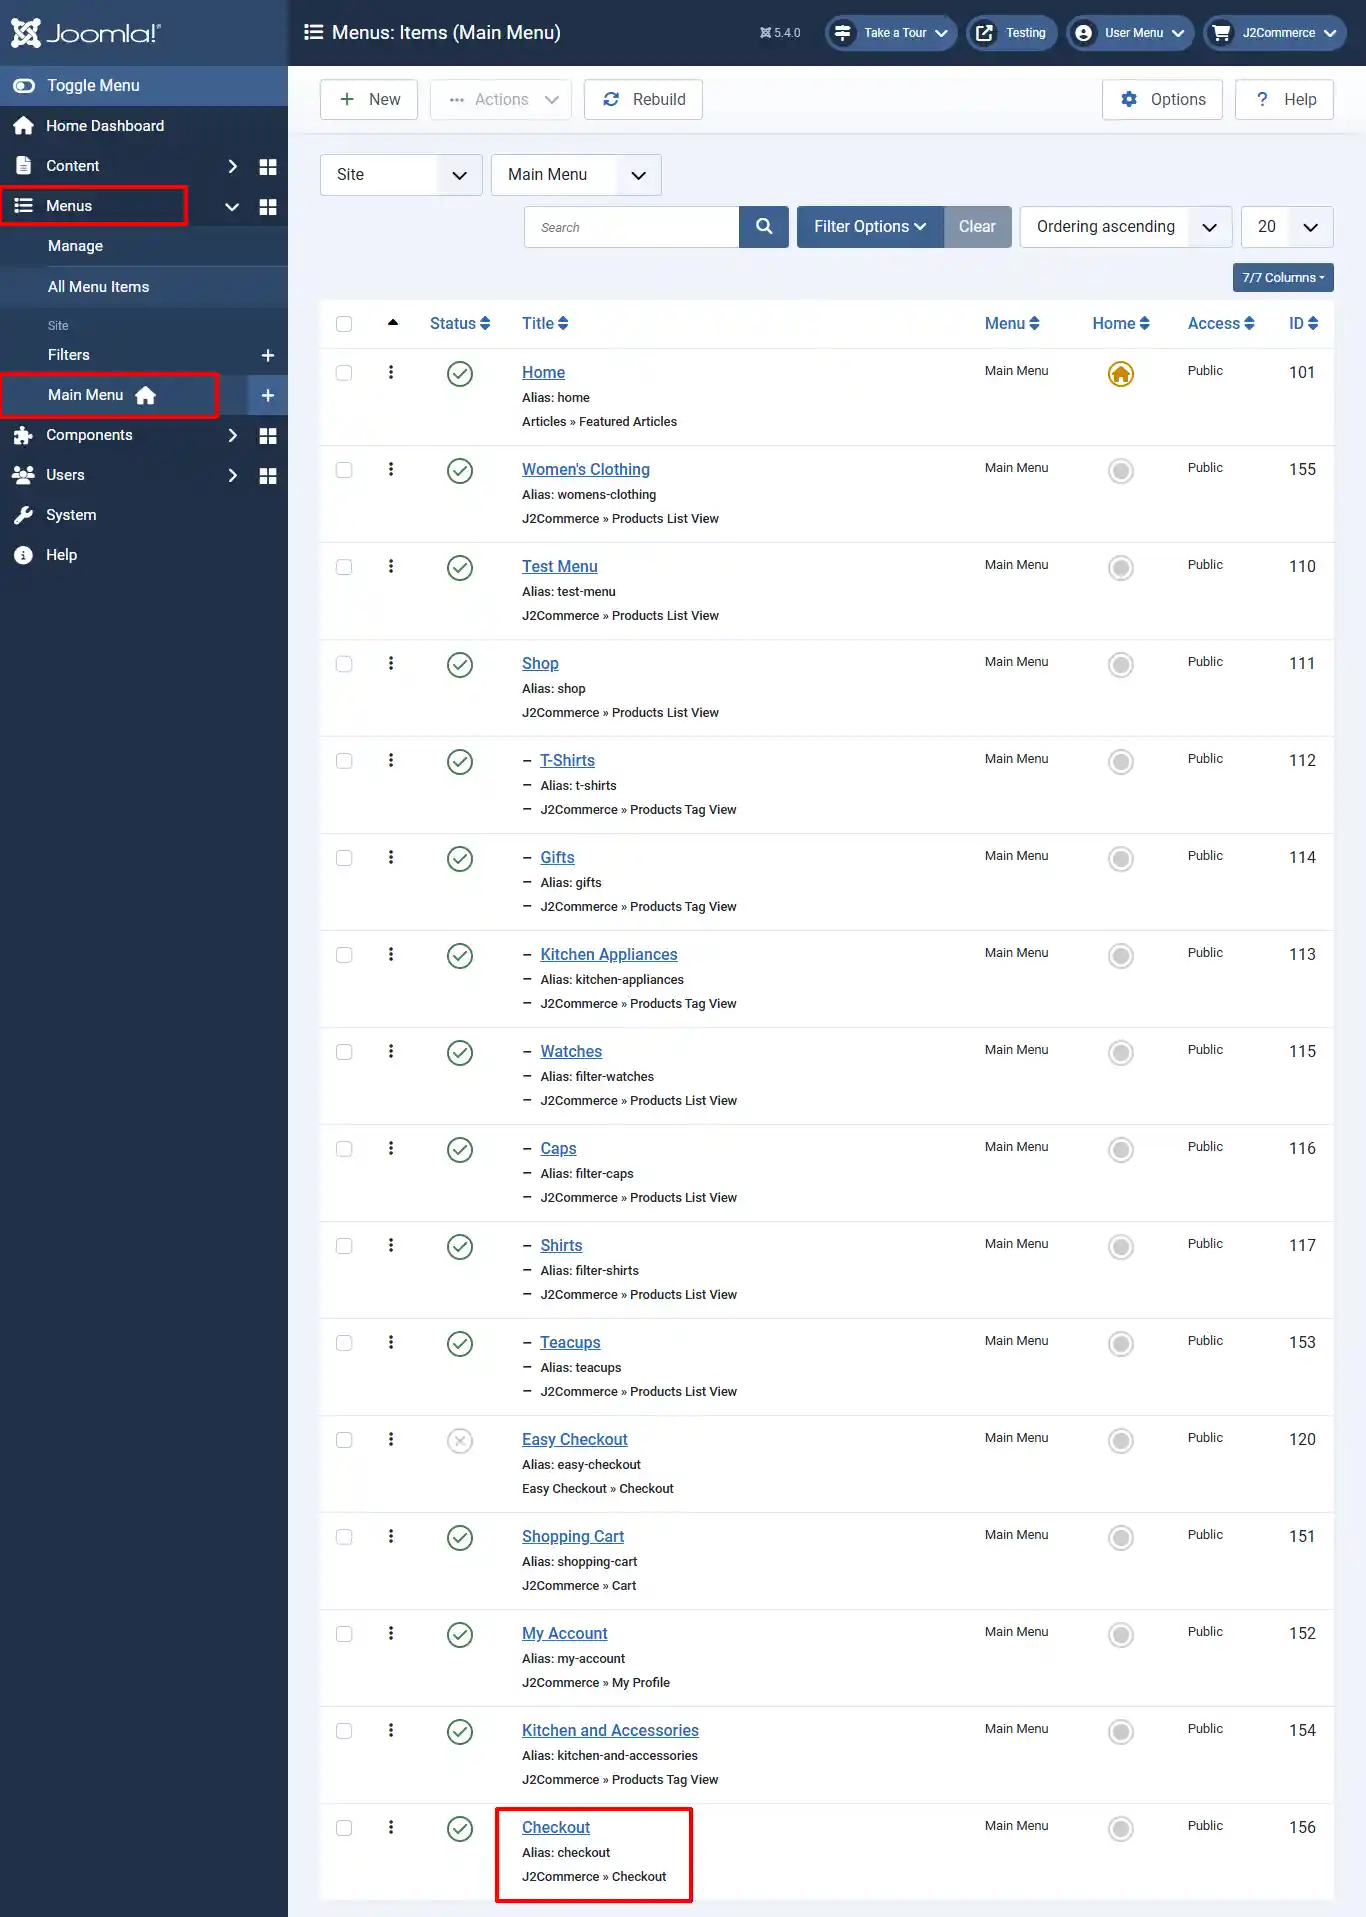
Step 1: Go to Menus > Main Menu > Checkout
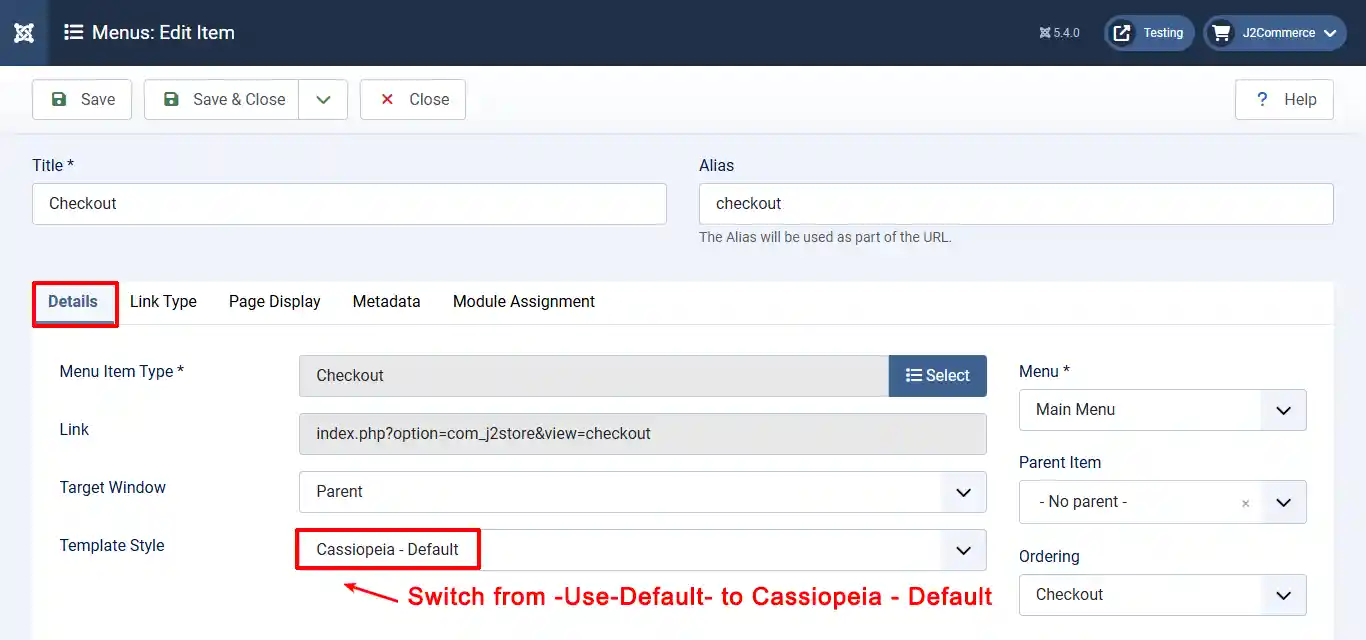
Step 2: Switch the Template Style from the -Use-Default- to Cassiopeia-Default
Setting up the Modules
Creating a New Module
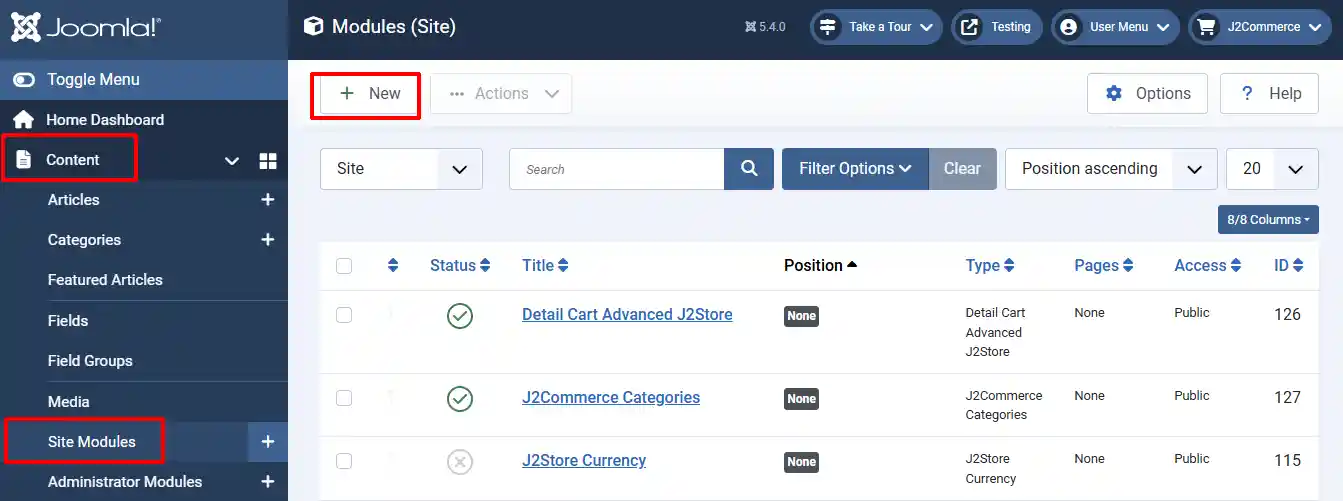
Go to Content > Site Module > New
Module Tab
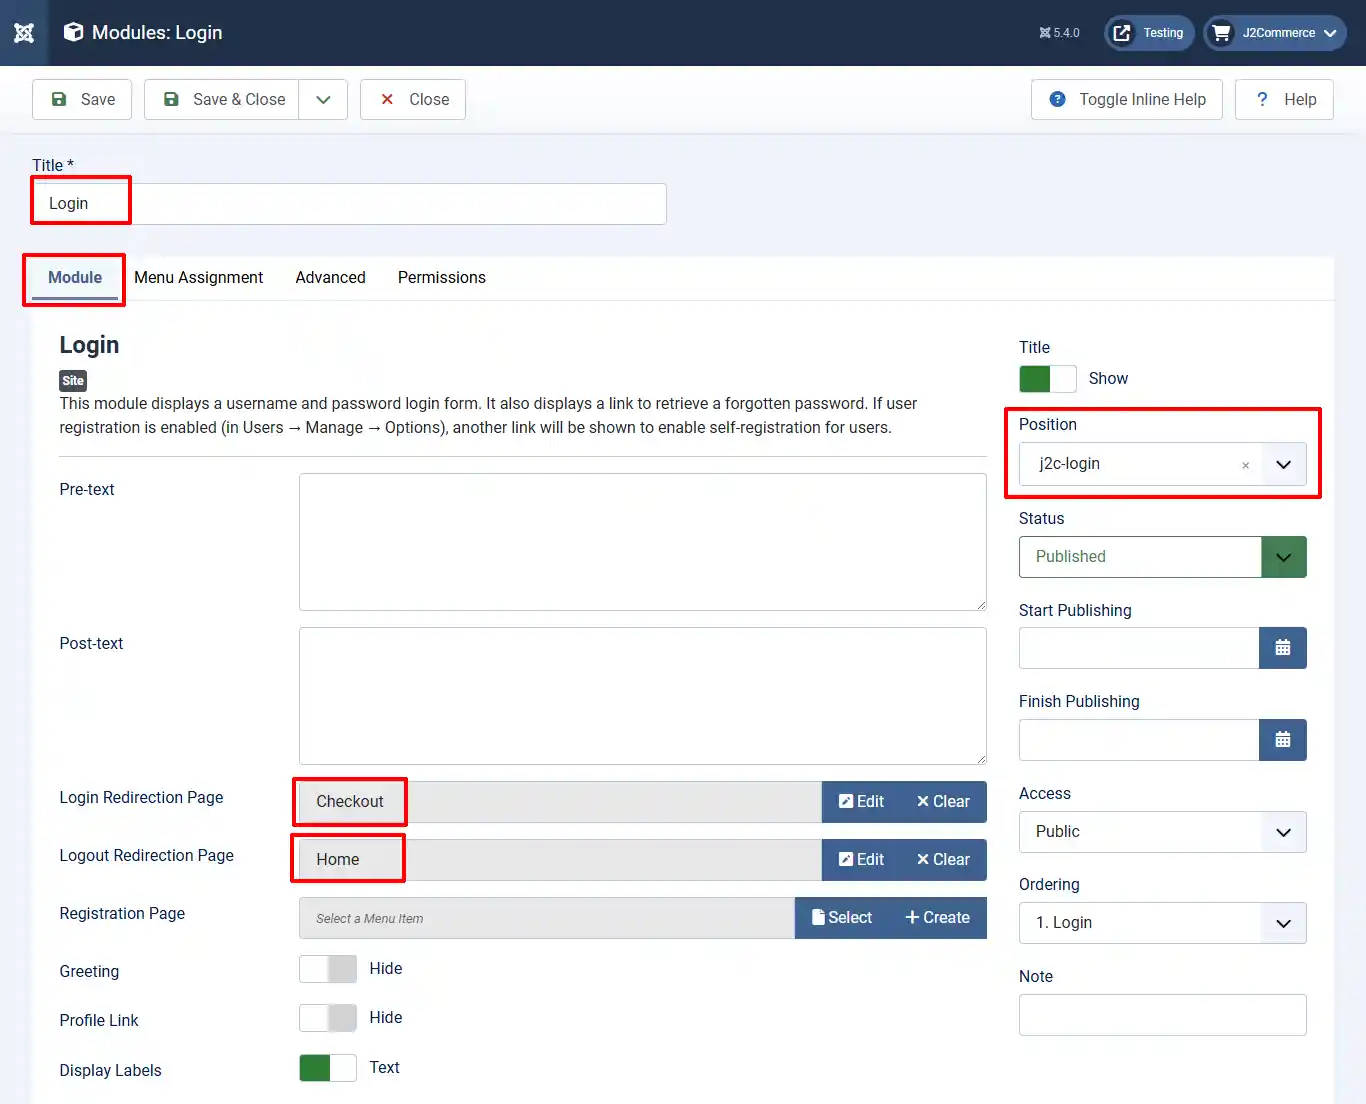
Title: Name the module, Login.
Position: Type j2c-login in the dropdown.
Login Redirection Page: Select the location you wish to redirect the customers after logging in. In many cases, it's the Checkout Page.
Logout Redirection Page: Select the location you wish to redirect the customers after they complete their order.
Menu Assignment Tab
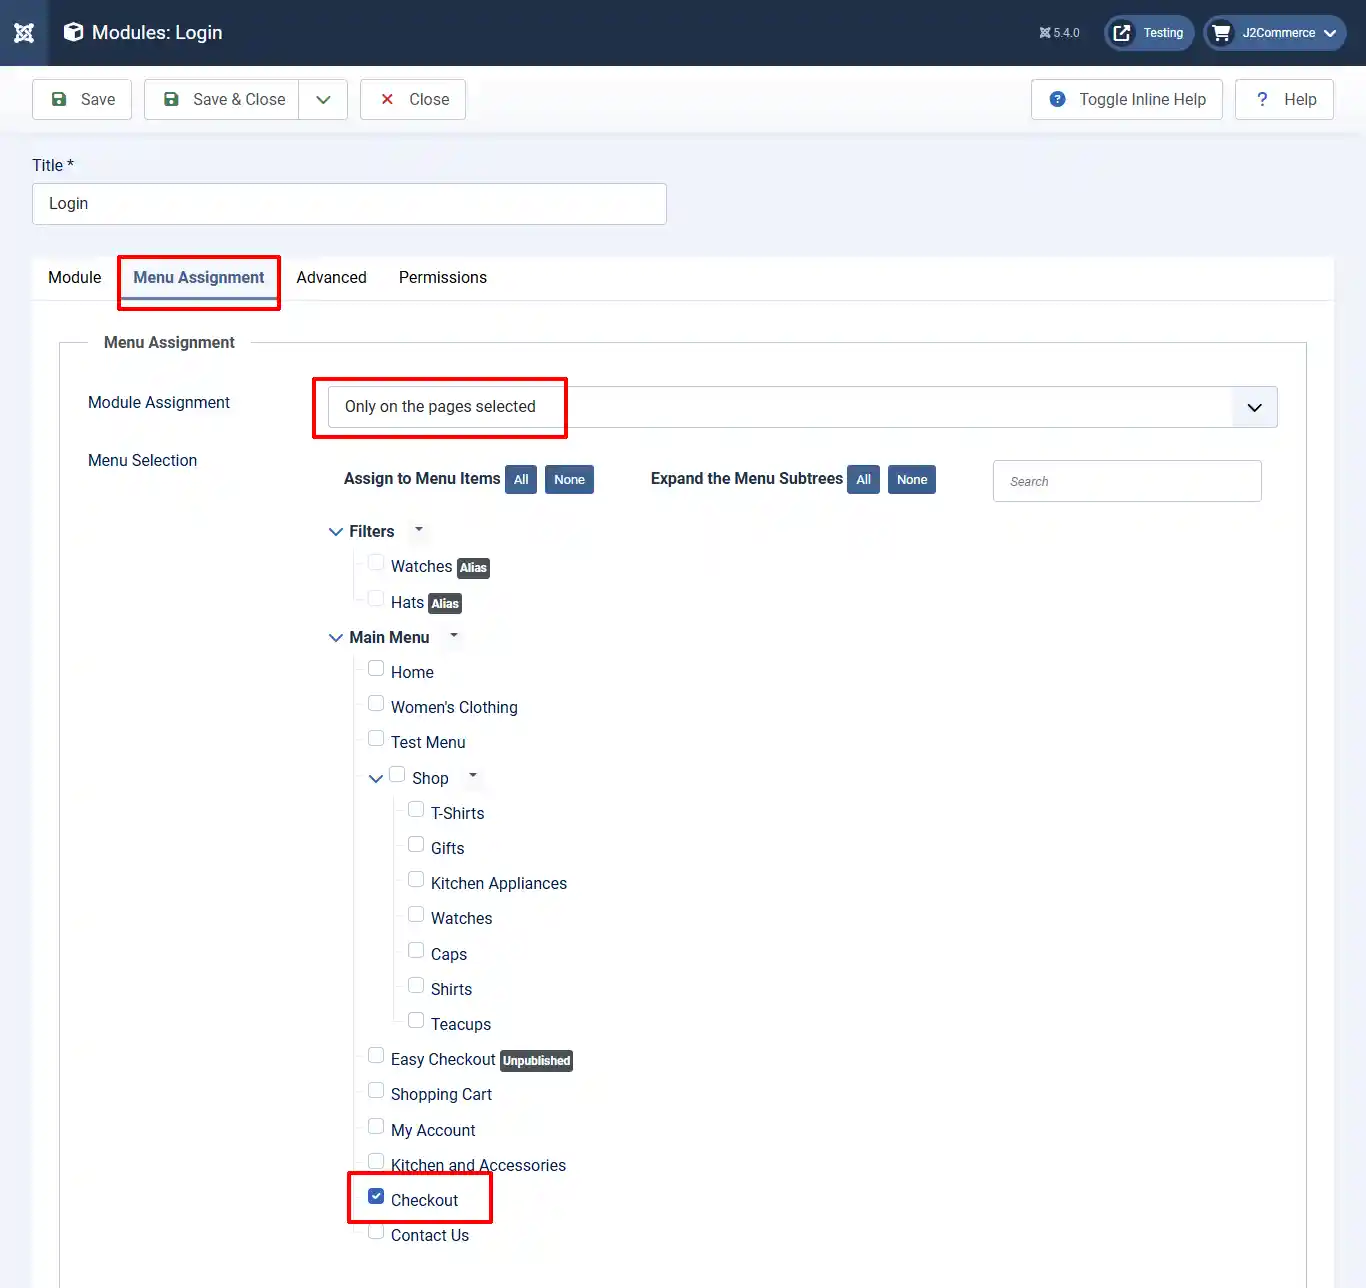
Module Assignment: Select Only on the pages selected
Menu Selection: Select Checkout
Advanced Tab
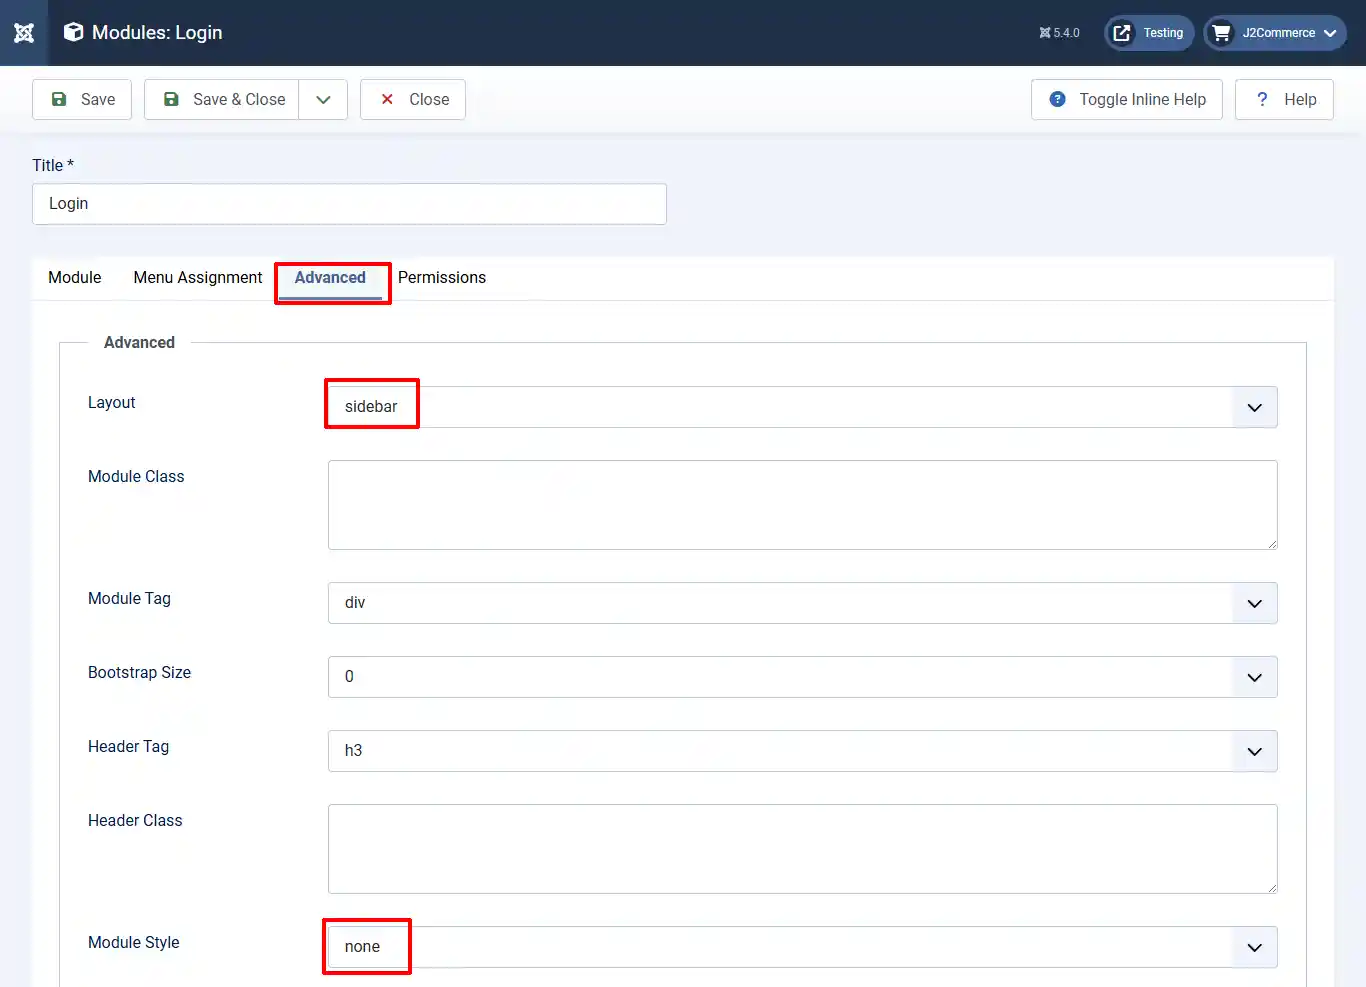
Layout: Select Sidebar
Module Style: Select None
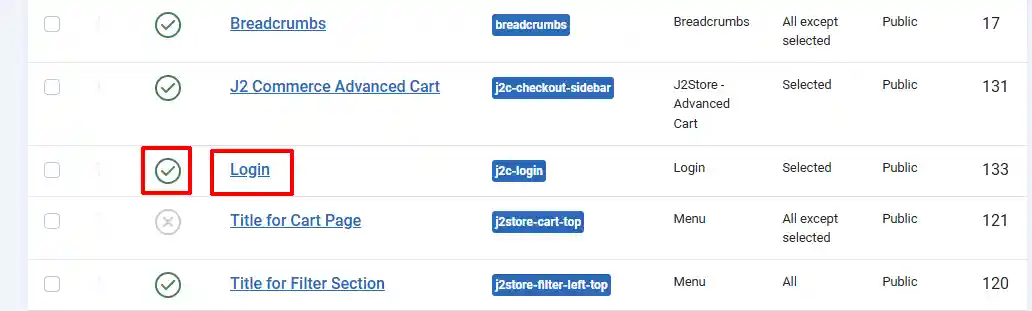
The Login Module is complete. Make sure it's enabled by clicking on the 'x' and turning it into a checkmark. It will now show up in the checkout cart.
Advanced Cart Module
Follow the same steps from creating the Login Module.
Go to Content > Site Module > New
Module Tab
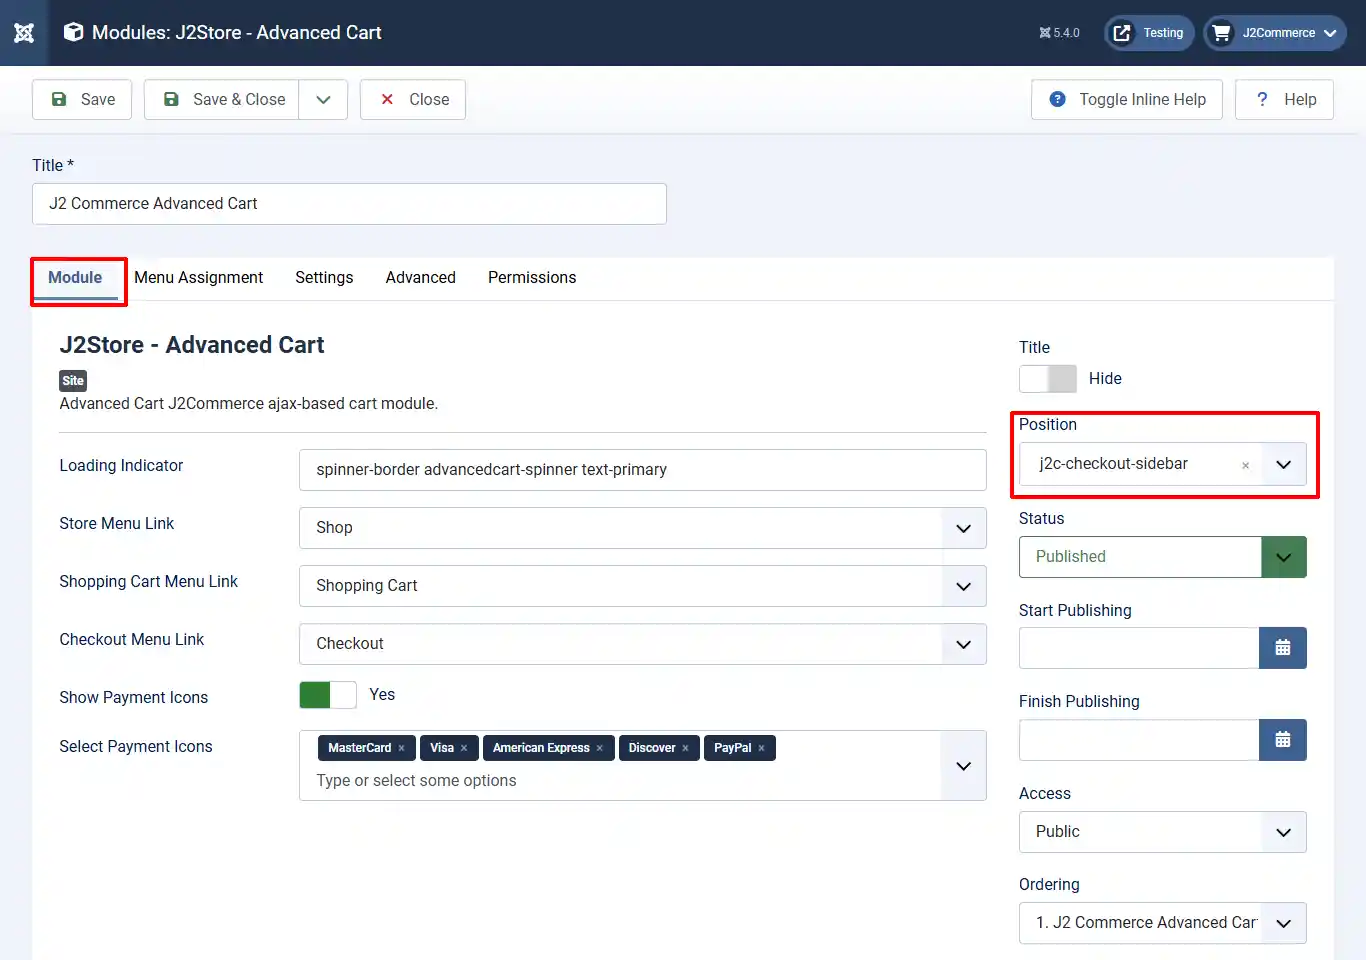
Title: Name the module, J2Commerce Advanced Cart
Position: Type j2c-checkout-sidebar in the dropdown
Loading Indicator: The Bootstrap 5 spinner class is used when reloading the advanced cart contents.
Store Menu Link: Advanced Cart J2Commerce ajax-based cart module.
Shopping Cart Menu Link: Select the menu item for the shopping cart page.
Checkout Menu Link: Select the menu item for the checkout page.
Show Payment Icons: Select yes to enable payment icons (helps add additional trust endicia to the checkout process).
Select Payment Icons: Select all of the payment options you want to offer
Menu Assignment Tab
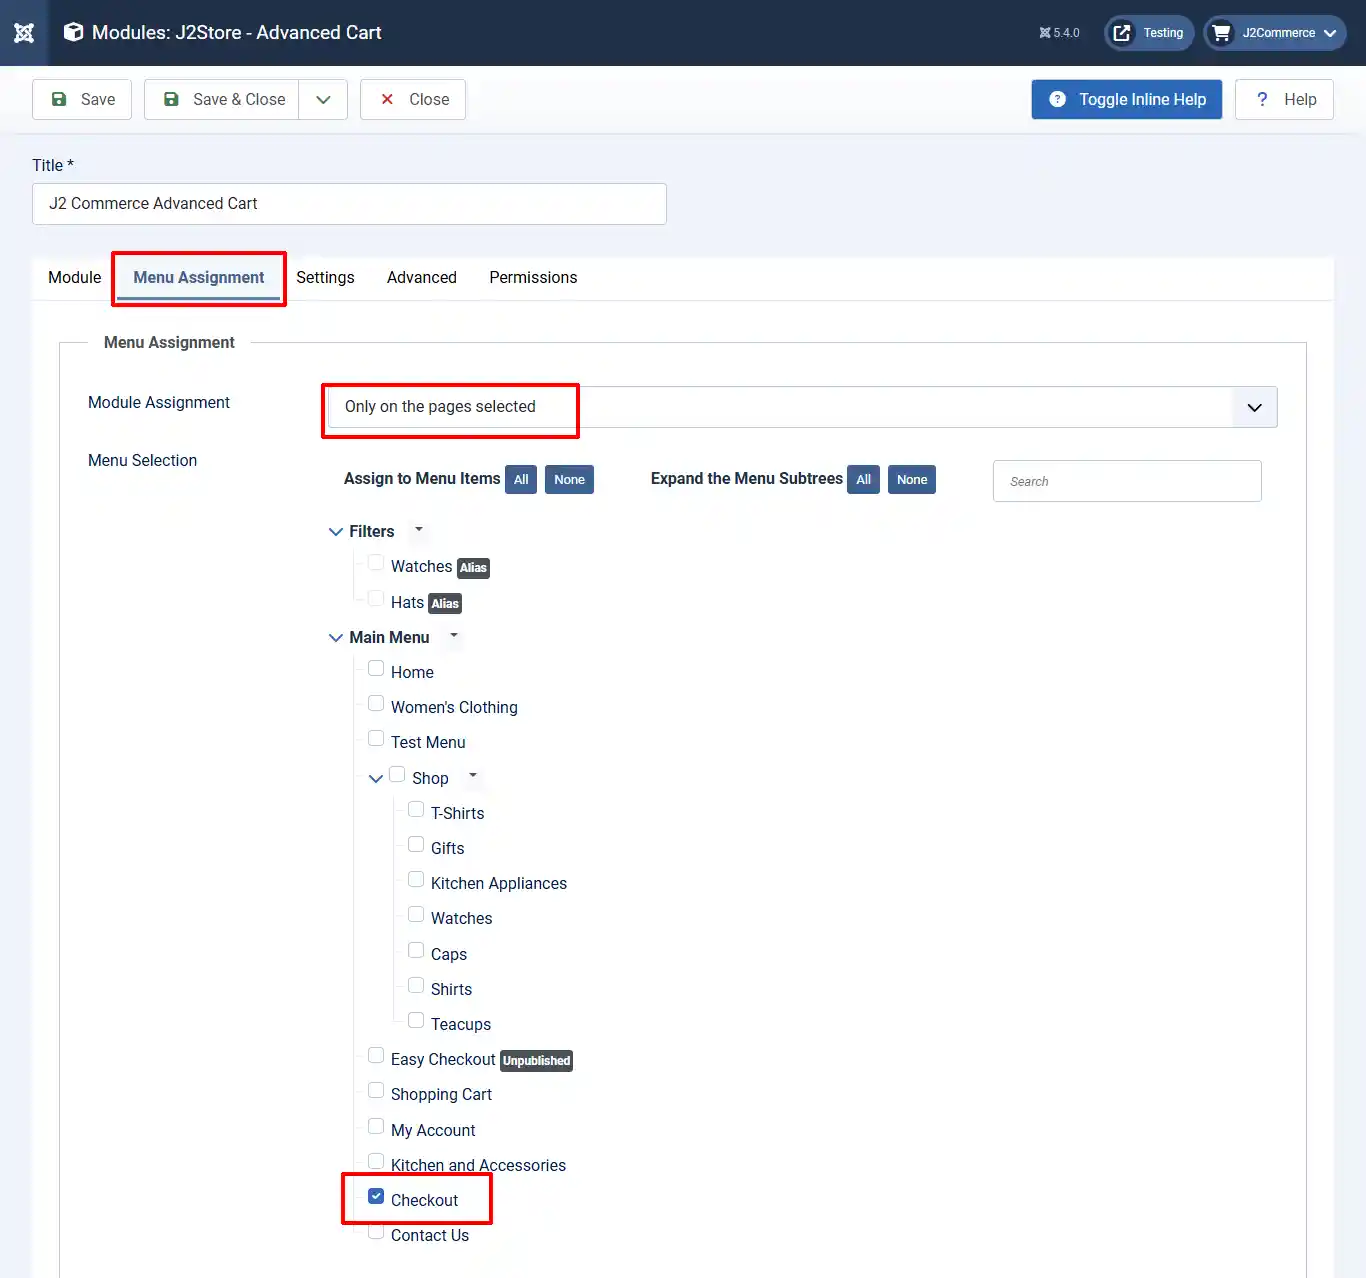
Module Assignment: Only on the pages selected
Menu Selection: Select 'Checkout'
Settings Tab
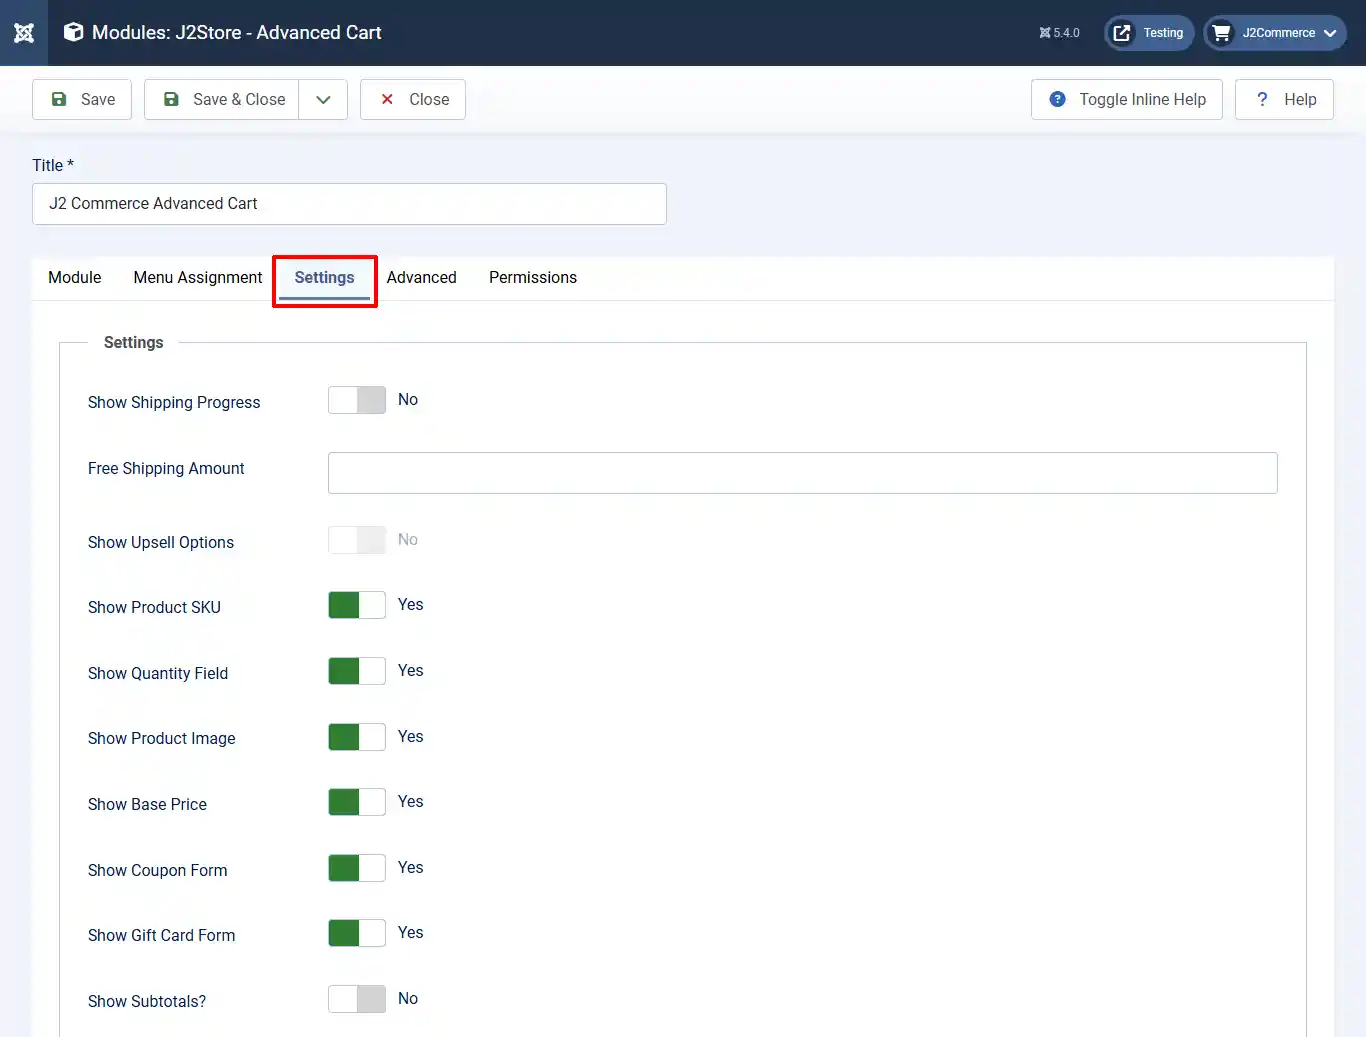
Show Shipping Progress: Select yes to show the shipping progress indicator in the modal cart.
Free Shipping Amount: Enter the minimum amount needed to qualify for free shipping. No currency sign - only number value. (No free shipping message will appear if left empty)
Show Upsell Options: Future option coming in a later version.
Show Product SKU: Select 'Yes' to display the product SKU.
Show Quantity Field: Select yes to display the quantity field. Select NO if you are selling digital products or other items that don't require quantities over 1 per item.
Show Product Image: Select yes to display the product's thumbnail image.
Show Base Price: Select yes to display the product's base price when a lower (sale) price is offered.
Show Coupon Form: Show coupon form in modal cart?
Show Gift Card Form: Show gift card form in modal cart?
Show Subtotals: Select yes to show cart subtotals.
Advanced Tab
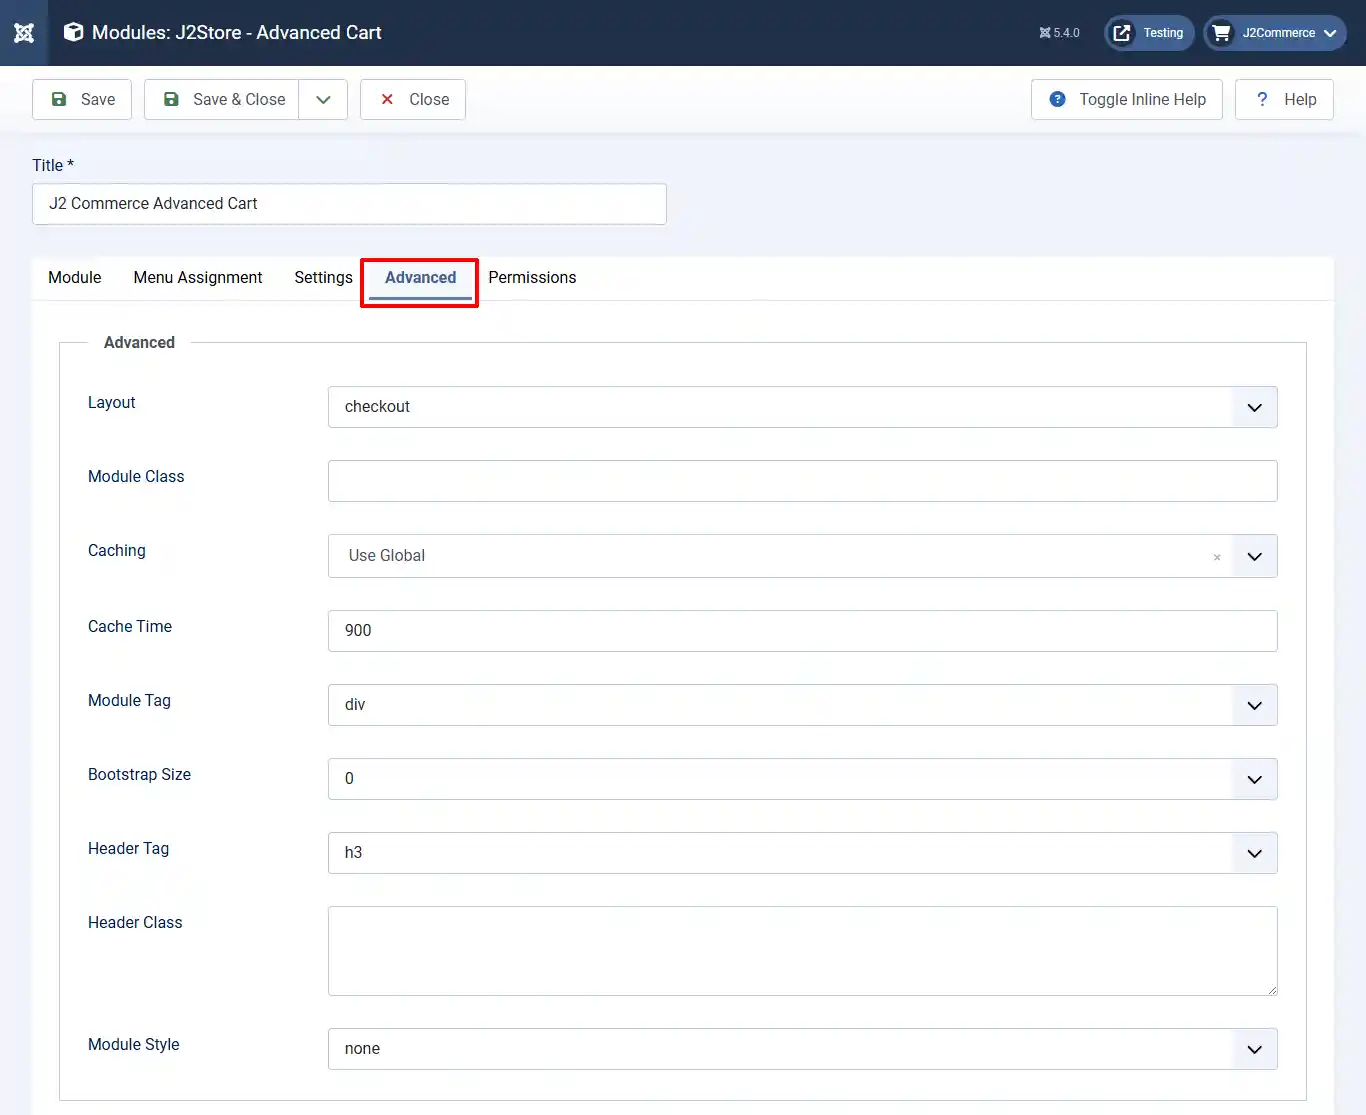
Layout: Select Checkout
Module Style: Select None
Setting up the Checkout Page
Go back into the Advanced Checkout App and open it.
Basic Tab
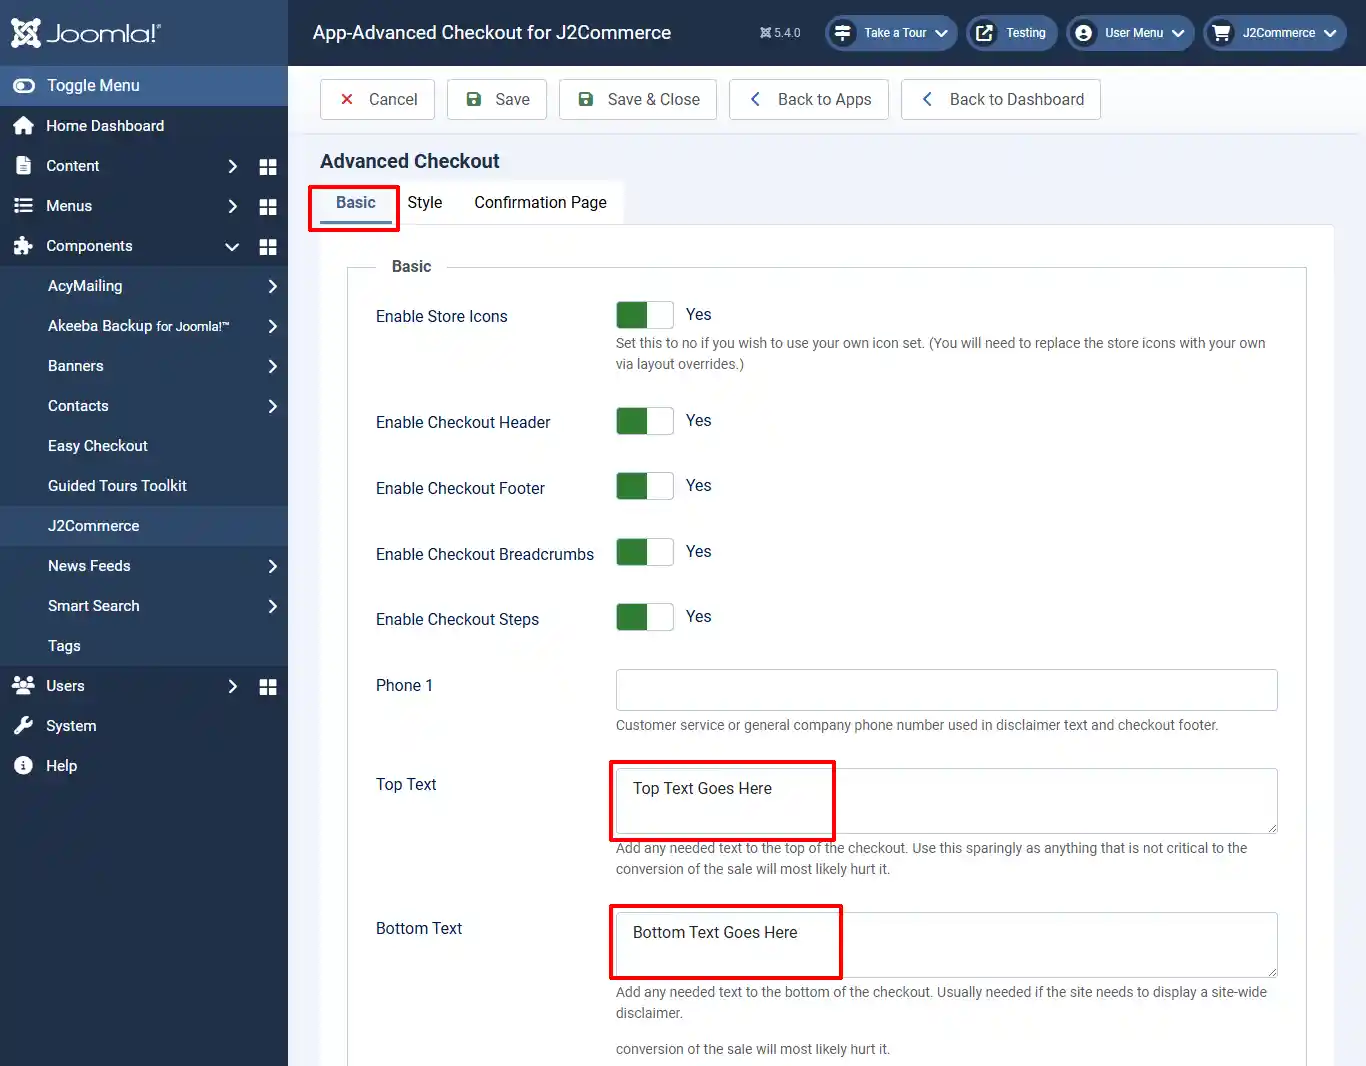
Enable Store Icons: Set this to no if you wish to use your own icon set. (You will need to replace the store icons with your own via layout overrides.)
Enable Checkout Header: If set as Yes, then you can add a custom header at the top of your checkout page. The location to attach the header image can be found on the Style tab.
Enable Checkout Footer: If set as Yes, then you can add a custom footer at the bottom of your checkout page. The location to attach the header image can be found on the Style tab.
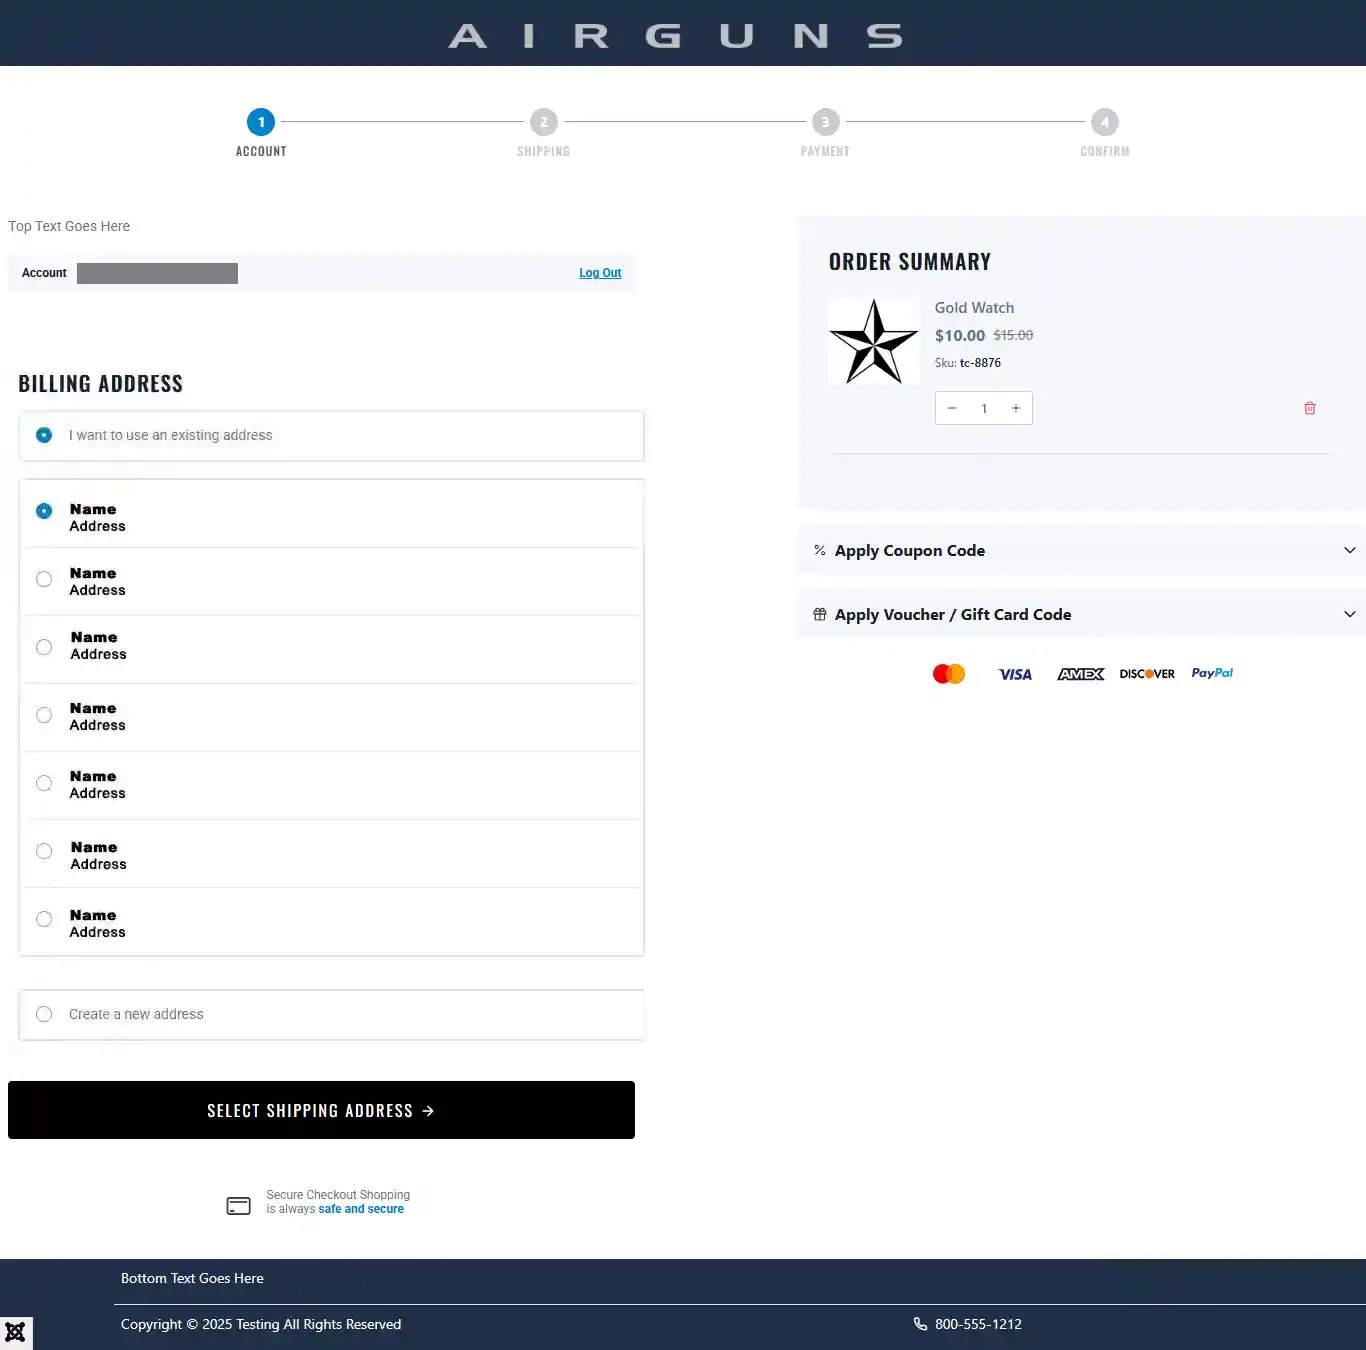
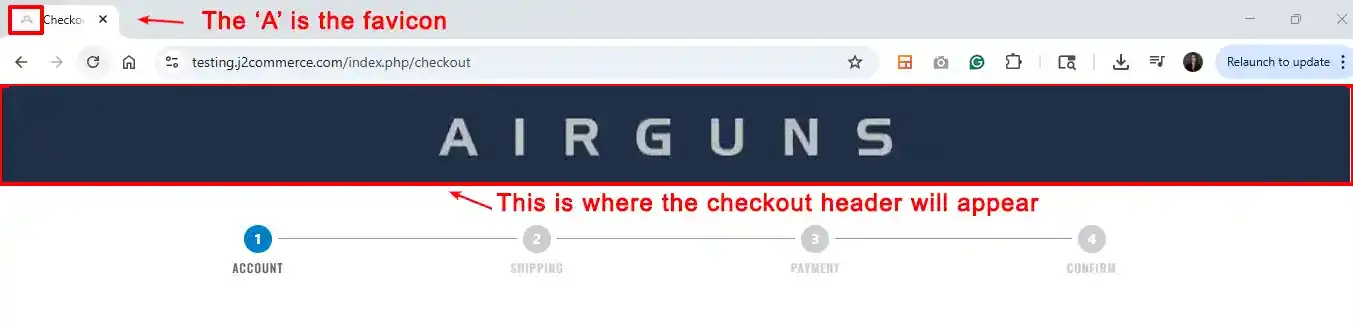
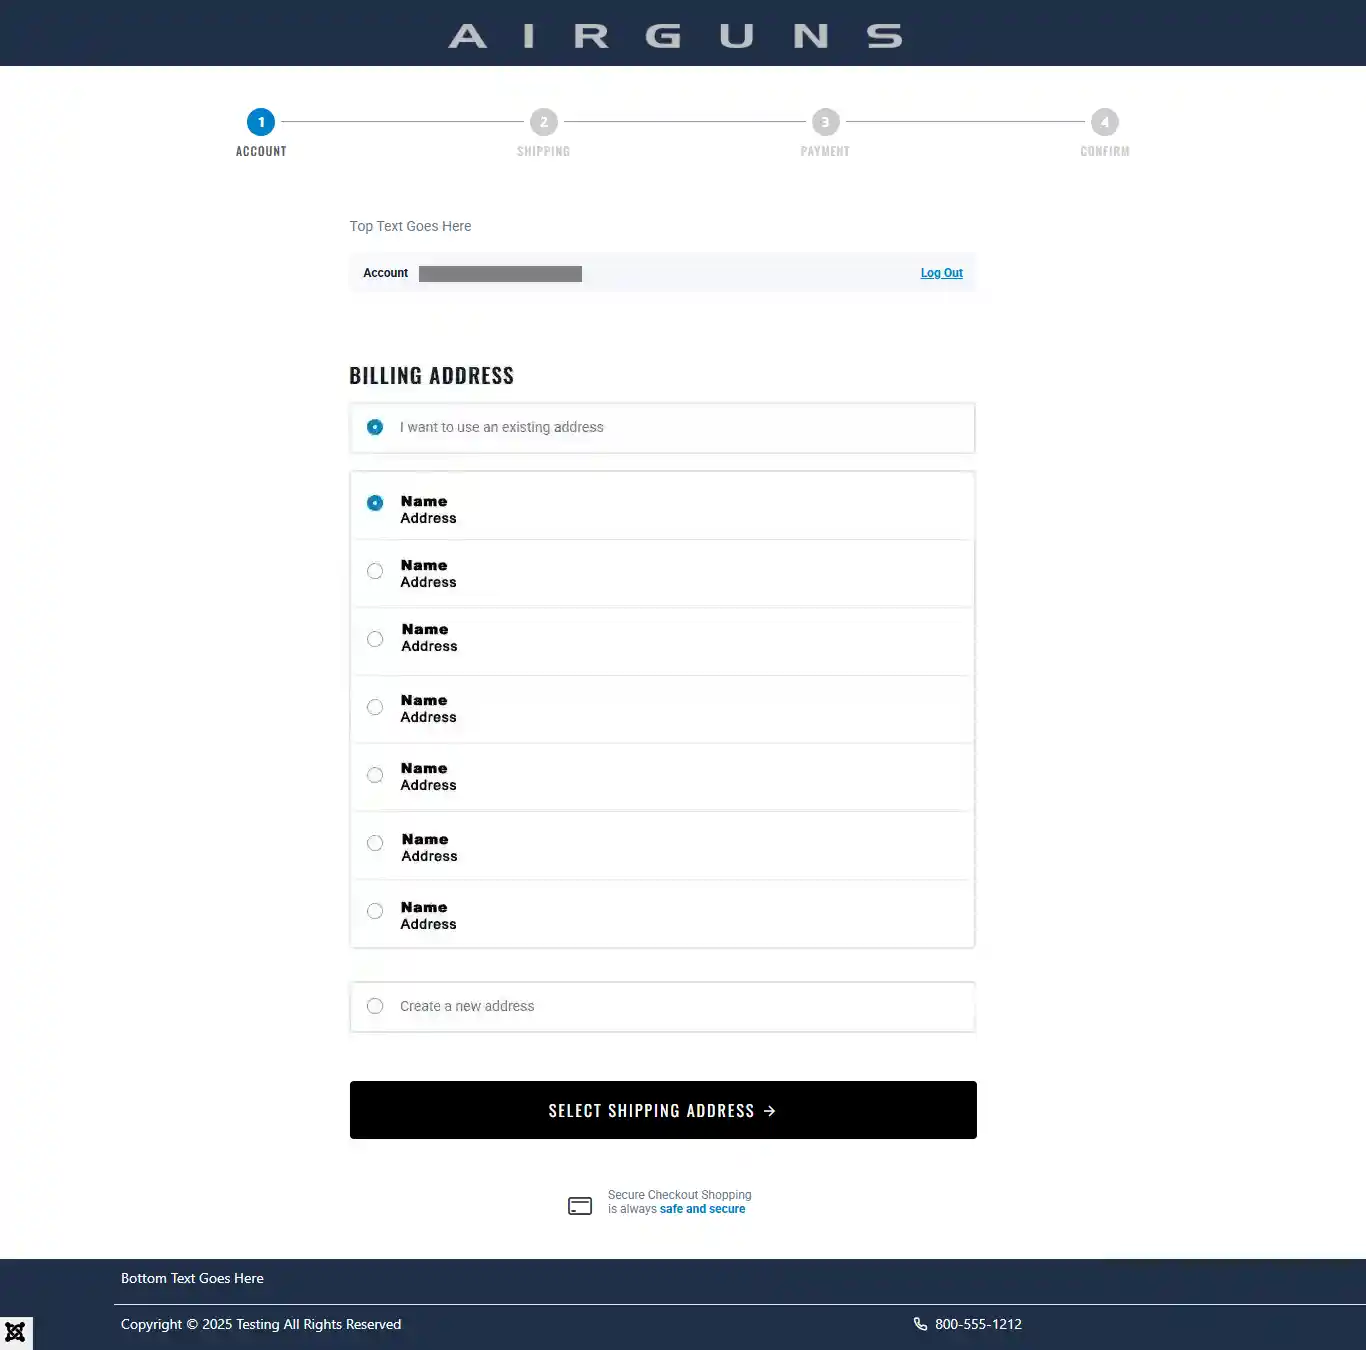
Enable Checkout Breadcrumbs: The breadcrumbs allow the customer to know which step during checkout they are on and how many more steps they need to complete. See image below.

Enable Checkout Steps: If set as Yes, it will enable the previous steps to show up at the top of each page, allowing the customer to verify the information is correct or edit the previous page. See image below

Phone 1: Customer service or general company phone number used in disclaimer text and checkout footer.
Top Text: Add any needed text to the top of the checkout. Use this sparingly, as anything that is not critical to the conversion of the sale will most likely hurt it. See image below.

Bottom Text: Add any needed text to the bottom of the checkout. Usually needed if the site needs to display a site-wide disclaimer. See image below.

Style Tab
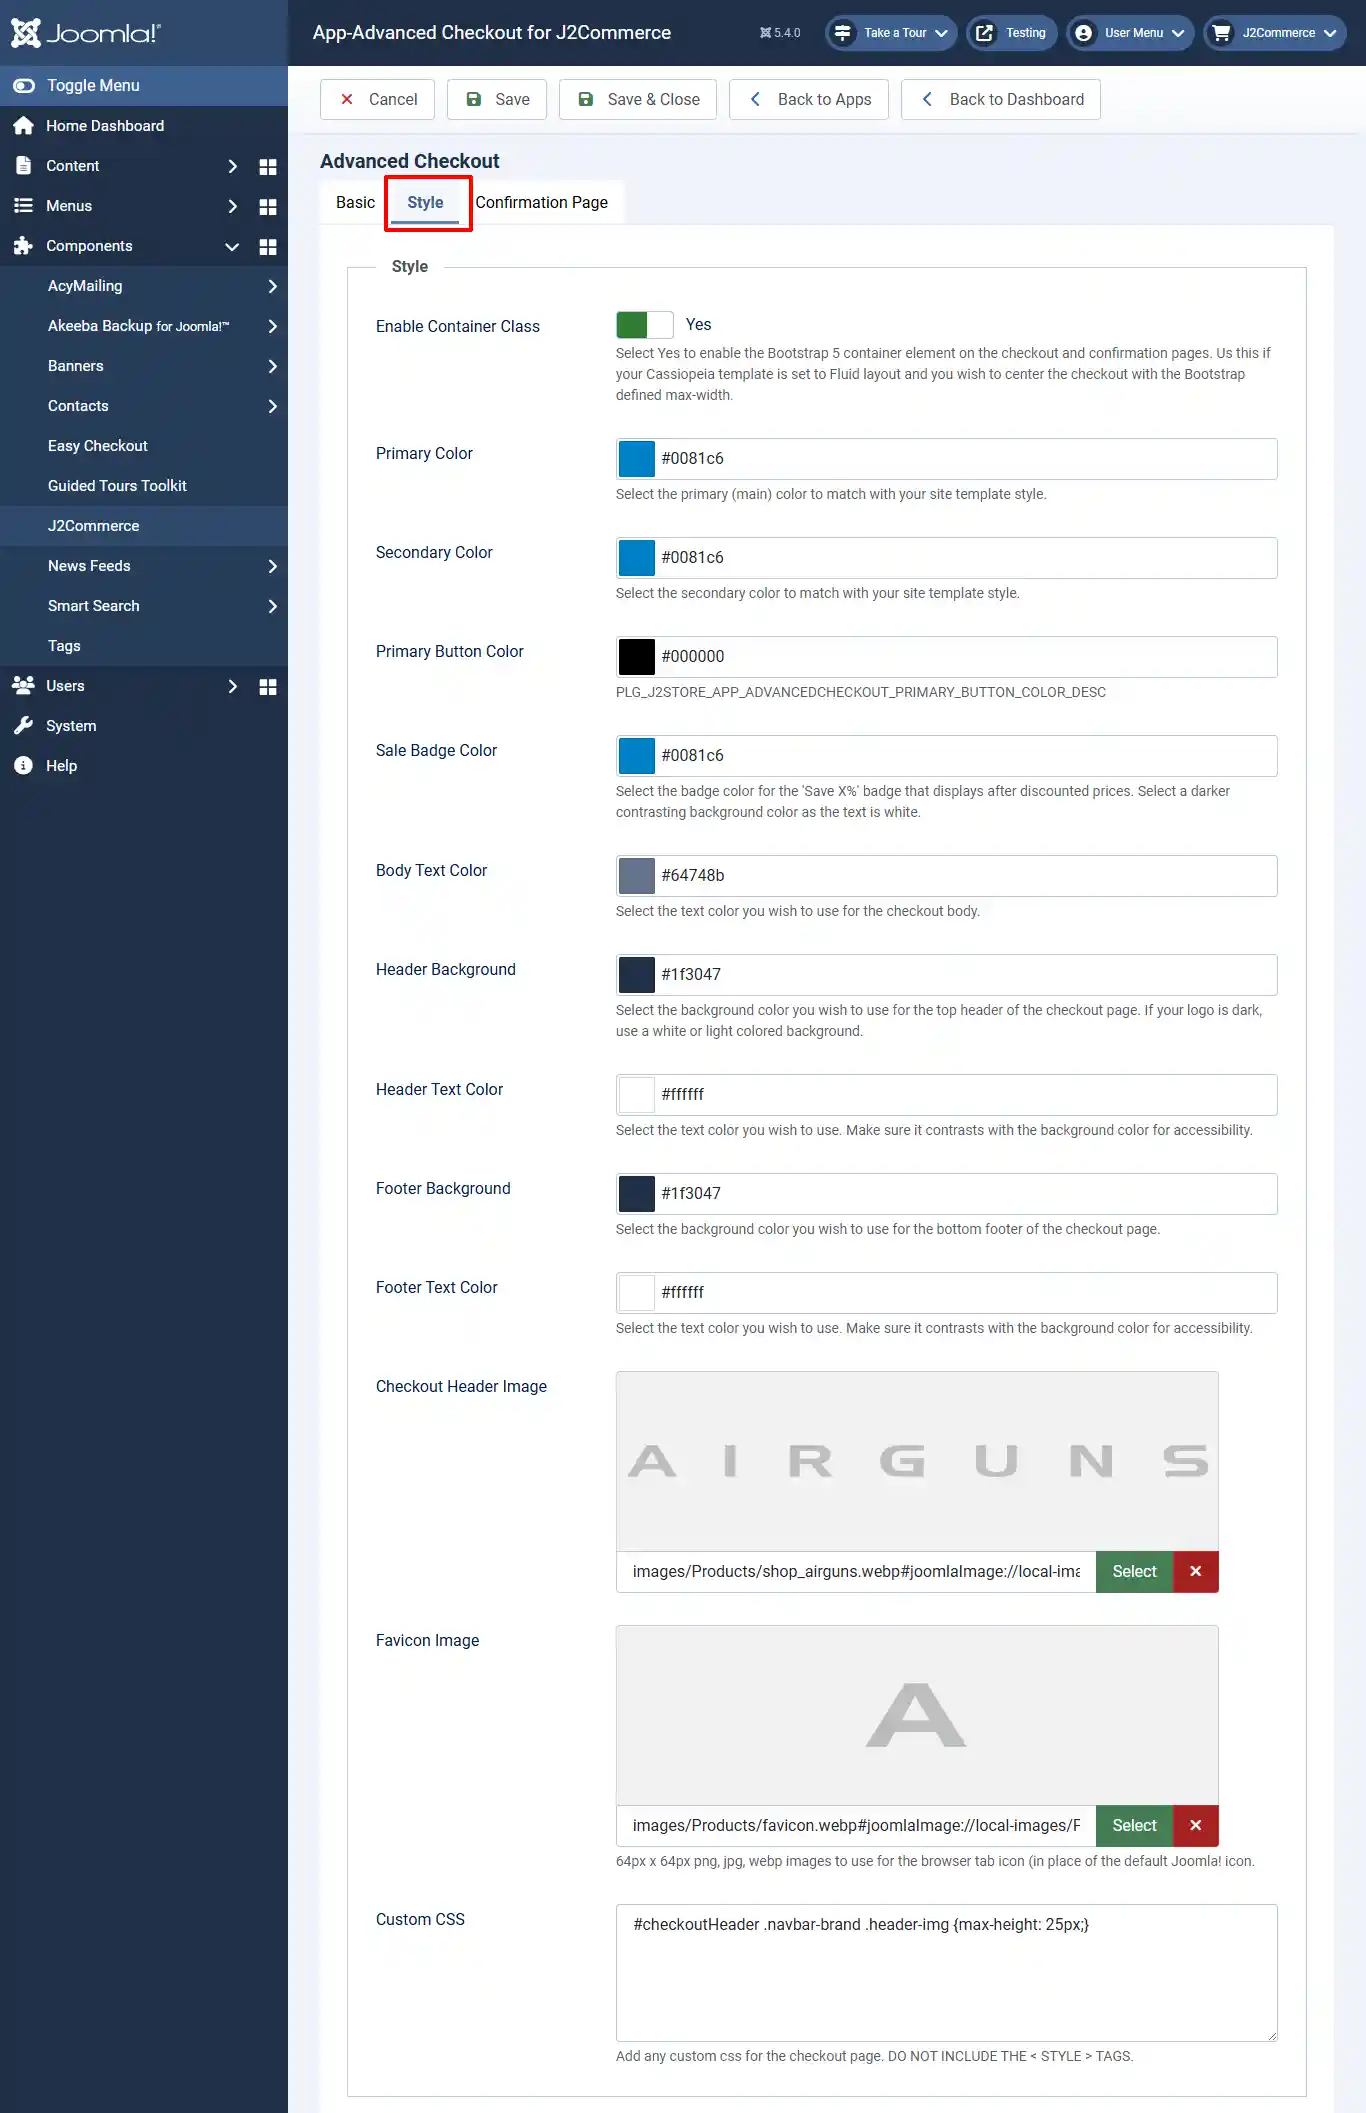
Enable Container Class: Select Yes to enable the Bootstrap 5 container element on the checkout and confirmation pages. Use this if your Cassiopeia template is set to Fluid layout and you wish to center the checkout with the Bootstrap-defined max-width.
Primary Color: Select the primary (main) color to match your site template style.
Secondary Color: Select the secondary color to match your site template style.
Primary Button Color: This is the color for the main checkout button on each page
Sale Badge Color: Select the badge color for the 'Save X%' badge that displays after discounted prices. Select a darker contrasting background color as the text is white.
Body Text Color: Select the text color you wish to use for the checkout body.
Header Background: Select the background color you wish to use for the top header of the checkout page. If your logo is dark, use a white or light colored background.
Header Text Color: Select the text color you wish to use. Make sure it contrasts with the background color for accessibility.
Footer Background: Select the background color you wish to use for the bottom footer of the checkout page.
Footer Text Color: Select the text color you wish to use. Make sure it contrasts with the background color for accessibility.
Checkout Header: 1900px x 100px png, jpg, webp images to use for the checkout header.
Favicon Image: 64px x 64px png, jpg, webp images to use for the browser tab icon (in place of the default Joomla! icon.
The screenshot below shows an example of the Header and Favicon
Custom CSS: Add any custom CSS for the checkout page. DO NOT INCLUDE THE < STYLE > TAGS. The default for the header is 25px high. You can customize the height by changing the pixels and add additional CSS code to customize the cart. See image below.

How to Change the Safe & Secure Language
The screenshot below shows how to change the Safe and Secure message to personalize it to the client's website.
The screenshot below shows the Safe and Secure link, which is located at the bottom of the Checkout page

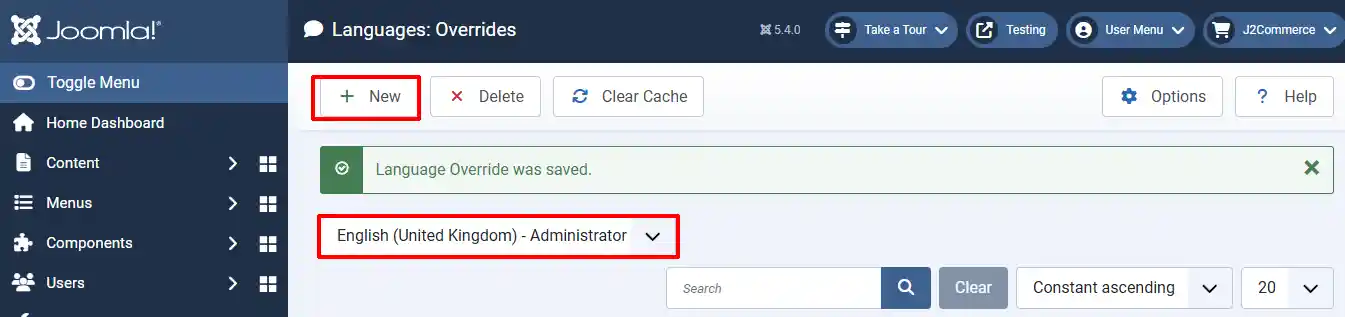
Step 1: Go to Settings > Manage > Language Overrides

Step 2: Select Language and Client drop-down > Click on English (United Kingdom) - Administrator > New
Safe and Secure Link
Once you click New, it's time to customize it.
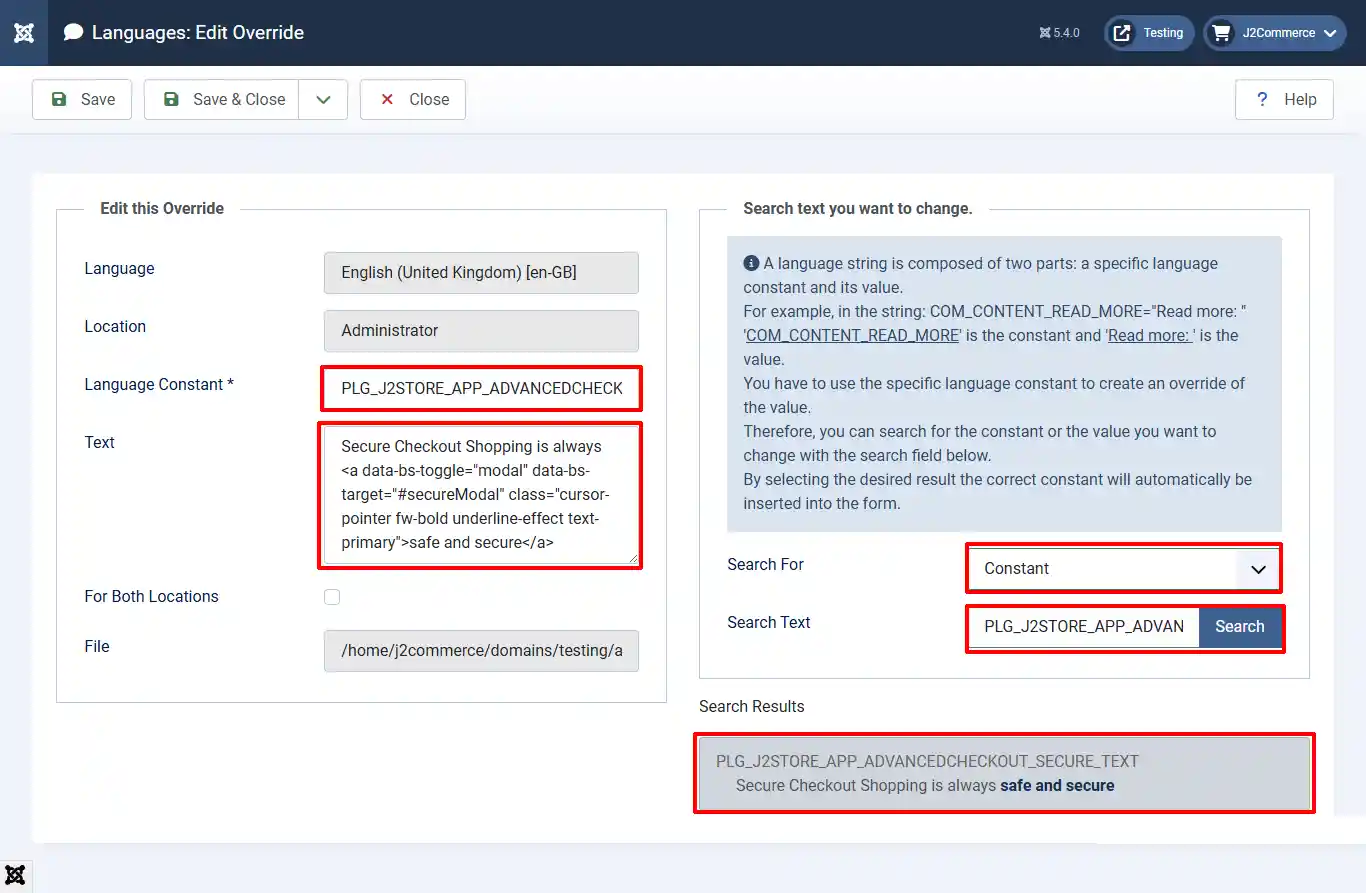
Step 1: Language Constant: Enter the following language string PLG_J2STORE_APP_ADVANCEDCHECKOUT_SECURE_TEXT
Step 2: Search For: Select Constant
Step 3: Search Text: Enter the same Language string from step 1 > click Search PLG_J2STORE_APP_ADVANCEDCHECKOUT_SECURE_TEXT
Step 4: Search Results: Once you click in the gray box, it will automatically transfer the editable language into the Text box
Step 5: Text: Change any of the information you wish
The Screenshot below shows the final look
Safe and Secure Modal Title
Follow the same steps from step 2 above: (Select Language and Client drop-down > Click on English (United Kingdom) - Administrator > New)
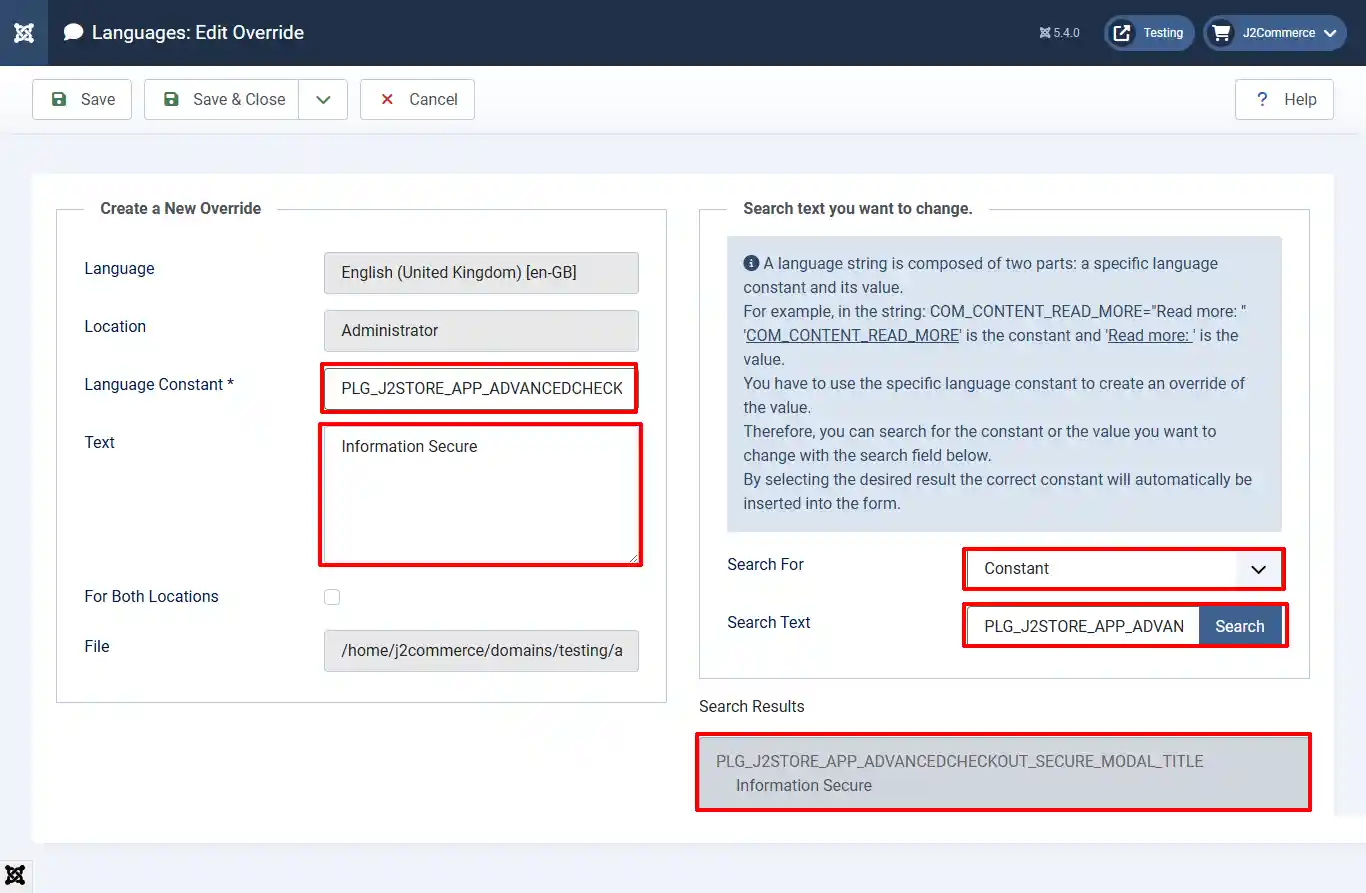
Step 1: Language Constant: Enter the following language string PLG_J2STORE_APP_ADVANCEDCHECKOUT_SECURE_MODAL_TITLE
Step 2: Search For: Select Constant
Step 3: Search Text: Enter the same Language string from step 1 > click Search PLG_J2STORE_APP_ADVANCEDCHECKOUT_SECURE_MODAL_TITLE
Step 4: Search Results: Once you click in the gray box, it will automatically transfer the editable language into the Text box
Step 5: Text: Change any of the information you wish
Safe and Secure Modal Content
Follow the same steps from step 2 above: (Select Language and Client drop-down> Click on English (United Kingdom) - Administrator > New)
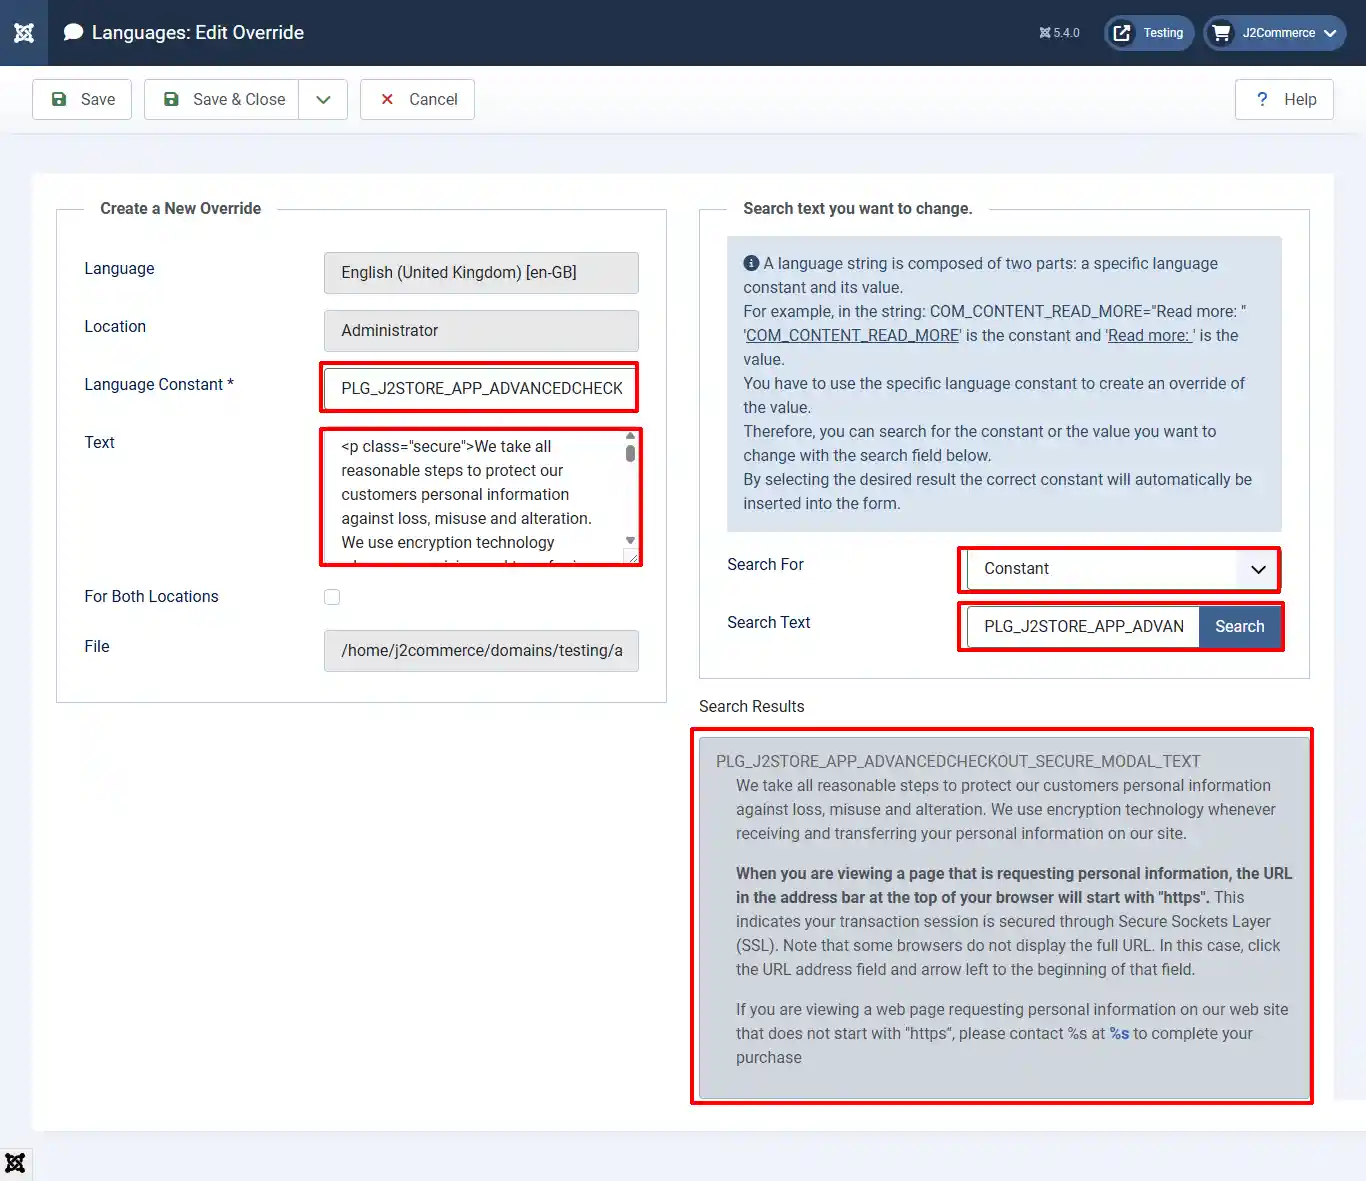
Step 1: Language Constant: Enter the following language string PLG_J2STORE_APP_ADVANCEDCHECKOUT_SECURE_MODAL_TEXT
Step 2: Search For: Select Constant
Step 3: Search Text: Enter the same Language string from step 1 > click Search PLG_J2STORE_APP_ADVANCEDCHECKOUT_SECURE_MODAL_TEXT
Step 4: Search Results: Once you click in the gray box, it will automatically transfer the editable language into the Text box
Step 5: Text: Change any of the information you wish
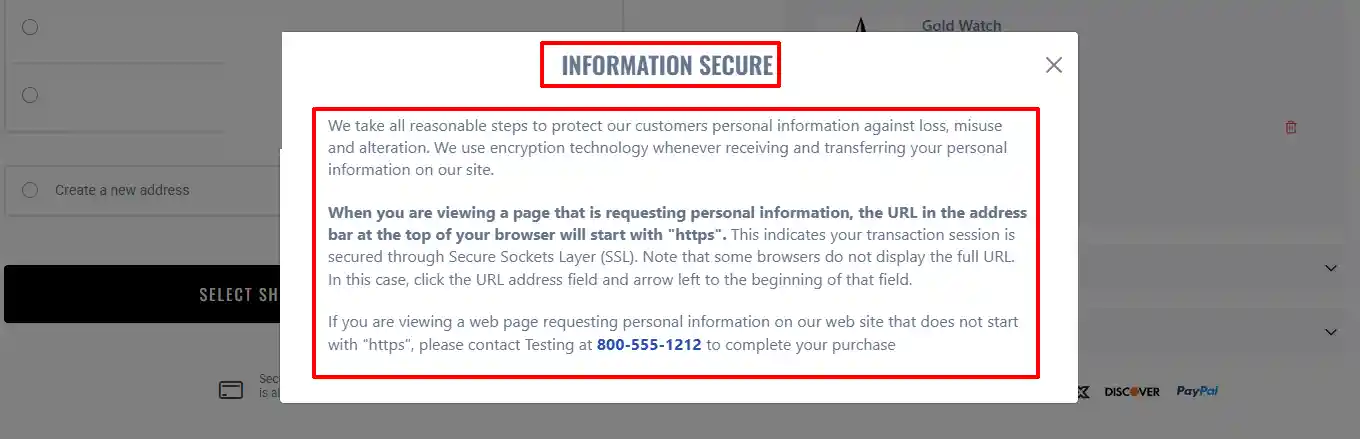
The Screenshot below shows the final look of the Modal Title and Content
Setting up the Confirmation Page
Confirmation Page Tab
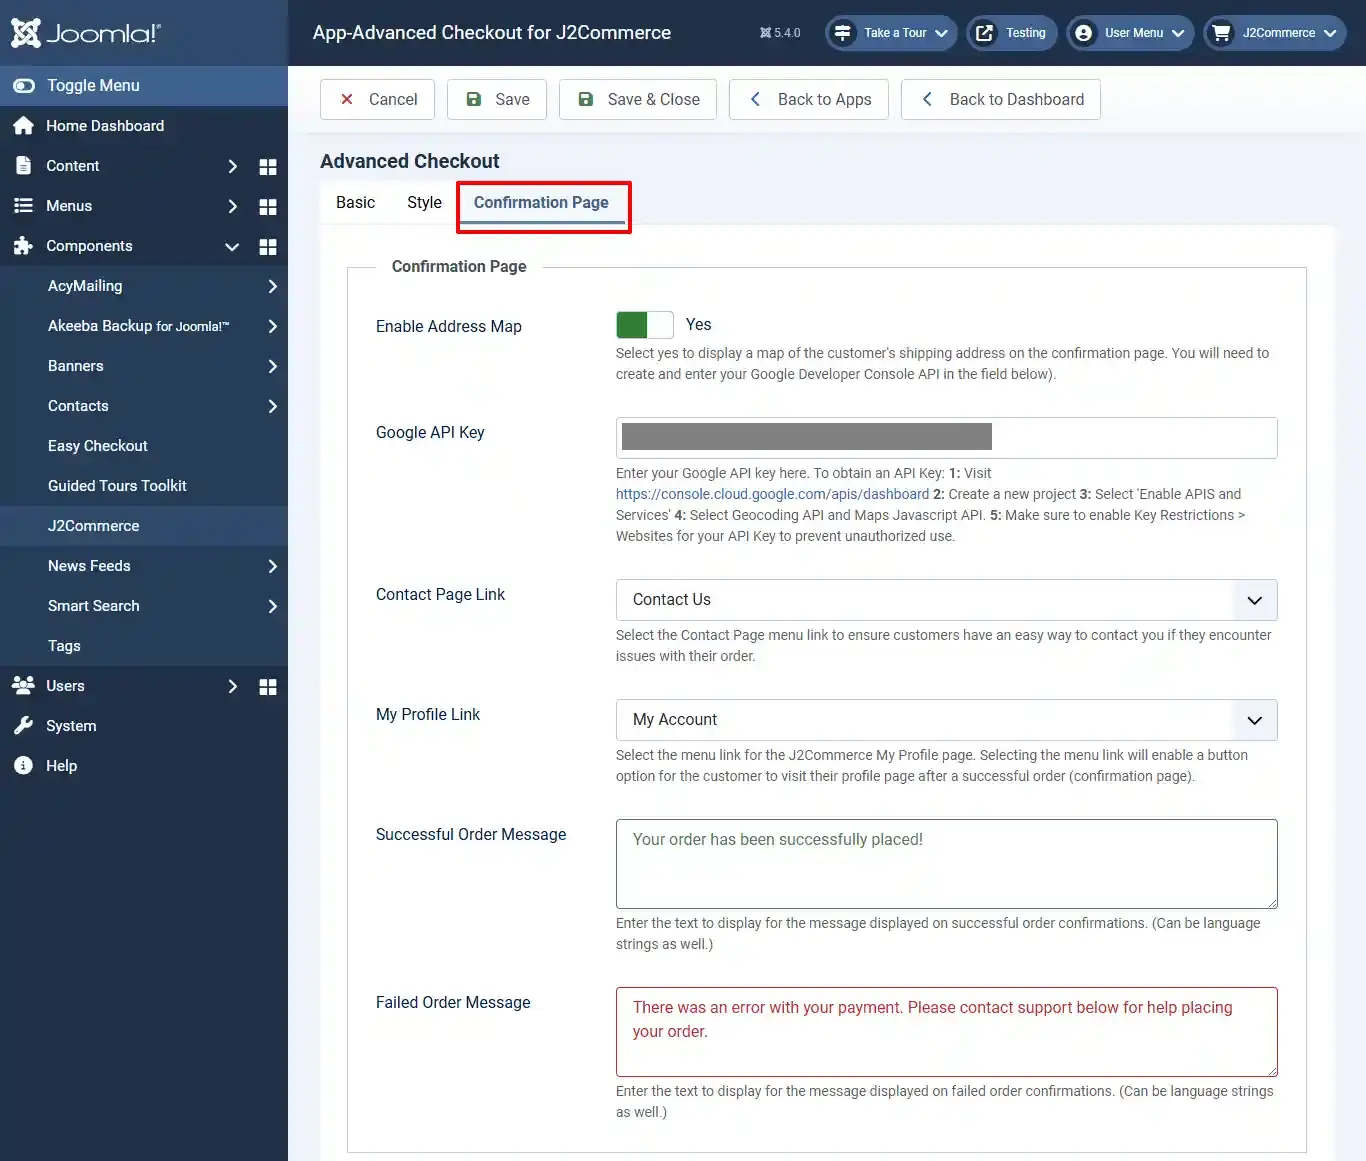
Enable Address Map: Select Yes to display a map of the customer's shipping address on the confirmation page. You will need to create and enter your Google Developer Console API in the field below.
Google API Key: Enter your Google API key here. To obtain an API Key follow the instructions at the end of this document.
Contact Page Link: Select the Contact Page menu link to ensure customers have an easy way to contact you if they encounter issues with their order.
My Profile Link: Select the menu link for the J2Commerce My Profile page. Selecting the menu link will enable a button option for the customer to visit their profile page after a successful order (confirmation page).
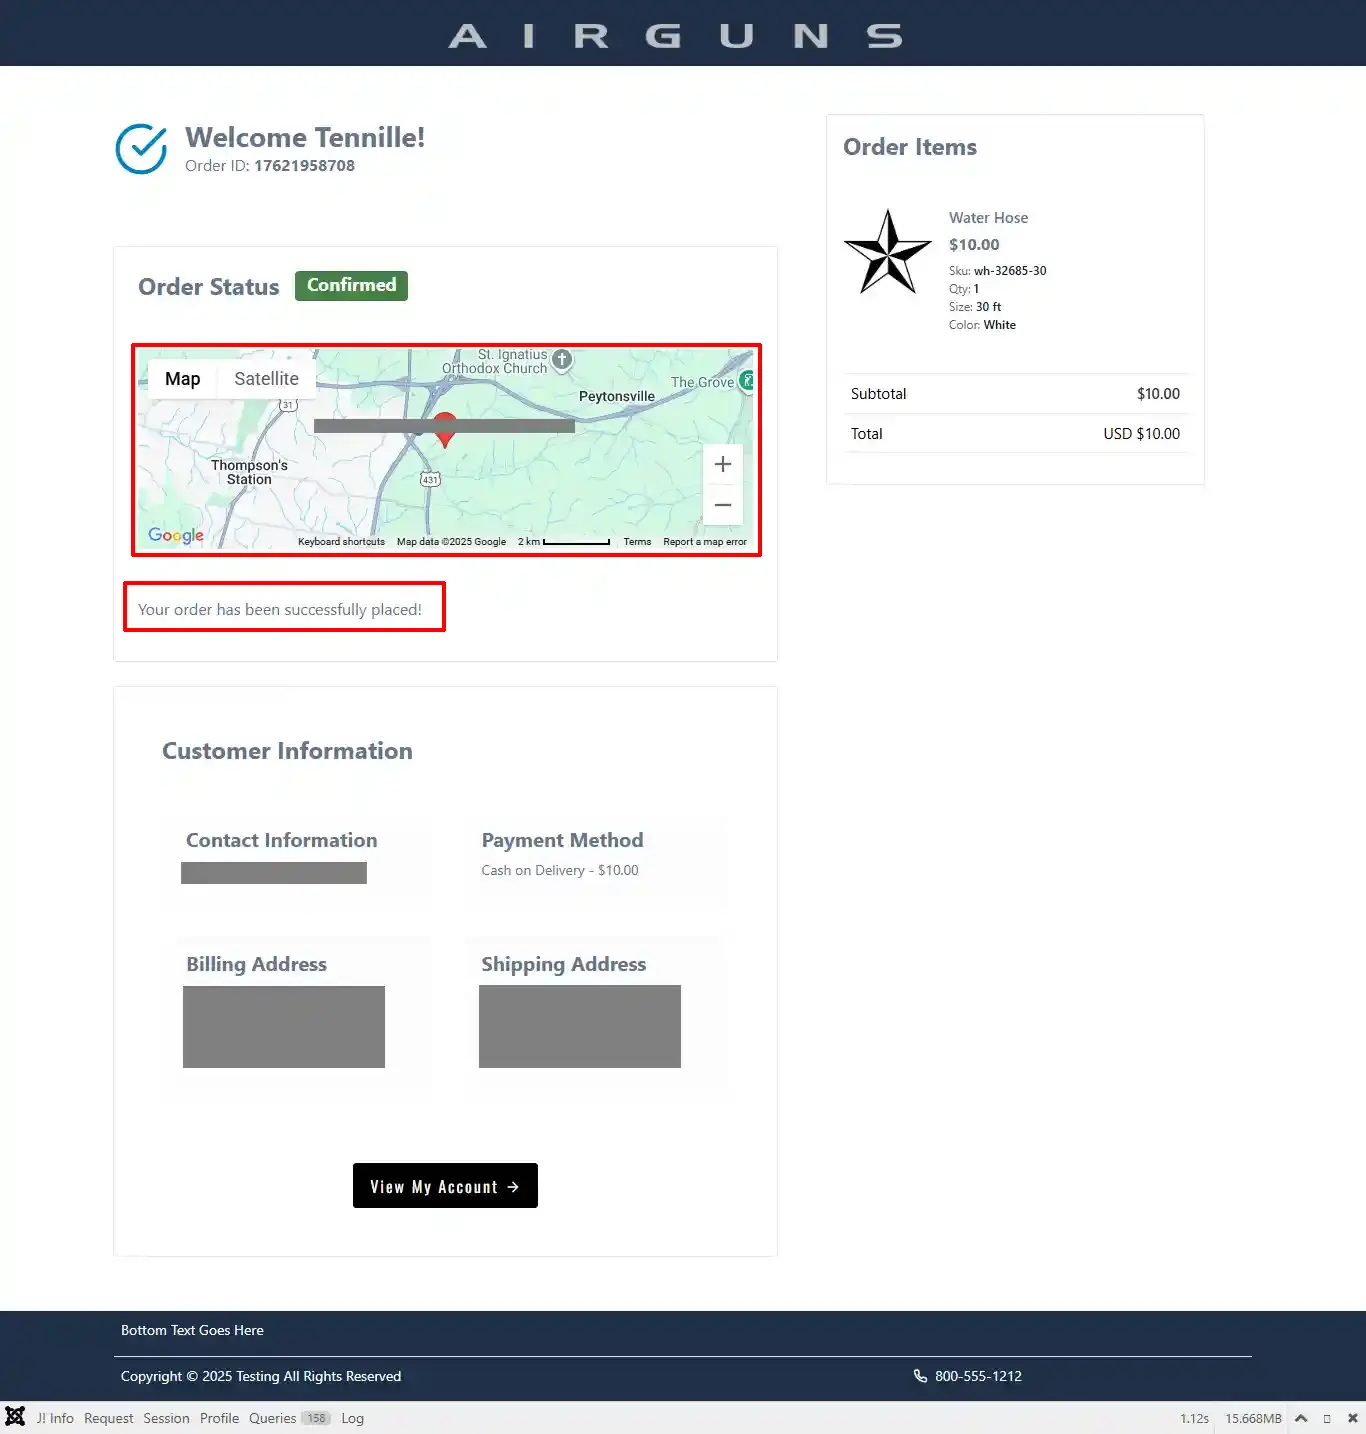
Successful Order Message: Enter the text to display for the message displayed on successful order confirmations. (Can be language strings as well.)
Failed Order Message: Enter the text to display for the message displayed on failed order confirmations. (Can be language strings as well.)
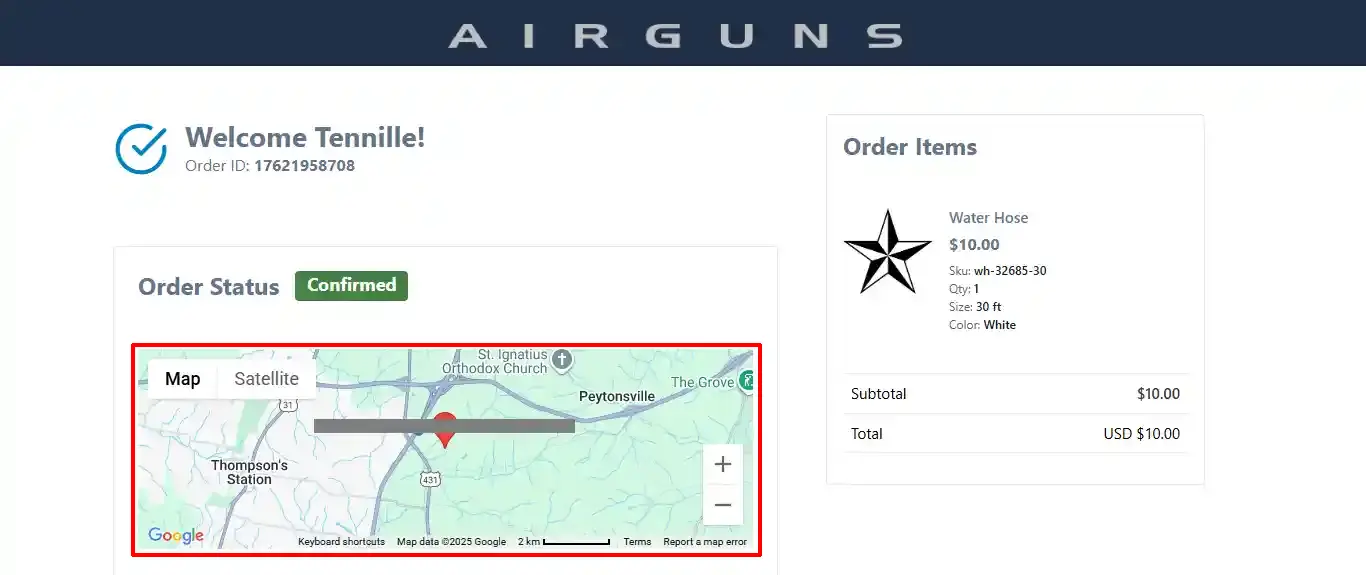
The screenshot below shows a successful Confirmation page on the frontend
If the order is unsuccessful, then the map will disappear, and the customer will see the Failed Order Message you entered
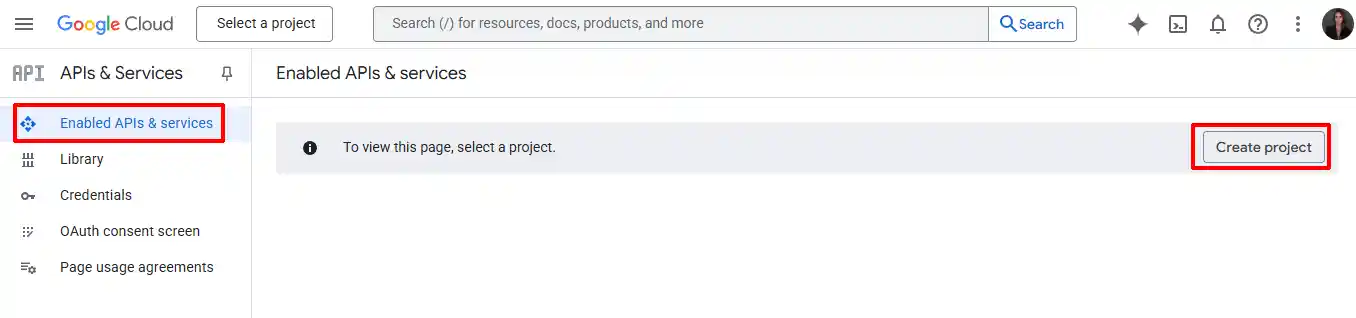
How to Obtain Your Google API Key
Step 1: Visit https://console.cloud.google.com/apis/dashboard
Step 2: Select Create project
Step 3: Name your project and select the location > Create

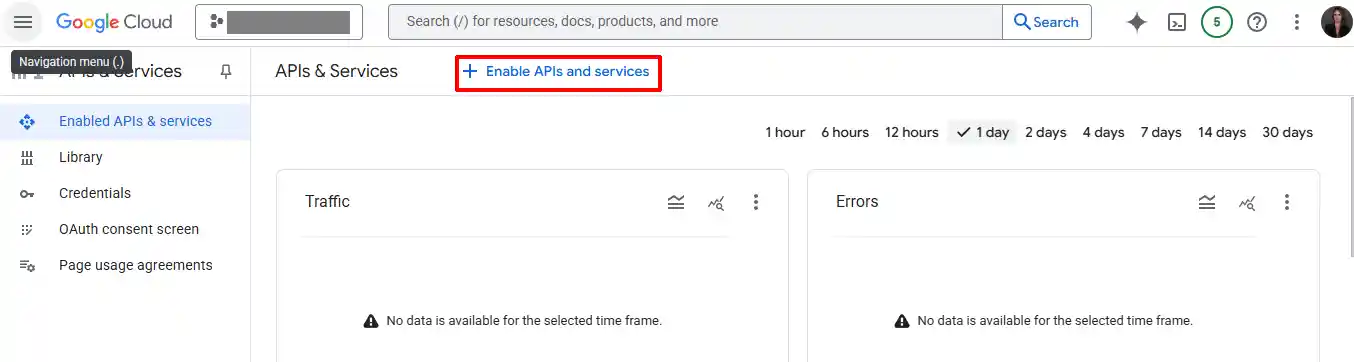
Step 4: Select 'Enable APIS and Services'
Step 5: Type Geocoding in the search bar
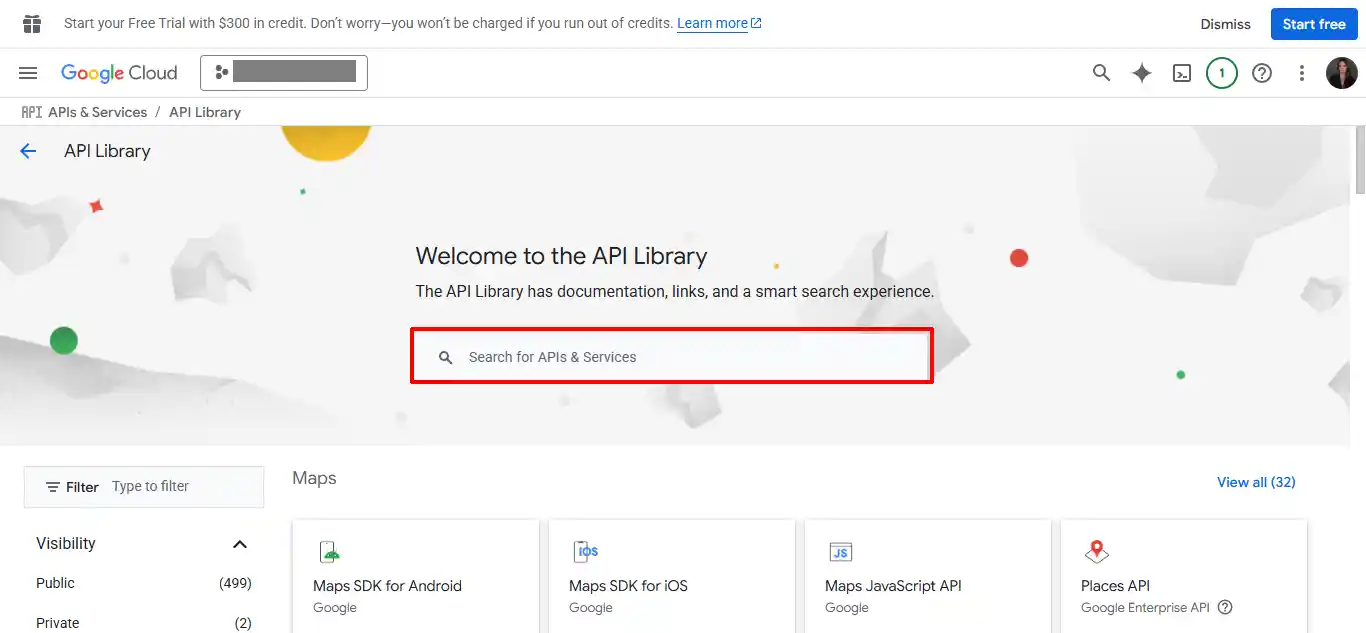
Step 6: Select Geocoding API and Maps Javascript API. You have to select them and follow steps 7-8 one at a time.

Step 7: Make sure to enable Key Restrictions > Websites for your API Key to prevent unauthorized use.

Step 8: Select Save and Continue > Enter your Credit Card for billing purposes
Template Settings
Go to System > Site Template Styles
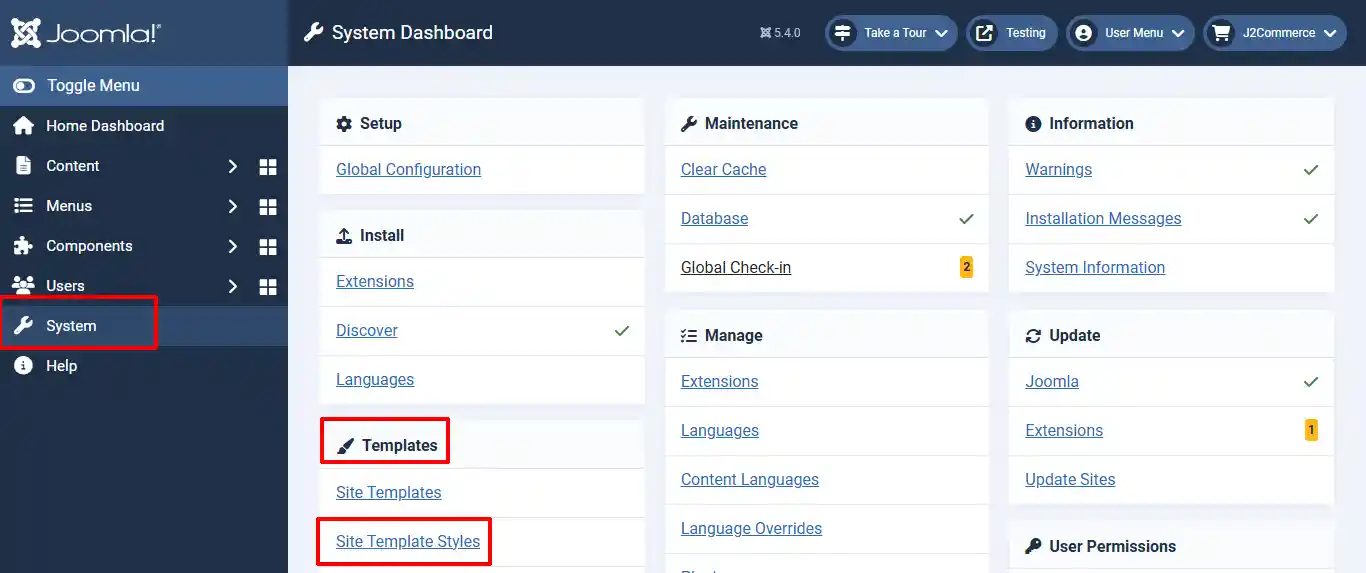
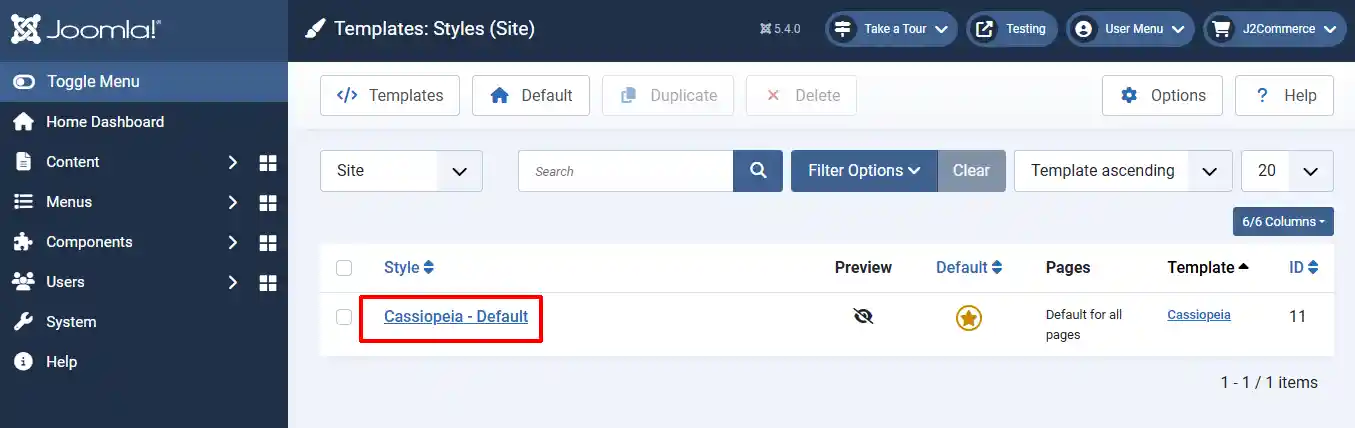
Click on Cassiopeia - Default to open it
Open the Advanced tab. Make sure Brand is turned off and Layout is on Fluid. Save and Close

Frontend
The screenshot below shows how your cart will appear without purchasing and installing the Advanced Cart Module.
The screenshot below shows how your cart will appear after purchasing and installing the Advanced Cart Module. To learn more about the Advanced Cart Module, visit: https://docs.j2commerce.com/advanced-cart/advanced-cart-guide